

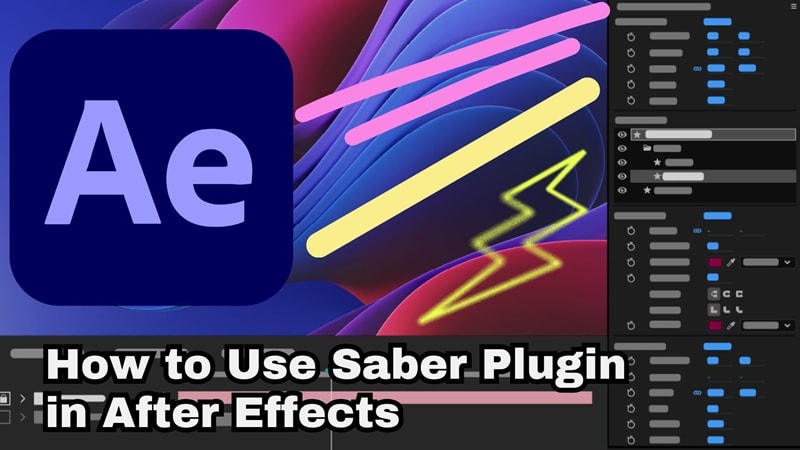
If you've never tried it before, the Saber After Effects is a free plugin that instantly transforms plain text, shapes, or paths into glowing energy visuals that look straight out of a sci-fi movie. And because of its capabilities, the Saber plugin for After Effects has become a go-to for creators and motion designers who love building eye-catching visuals without spending a fortune on expensive add-ons.
But the problem is, After Effects itself can feel a little overwhelming at first, especially if you're new to editing or visual effects. That's why in this guide, we'll explain how to use the Saber effect in After Effects step-by-step in the simplest way possible. And hey, by the end, you might even find an easier, beginner-friendly tool that can pull off a similar look!
Part 1. Creative Things You Can Do with the Saber Effect in After Effects
Before we get into the tutorial parts, it's good to know what the Saber in After Effects is capable of. Once you see what it can do, you'll get a better feel for how to use it and what kind of look fits your style.
Below, we'll break down some of the coolest things you can create with it.
1. Glowing Outline Animations
- Feature highlight: The Saber plugin in After Effects can trace light around your shapes, text, or logos with smooth motion and rich glow controls.
- What it's great for: You can use it for cinematic logo reveals, glowing text animations, or anything that needs that clean, polished shine.
2. Energy and Current Effects

- Feature highlight: With the Saber effect After Effects setup, you can build pulsing light streaks, electricity surges, or glowing sparks that ripple through your design. You control every detail, from how fast the light travels to how intense it glows.
- What it's great for: Perfect for giving life to sci-fi scenes, game titles, or music visuals.
3. Path-Following Animations

- Feature highlight: The After Effects Saber plugin handles motion along curves and turns smoothly. You can make light streaks or glowing lines follow any mask or custom path you draw.
- What it's great for: It fits beautifully in travel maps, motion logos, or text reveals where the light leads the viewer's eyes from one element to another.
All those glowing effects might look like high-end VFX work, but that's the best part about the Saber After Effects plugin: it's actually super easy to use. With just a few slider tweaks here and there, and you've got something that looks polished and cinematic without digging through layers or complicated setups.
Part 2. Step-by-Step Guide: How to Use the Saber Effect in After Effects
Now that you know what the Saber effect in After Effects can do, it's time to try it out for yourself. To make things simple, let's walk through how to use the Saber plugin in After Effects to create your first glowing logo animation, following the same easy approach shown by Adobe Simplified on YouTube.
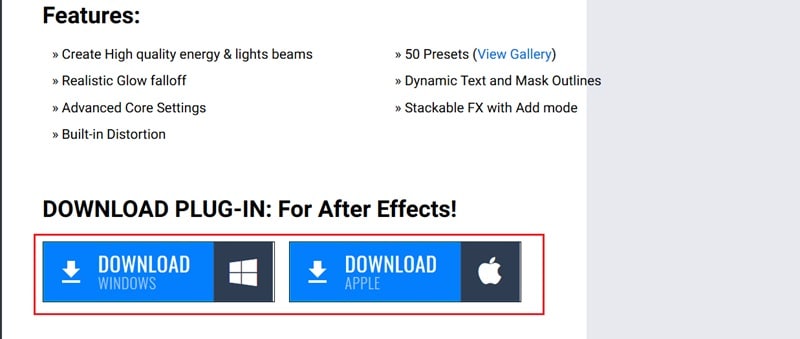
- Go to the official download link provided by Video Copilot.
- Choose the correct version based on your device (Windows or Mac).
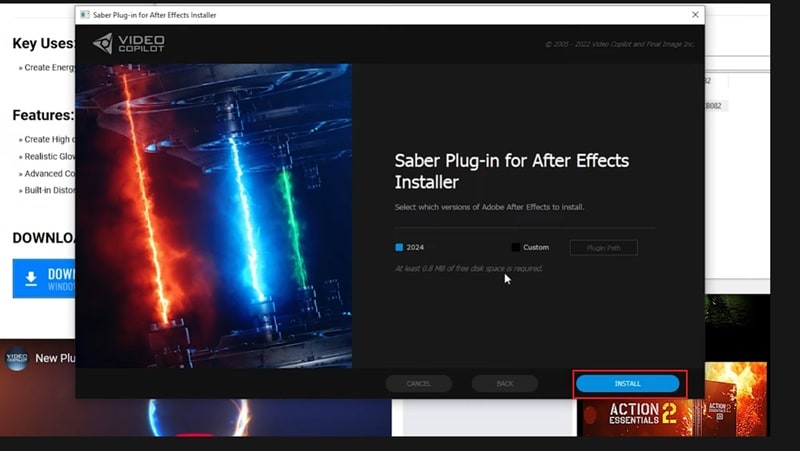
- Once it's downloaded, open the installer file.
- Agree to the terms and click Install, the setup runs automatically.
- After it's installed, restart After Effects and search for "Saber" under Effects & Presets to make sure it's working.
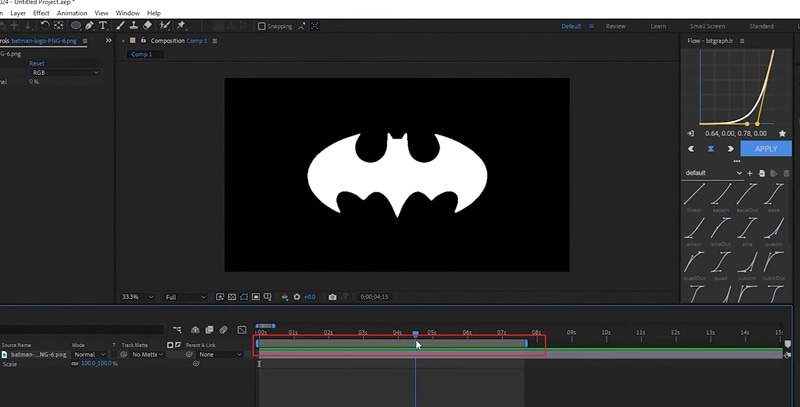
Import your logo (a transparent PNG works best) and drag it into the timeline.
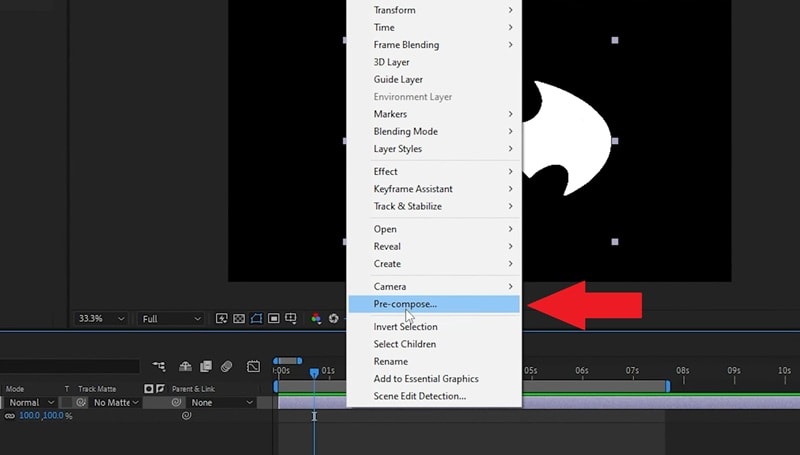
Then, right-click on the logo layer and select Pre-compose so it becomes one clean layer to work with.
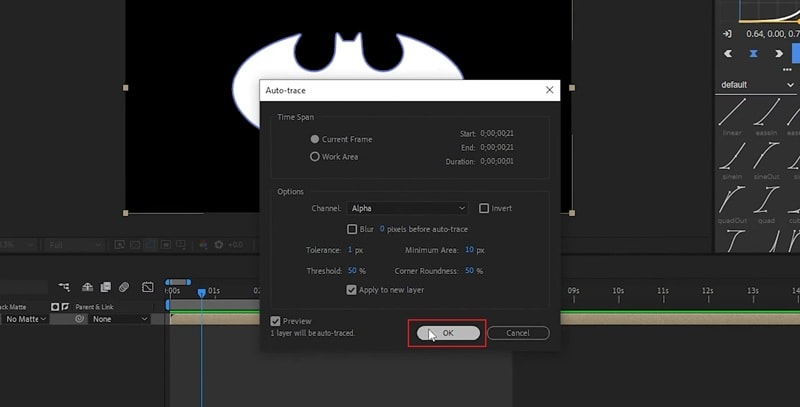
Go to the top menu and click Layer → Auto Trace. Leave everything as it is and hit OK. This will automatically outline your logo and turn its edges into masks, which Saber will follow to create the glowing effect.
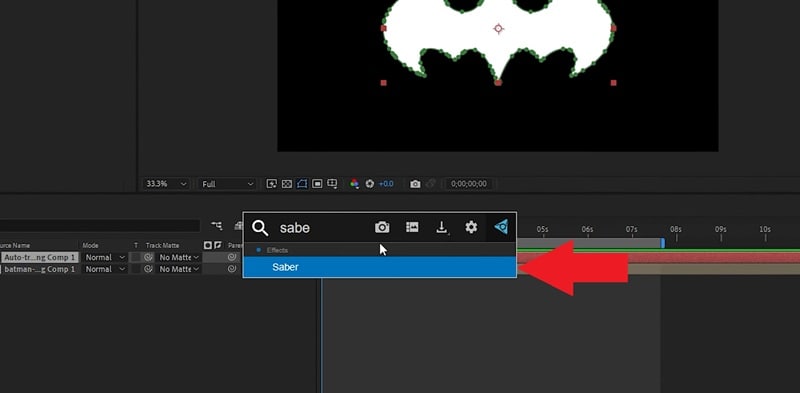
Select your traced layer and search for "Saber" under Effects & Presets. Drag and drop the Saber effect onto the layer.
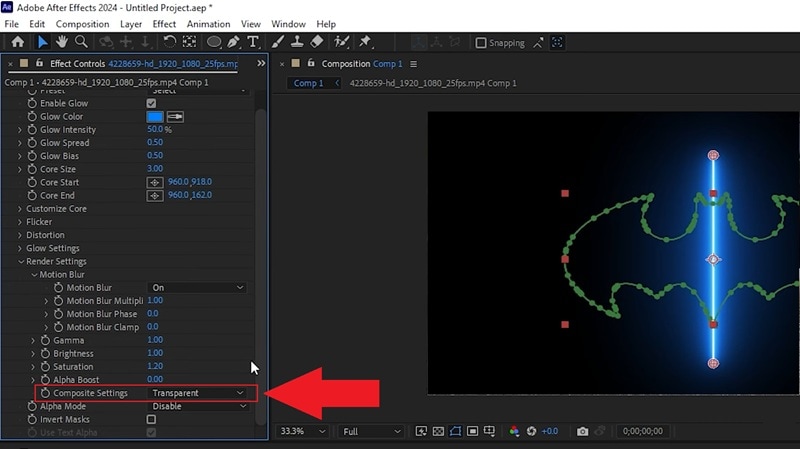
If your screen turns black, go to Render Settings inside the Effect Controls and set Composite Settings to Transparent.
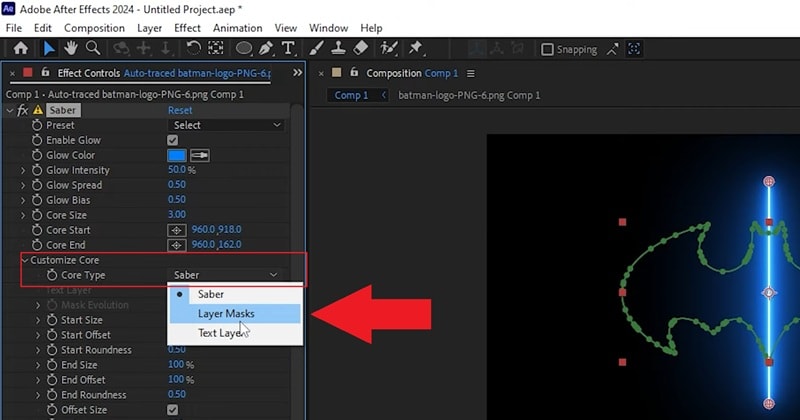
In the Effect Controls panel, open Customize Core and set the Core Type to Layer Masks. This tells the Saber effect to apply the glow directly along the mask outlines of your logo.
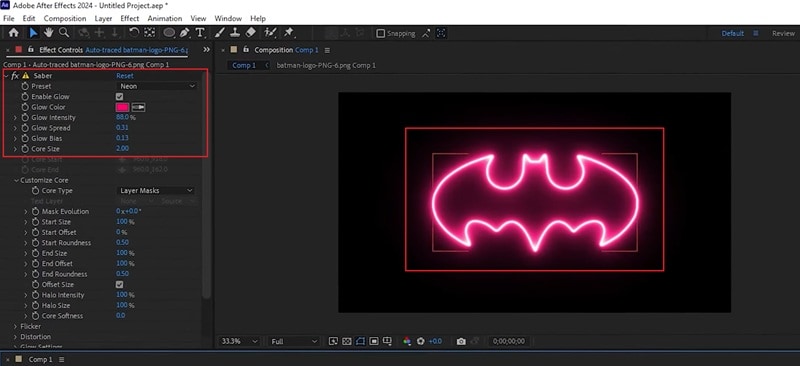
Browse through Saber's built-in presets and pick one that fits your style. You can also play around with the glow color, intensity, and size to match your brand colors.
- To make the glow move, set the End Offset to 0 and add a keyframe.
- Move forward a few frames in the timeline and change the End Offset to 100.
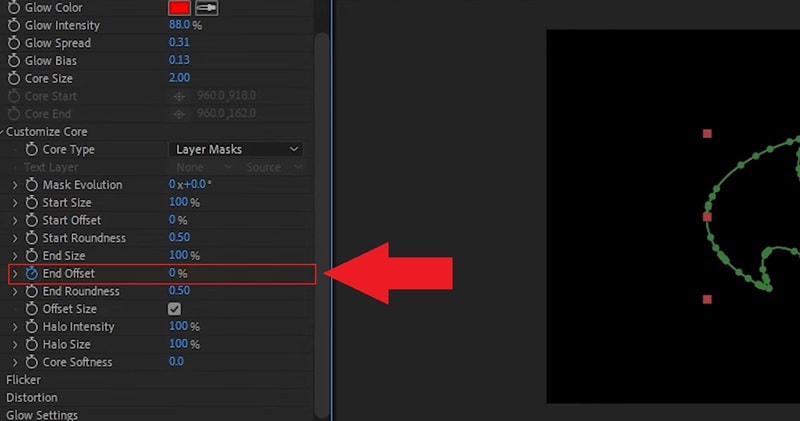
This will make the light trace your logo from start to finish, creating a smooth animation. Play it back to see your logo glow into view.
Part 3. A Simpler Option: Recreate Saber Effects Without Plugins
As you can see, the Saber effect in After Effects is surely a cool way to add glow and energy to your visuals. However, not everyone wants to spend time learning every little setting. So, if you're just starting out or prefer a faster workflow, there's a smoother path you can take.
We're talking about Wondershare Filmora's Pen Tool. With this feature, you can draw paths, animate outlines, and adjust colors right inside the editor without installing anything extra. It gives you that clean, glowing motion similar to the Saber plugin in After Effects, but with a much simpler setup that feels intuitive even if you've never touched advanced VFX before.

Why the Pen Tool in Filmora Might Be Better for Beginners
- No Plugins Needed: Everything you need is already inside Filmora. The Pen Tool is built in, so you can start creating glowing outlines right away without hunting for extra plugins or installing anything else.
- Faster Setup: Filmora keeps things quick and simple. You can open a project, draw your path, and animate it in minutes.
- Total Creative Control: With Filmora's Pen Tool, you can shape and move anything exactly how you want. Draw custom lines, trace around objects, or create smooth motion paths that match your scene perfectly.
- Real-Time Preview: What you see is what you get. Every adjustment you make with the Pen Tool plays back instantly, so you can fine-tune timing and flow without constantly rendering previews.
- Works Everywhere: No matter what device you're on, Filmora has you covered. The Pen Tool works smoothly on both Windows and Mac, so you can bring your glowing ideas to life wherever you edit.
How to Recreate Saber-Style Effects in Filmora
All those capabilities make Filmora feel like a smarter, more practical choice than dealing with the Saber effect plugin in After Effects. You still get that same glowing energy look but with a much simpler setup.
If you want to see how it works in action, here's a quick and easy guide to help you recreate Saber-style effects in Filmora and make your logo glow just like the experts do.
Be sure that you're using the latest version of Filmora on your computer. Once it's ready, launch the app and hit "New Project" to open up a clean editing space.

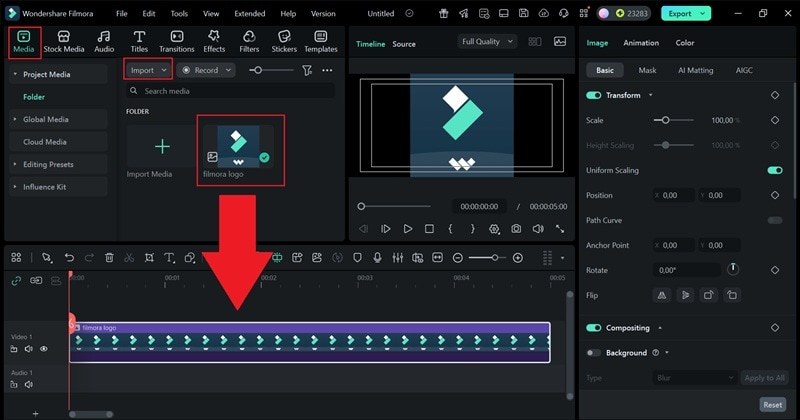
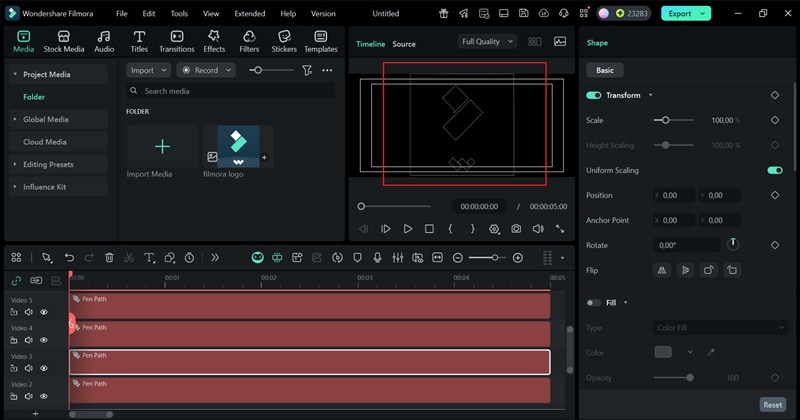
The Pen Tool in Filmora shines when used for outlines and path animations, so you'll want to start by adding your logo image to the project. This acts as your guide while you trace and build the glowing effect around it. Go to the "Media" tab, click "Import", and bring in your logo file. Once it's uploaded, drag it down to the timeline.
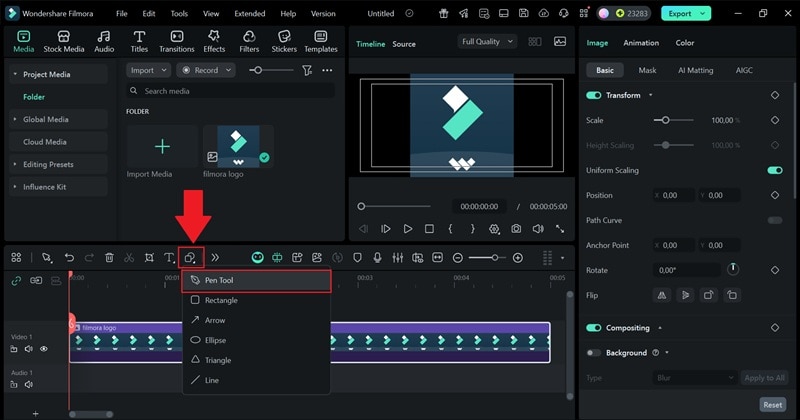
Next, click the shape icon above the timeline, right beside the text button. When the menu opens, pick "Pen Tool" to start tracing your path on the logo.
Use your mouse to carefully draw along the edges of your logo. Move slowly and follow each shape so the outline stays smooth and matches the original design.
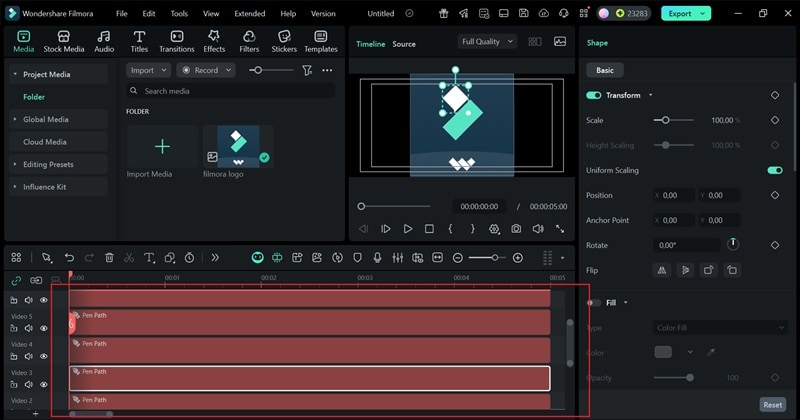
After you've finished tracing all parts of your logo, the path created by the Pen Tool will appear on the timeline. You can now delete the original logo layer. The outline you drew will stay right where it is, perfectly matching the shape of your logo.
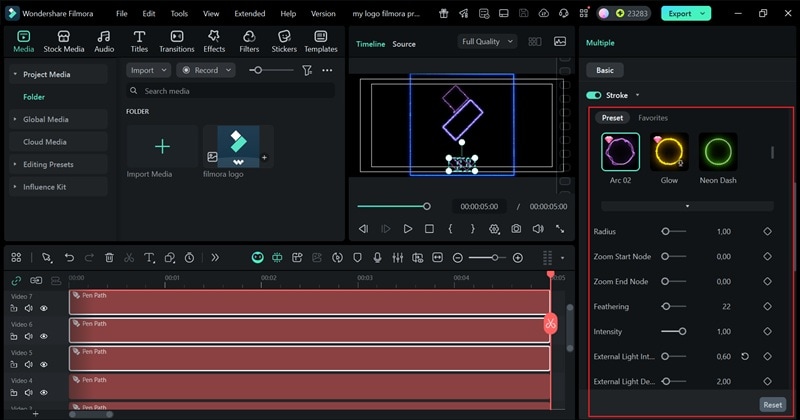
- Click on your Pen Tool outline in the preview window.
- Open the panel on the right and scroll down to find the "Effects" section.
- Pick a preset that fits your design and adjust the glow intensity or color to match your logo.
- Use your creativity here. You can give every outline the same look or make each one stand out with its own unique style.
- To make your logo appear as if it's being drawn live, add a little motion.
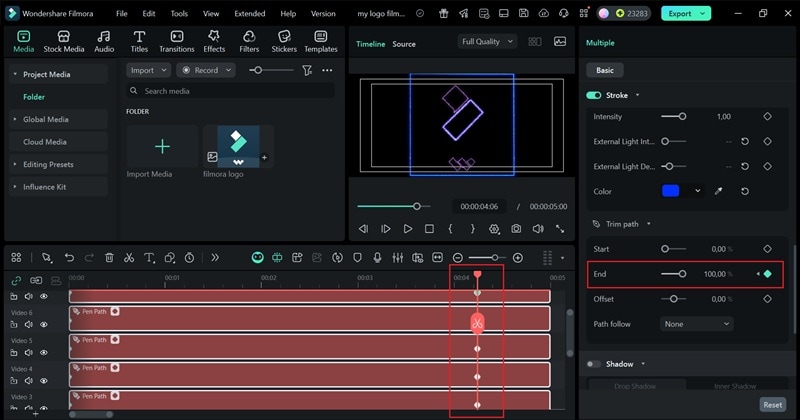
- Scroll down and open the "Trim Path" menu.
- Find the "End" setting, which starts at 0%. Keep your playhead at the beginning of the video and click Add Keyframe.
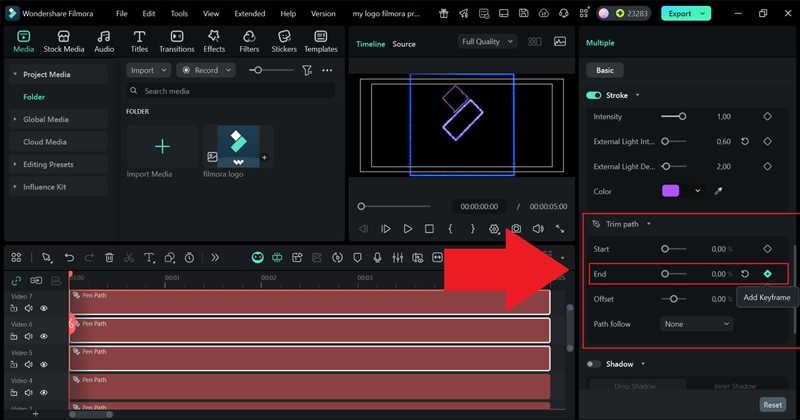
- Move the playhead to the end of the timeline and drag the End slider to 100%.
- Add another Keyframe to save it.
- When you play it back, your logo outline will smoothly animate across the screen, just like it's being drawn by hand.
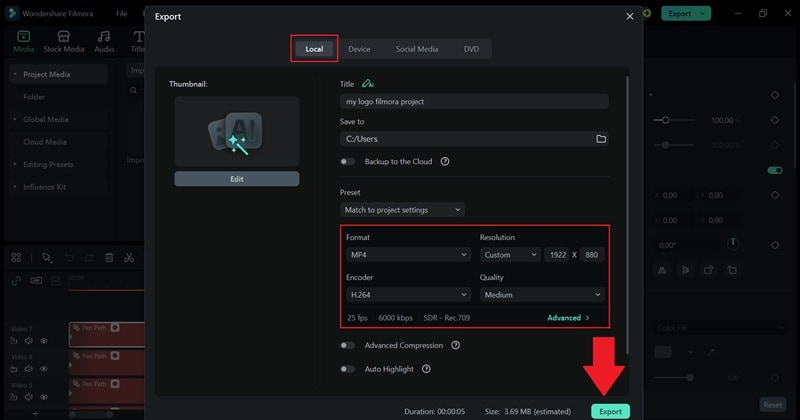
Press Play to see how your animation looks in motion. If you're happy with it, click "Export" to finalize your project. Choose "Local" to save the video on your computer, or pick "Social Media" to upload it directly online from Filmora. Give your project a name, select the file format and resolution you like, set a save location, then hit "Export" again to complete it.
And that's pretty much it! As you can see, with just a few simple steps, you've recreated the look of the Saber After Effects plugin in Filmora. And honestly, it might look even cooler. Since you can control every part of your logo individually, you get total freedom to fine-tune each detail until it feels just right. Now take a look at what you just made!

Conclusion
The Saber plugin in After Effects is a creative tool that can transform simple shapes, text, or logos into glowing, energetic visuals that feel cinematic. So, we walked you through how to use Saber effects in After Effects step-by-step, from installation to animation.
While the results look incredible, beginners might find the process a little complex at first. That's why Wondershare Filmora makes such a refreshing alternative. With its new Pen Tool, you can trace text, outline logos, and design glowing paths freely, all while keeping full control over timing and color. The built-in presets are vibrant, the animations are easy to fine-tune, and the whole process feels fun and creative from start to finish.
💬 FAQs About Saber in After Effects
-
1. Can you combine multiple Saber effects in one composition?
Yes, you can layer several Saber effects in After Effects on top of each other to build more complex visuals. Try mixing different colors or glow styles on separate solids to make your animation feel richer and more dynamic.
-
2. Why does my Saber animation flicker too much during playback?
That usually happens when the glow intensity or core distortion is too high. Lower the values a little, or do a RAM preview to see it play more smoothly. The Saber effect in After Effects can look flashy, but small tweaks often make it cleaner and easier on the eyes.
-
3. Is it possible to color-animate the Saber glow over time?
Yes, and it looks amazing when done right. Just keyframe the glow color so it shifts gradually, and your After Effects Saber will create a beautiful color transition that feels alive. It works great for music visuals, logo reveals, or energy-style animations.
-
4. What's a good alternative if I don't want to install plugins?
If plugins aren't your thing, Wondershare Filmora is a great option. Its built-in Pen Tool can mimic the same glowing outline effects you'd make with the Saber plugin in After Effects, but it's much easier to learn.
