

 TL;DR:
Mastering Photoshop color picker shortcuts accelerates static image editing, while dynamic video grading requires real-time tools like the Filmora HSL Eyedropper.
● Access the live HUD Color Picker by dragging the mouse while holding Shift + Alt + Right Click on Windows, or Control + Option + Command + Click on macOS with an active painting tool selected.
● Use the Photoshop HSL mode rather than RGB for independent adjustment of hue, saturation, and lightness, which prevents detail washout during subtle corrections like skin retouching.
● Rely on Photoshop for multi-step, precise color inputs in static graphic design, but utilize Wondershare Filmora for motion content to get instant visual feedback via a one-click preview eyedropper.
Ask AI for a summary
 ChatGPT
 Perplexity
 Gemini
 Claude
 Grok
Grok
Mastering the Photoshop color picker shortcut is essential for any digital artist. Whether you're fine-tuning a photo or designing complex graphics, knowing the right color picker in Photoshop techniques—like using the HUD color picker or Photoshop HSL mode—can drastically speed up your workflow. This guide covers everything from basic hotkeys to advanced video color grading.
Part 1. What is Color Picker in Photoshop and Why Does It Matter?
Every time you click on the foreground or background color, you open the Photoshop Color Picker. It's basically your main control panel for choosing and adjusting colors. You can pick a color visually, tweak it with sliders, or type in exact values like RGB, HEX, or HSL if you need something precise.
Why does this matter?
Color really affects everything. Photo retouching, digital illustrations, UI design, and social media graphics all look better when the colors feel right. The right shades can make your work look more put together and professional.
You can use the Photoshop Color Picker to:
- Grab colors in a reference image
- Match brand colors more easily
- Create and save your own custom shades in your swatches
- Keep your designs looking consistent across different projects
Knowing how to use the Color Picker in Photoshop, along with the shortcut, can save time and improve accuracy instead of guessing colors.
Part 2. Essential Photoshop Color Picker Shortcut List: Pro HUD & Eyedropper
Once you understand what the Color Picker is, the next step is speed. Mastering the right shortcuts completely changes how you work in Photoshop, especially when you frequently make color adjustments.
Basic Shortcut: Eyedropper Tool (I)

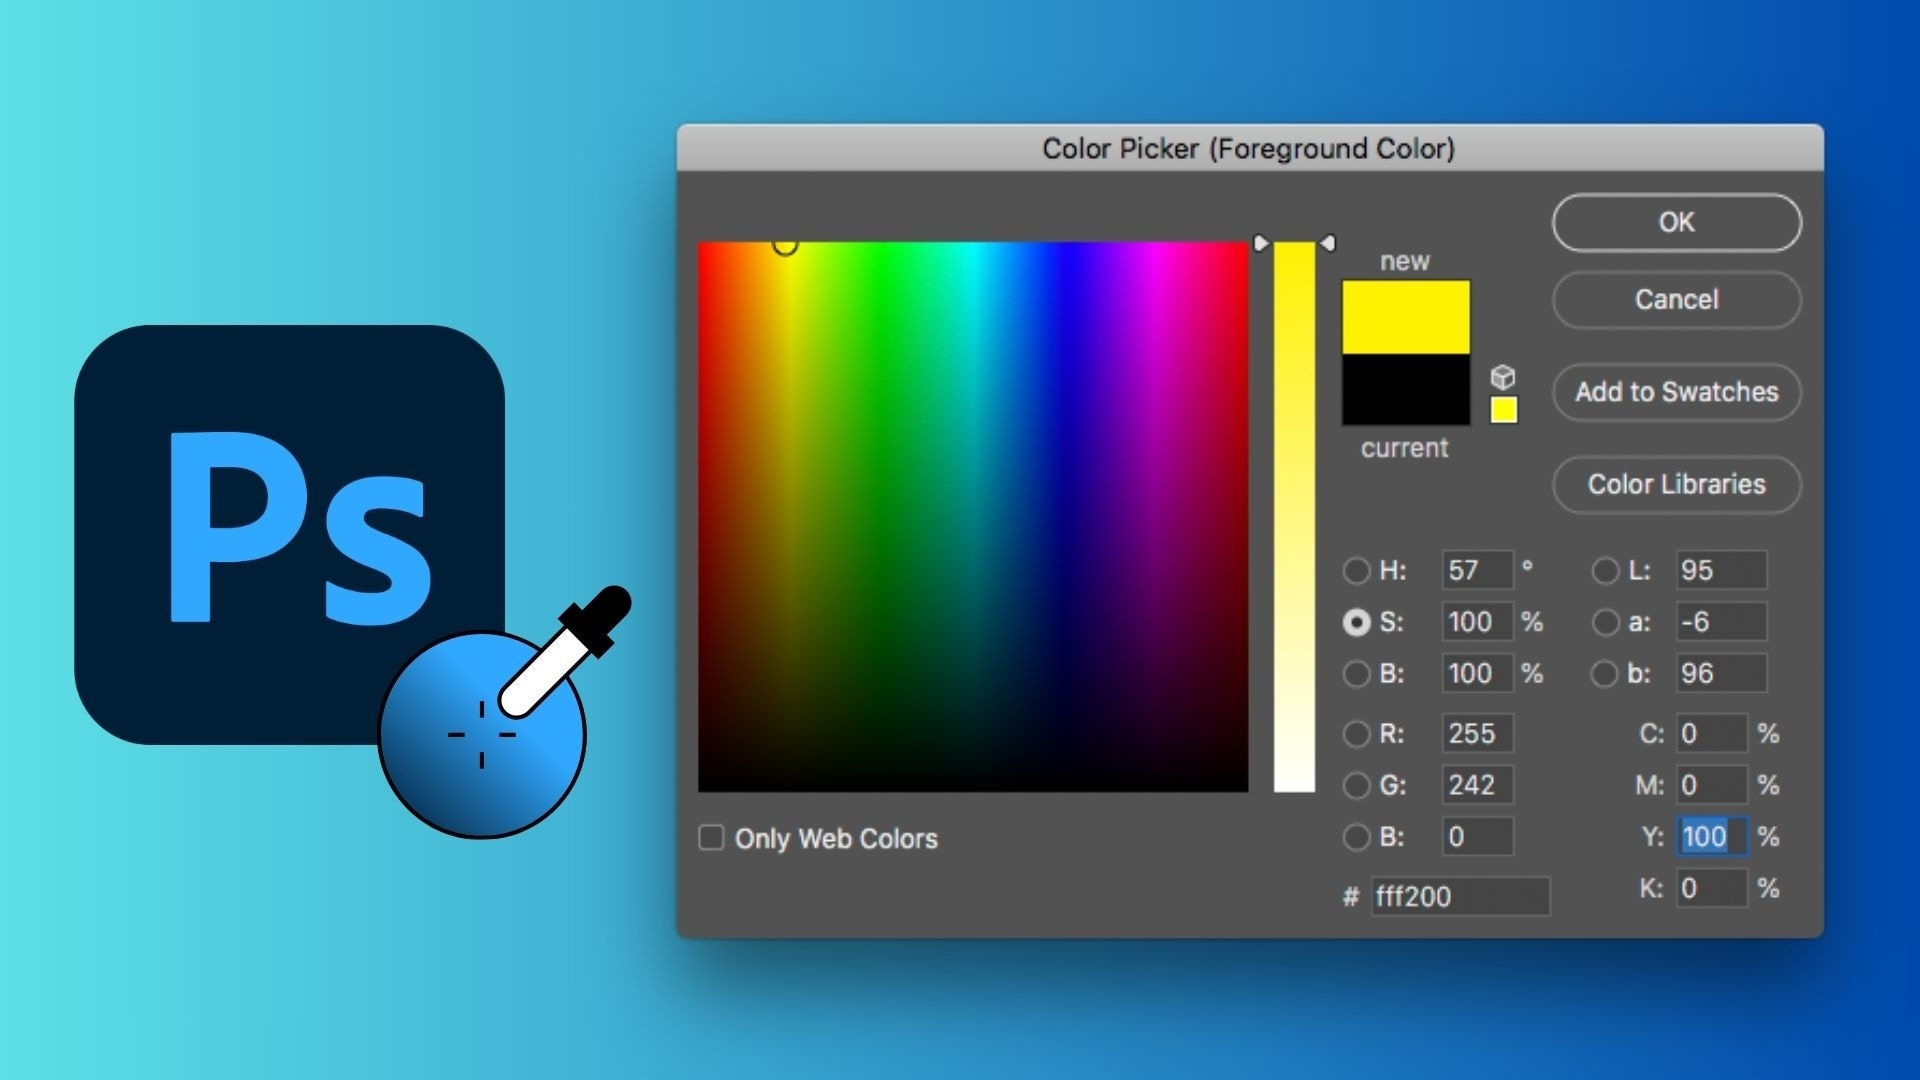
The most common Photoshop color picker shortcut is the Eyedropper tool (I). For a more advanced workflow, many professionals prefer the HUD Color Picker Photoshop shortcut. By pressing Shift + Alt + Right Click (Windows), you can access a live color wheel that allows for instant Photoshop HSL color picker adjustments without ever leaving your canvas.
Pro Shortcut: HUD (Heads-Up Display) Color Picker
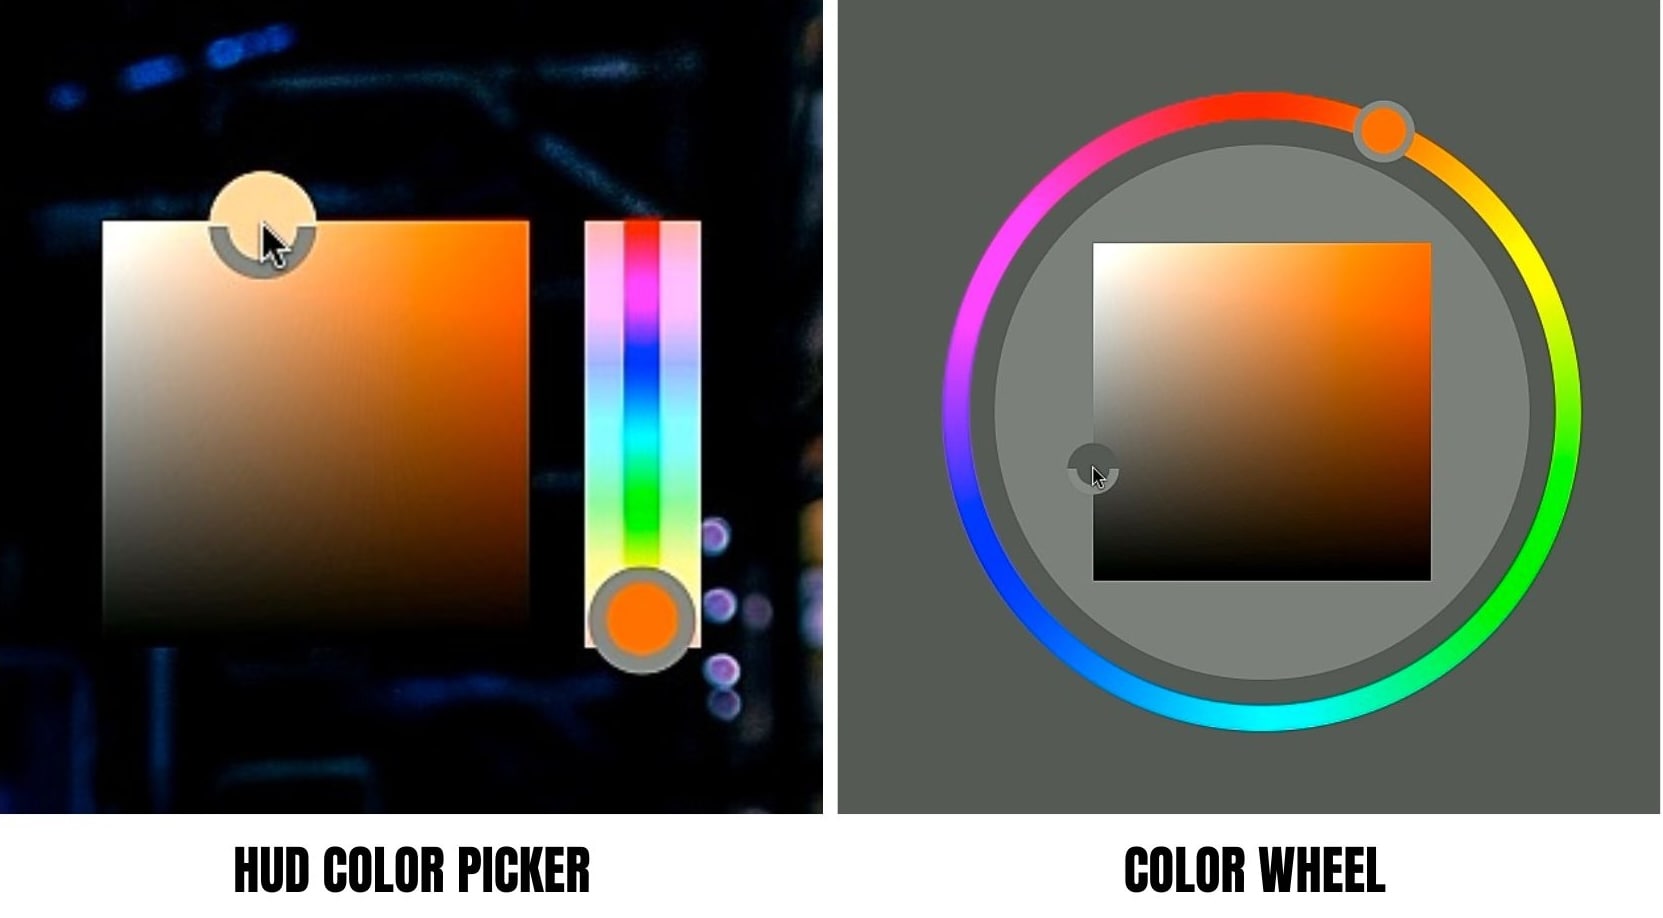
For faster and more intuitive control, use the HUD Color Picker.
- On Windows: hold Shift + Alt + Right Click, then drag your mouse.
- On macOS: press Control + Option + Command + Click with a painting tool selected (e,g., the Brush)
This shortcut opens a circular picker where you can adjust hue and saturation visually, which is ideal for quick Photoshop HSL tuning without interrupting your creative flow.
How to Change the Color Picker in Photoshop
If you prefer a different layout, Photoshop lets you customize the Color Picker itself.
- Go to Edit > Preferences > General
- Switch from the traditional Hue Strip to the Hue Wheel.
Part 3. Deep Dive into Photoshop HSL Color Picker
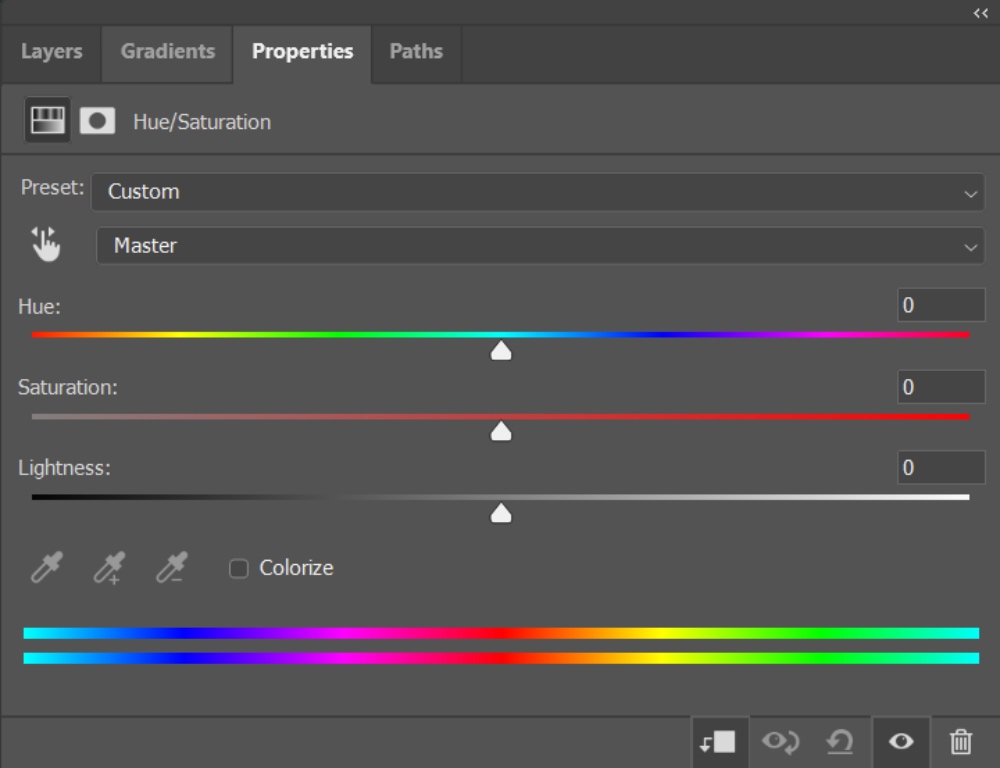
When you want full control over color without guesswork, the Photoshop HSL color picker is where things get powerful. Unlike RGB, which focuses on technical color values, HSL reflects how the human eye perceives color.
What Does Each HSL Slider Mean?
- Hue: Controls the actual color family, such as red, yellow, or blue. Small hue shifts are perfect for correcting skin tone color casts without changing brightness or saturation.
- Saturation: Adjusts color intensity. Lowering saturation helps reduce redness in skin, while increasing it makes colors pop without affecting exposure.
- Lightness: Manages how light or dark a color appears. This allows precise brightness adjustments without washing out details.
Because each element is adjusted independently, the Photoshop HSL mode is more effective than RGB for subtle editing. This mode helps you with cleaner control, smoother transitions, and more natural results for tasks such as skin retouching, color grading, and creative color correction.
Part 4. The New Trend: Efficiency Beyond Static Images
As content creation shifts from static visuals to dynamic motion-based formats, efficiency has become a top priority. Understanding how to use the color picker is no longer just about accuracy, but also about speed and real-time control.
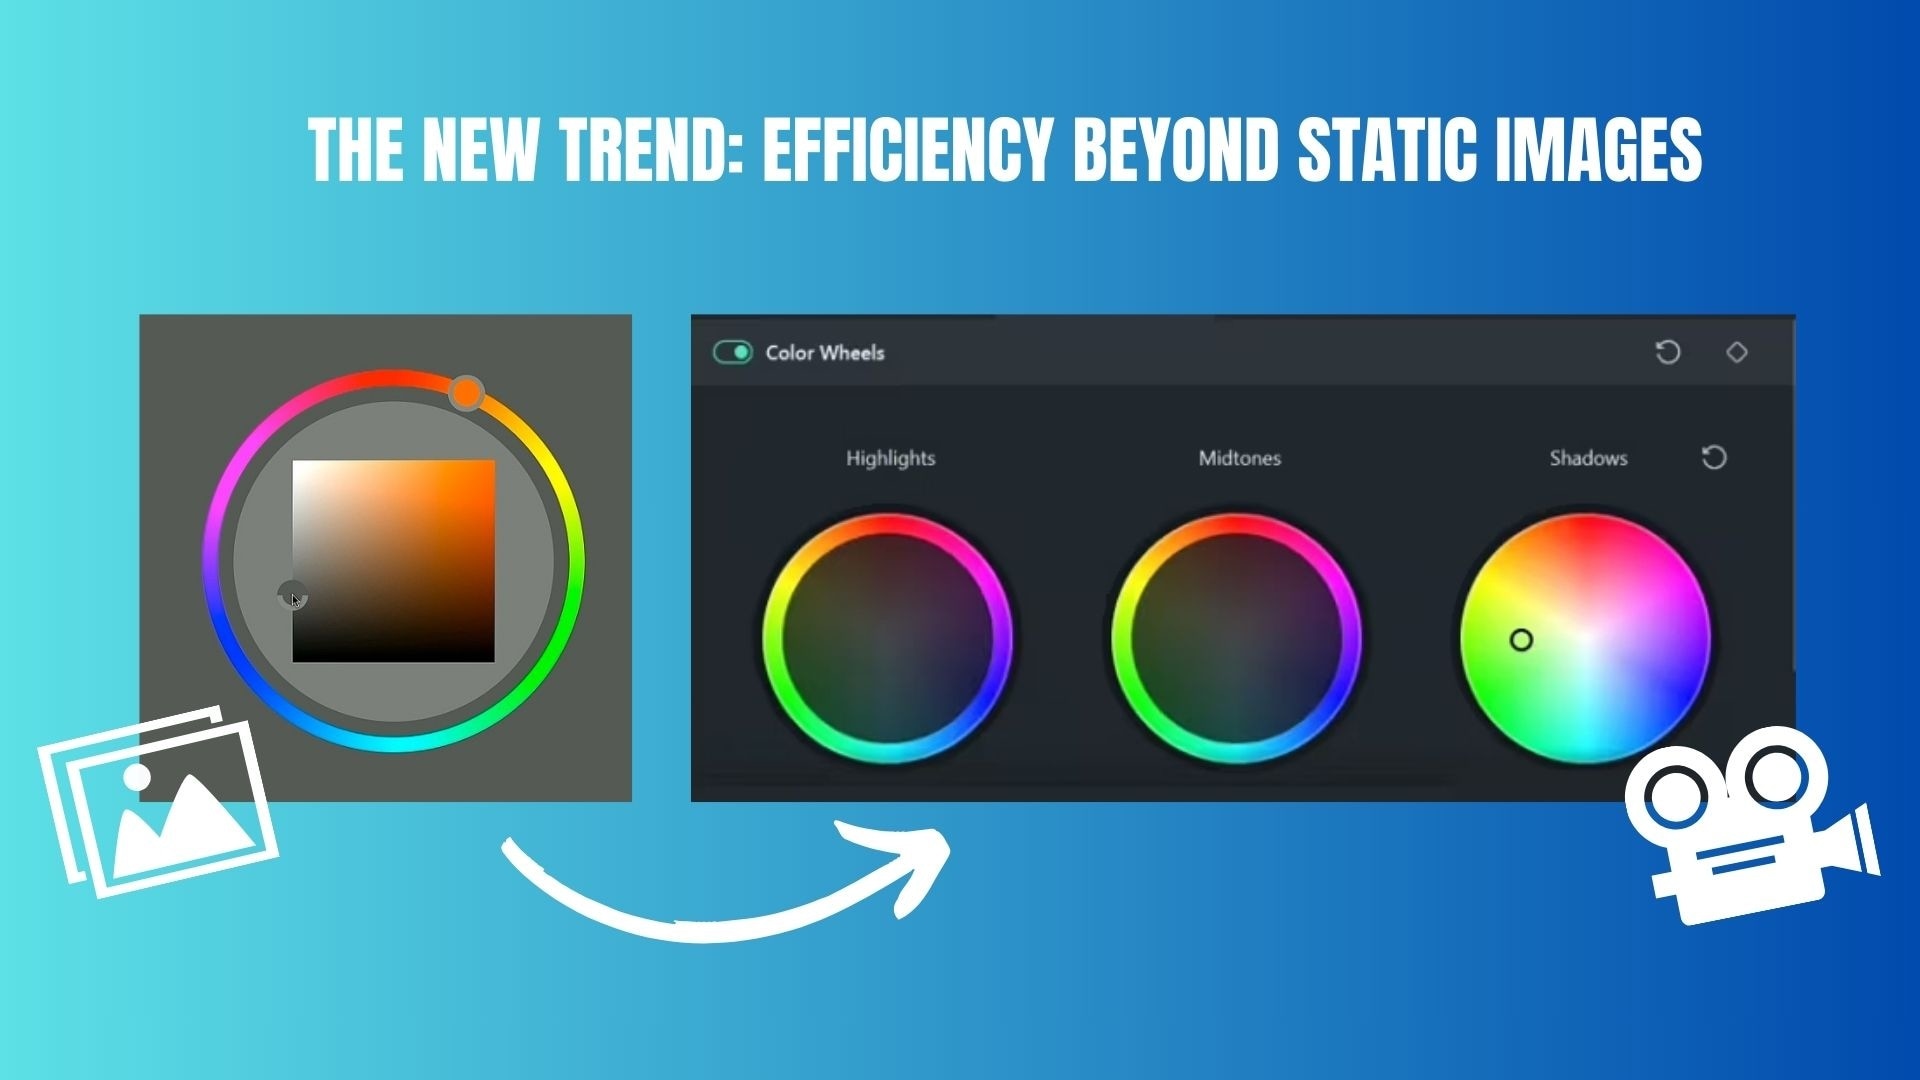
This change reflects the demands from users, where creators want tools that can adapt to fast-paced video workflows while still delivering professional color results. The comparison below highlights the differences between traditional color selection in Photoshop and modern video editing software in answering these new demands.
Comparison: Photoshop vs Video Editing Software Color Picker
| Aspect | Photoshop (Static Image Workflow) | Video Editing Software (Real-Time Workflow) |
| How to use the color picker | Manual, panel-based color selection | Interactive, real-time color adjustment |
| Workflow steps | Multi-step process: open picker, adjust values, apply, preview | Direct adjustment with instant visual feedback |
| Color preview | Static preview after applying changes | Live preview while the video is playing |
| Best use cases | Photo editing, illustrations, and graphic design | Video editing, motion graphics, short-form content |
| Efficiency level | High precision, slower execution | Faster execution with flexible experimentation |
| User experience | Technical and value-driven | Visual, intuitive, and timeline-based |
|
Show More
Show Less
|
||
Part 5. Next-Gen Color Grading: Filmora HSL Eyedropper Feature
Now, what if you want to do the same kind of color picking while working with moving images too? This eyedropper mechanism also becomes useful when you want to adjust a specific color in your video but don't know which hue, saturation, or lightness value to work on.
While the Photoshop color picker shortcut is great for static images, video creators need something faster. Wondershare Filmora bridges this gap with its intuitive HSL Eyedropper. Unlike the multi-step Photoshop process, Filmora's tool allows for one-click color sampling directly on the video preview, making video color grading as simple as editing a photo.
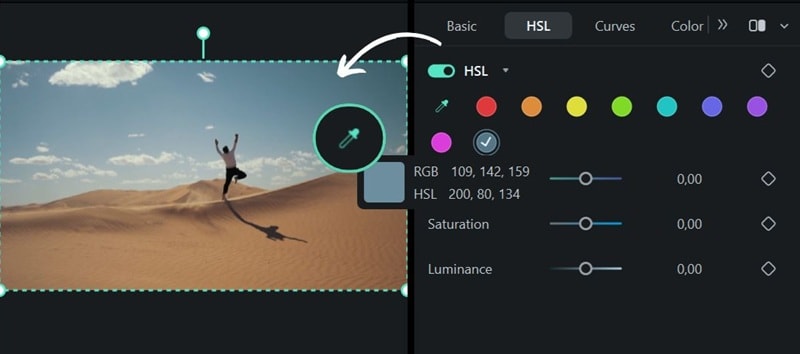
How to Use HSL Eyedropper Tool in Filmora


Part 6. Summary Table: Shortcut Comparison
To wrap things up, here is a clear comparison between the most common Photoshop color picker shortcut options and modern video-focused color picking workflows. This summary highlights the differences in shortcuts, interaction style, and efficiency across tools to help you choose the fastest method for your creative needs.
| Tool/feature | Shortcut or action | Interaction style | Best use cases |
| Photoshop Eyedropper | I | Click the sample color from the canvas | Matching colors in static images |
| Photoshop HUD Color Picker | Shift + Alt + Right Click (Windows) | Drag-based, visual color selection | Quick Photoshop HSL adjustments |
| Photoshop Color Picker Panel | Click Foreground Color | Menu-driven, multi-step | Precise value-based color input |
| Filmora HSL Eyedropper | One-click in the preview window | Real-time, direct interaction | Cinematic video color grading |
|
Show More
Show Less
|
|||
Conclusion
Mastering the Photoshop color picker shortcut is more than just memorizing keyboard commands. Rather, it's about selecting the right workflow for the type of content you create. Photoshop excels in precise color control for static images, especially when using HSL for detailed tuning and accurate adjustments.
As creative projects increasingly shift to video and motion formats, speed and real-time interaction become more important. Tools like Filmora demonstrate how modern color pickers simplify the process through direct adjustments with a single click.
