Expert Tips on Using Smooth Transitions in Filmora
What you need to prepare:
- A computer (Windows or macOS)
- Your video materials.
- Filmora video editor
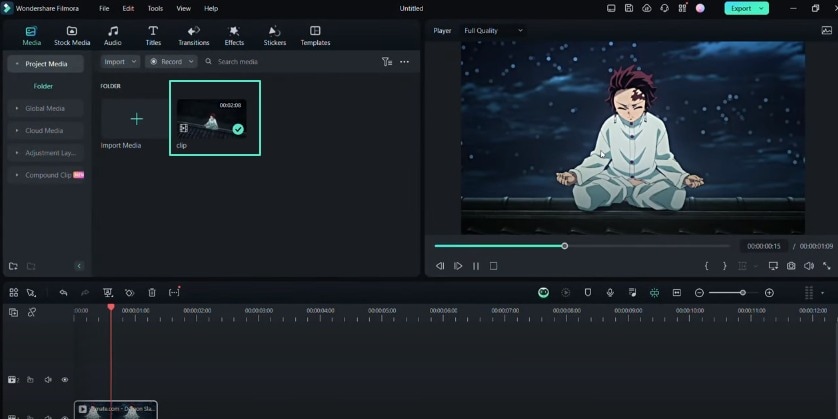
Bring Your Clip into Filmora
Open Filmora and import your clip in the editing window. After importing, add your clip to the timeline to add effects.
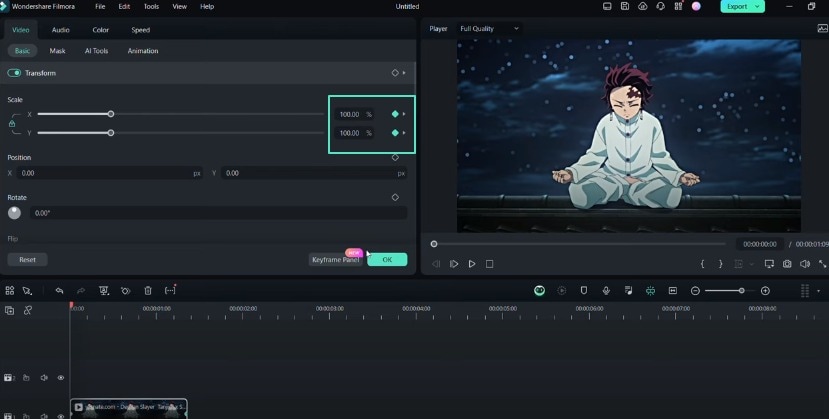
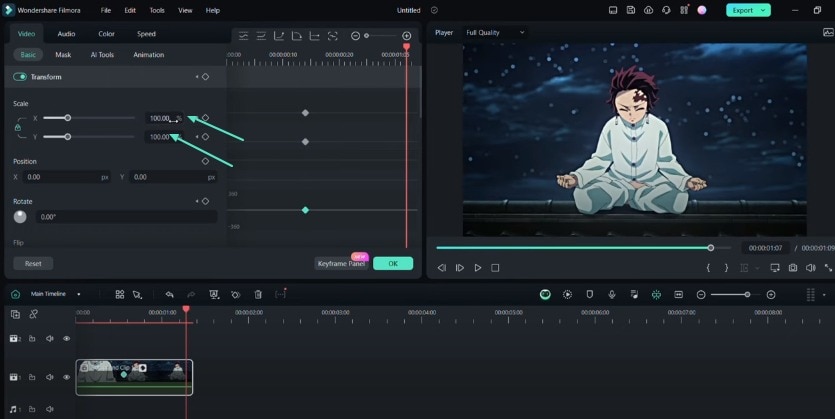
Create Zoom-Out Keyframes
Click on the clip to open its settings. Under the "Basic" tab, find the "X" and "Y" values under the "Scale" section. Set the "X" and "Y" values to 400% at the clip's start. Open the keyframe panel and start making your graphs. You can set an "ease in" preset to see the sticks. Adjust the sticks as desired until you achieve smooth results.
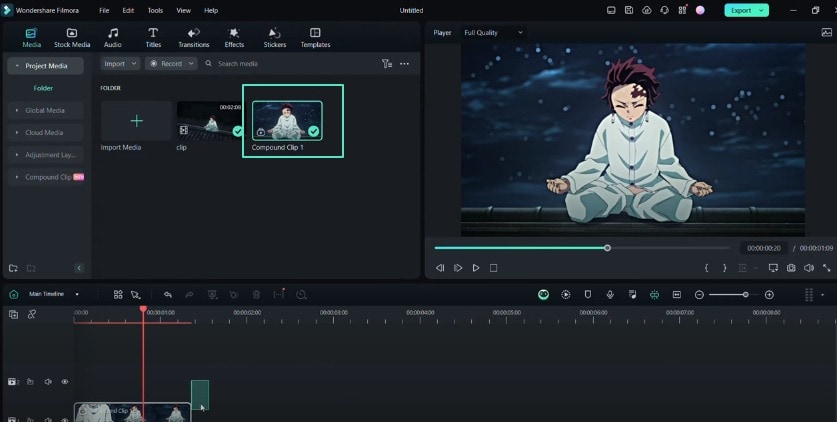
Create a Compound Clip
After creating the zoom-out keyframes, press "Alt + G" to create a compound clip of your zoom-out. Name the compound clip as desired, for example, "Compound Clip 1."
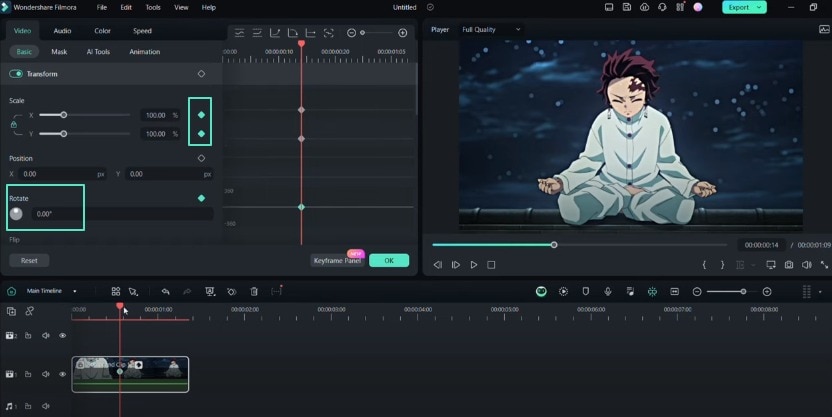
Add Scale and Rotation Keyframes
Create a keyframe for your scale and rotation in the middle or at the end of the compound clip. You can adjust the rotation angle to 30 degrees. Use the "sharp ease in" graph to make your clip look smoother. Compound your clip again to create a null movement.
Adjust Zoom-Out Transition
Make the zoom-out transition by adjusting the values of "X" and "Y" at different places in the timeline.
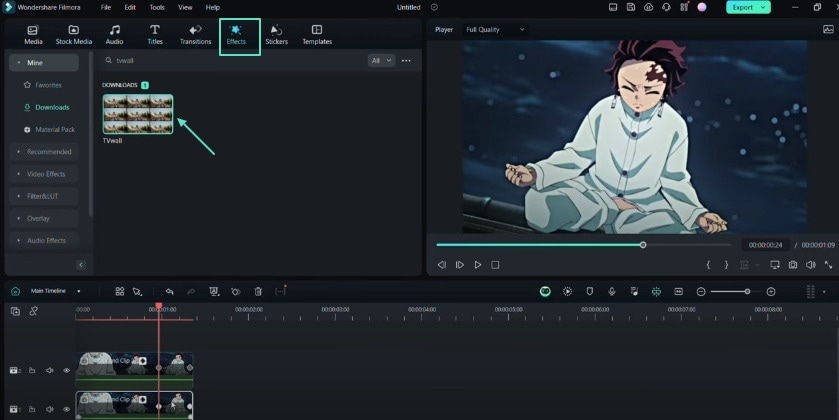
Add TV Wall Effect
Duplicate the clip and place it under the first one. Add the "TV Wall" effect and adjust the scale to match your clip. You should hide the first clip temporarily. Afterward, go to the "Flip" option and set the bottom clip to flip vertically.
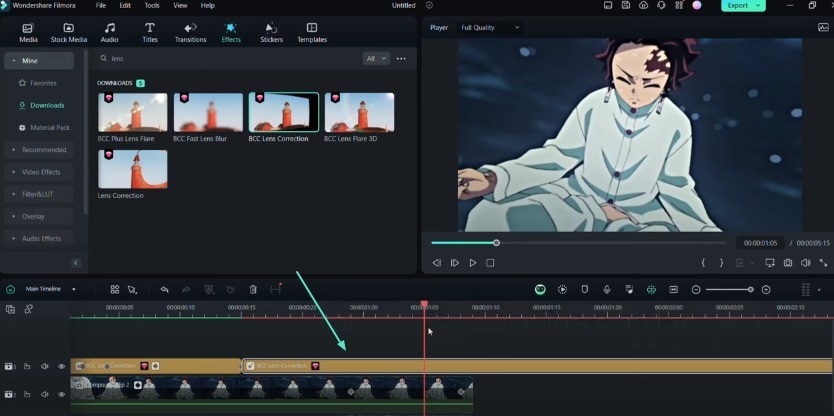
Add BCC Lens Correction Effect
Go to the effects and select "BCC Lens Correction." Add this effect to the timeline and open its settings. Use lens correction to warp your clip. Go to the Keyframe panel and adjust the "Correction" line. You can slide it higher or lower as desired. Set it to 100 and start creating keyframes for your zoom-outs.

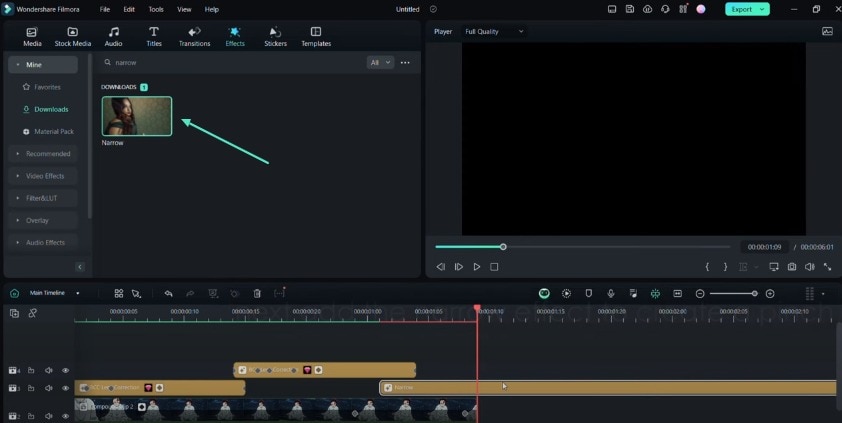
Add Narrow Effect
Go to the effects tab and search for "Narrow." Add the "Narrow" effect to the timeline and open its settings. You can adjust the percentage value as desired to create a pinch effect.
Add Small Zoom-In Effect
Add the "BCC Lens Correction" effect again for a small zoom-in. Adjust the "Correction" value for this effect and start creating keyframes.
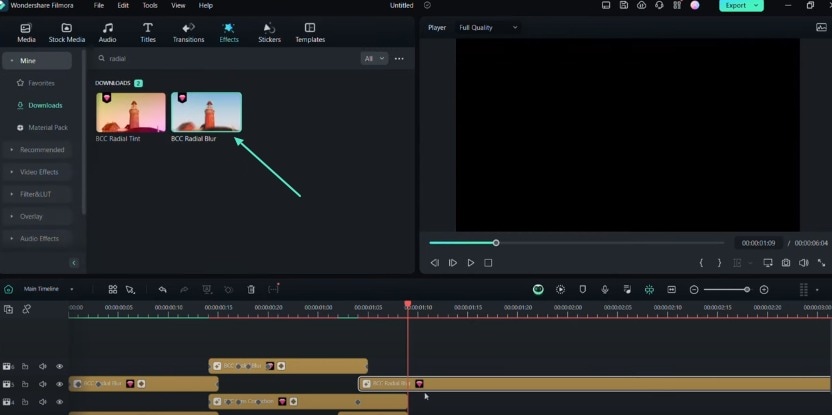
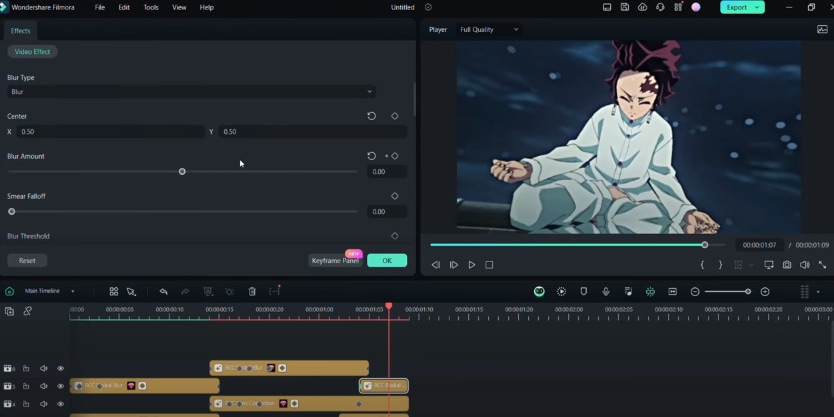
Add Motion Blur Effect
Go to the effects tab and select the "BCC Radial Blur" effect. It will give a motion blur effect. Adjust the blur amount at different places in the timeline as needed.
Review and Adjust
Review the clips on the timeline and make any necessary adjustments. Your smooth transition effect is now complete.
What you've learned:
- You can create unique, smooth transitions by mastering the techniques outlined here. All these Filmora's effects are easy to add without the need for any additional resources. Don't stop your creative mind after trying these effects! Check Filmora Creator Hub to discover other unique effects.


