Transcript
In this video, we will create a Stranger Things black void effect in Wondershare Filmora. First, film yourself in front of a green screen in which you're walking in a dark room and hearing unknown sounds, reacting to them by looking around. Also, you need some clips about putting the blindfold on your eyes and taking it off.
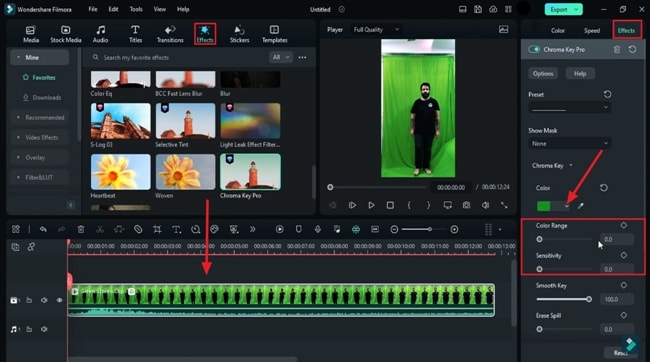
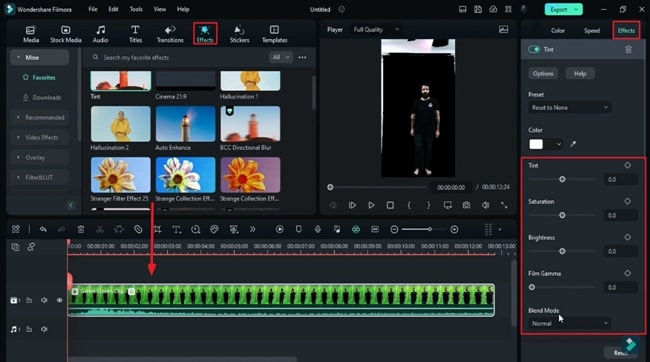
Then drop your footage on track 1, go to the "Effect," and apply the "Chroma Key Pro" effect by the "New Blue FX." Go to the "Effects," expand the "Chroma Key" option, change "Color" to the green "Color Range" to 100, and "Sensitivity" to 57.7. These values depend on your footage; then apply the "Tint" effect, change the "Tint" value to 6.3, "Saturation" to 3.1, "Brightness" to 9.4, and "Film Grain" to 35.9.
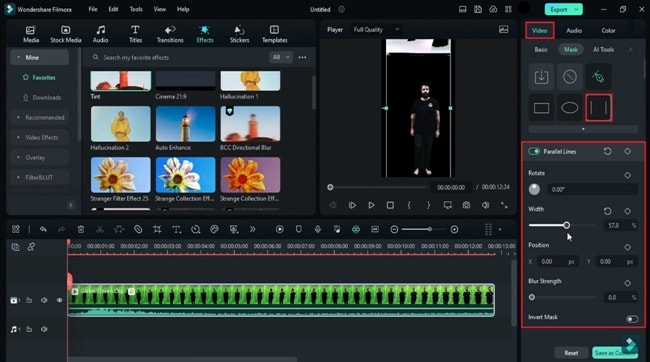
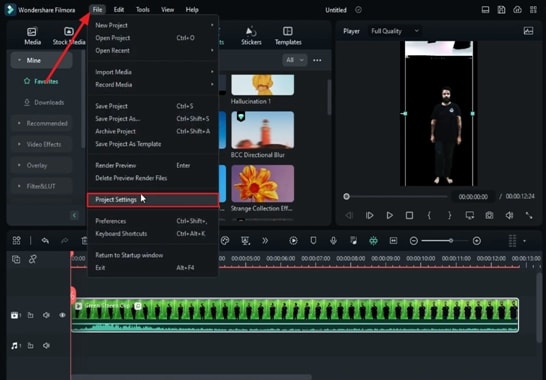
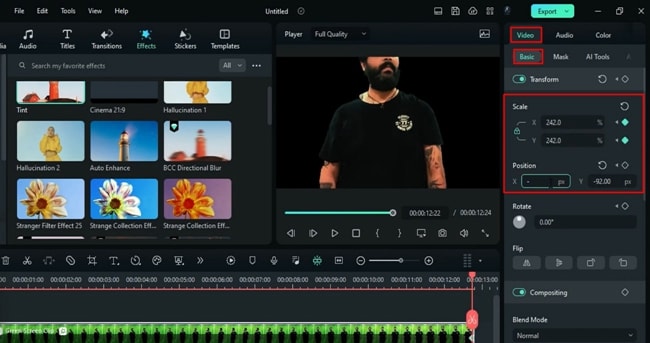
Go to the "Mask" and select the "Parallel Line" to hide the white part. Now, go to the "Project Settings" and change the video ratio to 16 by 9 widescreen. Do some color adjustments to blend it into the black environment. Change the "Temperature" to 37.5, "Exposure" to -12.5, "Highlight" to -20.3, "Shadow" to -87.5, "White" to -37.5, "Black" to -10.9. Then go to the "Video," turn on the "Transform" keyframes, set "Scale" to 197.8 at the start of the clip, and adjust the X and Y values to bring the subject to the center. Go to the endpoint and change the "Scale" to 242, X position to -71.16, Y to -379.05.
Turn on the "Opacity" keyframes at the start and set it to 0%. Then, go one second and 23 frames forward and set the "Opacity" back to 100%. Move the subject to the center, shift this clip to track 2, and hide it.
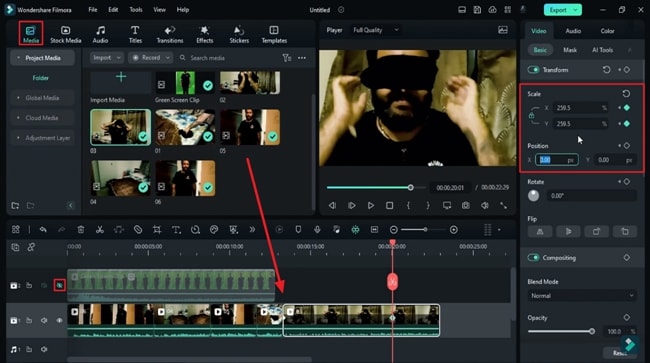
Now, go to the "Media" and drop your first scene footage on track 1. Turn on the "Transform" keyframes at the starting point, set the "Scale" at 152.8 at the endpoint to create a zoom-in effect, and adjust the X&Y position accordingly. Then, drop the second scene on track 1, drop the third scene on track 1, and change Y to -130. Then drop the fourth clip, drop the fifth clip, and turn on "Transform" keyframes at the start point. Go to 20 seconds, and change the scale to 259.5, X position to 253, and Y to -276. Change "Scale" to 1259 at 22 seconds and 18th frame.
Adjust the X&Y position to bring the blindfold on the eyes in the middle and use it as a transition; turn on the "Opacity" keyframe, then set the "Opacity" to 0 at the end. Now, place your green screen clip after this clip. Place the last clip after the green screen clip, and set Y to 1200 at the start.
Turn on "Transform" keyframes, and bring the blindfold on the eyes to the center of the screen. Change "Scale" to 208 after five frames and adjust the X&Y position. Turn on the "Opacity" keyframes in the middle of the clip, then change the "Opacity" to 0%. At the end, last but not least, do some final color adjustments on the green screen and other clips.
Now, let's render it to see the final preview.
Steps To Create the Black Void Effect Using Wondershare Filmora
What you need to prepare:
- A computer (Windows or macOS)
- Your video materials.
- Filmora video editor
Set Up The Scene and Import Media
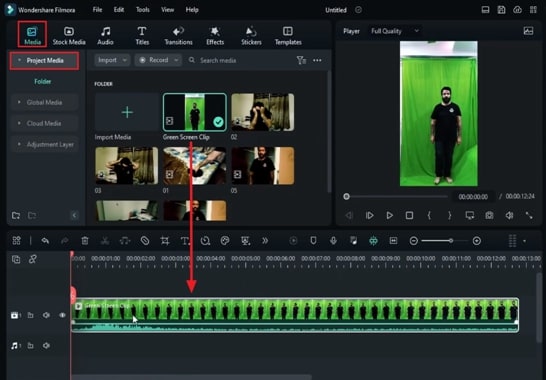
Record your video in a dark room with a green screen background behind the subject. This green screen will later be replaced with other footage. Launch Wondershare Filmora and begin a new project. Import your video files into the "Project Media" section for easy access. Afterward, drag and drop the green screen video clip into the timeline track.
Apply and Adjust Suitable Effects
Access the “Effects” menu and choose a suitable Chroma Key effect for your video. Next, drag and drop the effect onto the green screen clip. Click the green screen video and go to the adjustment panel on the right side. Access “Effects,” choose and go to the section with the added effect's name, and pick a color that matches your green screen. Customize settings like "Sensitivity" and "Color Range" as needed for your video.
Add Tint Effect (Optional)
For artistic effects, apply a tint effect to your video clip. Make necessary adjustments to the tint effect according to your requirements.
Handle White Portions (Optional)
If there are any remaining white portions in the video, access the “Mask” option from the adjustment settings panel and apply a mask to eliminate them.
Adjust the Aspect Ratio
To adjust the ratio of video, go to "File" and click on "Project Settings." Next, change the "Aspect Ratio" according to your clip and click "OK" to give your clip a cinematic feel.
Making Additional Adjustments
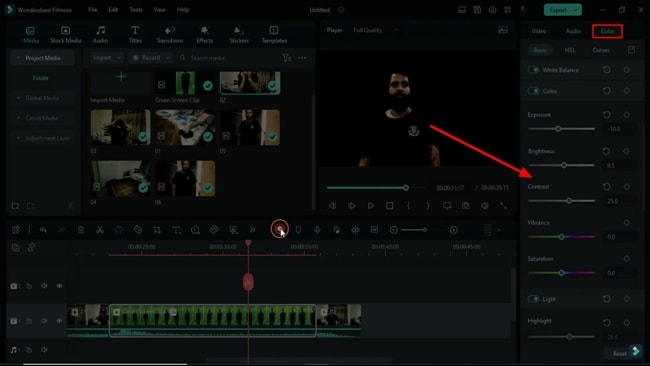
From the adjustment panel, go to “Color” and make color adjustments that best suit your video. To position the subject perfectly, change the “Scale” and “Position” of the green screen at the center of the screen.
Add Other Clips And Edit
Move your green screen video clip to another track and hide it by clicking the "Eye" icon of the designated track. Bring your second video clip to the timeline and start and apply a zoom-in effect by adding a "Transform" keyframe and increasing the "Scale" value.
Add More Clips and Adjustments
You can add more video clips and make additional adjustments that support your storytelling perspective for the video. After editing other scenes, bring back your green screen video clip to the track where all the other videos are and place it where it blends seamlessly with the other clips to create a coherent story.

Color Correct and Finalize
Make sure all your video scenes are color-corrected to blend together smoothly and maintain consistency throughout the video. After that, review your video, make any necessary tweaks, and when you're satisfied with the result, export your cinematic video with the green screen effect.
With the popularity of Stranger Things, everyone wants to copy its iconic blindfolded scene. You can create similar footage with just the right video clips and simple edits. Using Wondershare Filmora's guide, you can create the famous black void effect of Stranger Things with some pretty straightforward steps to help you. Also, if you want to remove the black bars in your video, Filmore also here to help.


