Transcript
We can use more than one video at the same time to use the face effect on video. Import the videos and drag to timeline using match to media resolution. This will set the default resolution similar for both the video content.
Order the videos in the timeline. This is to get an idea of what your videos will look after the effect addition. You can arrange them as per your choice within the timeline. Make sure it doesn’t overlap each other.
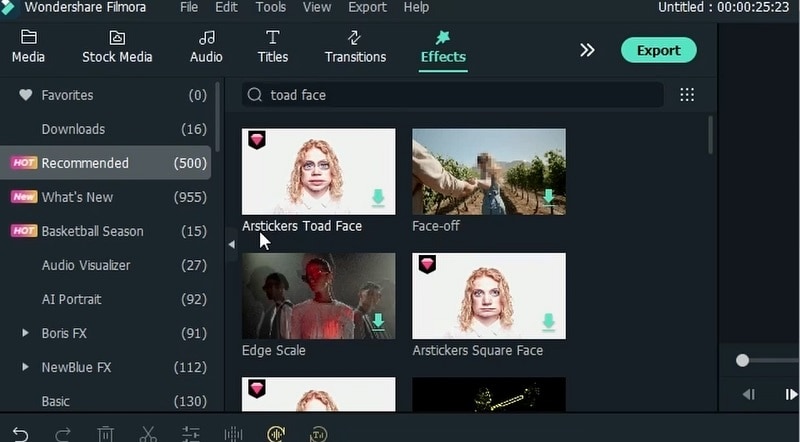
In the effects menu, type in toad face and use the ARsticker Toad Face you can explore the other options as well. Simply choose the effect from the list and you can add it to the video inside the timeline.
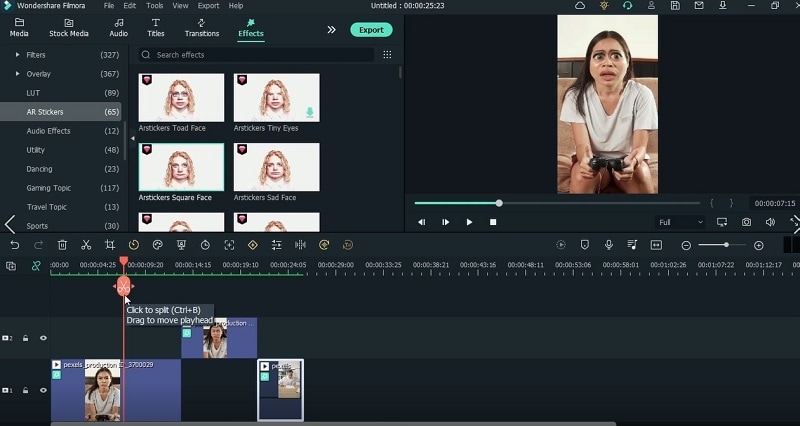
Split the video to change the dimensions including the scaling and the resolutions of frames. Make sure you split the video to the flipping scenes so you can use different effects for different scenes of your video.
Drag the toad face effect directly on your first video which you have split before. Drop the effect on the first scene where the person is having an annoying mood and the toad face effect will spruce up the mood in a better way.
Go with the other effect and add onto the second scene of the video where the person gets sad after the annoying mood. You can use any other effect to depict the mood of the person in a better way.
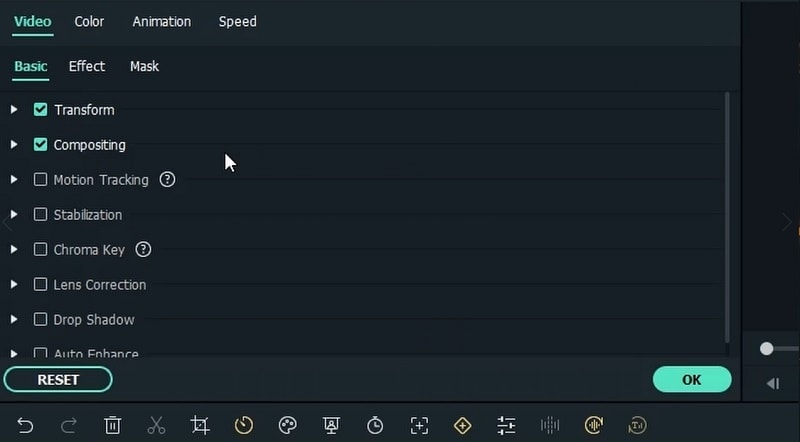
After the effect selection, now preview the other video to analyze the scenes and then double click on the video to open the effect menu.
Choose different stickers for different videos. You can check the AR stickers in the Effect menu and from there confirm the different stickers are being used for different video scenes.
Preview the effects on videos. You can use the overlays to match the themes of the videos. Analyze both the videos for a better overview and you can always add more to the effects on either video if it seems not interesting.
Use the animation to spruce up your video. Go to the animation menu bar and select the customize toolbar from there. You can add keyframes at the start of your video.
At the end of the video, scale the video inwards and use zoom in on your video character. This will add more cinematic effect on your video as the scaling makes the video interesting to watch.
Use the cinematic effects by typing rain within the effects search bar. Drag and drop the effect on top of your video and it will appear along with the video where the person’s mood is changing.
Use other effects such as blue effect for a clearer outlook of a sad mood. Like the red color, blue color is also proven for a sad depiction so you can use the blue filter to show the sad mood of the person inside the video.
For the second video, use the other effects such as shake effect and use it on top. You can also use other effects such as Mild effect.
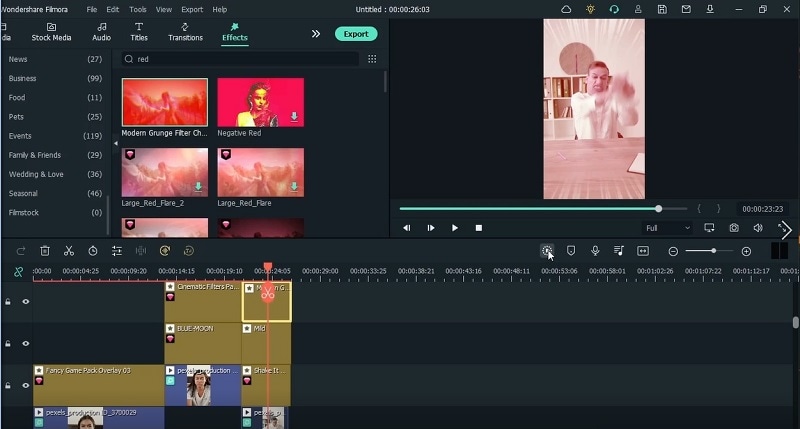
Use the red filter such as modern grudge filter to show the angry mood of the video. The reason to use red color is for the anger depiction as it is a evident for showing anger.
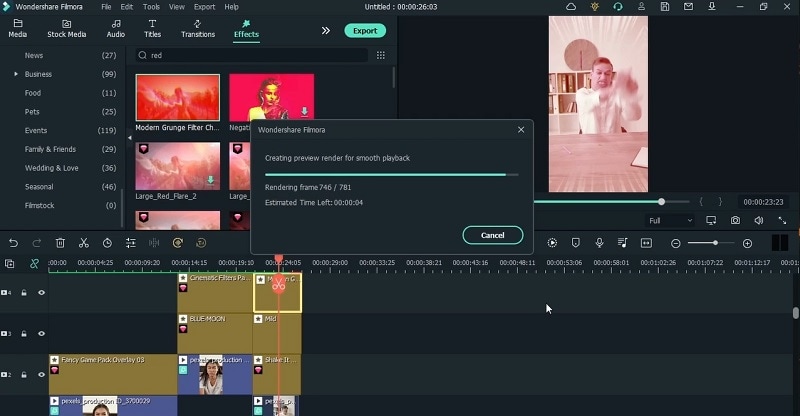
Start the rendering process for your video by clicking on the playback icon within the timeline. This will start the process and show you the timeline of rendering of your video as well.
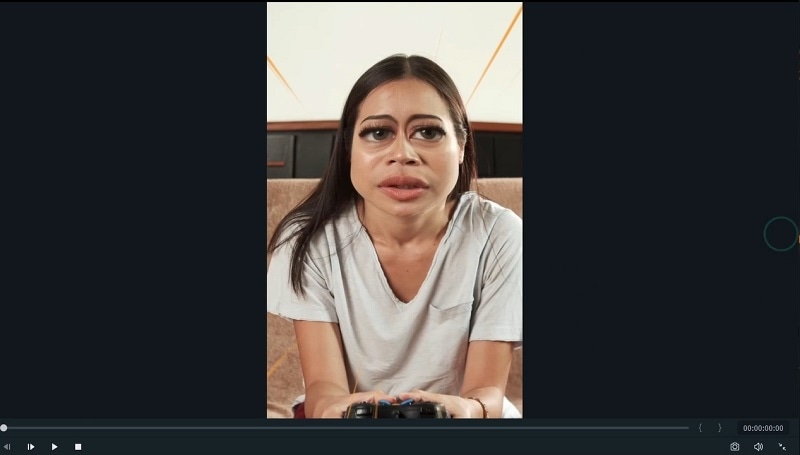
Preview the first video and see the effects within the video for a better analysis. You can use the preview window to pause and check the effects in order to make sure everything is in place.
Preview the second video and in this way, you can add the face effects on your videos right within the timeline at the same time.
How to Create a Meme with Face Effect
What you need to prepare:
- A computer (Windows or macOS)
- Your video materials.
- Filmora video editor
Download and Install Filmora
The first and foremost step before we dive into the use of this meme face video maker is downloading and installation of Filmora which is a handy tool even for beginners. To download this software, follow the link below which can take you to the .exe file download of this software. Without worrying for Windows or Mac OS, you can download your required version and install it afterwards.
Import the Footage
The next step is to make your meme face footage. This can be done with the Filmora or if you have it already created, then give it a go and import your footage to the editor. For that, hit the Import button and select the video to include in your meme video. You can also set the resolution of the footage upon importing and including them into the timeline.

Select and Download the Favorite Effect
Here comes the kicker! Head towards the effect menu and search for the Toad Face meme effects in the Effects section. In this way, you will be offered a variety of effects to choose from the ARSTICKER section. Select the one that fits for your video in a perfect manner and download it. Filmora provides a wide variety of filters, but if you're looking to add a unique twist, check out other fun AI filters:
- AI Age Filter: adjust the age of your characters
- AI Facial Expression Changer: change facial expression for different emotions
- Funny Face Filter: add even more playful details
Add the Effect to Timeline
In the next step, split your raw video within the timeline and drag the effect on the video scene. You can add the effect on top of the video where you want the effect to appear at.
Customize the Effect
Now, double-click on the effect and customize it to the full extent. The editor allows you to do a number of editing to the meme effect so you can make it stand out.
Polish Up the Scenes
You can also add more color effects and customize them accordingly. The goal is to look the meme video outstanding and Filmora has all you would need. Go for the color correction effect, rain effect, blue color, red color or any color palette, the software is filled with such effects and you can add as many as you want to make it look out of the box.
Render the Video Meme
When you are finished adding the numerous keyframes to the meme video, its time for rendering the effects so that everything gets in place. Hit the Render button within the timeline and within few minutes, your meme video is ready.
Preview and Export the Footage
Lastly, export your meme to the format of your own choice. You can opt for any of the formats from the format list. If you want to upload it to the YouTube channel as you’ve other option of MOV which is purely for the web content videos.
To go with exporting, hit the Export button and within the export settings, you have got the option to choose the encoder from the dropdown menu list.
In summary, you will have a choice of making your meme face video with a lot of customizations as Filmora is filled with features. All you need is a raw footage and Filmora to spill the magic of Meme face effect onto it. Download the software now and make it happen in a matter of few minutes.


