Transcript
Just like you have seen on games, we are going to be placing some options on the screen and then going over them with our mouse. We can see the preview of our character and proceed to go with that certain style.
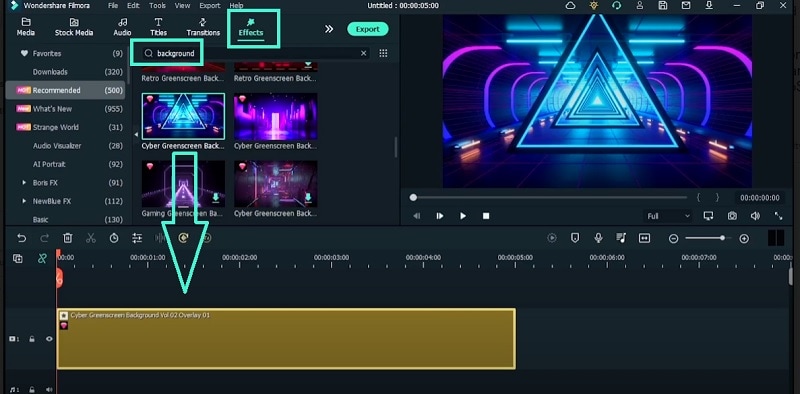
This effect is pretty easy to do with Wondershare Filmora. First, we need a background for this effect. In the Effects menu, type in “background” and choose Cyber Greenscreen Background Vol 2 for proper gameplay effect.
Drag the background onto the timeline. Drop your greenscreen video with the dancer onto the timeline as well. Separate green from greenscreen video. Select the footage and head over to Chroma key.
Choose a random color. Then use the eyedropper tool to select the exact shade of green in the video. Turn on Alpha Channel to ensure the background is perfectly replaced.
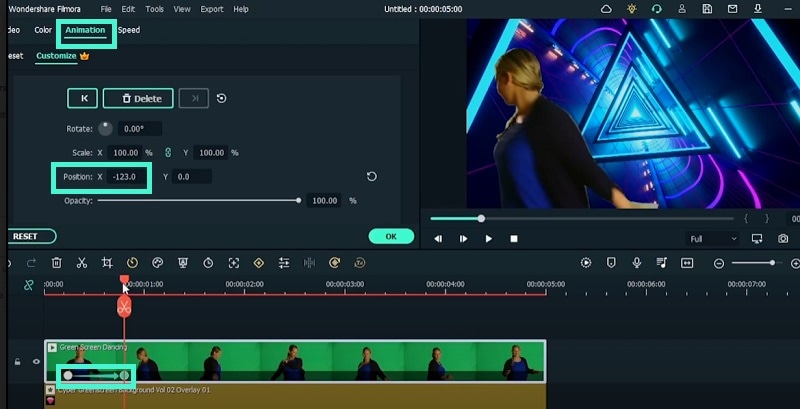
We are going to animate the position of our dancer. Double-click on the video and head over to Animations. Create a keyframe in the current position. Move the marker a few frames and change position X to the left.
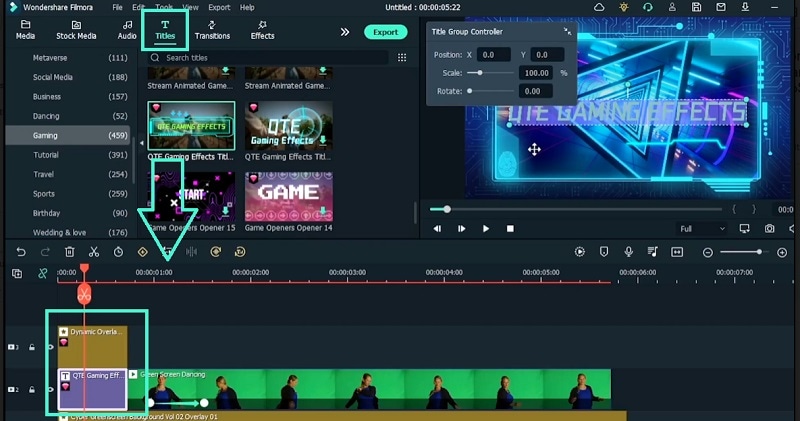
Now we need an opening overlay for the gameplay. Go to Effects> Gaming Topic and choose Dynamic Overlay 04. Place it over greenscreen video. Shorten its duration and move the greenscreen to the right.
We will need a text for our opening scene. Go to Titles> Gaming and place QTE Gaming Effects underneath the overlay. Double-click to edit text and style to match the overall effect.
Let us add a transition at the start of the overlay. Go to Transitions> Gaming. Add Streaming and Gaming effect and place it in between the greenscreen and overlay as well as the top effect.
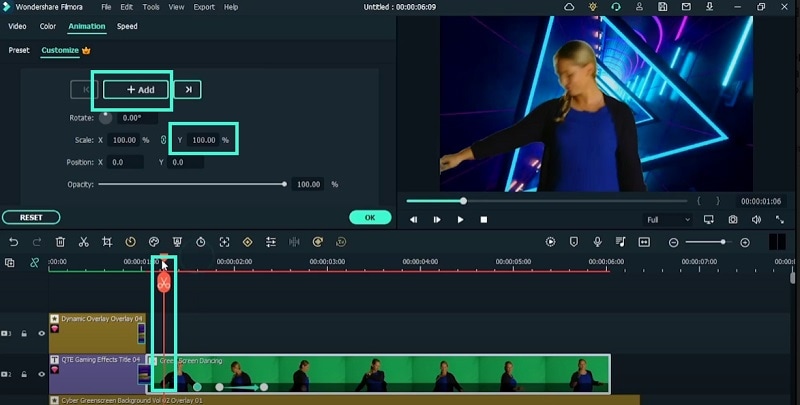
We are going to create an animation at the start of the greenscreen where the subject will move up from the bottom and move to the side. Add a keyframe and change position Y to get the animation as expected.
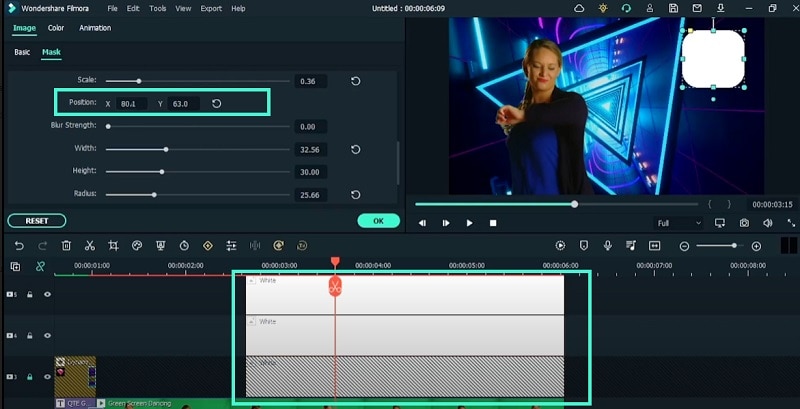
Time to bring in the boxes that have the effects on them. Go to Media> Sample Color and choose a color for background. Double-click on it and go to Mask and add a Rectangle mask. Make it square and increase the radius for rounded edges.
First, you need to capture an empty shot of the room without the actor. Then you need to capture video of the actor jumping around a few times. Once you have these two video shots, you can use Wondershare Filmora to create the desired effect.
Now we are going to add an entrance animation for all white boxes. Click on them and go to Animations, and use Slide Right preset animation. Offset them from each other so that they appear one by one.
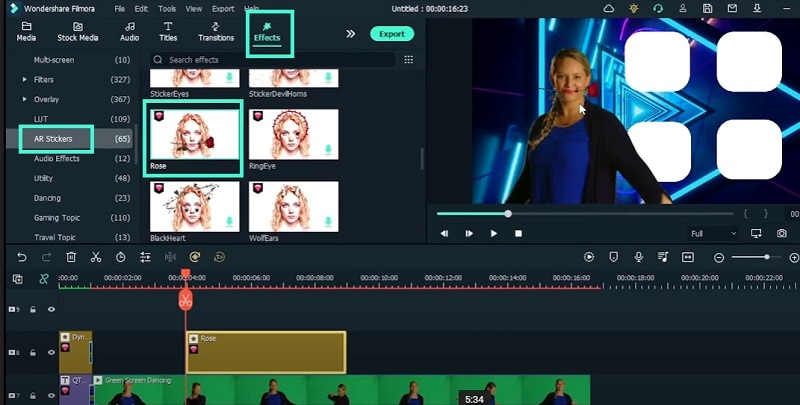
Change the position of these white boxes and move them underneath your greenscreen video. Now go to Effects> AR Stickers and choose the elements to represent the white boxes. Add them over the greenscreen video.
We have picked Rose, Magehat, Angel, and Butterflies elements. Place them side by side on the timeline. We need stickers to represent the elements. Go to Stock Media> Giphy and find the appropriate stickers.
Type in the sticker like “rose” and place it under greenscreen but matching the Rose element duration. Adjust the position of the sticker on the white box in the Viewer.
Since the stickers are animated, we need to use a freeze frame so that they animate only when the mouse is placed on them. Copy and paste them on the other side and right-click to go to Speed> Add Freeze Frame option.
We can now make them last as long as we want. Place them underneath the animated effect and match them with the white box. Do the same process for all the white boxes.
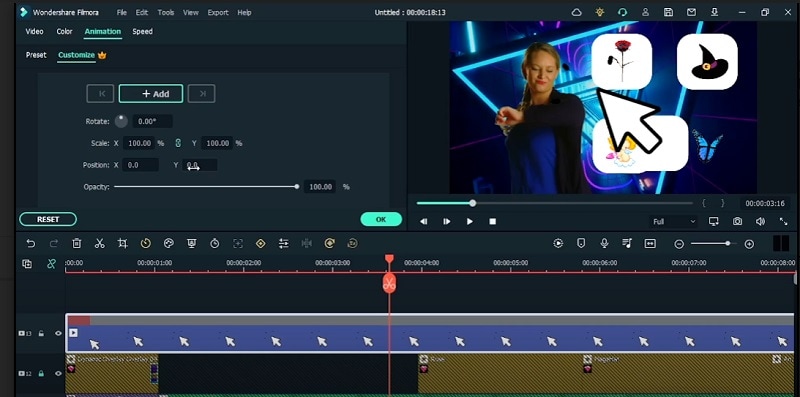
Finally, we are going to need a mouse element. Grab an element and make it look as if we are clicking on the white boxes. Go to Stock Media and type in “Click”. Bring it on the timeline and add a freeze frame.
Resize the duration and bring it right above all other tracks. Match the duration and add a keyframe in line with each of the effects. First, make it come from below with position Y and bring it up the rose box as if we are clicking on it.
Move it a few frames until you get the second effect. Add a keyframe a few frames before the second effect, and we are going to move the mouse sticker to the second box. Repeat the same for all the other boxes.
Finally, go to Effects and add Fitness Intensity to the top of all the existing tracks. Now we are finished, and you should play the video to watch the game character animation.
How to Create a Game Screen Video Effects
What you need to prepare:
- Your computer (Windows or macOS)
- Video clip with the subject giving angry expressions
- Wondershare Filmora video editor
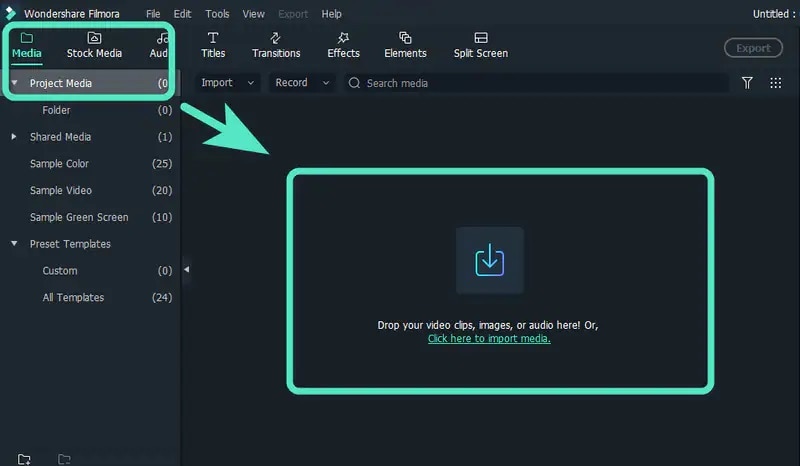
Install and launch Filmora on your computer. Click on New Project to get started. Drag and drop your greenscreen video to Project media folder.
Go to Effects menu and search for Background. Drag and drop “Cyber Greenscreen Background Vol 02 Overlay 01” onto the timeline. Drop your green screen video on the timeline. Change the green screen with background from Video> Basic> Chroma key.
Double-click on the video and go to Animations. Create a keyframe in the beginning and move it a few frames and add another keyframe, and change Position X to move it to the left. Go to Effects> Gaming Topic and place Dynamic Overlay over the greenscreen video. Move the greenscreen video to the right and match durations.
Go to Titles> Gaming and drop “QTE Gaming Effects Title” and place it underneath your overlay. Double-click to edit text and style as per your preference. Go to Transitions and place “Streaming and Gaming transition” and place it in between text and greenscreen video. Do the same between overlay and greenscreen video.
Add a keyframe at the beginning of the greenscreen video and change Position Y to negative. Create another keyframe a few frames ahead so that the character shows up from below. Go to Media> Sample Color> White and add to the timeline. Double-click and add a rectangle mask. Make it square and increase the radius to make the corners rounded.
Copy and paste the white box track to create four of them and place them on top of one another. Double-click and change Position X and Y so that they show up side by side on the screen. Go to Animation> Slide Right for the entrance of the boxes. Offset the boxes so that they appear one by one. Finally, move the white boxes underneath the greenscreen video.
Go to Effects> AR Stickers> Rose and drag it over greenscreen video. Similarly, choose MageHat, Angel and Butterflies. Go to Stock Media> Giphy> type in ”Rose” and place it below greenscreen video and match the duration with AR Stickers. Do the same for all other AR Stickers. Add the freeze frame effect for each element and match the white box.
Go to Stock Media>Giphy> type in “Click” and add to the timeline above all clips. Add freeze frame and add keyframes to make the mouse pointer come from below and move from one white box to another. Match the duration of the keyframes with the elements. Go to Effects> LUT> Fitness Intense for a dramatic game look. We are done and you can play the video.
What you’ve learned:
- Animation Tips & Tricks to Bring New Ideas to You
- How to create boxes and add AR stickers to them
- How to use elements and add mouse click effect