Create Speed Ramping Video in Filmora
Speed ramping is a technique for making cuts that are faster than normal without compromising the quality of the final product. It's a great way to make edits quickly and easily while still maintaining the quality of your video.
Tool
Assets


Transcript
Are you looking for an effortless way to give a unique cinematic effect? Speed ramping is an approach to adjust the clip speed to send the message across and give the audience an element of suspense.
It's an approach that can be used to increase or decrease the speed of a video clip. Filmora has a masking transition which makes it easy for the user to speed ramp their videos.
This is useful for creating a smooth transition between two clips. It can also be used for adding attention to a particular moment in a clip.
The super-speed video effects develop the required pace of the film. To create a cinematic effect by speed ramping. Before editing installs Filmora. Once it is installed it'll start and run automatically. First of all, make sure that you have updated your Filmora software to the latest version, which is version 11.
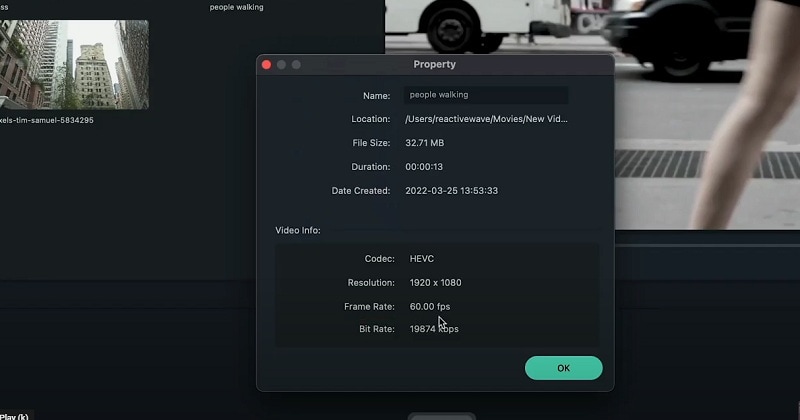
The latest version, which is 11, is very important because in this version you have the speed ramping feature. One more thing that is necessary for speed ramping is that the footage must be more than 50 FPS (frame per second). So footage less than 50 fps (frames per second) will not be considered.
The term "frame rate" refers to the number of frames that are displayed per second. The higher the frame rate, the smoother the video will appear.
You can check your video's fps (frame per second) by importing it into the Filmora. Then right-click on it, select Properties, and here's the frame rate information for your footage.
The frame rate of a video can impact the quality of the video, but it is not only a factor. Other factors such as resolution, bit rate, and Codec can also affect video quality.
Drag your video to the timeline. Keep the timeline to 25 or 30 fps (frame per second ). Double-click on the video goes to the speed tab, then the speed ramping category. So we can see here are some presets you have to choose for the montage.
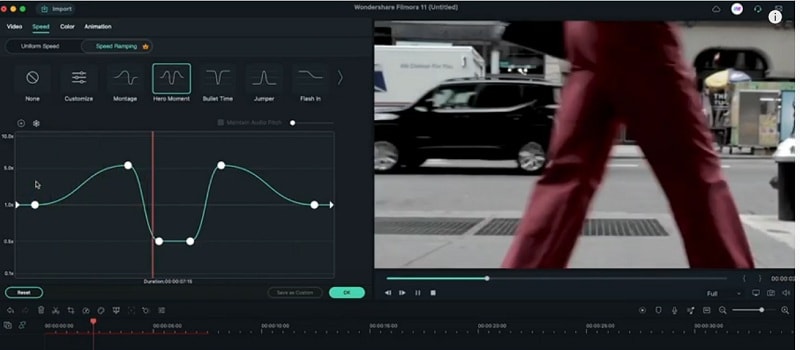
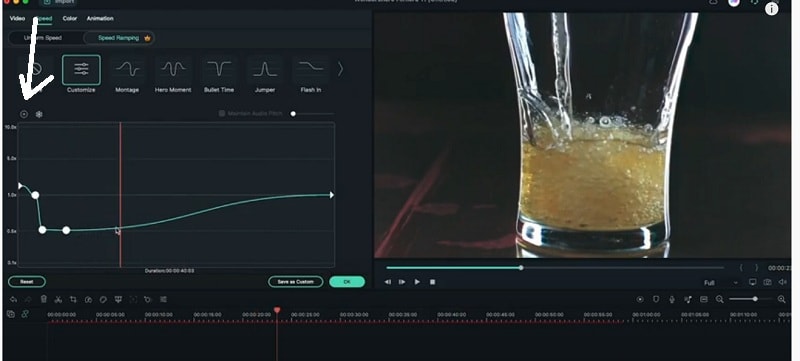
Now let us try the second one, which is named hero moment. If you want to create your custom speed ramping effect. Just click on customize option here. Drag these points up to increase speed.
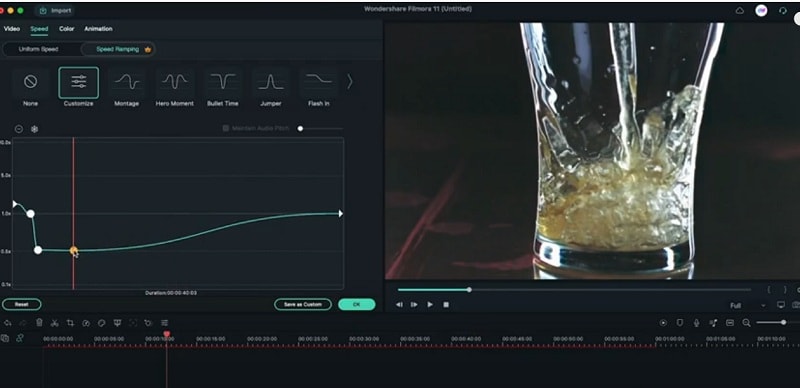
If you keep the points on the middle line, there will be no change in speed. If you want to create new points, just click on this plus icon, and now just keep adjusting the speed as per your liking.
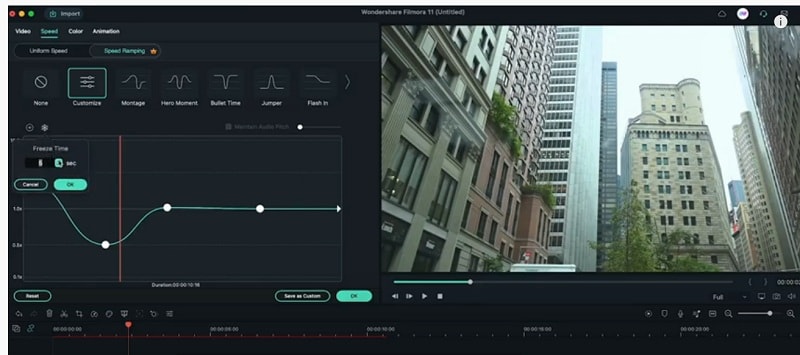
Let us say if you want to add a freeze effect then just click on this snow icon here and then adjust the time of the freeze effect. But if you want to change the freeze time later, you can change it by double-clicking on the square-shaped point.
How to Do Speed Ramping in Filmora
What you need to prepare:
- A computer (Windows or macOS)
- Your video materials.
- Filmora video editor
Creating cinematic effects by speed ramping
Open Filmora and import your file. First of all, go file and go project setting and set the frame rate to 60 fps (frame per second). It is necessary for speed ramping that the footage must be more than FPS (frame per second) then you get better results.
Speed ramping is a video transition that can be used to cover up a scene change or when the camera needs to slow down or speed up. It has been used in many popular movies. Filmora is great for those who want a quick way of adding transitions without having to go through the process of adding them manually.
Speed ramping of clip
Add the clip which you want to speed ramp to the timeline. Then add keyframes to the start and end of the clip. For this, click on the add keyframes button, which is located above the timeline. When you add keyframes you will have to adjust the speed of the clip. Keep the timeline to 25 or 30 fps (frame per second ).
Double-click on the video goes to the speed tab, then the speed ramping category. So we can see here are some presets. Choose montage. Render the clip to see the results of your speed ramp. This is useful for creating a smooth transition between two clips. It can also be used for adding attention to a particular moment in a clip.

For Hero Moment in Speed ramping
You can also create hero moments where the footage speeds up or slows down for added effect. In the speed ramping option you will see the option of hero moment which is just next to the montage option. Just click on hero moment mode.
For Creating customize speed Ramping
To create the custom speed ramp, select the footage. Then on the timeline click on the speed ramping option. To create a speed ramp, select the ramp-up and ramp-down options. In speed ramping mode, the customize option you see is located just behind the montage option.
Then set the speed you want the footage to ramp up or down. You can also set a point in the timeline where you want the ramp to start and end. Then click OK to apply the speed ramp to your footage.
For creating new points
We create new points to create a new starting point for your video. Also for making changes to your video without affecting the original. We can create a different effect when we create new points. To create new points for speed ramping in Filmora, click on the speed ramping icon in the toolbar.
Then click and drag the icon to the desired position on the video timeline. To create a new point, simply click on the add icon, which is like a plus icon. When you keep the points on the middle line, there will be no change in speed. If you want to create new points, just click on this plus icon, and now just keep adjusting the speed as per your liking.
Adding freezing effect
Select the clip you want to add the effect to. Go to the effects option and search for the freeze-frame effect. Drag and drop the effect onto the clip in the timeline. In the effect control panel click the pencil icon, which is located next to the effect to open the freeze frame options.
Select the frame which you want to freeze. Adjust the time duration for effect. You can do it in the timeline option. Adjusting duration is just for how long you want that freeze effect. Click on the snow-like icon and then adjust the time of the freeze effect.
But if you want to change the freeze time later, you can change it by double-clicking on the square-shaped point. If you are interested in adding a border around the frozen frame, check the box checkbox. For adding a drop shadow to the freeze frame, check the shadow checkbox.
What you've learned:
- You can change any background in video with green screen.
- Use transitions in video to make it more smoothly.
- Filmora comes with many types of background, including social, busiess, sports and more.
