

How to Make Objects Move in Video?

May 12, 2025• Proven solutions
If you are a post-production beginner or an editing enthusiast, you must learn how to make objects move in a video. When it is about moving the objects, there are the following two ways this can be done:
- Follow an Object or Person in the Footage
In this case, one object follows the movement of another entity that the footage has. For instance, if the clip has a car in motion, you can make a text or any other external element tail the car. This way, wherever the vehicle goes, the external object follows.
- Freeform Movement
In this method, you can make any external object move freely within the screen, i.e., without following any other entity. For instance, if a person is walking on a side path of a street, you can make a third-party element (e.g., a vector art) move on the other side of the road, or fly in the sky, etc.
With that said, the sections given below cover both the approaches and teach you how to make objects move in a video using one of the best and easiest video editing applications, Wondershare Filmora:
Part 1: How to Make the Objects Move with Your Motion in Filmora?
This method explains how you can make any external object (a location symbol in this example) move along with an entity that footage has. Here, the Motion Tracking feature plays a vital role where it tracks the motion of the target element in the video, and enables you to associate an external object to it. You can learn the process by following the steps given below:
Step 1: Import the Ingredients and Add to the Timeline
Launch Wondershare Filmora on your Windows or Mac computer (a Windows 10 PC here), click anywhere inside the Media window, and locate and import the source video and the object you want to move along to the application. Next, hover the mouse over the icon of the video clip, and click the + icon that appears at the bottom-right corner of the thumbnail. On the confirmation box, click the button under the Match to Media or Keep Project Settings section to add the footage to the Timeline.
After this, drag the external object from the Media window to the Timeline, and place it on a new track. Now, drag the object in the Timeline, and position its left side on the frame from where you want it to appear in the movie. Drag its right handle to extend or reduce its visibility duration in the video. If need be, click the object in the Preview window, and use the scaling handles to resize it.

Step 2: Start Motion Tracking
Place the Skimmer ( Playhead ) on the frame you want to start the third-party object to follow. Select the video layer, and click Motion Tracking from the left toolbar present above the Timeline. Click the tracking frame in the Preview window, use the scaling handles to resize the frame to cover only the area/element (the dog for this example) that needs to be followed by the object, and then place the frame right above the target area/object. Click Start Tracking from the window in the upper-left area, and wait while Filmora tracks the movements of the target object.
![]()
Read this article to explore more motion tracking usage in Filmora.


Step 3: Bind the External Object with the Tracked One
Make sure that the Playhead is positioned on the frame where the left side of the third-party object is, drag the object in the Preview window to set its location correctly, and choose the object from the drop-down list present under the Motion Tracking button (an object called Location is selected for this example).

Click the Play button under the Preview window to see if everything looks acceptable. Feel free to make any other changes if required, and click OK from the bottom-right corner of the Motion Tracking window. Export the video for final output.

Part 2: How to Make Objects Move in Any Way You Like in the Video?
Wondershare Filmora 14 uses the keyframe approach to add animations to the objects, thus making it easy for you to move them in any direction you want. Multiple keyframes can be added to make each object change its direction or scale. You can learn how to make objects move in any direction in Filmora by following the instructions given below:
Step 1: Import the Ingredients and Add to the Timeline
Use the method explained above to add the source video and the third-party object to Filmora, and then bring both of them to the Timeline in a way that the object layer remains above that of the video. Position the third-party object on the frame in the Timeline you want it to appear in the movie from.
Step 2: Add the Keyframes
Select the object layer, position the Skimmer on the frame from where you want the object to start moving, and click the Keyframing button present in the left toolbar above the Timeline.
Next, move the Skimmer to the frame where you want to stop the movement of the object.

Move the object in the Preview window to its destination position. You can also change the Rotation, Scale, Position, and Opacity values to make the animation more dynamic. Notice how the keyframes are automatically added for each animation that you add.

Step 3: Preview and Export
Click the Play button under the Preview window to see if the object moves as expected, and click OK from the bottom-right corner of the Animation window. Back in the previous mode, click EXPORT from the top-center area to export the video for distribution and/or sharing.

Want to learn more about keyframing animation? Check this creative tutorial about Filmora keyframing animation.
Part 3: How To Make the Objects Move With Your Motion in Filmora Mobile?
Now, you should know how to use the Filmora desktop version to make the objects move with motion, but do you know you can also use the same motion-tracking feature with your mobile phone? You can add fun stickers, symbols, or even text to your videos that follow the subjects in your video. This time, let’s try adding a bone sticker to this video of a dog running. Follow the steps below as you try to explore Filmora’s mobile version:
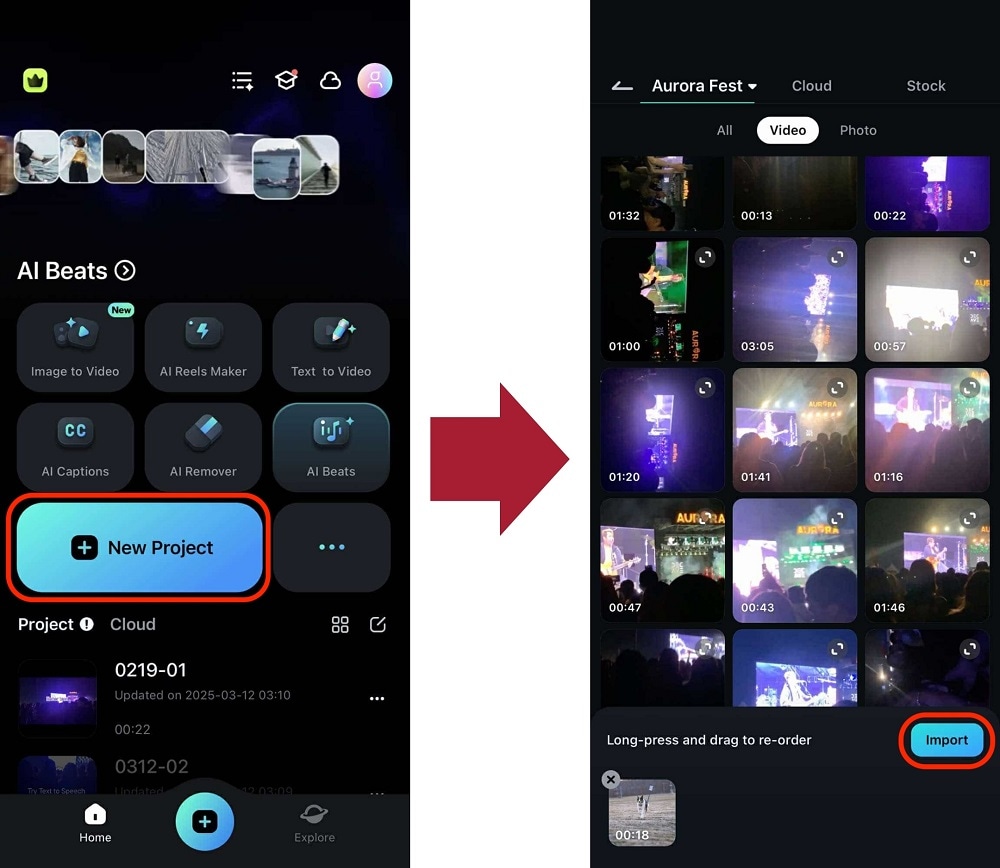
Step 1: Import the Video
Start a New Project, and upload the video with the motion you want an object to follow.
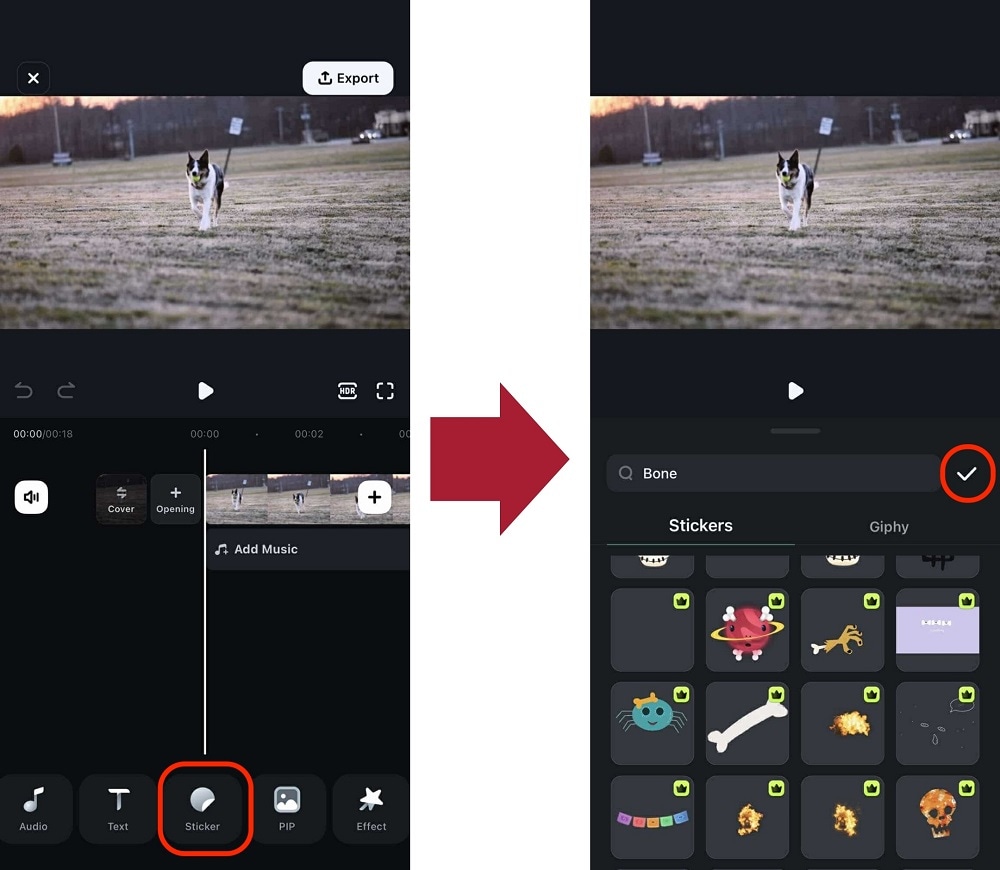
Step 2: Add an Object
Proceed to add the object with the two functions: PIP (to add your own image) or Sticker. The example below uses a Sticker.
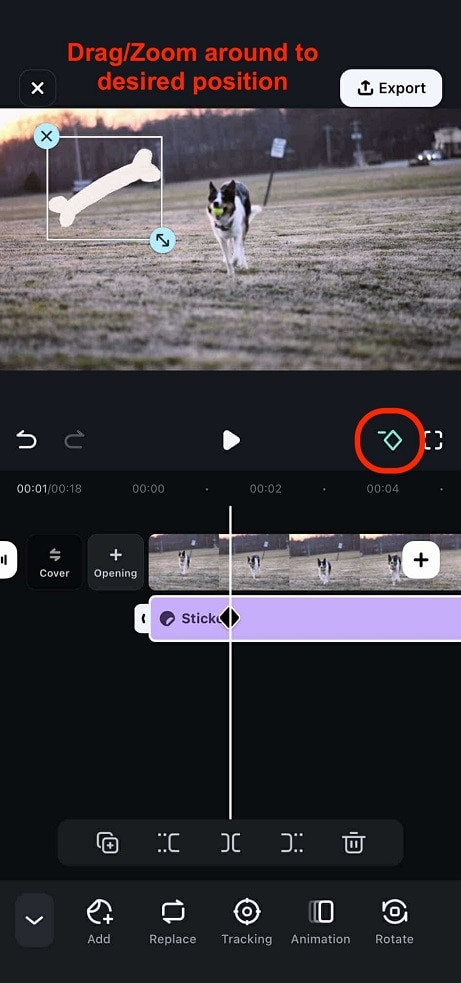
Step 3: Start Motion Tracking
Select the object you added from the timeline. Then, go to Tracking > Start Tracking. Make sure to drag the appearing reticle around the subject you want it to follow for accuracy.

After that, when you tap the play button, the object should begin following the subject where you placed it with the help of the reticle.
Part 4: How To Make Objects Move in Any Way You Like with Filmora Mobile?
With Filmora’s mobile app, you’re not limited to motion tracking - you can also make objects move in any direction you want! Let’s take the same scenario of the dog running video from earlier. In this example, let’s make the bone sticker move around.
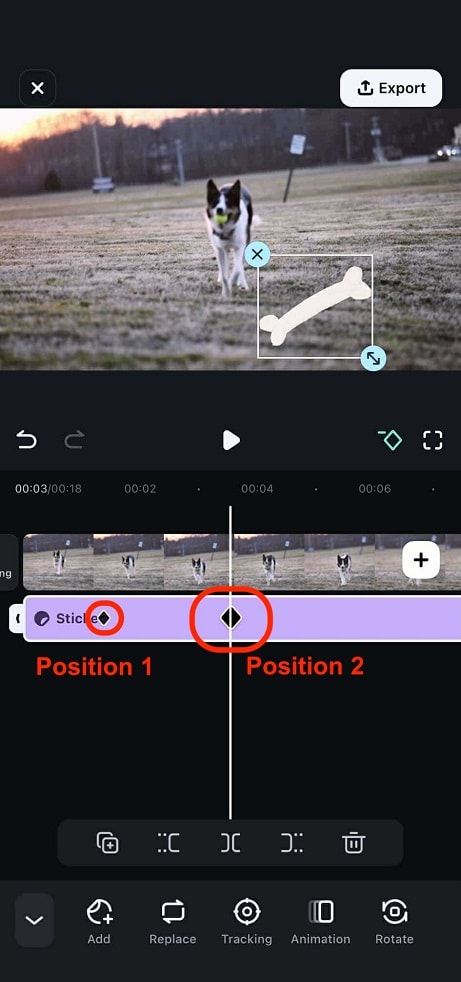
Step 1: Set the Starting Position of the Object
After selecting the sticker from the timeline, drag it around to the desired starting position. Then, tap the Keyframe button.
Step 2: Set the Target Position and Play
Move the play head to a later timestamp where you want the object to reach a new position. Then, just drag the object to its target position, and it will automatically generate a keyframe. For example, when you select play from Position 1, you will see how the object moves to Position 2.
You can set as many keyframes as you want across the video. Just remember to put them at different timestamps to ensure the object moves along with it. This is how you can make objects move with Filmora mobile. Explore more creative features with this tool by downloading it today!
Conclusion
Making the third-party objects move in an already recorded video is an easy task when you are with Wondershare Filmora. Where Motion Tracking is used to make an external element follow something that is within the video, the keyframing approach allows you to move an entity freely and in any direction you want. The good thing is, as you move an object in the Preview window and/or change its direction, a new frame is automatically added, hence making it convenient for you to animate the third-party element within the video.
Seamless, Effortless, Intuitive.
AniEraser makes it easy to perfect any photo or video; no matter the device or platform - experience a smooth, effortless transformation of your image and maximize its potential with just one click.
Make your moment perfect.

Learn all about what an image masking tool is and how to apply masks to photos step by step with Filmora.
by Benjamin Arango Jun 18, 2025 14:52 PM
Trying to master the Photoshop Liquify tool is easy with this step-by-step guide. Here, we will explore how to apply the Liquify effect in Adobe Photoshop to enhance images creatively.
by Benjamin Arango Jun 18, 2025 14:52 PM
Here, find out the best lip filler simulator for creating stunning simulation videos and animating lip movement after fillers, for social media and client consultations.
by Benjamin Arango Jun 18, 2025 14:52 PM
Benjamin Arango
staff Editor
