

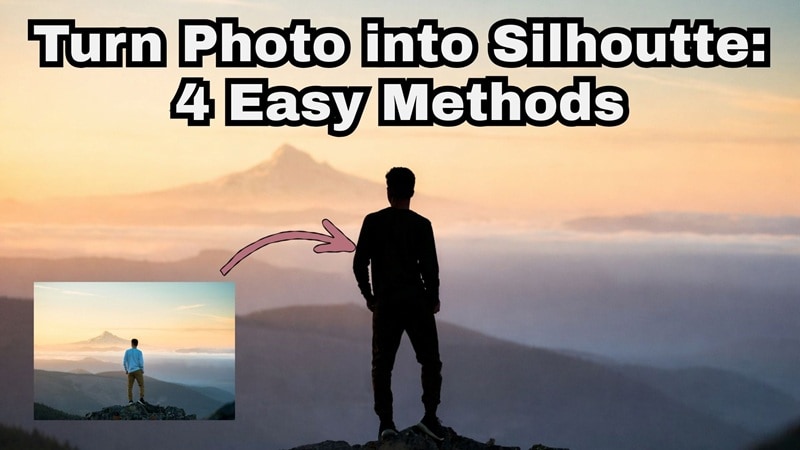
People love silhouette photos because they look clean, dramatic, and instantly recognizable without showing every detail. Normally, you'd need perfect lighting or backlit shots to get that classic silhouette effect organically.
That said, most of the time, you have already taken the photo. But if you keep reading this article, you don't need to reshoot anything! We'll offer plenty of ways to turn a photo into a silhouette through practical methods, including AI-powered ones, using an advanced video editor.
Part 1. Turn a Photo Into a Silhouette with AI Cutout and Contrast Control
If you're wondering how to turn a photo into a silhouette without spending forever cutting things out by hand, you need a solid silhouette video maker that can separate your subject from the background cleanly. And thankfully, you don't need to look for long because Wondershare Filmora makes it surprisingly simple.
The AI Portrait Cutout does the heavy lifting by pulling the subject away from the background in seconds. From there, all you really need is a quick contrast and brightness adjustment to push the subject into a solid shape.
Best For: This is a great option if you want more control over how strong the silhouette effect looks. You can decide whether the subject is fully black, slightly textured, or somewhere in between.
Step-by-Step: Turn a Photo Into a Silhouette with Portrait Cutout
- Install and open the latest version of Filmora on your device.
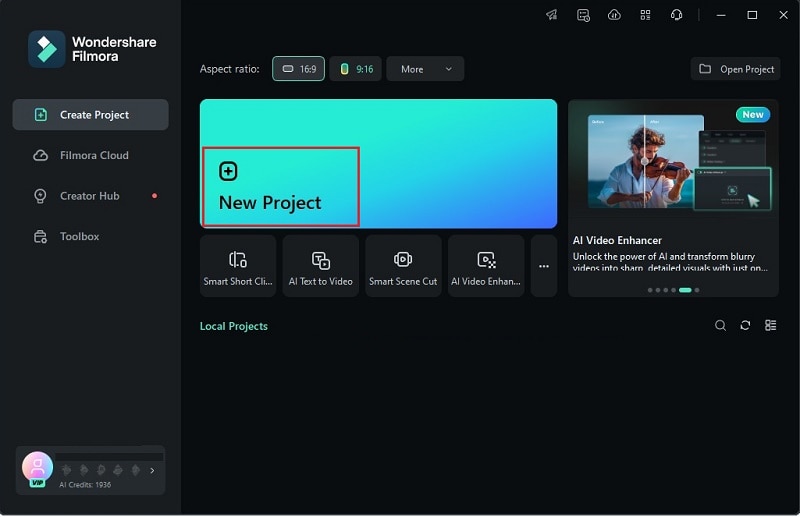
- Click "New Project" to start with a clean workspace.
- Go to the "Media" tab and click "Import" to upload your photo.
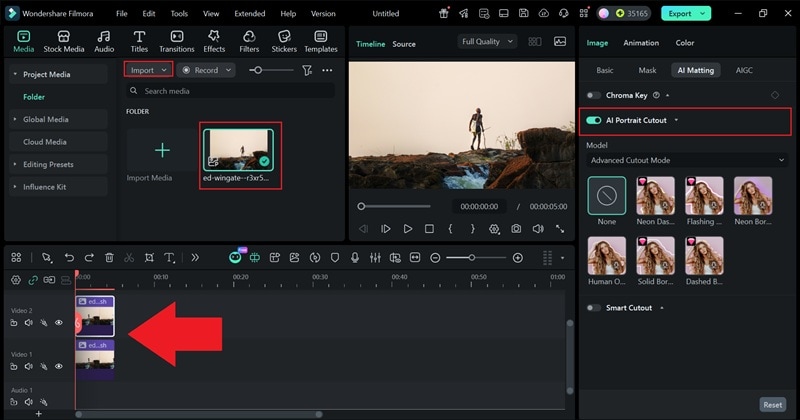
- Drag the photo onto the timeline twice, placing one on track "Video 1" and the other on track "Video 2".

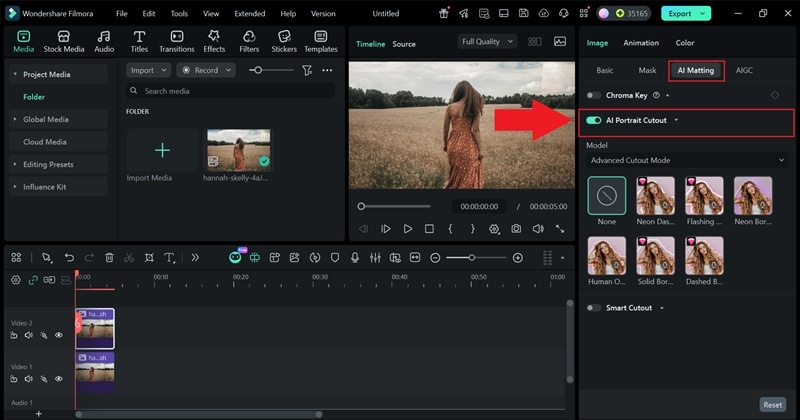
- Click the photo on track "Video 2" and select "AI Matting" on the properties panel.
- Turn on "AI Portrait Cutout" and wait for Filmora to finish isolating the subject.
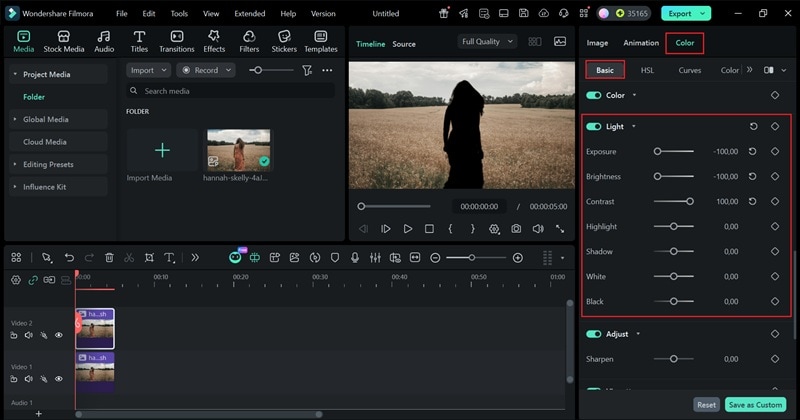
- Go to "Color" > "Basic" and find the "Light" controls.
- Lower Exposure and Brightness to -100.
- Increase Contrast to 100 to turn the subject into a clean silhouette shape.
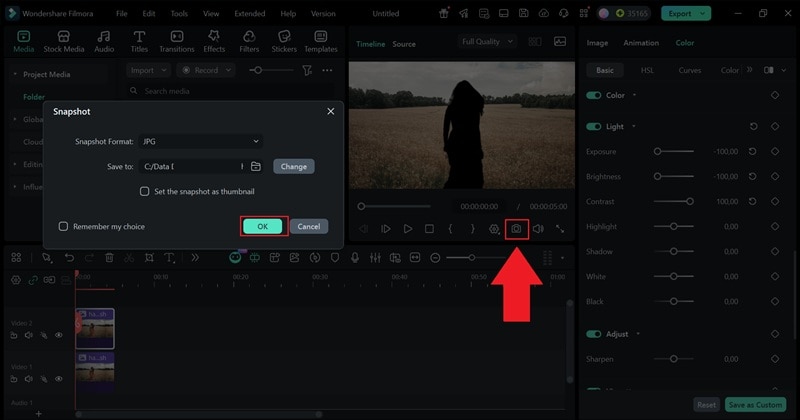
- Click the camera icon below the preview window.
- Choose your image format and file location and click "OK."
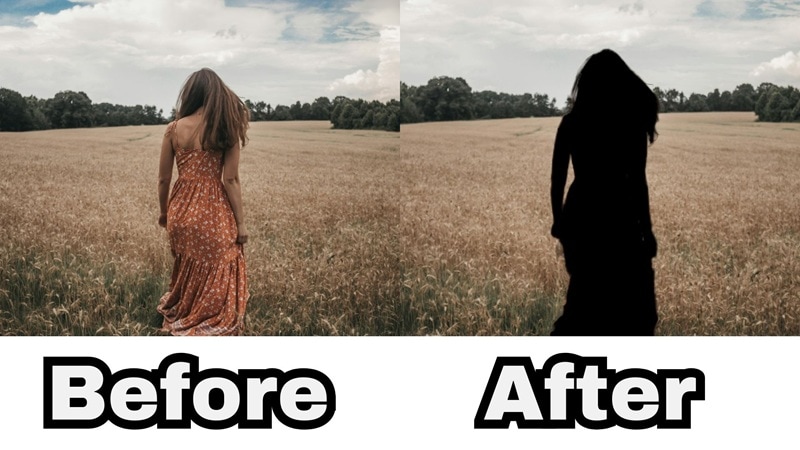
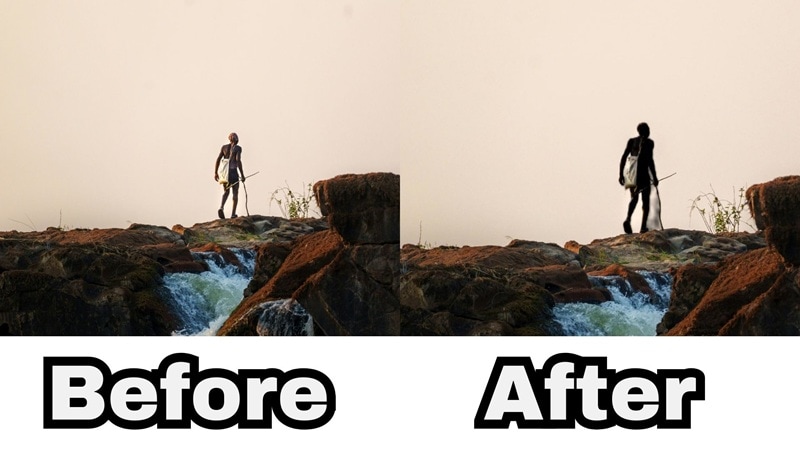
And that's all it takes! Instead of reshooting or setting up perfect lighting, you can convert a photo to a silhouette using the image you already have and adjust the look exactly how you want. Take a look at the before-and-after to see how clean the silhouette effect turns out.
Part 2. Convert a Photo to a Silhouette Using Built-In Video Effects
If you want a faster, more stylized approach, Filmora's built-in video effects can help a lot. When you combine these effects with AI Portrait Cutout, you can get a solid silhouette look with just a few clicks.
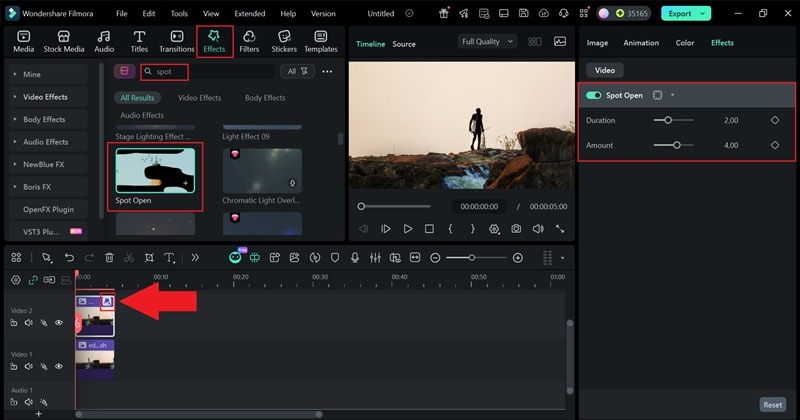
One effect that works especially well is Spot Open, which naturally darkens the subject while keeping the outline clean and easy to recognize. Instead of pushing exposure and contrast all the way down yourself, the effect helps shape the silhouette effect for you. You can still adjust the strength, but most of the heavy lifting is already done.
Best For: This works best if you want fast results and do not need total control over every detail. It is especially useful for social posts, creative visuals, or when you want a softer silhouette effect style that still looks polished.
Step-by-Step: Turn a Photo Into a Silhouette with Built-In Effects
- Import your photo and drag it onto the timeline twice on different tracks.
- Click the clip on "Video 2" and open the property panel on the right.
- Turn on AI Portrait Cutout to separate the subject from the background.
- Open the "Effects" tab and search for "Spot Open".
- Drag the effect onto the clip on track "Video 2" to apply the silhouette effect.
- Adjust the effect settings until the silhouette effect looks the way you want.
Pretty simple, right? You've just learned another way to learn how to turn a photo into a silhouette without overthinking the process. Since the silhouette effect is already built in, there's no need to fiddle with sliders or settings.
Take a look at the before-and-after to see the difference.
Part 3. Turn an Image Into a Silhouette Using AI Image and Prompts
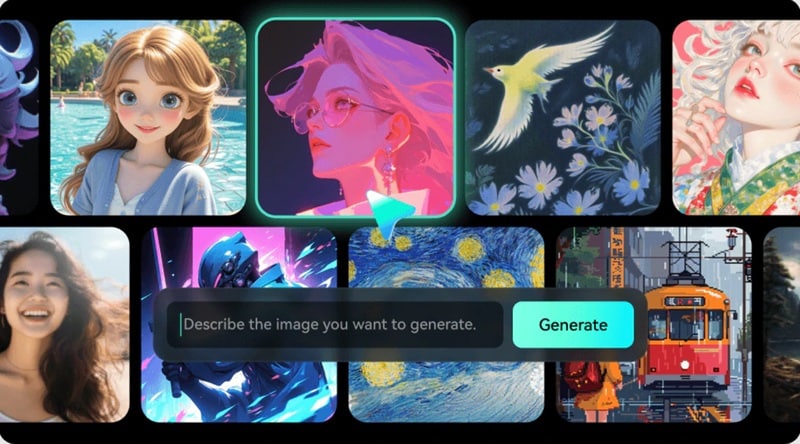
If you want a more advanced way to learn how to turn an image into a silhouette, Filmora also gives you an AI Image option. This method feels different because you are not adjusting sliders or adding effects. Instead, you upload your original photo and let AI rework it into a new AI silhouette version based on your prompt.
The AI Image feature is powered by Nano Banana Pro, which helps keep the shape of your subject clean while stripping away details. You can describe the silhouette style you want, generate a few variations, and pick the one that fits your idea best.
Best For: This method works best if you want a more creative result or plan to use an AI silhouette generator for posters, artwork, or stylized visuals. It is also useful when you want the silhouette to feel more illustrated rather than directly edited from the original photo.
Step-by-Step: Turn a Photo Into a Silhouette with AI Image
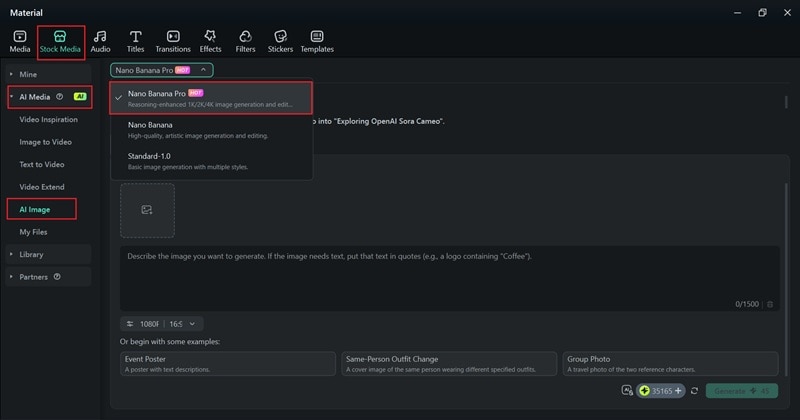
- Open Filmora and go to Stock Media > AI Media > AI Image.
- Set the model to "Nano Banana Pro" for the best results.
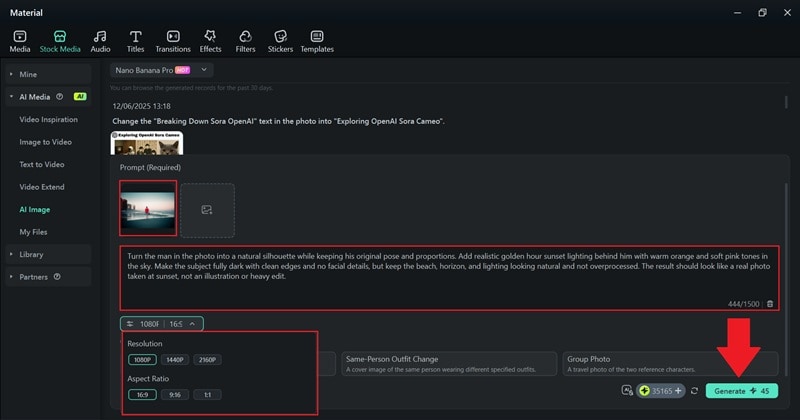
- Click the picture icon to upload the photo you want to edit.
- Enter your prompt and set the aspect ratio and photo quality
- Click "Generate" to create the silhouette AI image.
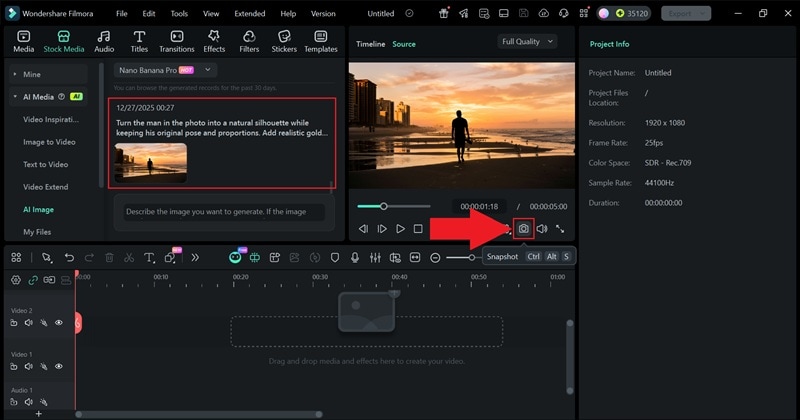
- Click the download icon to preview the result.
- Drag the photo onto the timeline and adjust it however you like.
After you're happy with the result, click the camera icon below the preview window to save it to your device.
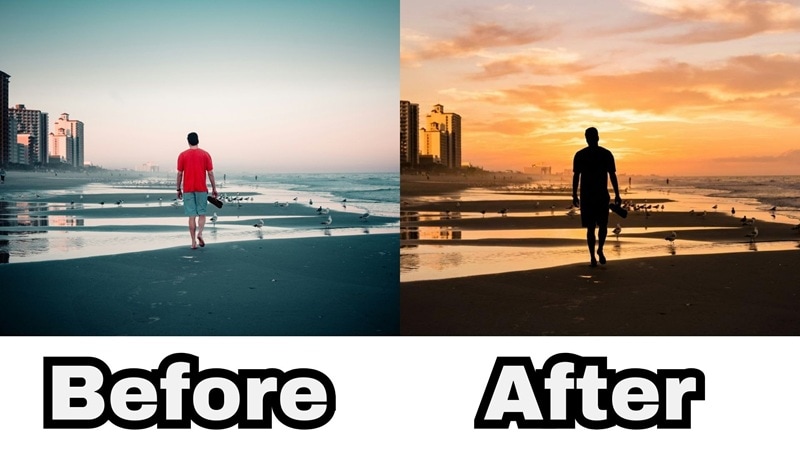
And that's pretty much it! This method does more than just add a silhouette effect. It cleans up the lighting and mood at the same time, which makes the result feel natural instead of forced. That's why Filmora works so well as an AI silhouette maker.
Just take a look at the before-and-after, and you'll see the difference right away.
Prompt Examples to Turn a Photo Into a Silhouette
By now, you can probably see why this is such a solid way to learn how to turn a picture into silhouette. It does not just darken the subject. It also fixes the lighting and mood, so the whole photo feels more polished and natural.
That said, the final result depends a lot on what you type into the prompt, which is why using the right words really matters.

To make things easier, here are a few prompt examples you can use as they are or tweak until the silhouette looks just right:
- Clean and classic silhouette: Turn the man in the photo into a clean black silhouette with sharp edges and no facial details. Add natural golden hour lighting in the background with warm sunset colors and realistic shadows.
- Minimal and modern silhouette: Turn the man into a simple solid silhouette with smooth edges. Keep the background clean with soft sunset colors and avoid heavy contrast or dramatic lighting.
- Bold and dramatic silhouette: Convert the subject into a strong dark silhouette against a glowing sunset sky. Use rich golden and orange tones while keeping the beach and horizon looking natural.
- Artistic but realistic silhouette: Turn the man into a stylized silhouette while keeping the photo looking realistic. Add warm sunset tones and balanced lighting so it still feels like a real photo.
Part 4. Create a Silhouette Video with AI (From a Single Photo)
Once you know how to turn a photo into a silhouette, it kind of feels like a waste to leave it sitting there as a still image. What you can do next is to animate your image and create silhouette videos using Filmora's AI Image to Video.
This feature runs on Veo 3.1 and Sora 2, so the movement feels smooth and natural. You can add subtle motion like walking, turning, or drifting light in the background, and it all stays consistent from frame to frame. That makes learning how to make a video silhouette feel surprisingly simple, even if you have never tried AI video tools before.
Best For: This is perfect if you want to create short cinematic clips, social media videos, or visual storytelling content from just one photo. It also works well when you want something eye-catching without filming new footage or setting up a full video shoot.
Step-by-Step: Turn a Photo Into a Silhouette Video with Filmora
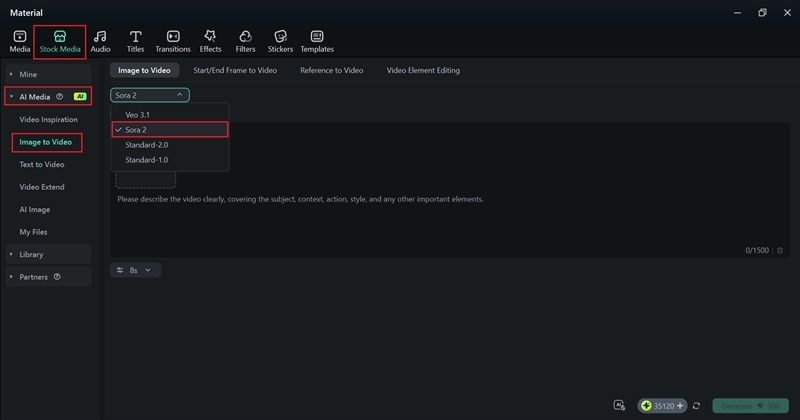
- Open Filmora and go to the "Stock Media" tab.
- Select the "AI Media" option, then choose "Image to Video".
- Set the model to "Sora 2" for higher-quality video results.
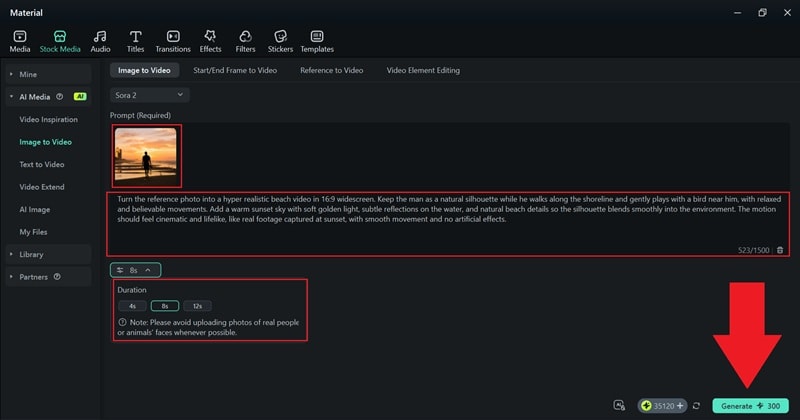
- Click the picture icon to upload your silhouette photo.
- Enter your prompt in the description box and be as descriptive as possible.
- Set the video duration, then click "Generate" to create the silhouette video.
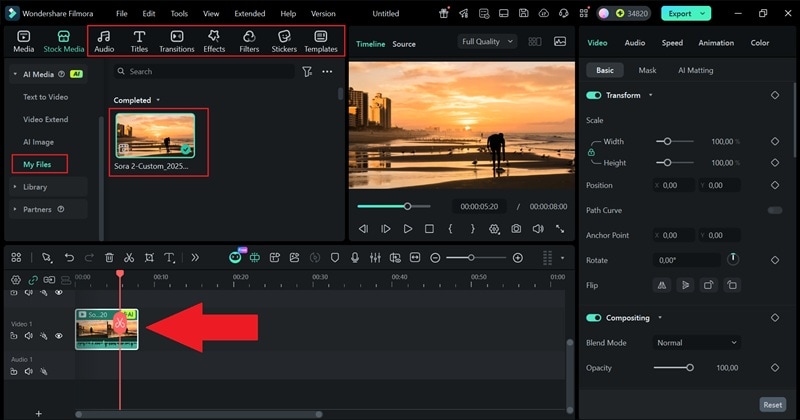
- Once the video finishes generating, find it in the "My Files" section.
- Drag the video onto the timeline to preview the result.
- If you want to polish it further, you can add stickers, filters, or video effects to enhance the final look.
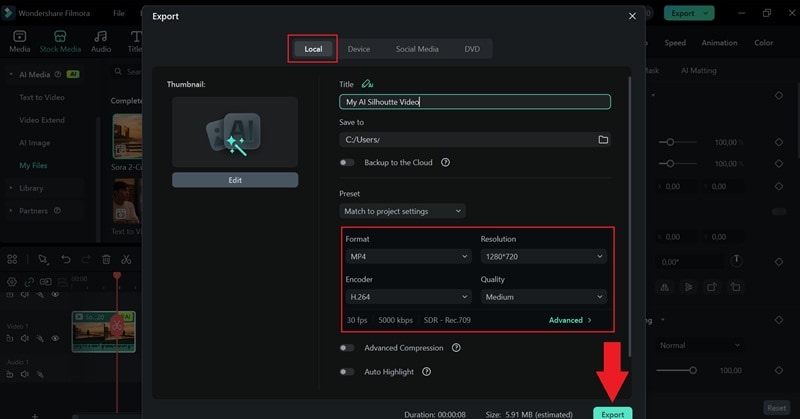
- Once you finish editing, click "Export" in the top right corner.
- Choose "Local" to save the video to your device.
- Set the format, resolution, and save location, then click "Export" again to finish.
And just like that, it all comes together. In just a few steps, you've learned how to create a silhouette video with AI using Filmora, and the result feels natural instead of overdone.
Conclusion
Making a silhouette effect no longer feels complicated or limiting, and there is no need to reshoot or worry about perfect lighting thanks to Filmora's AI silhouette maker.
With different options available, you can turn a picture into a silhouette using AI cutout and contrast control, combine AI cutout with built-in effects, or even create one from an AI image using a simple text prompt.
Once you know how to turn a picture into a silhouette, you can take things a step further by creating silhouette videos that feel natural. Filmora makes this easy with AI image to video, letting you bring a single photo to life with realistic motion and clean results.
