Guide to Creating a Basic Reel Using Filmora

In this video, you can learn how to create a reel video with perfect ratio and seamless editing in Wondershare Filmora. Keep reading the below section to expand your creative horizons on producing quality content for Instagram.
Key Steps of This Video Tutorial To Follow
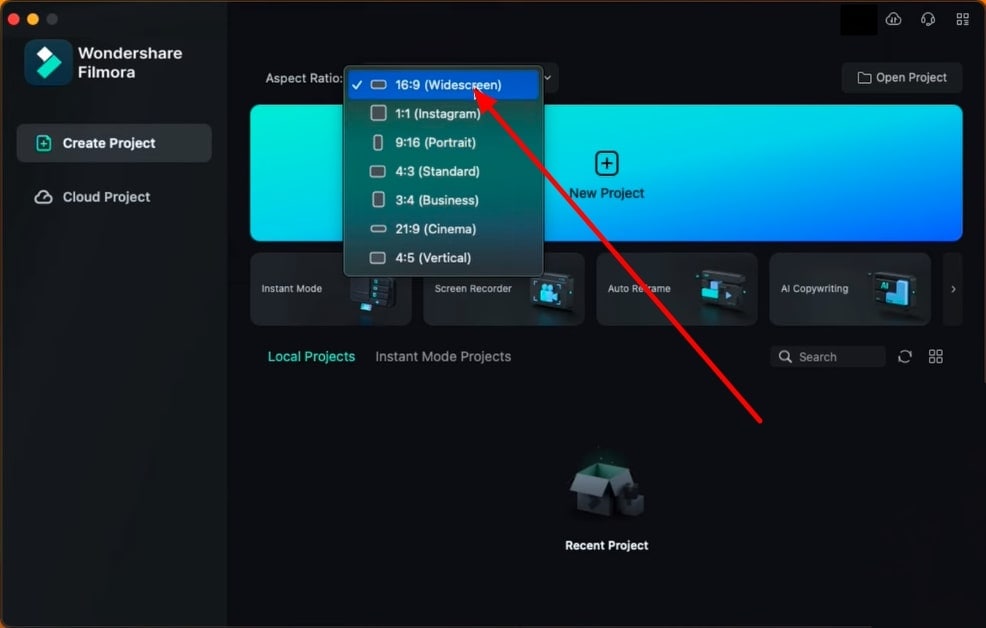
Before starting reel creation in Filmora, setting the aspect ratio according to Instagram's requirements is important. For this purpose, start Filmora after downloading it and use your cursor to reach the top and find the "Aspect Ratio" option. Click the downward navigation arrow and select a suitable option for your reel.
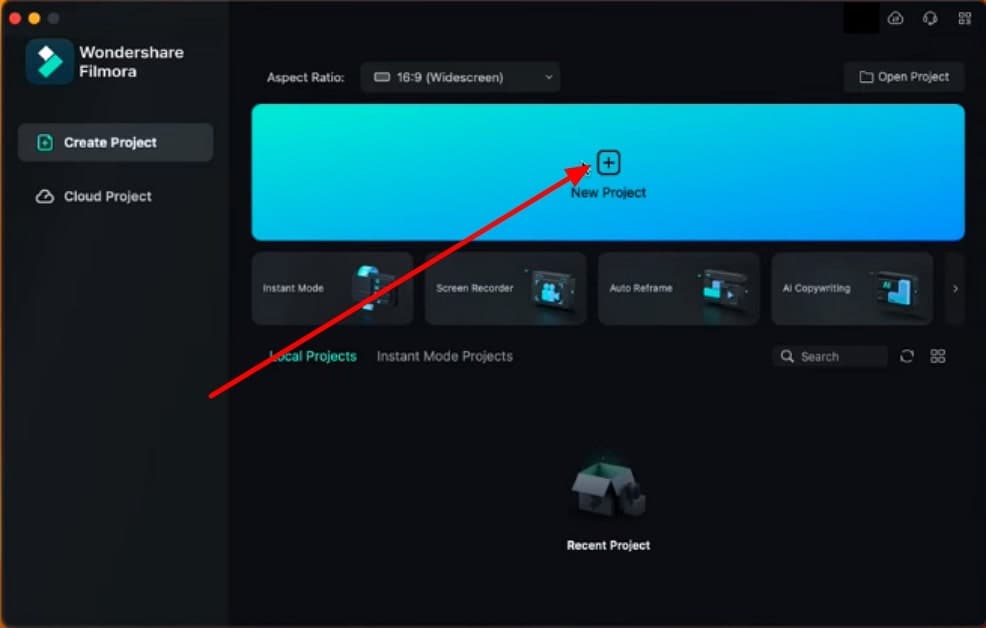
For this step, we recommend you align all your media in one folder so that you can start editing without having to look for them in every folder. Now, from the display screen of Filmora, click on the “New Project” button and enter its official editing interface.
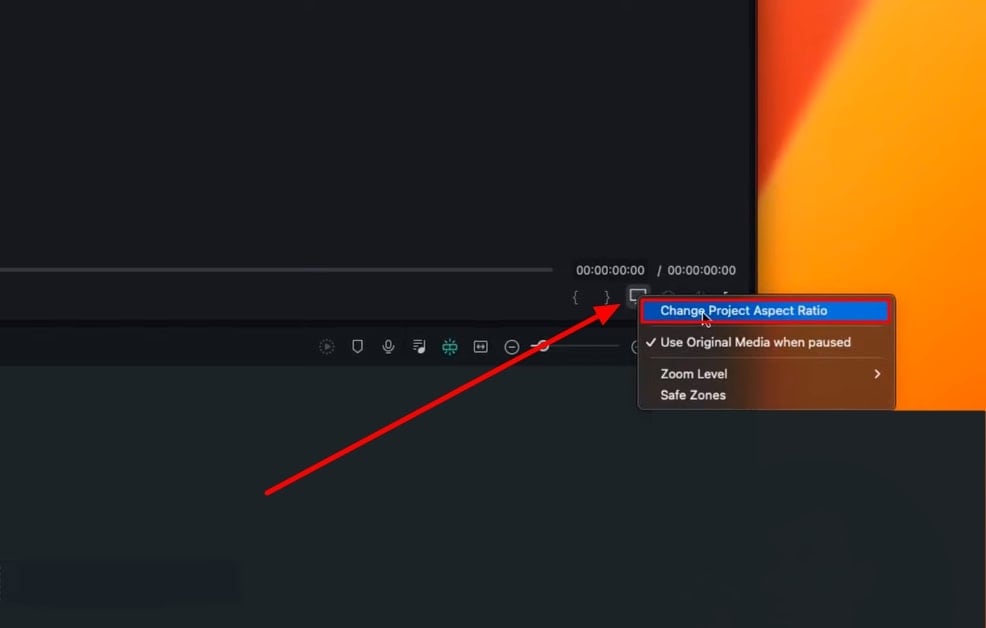
After accessing the editing interface of Filmora, use your cursor to navigate toward the Preview screen and find the "Settings" option at the bottom of the preview section. Upon expanding the settings, click the "Change Project Aspect Ratio" option.
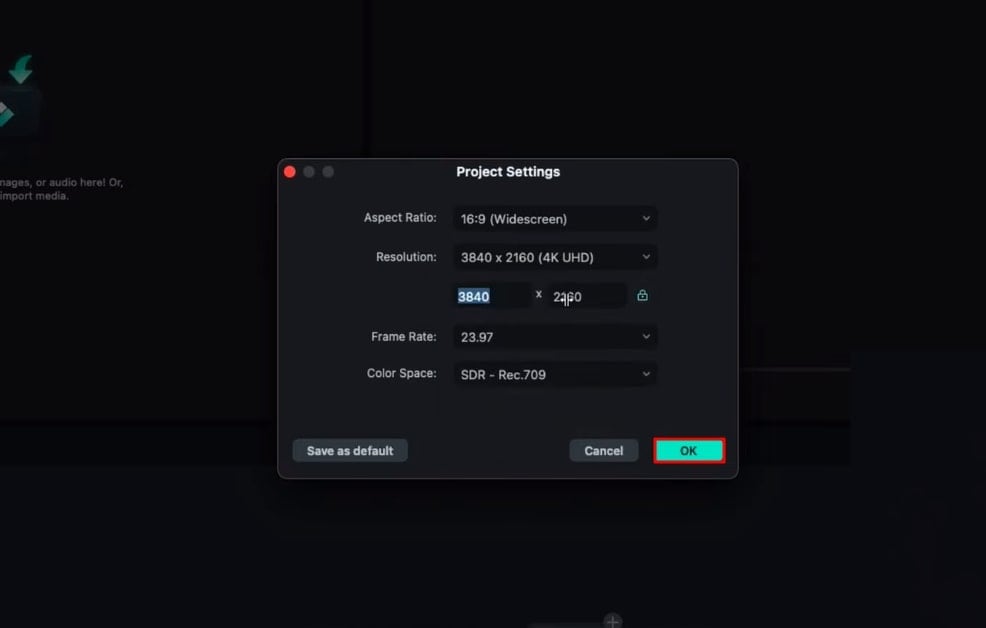
A Project Settings window will appear on the screen. Using this window, you can adjust the "Resolution" and "Frame Rate" as per your video and click the "OK" button. You have already set the aspect ratio settings, so it is fine the way it is.
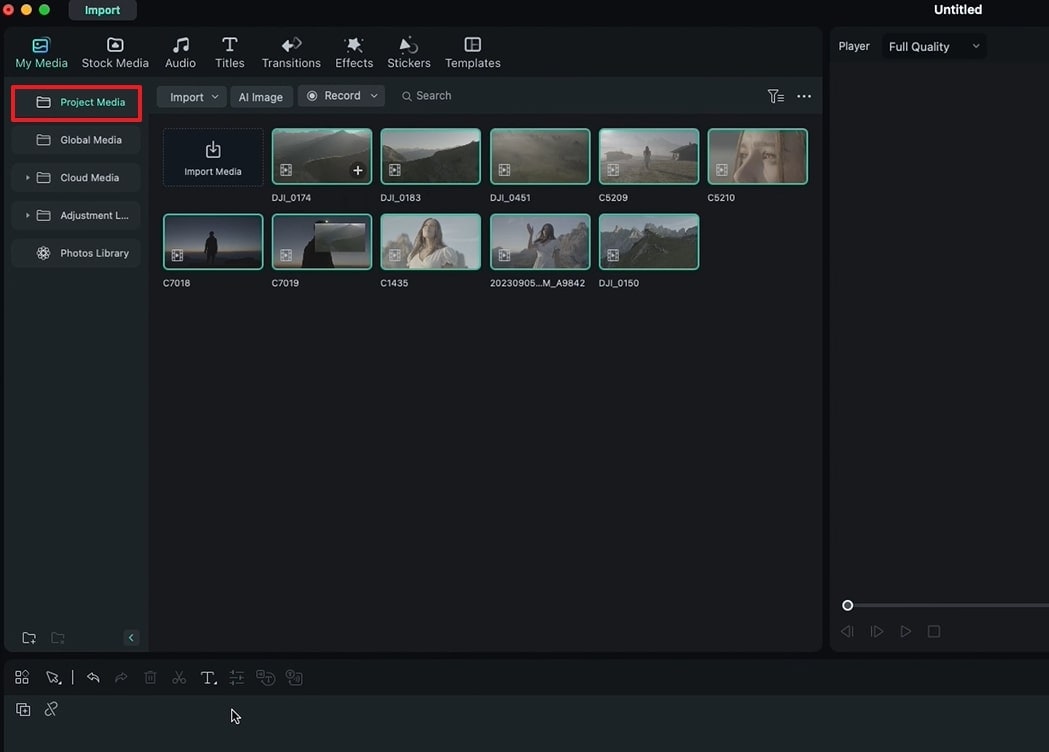
There are a couple of methods to import media in Filmora; you can either use the "Import" option at the top or click on the "Folder" icon. Afterward, select the media from your device and press Enter to upload them in Filmora. After importing, you can find all your media clips in the Project Media section.
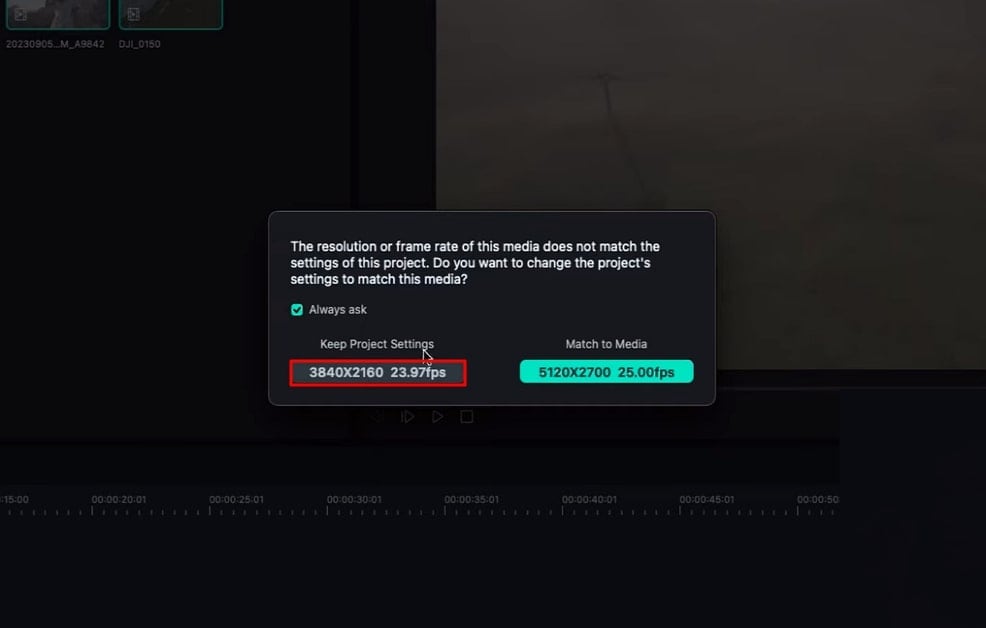
With the help of your cursor, navigate toward the Project Media section, select all the media clips, and use the drag-and-drop functionality to place them on the timeline. A pop-up will appear asking you to select between the "Keep Project Settings" and "Match to Media" options. Select the "Keep Project Settings" that we adjusted for our reel.
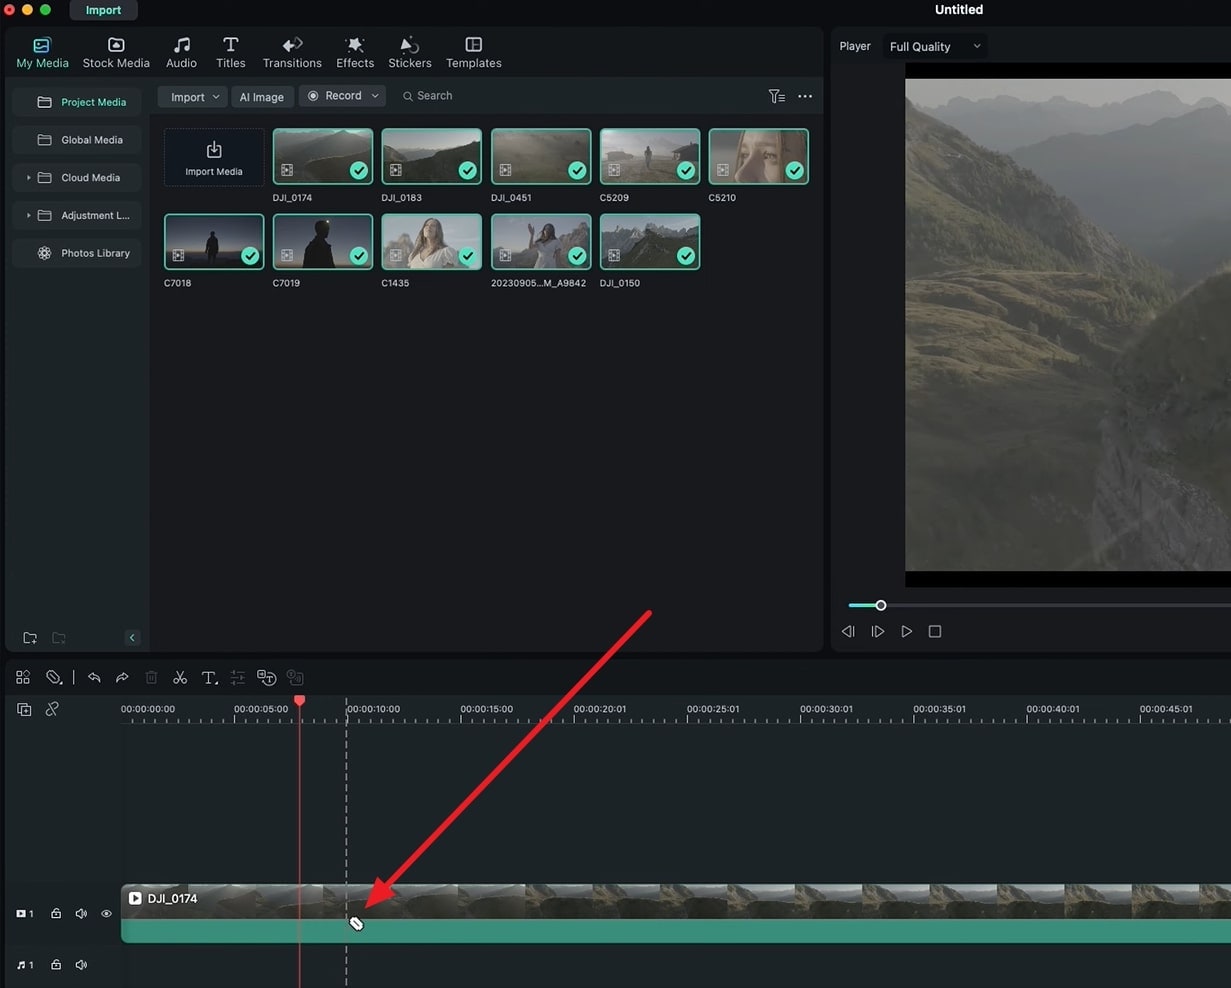
Now, hover towards the timeline panel and start editing your clips. First, you need to identify the parts of the clip you want to keep. Then, place the timeline playhead on the cutting point and press the "Scissor" icon to cut the footage. You can expand the timeline view of a clip for precise editing.
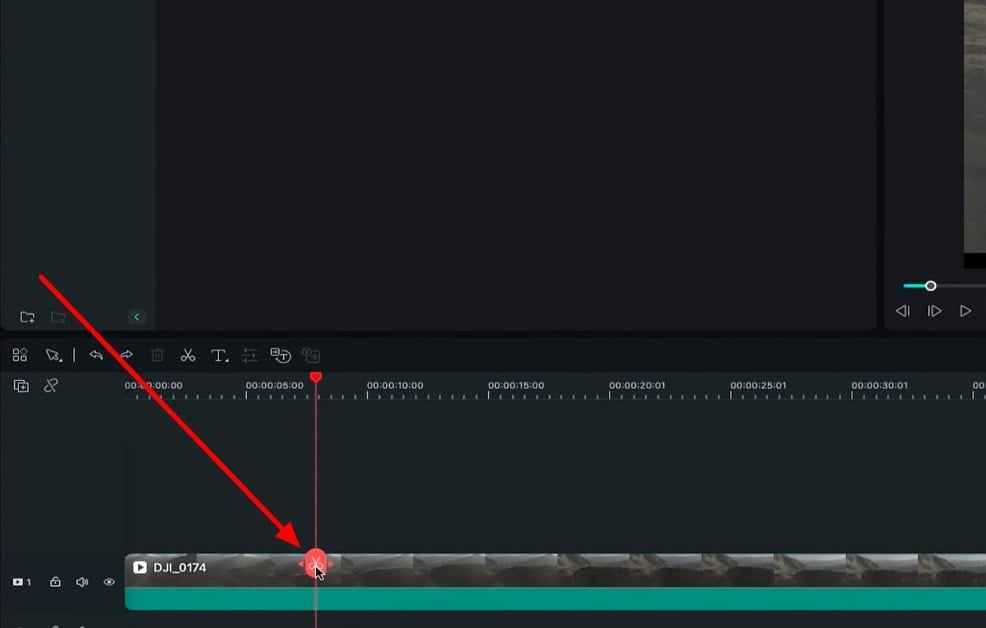
An alternative method of cutting your clips is to press the "C" key from the keyboard and then use your cursor to cut the clip. Once you are done with cutting, press the “V” key to go back to the original mode. To eliminate the unnecessary parts, select that part and press “Delete” from your keyboard. Repeat the same procedure for all the other clips, position them, and you’ll have a complete reel.
In this tutorial, users have learned about the primary method of creating a reel in Wondershare Filmora. Along the way, they got to be familiar with the project settings functionality, the media import feature, and how to cut videos in Filmora precisely. So, to create amazing reels, Filmora is the best platform offering other options as well.
Nikolaj's Other Filmora Master Lessons

- 01. Reel in the Basics: Getting Started with Filmora >>04:08
- 02. Visual Magic: Editing Techniques for Stunning Reels >>05:04
- 03. Soundscapes and Storytelling: Audio Mastery for Reels >>05:18
- 04. Text and Graphics: Elevating Your Reels with Visual Elements >>03:56
- 05. Maximizing Engagement: Tips for Reel Success >>05:19
