Guide to Maximize Engagement on Your Reels Using Filmora

While reading this guide, you'll get familiar with how to export a video in high quality after editing it in Filmora. In addition, we’ll give you some methods to promote a reel on Instagram./p>
Key Steps of This Video Tutorial To Follow
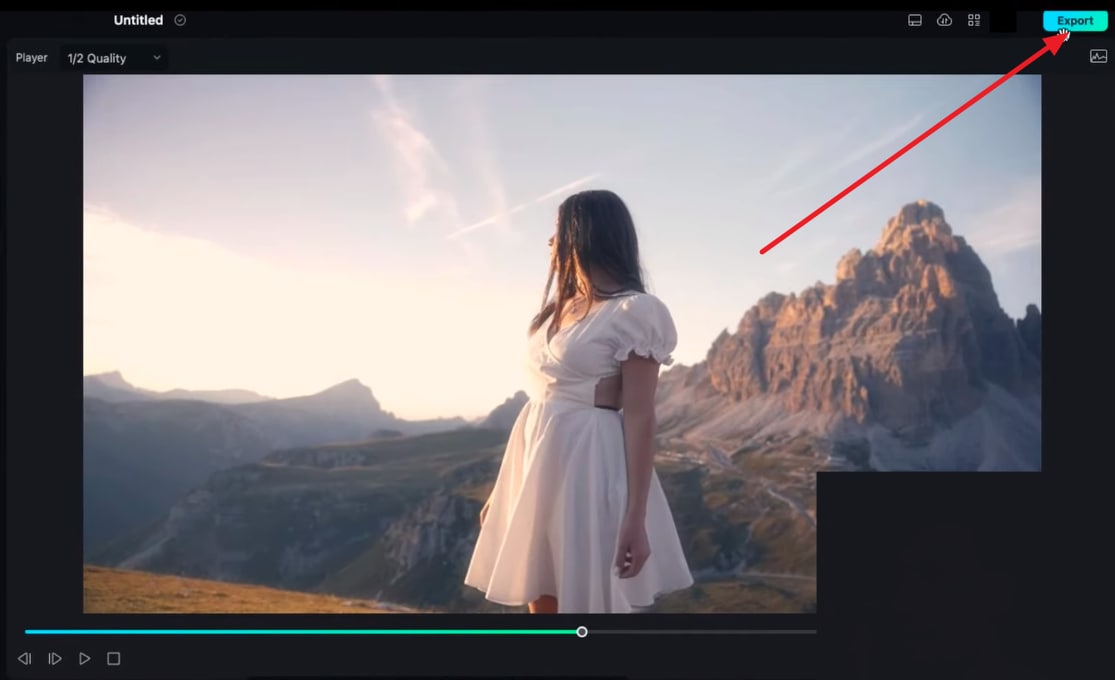
Once you have edited your reel in Filmora, navigate towards the top right corner and click on the “Export” button.
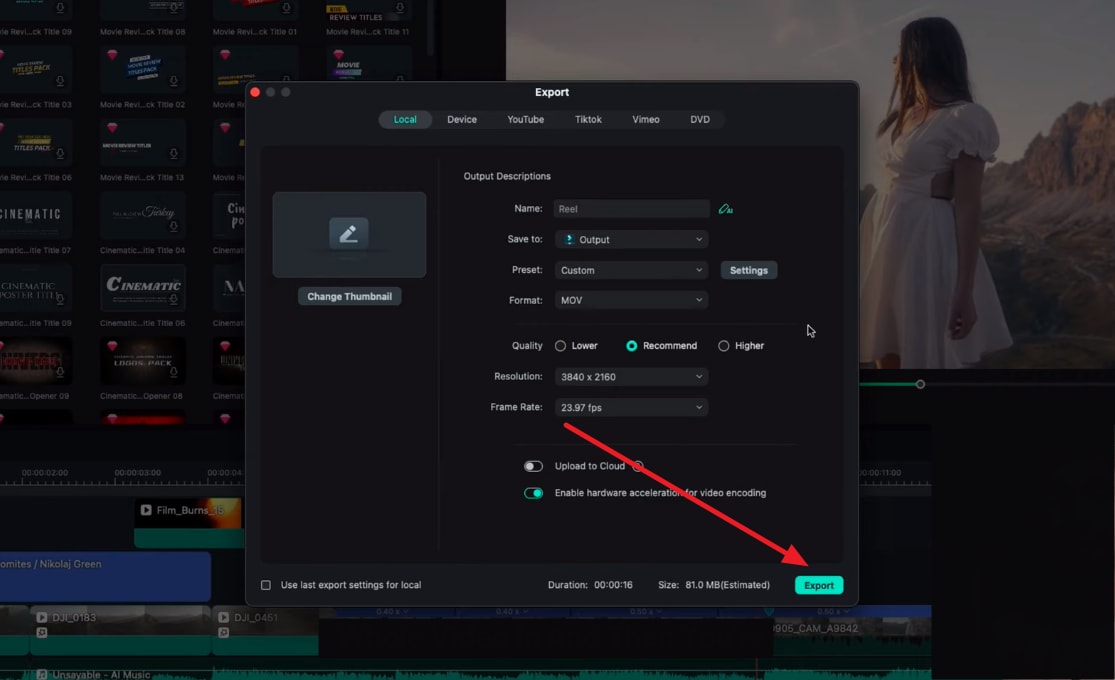
Once the “Export” window features on your screen, start personalizing the video properties from there. Give your video a name and set a location for saving your project. You can save it in Filmora's storage or on your device. Then, set the quality, format, and resolution of your video and hit the "Export" button.
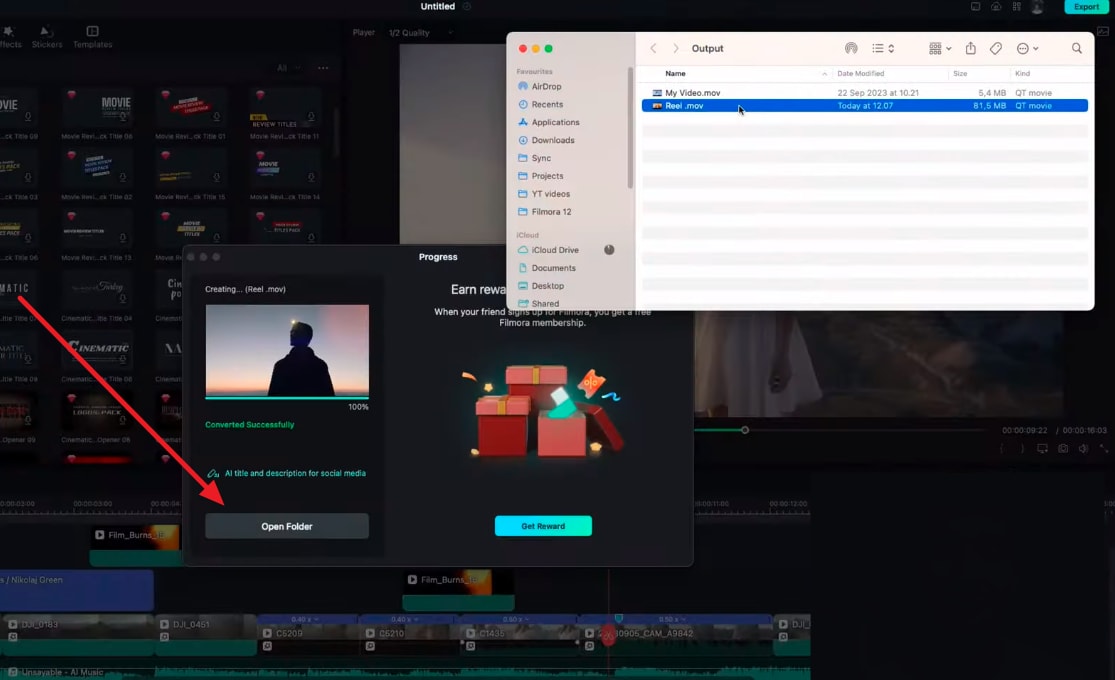
After hitting “Export," a progress window will appear on the screen from where you can observe the output progress of your video. Afterward, click on the "Open Folder" button to see the finalized video. If you are a Mac and iPhone user, use AirDrop to preserve 100% quality of your video. However, if you use Windows and Android, use a USB or data cable to transform data for maximum quality.
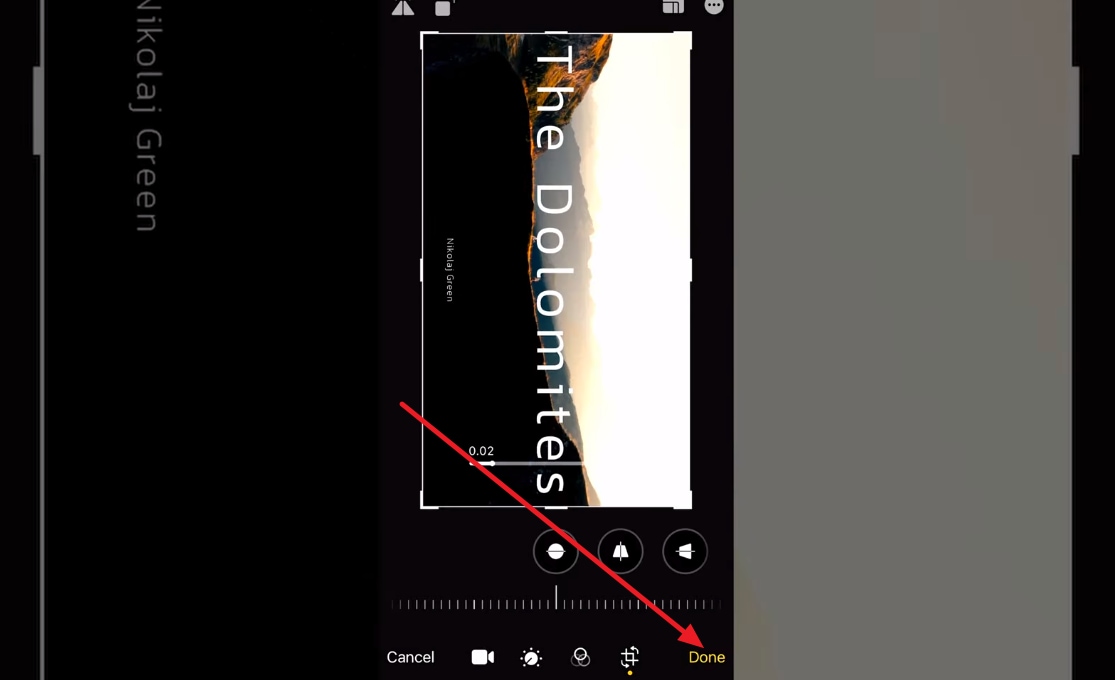
Instagram reels have a standard ratio and are usually posted in the “Portrait” mode. However, if you have shot and edited a video in “Landscape,” use your device's built-in rotate functionality to rotate your video. Afterward, click “Done” to save the rotate settings.
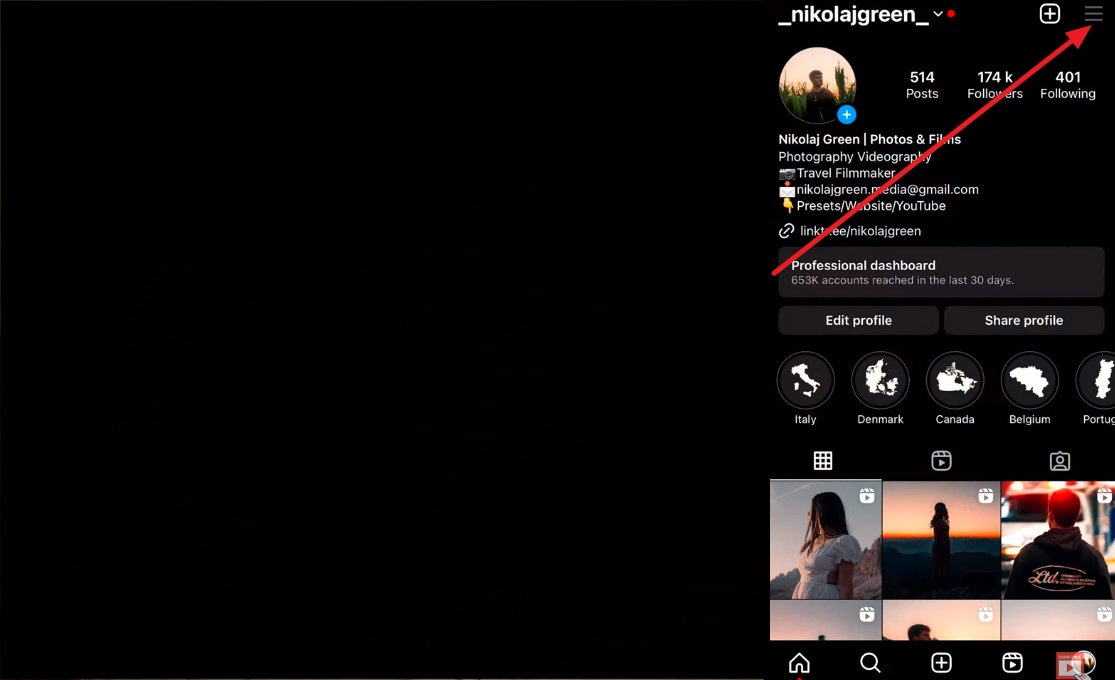
Open your Instagram profile and navigate towards the top right corner to access the “Three Bars” icon to access profile options.
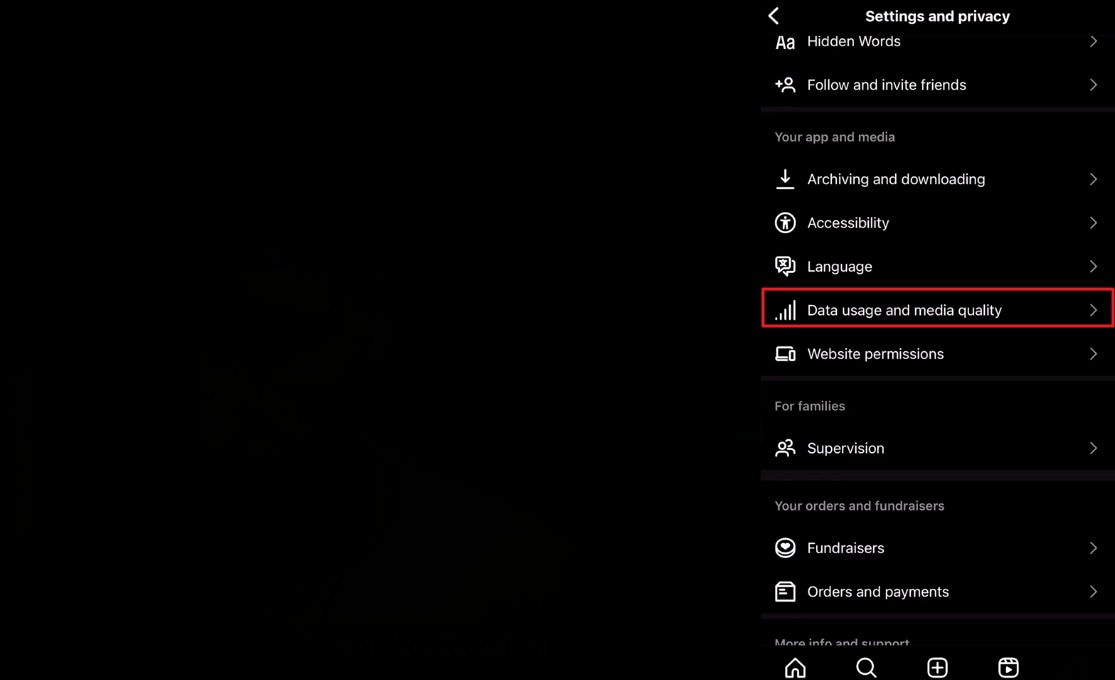
Then, from the appearing menu, click on the "Settings and Privacy" option and scroll down to the respective screen. Head on to select the "Data usage and media quality" option under the "Your app and media" section.
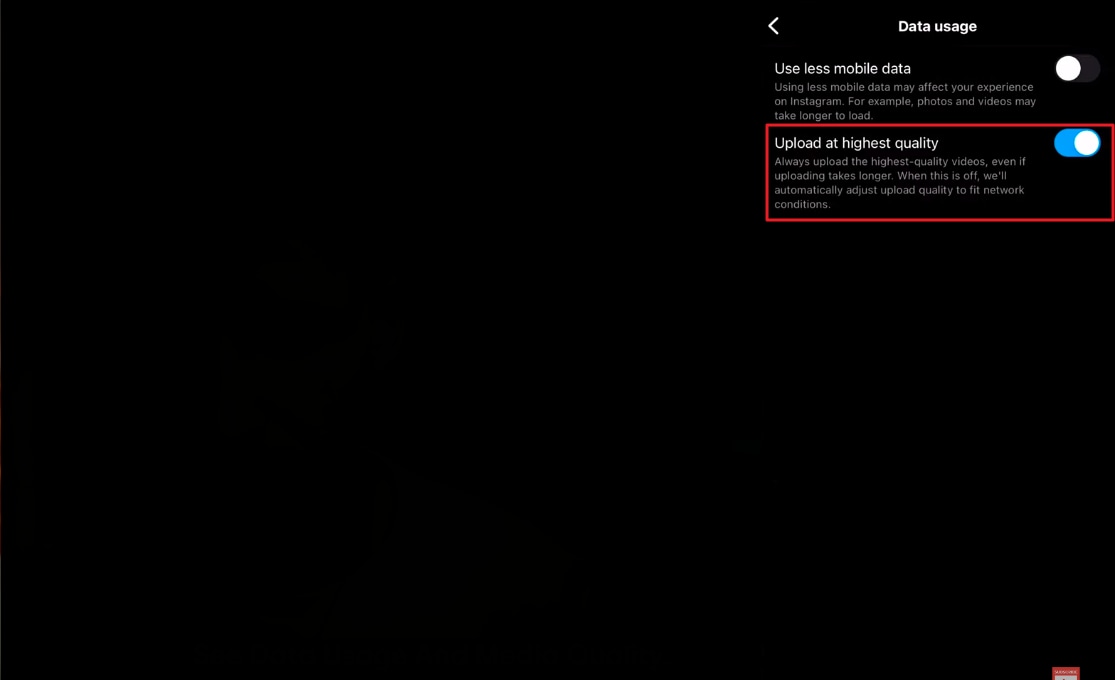
A “Data Usage” screen will feature on your phone’s screen. Next, you will need to enable the “Upload at highest quality” option under “Data Usage.”
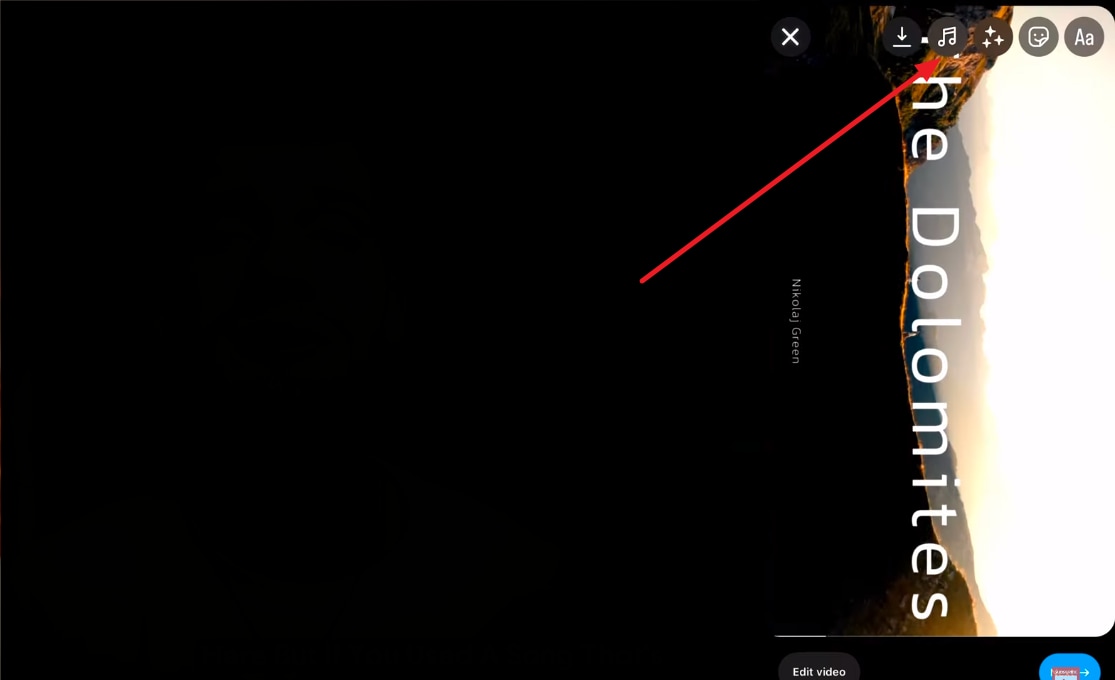
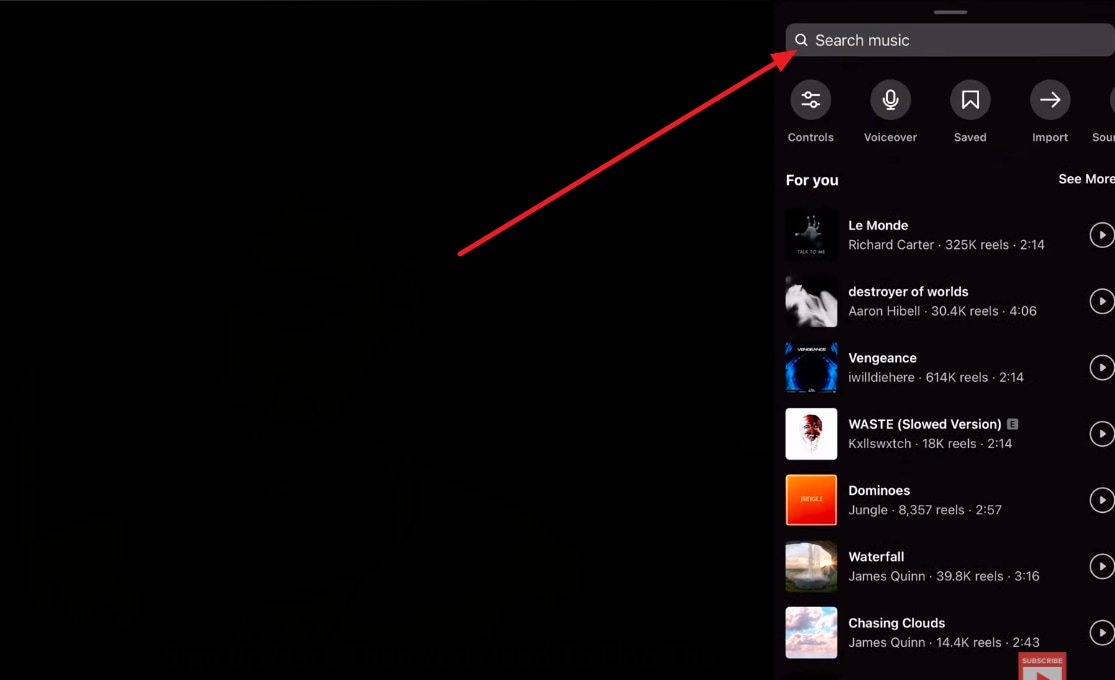
Once you have chosen a video to upload as a reel, another tip is to add a trending song for it. For this purpose, navigate towards the icons at the top and choose the “Music” icon.
From the appearing screen, search for a song that you like and add it to your reel. If you have not already added an audio in your video during editing, you can use this song. However, if you have previously used some sound effects and audio in your reel, the next step is for you.
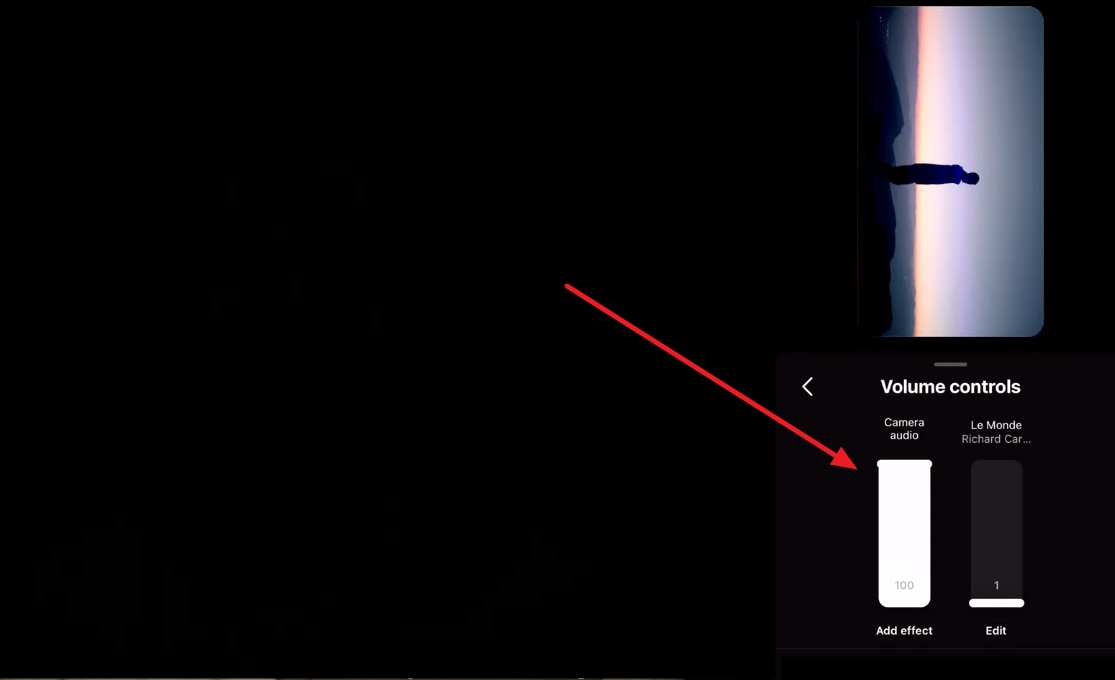
For this purpose, click the "Music" icon once again, and from the appearing screen, go to the "Controls" option.
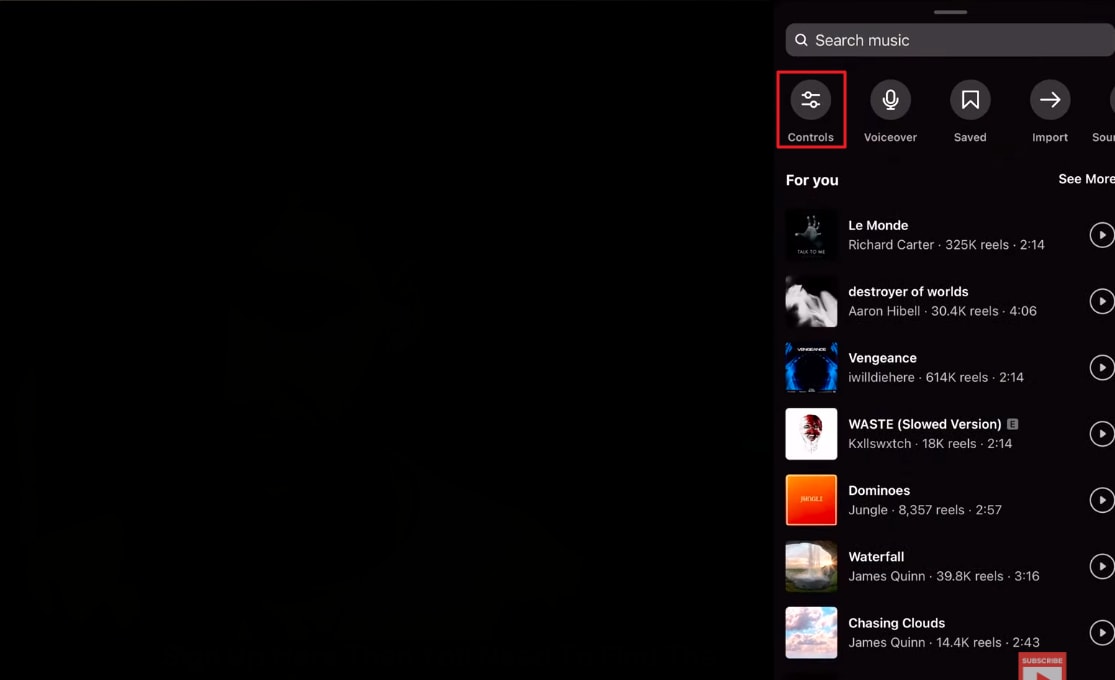
From the “Control” options, decrease the added song's volume to 0 or 1 and increase the "Camera audio" to the maximum. Then click on the "Done" button to finalize the settings. This will preserve all the audio and sound effects in your video.
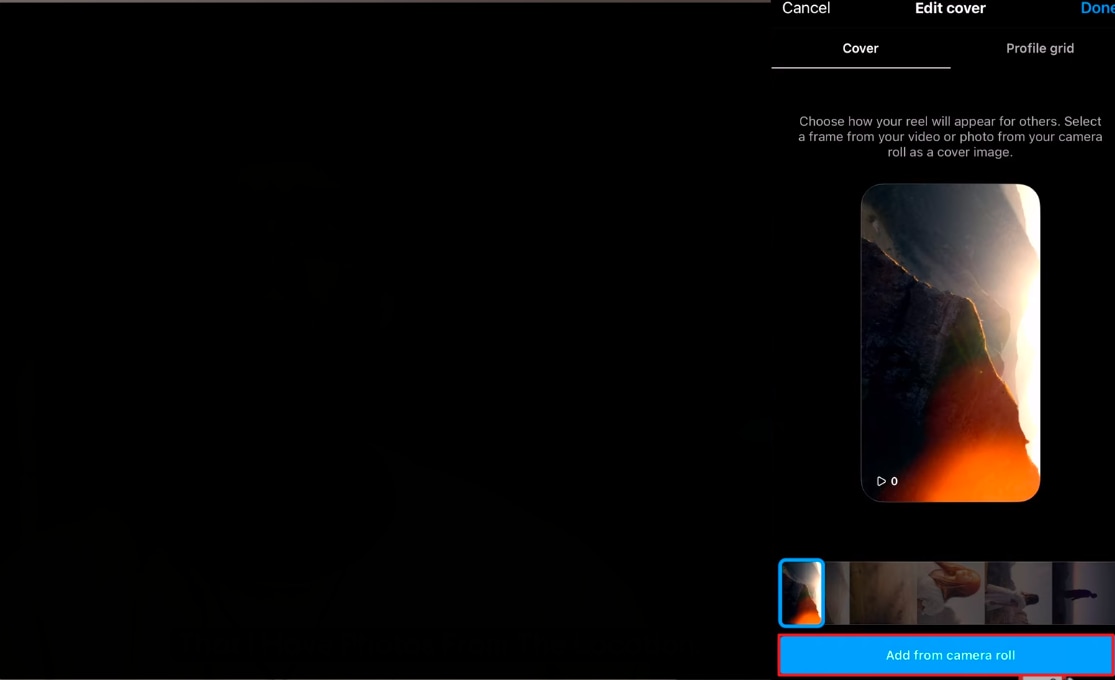
Once you finish the music settings, click on the "Next" button to move forward. In the “New Reel” screen, hit the "Edit Cover" option.
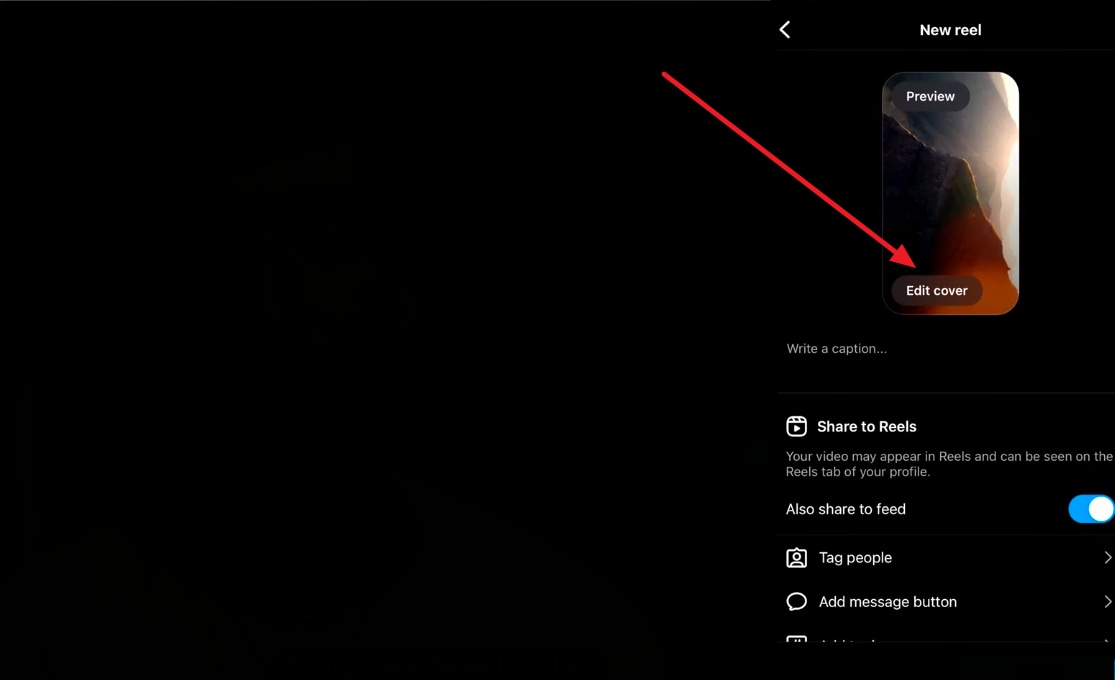
You can choose one of the video frames as a cover, or you can click on the "Add from camera roll" option to choose a cover from your collections. Upon choosing a cover, you can adjust its position as well, and once it fits, click "Done."
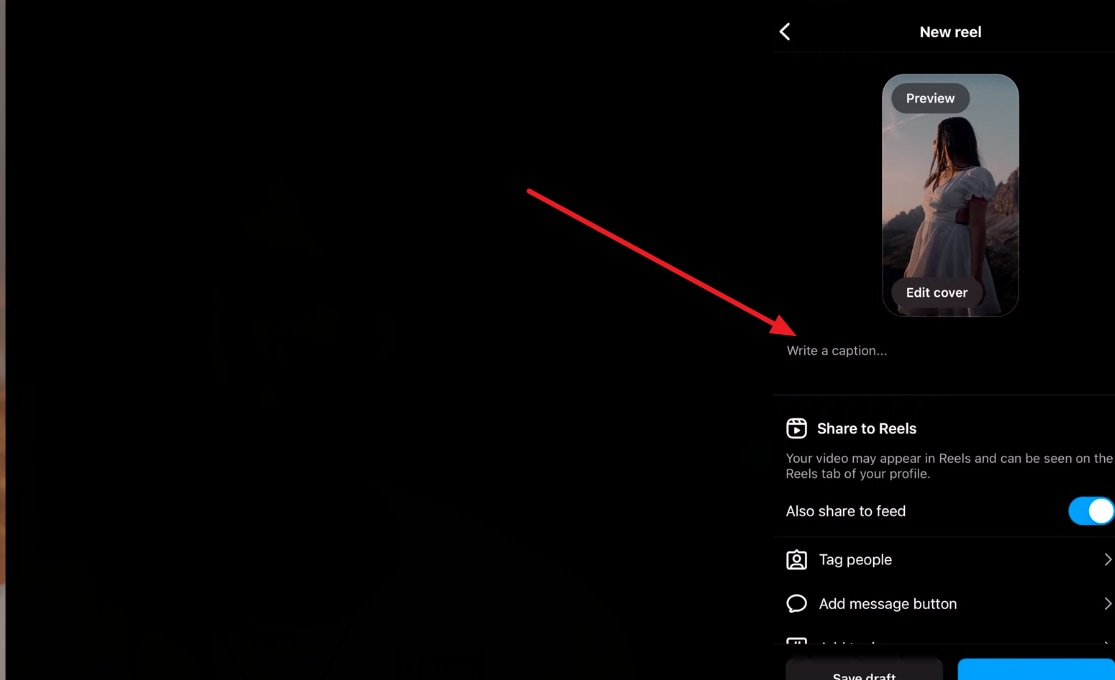
From the "New Reel" screen, hit the "Write a caption" section, and you'll be navigated towards the caption options. For a reel to reach the relevant audience, adding hashtags is important. However, there is no need to overstuff hashtags as 5 to 7 relevant hashtags are enough for the reach. If these hashtags align with your content boost, Instagram's algorithm will detect them and show them to the relevant audience.
Instagram has recently introduced a new feature for adding topics to your reel. This feature also helps the algorithm to make your reel reach the right people. Click on the “Add topics” option featured on the screen.
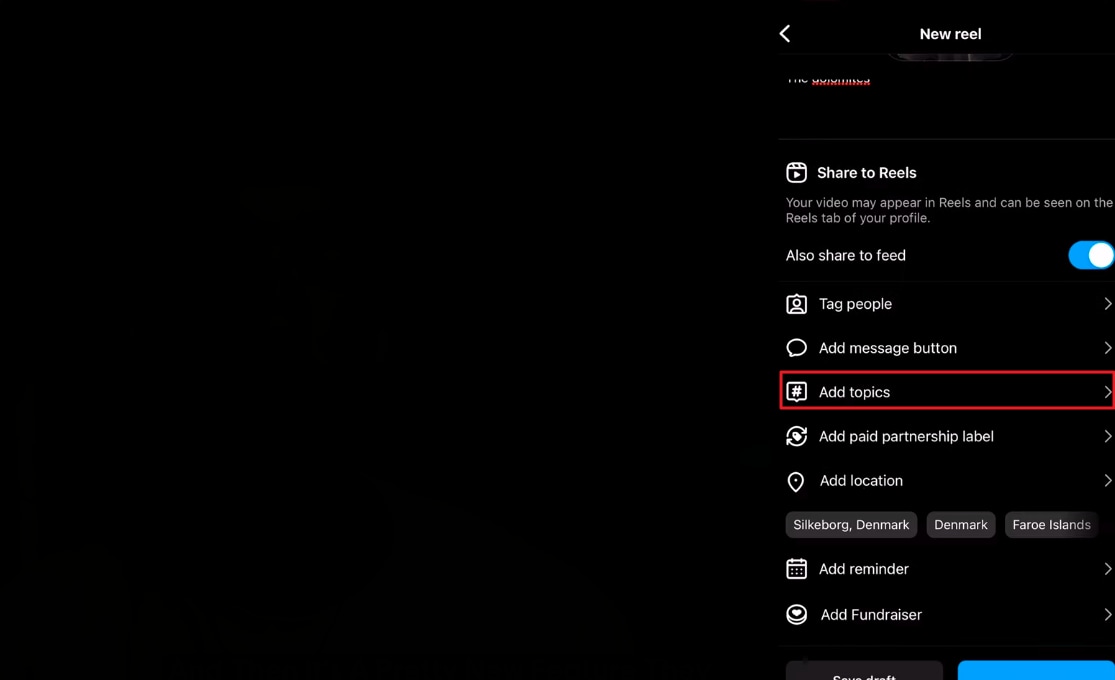
On the new page, you'll find many options, pick some relatable topics for your reel and click on the “Done” button to upload your reel.

This guide gave a brief overview of Filmora's export functionality and how to export video for making an Instagram-worthy reel. Moreover, we talked about engaging the audience with trending songs, captions, hashtags, and reel topics. At the end of the day, the most important factor that keeps the audience engaged is the consistency in uploading reels.
Nikolaj's Other Filmora Master Lessons

- 01. Reel in the Basics: Getting Started with Filmora >>04:08
- 02. Visual Magic: Editing Techniques for Stunning Reels >>05:04
- 03. Soundscapes and Storytelling: Audio Mastery for Reels >>05:18
- 04. Text and Graphics: Elevating Your Reels with Visual Elements >>03:56
- 05. Maximizing Engagement: Tips for Reel Success >>05:19
