Guide For Editing Techniques For Stunning Reels Using Filmora

In the first tutorial for creating reels, you have learned how to import media and adjust the basic settings of the video. In this video, you will gain insights into editing a reel to its perfection by maintaining the color elements. Wondershare Filmora offers multiple color grading, effects, and custom settings for this purpose.
Key Steps of This Video Tutorial To Follow
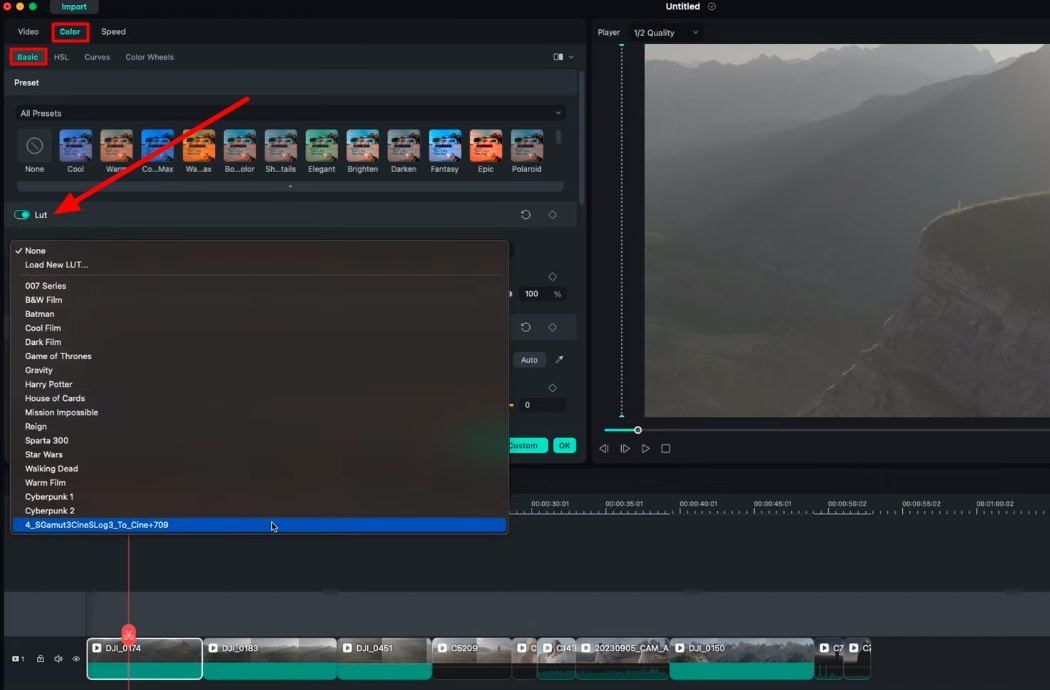
After adjusting to creating a reel, select a video clip in the timeline and navigate toward the featured settings panel. From there, access the "Color" tab, and under "Basic" settings, locate and enable "LUT." Afterward, expand the LUT navigation arrow and change the LUT mode according to your video to preserve the maximum color quality.
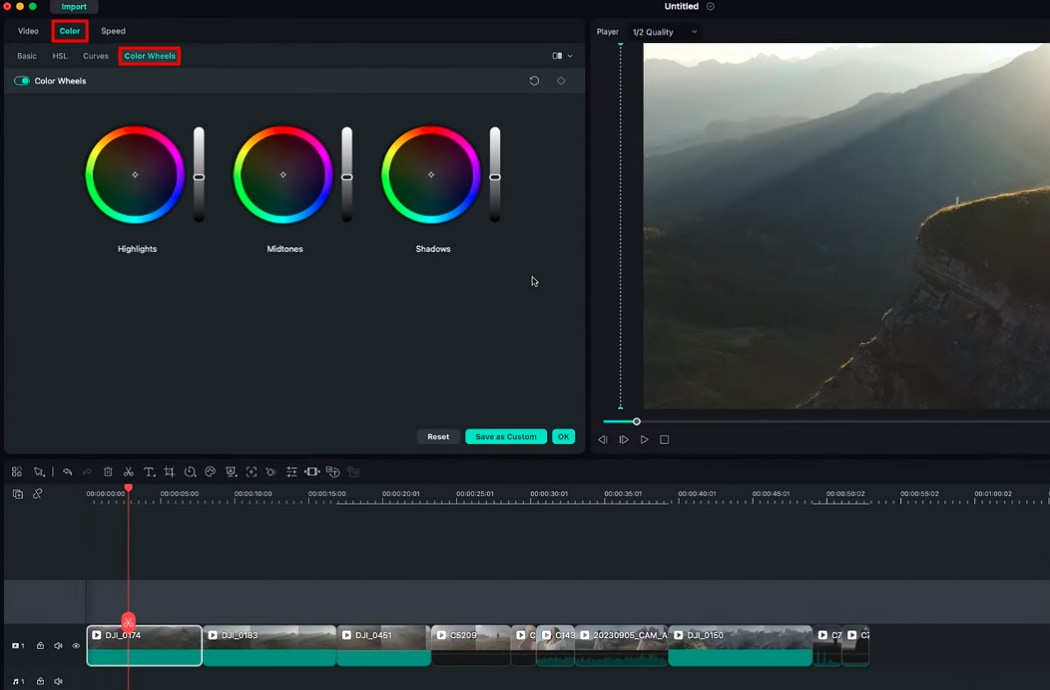
Now, while staying in the "Color" tab, access the "Color Wheels" and play with the wheelers to change the colors of your video. You can adjust the color of Highlights," "Midtones," and "Shadow" using the respective wheels. You can use the given sliders to adjust the intensity of the colors.
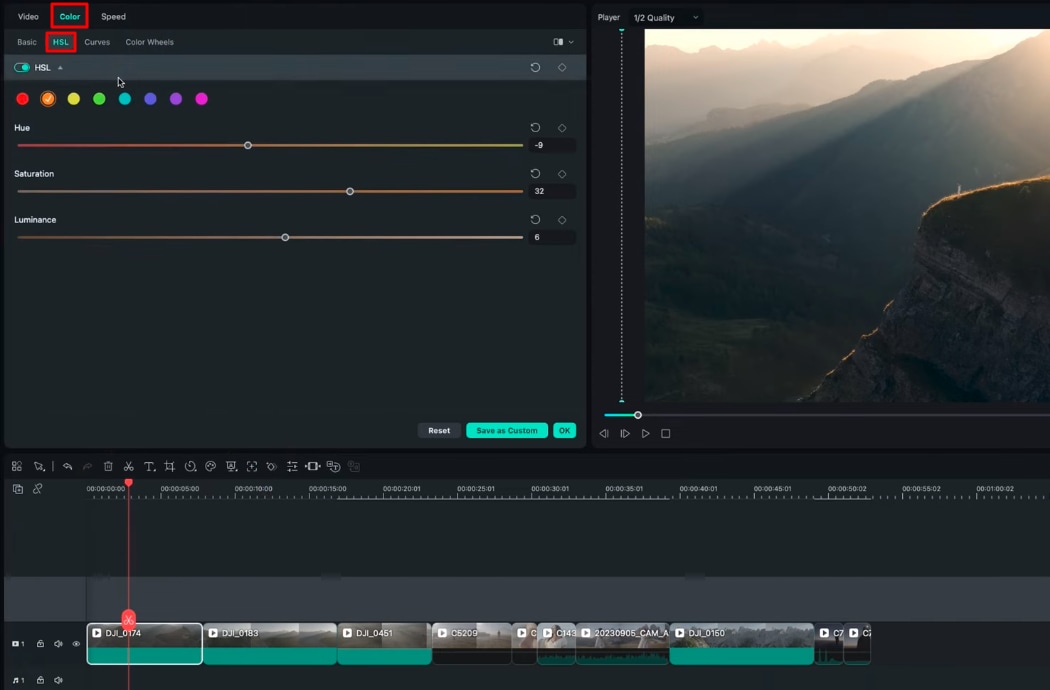
Select the "HSL" option under the "Color" tab and adjust the color options there independently. You select the color from the top and adjust the values "Hue," "Saturation," and "Luminance" values for these colors.
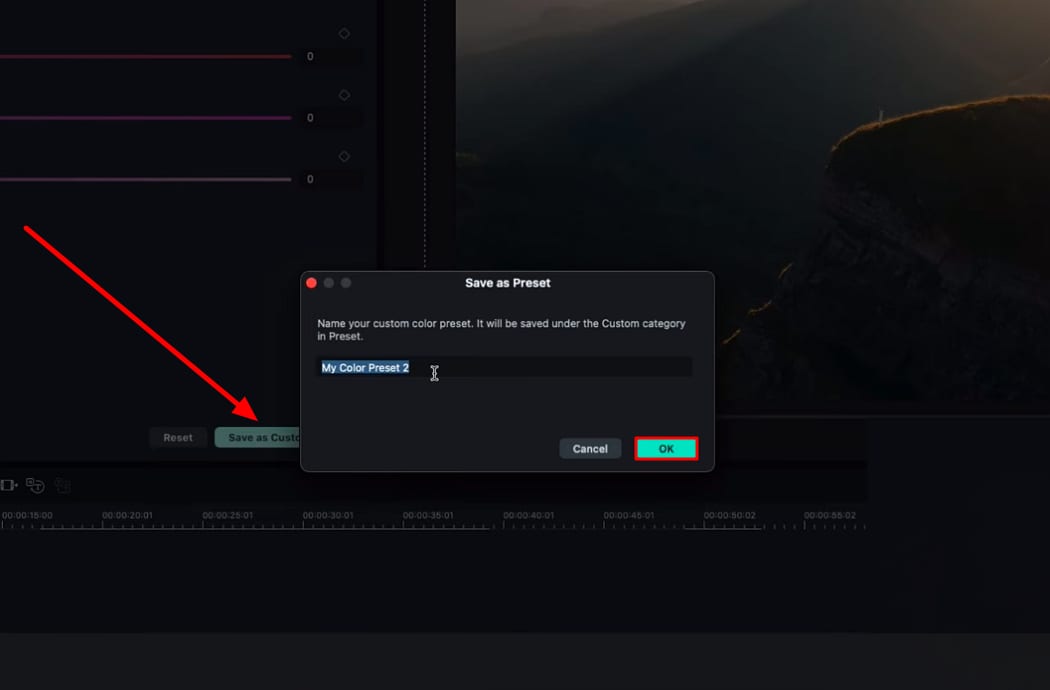
If you wish to apply the same color settings on all the clips in the timeline, there is a shortcut to do that. After adjusting colors for this video, navigate toward the bottom of the settings panel and click the "Save as custom" button. From the pop-up window, give your preset a name and press "OK."
Now select the unedited clip from the timeline panel, go to "Colors > Basic," and access the Preset section. Expand the preset option by clicking on the navigation icon and selecting "Custom" from there. Click on the name of the custom preset you just saved, and it will be applied to your video. Repeat the same process for all videos in the timeline for a synchronized look.

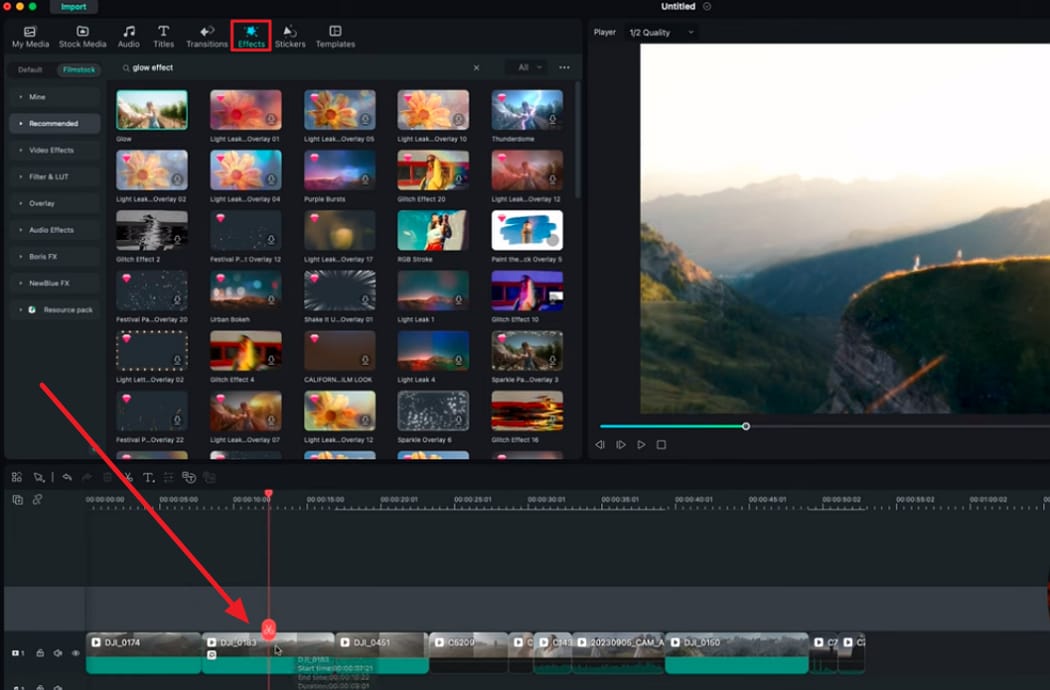
This step of video is not necessary. However, it can enhance the outlook of your video and bring out the best in it. Use your cursor to navigate toward the "Effects" tab in the custom toolbar and select an effect according to your preference and video requirement. Then, drag and drop this effect on the clip you want to enhance.
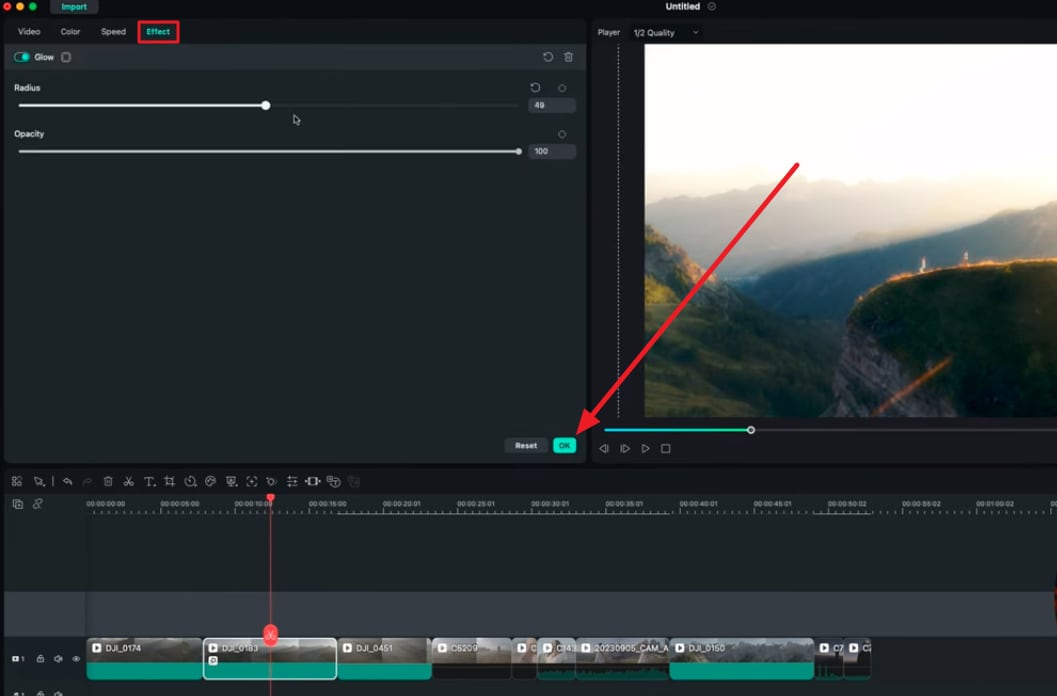
The effect can be a bit harsh or too mild for your clip. To adjust it as per your clip, go to the "Effect" tab in the settings panel and play with the "Radius" and "Opacity" sliders there. Then, click “OK” to finalize the effect settings.
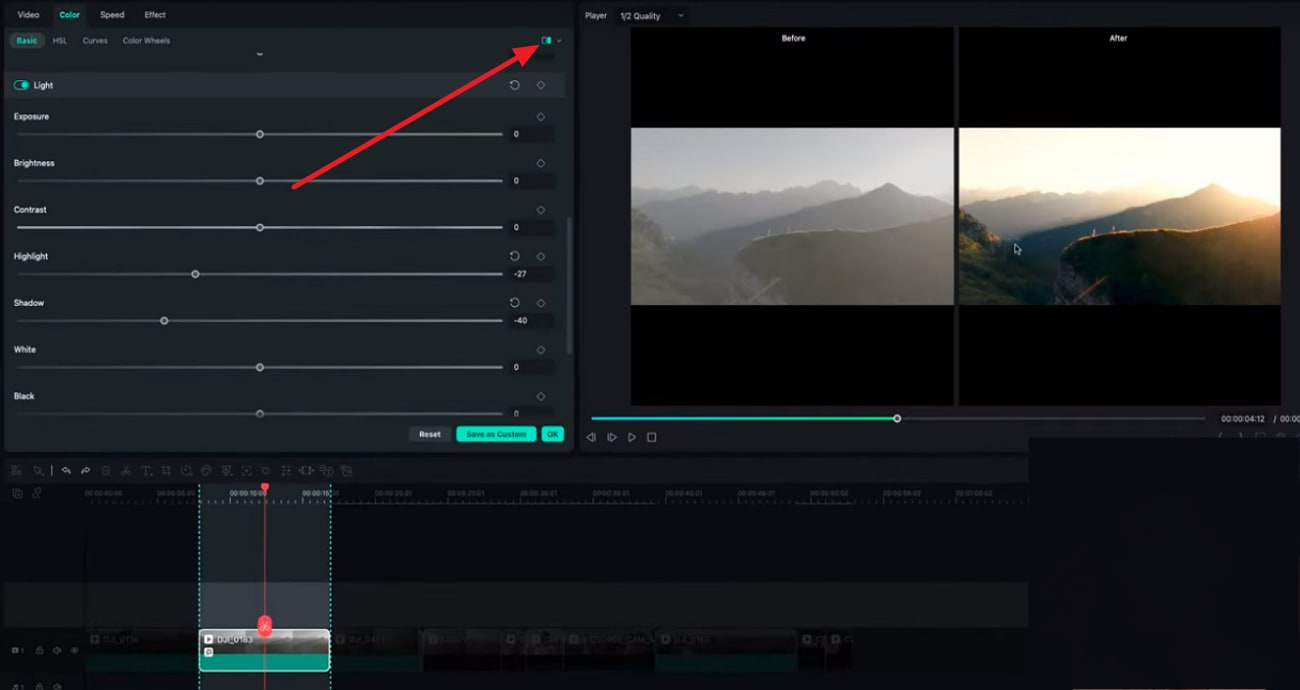
If you are willing to see the difference between the before and after of your video, then select the video and navigate toward the settings panel. From the top right corner, select the "Color Comparison" icon, and the before and after will feature on the preview screen.
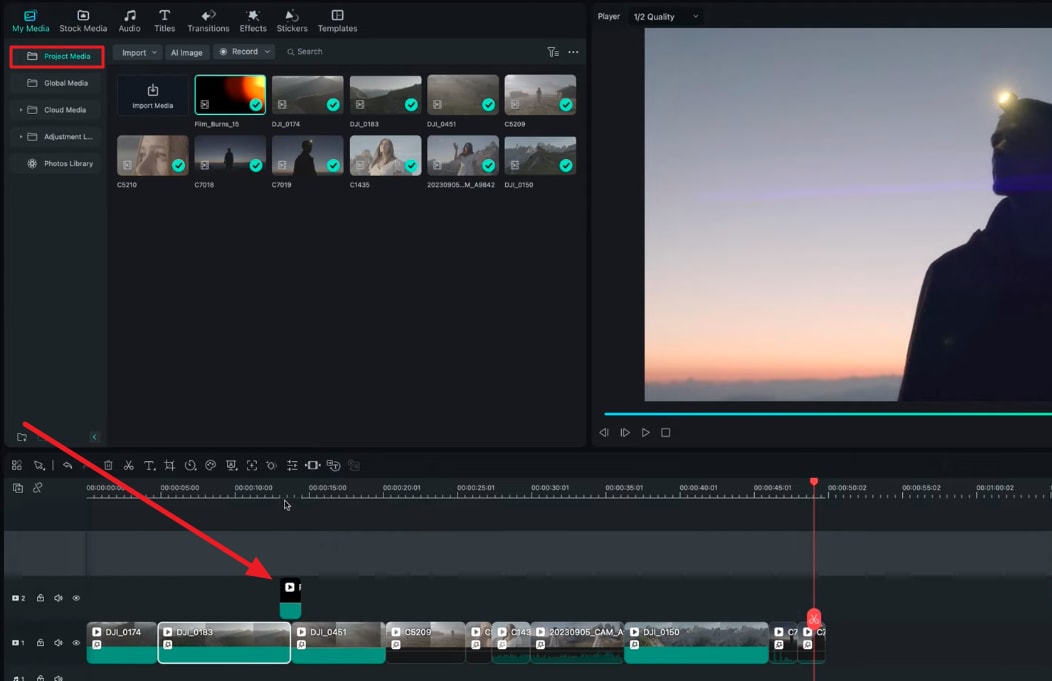
To ensure a smooth alignment between clips, you must add some transitions. For this purpose, right-click on the Project Media section and click the “Import” option to import a custom transition from your device. Drag and drop this transition on the track above your clips and position it at the joining points of two clips. You can also use Filmora’s “Transition” tab to add a transition.
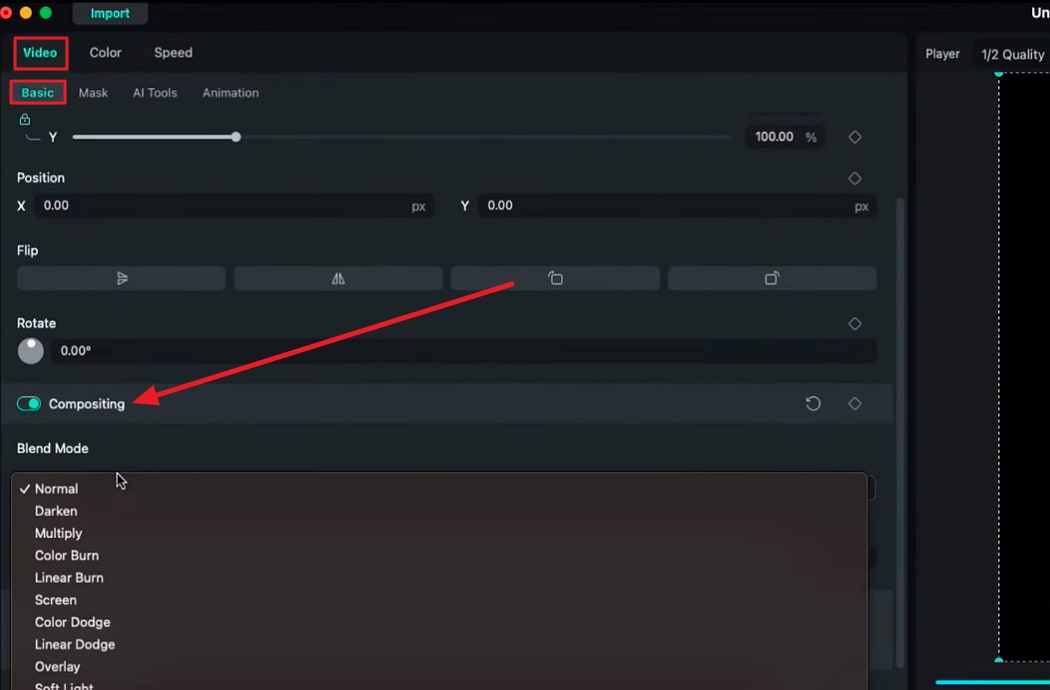
You might notice that the transition is not blending in with the video. To ensure that, click on the transition and navigate towards the settings panel. Under the "Video > Basic" tab, locate and enable the "Compositing" option. Further, expand the "Blend Mode" and choose the one that fits your video. Repeat the similar process for clips that need alignment. Now, hit the Play button for the final preview.
This step-by-step guide has given users an effective way of editing their reels. The reader gained insights on color grading, effects, and transitions. In addition, there were instructions on adjusting the custom settings of these effects and presets. By following this guide, users can learn about creating, editing, and enhancing an Instagram reel.
Nikolaj's Other Filmora Master Lessons

- 01. Reel in the Basics: Getting Started with Filmora >>04:08
- 02. Visual Magic: Editing Techniques for Stunning Reels >>05:04
- 03. Soundscapes and Storytelling: Audio Mastery for Reels >>05:18
- 04. Text and Graphics: Elevating Your Reels with Visual Elements >>03:56
- 05. Maximizing Engagement: Tips for Reel Success >>05:19
