
In the competitive world of video editing, Wondershare Filmora has emerged as one of the most useful tools on the market. Offering a vast variety of features while maintaining a user-friendly interface, Filmora caters to both professionals and beginners.
Even though it’s primarily used for editing, Filmora also excels in converting videos to various formats. This feature makes it a perfect choice for many streamers and the Twitch community in general.
Filmora’s feature “Smart Short Clips” comes in particularly useful to streamers. It identifies key moments in your videos and creates multiple short clips in just a few clicks. Streamers love this for their YouTube campaigns, as it saves them hours of video reviewing, editing and cutting.
In this article
Why Are Twitch Clips Significant

Twitch clips capture the soul of the streamer. Streamers usually use them to create montage videos to showcase their skill or simply post them as shorts on YouTube or social media. Some streamers even go as far as creating fail compilations of them messing up on stream. These clips serve as a great source of entertainment for viewers even when their favorite streamer is offline.
The aspect of the Twitch community cannot be overlooked either. Twitch viewers absolutely love to clip their favorite streamer slipping up or saying something funny. Streamers usually react to these clips live on stream, hyping up viewers even more.
Imagine your favorite athlete reviewing your work and talking about it – that’s how most viewers feel when their favorite streamer views their clips. This cycle forms a close connection between a streamer and their viewers, which can go a long way.
Why Should You Convert Twitch Clips to Different Formats
While you can save, share and cut clips on Twitch, the platform doesn’t offer any more options than that. You must rely on third-party software if you want to export videos in different formats or simply edit them. That’s where Wondershare Filmora comes into play.
There are many reasons to convert Twitch clips into a different format. Mainly, there is no standard format for all devices. If you’d like to view your clips on Mac, for example, their devices often favor .MOV files, while Samsung TVs might perform better with .MP4 or .MKV formats.
Some platforms might require different aspect ratios or different file sizes. With Filmora, you can easily edit the resolution, size, quality or format of your videos. Your videos will be optimized and ready to meet any requirements in just a few clicks.
With this kind of flexibility, you can make sure that your content looks the way you intended, whether it’s being viewed on a smartphone, laptop or smart TV.
How to Start the Twitch Clip Format Conversion Process
The first thing you should do, of course, is go ahead and download Filmora. Open it up, and simply drag and drop the video to Filmora’s main interface. Once you’ve done that, you can now select your video and start your editing process.
How to Cut and Trim Your Videos in Filmora
It all begins with simple cutting and trimming. Let’s go over this process step by step.
Step 1: Once you’ve selected your video it will appear in your timeline, as you can see below. Simply drag the playhead button to the part where you’d like to split the video and click the playhead button to split.

Step 2: To avoid splitting all videos in your timeline, check this option in your settings.
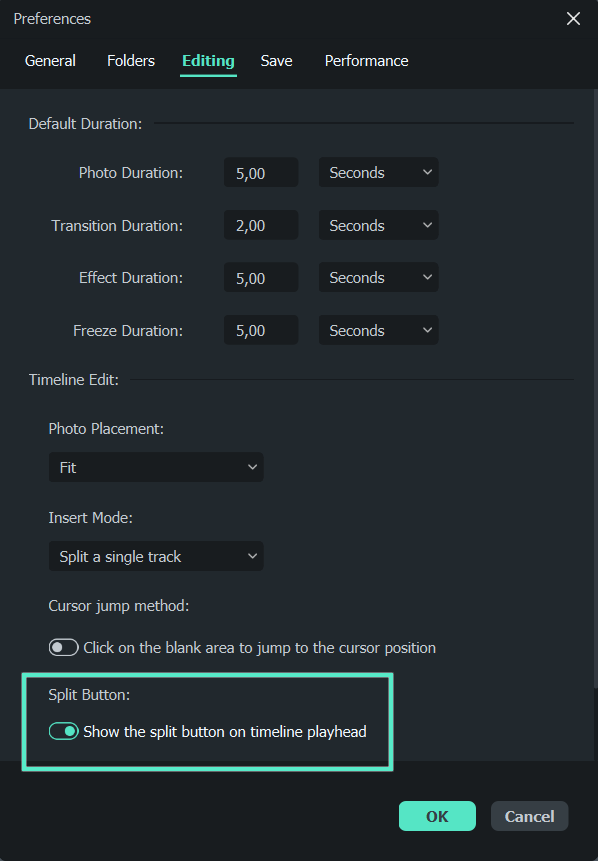
Quick tip - You can use Filmora’s Quick Split Mode to quickly navigate through your video and trim it to highlight important moments. Simply select the parts you want to split and you’ll be all done!

Now that you’ve trimmed your video, it’s time for editing.
How to Edit Your Twitch Clips Using Filmora
With Filmora, you can add all sorts of cool effects to your videos, modify transitions or add custom elements. Let’s go over these few features that are essential for your video editing.
Make Your Videos Stand Out with Custom Effects
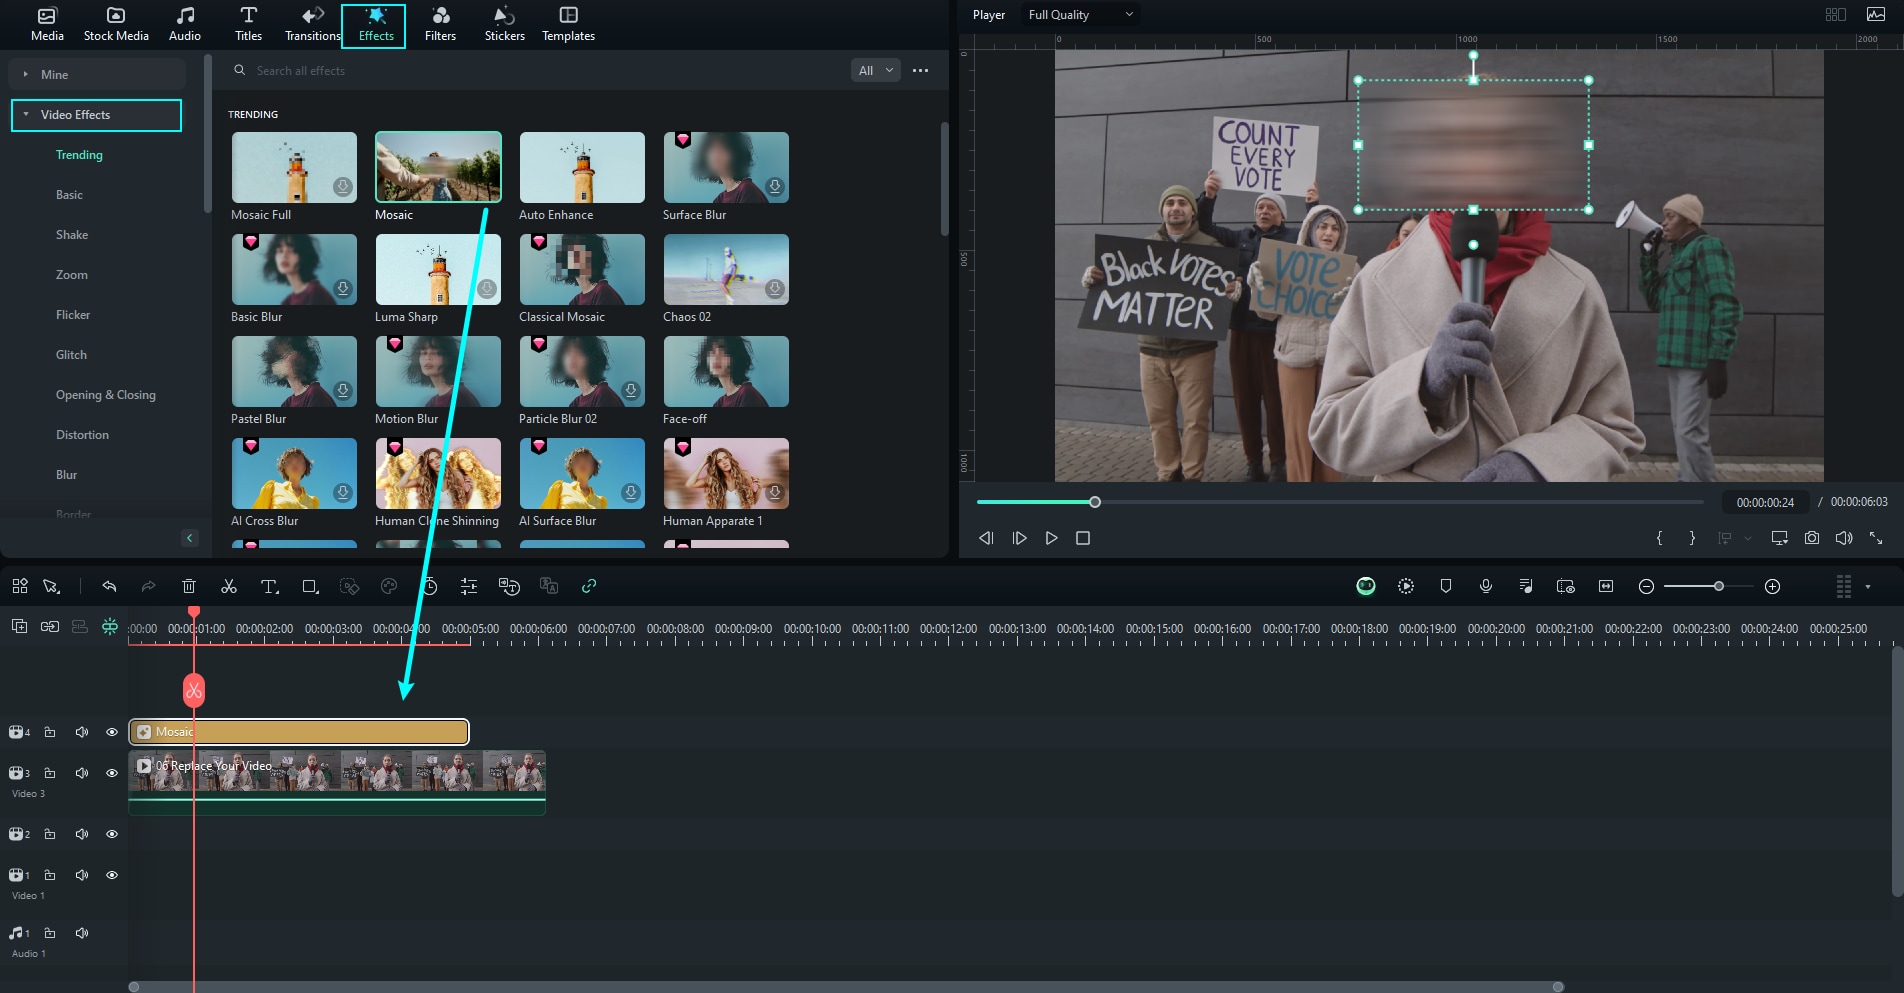
Filmora offers a plethora of effects for you to choose from. Some of the most popular ones proved to be Overlay, Mosaic Blur and Face-Off effects. Mosaic Blur is fixed to a certain part of your screen, whereas the Face-Off effect follows a person's movement throughout the video to hide it.
Here’s how to do it.
Step 1: Select your video and head over to the Effects menu. Choose the effect that you like and drag and drop it to track above your video.
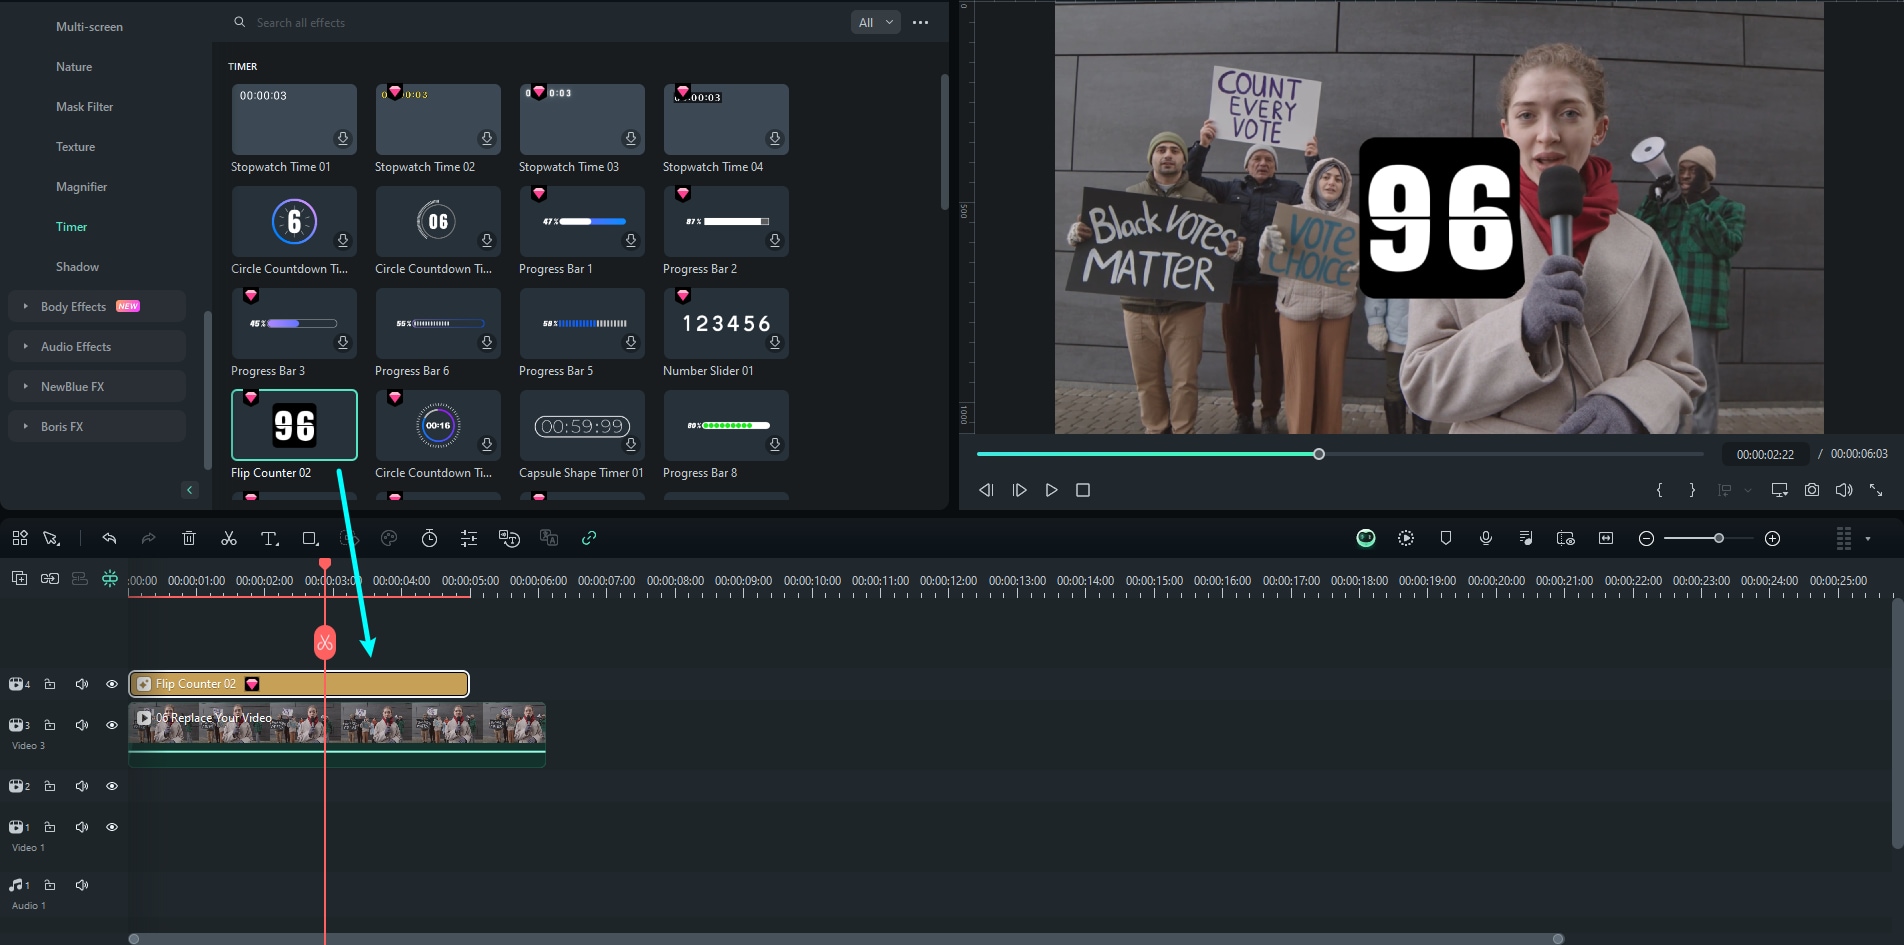
Step 2: Timer effects have also been very popular among content creators. Scroll through the Effects menu and search for Timer. Simply select the design you like and drag it to your timeline.
Step 3: With Filmora, you can add as many overlays as you want. You can customize them or select your favorite one, so it always appears first when you’re editing. Go to your Effects menu, select the overlay and drag and drop it to your timeline.
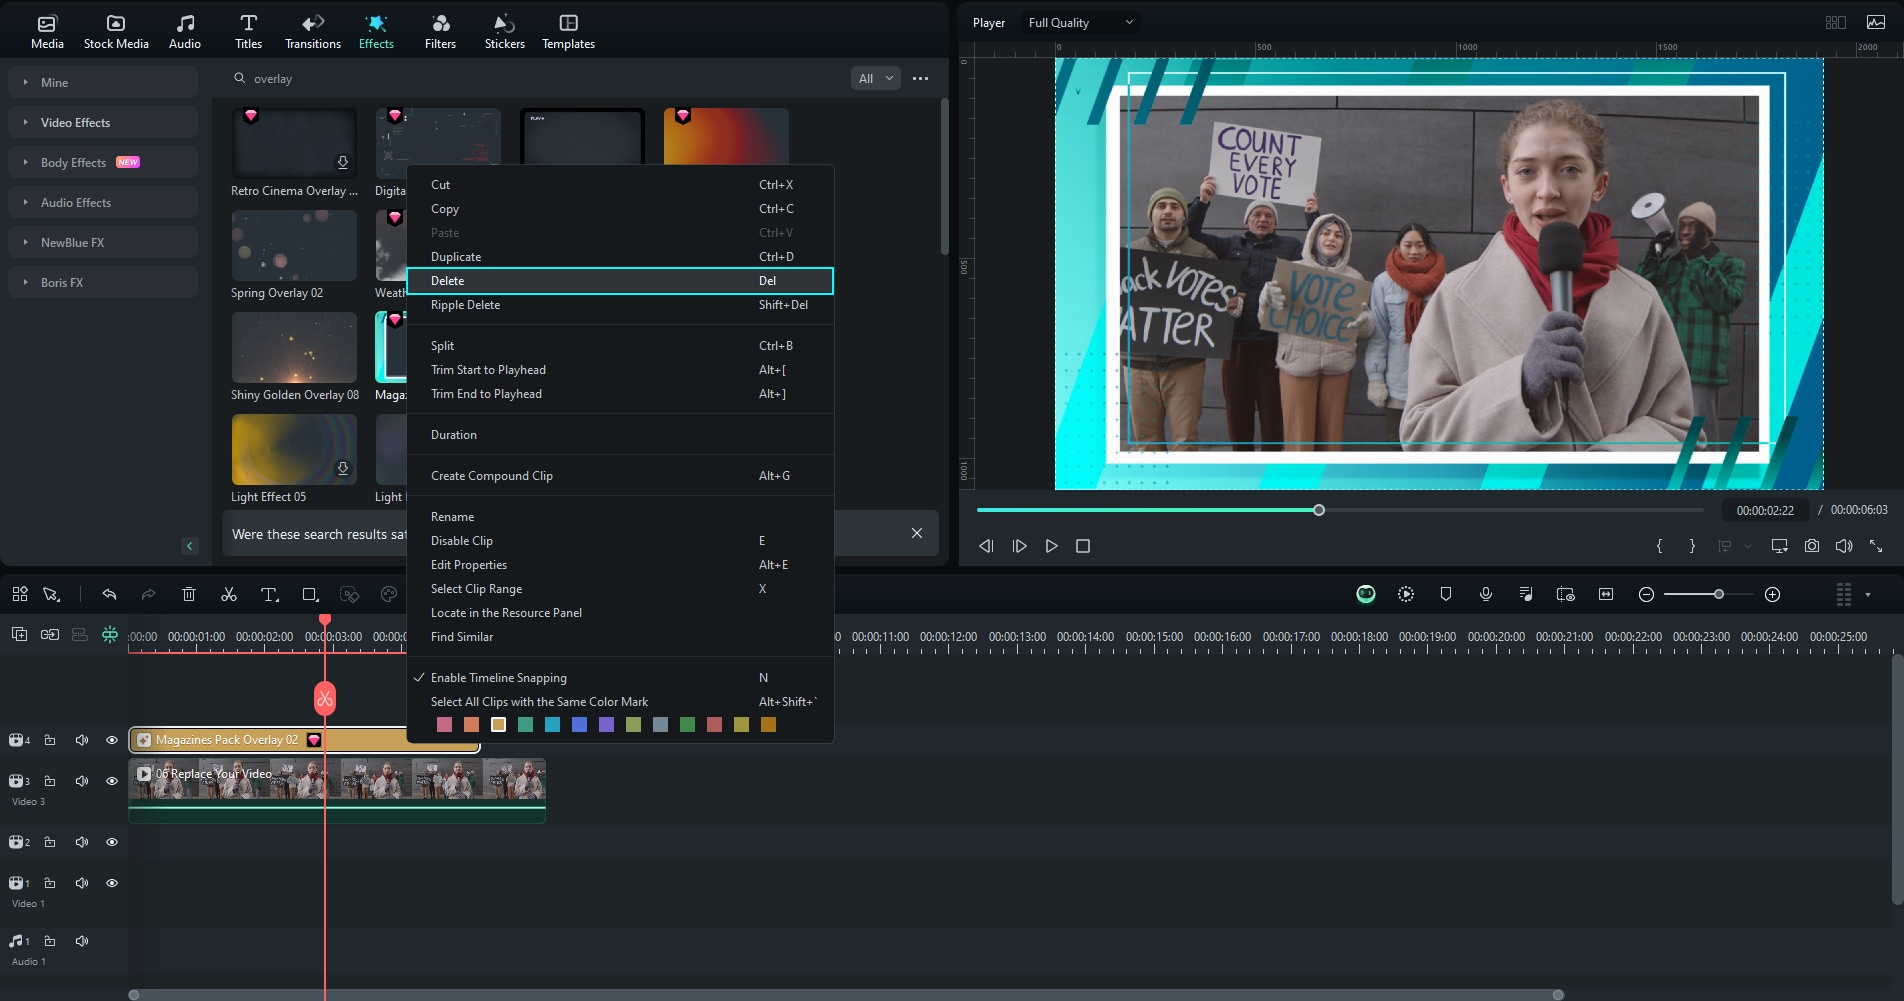
Now that you’ve taken care of people’s privacy and your video looks nice and trendy with your brand-new overlay, it’s time to modify the transitions.
How to Make Seamless Transitions with Filmora
This feature comes in particularly useful in making compilations of your Twitch clips. You can now seamlessly blend your Twitch clips into highlight reels or montages. Here’s how to do it.
Step 1: Click on the Transition menu in the header next to the Effects menu.
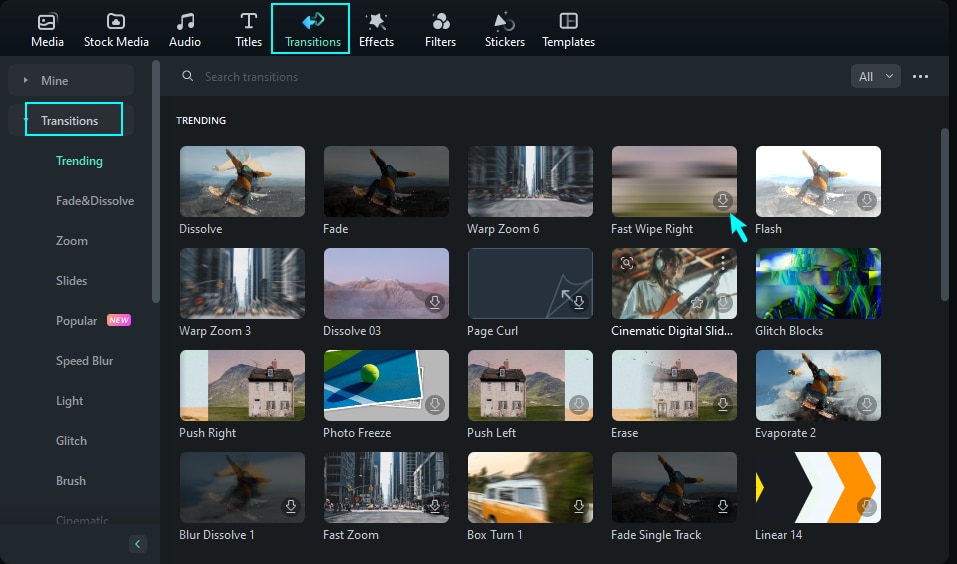
Step 2: Select and download the transition effect or effects you like. Once it’s ready, select the transition effect and drag it to your timeline.
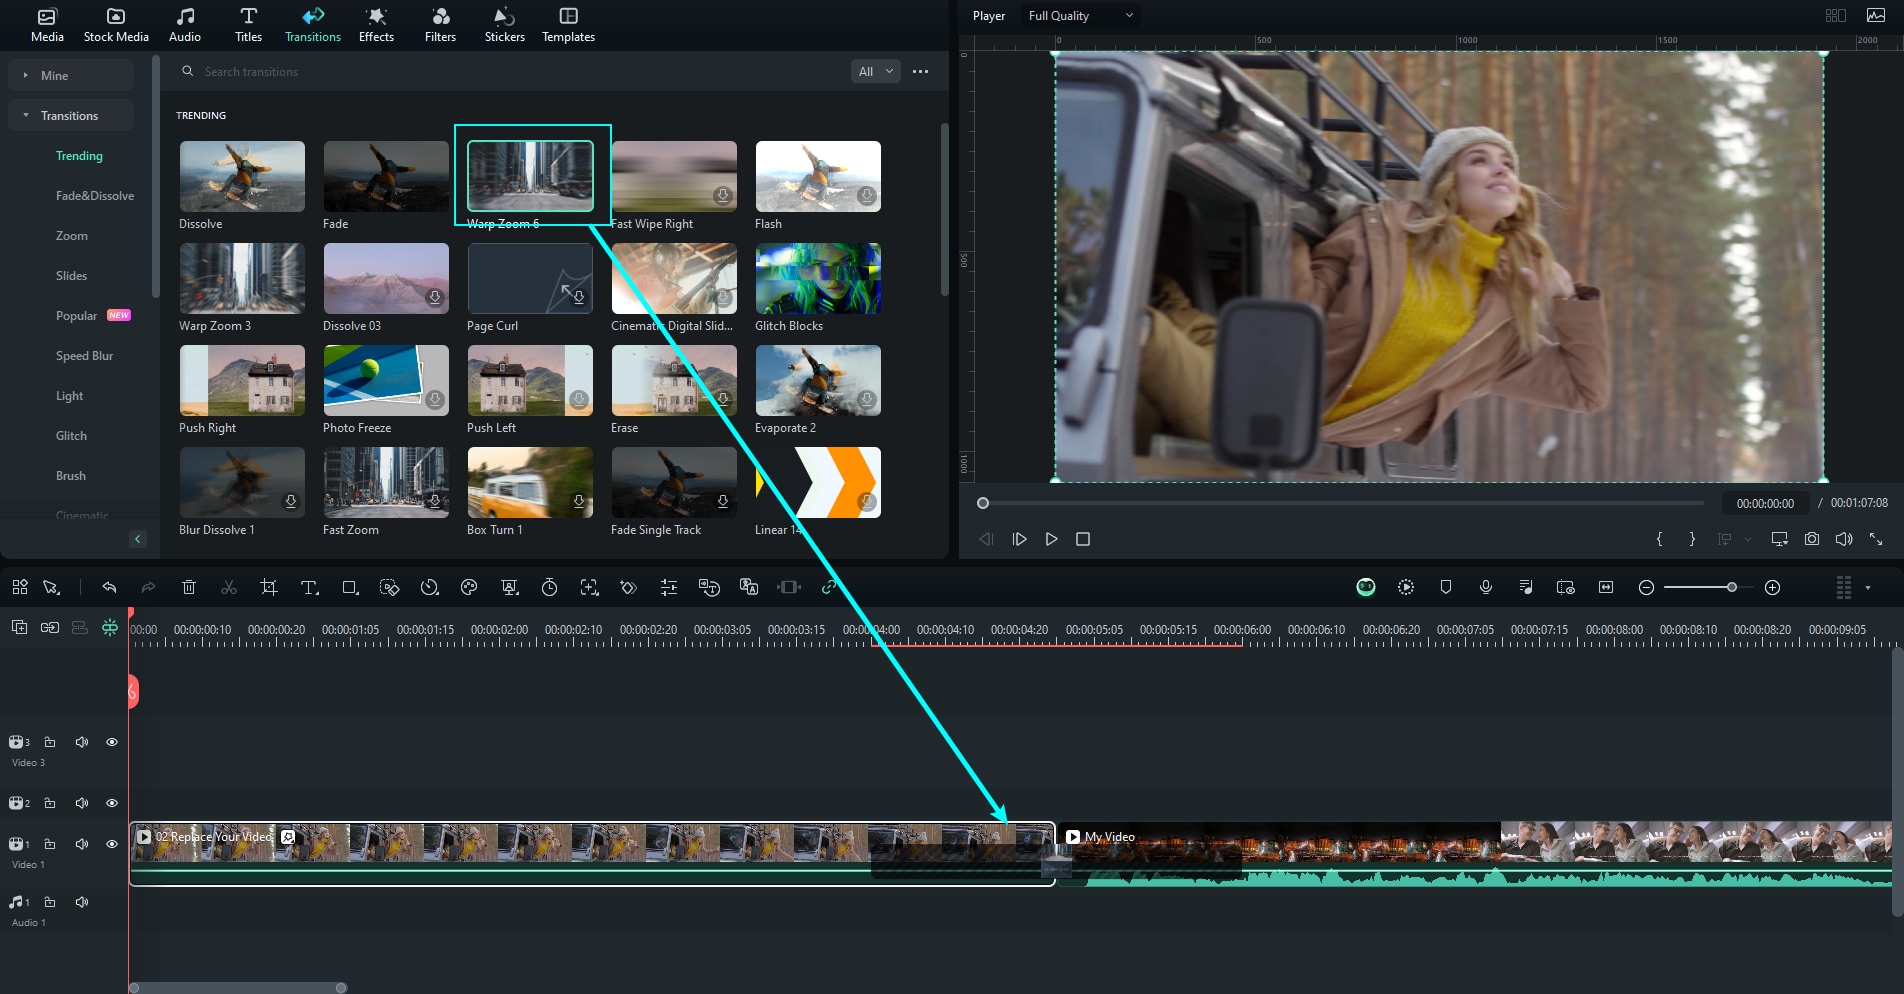
Step 3: Once you’ve added your transition, you can customize it by double-clicking it. You can adjust its position as well as duration.
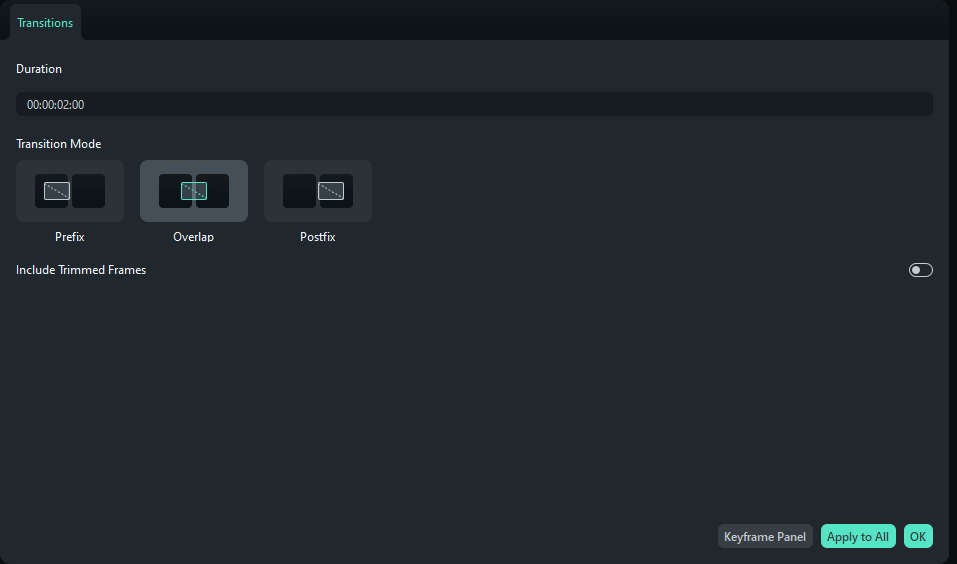
Apply the changes, and you’ll be all set!
How to Add Custom Elements to Your Clips
Spice it up by adding custom stickers to your videos. Not only will they light up your videos, but you can also encourage your viewers to subscribe, like or share them. Here’s how it’s done.
Step 1: Navigate through the header to find the Stickers menu. Once you open it, you can download any sticker you like.
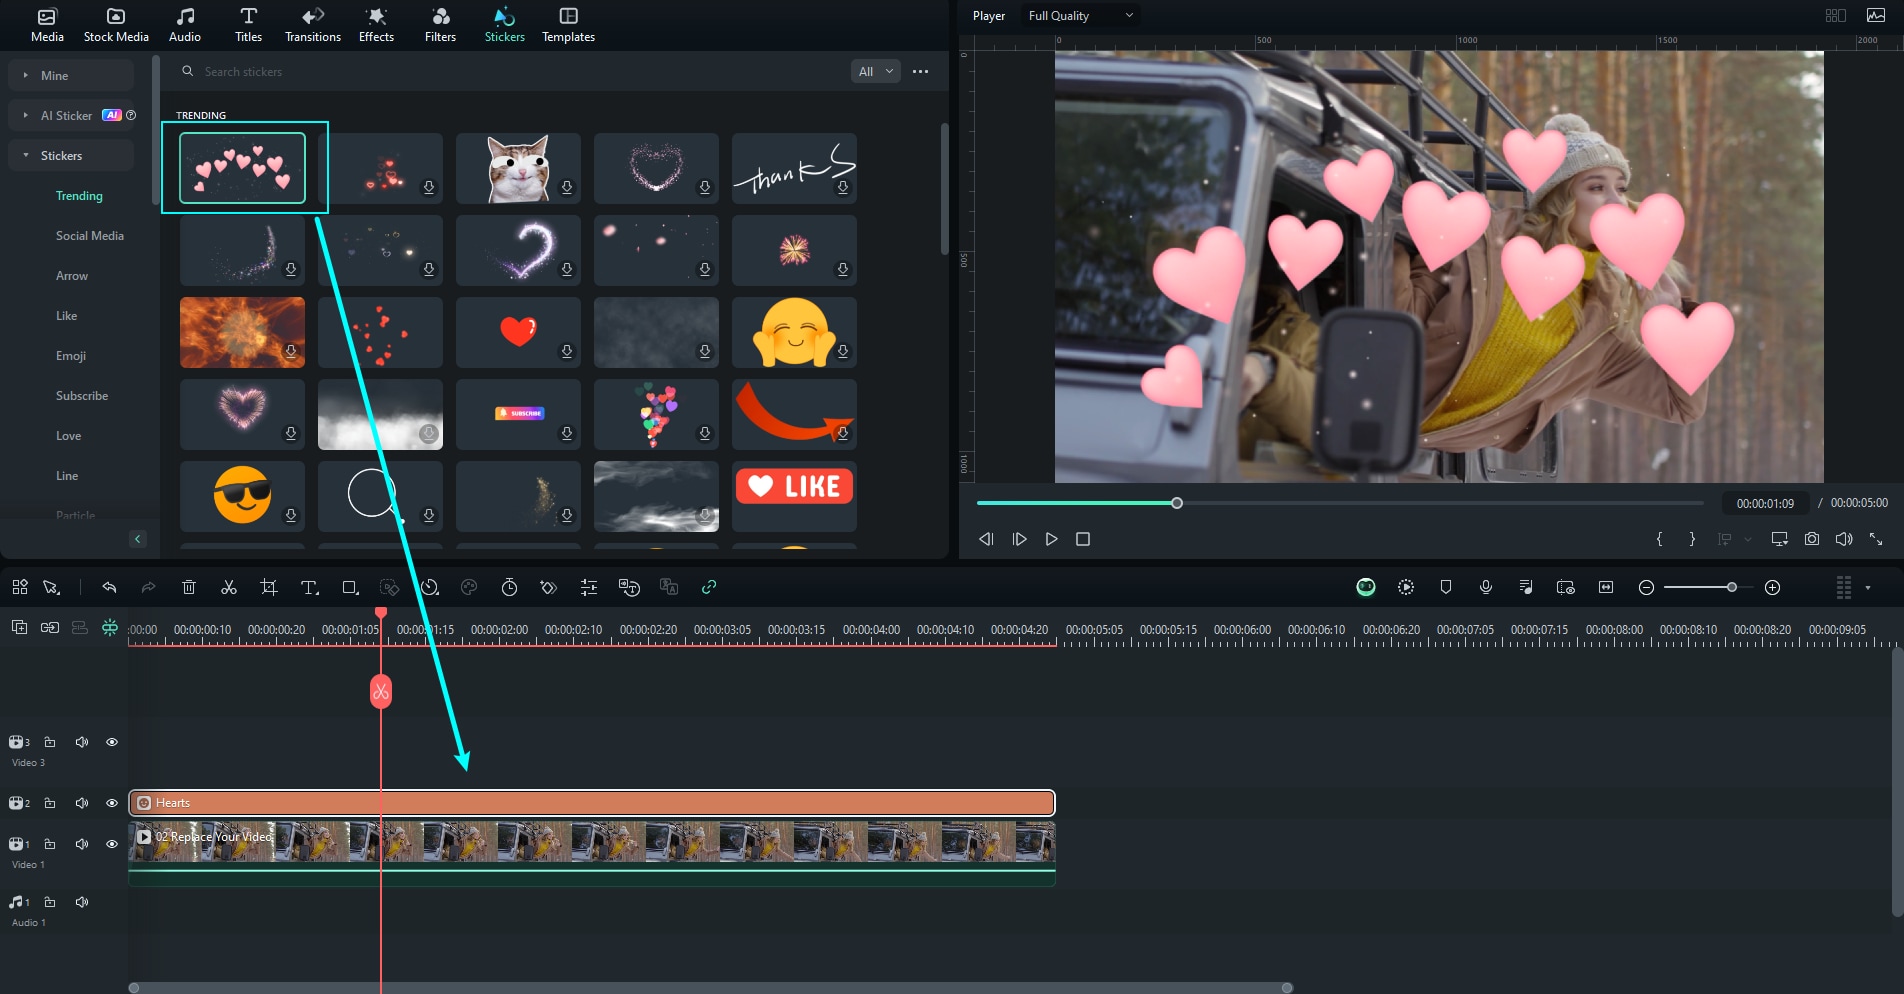
Step 2: Once you pick your sticker, just drag and drop it to your timeline.

Step 3: Customize your sticker by double-clicking it on your timeline.
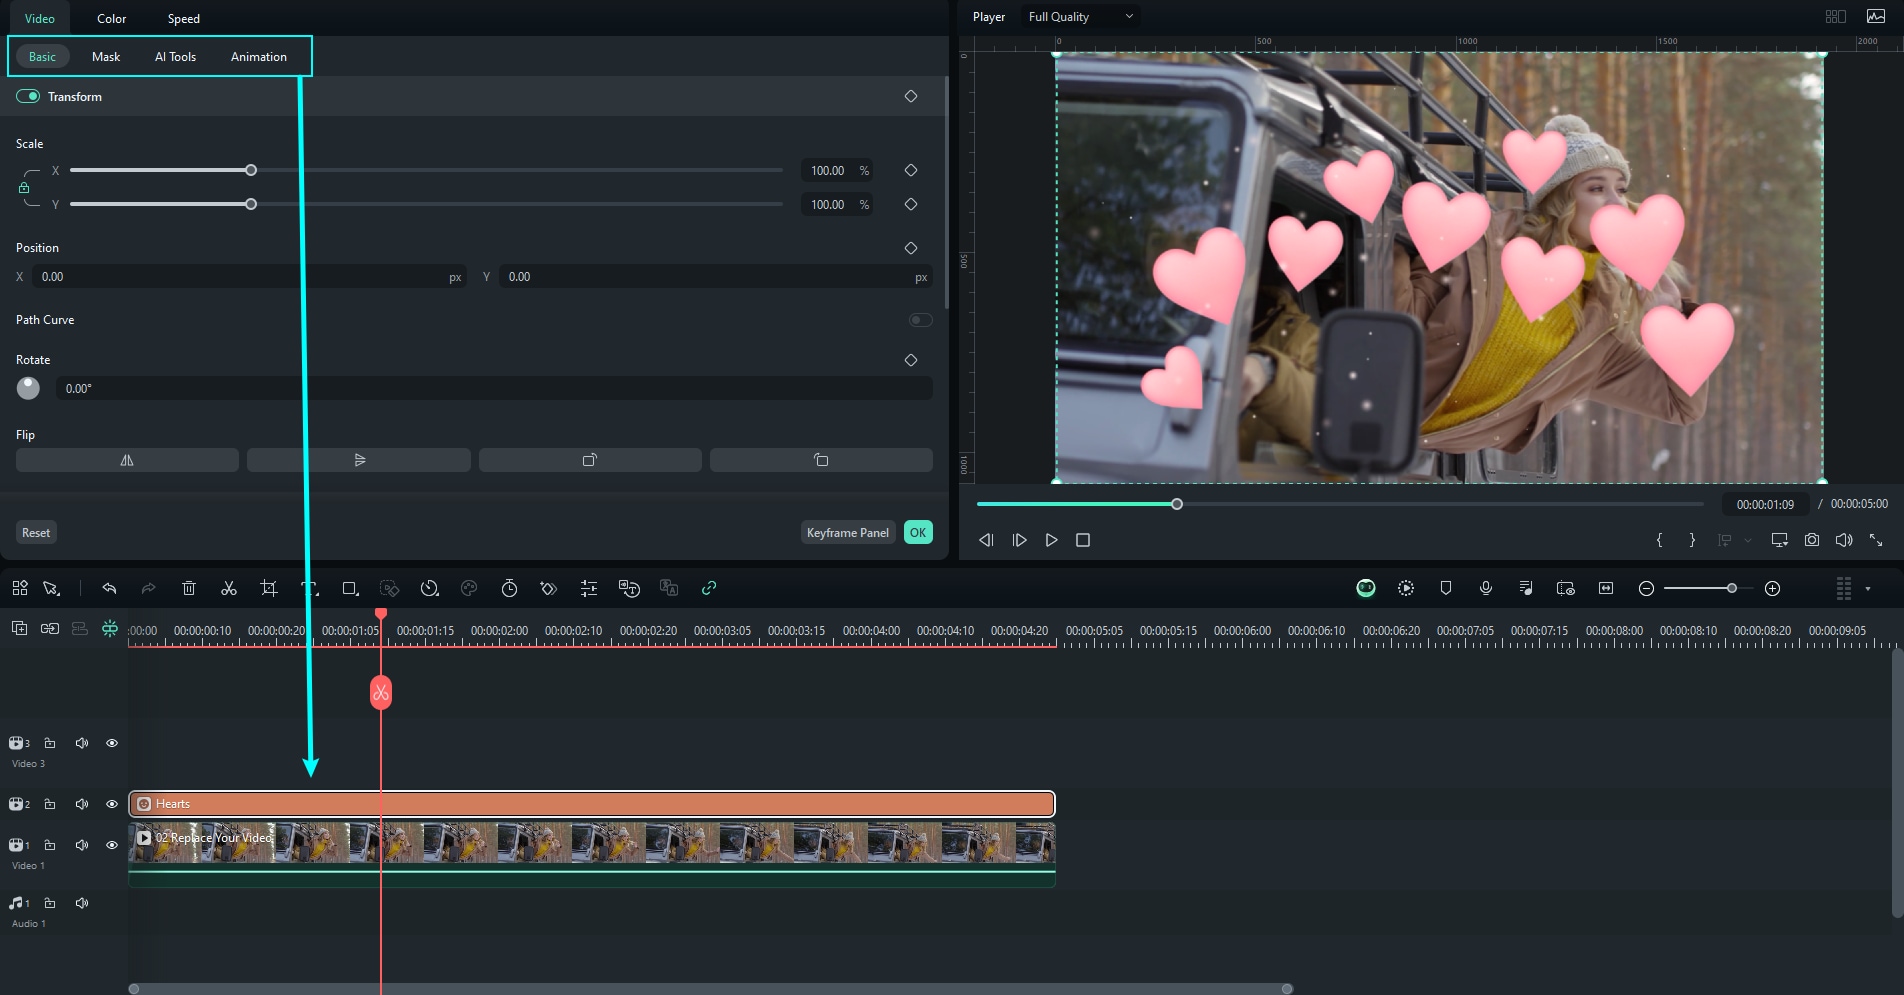
Click Apply Changes, and your stickers will be added to your clip.
Smart Short Clips Feature
Filmora now has a brand new feature that allows you to quickly chop up your VoDs into TikTok or YouTube-ready clips. This powerful feature automatically recognizes key moments in your video and allows you to export shorts in just a few clicks. Here’s how to do it.
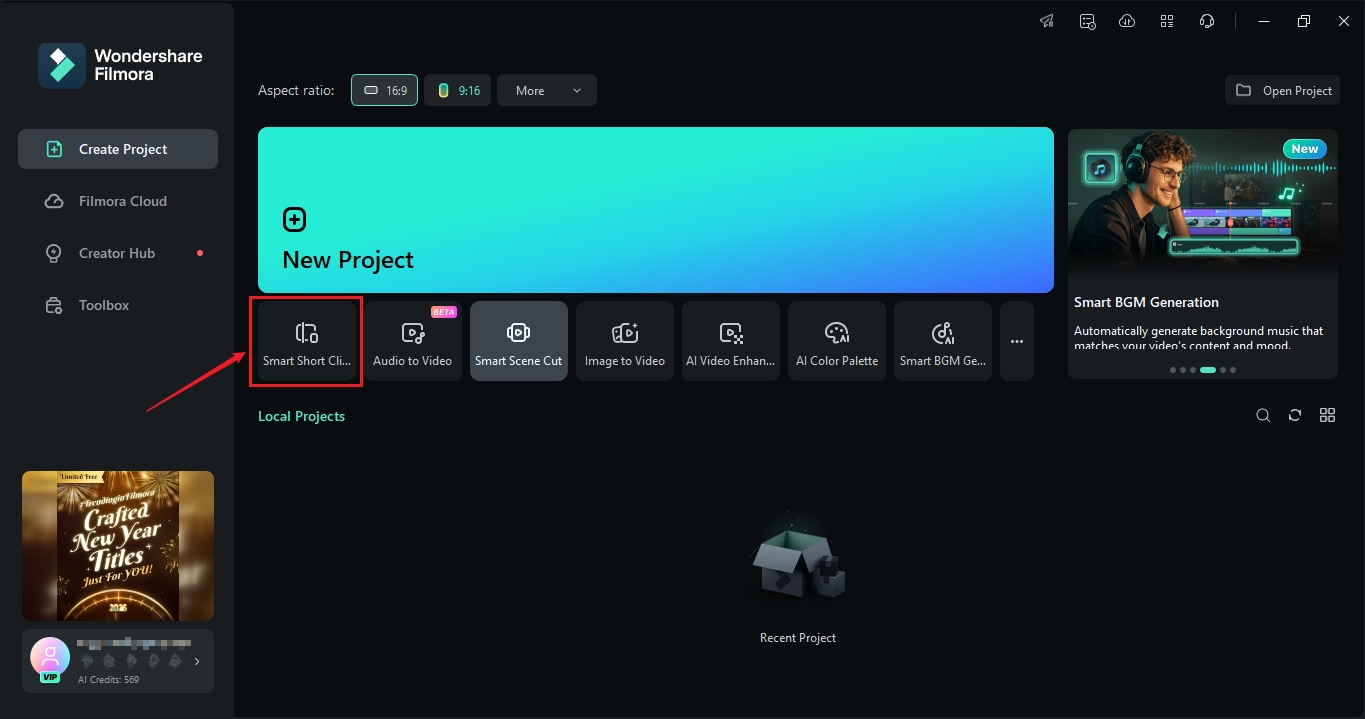
Step 1: Open up Filmora, and just below the New Project button, click on the Smart Short Clips button.
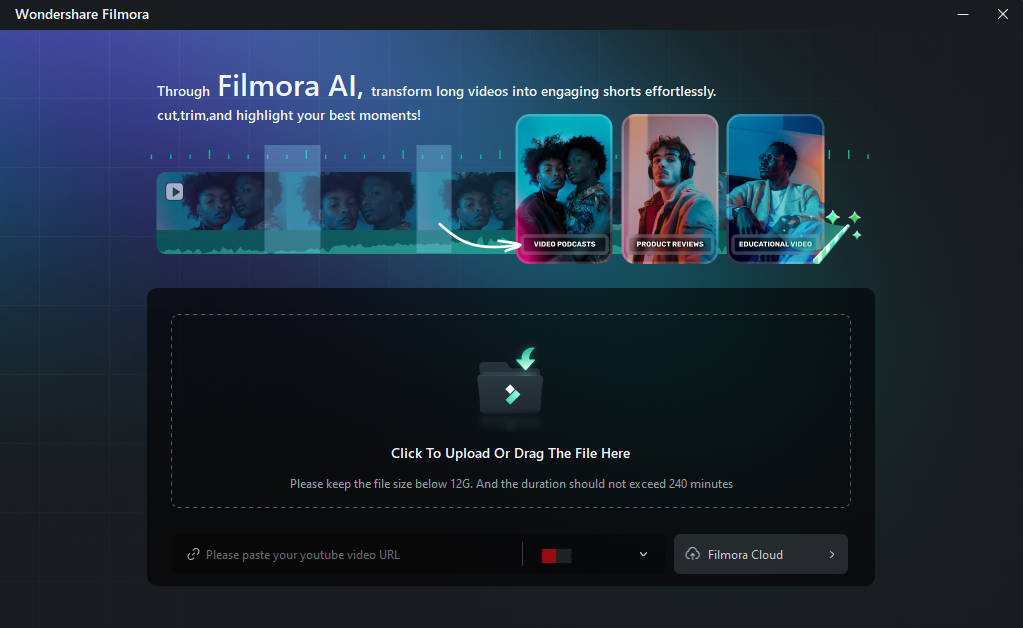
Step 2: Upload your video or paste the link to your video.
Step 3: You will need to customize the language manually if you’re uploading the video. Under the same settings, you can customize the duration of your shorts and aspect ratio and add a custom theme.
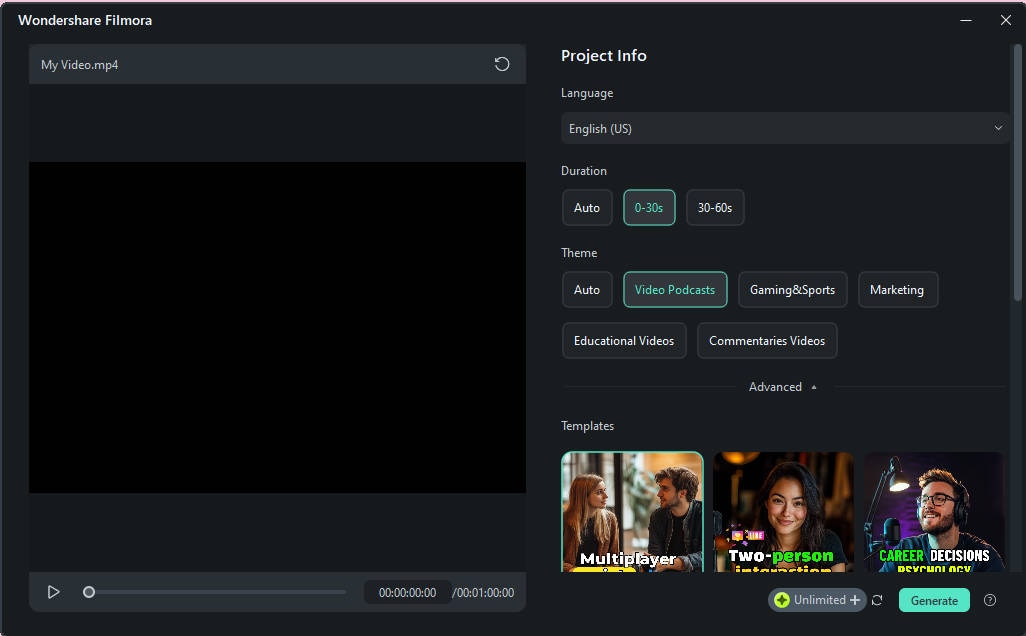
Step 4: Choose a template that you like and click Generate.
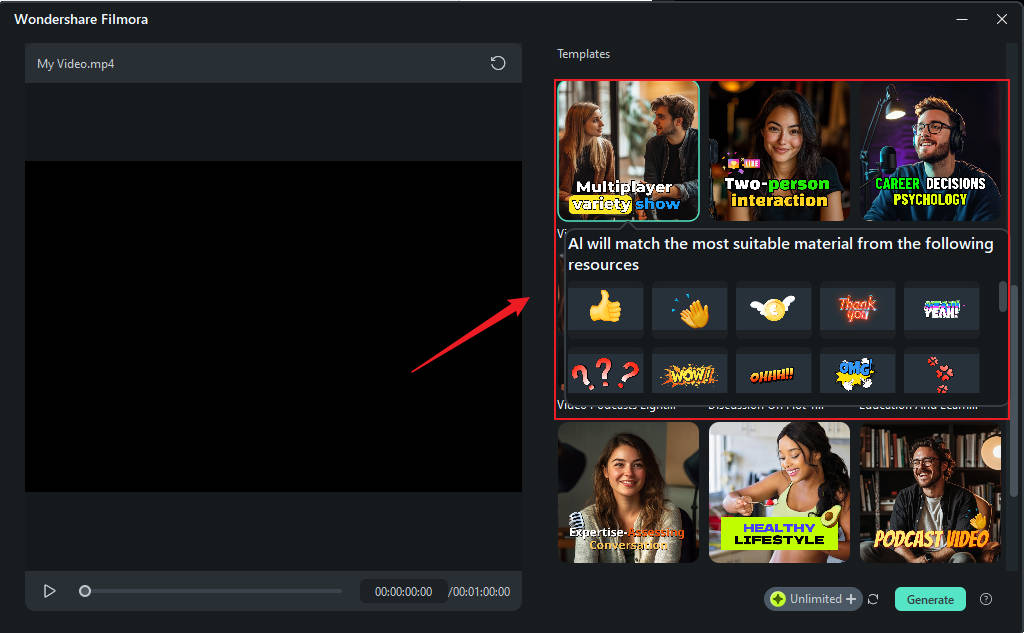
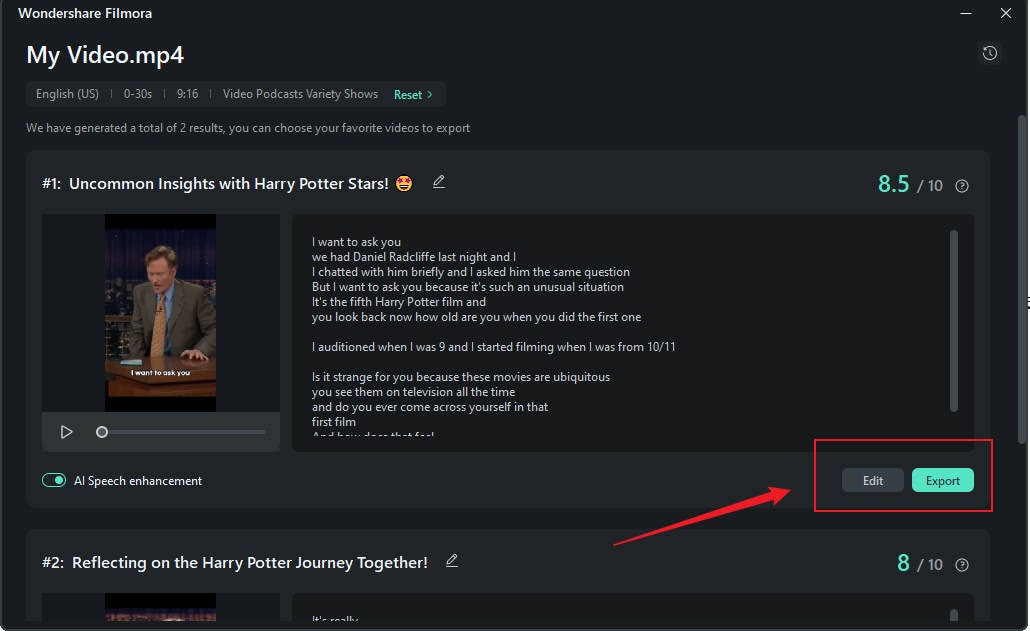
Step 5: Filmora will automatically generate a few different results for you to choose from. Choose the one you prefer, and click Export. If you’re unsatisfied with the results, click Reset to regenerate.
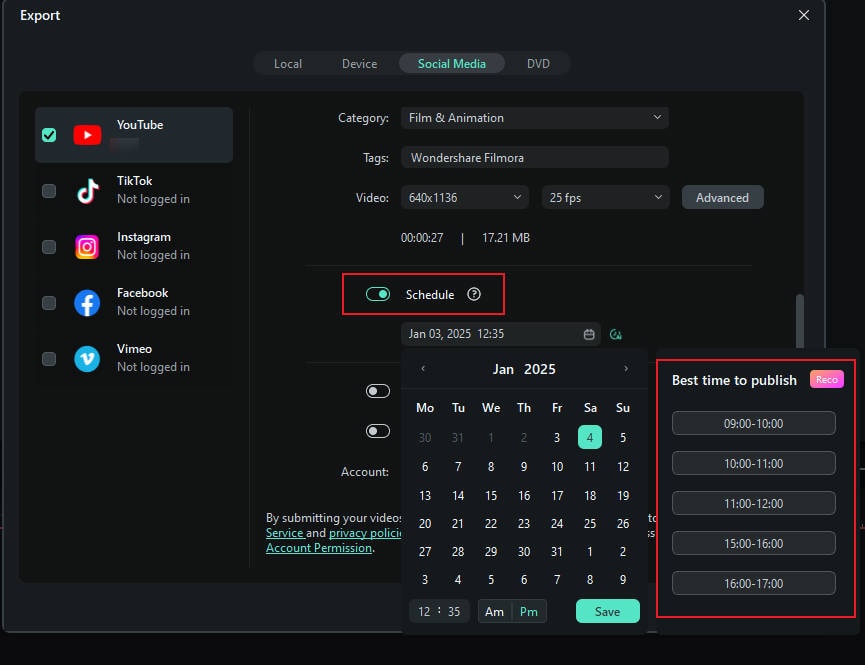
Step 6: You can now fill in all the information about the clip, such as title, description, category and tags. You can also schedule your video for upload and choose the platform you want.
And you’re done! If you need more information on how our Smart Short Clips works, please check out our detailed guide.
Export the Video to the Desired Format
Filmora supports all the formats you’ll ever need as a streamer. Once you’ve finished editing your videos, you can review your work, make any final adjustments and export your video. It’s really easy, and you can do it in two steps.
Step 1: In Filmora’s editing window, click the Export button in the top right corner.
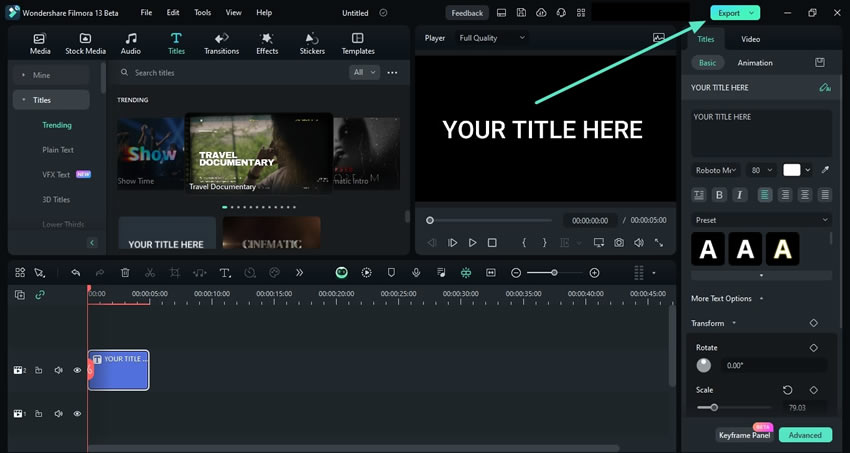
Step 2: Adjust the settings to your liking. Name your video, select where you want to save it and select the desired format.
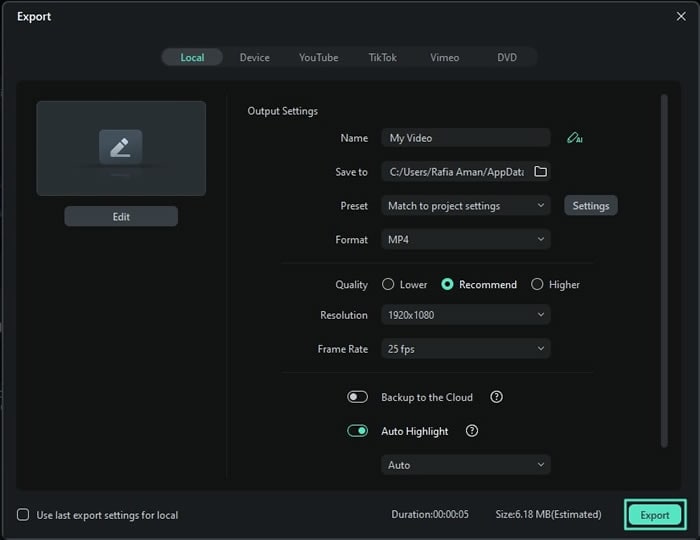
Click on Export and there you have it! Your clips are now ready to be published and shared across social media.
Conclusion
Apart from editing, Filmora lets users share, manage, and improve their Twitch clips. Filmora can help you relate to your audience in new and intriguing ways regardless of your level of experience. You can now maximize your content impact and reach by optimizing your clips to fit the requirements of any platform.
With its powerful editing features and seamless conversion tools, you can now transform your Twitch highlights into professional videos that resonate with audiences everywhere. Everyone from casual viewers to dedicated fans will appreciate the polished and accessible content you’ll create using Filmora.


 100% Security Verified | No Subscription Required | No Malware

