

 TL;DR:
Filmora project files (.wfp) are editing instruction files rather than playable media, meaning they cannot be processed by online converters and must be opened directly in Wondershare Filmora to be exported as an MP4.
● For standard formats like MOV, MKV, or AVI, desktop programs like Filmora and Adobe Premiere Pro offer the fastest MP4 conversion via hardware acceleration, while HandBrake and VLC Media Player provide free local alternatives for advanced H.264 encoding and batch transcoding.
● Browser-based converters like Zamzar are restricted to standard media formats and are best suited for quick, small files, as they lack .wfp support and experience significant slowdowns with large videos due to upload constraints.
● To achieve the best balance of quality and file size when exporting to MP4, apply the H.264 video codec with AAC audio while maintaining the exact frame rate and resolution of your source footage.
Ask AI for a summary
 ChatGPT
 Perplexity
 Gemini
 Claude
 Grok
Grok
To convert video to MP4, you can use Wondershare Filmora, VLC, HandBrake, Adobe Premiere Pro, Movavi, or an online video to MP4 converter. If you are working with a standard video file like MOV, AVI, MKV, or WMV, simply import the file into a converter, choose MP4 as the output format, and export it. If you are trying to convert a Filmora project (.wfp file) to MP4, you cannot use a .wfp to MP4 converter online because a WFP file is a project file rather than a playable video. You must open the project in Filmora and export it as MP4.
This guide explains the difference between a .wfp project and a real video file, then walks you through 7 reliable ways to convert video to MP4. Whether you need to convert MOV to MP4, convert MKV to MP4, convert AVI to MP4, or find the best video to MP4 converter for Windows or Mac, you will find the right method below.
First Things First: Why You Can't Convert a Filmora Project (.wfp) File Online
This is the most common point of confusion. A Filmora project file (.wfp) is not a video. Think of it like a recipe: it contains all the instructions—where your clips are, what effects you used, the music timing—but it is not the finished cake. To get the "cake" (the MP4 video), you must "bake" (export) it using the original kitchen (Filmora).

That's why no online converter can process a .wfp file; they don't have the ingredients or the recipe instructions.
Compare the Best Methods to Convert Video to MP4
Before choosing a tool, it helps to compare the most practical ways to convert video to MP4. Some tools are better for exporting a Filmora project (.wfp), while others are more suitable for converting common formats like MOV to MP4, MKV to MP4, or AVI to MP4. The table below compares the most popular options based on ease of use, supported input types, speed, and pricing.
| Method | Best For | Supported Input Types | WFP Support | Difficulty | Speed | Price |
| Wondershare Filmora | Exporting Filmora projects and converting video to MP4 with editing | MOV, MKV, AVI, WMV, MP4 and more | ✔ Yes (Native) | Easy | Fast with GPU acceleration | Free Trial / Paid |
| VLC Media Player | Free local video to MP4 conversion | Most common video formats | ✘ No | Medium | Medium | Free |
| Zamzar (Online) | Quick one-off online video to MP4 conversion | MOV, AVI, WMV and other upload-based formats | ✘ No | Easy | Slow for large files | Free / Paid |
| Movavi Video Editor | Beginner-friendly format conversion and light editing | Popular video formats | ✘ No | Easy | Fast | Free Trial / Paid |
| Adobe Premiere Pro | Professional editing and high-quality MP4 export | Most professional video formats | ✘ No | Advanced | Fast | Paid |
| HandBrake | Batch transcoding, compression, and advanced MP4 settings | Most common video formats | ✘ No | Medium to Advanced | Fast | Free |
If you want the best video to MP4 converter for ease of use, Filmora is a strong choice. If you need a free video to MP4 converter, VLC and HandBrake are reliable options. If you only need a quick browser-based tool for a small file, an online video to MP4 converter like Zamzar may be enough.
Exporting Filmora Projects (.wfp) to MP4 (The Official Way)
Many users search for a Filmora to MP4 converter online, but it's important to know that .wfp files are project files, not videos. To convert them, you must use Filmora's export function:
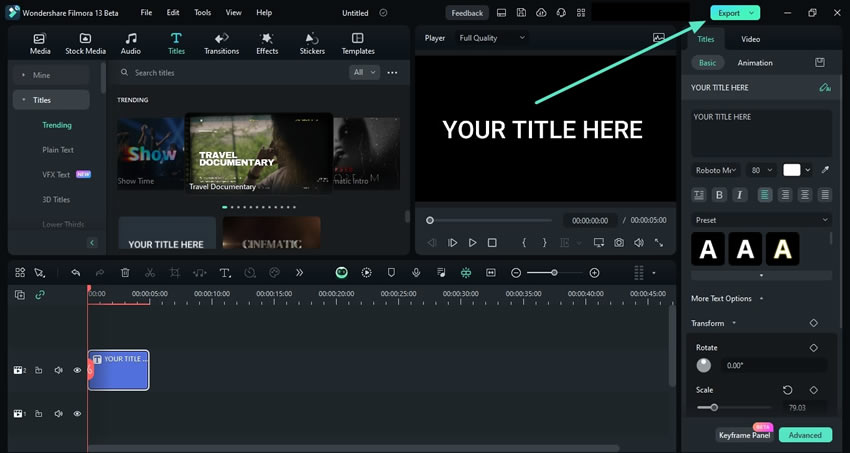
- Select one or more clips on the timeline, right-click, and choose export to save them individually.
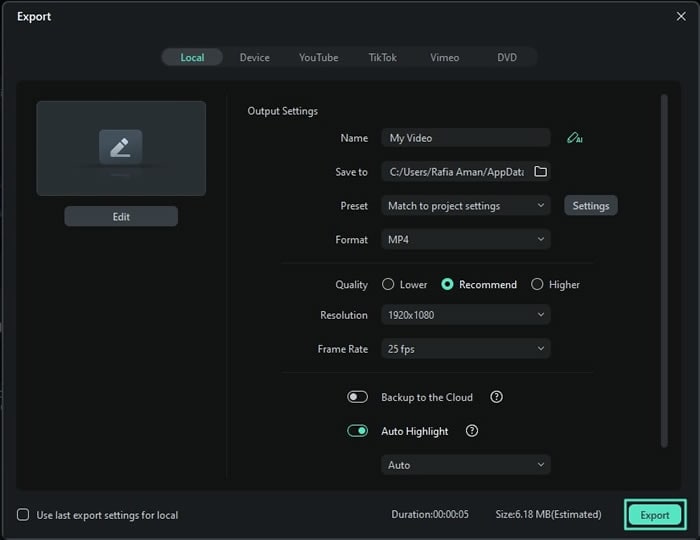
- Set the video format, quality, save path, and other options in the new window.
- Click "Export" to start exporting your clip(s) and monitor the progress.
Using Filmora as a Universal Video to MP4 Converter
Filmora is a perfect solution for those who have enough video editing experience, but if you're new to editing a video and looking for a simpler video converter, then Filmora video editor will be a better suit for converting videos to MP4.
Converting video to MP4 format is easy in Filmora. Here is how to do it:

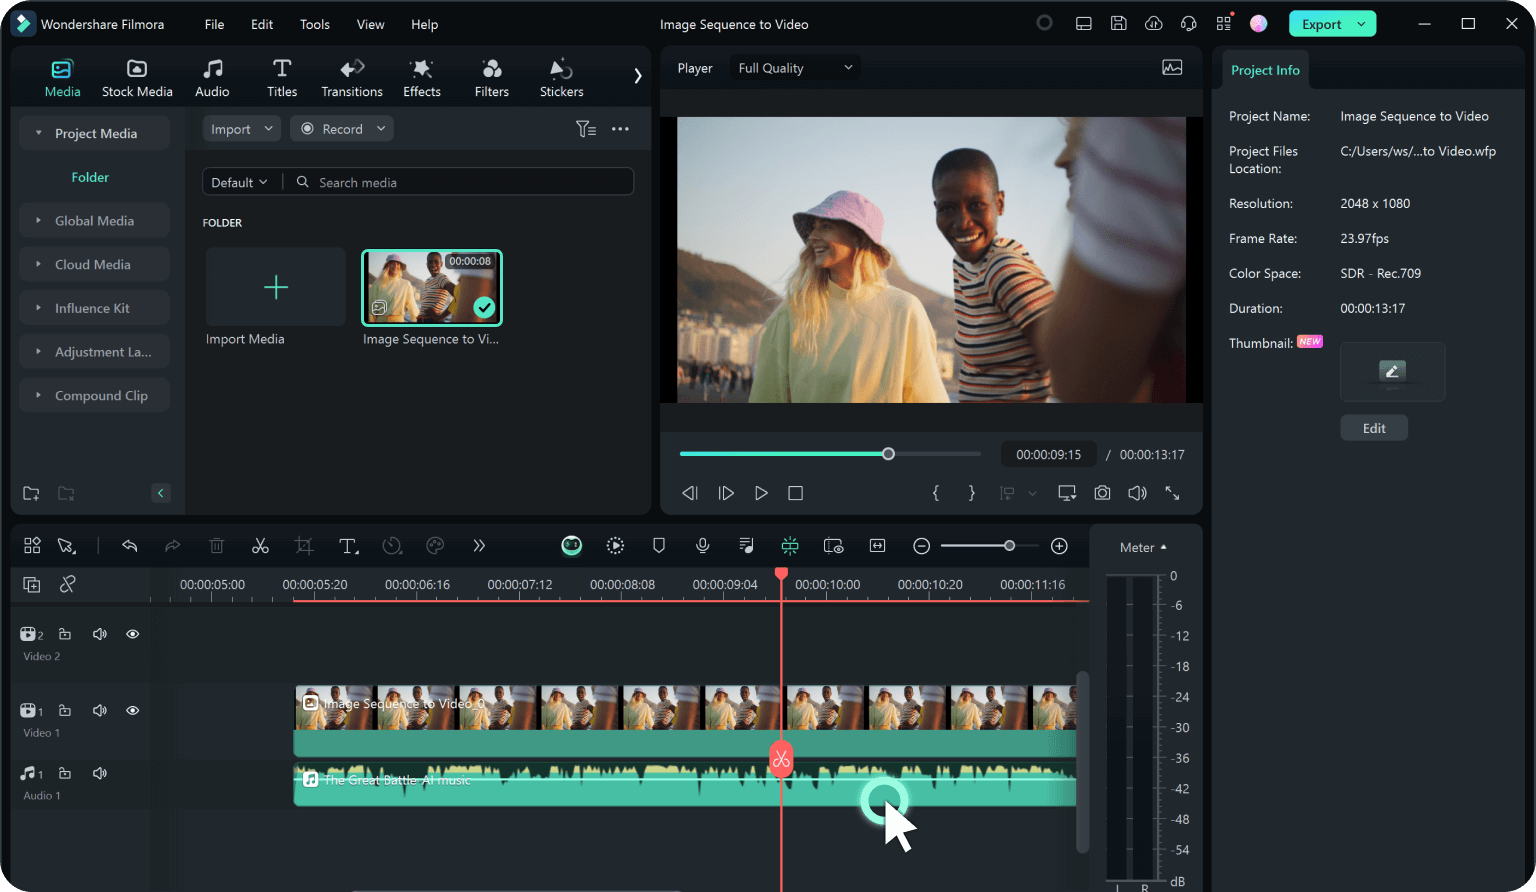
Below is a quick tutorial on how to edit videos with Filmora. Download the free trial and follow along.

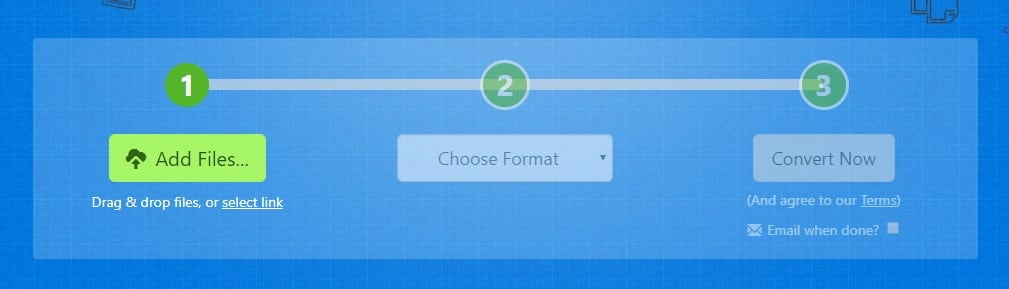
Using Free Online Converters for MP4 (Like Zamzar)
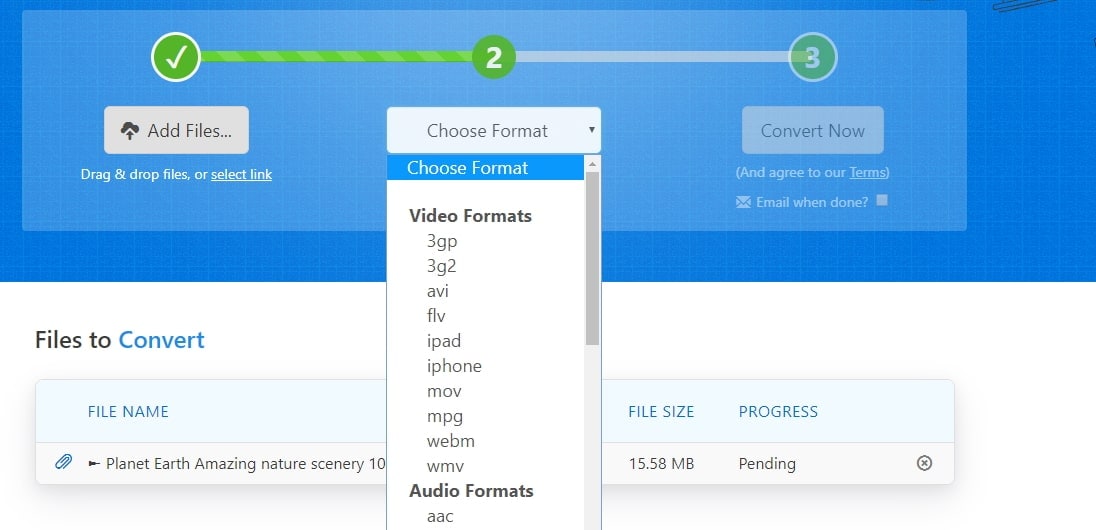
Zamzar is a web-based program that is infused to process converting operations at a blazing speed. Being a simple and easy medium of converting, it can process the conversion of audio, eBooks, docs, images, and several other compressed formats. Within a fraction of a minute, users can fetch the desired output. They just have to upload the file or drag it to the program, perform customizations, and convert video to MP4 accordingly.
In this section, let us understand how to convert video to MP4 easily using this online tool.
How to Convert Video to MP4 with VLC Media Player
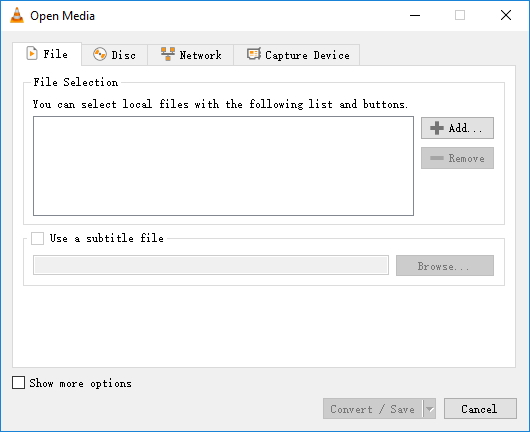
One of the reliable mediums of media players is VLC Media Player – a free, open-source which was developed by the VideoLAN project. Commonly used for playing simple to complex kinds of popular formats, this free source platform allows users to convert, compress, and save video at a good speed.
Now, let us understand how to convert any kind of video to MP4 using VLC Media Player.
Note: On Mac systems, use the Convert/Stream option.
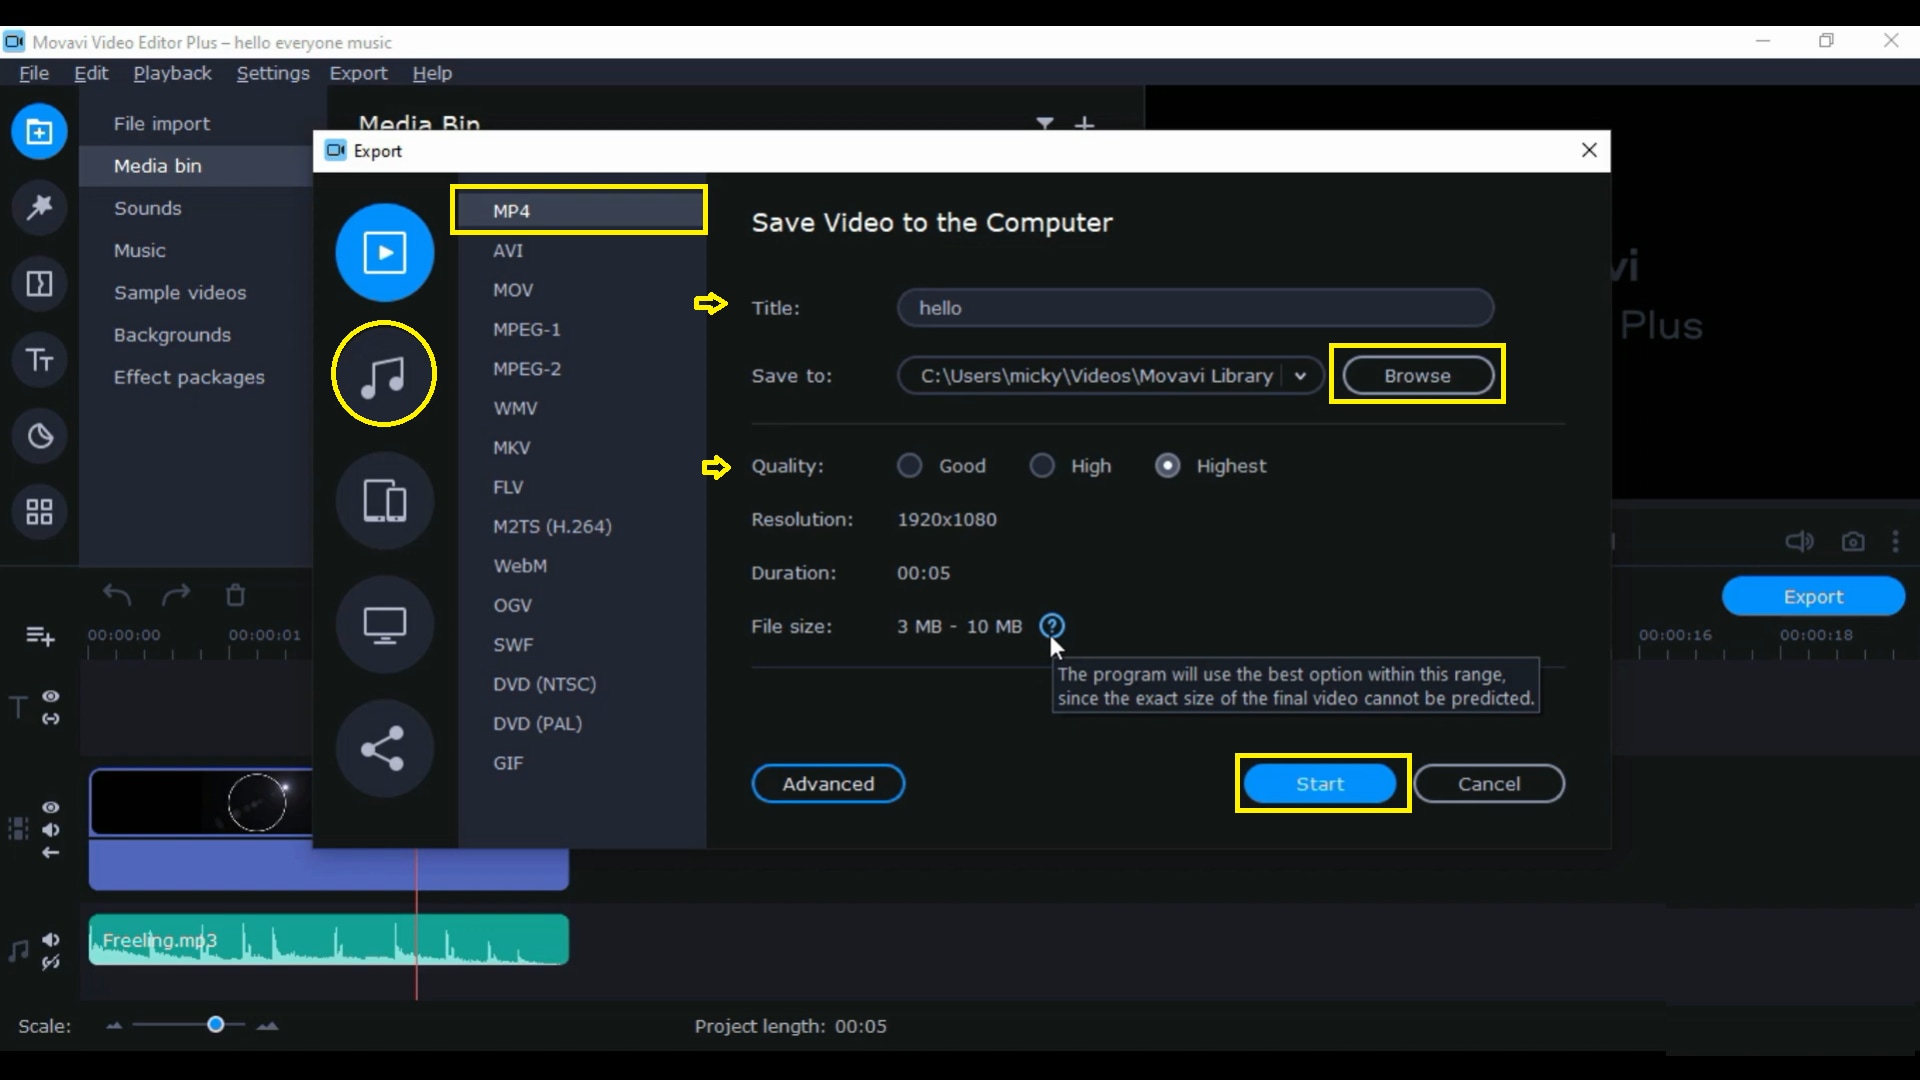
Converting to MP4 with Movavi Video Editor
Movavi Video Editor is quick and easy to convert videos from different formats. It is highly recommended for beginners.
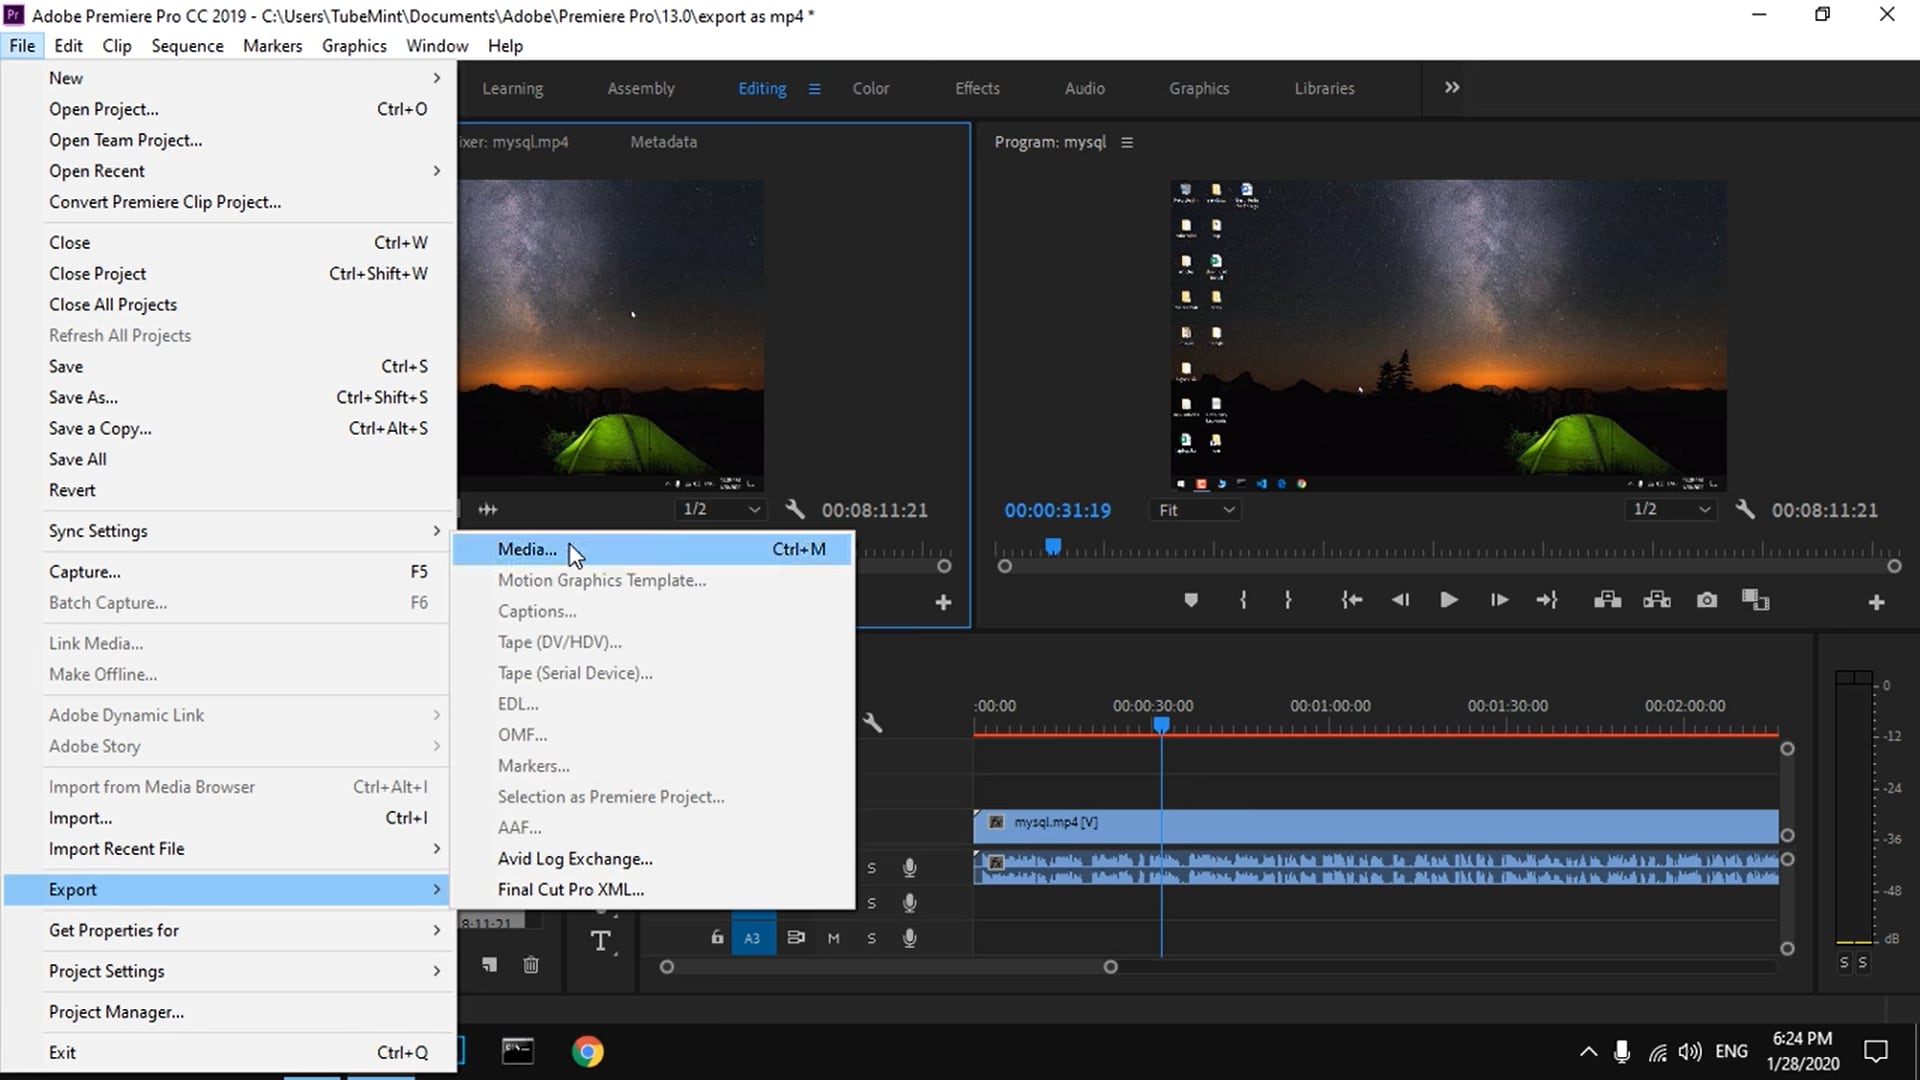
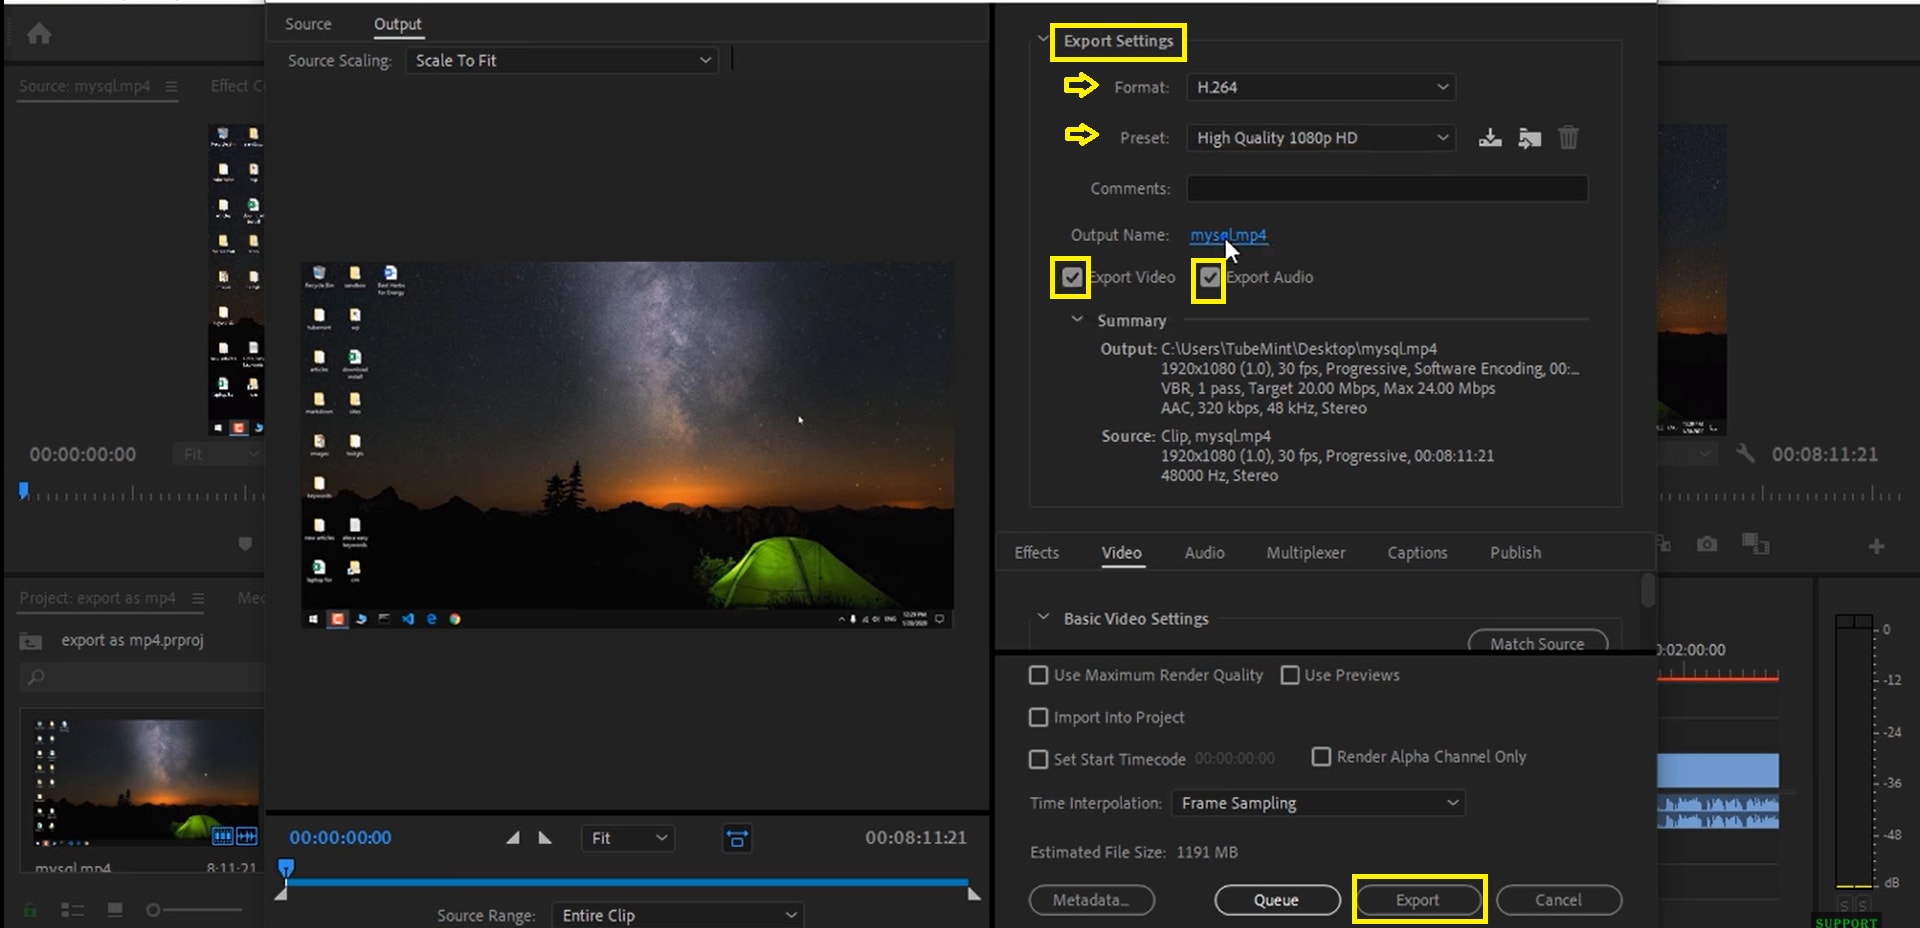
Exporting MP4 Files from Adobe Premiere Pro
Premiere Pro is a video editor which is compatible with both Windows and Mac. All the editing procedures are the same for both. So let's get started! Here is the video clip, which has been edited and is ready to export.
Using HandBrake for Advanced MP4 Conversion
Now, we shall teach you how to use the HandBrake. Which is a free and open-source video transcoder. It is a tool for converting video for almost any format to a selection of widely supported codex.
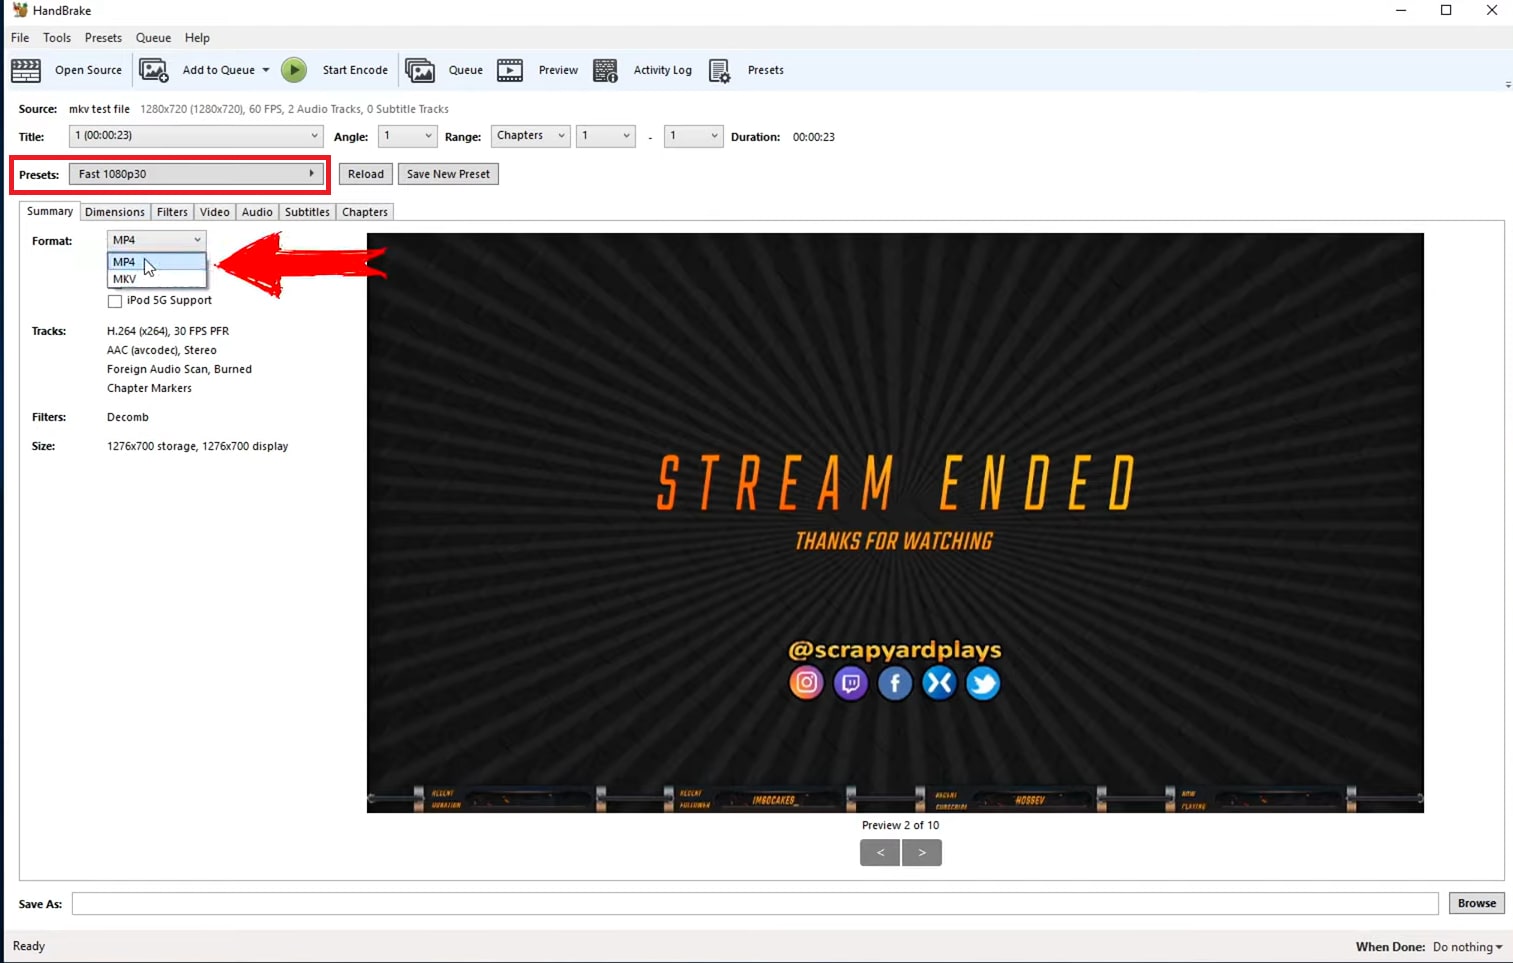
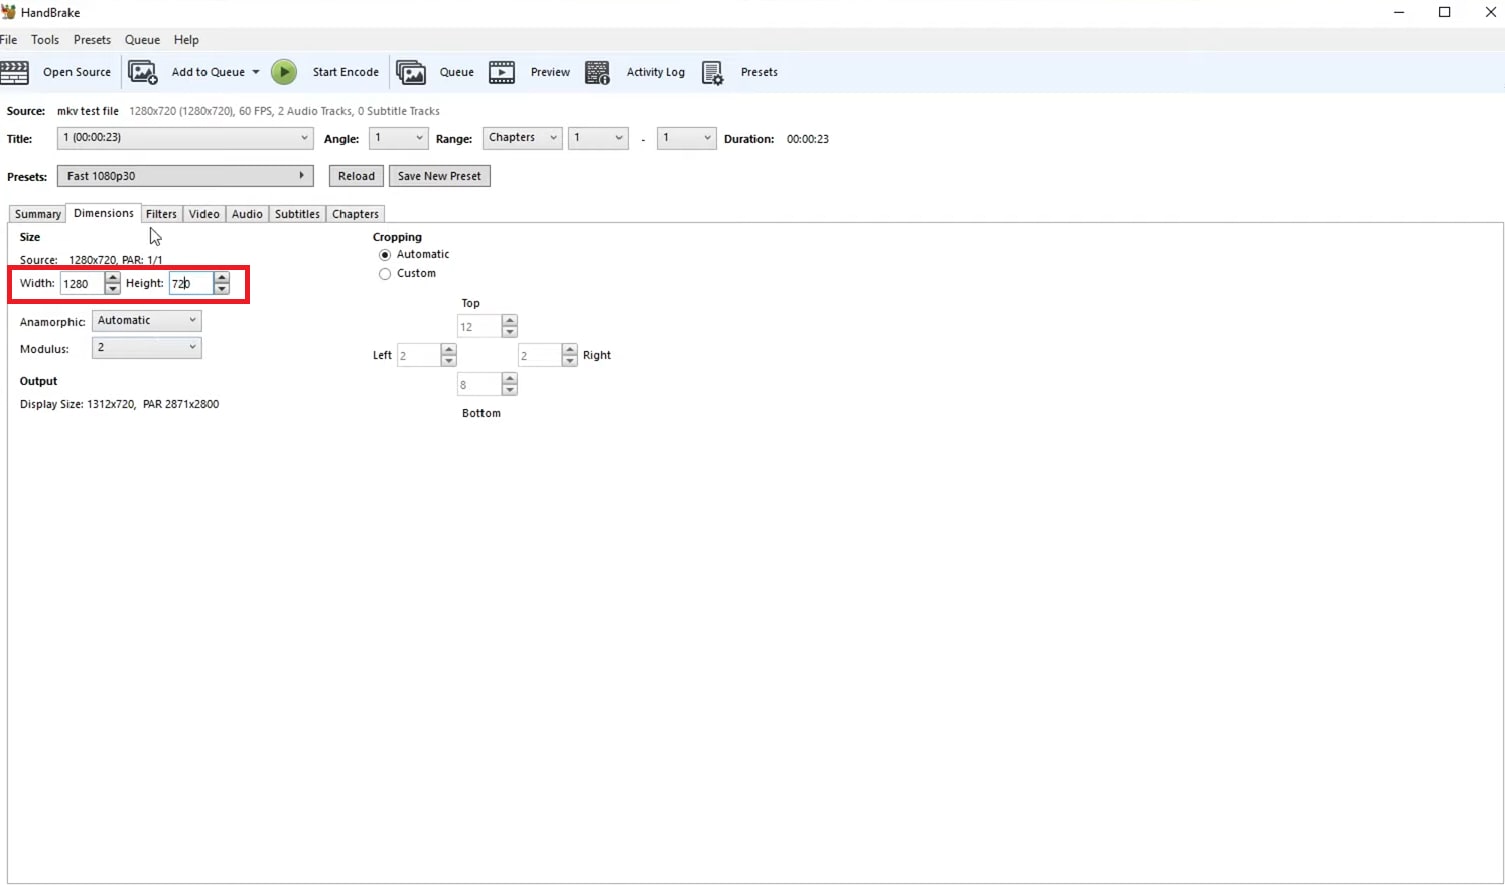
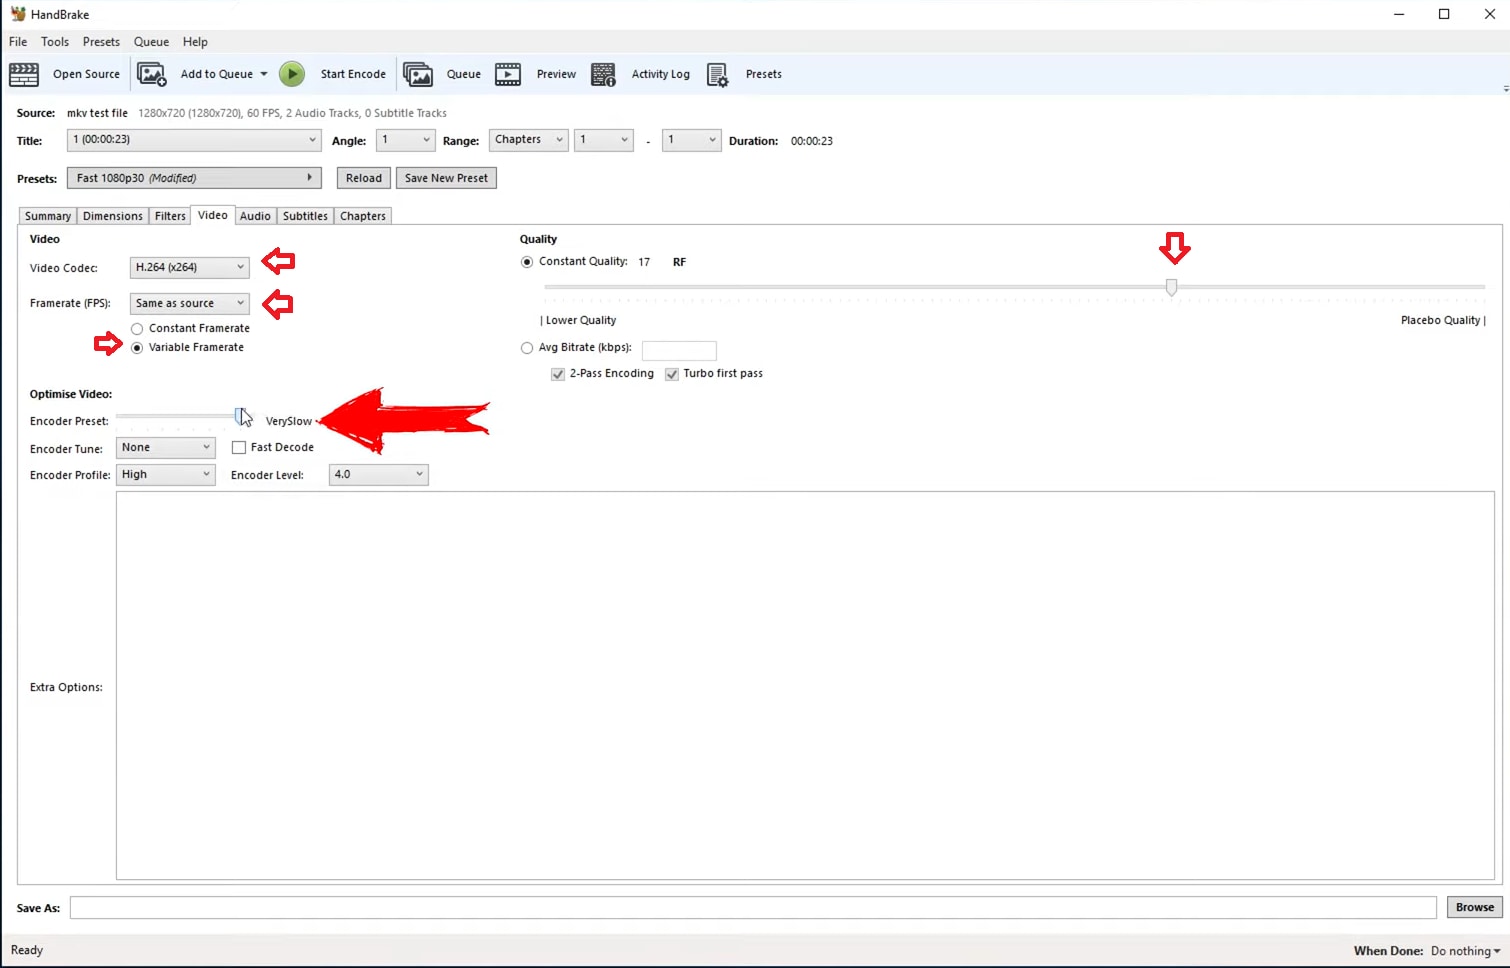
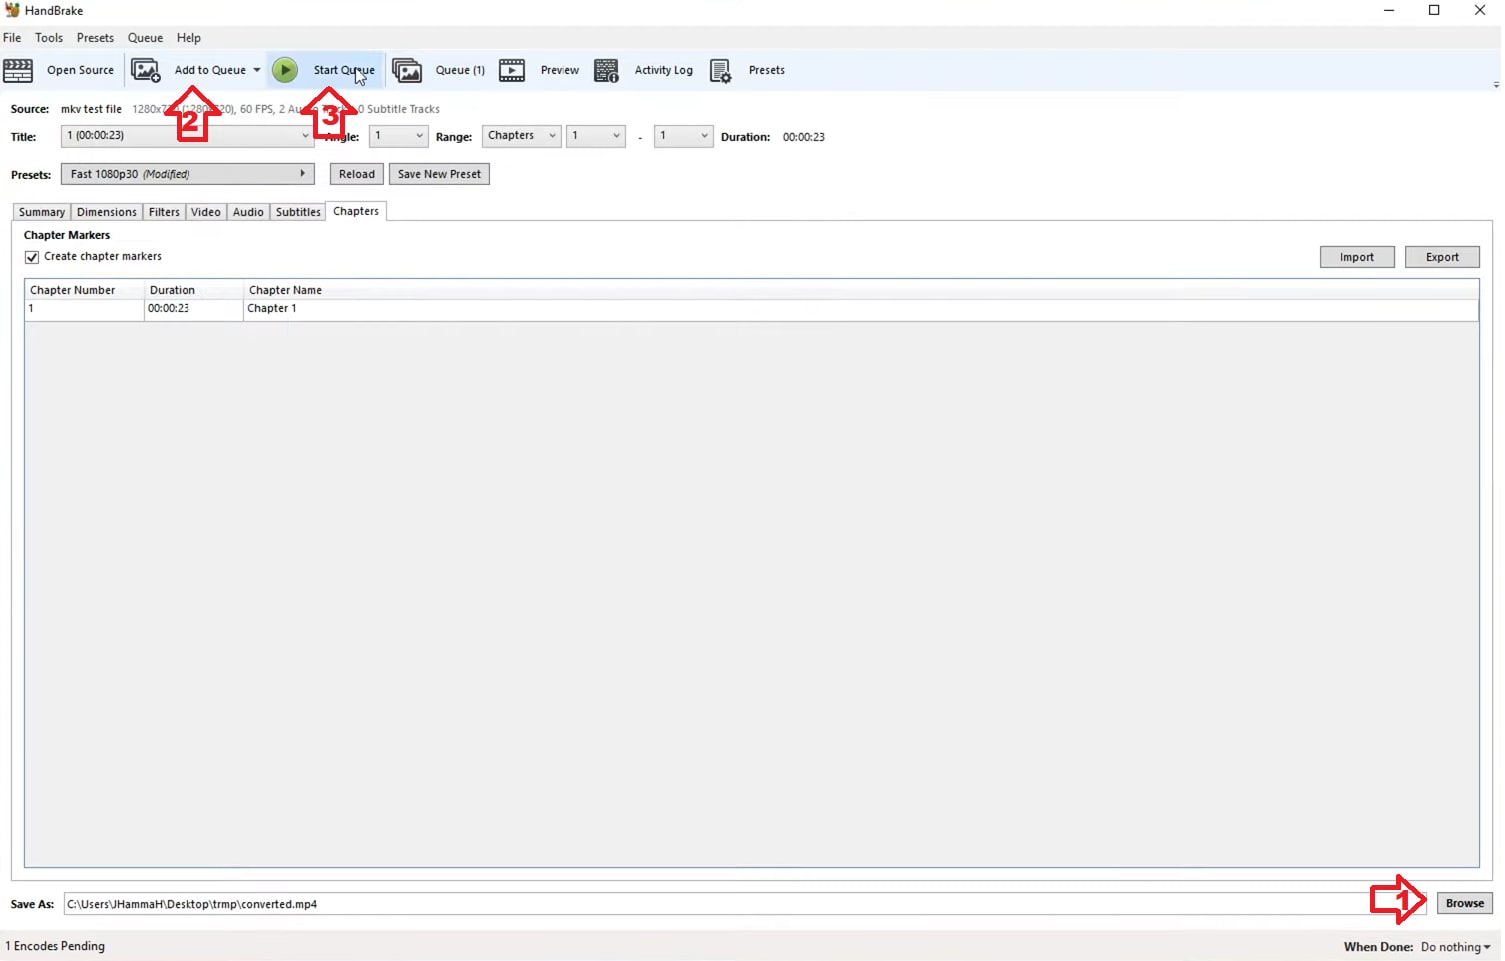
It is simple and works well for converting an MP4 file.
Conclusion
MP4 is the de facto standard for any system, device, and future models. To adapt to it, conversion sorts out to be a reliable means. To make it possible, we've briefly touched upon the different kinds of ways to convert any video to MP4 easily. For one's convenience, one can opt to work on a particular method. However, free faculties convert video to MP4, but it takes ages to do so. To curb such problems, using Filmora is an excellent way of converting and dashing in special kinds of effects!
FAQ
Below are the most frequently asked questions about how to convert video to MP4, including MOV to MP4, MKV to MP4, AVI to MP4, and exporting Filmora projects.
-
Can I convert video to MP4 for free?
Yes. You can convert video to MP4 for free using tools like VLC Media Player, HandBrake, or online video to MP4 converters. If you want more editing features and a simpler workflow, Wondershare Filmora is also a good option with a free trial. -
How do I convert MOV to MP4 on Windows or Mac?
To convert MOV to MP4, import the MOV file into Filmora, VLC, HandBrake, Premiere Pro, or another video converter, choose MP4 as the output format, and export the file. The process is similar on both Windows and Mac. -
Can I convert MKV to MP4 without losing too much quality?
Yes. To convert MKV to MP4 with minimal quality loss, use a desktop tool like Filmora or HandBrake and keep the original resolution, frame rate, and a high-quality H.264 export preset whenever possible. -
What is the best video to MP4 converter for beginners?
For beginners, Wondershare Filmora and Movavi are among the easiest tools to use. They offer simple import, edit, and export workflows, making them suitable if you want to convert video format to MP4 without technical settings. -
Can I use an online video to MP4 converter for large files?
Online converters are useful for small files and quick jobs, but they may be slower for large videos and often have file size limits. For better speed, privacy, and export control, a desktop video to MP4 converter is usually the better choice. -
Why can’t I convert a Filmora project (.wfp) to MP4 online?
A .wfp file is not a video file. It only stores project information such as clip order, effects, music, and edit decisions. To convert a Filmora project to MP4, you must open the original project in Filmora and export it from there. -
How do I convert AVI to MP4?
To convert AVI to MP4, open the AVI file in Filmora, VLC, HandBrake, or another video converter, select MP4 as the output format, and start the conversion. This is one of the most common ways to improve compatibility for playback and sharing. -
Why is my converted MP4 file so large?
Large MP4 files are usually caused by high bitrate, high resolution, or long video duration. To reduce file size, lower the bitrate slightly, use H.264 encoding, and choose a resolution that matches your actual playback needs. -
What is the fastest way to convert video to MP4?
The fastest way to convert video to MP4 is usually with a desktop program that supports hardware acceleration, such as Filmora or Premiere Pro. Online converters are convenient, but upload and download time often makes them slower overall. -
What format settings should I use when exporting MP4?
For most users, MP4 with H.264 video codec and AAC audio is the best choice. Keep the same frame rate as the source video unless you have a specific reason to change it, and choose a bitrate based on your target quality and file size.
