
 100% Security Verified | No Subscription Required | No Malware


 ChatGPT
 Perplexity
 Gemini
 Claude
 Grok
Grok
Adding relevant and attractive elements like text not only enhances the overall look of your video but also makes it more appealing for the audience. With the integration of advanced technology, adding beautiful text to your videos and other media has become pretty easy. Most content creators used to like Wondershare Filmora to give their videos creative flair by adding compelling text.
However, if you are new to this field, you might struggle with finding the best text fonts and ways to incorporate them in your visual content. In this article, we will discuss the best solutions for how to add text in video in Filmora. Read this article till the end to get an insight into all the wonderful font types along with their complete guide.
In this article
Part 1. Top 8 Elegant Font Types Offered by Filmora
Filmora is an all-in-one multimedia editor that allows users to create compelling content by adding various basic and AI-powered enhancements. It provides the ability to add various types of text and titles to your videos and images to make them visually appealing. The tool offers an extensive library of font templates for users to select according to their preferences.
 secure download

Besides manual text edition, the tool offers automated ways to insert text into your content using advanced AI. Before moving towards how to add a title in Filmora, let us first explore some of the most elegant font types this comprehensive tool offers:
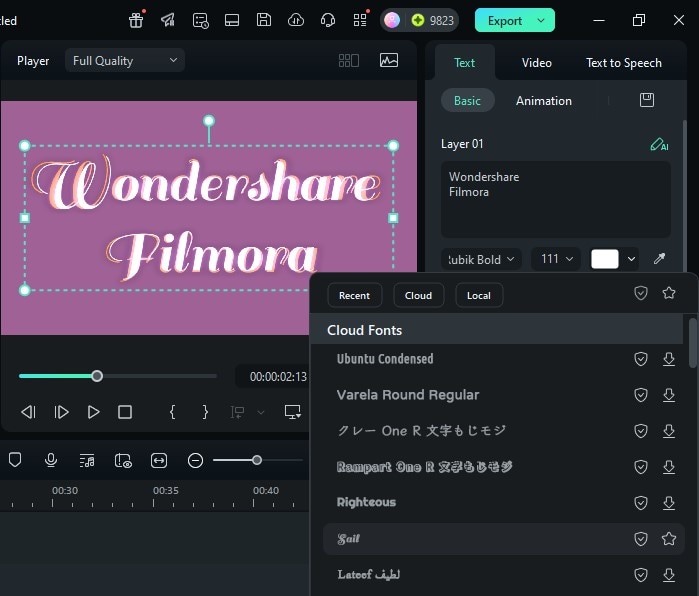
1. Sail
It is a beautifully crafted script font with a vintage flair that features flowing and delicate strokes. The elegant swashes give it an airy and sophisticated look. The dynamic uppercase letters and smooth curves make it perfect for stylish titles or any design that needs a touch of classic elegance and personality.
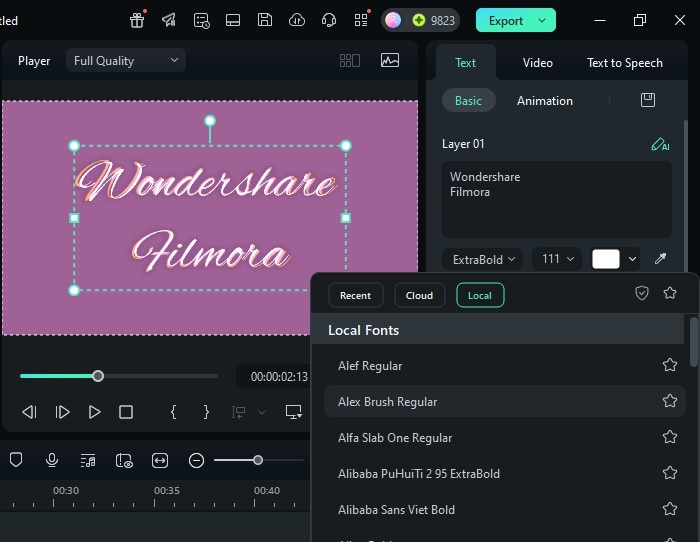
2. Alex Brush Regular
If you're looking for a cursive script font with a flowing feature, this font is ideal for you. The graceful brush and readability of this text phone make it an ideal choice for adding as a title for any intro video. The strokes are a perfect balance between friendliness and formality, while adding a touch of warmth and charm.
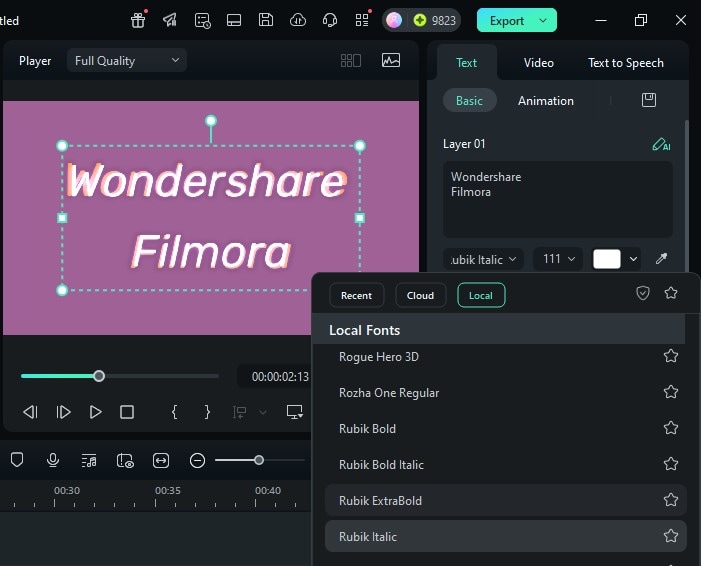
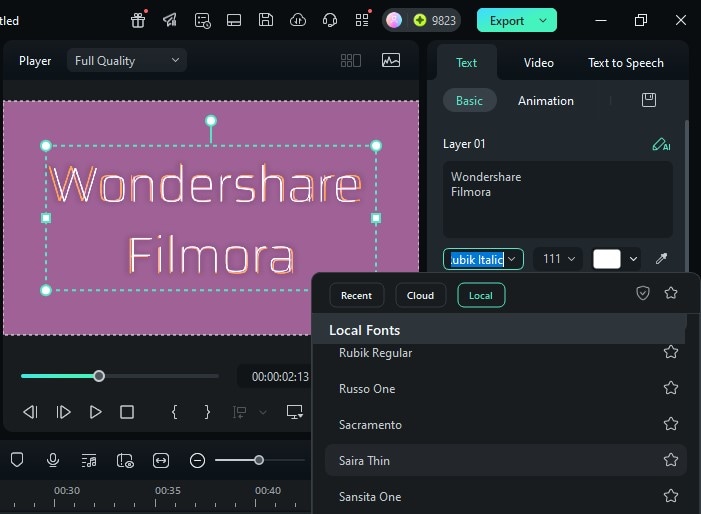
3. Rubik Italic
One of the modern sans-serif typefaces with light strokes that give it a refined and airy appearance, Rubik Italic is the right font. The metallic style introduces a dynamic edge while enhancing emphasis to maintain the crisp and legibility of the text. When you want to enhance your video's appeal, learning how to add text in Filmora can help you easily incorporate such fonts.
4. Saira Thin
Saira Thin is a minimalist typeface with simple strokes, which is suitable for sleek modern video overlay. Elegance and simplicity help in providing an understated design, a touch of modernity without overwhelming the content.
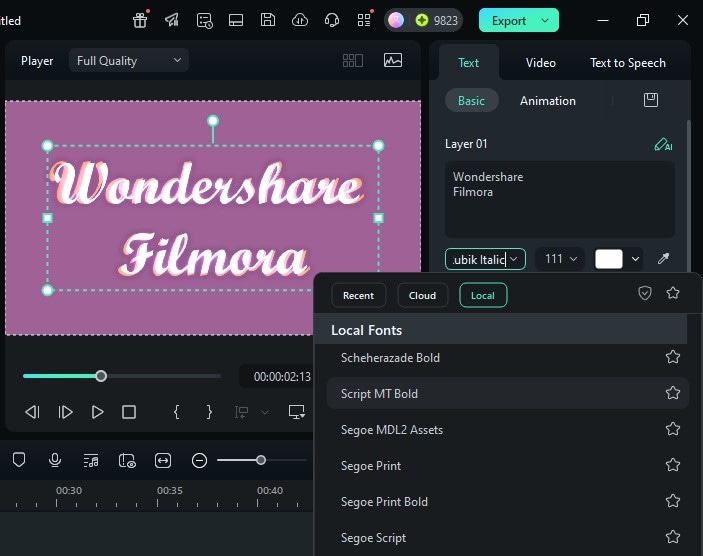
5. Script MT Bold
This is a classic bowl script font with sweeping strokes to create a strong presence with an artistic touch. Users who want to make an impactful headline or logos while combining the vintage charm with confident Expression go for this font.
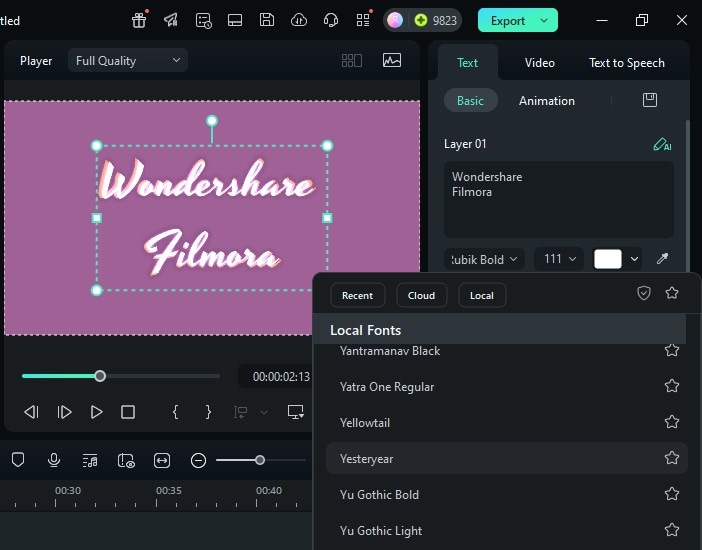
6. Yesteryear
Retro-inspired script with smooth flowing lines and subtle vintage touches, Yesteryear is one of the most elegant fonts offered by Filmora. It brings out nostalgia and personality while landing the timeless charm with the handcrafted feel. If you're wondering how to edit text in Filmora, this font allows you to easily customize your text to achieve that perfect retro look.
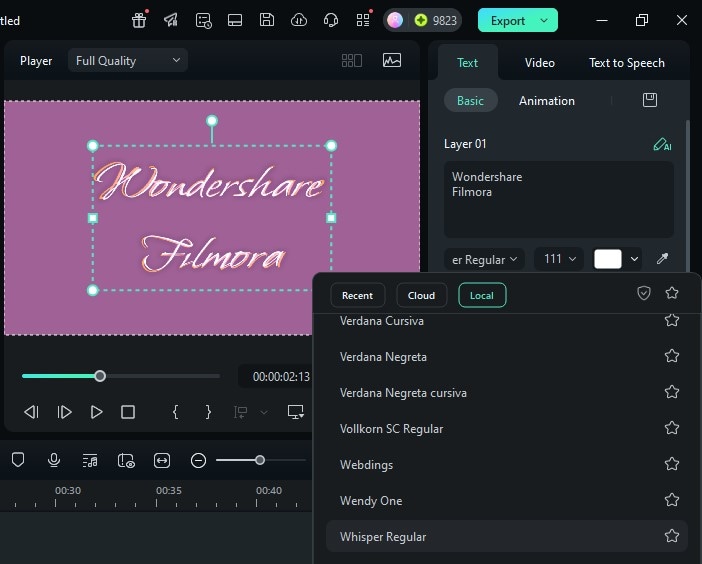
7. Whisper Regular
If your video requires a delicate handwritten style with gentle curves, Whisper Regular is the right choice. The understated elegance of this font makes it perfect for personal messages and subtle blinding while enhancing the artistic side of the video.
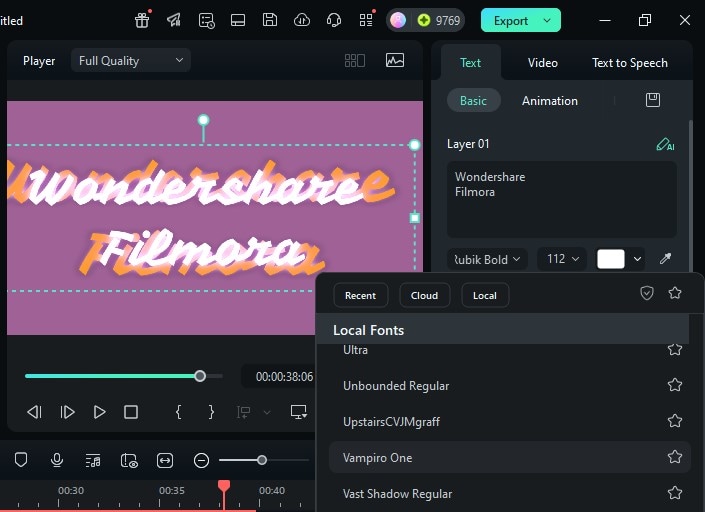
8. Vampiro One
It is a bold and Gothic-inspired display font with dramatic strokes and edgy characters. You can use this font to give striking titles or themes with a mysterious and bold vibe in any visual project. Learning how to add text to video in Filmora will help you use this font effectively and creatively.
secure download
Part 2. Different Methods of Adding Text to Videos With Filmora Desktop
The below section covers all the methods you can utilize to add and customize the text using the intuitive interface of Filmora desktop:
Method 1. Titles Templates Library
Filmora offers an extensive library of titles from which users can select their choice conveniently. From Halloween theme text titles to simple bold design, you get various options to select from. The applied title can be customized in terms of font, color, and size.
Moreover, you can adjust the position of the applied text wherever you want on the screen. To learn how to edit text in Filmora using the title templates, read the steps mentioned below:
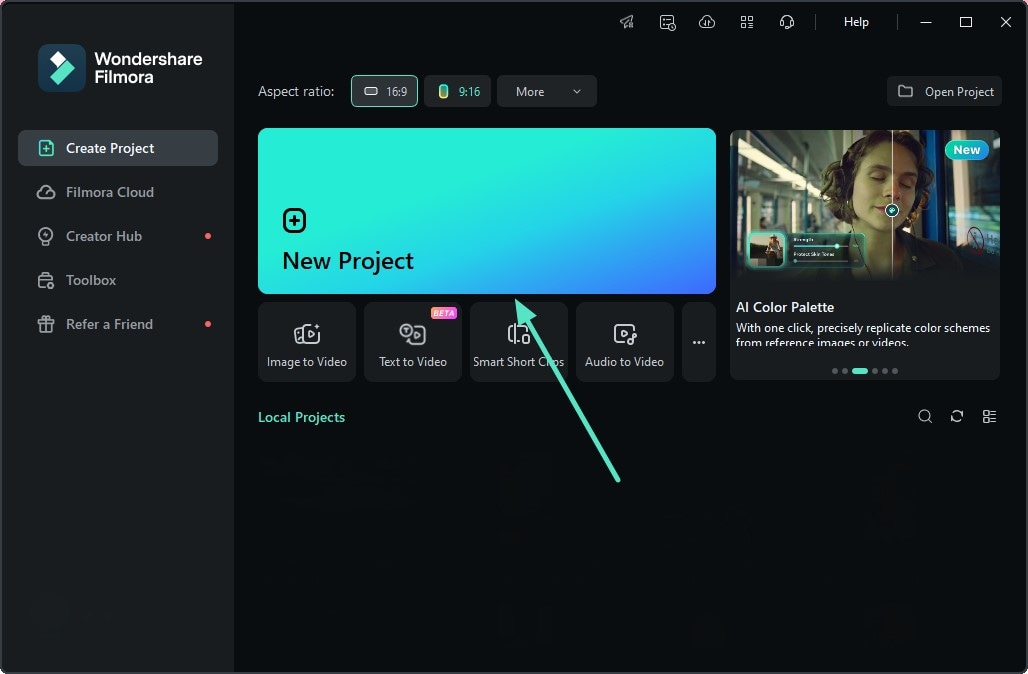
- Step 1. Start By Creating a New Project. To begin, launch the tool on your PC and locate the "New Project" tab within the homepage. Next, click on it and import the video on which you want to add the text from the titles template. Drag the video to the editing timeline of the tool to continue with the process.
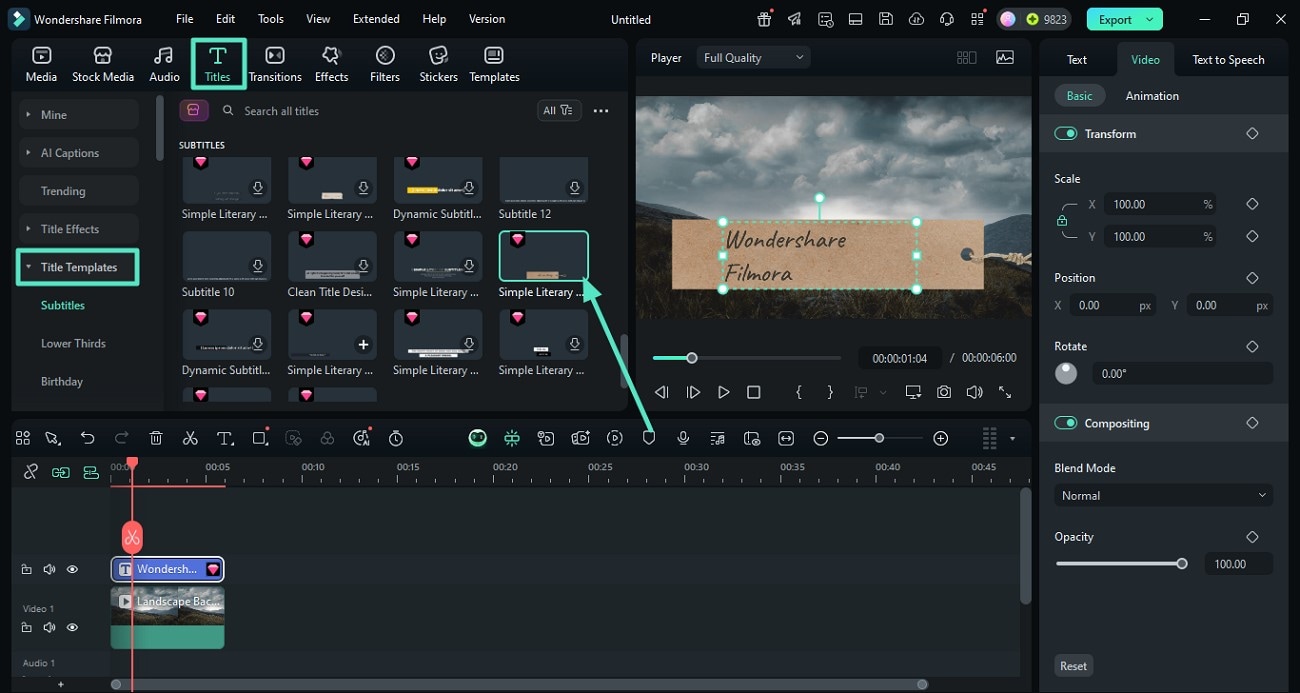
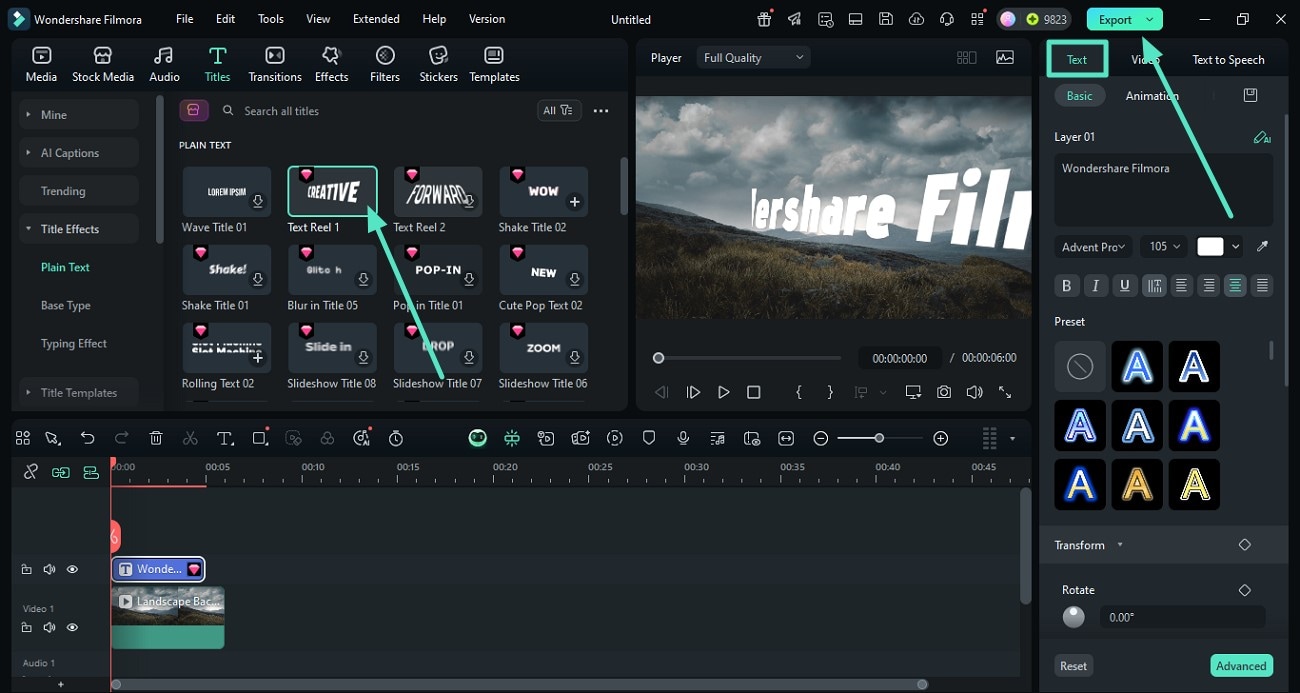
- Step 2. Opt For the Title Templates. Access the "Titles" option located on the toolbar of the interface and expand the "Titles Template" section from the left. Next, choose the template of your choice from the options provided and apply it to the video using the "+" icon.
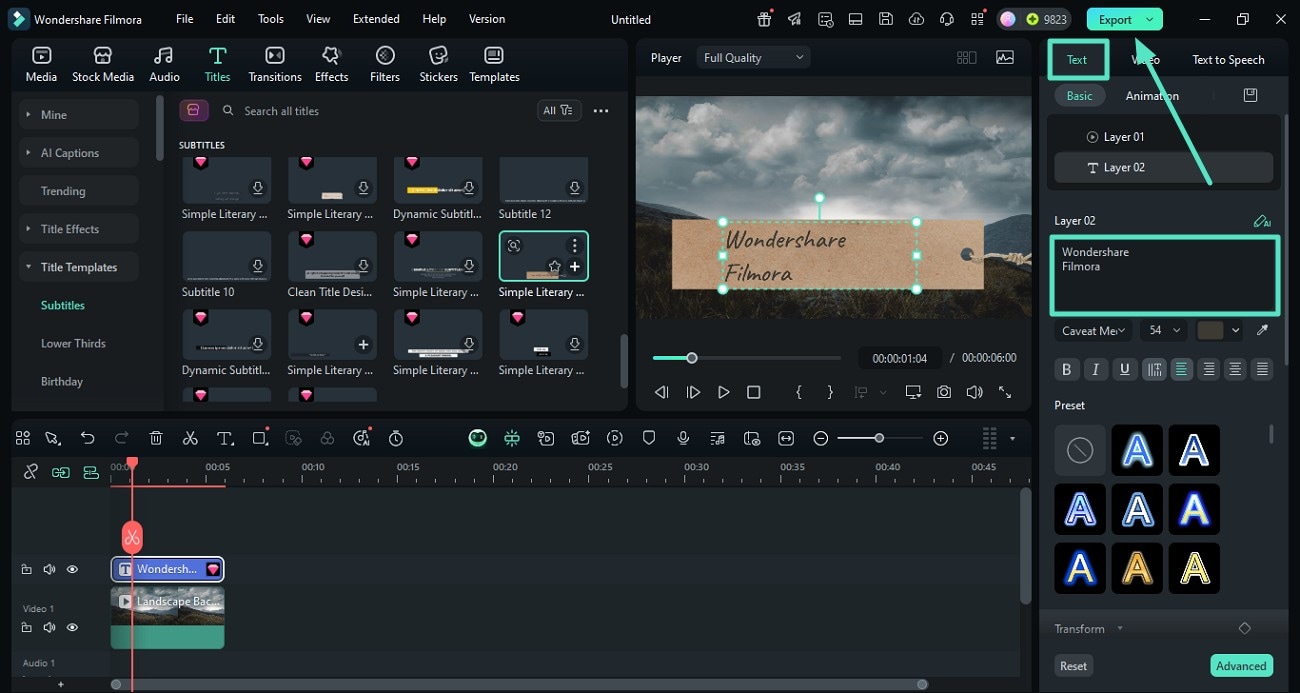
- Step 3. Customize the Text and Export. Once the template is applied, add the relevant text using the "Text" panel on the right. Customize the added text according to your preferences by accessing the options within the panel. Head to the top-right corner of the interface and press the "Export" button once you are satisfied with the applied text.
Method 2. Titles Effect
Filmora provides a powerful "Titles Effects" feature that allows users to instantly elevate their videos by applying dynamic and visually appealing text animations and effects. Whether you want a wiggly water text effect or a blurred text with balanced visibility, you can apply all types of effects to your text.
This feature makes your videos look more interesting with the animated text on the screen. Learn how to add text to video in Wondershare Filmora by accessing the Title Effects in the guide mentioned below:
- Step 1. Choose the Text Effects Option. After importing the video on which you want to add the text within Filmora's interface, head to the toolbar and opt for the "Titles" option. Next, enable the title effect section from the left side of the interface. Select the category from the options provided, like 3-D titles on Neon, and choose the title effect of your choice.
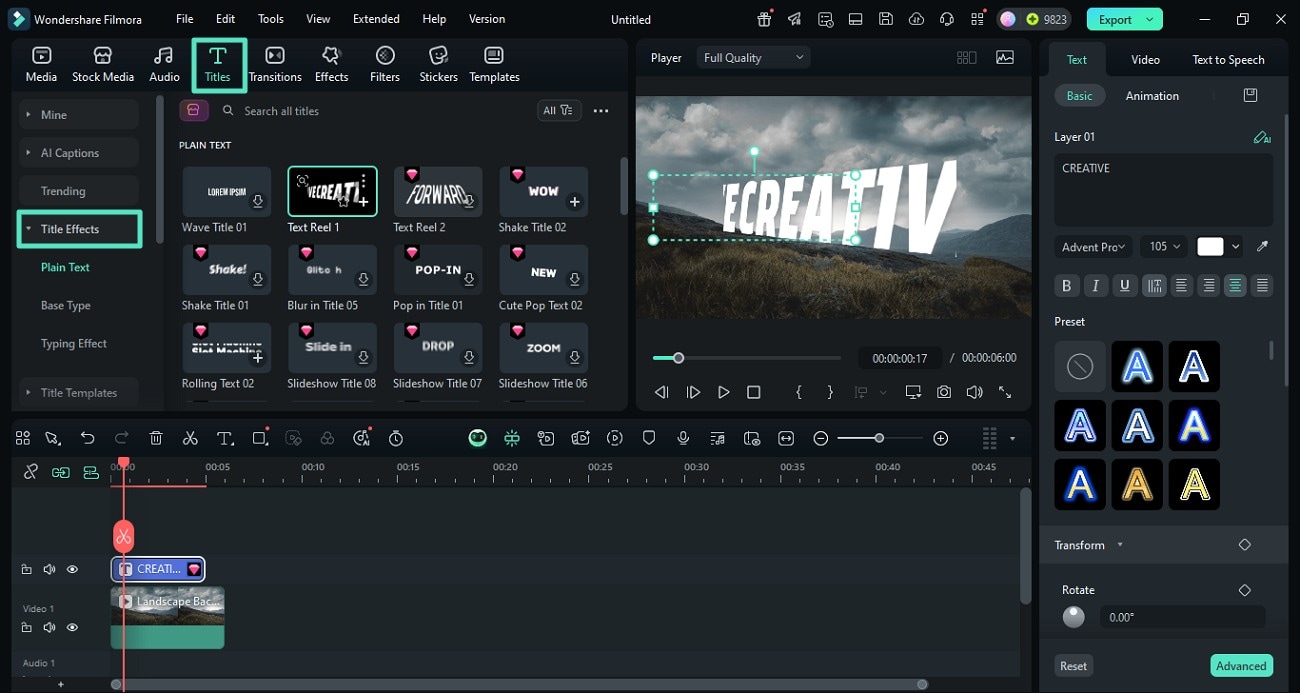
- Step 2. Apply the Title Effect. Apply the title effect by pressing the "+" icon located on the thumbnail. Now, head to the right side and access the "Text" panel to customize the text of your choice. Choose the font and size from the options provided and adjust the text according to your preferences. Finally, when all the editing is done, press "Export" to save the applied text to the video.
secure download
Method 3. Speech to Text
The speech-to-text feature of Filmora allows users to convert the spoken words in the video into text. The text can be customized in terms of appearance according to your preferences. You can select the language of the video and save the generated output in multiple formats, such as SRT. Provided below is a complete step-by-step guide to access the speech-to-text feature of this incredible tool:
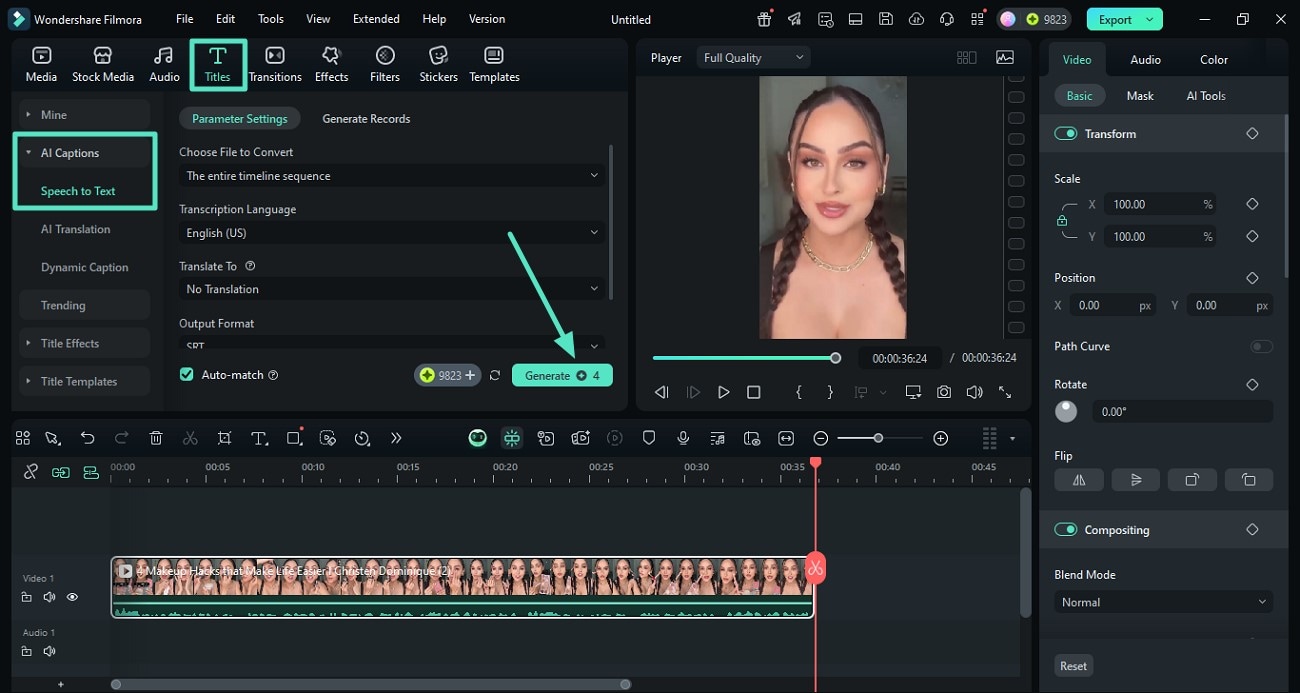
- Step 1. Access Speech to Text Feature. Once you have imported the video to the tools interface, head to the "Title" section from the toolbar and expand the "AI Captions" option. Now, press the "Speech-to-Text" option and select the language format and other settings. Finally, press the "Generate" button to begin the conversion process.
- Step 2. Customize the Generated Text. When the text is generated with the Add Text feature in Filmora, double click on the text track to enable the "Edit Subtitle File" window. Here you can edit the text generated and apply different presets according to your preferences. Moreover, you can enable the customization section to add effects, adjust opacity, and add a background to the text.
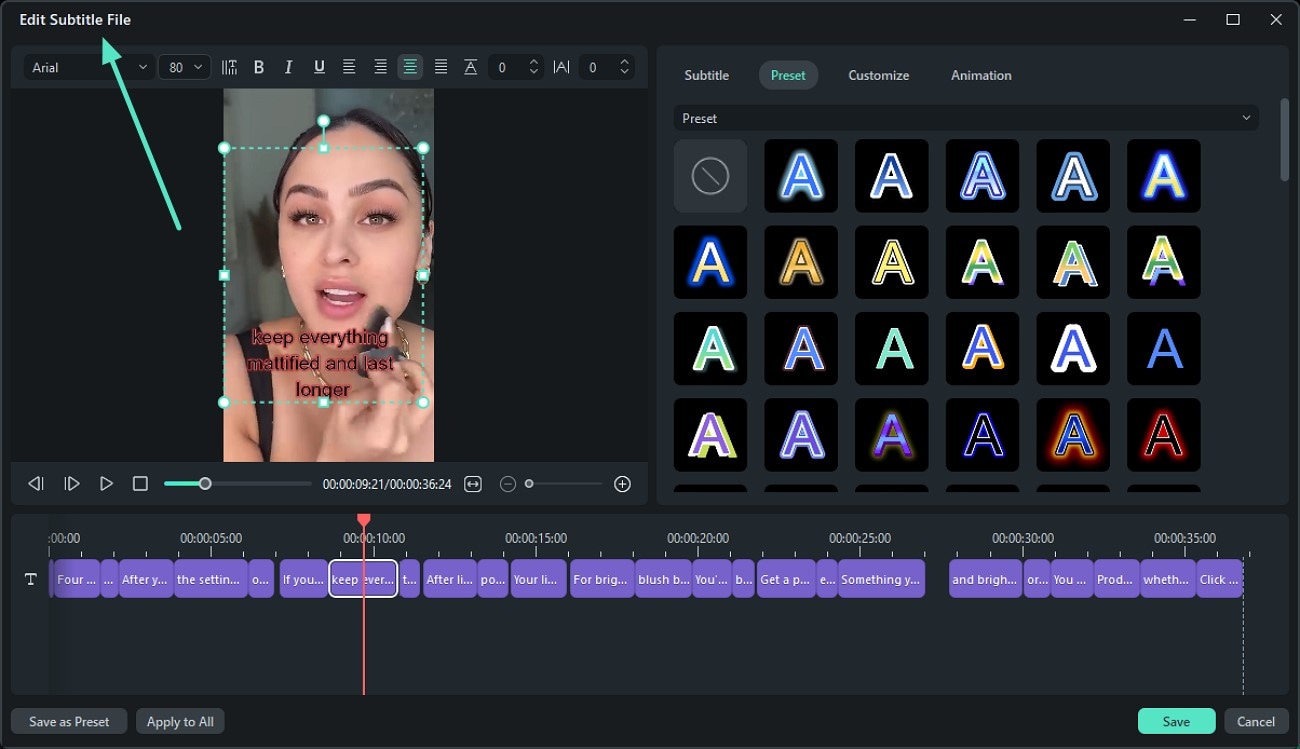
- Step 3. Animate the Text. Enable the "Animation" section on the right side of the screen to add text animation to your generated captions. You can add animation for the start and end of the text appearance or apply a loop animation as well. Once all the setting is done, press the "Save" button located at the bottom of the interface to apply the changes to the text.

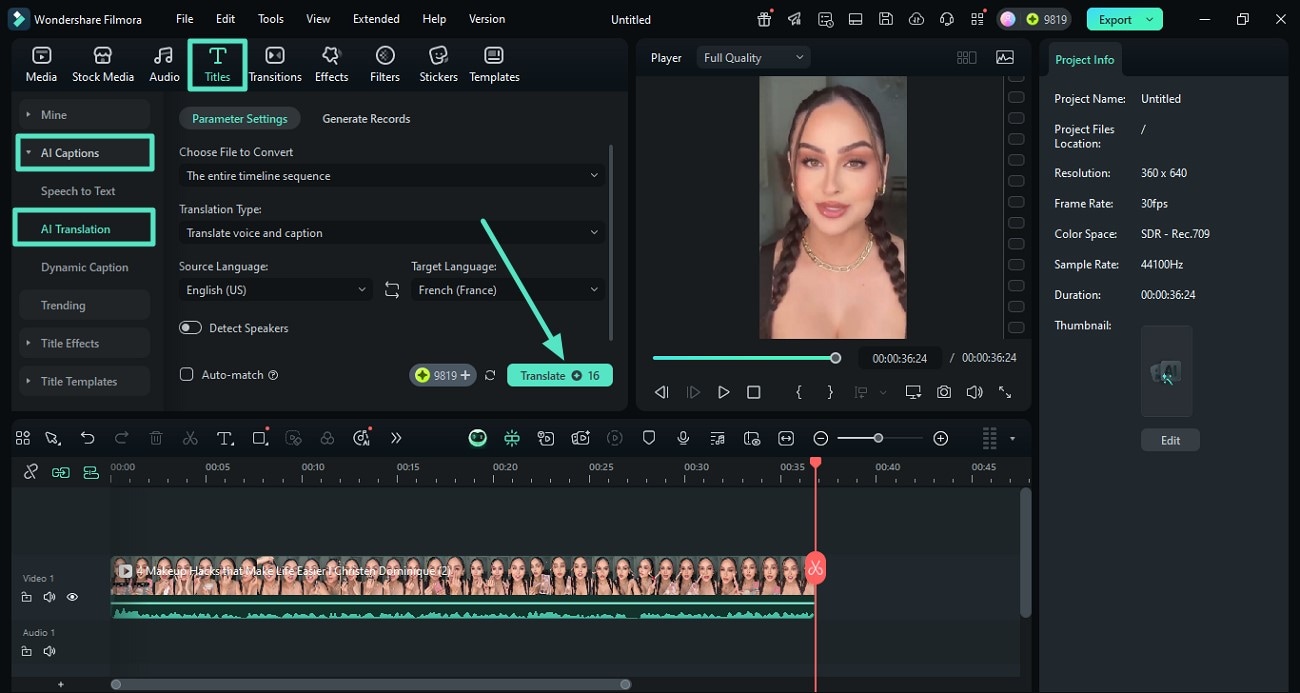
Method 4. AI Translation
The AI translation utility offered by the Filmora desktop allows users to generate text in multiple languages from the spoken words in their videos. You get the ability to customize the text according to your needs and preferences. The lip sync feature accurately synchronizes the spoken words and the translation of the video. To learn how to add a title in Filmora, follow the steps mentioned below:
- Step 1. Access the AI Translation Utility. From the same "AI Captions" section, enable the "AI Translation" option after importing your video to the tool's interface. Next, specify your original and target language and other settings, and press the "Translate" button.
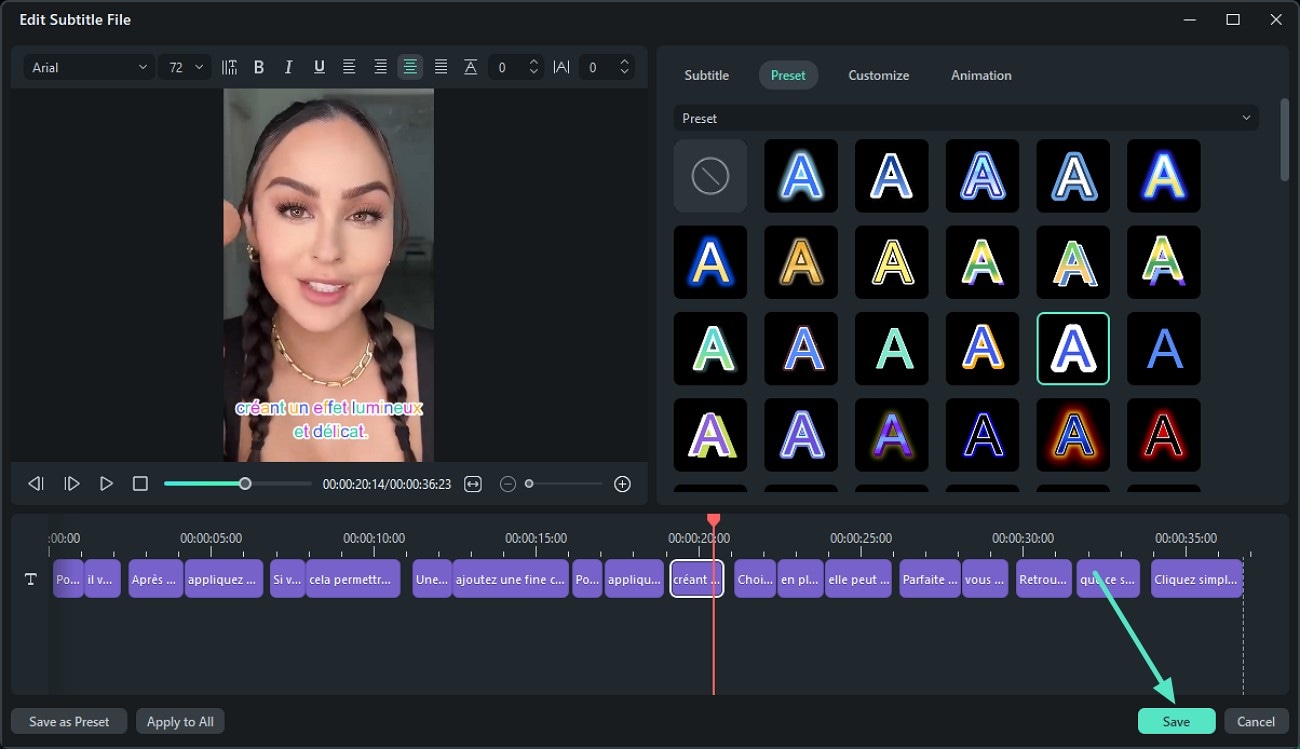
- Step 2. Customize the Translated Text. After the translation is generated, double tap the text track to enable the customization window. Now, select from the preset or personalize each attribute and press the "Save" button at the bottom once applied.
secure download
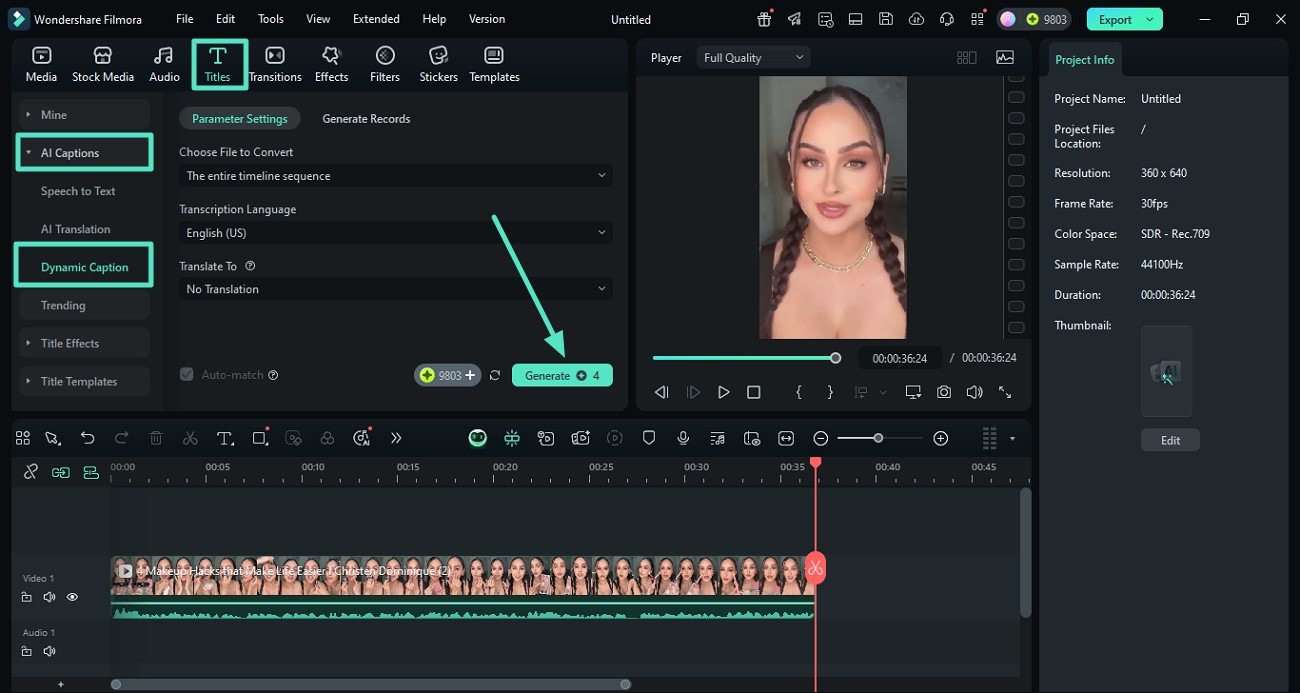
Method 5. Dynamic Captions
If you want the text of the video to emphasize each word when spoken in the video, dynamic captions is the right utility. This feature generates automated captions for your videos and highlights the text being spoken in the video at that moment.
You can select from different presets to change the layout of the generated dynamic captions. Follow the step-by-step guide mentioned below to learn how to add text to video for free using the dynamic captions utility:
- Step 1. Acquire Dynamic Captions. Once you have entered the editing interface of Filmora and imported your video, head to the toolbar and access the "Title" section. Following that, enable the "AI Caption" section from the left, and choose the "Dynamic Captions" option. Now select the language of your video and press the "Generate" button to let the tool automatically craft captions.
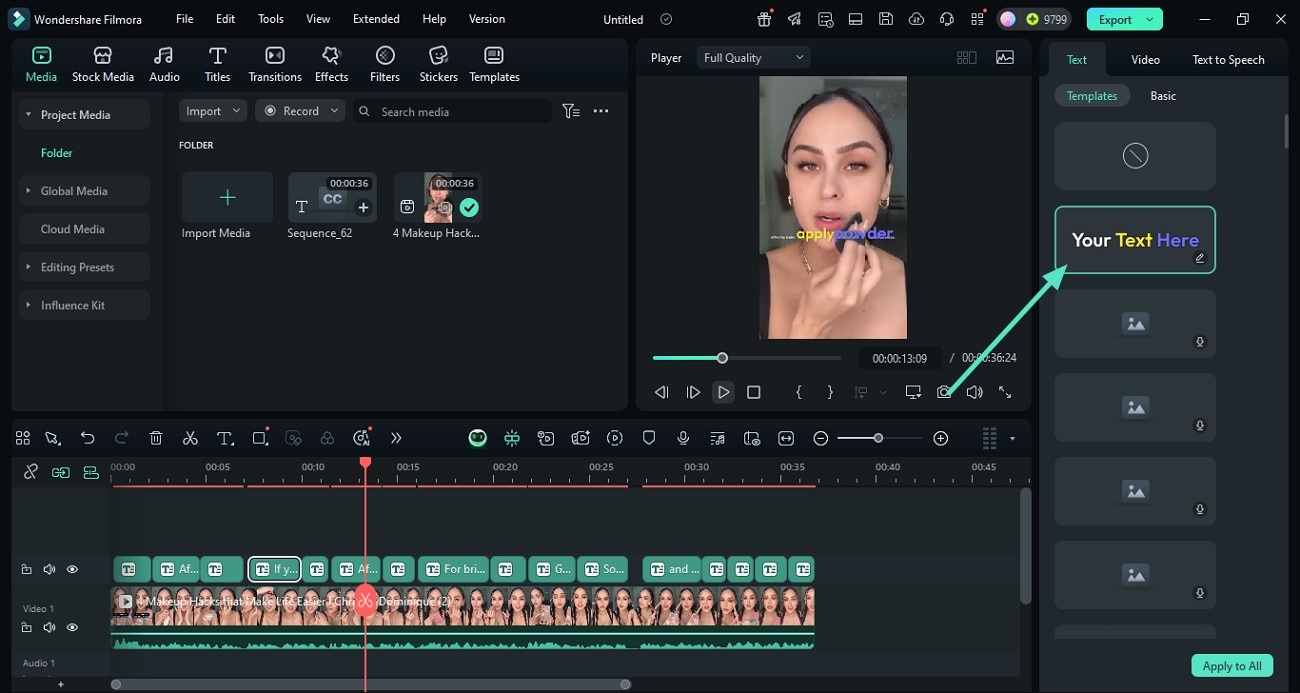
- Step 2. Choose the Text Layout. When the dynamic captions are successfully generated, you can select the text layout from the preset located on the right-side panel. Conversely, you can also customize the text and its appearance according to your preferences by accessing the same panel.
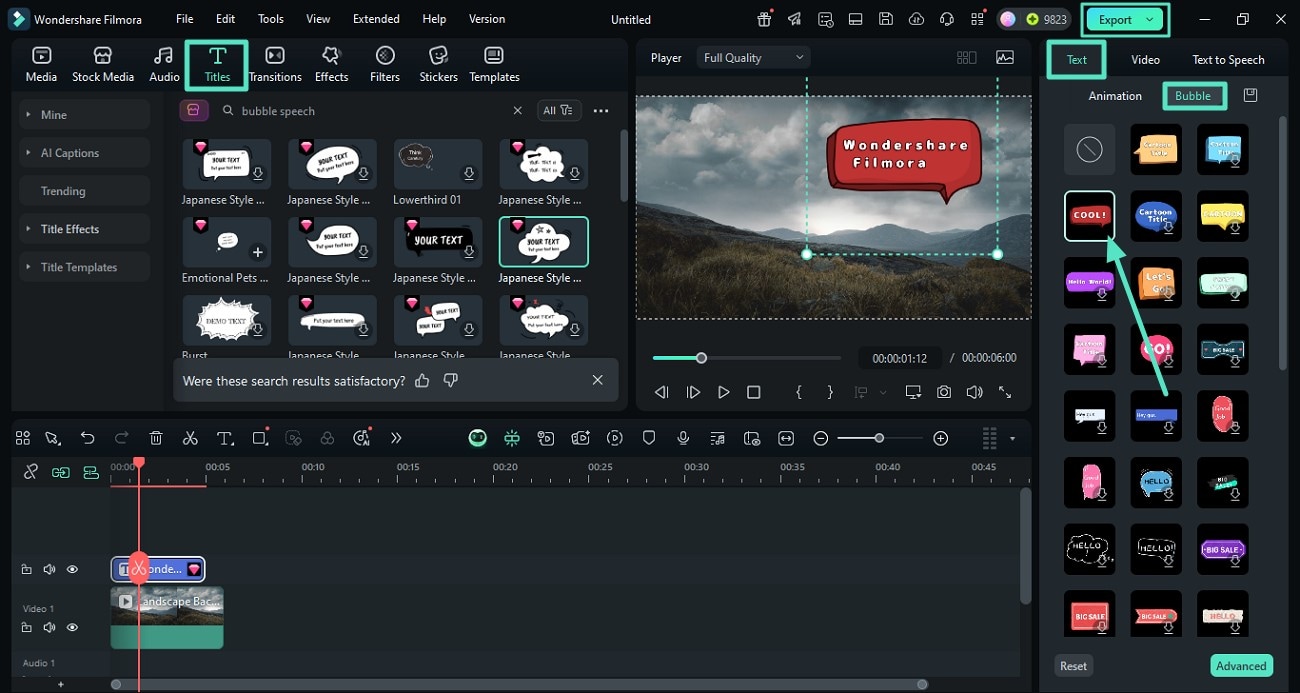
Method 6. Text Bubble
If you want to represent a dialogue or a conversation in your video, you can use the text bubble feature offered by Filmora. This edit text into video utility offers an extensive library of text bubbles with colorful designs and layouts.
You can simply download the bubble preset of your choice and adjust it to the screen as per your requirement. Learn how to apply the Text Bubble on your video with the desktop version of Filmora in the instructions mentioned next:
Instructions. After importing the video, opt for the "Titles" section from the toolbar and insert text using the effect or templates option from the left. Now, access the "Text" panel on the right and scroll through the options to choose the "Text Bubble" section. Select the layout of your choice and apply it to the text by pressing the "+" icon. Once done, press the "Export" button to save your video successfully.
Part 3. Inserting Stunning Text Using the Filmora App
If you are on the go and looking for an instant solution to add a versatile range of text to your video, use the Filmora App [iOS/Android]. The application allows you to add and modify the text appearance according to your preferences. Moreover, you get a vast library of templates to choose the text style of your choice.
Method 1. Text Style Library
The text style library of the Filmora App enables you to choose each attribute of the text as per your choice. You can opt for the text color and background. Additionally, you get the ability to select the case and size of the text to appear on the screen. Let us have a look at the steps for accessing the Text Style library of the application to add text to video in Filmora:
- Step 1. Create a Project and Choose Text. To begin, launch the application on your smartphone and use the "New Project" tab located on the homepage. Next, import your video to the app's interface and access the options located at the bottom. Tap the "Text" icon and press the "Text" option from the following toolbar.
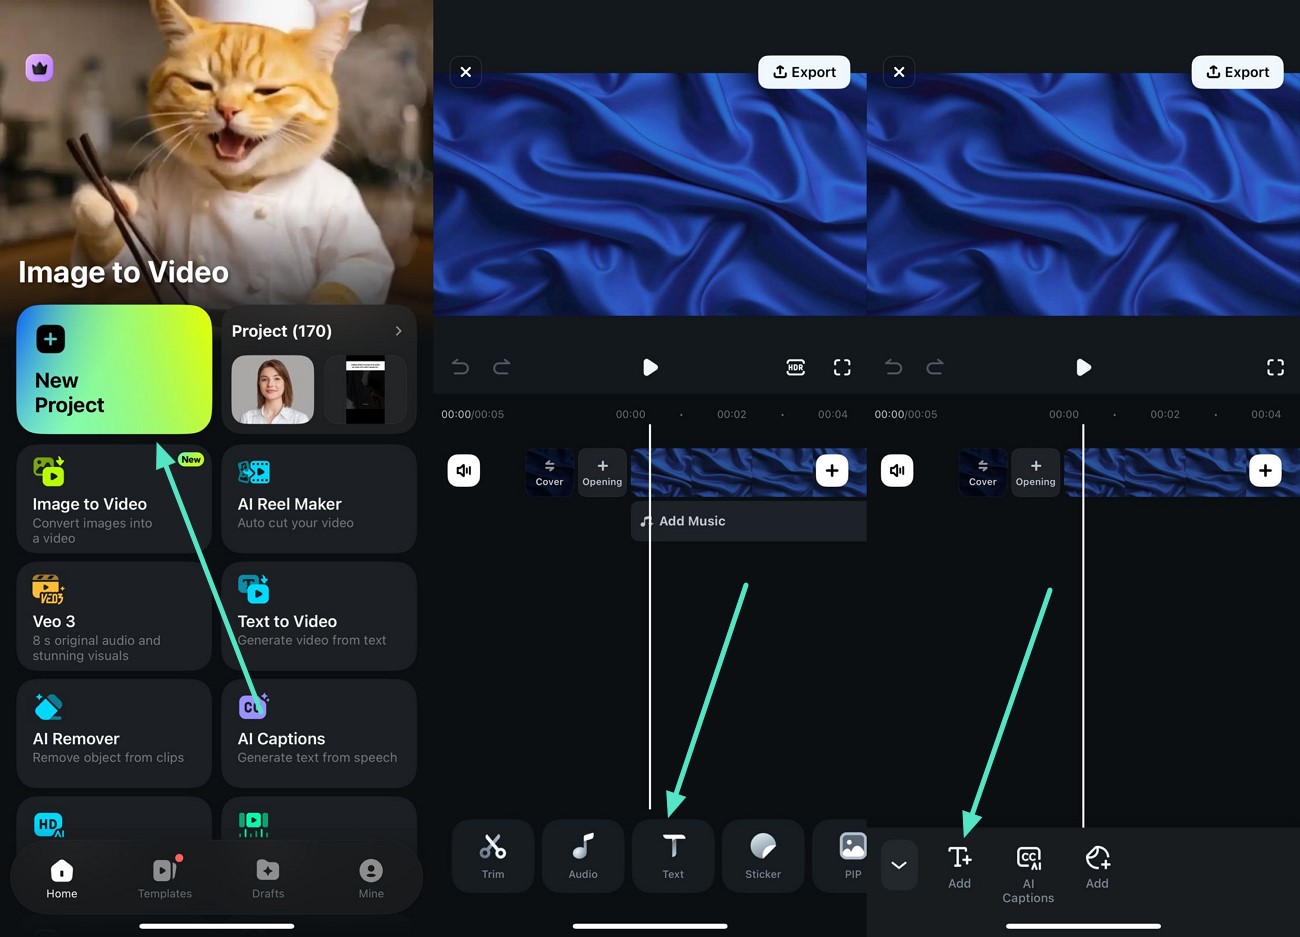
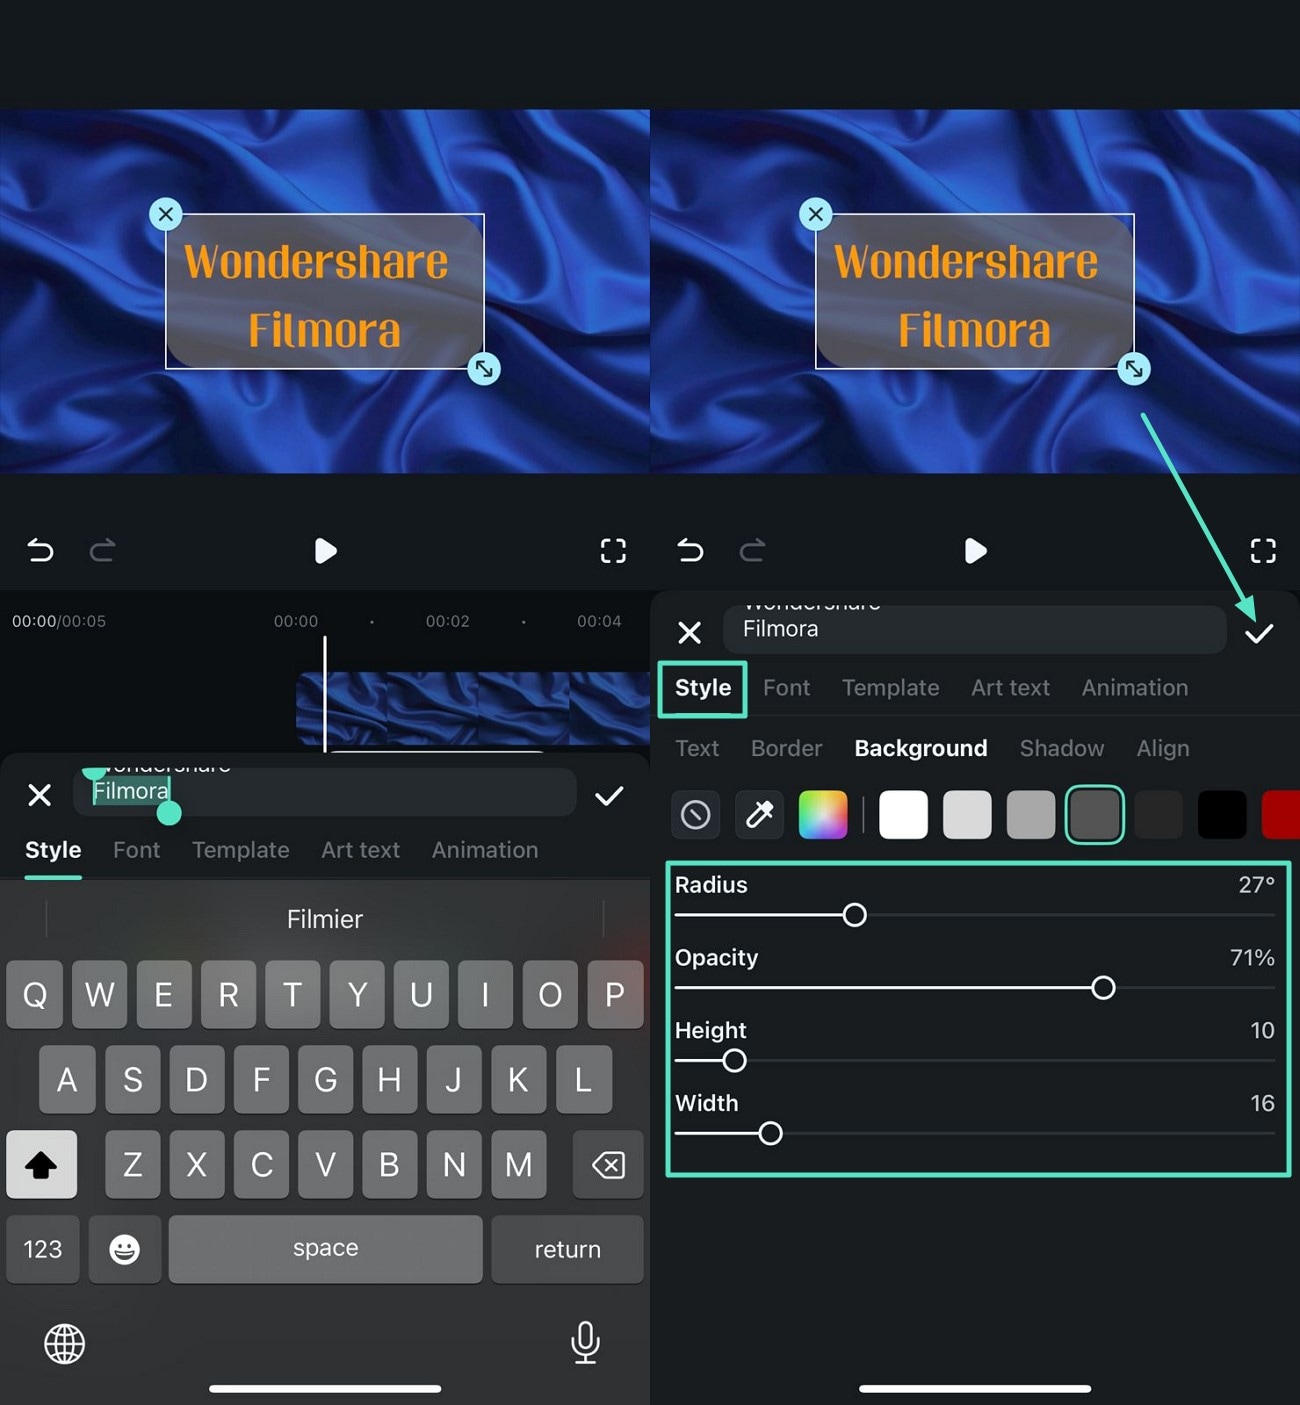
- Step 2. Add Text and Stylize It. Input text by accessing the keyboard and enabling the "Style" section. Choose the color, background, and other attributes from the options provided. Next, adjust the opacity and size of the text by dragging the respective sliders. Once you are done with customization, press the "Tick" icon on the right to save the changes.
secure download
Method 2. Text Art and Animation
With the Filmora App, you get access to a vast library of text art and animation to apply to your text. Instead of reviewing manual customization, get these presets and add dynamism to the text effortlessly. These libraries contain presets relevant to the content, making it easier to pick the best match. Provided below are the steps to access the text art and animation utility of Filmora, add text:
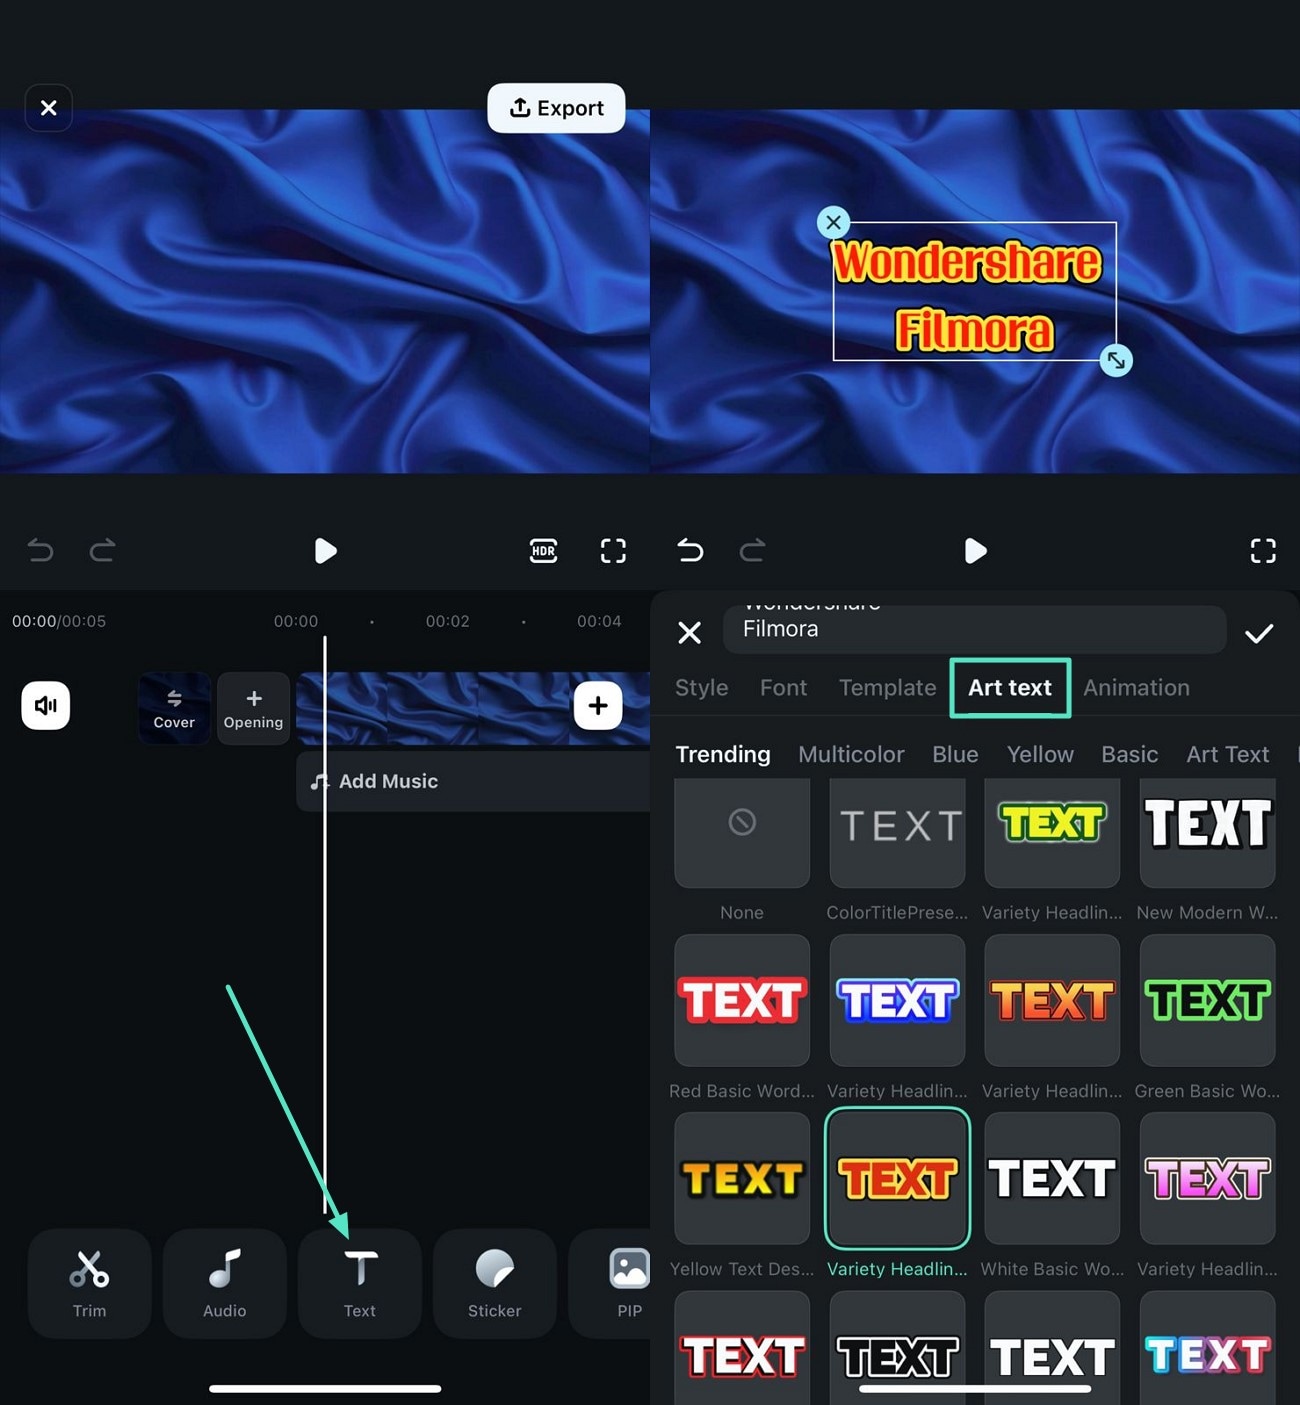
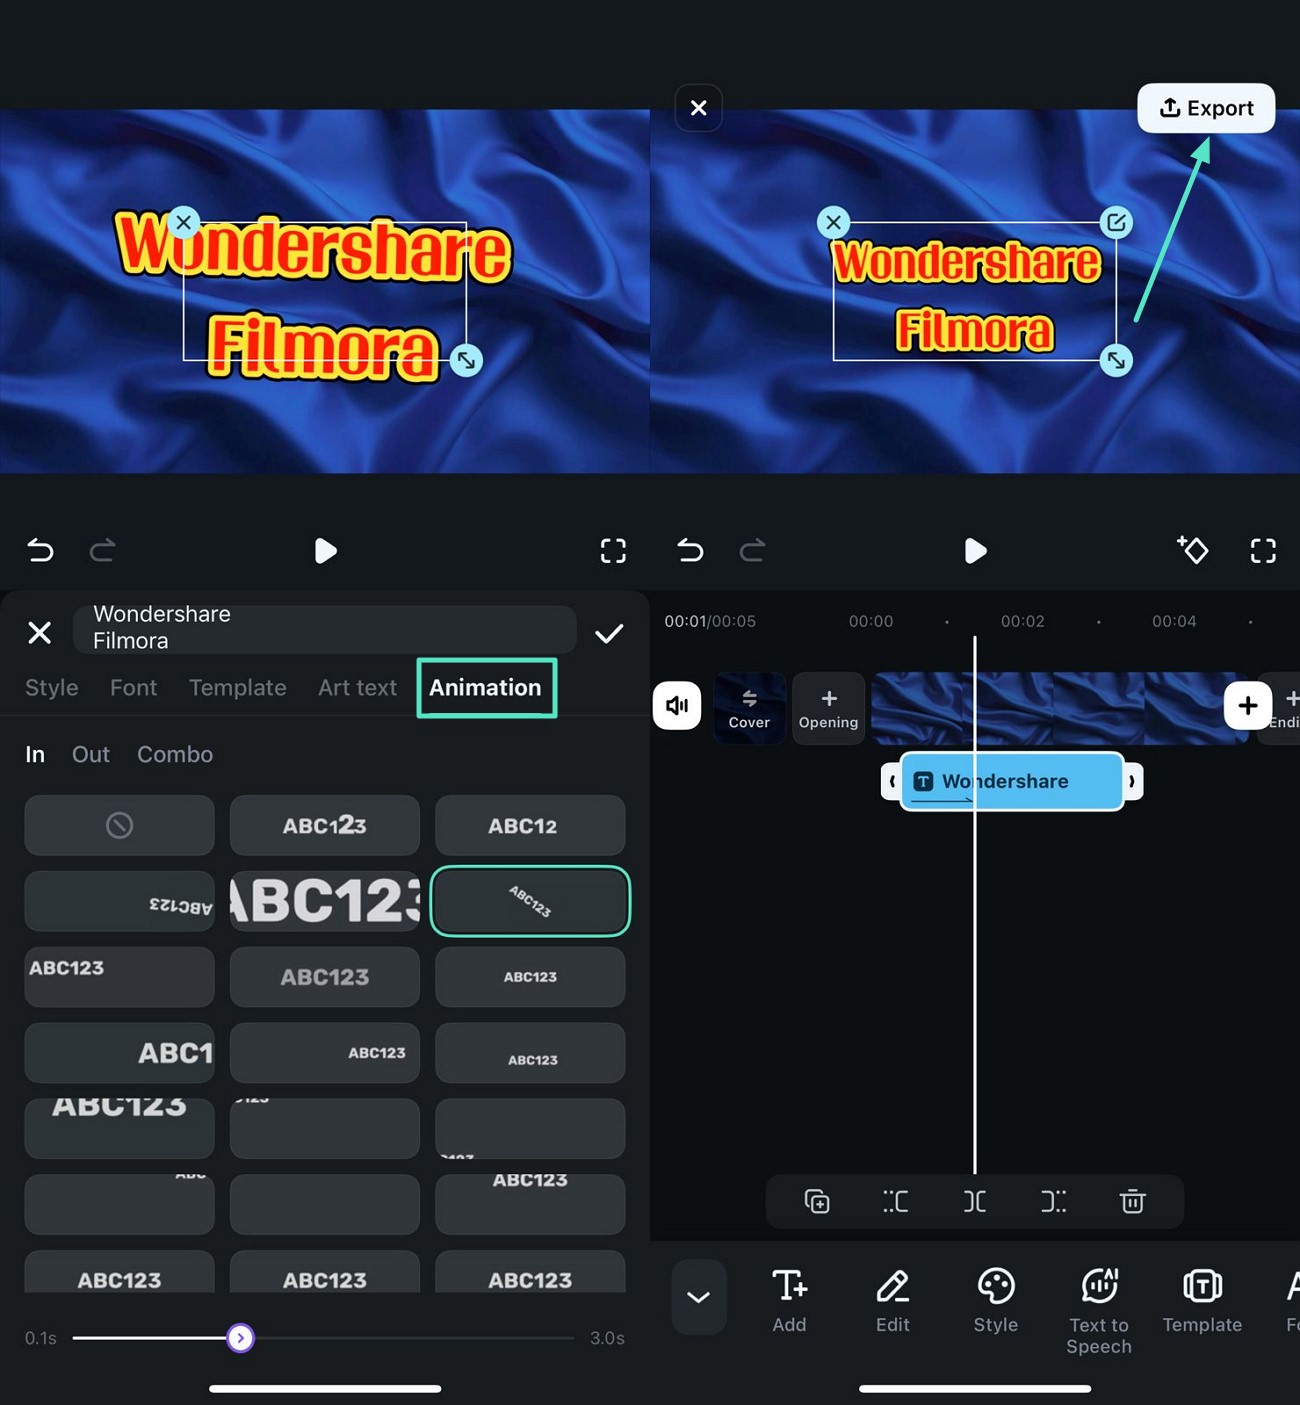
- Step 1. Input Text and Select Art Text. After importing your video or image, access the "Text" option from the toolbar and input the text. Next, enable the "Art Text" section and choose the text style from the library. Apply it to the text by tapping on the "Tick" icon on the right.
- Step 2. Apply Text Animation. Similarly, access the "Animation" section next to the Art Text and pick the animation for the text from the provided options. Save the changes by tapping the "Tick" icon located on the right. Once you are satisfied with the results, press the "Export" button to save the video with animated text.
Method 3. AI Caption
The AI caption feature of the Filmora App allows users to automatically generate subtitles with different layout options. You can choose the text style as per your choice and adjust its placement on the screen. Moreover, you get the ability to enable the AI Emoji feature, which automatically generates an emoji across each word in captions. Follow the steps mentioned below and learn how to add captions in Filmora App effortlessly:
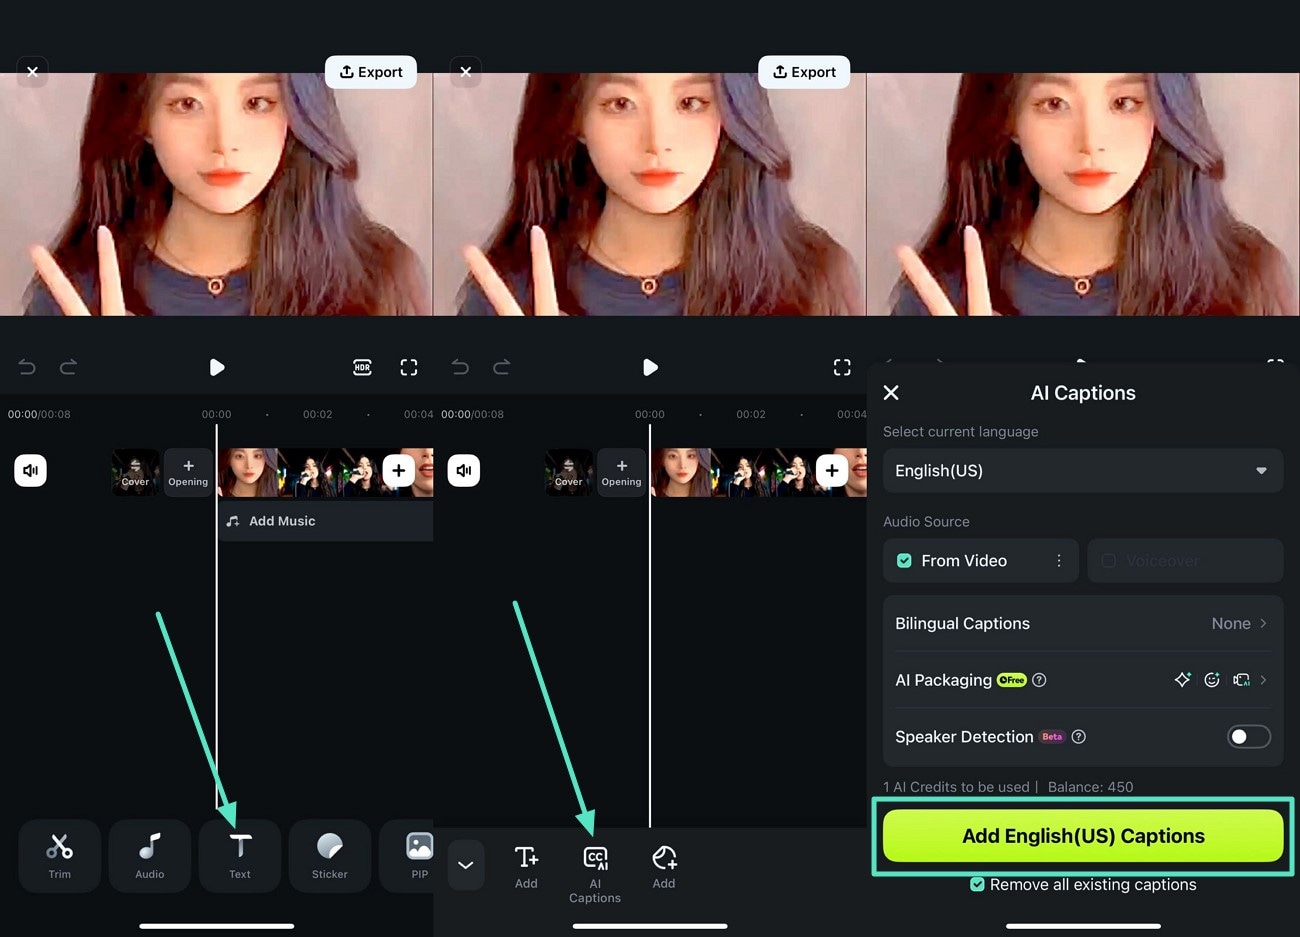
- Step 1. Opt For AI Captions. After accessing the "Text" option from the toolbar below, tap the "AI Captions" option in the following toolbar. Now, choose the language for the caption and enable AI packaging to highlight the word being spoken in the video. Press the "Add Captions" button located at the bottom to begin the process.
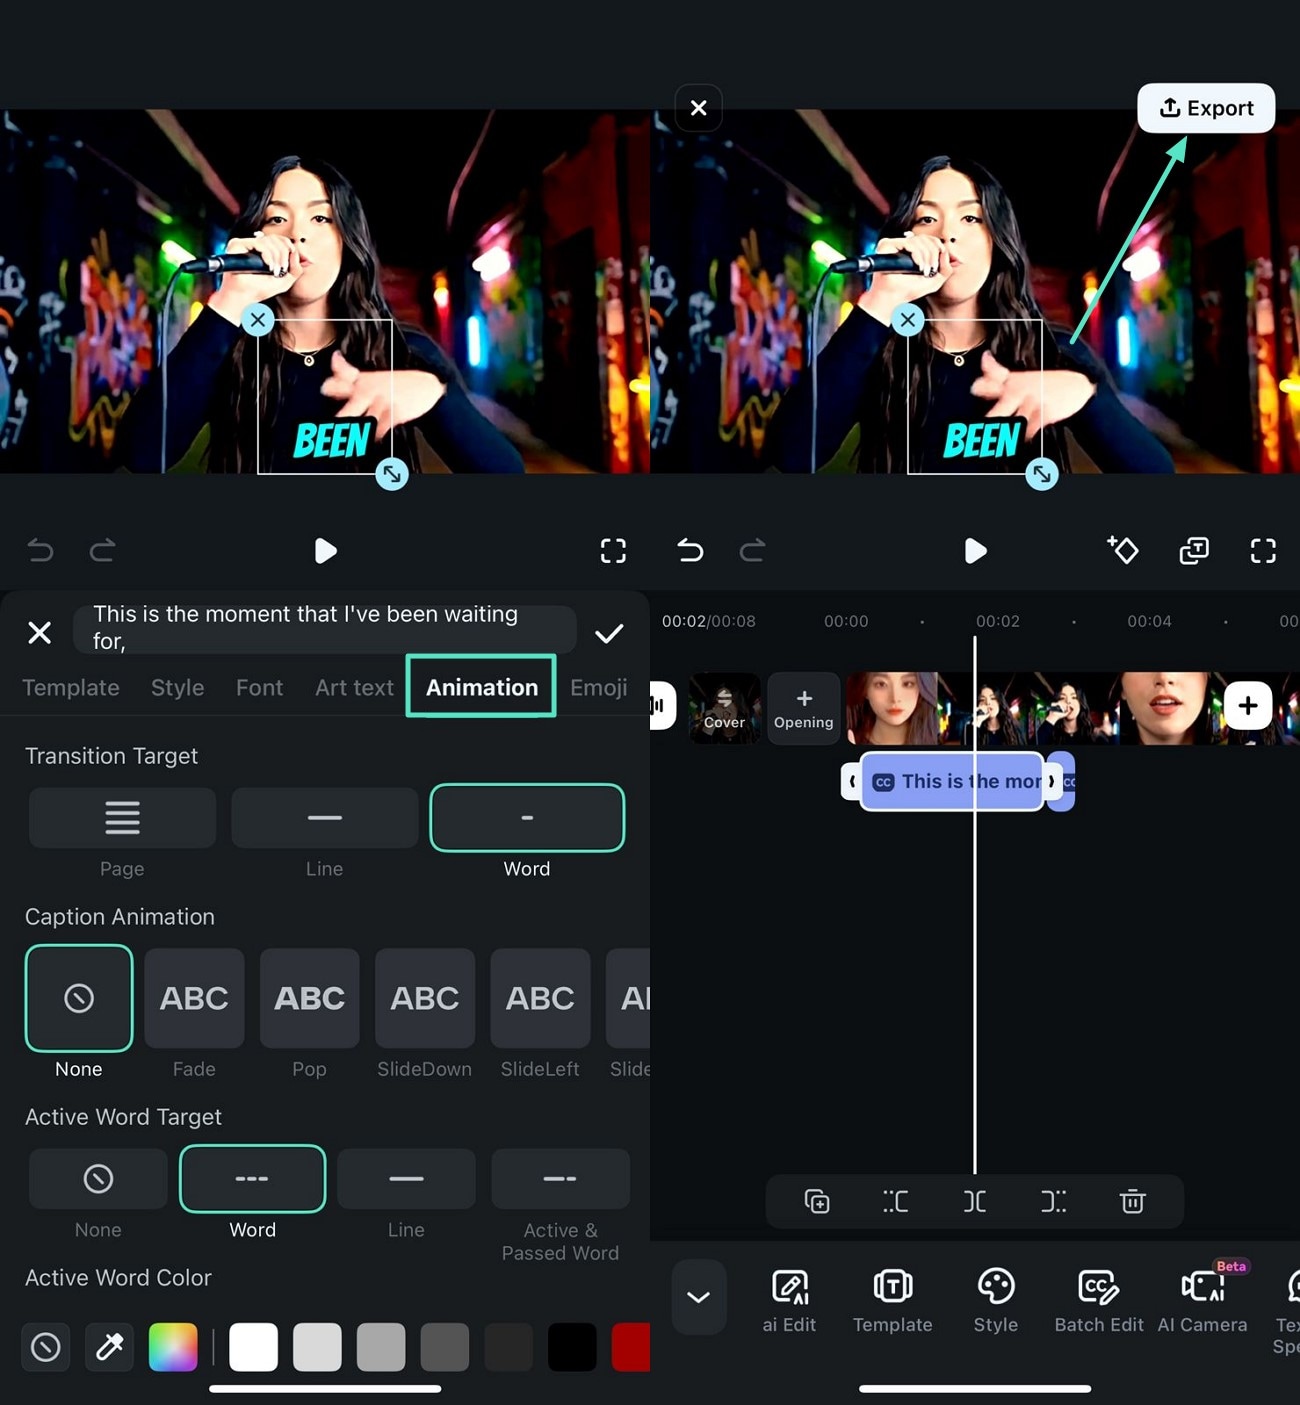
- Step 2. Modify the Subtitles Appearance. Once the captions are generated, tap them to change the style from the text style library offered by the application. You can animate the text or apply a predesigned template provided by the application. As satisfied with the output, press the "Export" button located at the top-right corner of the screen.
secure download
Conclusion
To wrap it up, this article discussed the top ways how to add text in a video in Filmora effortlessly. The article also explored different elegant fonts that the tool provides to add to your visual content. Using the diverse methods offered by both the desktop and app versions of the platform, you can create compelling visual content with text that grabs attention.
