Having a neat and professional background during a Zoom meeting is necessary to keep your professionalism intact. Can you imagine trying to conduct a serious business meeting while your background consists of a messy room with laundry strewn across the bed? It would certainly detract from the professional image you're trying to portray and could potentially distract your colleagues or clients from focusing on the meeting.
Thankfully, Zoom provides a virtual background feature that allows you to replace your actual surroundings with a variety of professional and polished images. But to do it effectively, you’ll need a green screen. Here’s a guide you need to use for a green screen on a Zoom meeting.
In this article
Part 1. Why Use Green Screen on Zoom?
Virtual backgrounds on Zoom have gained significant popularity as the pandemic encouraged remote work and virtual meetings. The virtual background on Zoom is useful to create a professional appearance during video calls. They provide a consistent look across different meetings, ensuring the focus remains on the speaker rather than the background. This is useful for presentations, webinars, and online classes.
But if you have tried using the virtual background on Zoom before, you may know how tricky it can be. Sometimes the virtual background won’t blend smoothly, especially if your physical environment has poor lighting. This can result in parts of your actual background bleeding through or the edges of your outline appearing jagged or blurry.

To overcome it, having a green screen for your Zoom is highly recommended. A green screen provides a consistent and neutral background that Zoom can easily replace with your chosen virtual background. It helps you to maintain a professional appearance and hide cluttered or unprofessional environments smoothly.
Part 2. How to Setup Green Screen for Zoom Meeting
To ensure your virtual background displays well, you need to set up the green screen properly. There are several aspects you need to consider before setting up a green screen for Zoom:
- Select a green screen made from wrinkle-free material, such as polyester or a spandex blend. This helps avoid wrinkles that may create shadows and interfere with your virtual background.
- Choose a lightweight green screen that is easy to carry, especially if you need to move your setup frequently. Pop-up or collapsible green screens are great options for this need.
- Ensure the green screen is large enough to cover the entire area behind you that will be visible on camera. A wider screen may be necessary if you move around during meetings.
- Use soft, even lighting to minimize shadows. Position lights on either side of the green screen to ensure even illumination. Avoid using overhead lighting that can cast harsh shadows.
- Place yourself a few feet in front of the green screen. This helps to reduce shadows and prevent green light from reflecting onto you, which can cause issues with the virtual background.
- Position your camera at eye level and ensure it is focused on you with the green screen fully visible in the background. Adjust the zoom to frame yourself properly without cutting off parts of the green screen.
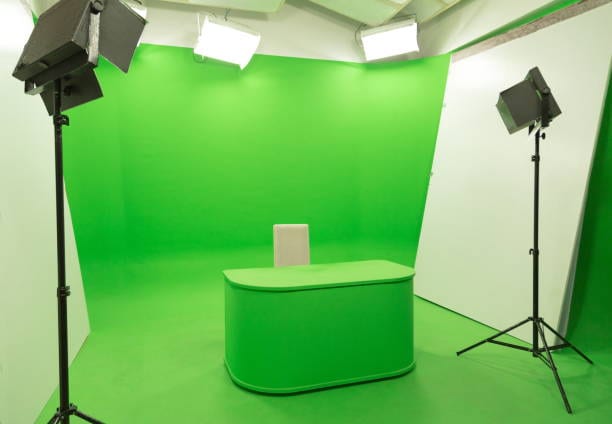
When you have ensured that your green screen setup needs are met, you can use your virtual background with peace of mind.
Part 3. How to Apply Zoom Virtual Background Using Green Screen on Computer
Now, how can we remove the green screen background in our Zoom calls? If you are using Zoom on computer, Zoom offers a feature called "I have a green screen" to let the software know that you are using a green screen setup. It will It will then use this information to remove the green background and replace it with your selected virtual background.
You can follow this guide to use this feature:
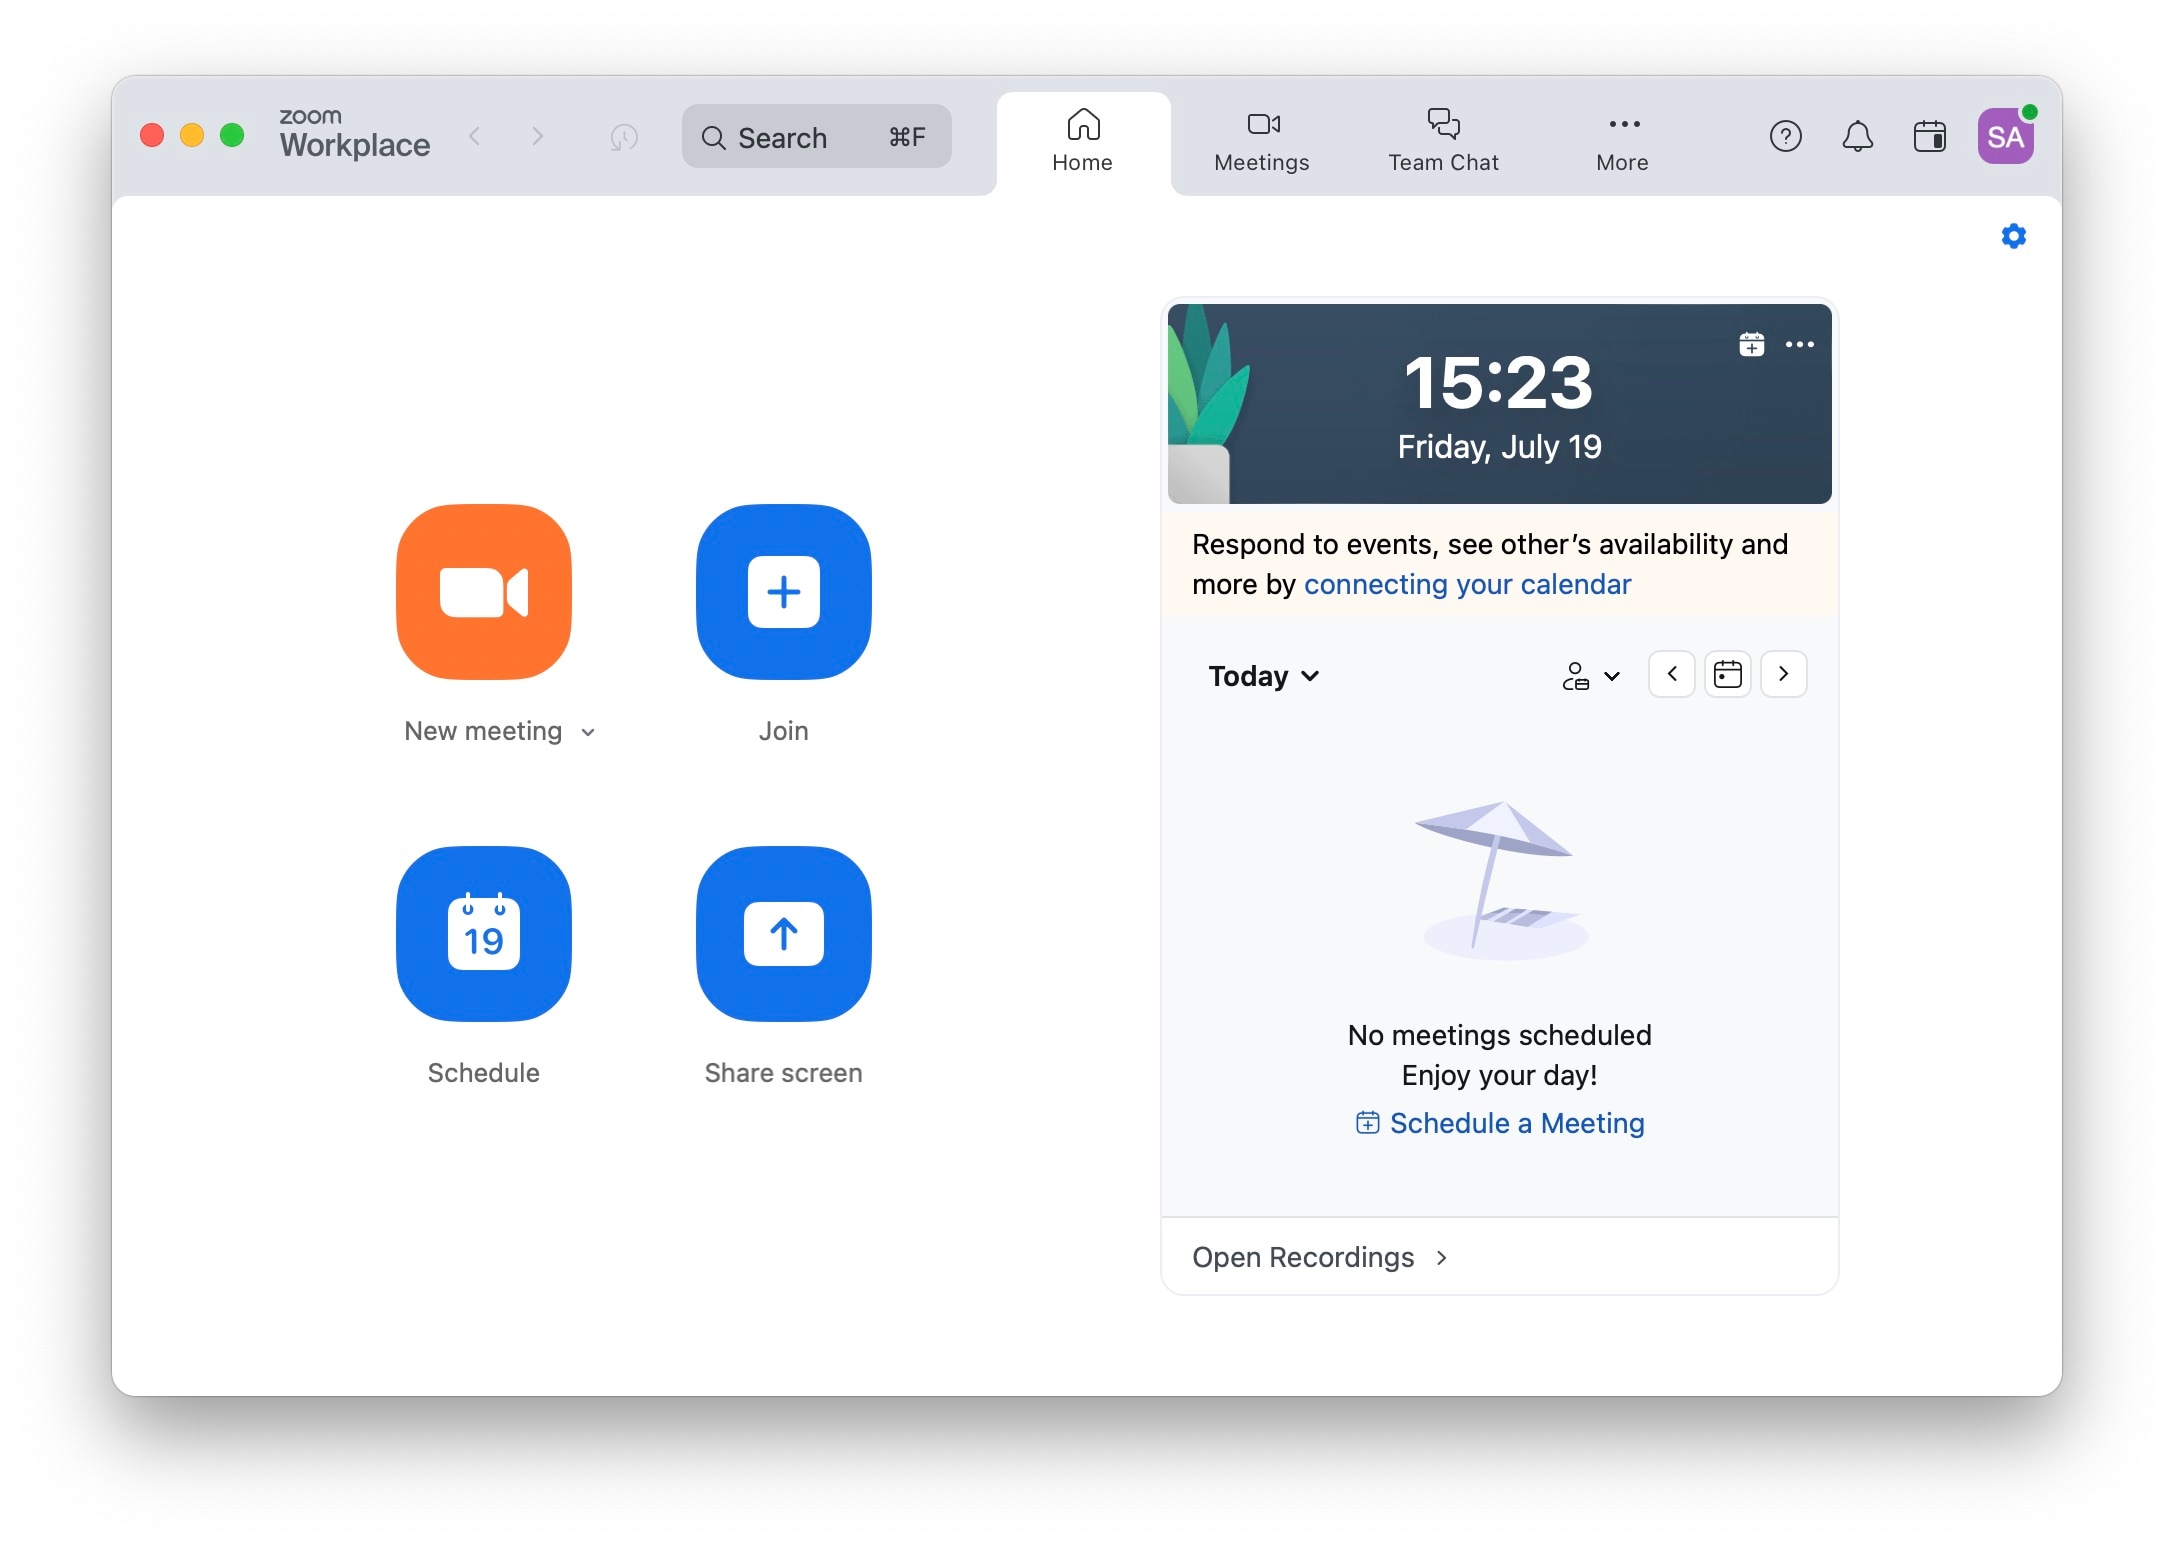
Step 1. Open the Zoom application and log into your account. Then, click Settings in the top-right corner.
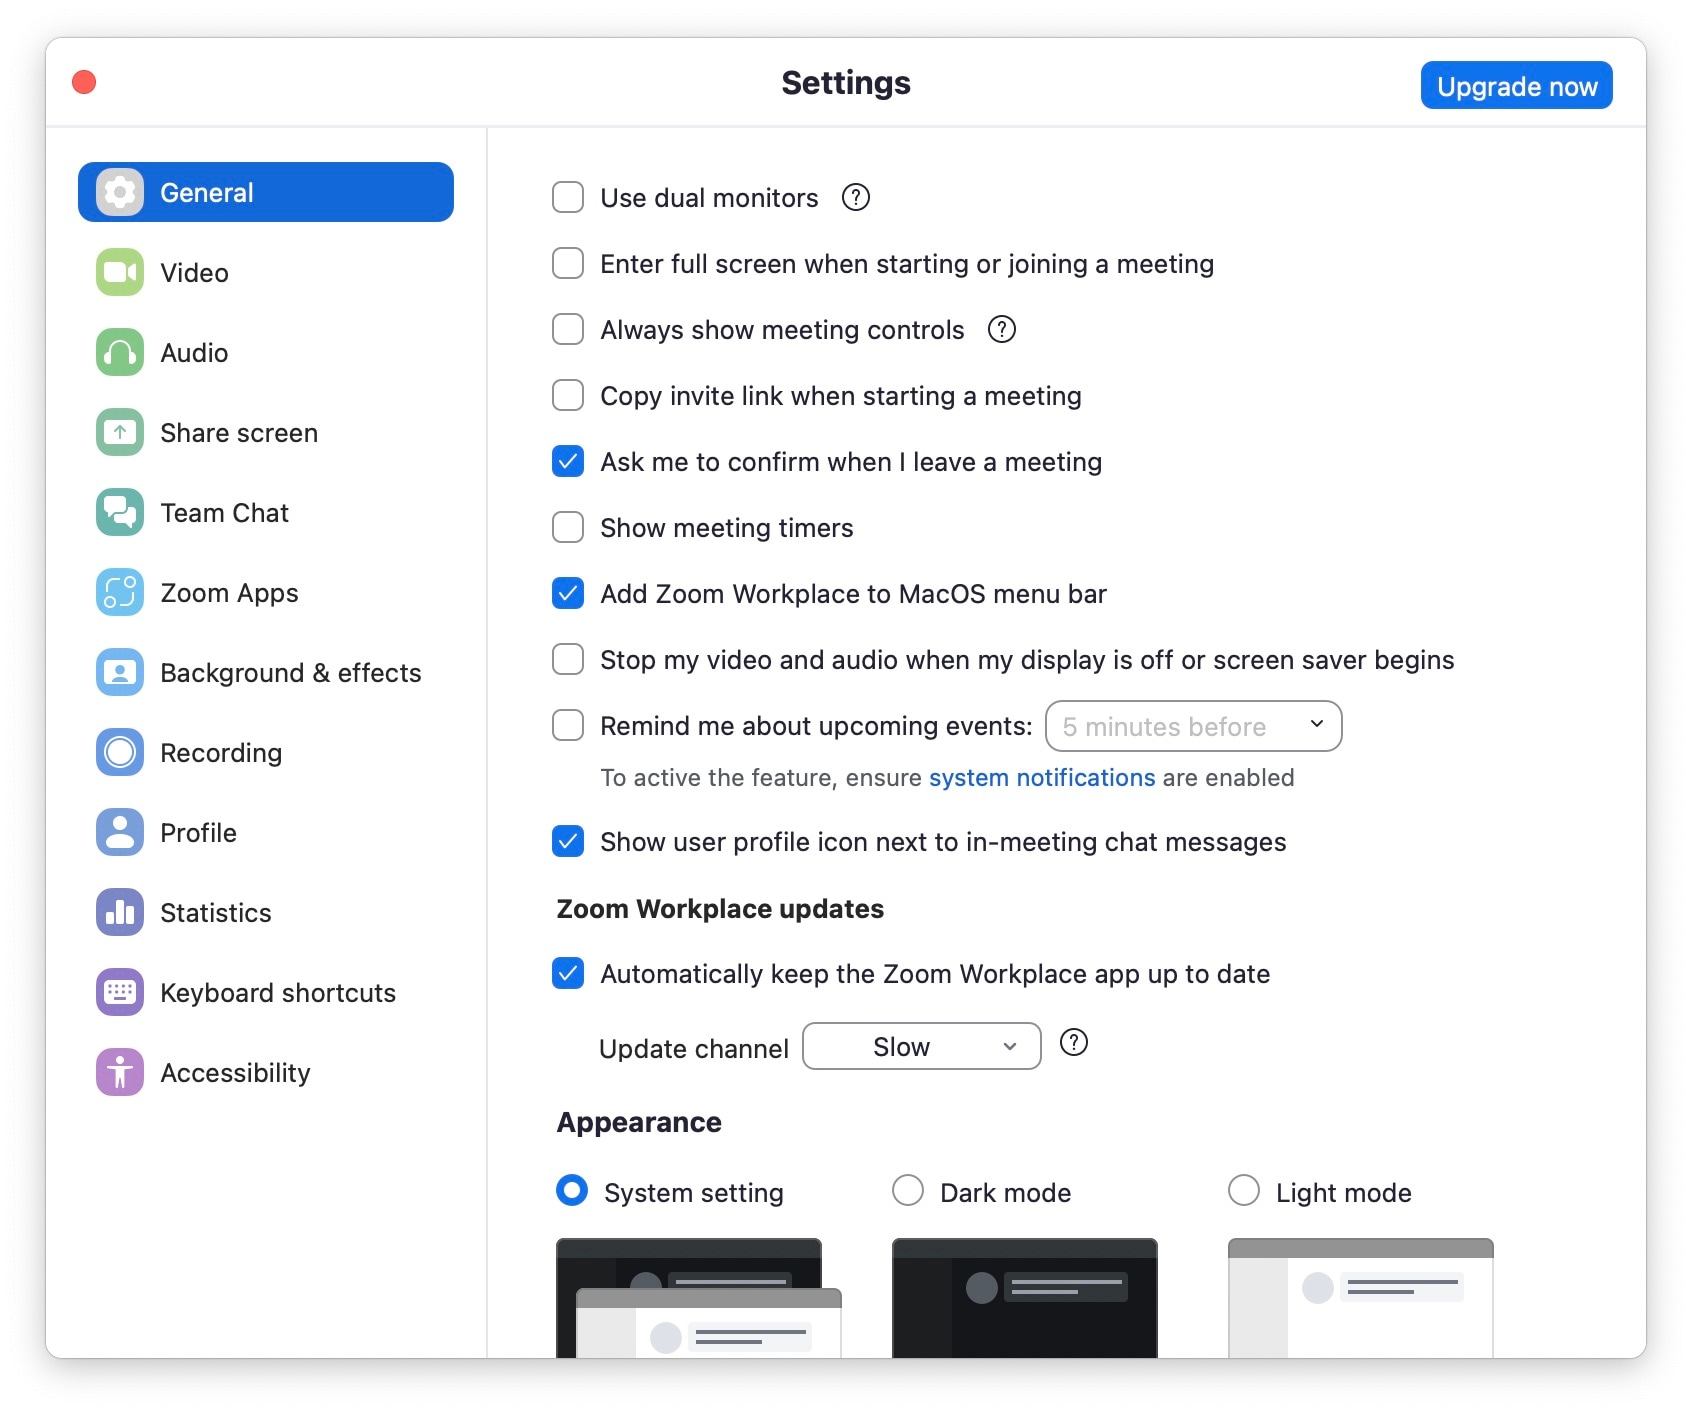
Step 2. After the Settings window opens, choose the Background effects option on the left panel.
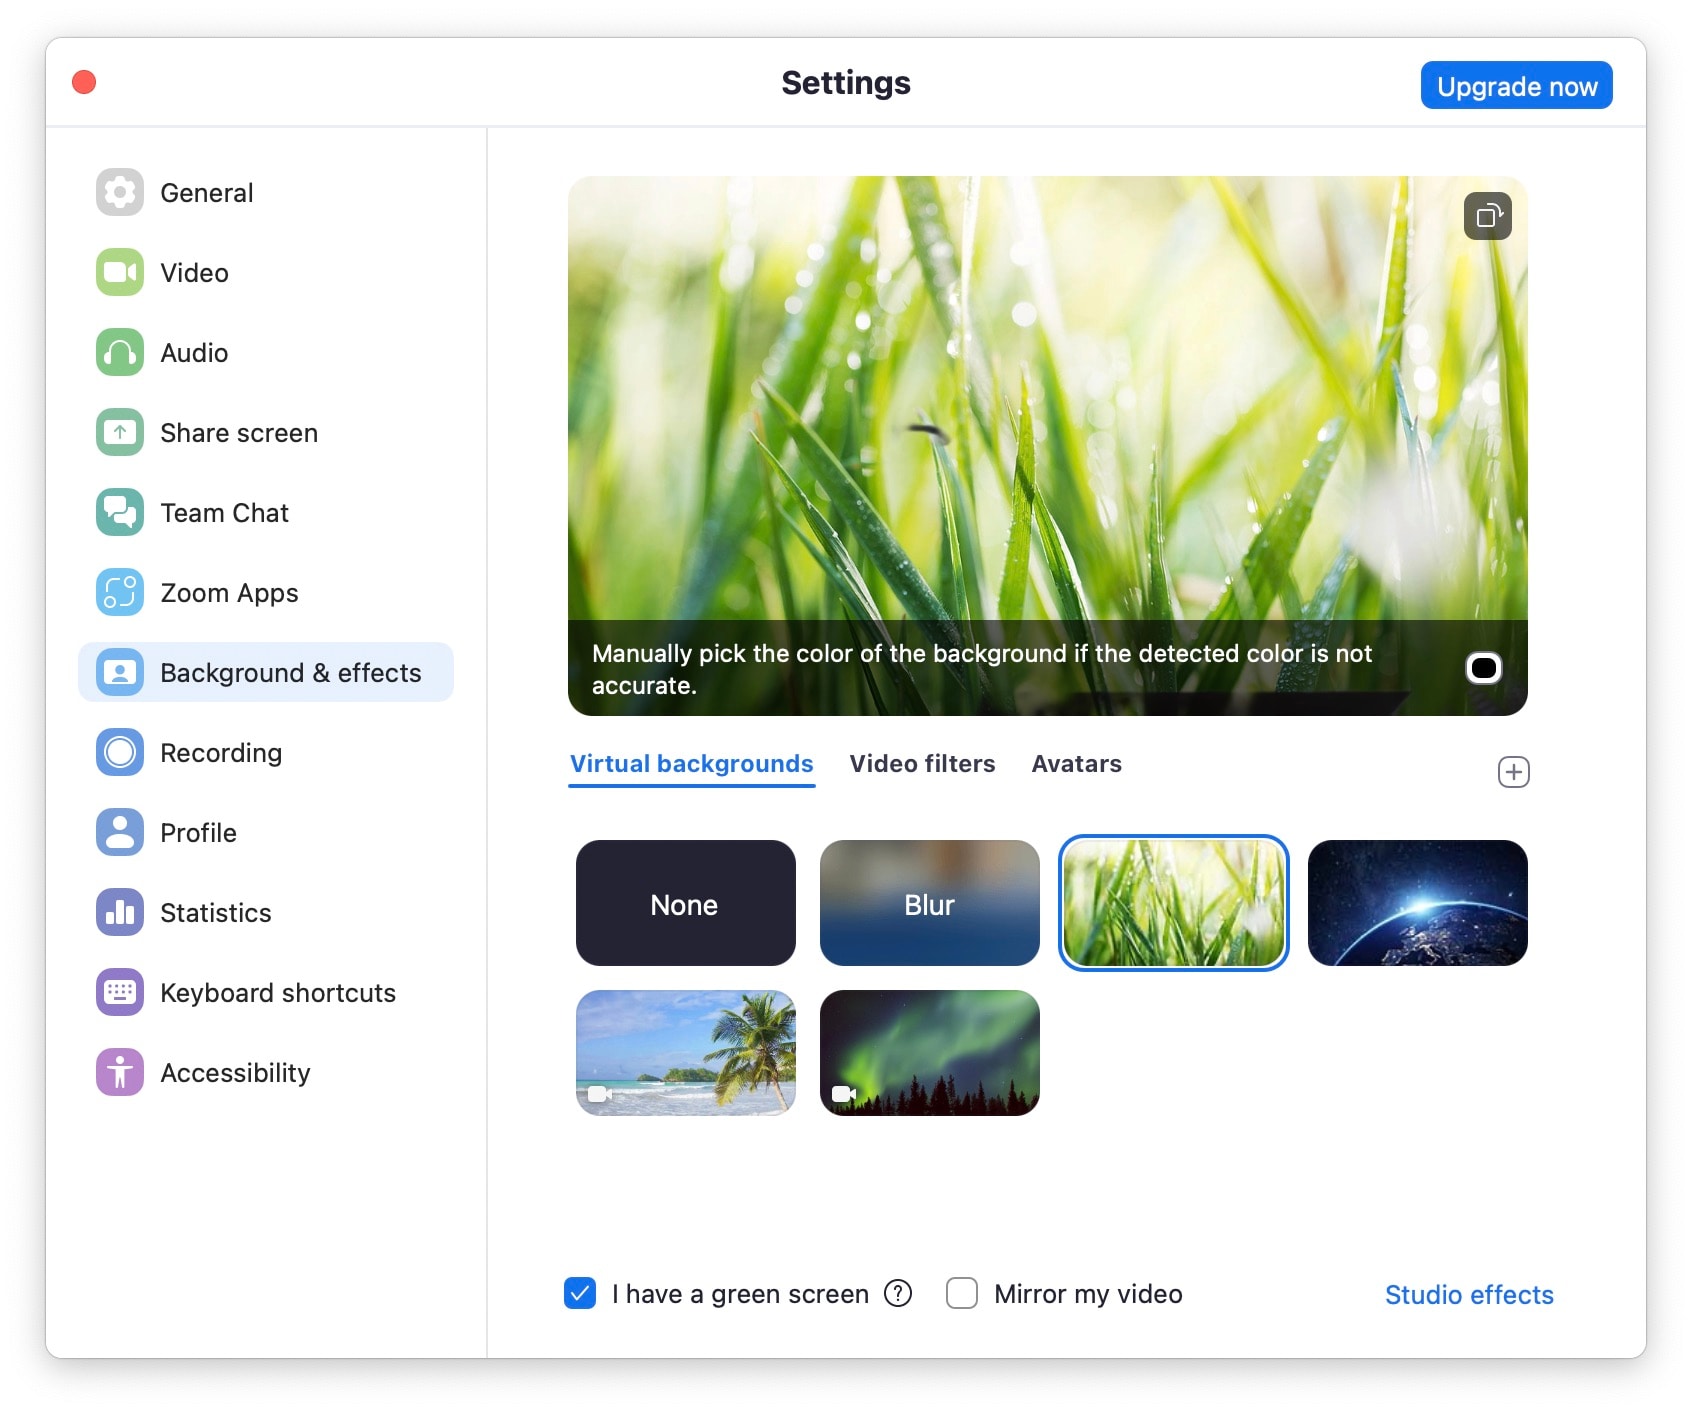
Step 3. Make sure the “I have a green screen” option is enabled first. Then, you can choose your preferred virtual background for your Zoom meeting. Besides the existing background, you can also add photos or videos from your device.
Part 4. How to Use Zoom Green Screen on Mobile
Although Zoom for desktop offers more features, some users prefer to use Zoom through their smartphone. Zoom on mobile provides greater flexibility rather than on desktop, suitable for users with high mobility.
But don’t worry, you can also set up a green screen for Zoom on your smartphone. Here are the steps to add a green screen on Zoom mobile for both Android and iOS users.
Step 1. Open the Zoom meeting and sign into your account.
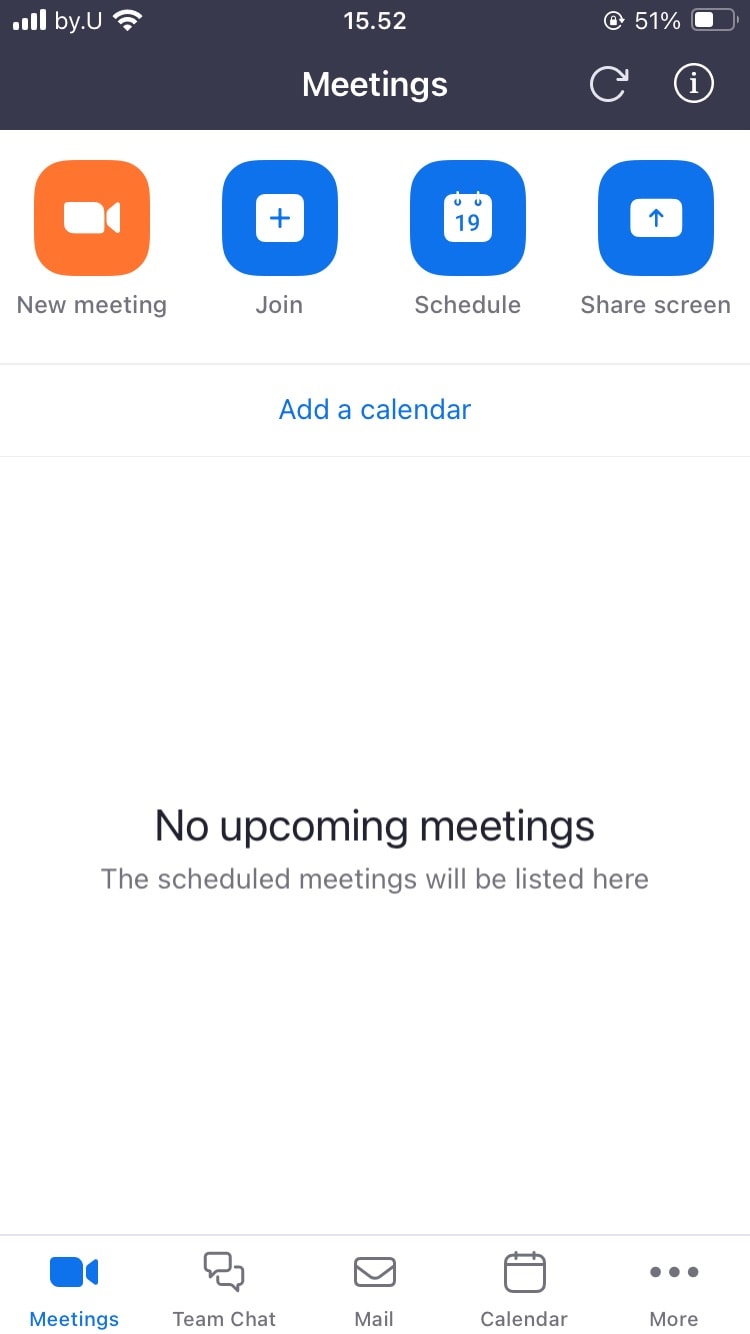
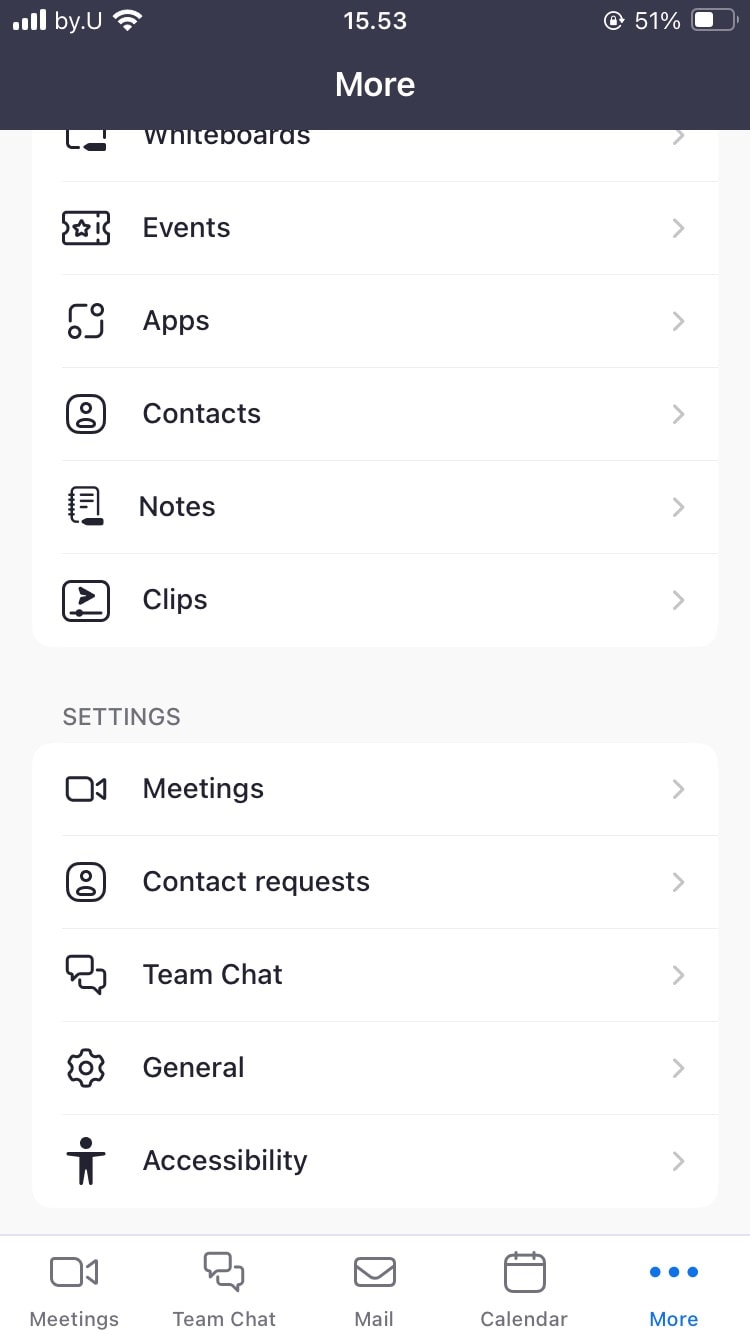
Step 2. Click the More option in the bottom-left corner, then choose Meetings
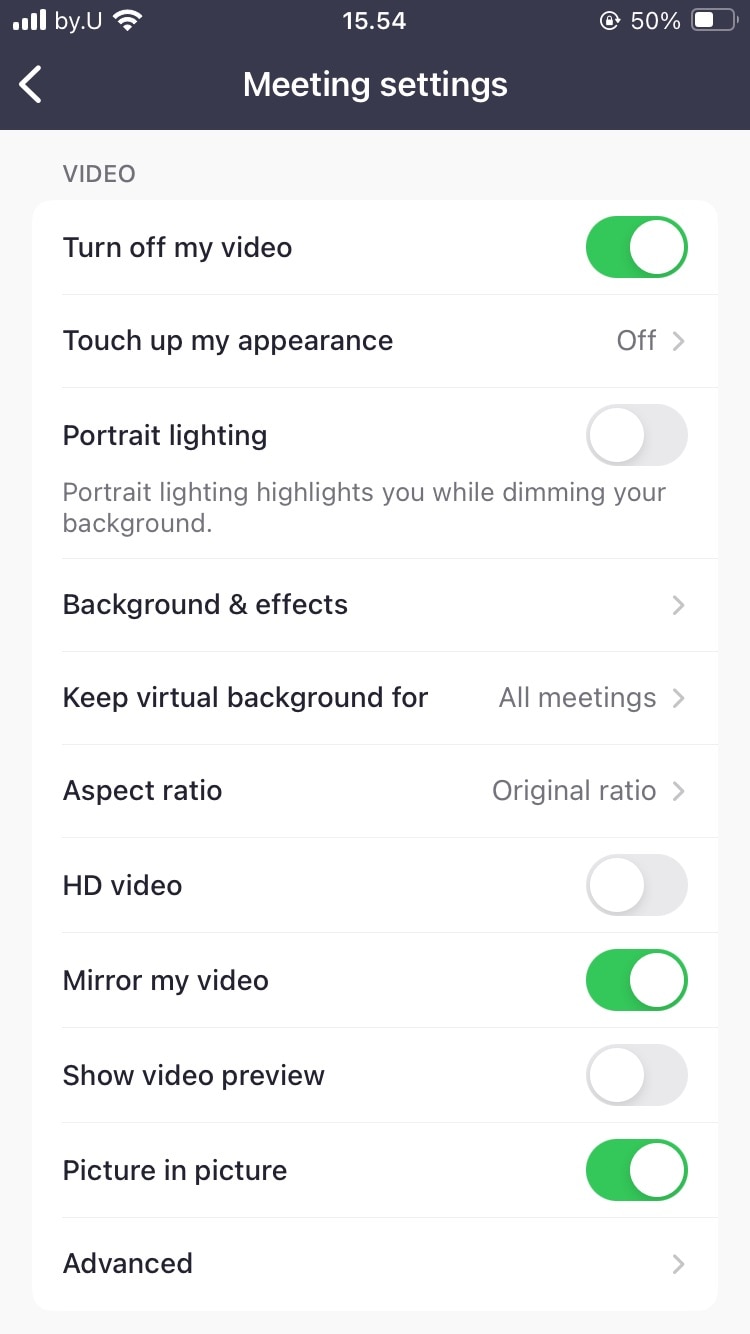
Step 3. On the Video settings, select Background effects.
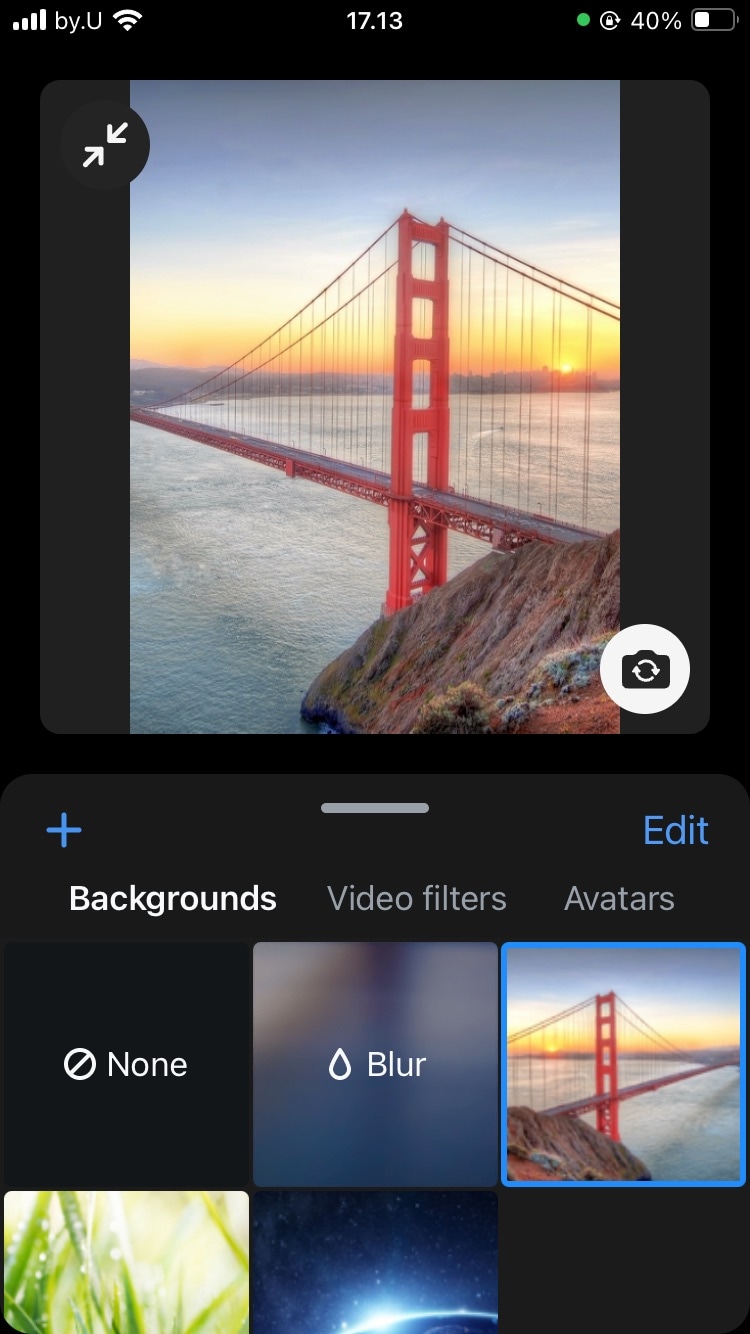
Step 4. Replace your green screen with the existing backgrounds on the application or you can use your photo or video from your phone by tapping the “+” icon.
Step 5. Close the settings and your virtual background has been applied to your Zoom video.
Part 5. Bonus: How to Edit Your Video Recording with Green Screen
While we are at it, what if you want to make use of the green screen further? We've previously learned about using green screens in Zoom, but similar techniques can be applied to video recordings as well. For example, you could use the green screen to edit your presentation video and insert slides directly behind you.
What you need to do is prepare a video recording with a green screen and the background of your choice. Then, use Wondershare Filmora’s chroma key capabilities to remove the green background and replace it with your slides or other visual elements.
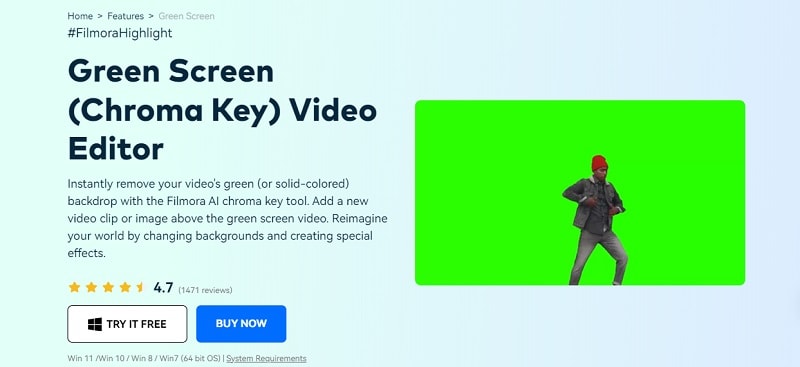
Wondershare Filmora is a video editing software that features a green screen editor, allowing you to quickly key out the green color and replace it with a different background. With the Filmora AI chroma key tool, you can instantly remove the green (or any solid-colored) backdrop from your video. Then, you can also easily add a new video clip or image over the green screen video.
Here are the steps to edit your video recording with a green screen using Wondershare Filmora.
Step 1. After creating a new project, import your video recording with a green screen and video/image background to the media library.
Step 2. Drag the background clip or image to the video track on the timeline and place the green screen footage on the track above it.

Step 3. Remove the green screen using the Chroma Key tool. To do it, click the green screen clip and navigate to Video AI Tools. Then, turn on the Chroma Key option, and the green color will be automatically removed.

Step 4. Adjust the offset, tolerance, edge thickness, and edge feather settings to refine the clarity of the background video.
Conclusion
Using a green screen can enhance your Zoom virtual background experience, particularly to boost your professionalism. You can have a clear and solid virtual background on Zoom with a green screen, both from your computer or mobile. If you face challenges with your green screen setup, you can use software like Wondershare Filmora to edit your Zoom video recording. Filmora AI chroma key tool can replace the green screen with your preferred photo or video easily.


 100% Security Verified | No Subscription Required | No Malware

