

 TL;DR:
Lightroom's desktop Enhance tool utilizes your GPU to apply AI-driven quality improvements, offering Denoise and Raw Details exclusively for RAW files, alongside Super Resolution for upscaling RAW, JPEG, and TIFF formats.
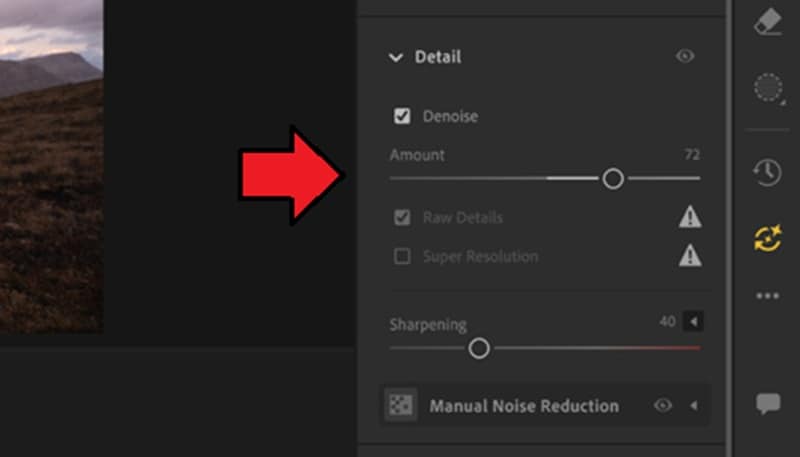
● Select Denoise to remove high-ISO grain, Raw Details to correct edge sharpness and color rendering for large prints, or Super Resolution to double linear dimensions up to a maximum limit of 128 MP or 32,500 pixels per side.
● Processing requires a system running Windows 10 (version 22H2), Windows 11 (23H2+), or macOS Sonoma (14.x+) with at least a 4 GB VRAM dedicated GPU, and it will generate a significantly larger DNG file while leaving your original untouched.
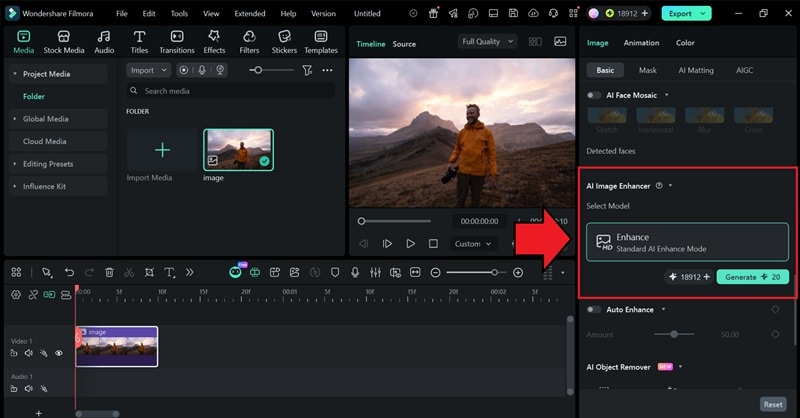
● Never apply enhancements multiple times to the same file as it causes artificial smoothing and wastes storage space; if you need to process unsupported heavily compressed images, use Wondershare Filmora's AI Image Enhancer as a fallback.
Ask AI for a summary
 ChatGPT
 Perplexity
 Gemini
 Claude
 Grok
Grok
Do your photos suffer from quality loss from grain, high ISO noise, compression artifacts, or low resolution? Lightroom's Enhance feature can fix all of that. This feature uses AI to reduce noise, recover detail, and increase resolution without touching what's already good about your photo.
We'll walk you through how to enhance photo quality in Lightroom step by step, and how to pick the right Enhance option for your specific situation.
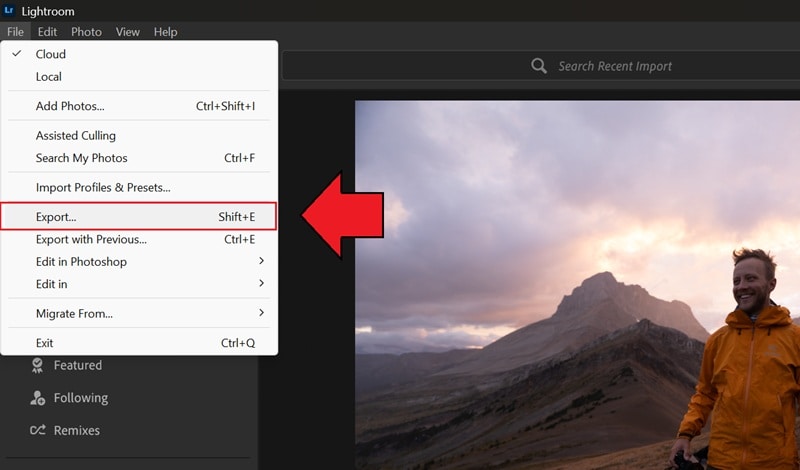
Part 1. How to Enhance Photo Quality in Lightroom (3-Steps)
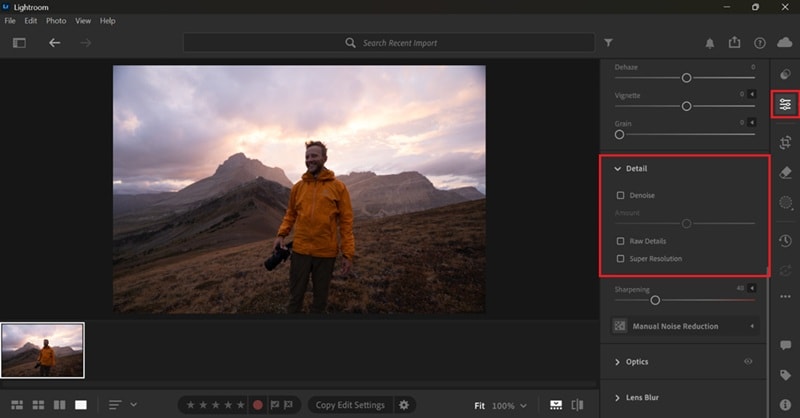
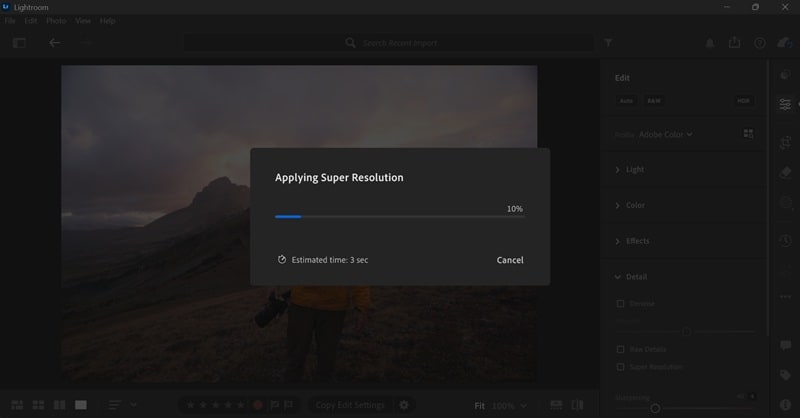
Lightroom's Enhance feature is a dedicated tool available in the desktop app that handles noise, low-resolution, and fine-detail recovery. It heavily uses your GPU, so processing speed really depends on how powerful your graphics card is and how large your source files are.
There are also minimum system requirements to check before you get started.
| Operating System | Minimum Version |
| Windows | Windows 10 (version 22H2) or Windows 11 (version 23H2 or later) |
| Mac | macOS Sonoma (version 14.x) or later |
| RAM | 8 GB; 16 GB recommended for large files |
| GPU | A dedicated GPU with 4 GB VRAM or more |
|
Show More
Show Less
|
|
If your system is compatible, follow the steps below to enhance image quality in Lightroom. We will be using Lightroom CC v9.3.
How to Improve Image Quality or Resolution in Lightroom
- Denoise
- Raw Details
- Super Resolution (for doubling image resolution)
Part 2. Choosing Between Denoise, Raw Details, and Super Resolution
In Lightroom's Enhance feature, the options include: Denoise, Raw Details (previously Enhance Details), and Super Resolution, which are designed to handle different types of image quality problems.
| Feature | What It Does | Best For | Output Resolution |
| Denoise | Remove noise while preserving fine detail using AI | High-ISO shots, low-light photos | Same as original |
| Raw Details | Sharpens edges, improves color rendering, reduces artifacts | Making large prints; Fujifilm X-Trans files | Same as original |
| Super Resolution | Doubles linear resolution using AI upscaling | Cropped images, older/low-res cameras, printing large | 2x width & height (4x total pixels) |
|
Show More
Show Less
|
|||
To sum up:
- Denoise and Raw Details both improve your image quality at the same resolution.
- Denoise is for noisy, grainy photos shot at high ISO or in low light.
- Raw Details is for sharpening edge detail and improving color accuracy.
- Super Resolution is the option to use when you want to learn how to increase resolution in Lightroom.
Note: Super Resolution can't be applied to images with a resolution higher than 128 MP or with dimensions greater than 32,500 pixels on either side.
Part 3. Common Mistakes When Enhancing Photos in Lightroom
Even with a simple tool like Enhance, there are a few things that catch people off guard the first time they use it.
1. Not Checking the File Type
Lightroom Enhance doesn't support all file formats, and each mode has its own list of compatible types.
| Enhance Option | Supported Formats |
| Denoise | Linear DNG, Smart Previews (DNG proxies), Monochrome RAW (Leica), Canon sRAW/mRAW, Nikon sRAW, Fujifilm non-X-Trans (SR/EXR), Sony Linear RAW (pixel shift), Pentax PSR, Foveon (Sigma/Hasselblad), Apple ProRAW, HDR, Samsung Expert RAW, Google Pixel RAW |
| Raw Details | Bayer and X-Trans mosaic raw |
| Super Resolution | Raw images, JPEG, and TIFF |
|
Show More
Show Less
|
|
Denoise and Raw Details are exclusive to RAW files, while Non-RAW files like JPEG or TIFF can only be processed by Super Resolution. For other formats (e.g., HEIC or PNG), you may need to convert them to a supported format first before improving image quality with Lightroom Enhance.
2. Ignoring the Larger File Size After Enhancement
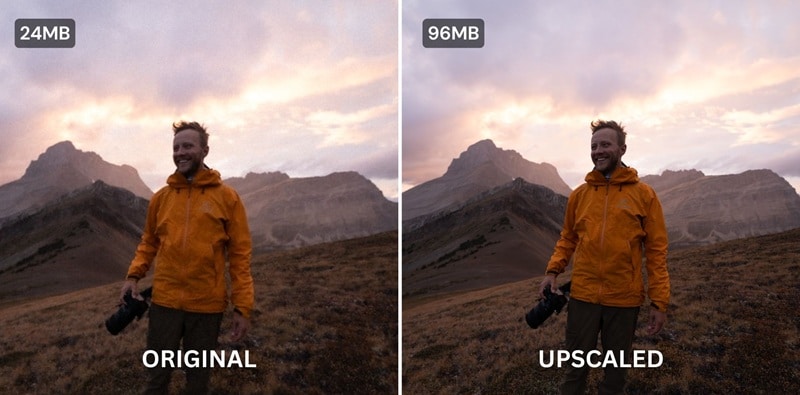
Enhanced images get significantly larger, so you need to make sure you have enough disk space before running Enhance on a large batch. If you apply Super Resolution to a 24-megapixel raw file, the resulting enhanced DNG will have 96 megapixels or four times the original.
Newer versions of Lightroom use JPEG XL compression to reduce this somewhat, but you should still expect enhanced files to take up more storage than the originals.
3. Applying Enhancement More Than Once
You might think that running Denoise or Super Resolution twice would improve the result further. Well, it doesn't. Applying Super Resolution a second time doesn't double the resolution again in any meaningful way. It only adds more processing time and a larger file with no real quality gain.
The same goes for Denoise. Stacking it on an already-processed file can over-smooth details and make the image look plastic or artificial. Just run each enhancement once on the original file.
Part 4. What to Try Next If Lightroom Enhance Isn't Enough
Lightroom's Enhance feature covers most common quality issues in a photo, but it has limitations, such as:
- Denoise and Raw Details are restricted to raw files.
- No option for images that are too damaged or compressed to respond well to AI upscaling.
- Processing can be slow on mid-range systems.
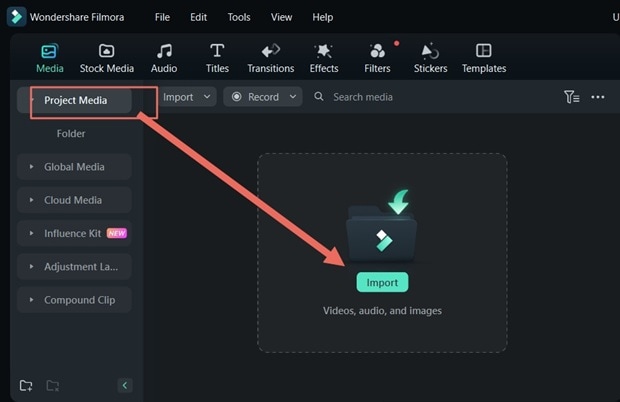
If you're having trouble with Lightroom Enhance, you may want to consider switching to Wondershare Filmora, specifically for its AI Image Enhancer.
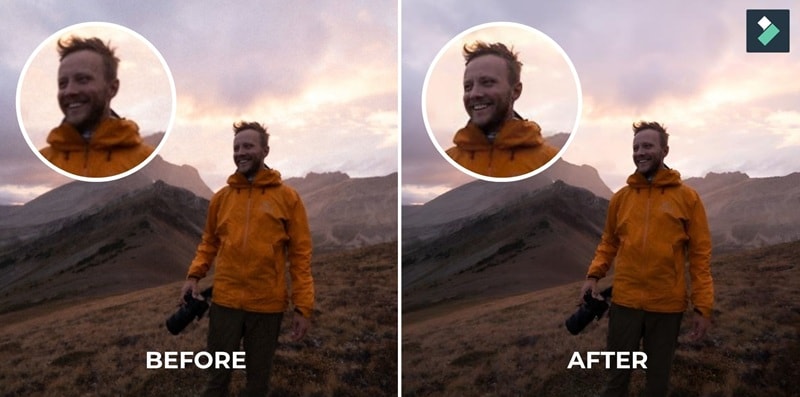
How to Enhance Image Quality in Filmora
Part 5. Tips to Enhance Photos More Effectively in Lightroom
Learning how to improve image quality in Lightroom is only part of the process. These three tips will help you get even cleaner, sharper photos.
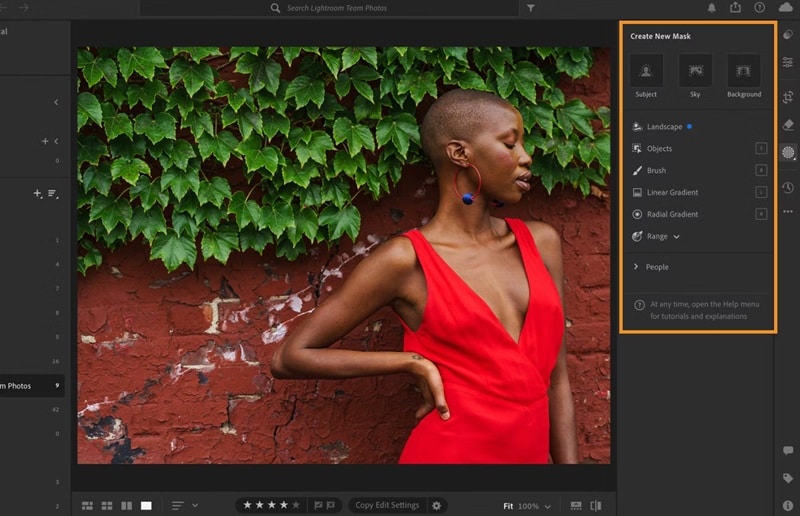
1. Improve Specific Areas With Masks
If your photo only has problems in specific areas, you can use Lightroom's Masking tool to paint over or select specific areas and apply adjustments only there. From there, apply sharpening, noise reduction, or clarity changes just to that selection. The rest of the image stays untouched.
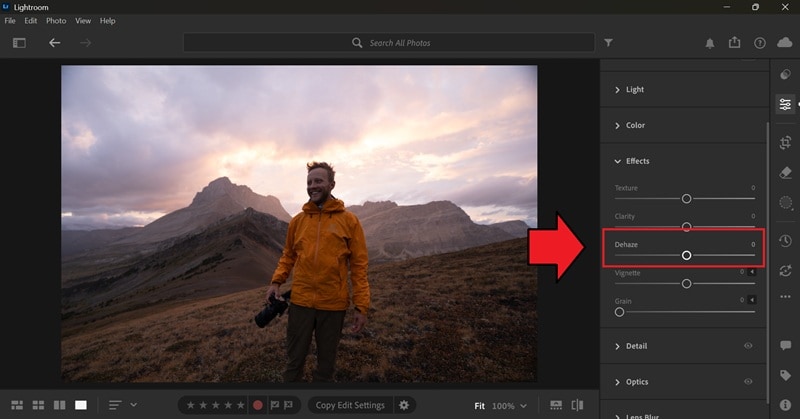
2. Use Dehaze to Clear Up Foggy or Hazy Areas
Raw photos that look flat or washed out due to fog, haze, or atmospheric conditions can be fixed with the Dehaze tool first, found in the Effects section of the Edit panel. It works by boosting contrast in flat areas of the image without touching the parts that already have good contrast.
Remember to apply it locally, not globally. If you drag the Dehaze slider across the whole image, it will affect skin tones and well-exposed areas that didn't need fixing in the first place. Use the Masking tool to select just the hazy area and apply Dehaze only there.
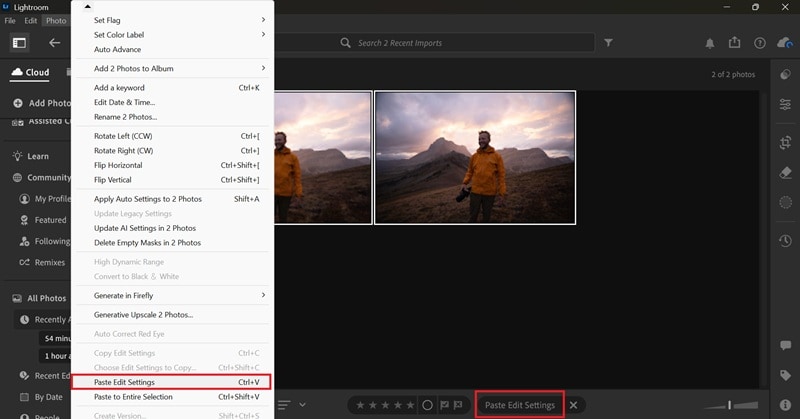
3. Enhance Multiple Images in One Go
If you shot a series of photos in the same lighting conditions, you don't have to enhance each one individually. In Lightroom CC:
- Apply your adjustments to one photo
- Go to Photo > Copy Settings and choose which adjustments to copy
- Switch to Grid view and select all the images you want to edit
- Go to Photo > Paste Settings to apply those edits across the batch
Final Words
You now know how to enhance photo quality in Lightroom, as well as which option to pick for your specific situation. Use either Denoise for grainy high-ISO shots or Raw Details for sharper edges and better color accuracy, and Super Resolution when you want to increase photo resolution in Lightroom.
Lightroom, however, works best for RAW files. If your problem revolves around JPEGs, heavily compressed images, or formats Lightroom doesn't support, Filmora's AI Image Enhancer is a practical alternative you can try next.
FAQs on Enhancing Photo Quality in Lightroom
-
1. How to enhance photo quality in Lightroom mobile?
Enhancing photo quality in Lightroom mobile is a bit different from the desktop version. On Lightroom mobile, you can use the Quick Actions feature. Open a photo, tap the Actions button, and Lightroom will analyze your image and suggest improvements based on what it detects.One of those suggestions is Enhance, which automatically detects what's in the whole scene, including people, background, mountains, water, snow, and more, and applies adjustments accordingly.
-
2. Does Enhance change the original photo?
No. Lightroom saves the enhanced version as a separate DNG file and stacks it with the original. Your original file stays untouched. -
3. Which is better, Denoise, Raw Details, or Super Resolution?
Denoise, Raw Details, or Super Resolution solve different problems. Denoise is for noise and grain. Raw Details is for edge sharpness and color accuracy. Super Resolution is for increasing resolution. The right one depends on what your photo actually needs. -
4. Can I undo or re-edit an enhanced image in Lightroom?
You can delete the enhanced DNG file if you want to start over, but you cannot undo the enhancement itself after it's been applied. The enhanced file is editable like any other file in Lightroom, so you can still make adjustments on top of it. -
5. What's the best resolution for high-quality photos in Lightroom?
The best photo resolution depends on your end use. For print, 300 PPI is the standard, with common sizes like 3000 × 2400 pixels or an 8 × 10-inch print to keep details sharp. For web and screen use, 72 to 96 PPI is enough, such as 1920 × 1080 for full HD displays or 2048 pixels on the long edge for general online sharing.
