
 100% Security Verified | No Subscription Required | No Malware


 ChatGPT
 Perplexity
 Gemini
 Claude
 Grok
Grok
Have you ever wondered, "Can I add a transparent watermark in Lightroom?" or "How do I add a watermark on the Lightroom mobile app?" If you've asked yourself the same questions, you're not alone.
Adding a watermark in Lightroom is one of the easiest ways to protect your photos, showcase your brand, and maintain a professional look across platforms.
In this guide, we'll walk you through step by step how to add a watermark in Lightroom—whether you're using the desktop version or the mobile app—so you can safeguard your images while keeping them visually stunning.
In this article
How to Add a Watermark in Lightroom Classic (Desktop Method)
As we all know, Adobe Lightroom is a powerful photo editing and management tool trusted by photographers worldwide. Beyond color correction and retouching, it also offers features like watermarking to help protect your work and maintain a professional identity. Whether you're editing on desktop or mobile, Lightroom makes adding a watermark quick and customizable.
The most reliable way to add watermarks on a desktop is through Lightroom Classic during the export process. Exporting ensures that the watermark is embedded into the final file, so whether you are planning on uploading it to Instagram, sending it to a client, or archiving it, your watermark will remain intact.
Let's assume that you have finished editing the photo and want to add the watermark to the photos in Lightroom. To learn how it works, follow the steps below.
- Right-click on the photo you want to export and then go to Export > then select Export.
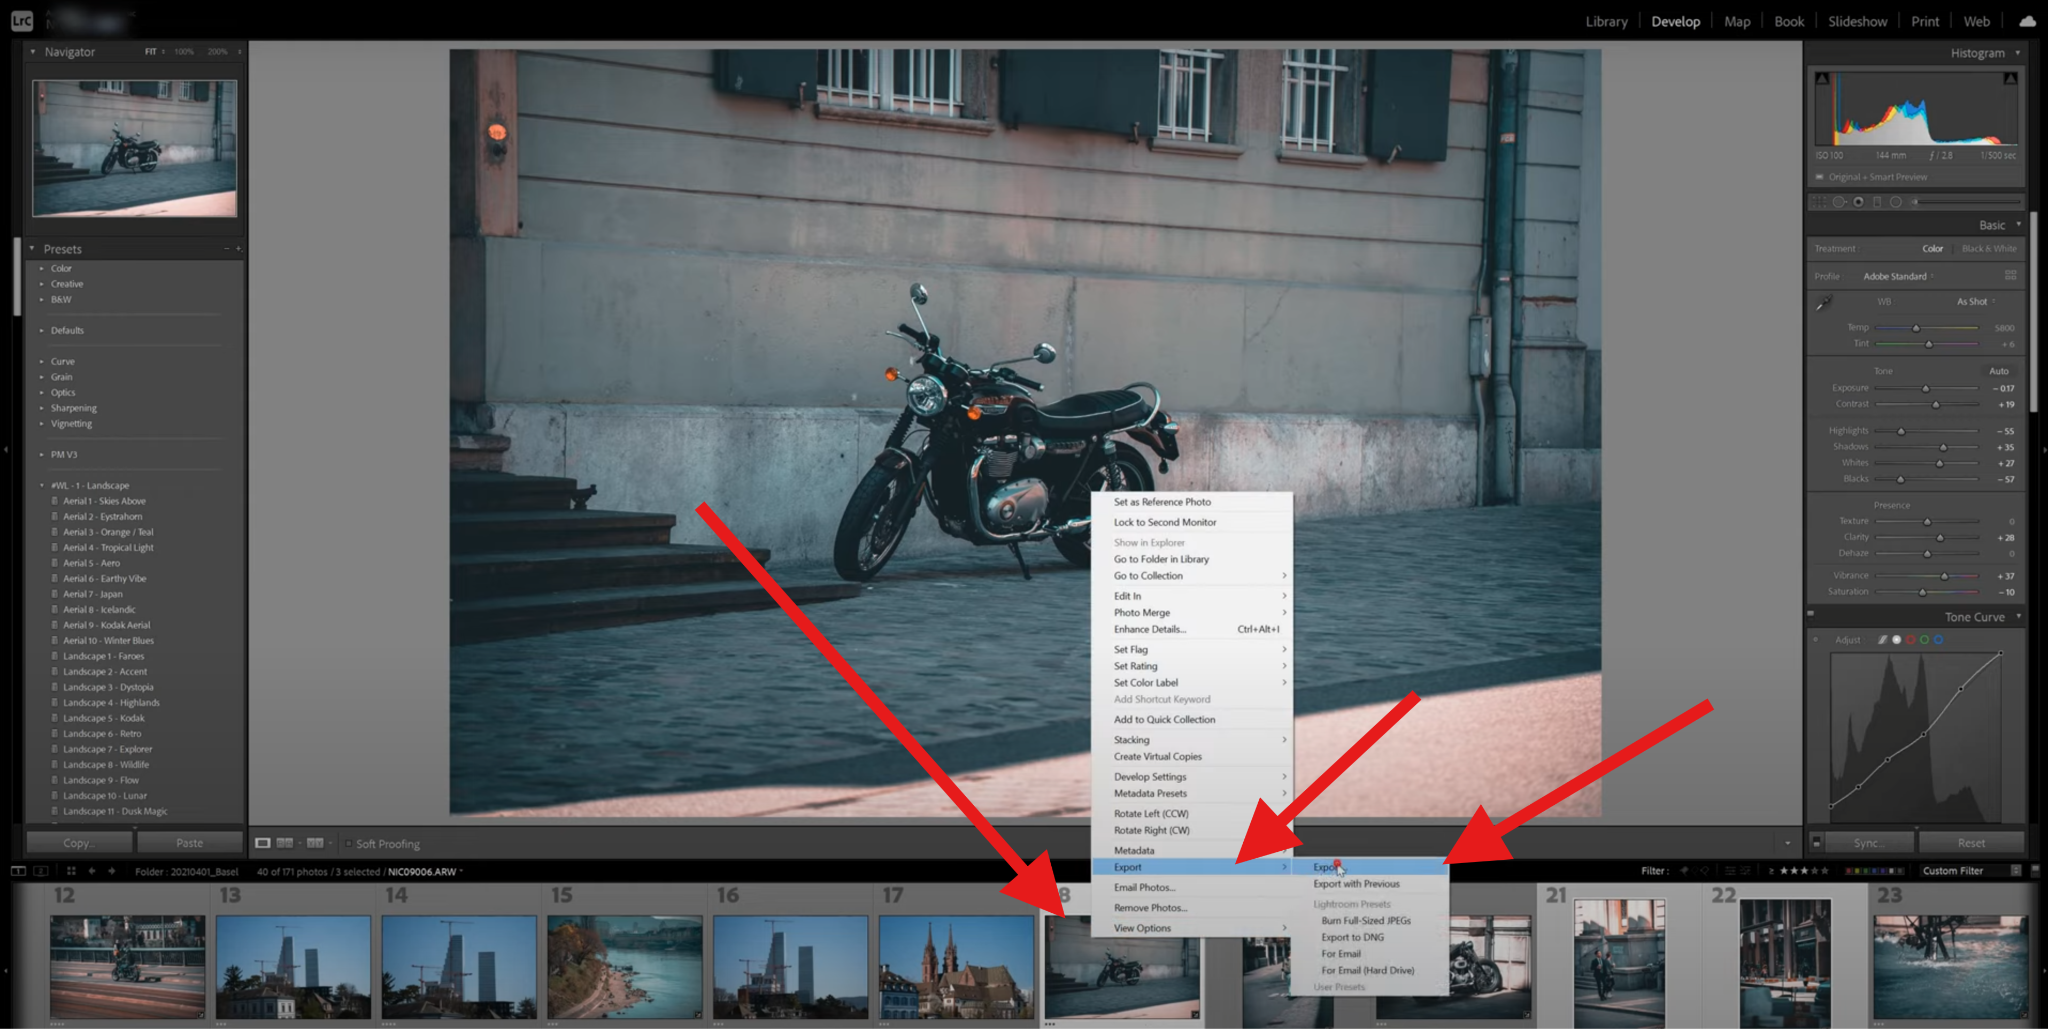
- A new window will pop up. Scroll down to the Watermarking section, activate the Watermark feature, and select Edit Watermark in the drop-down menu.

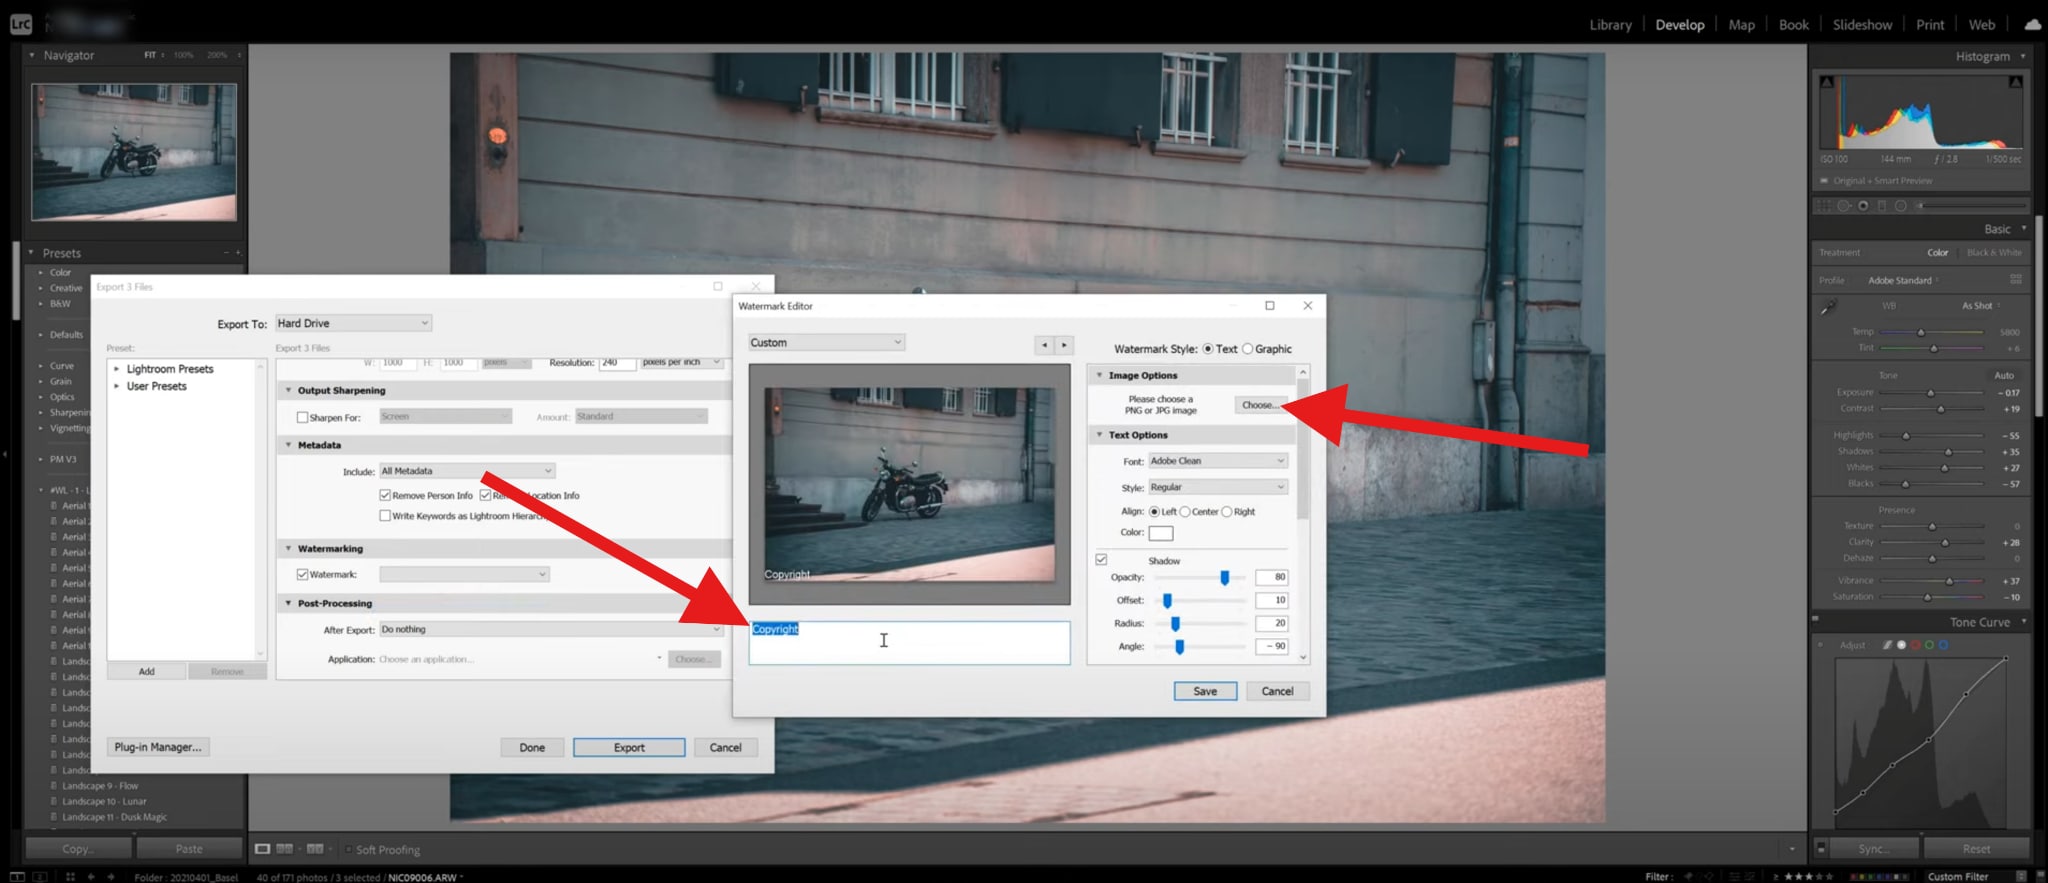
- You can now add custom text as a watermark. If you want to add an image as a watermark in Lightroom, click on Choose.
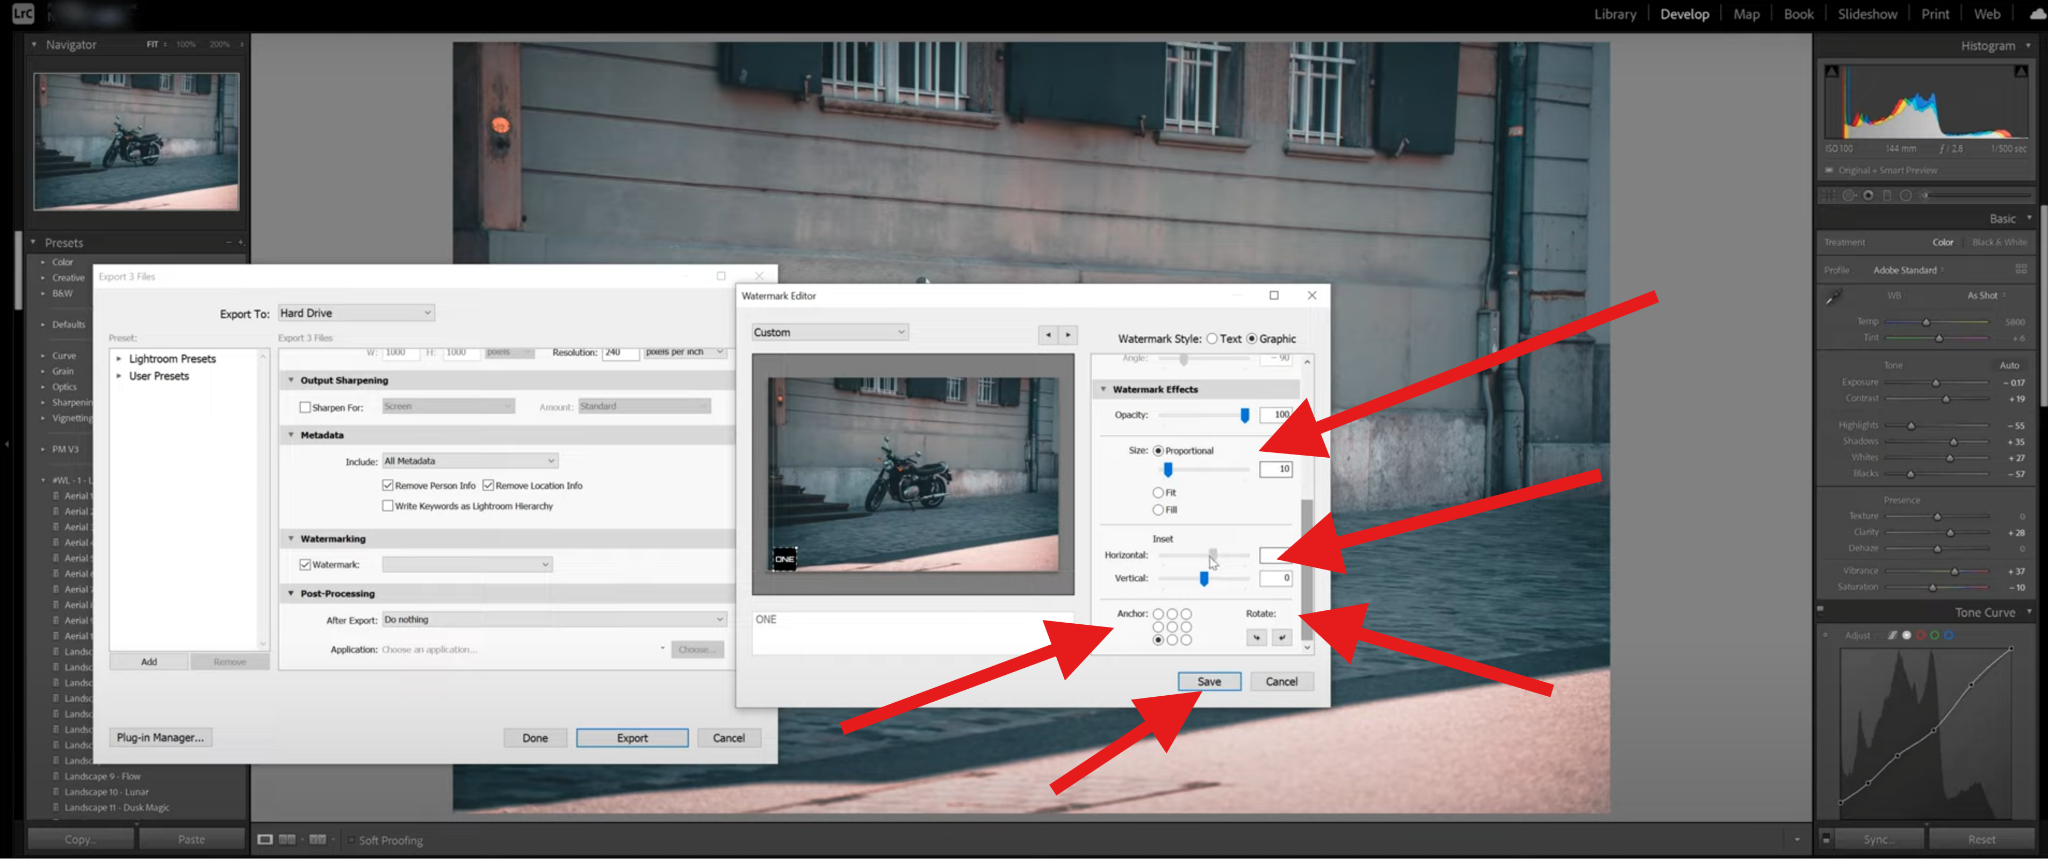
- You can now adjust the size, offset, and anchor of the watermark. There is also a Transparency slider. You can also rotate the watermark if needed. When you are satisfied with the result, click Save. You will then be prompted to add a name to your new watermark preset.
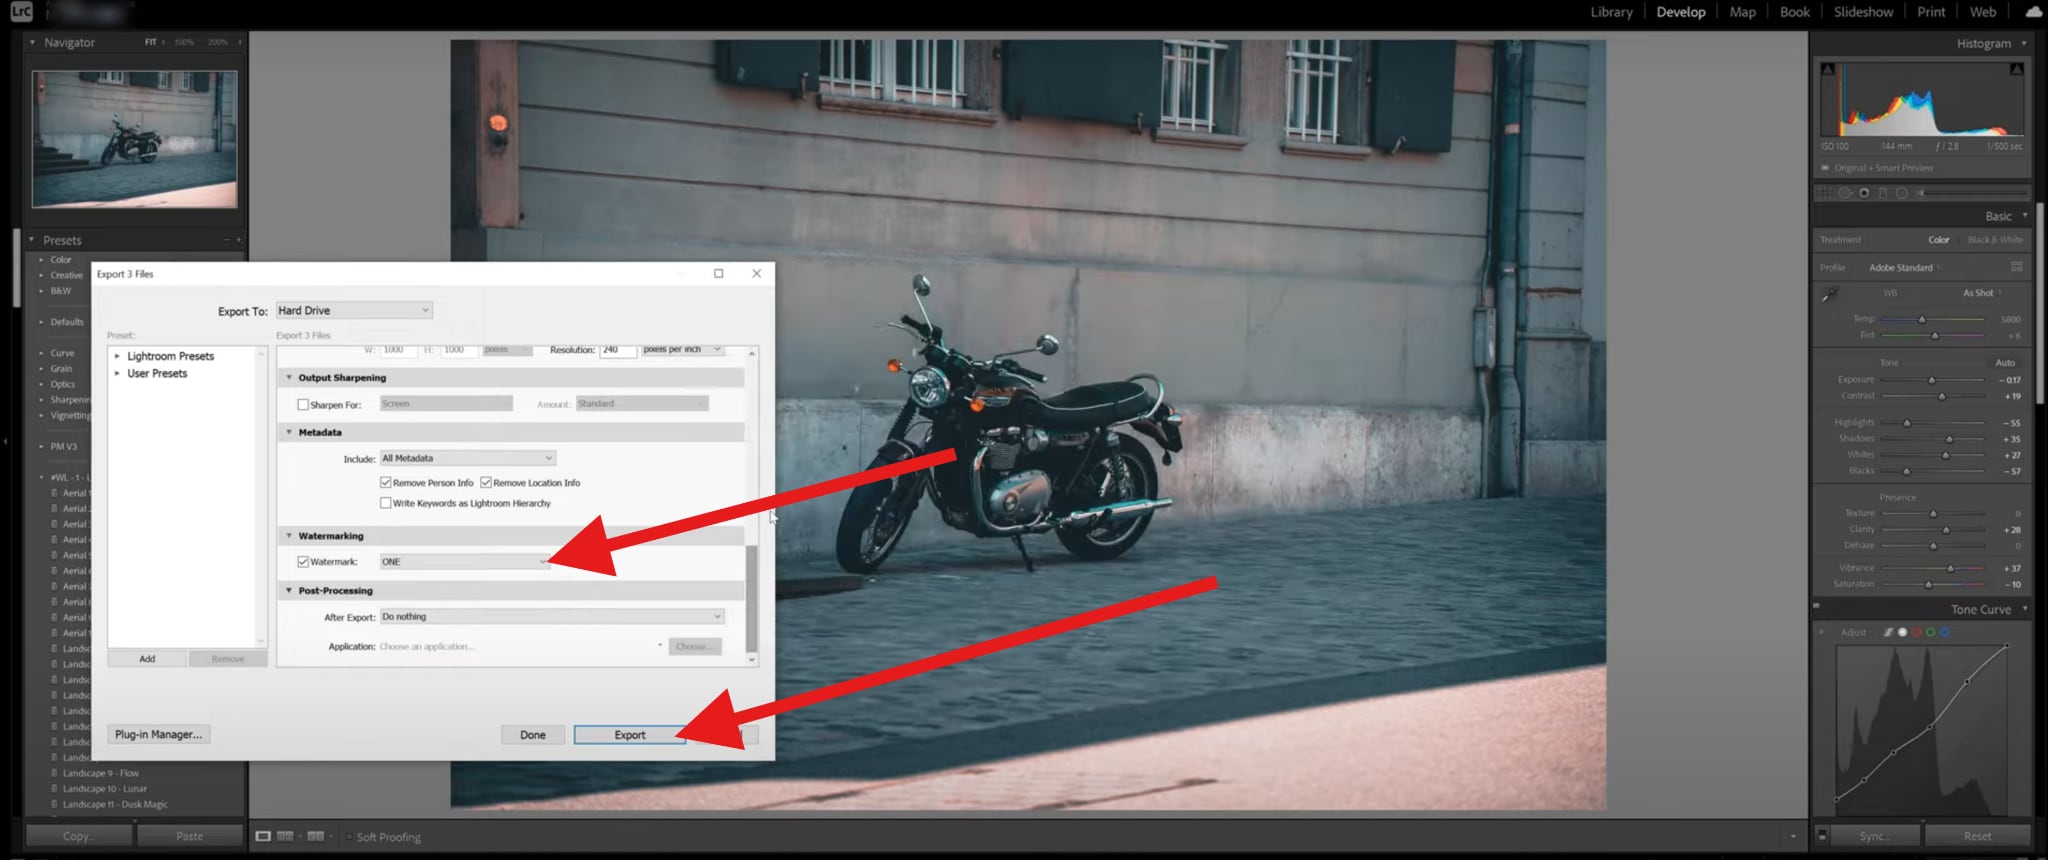
- Select the new preset and click on Export.
With this step, you have completed adding a watermark to a photo using Lightroom Classic. Let's switch to the mobile version now.
How to Add a Watermark on Lightroom Mobile (App Method)
For creators who prefer editing on the go, Lightroom Mobile provides a built-in watermark feature. While simpler than the desktop editor, it covers all the basics needed for branding and protection. Here's how it works.
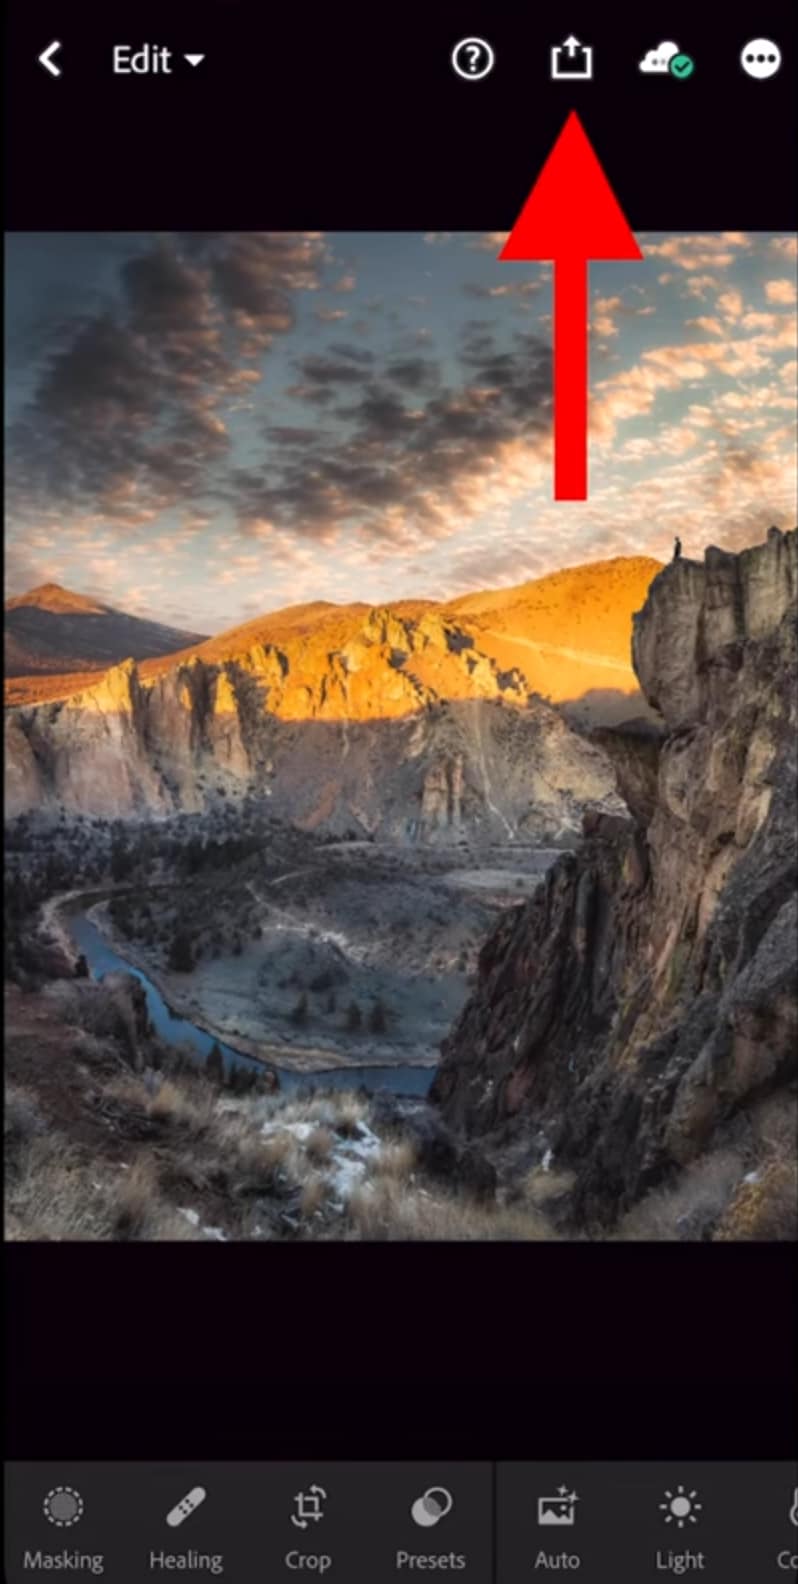
- Open the photo you would like to protect with a watermark using the Lightroom app and click on the Export button at the top.
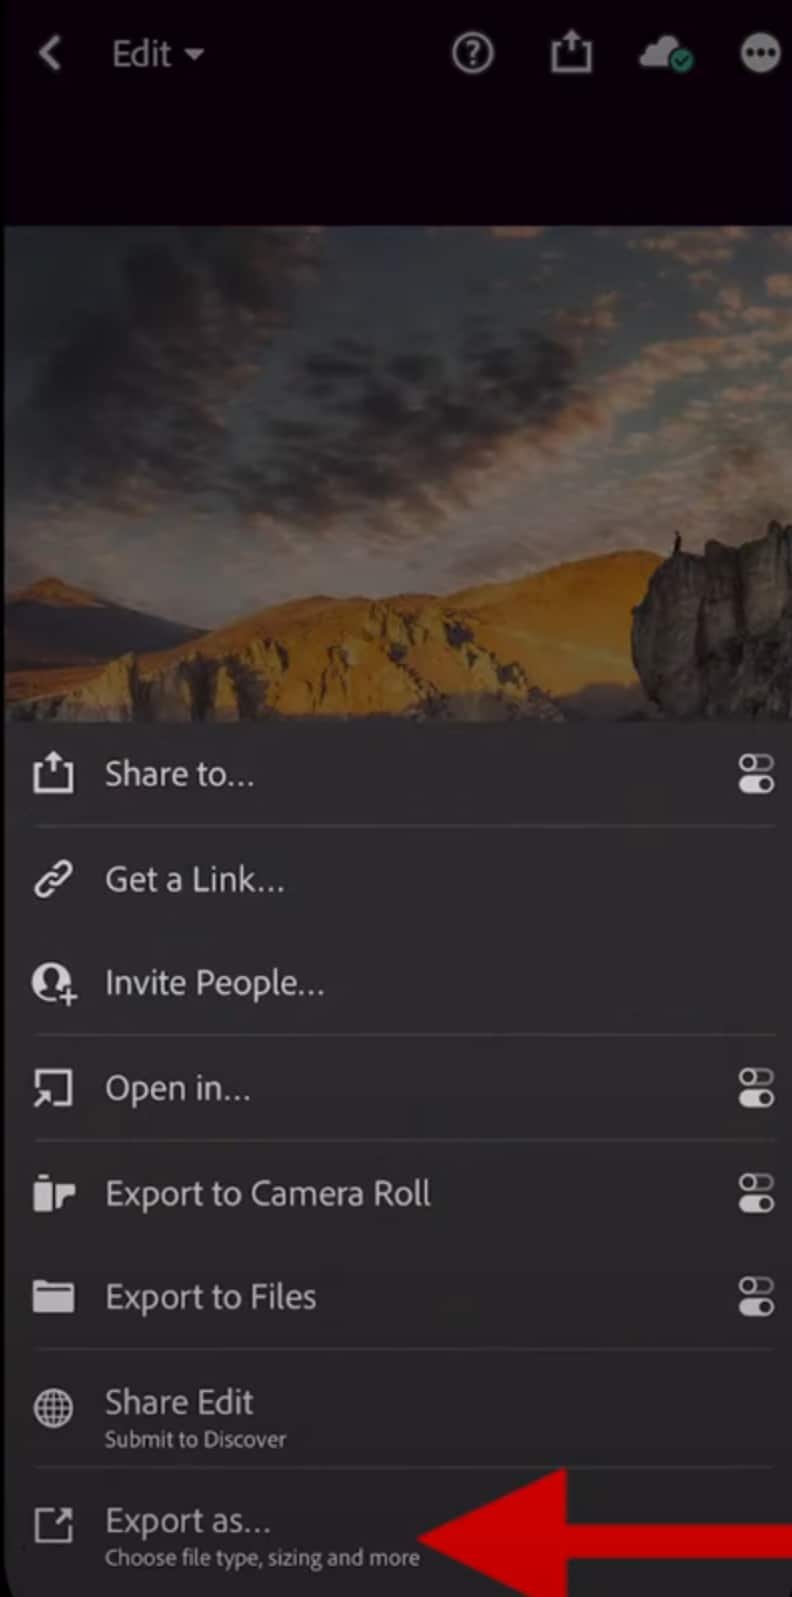
- Now, tap on Export as…
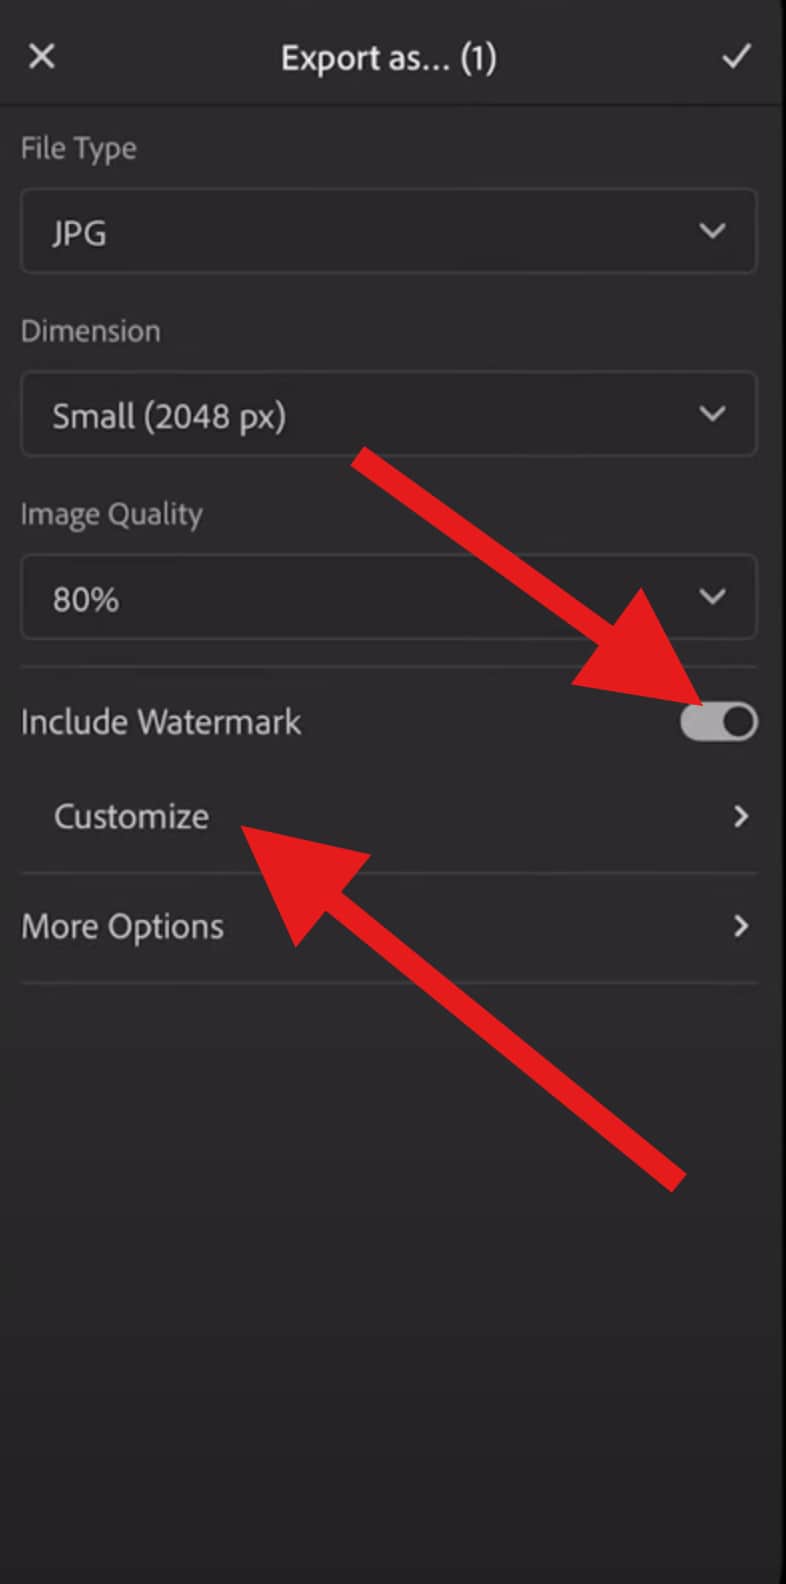
- Activate the Include Watermark feature. Then, tap on Customize.
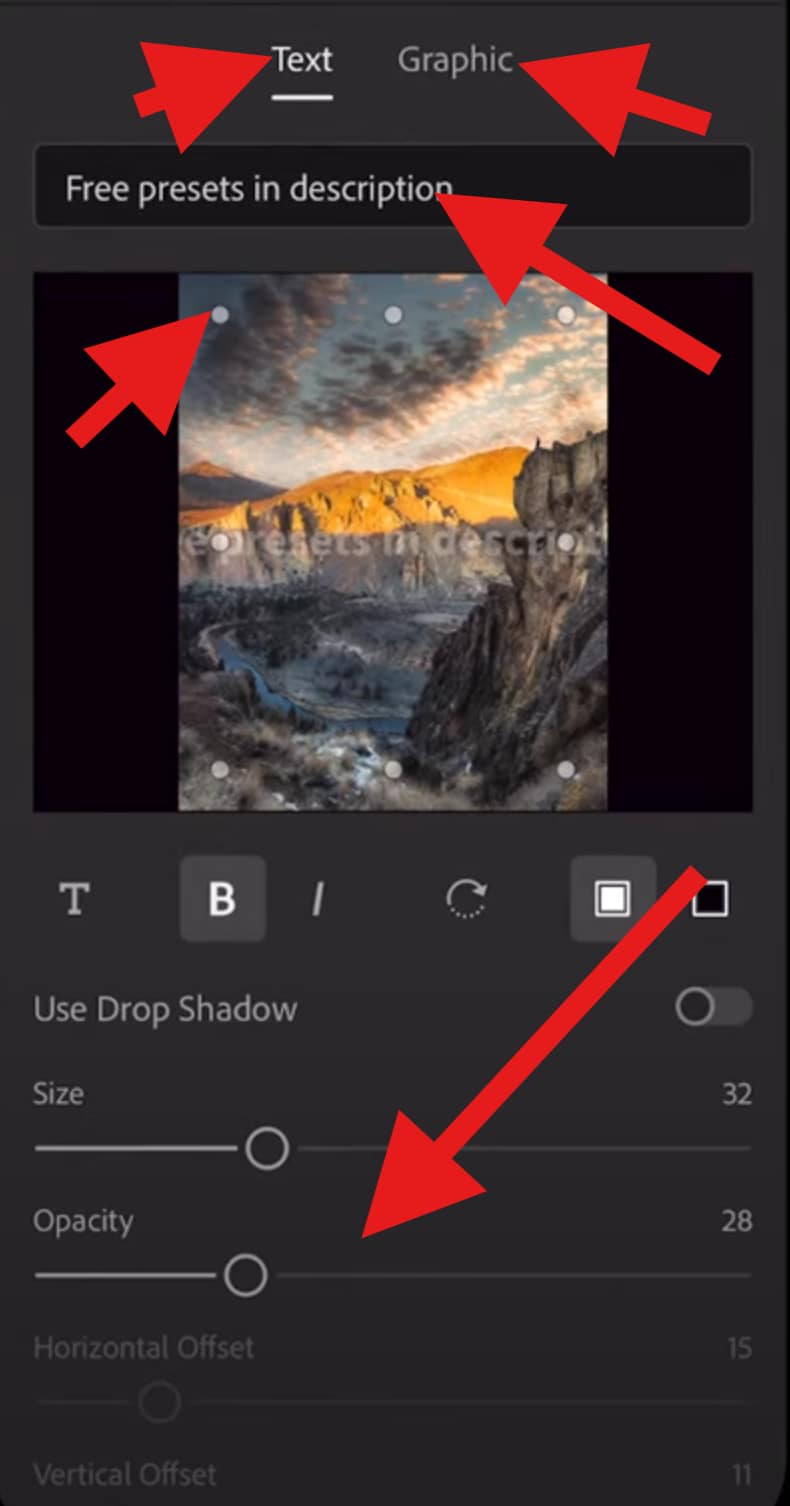
- You can choose to go with either a text watermark or a graphic watermark. If you go with text, you can enter the text you want, pick the position of the watermark in the preview section of the interface, and explore various customization options, like the size, opacity, and offset.
- If you want to select the Graphic option, tap on the + icon and pick a photo (preferably a PNG file). As in the previous step, you can adjust the size and position later.

When this is done, just go back and click on the checkmark to accept the changes, and that's it. You have learned to add a watermark to photos in Lightroom. Now, let's explore some customization tips.
Lightroom Watermark Customization Tips
If you want your watermark to be effective, you need to pay attention to its design and placement. Here are some pro tips that you should pay attention to.
- Use a Transparent Logo: PNGs with transparent backgrounds look cleaner than JPEGs with solid blocks. A transparent logo seamlessly integrates with any photo, avoiding awkward edges.
- Keep It Subtle: Viewers should notice your watermark without it stealing their attention. A lower opacity and moderate sizing prevent your work from looking cluttered or like it was done by an amateur.
- Choose Brand Colors: Align your watermark with your existing brand identity. If your logo uses navy blue and white, replicate those shades. Consistency across your portfolio builds stronger brand recognition.
- Leverage Presets: Lightroom Classic can save multiple watermark presets. For example, you might use a bold watermark for drafts, a subtle one for Instagram, and none at all for gallery prints.
- Test Placement: Preview your watermark across different photos. What looks perfect on a portrait may obscure the focal point of a landscape. Adjust placements to avoid clashing with the main subjects in the photo.
When Lightroom Isn't Enough
Lightroom excels at watermarking photos, but its functionality stops there. If you are also a video producer or simply want animated or dynamic watermarks, you'll quickly run into a wall. Lightroom does not support adding watermarks to videos, nor does it allow creative effects like motion or glow. For artists branching into multimedia or YouTubers looking to maintain consistent branding across photos and videos, Lightroom alone isn't enough.
That's where a much better alternative comes in as a more versatile solution.
Add Watermarks to Videos with Filmora (Best Alternative)
Filmora is a popular video editor that also supports watermarking. Unlike Lightroom, it works with both photos and videos, giving you more creative control. Its simple interface is designed so that you don't need advanced editing skills to get started. With Filmora, you can build watermarks that are static, animated, or stylized with effects.
 secure download

Why Filmora Is Better for Watermarking Photos and Videos?
- AI-powered Video Watermarking - Add watermarks to short videos with AI by reference pictures and simple prompts, and the AI will fully merge and place the watermark in videos properly.
- Drag-and-drop simplicity — Filmora makes watermarking as easy as dragging your logo or typing text directly onto the timeline. Anyone can do it.
- Creative customization — You can do more than adjust opacity. Add motion so the watermark fades in, slides across the screen, or pulses subtly. Apply glow effects, shadows, or outlines for visibility across varying backgrounds.
- Batch watermarking — If you manage a series of vlogs or tutorials, Filmora lets you apply the same watermark across multiple projects at once.
- Cross-platform support — It is compatible with Android, iOS, Windows, and Mac.
Steps to Insert a Watermark in Filmora
And now, let's learn to add a watermark to a video using Filmora. We'll begin with the desktop version.
- Download and install Filmora on your device.
secure download
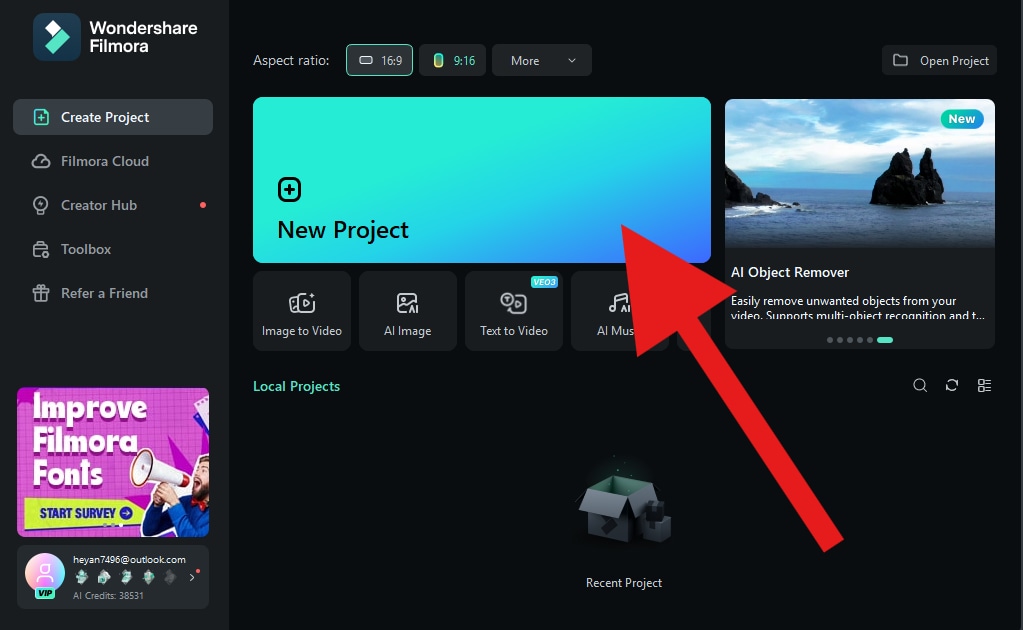
- Open Filmora and create a New Project.
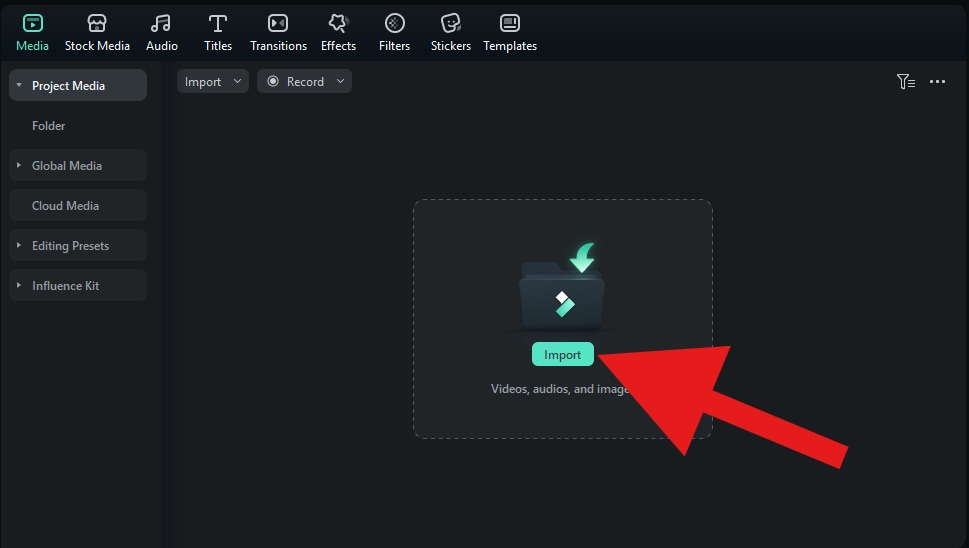
- Click on Import and add a video to the Filmora project.
- Now, drag the video to the timeline.

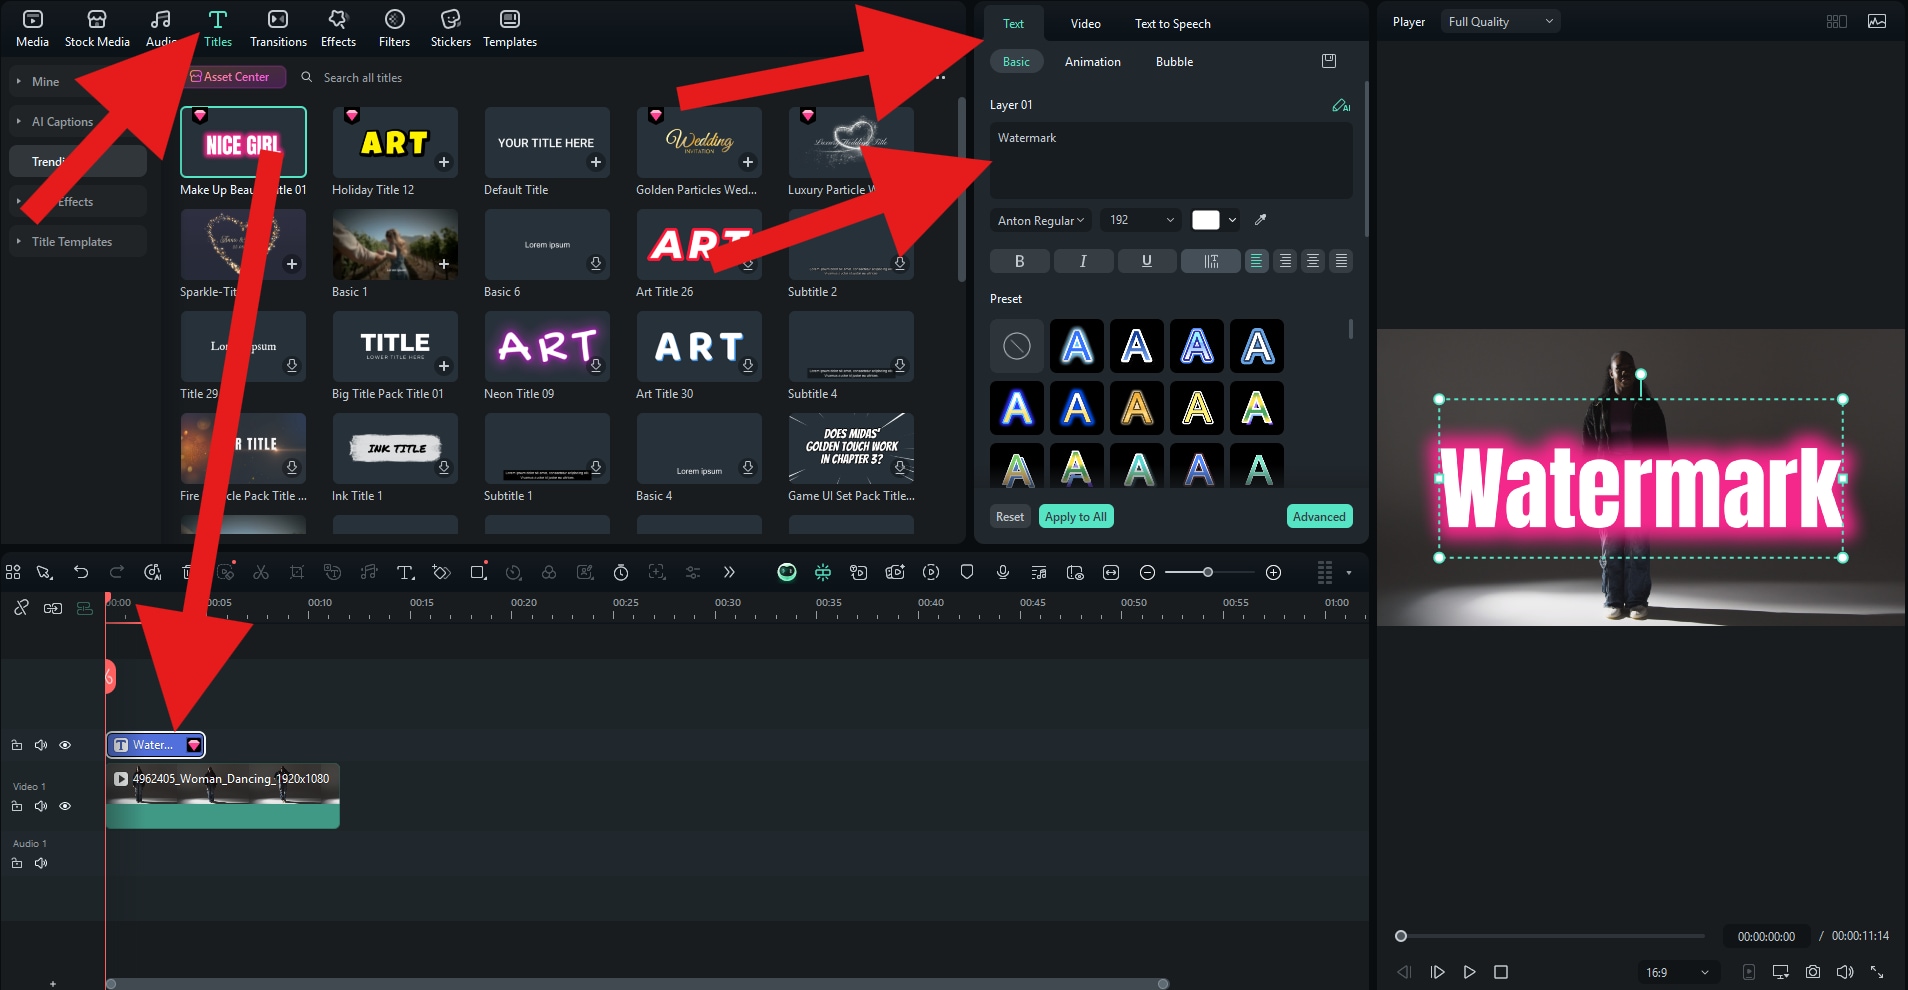
- If you want to add a text watermark, go to Titles and pick an animated title sequence that you like. Then, drag it to the timeline above the video clip. After that, go to Text > Basic, and input the words that you want to see in your watermark.
- You can adjust the size and position of the watermark text directly in the preview window. Go to Video (or Image) > Basic and adjust the Opacity to your liking.
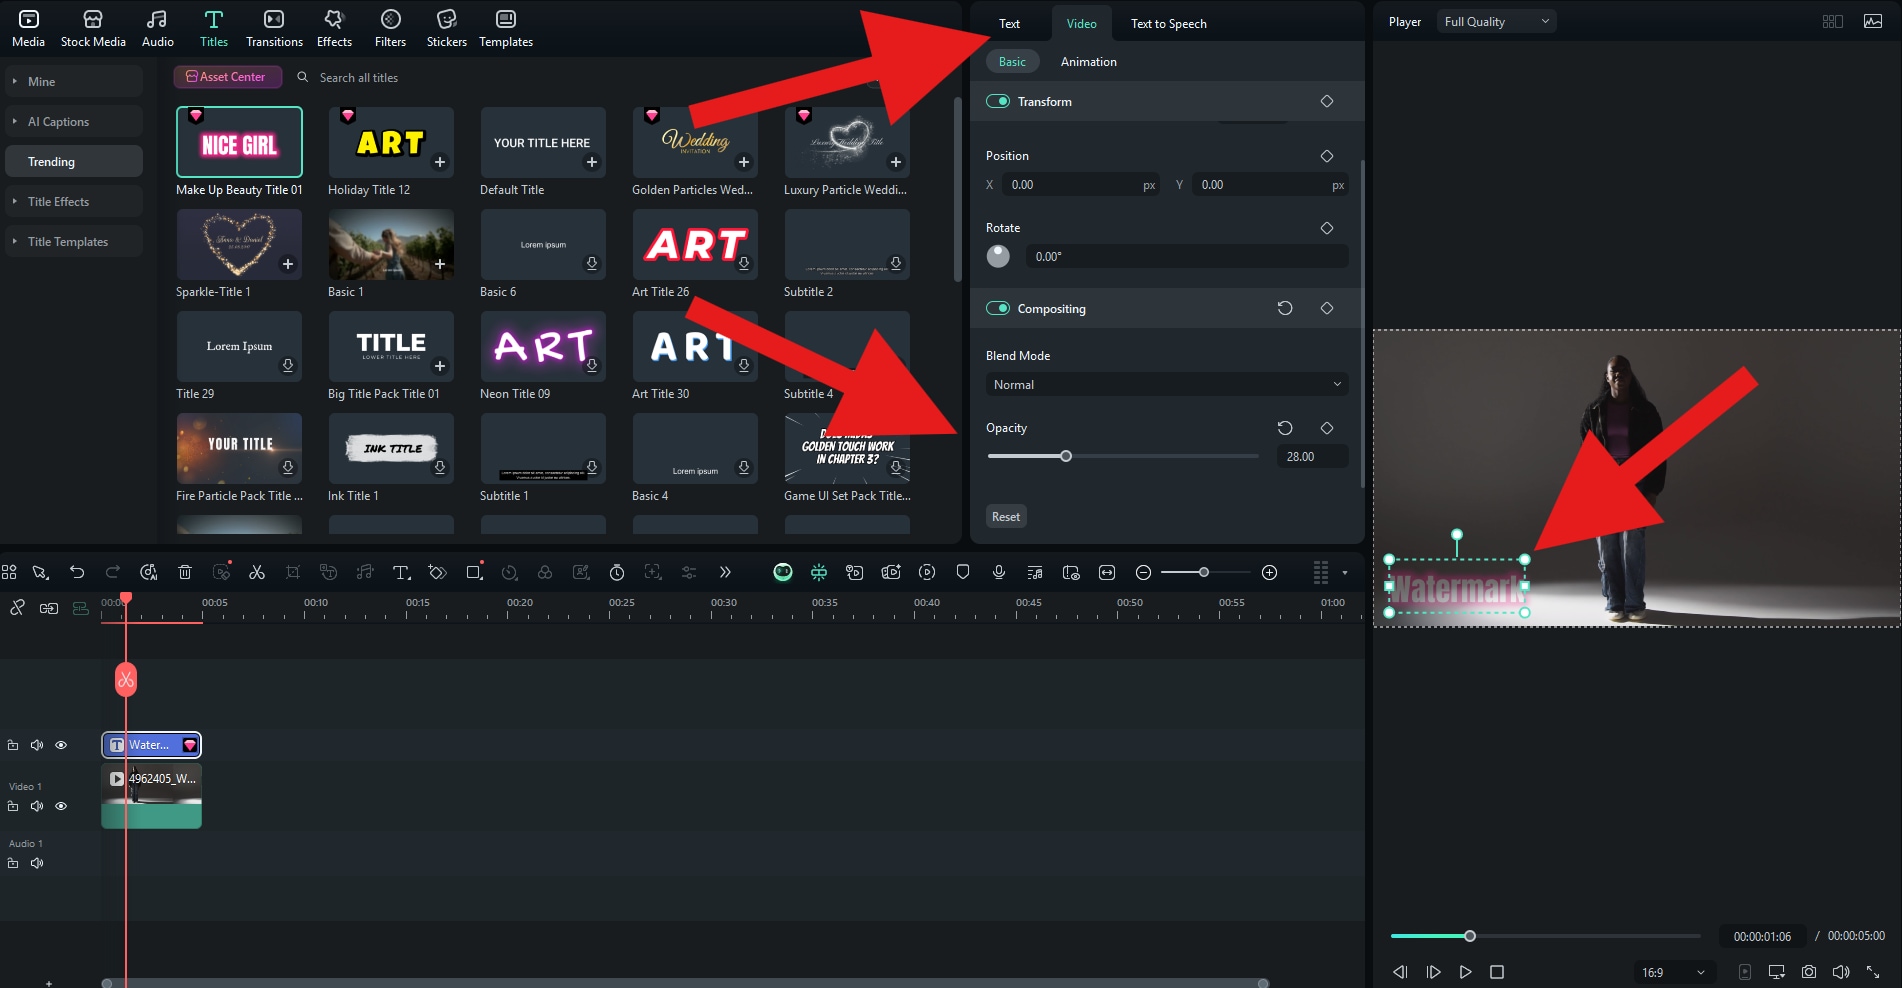
Check out the result.

If you want to add a PNG as a watermark, simply upload it as a separate file and repeat the process.
Looking for an alternative to Lightroom mobile? You can check the app version of Wondershare Filmora. It allows you to add watermarks to photos and videos with a click. Here are the quick steps to put a watermark logo on the photos in the Filmora app.
secure download - After downloading the app on your phone, open it and start a new project.
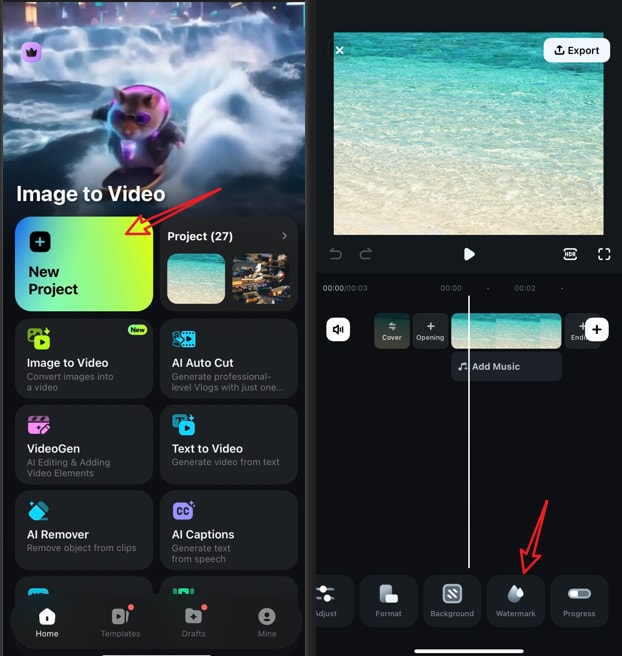
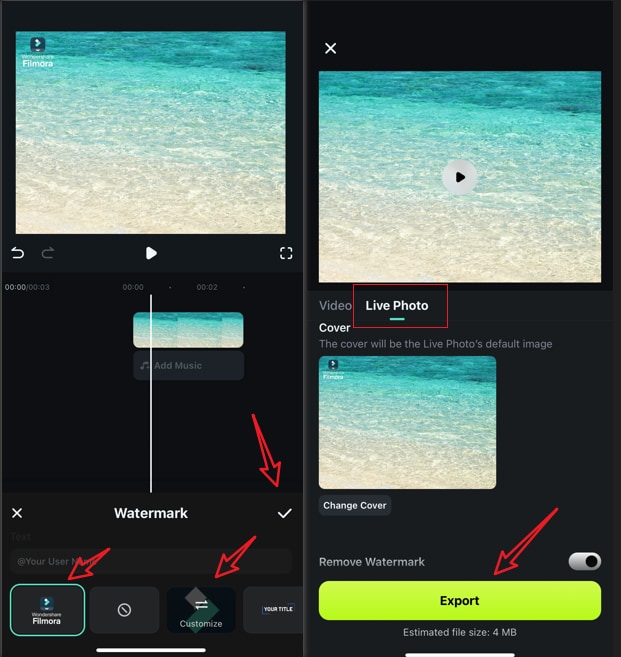
- Import a picture > navigate to the watermark feature > tap on a preset watermark or import your own watermark by tapping the customize feature.
- Accept the changes, take a screenshot or tap on Export to save the photo after adding a logo.
If you are looking for a more customized method to add watermarks to photos, you can use the PIP feature to overlay it, then use its powerful editing feature to adjust and customize it on your own.
- Find the PIP feature in the bottom menu and upload the video file you want to use as a watermark.

- Position it where you want and adjust the size, position, tilt, and tap on Blending.
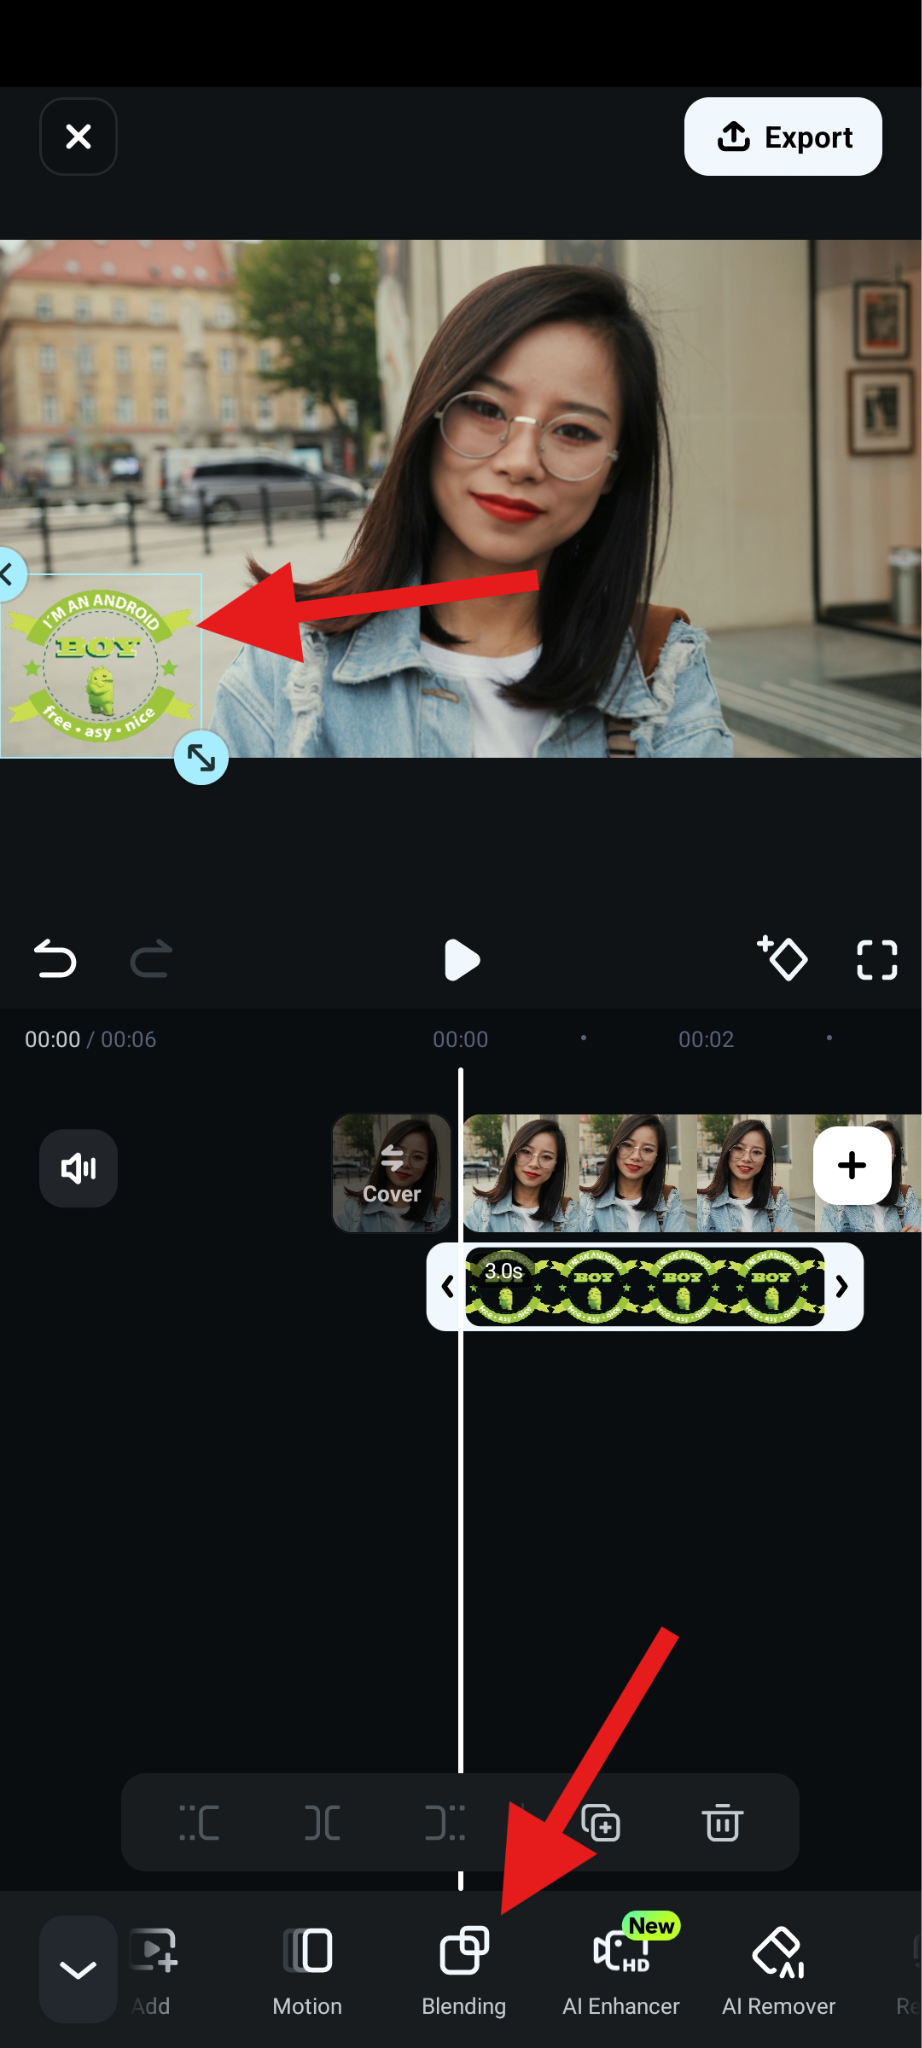
- Adjust the Opacity slider and accept the changes.

Check out the results.

Conclusion
In this article, we have discussed how to add watermarks in Lightroom on a PC or using a mobile device. Adding a watermark is quick, effective, and customizable, but if you're expanding into video or want more creative control, Filmora fills that gap, offering everything you need to safeguard your visuals and grow your brand.
Download Filmora today and elevate your visual branding across both photos and videos.
secure download 