
 100% Security Verified | No Subscription Required | No Malware


 ChatGPT
 Perplexity
 Gemini
 Claude
 Grok
Grok
Have you ever uploaded a video only to see it reposted without proper credit? A good way is to add a watermark to videos to project that. If you are a CapCut user and want to learn how to make your own watermark in CapCut and how to add it to your videos, you've come to the right place.
In this article
How to Make Your Own Watermark in CapCut?
As a popular video editor, CapCut also allows you to create a watermark and customize it within the app itself. You don't need professional design software. With a few taps, you can create either a text watermark or a graphic-style one using built-in stickers and shapes. Let's see how to create and add your own watermark in CapCut.
Method 1 — Create a Text-Based Watermark
If you want to use simple text as a watermark, follow the steps below.
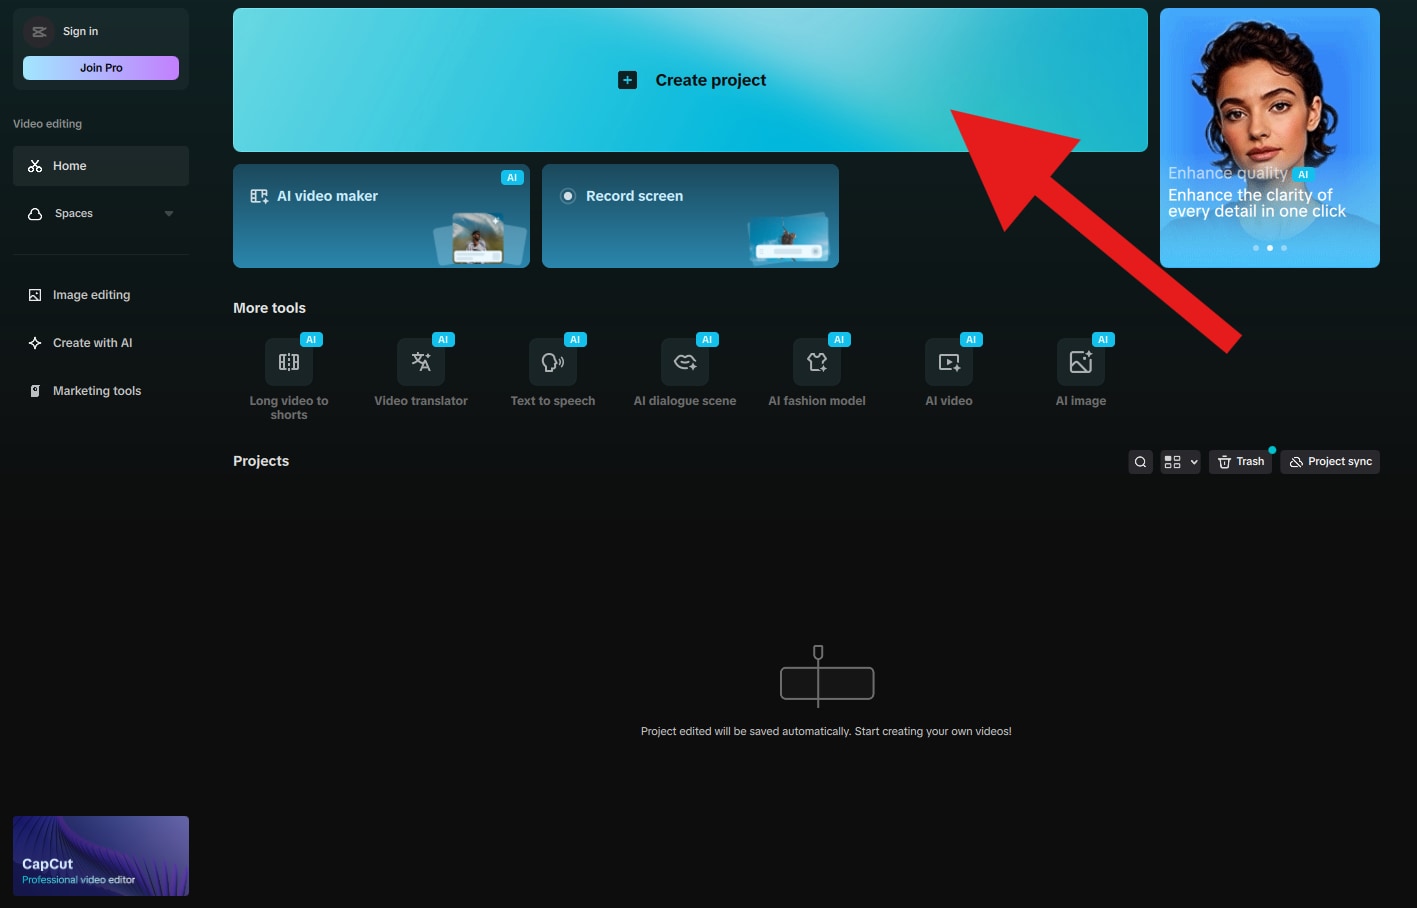
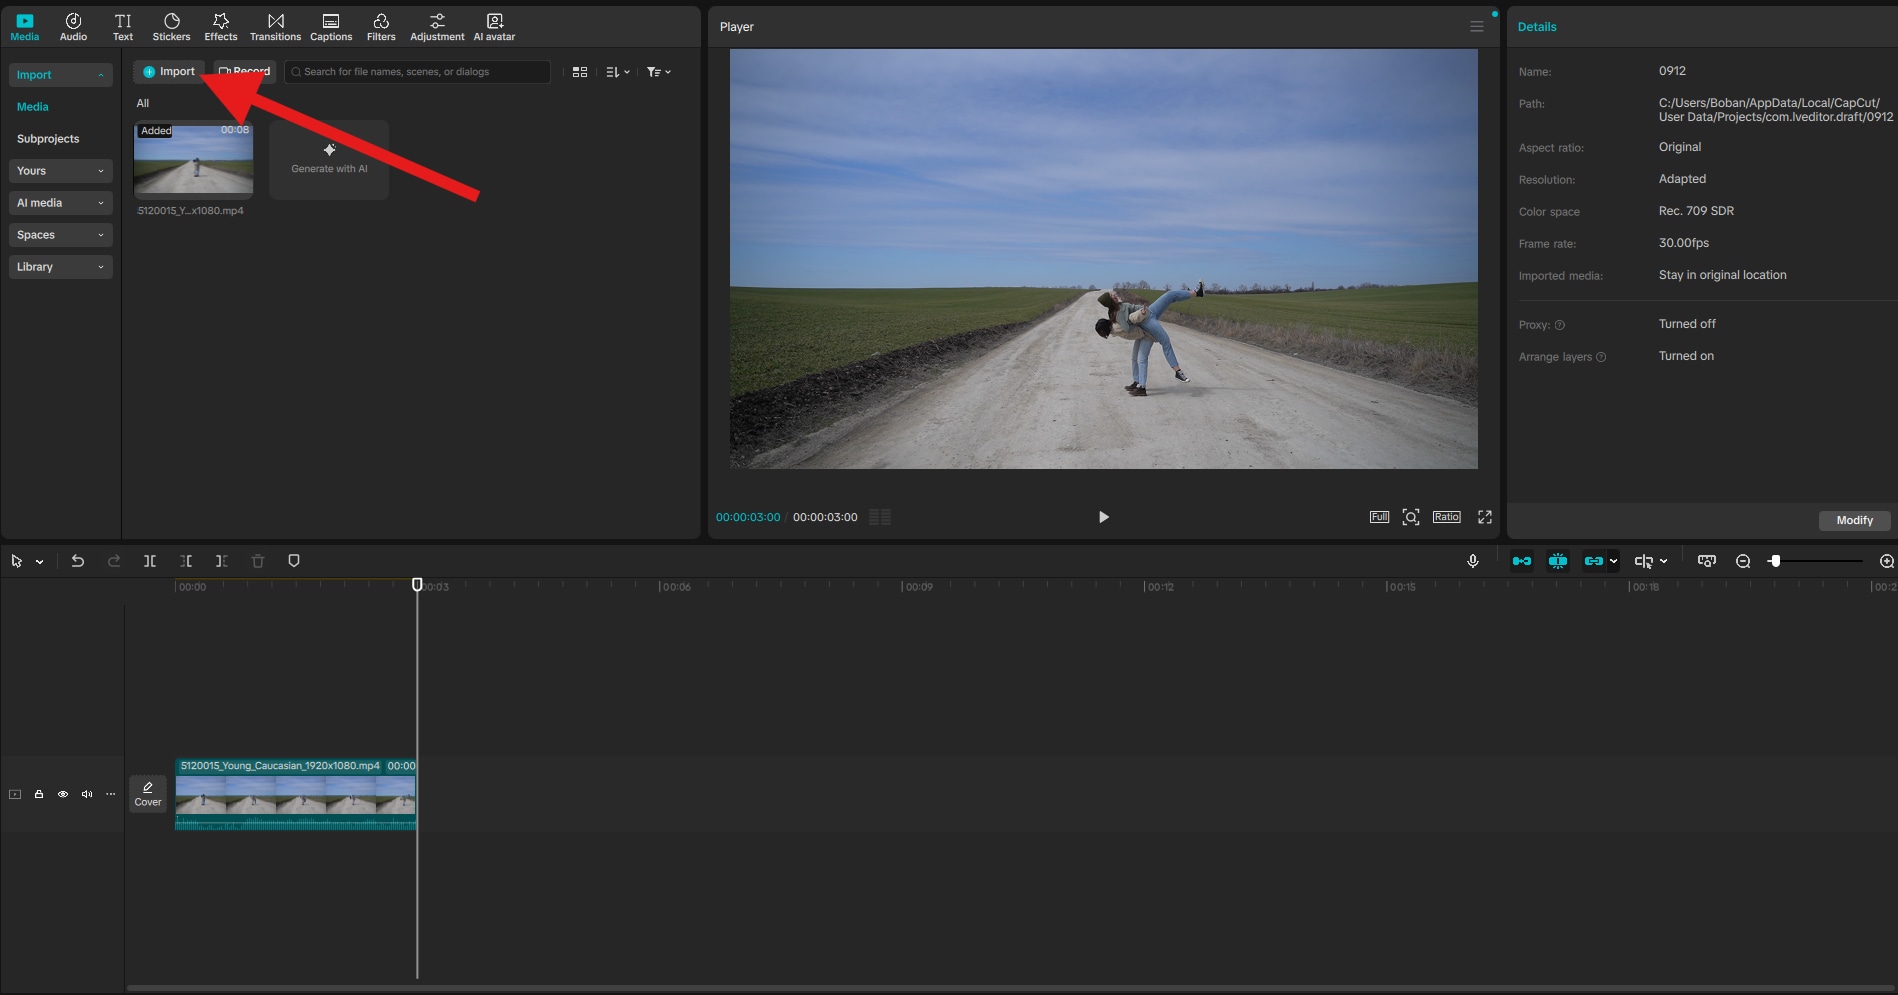
- Open CapCut and click on Create project.
- Click on Import and add a video or photo to your project. We'll go with a video file.
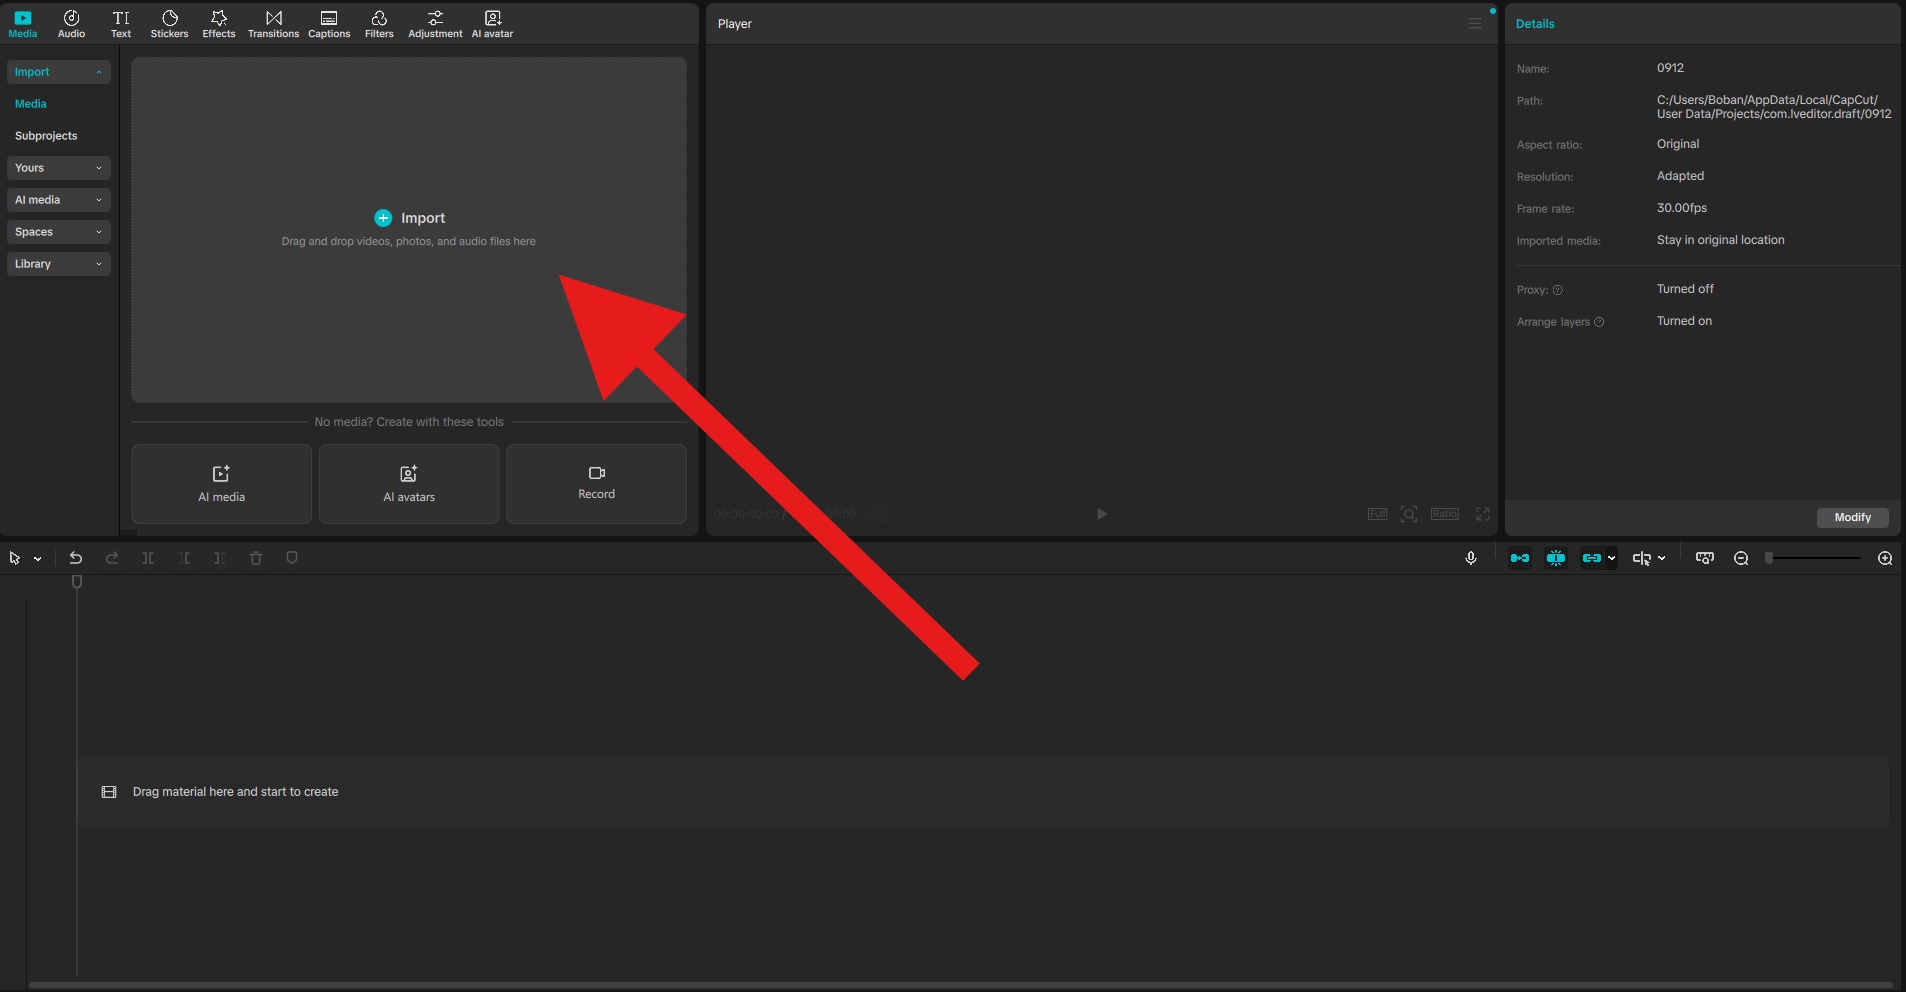
- Drag your clip to the timeline.
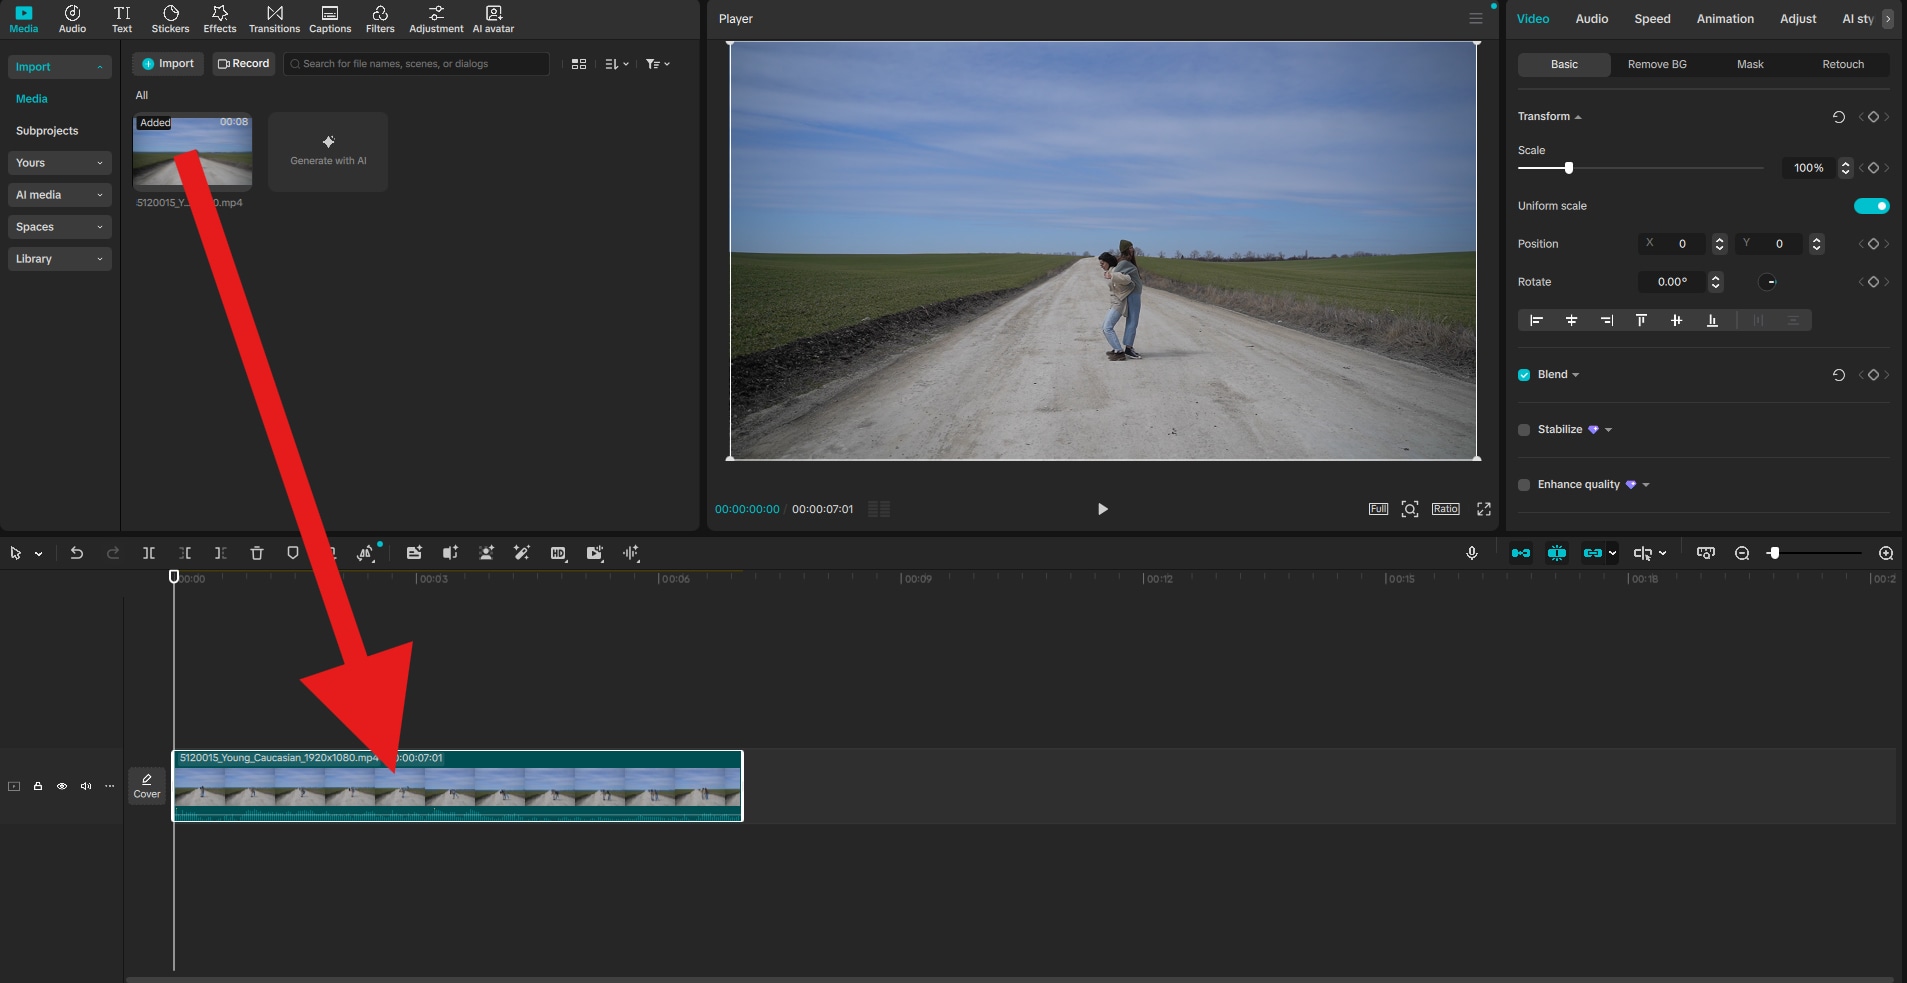
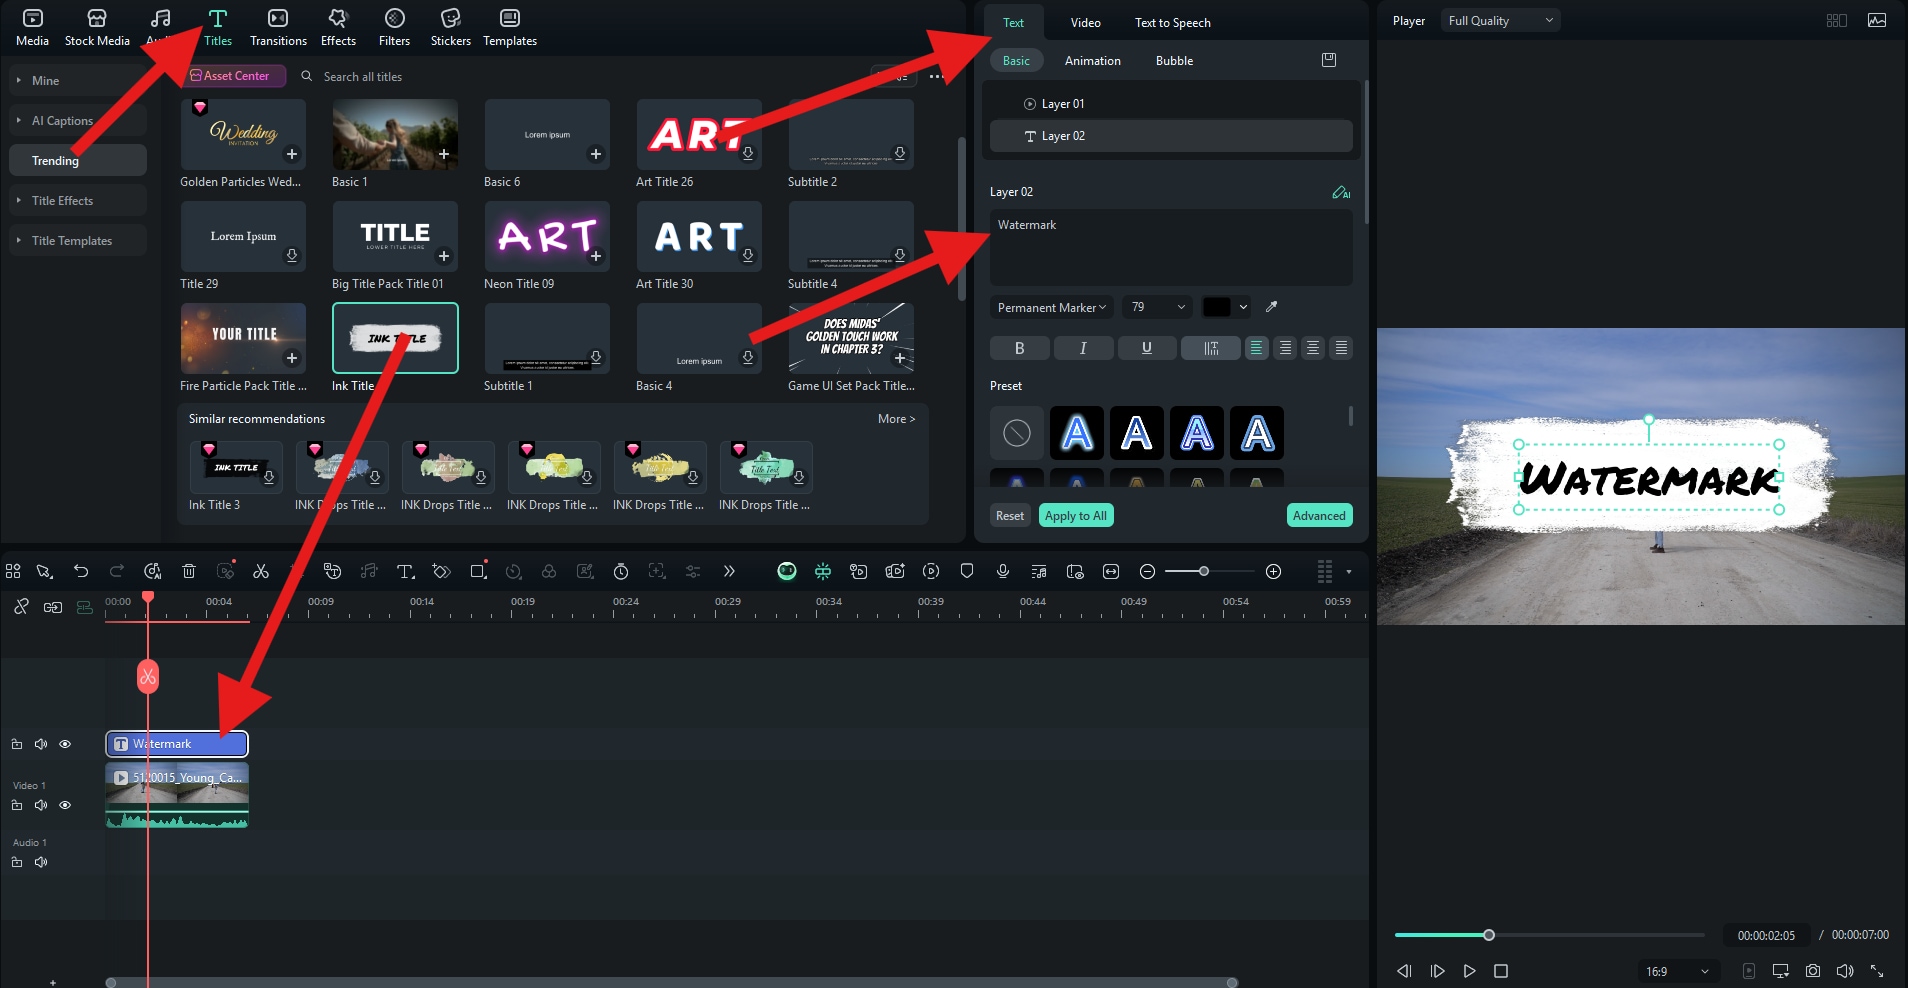
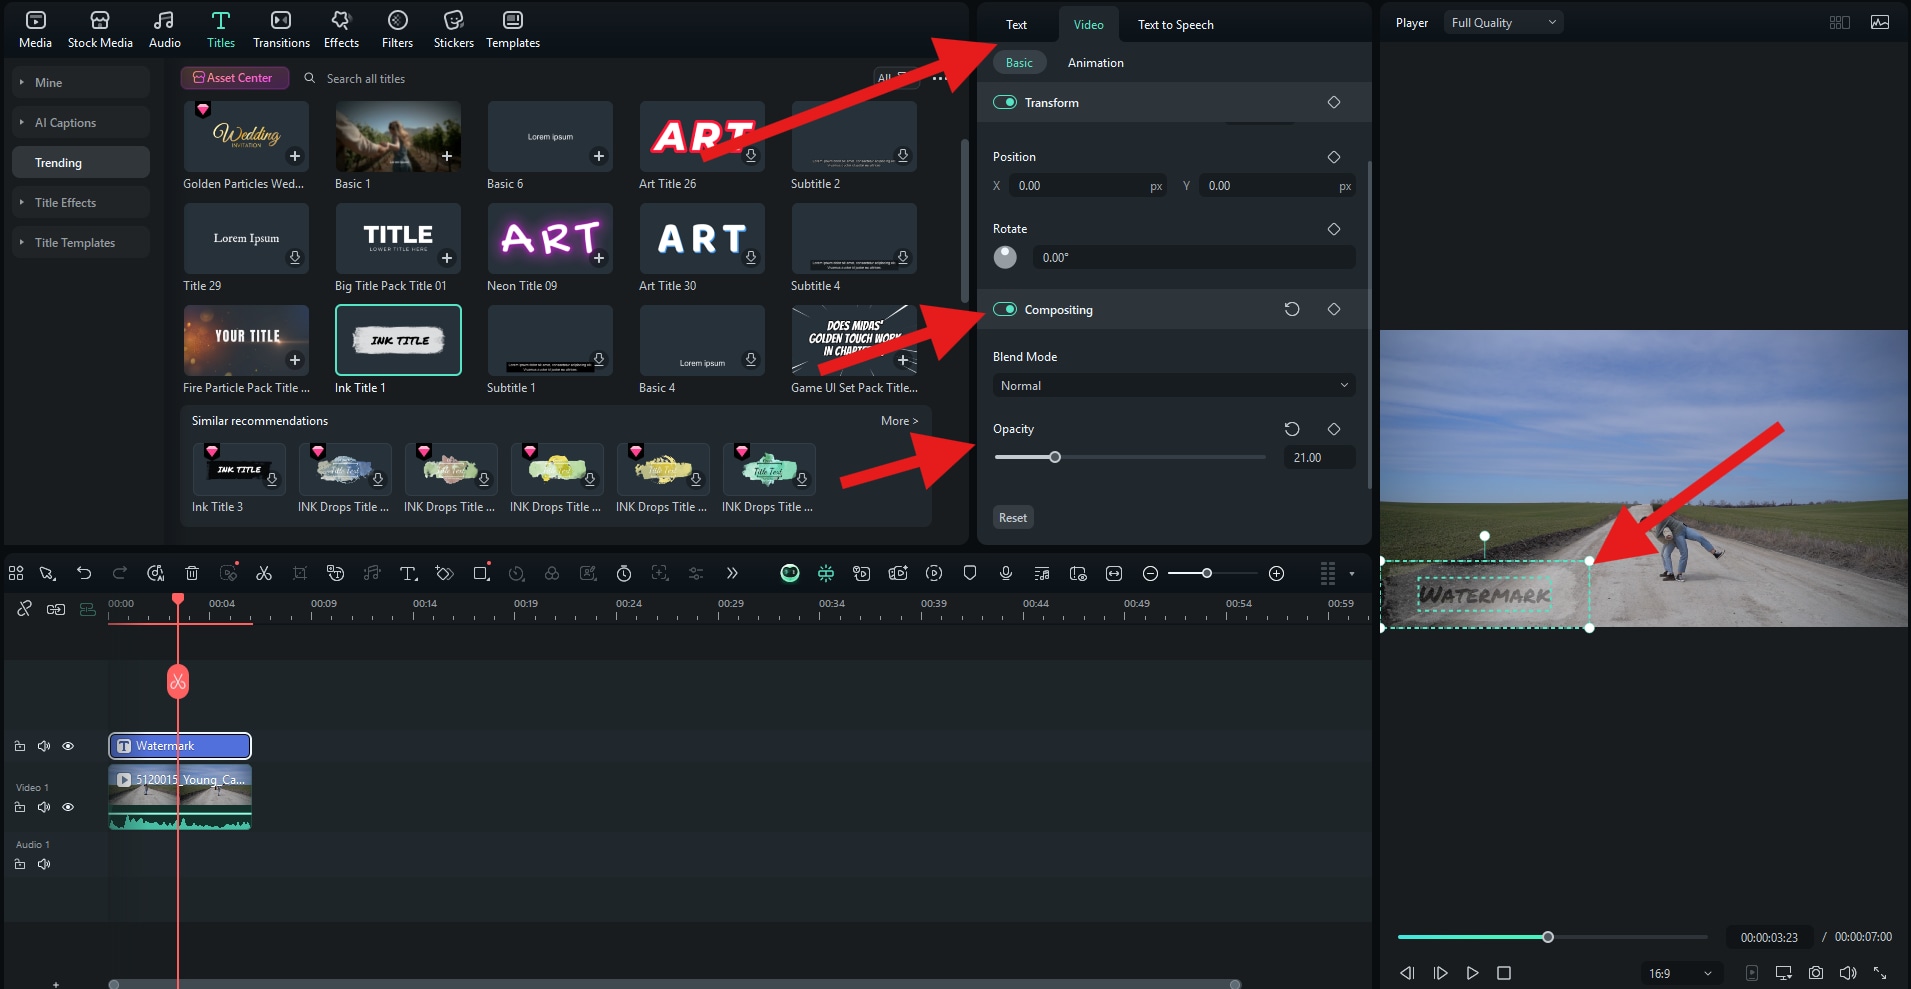
- Go to the Text tab, and drag the Default text to the timeline above the clip you imported. Then, go to Text > Basic and edit the text to insert the words you want. Then, change the font to something that you think is cool.
- Finally, you can adjust the size and position of the watermark directly in the preview section of the interface. Under Text > Basic, scroll down until you find the Opacity slider. Reduce the opacity to your liking.
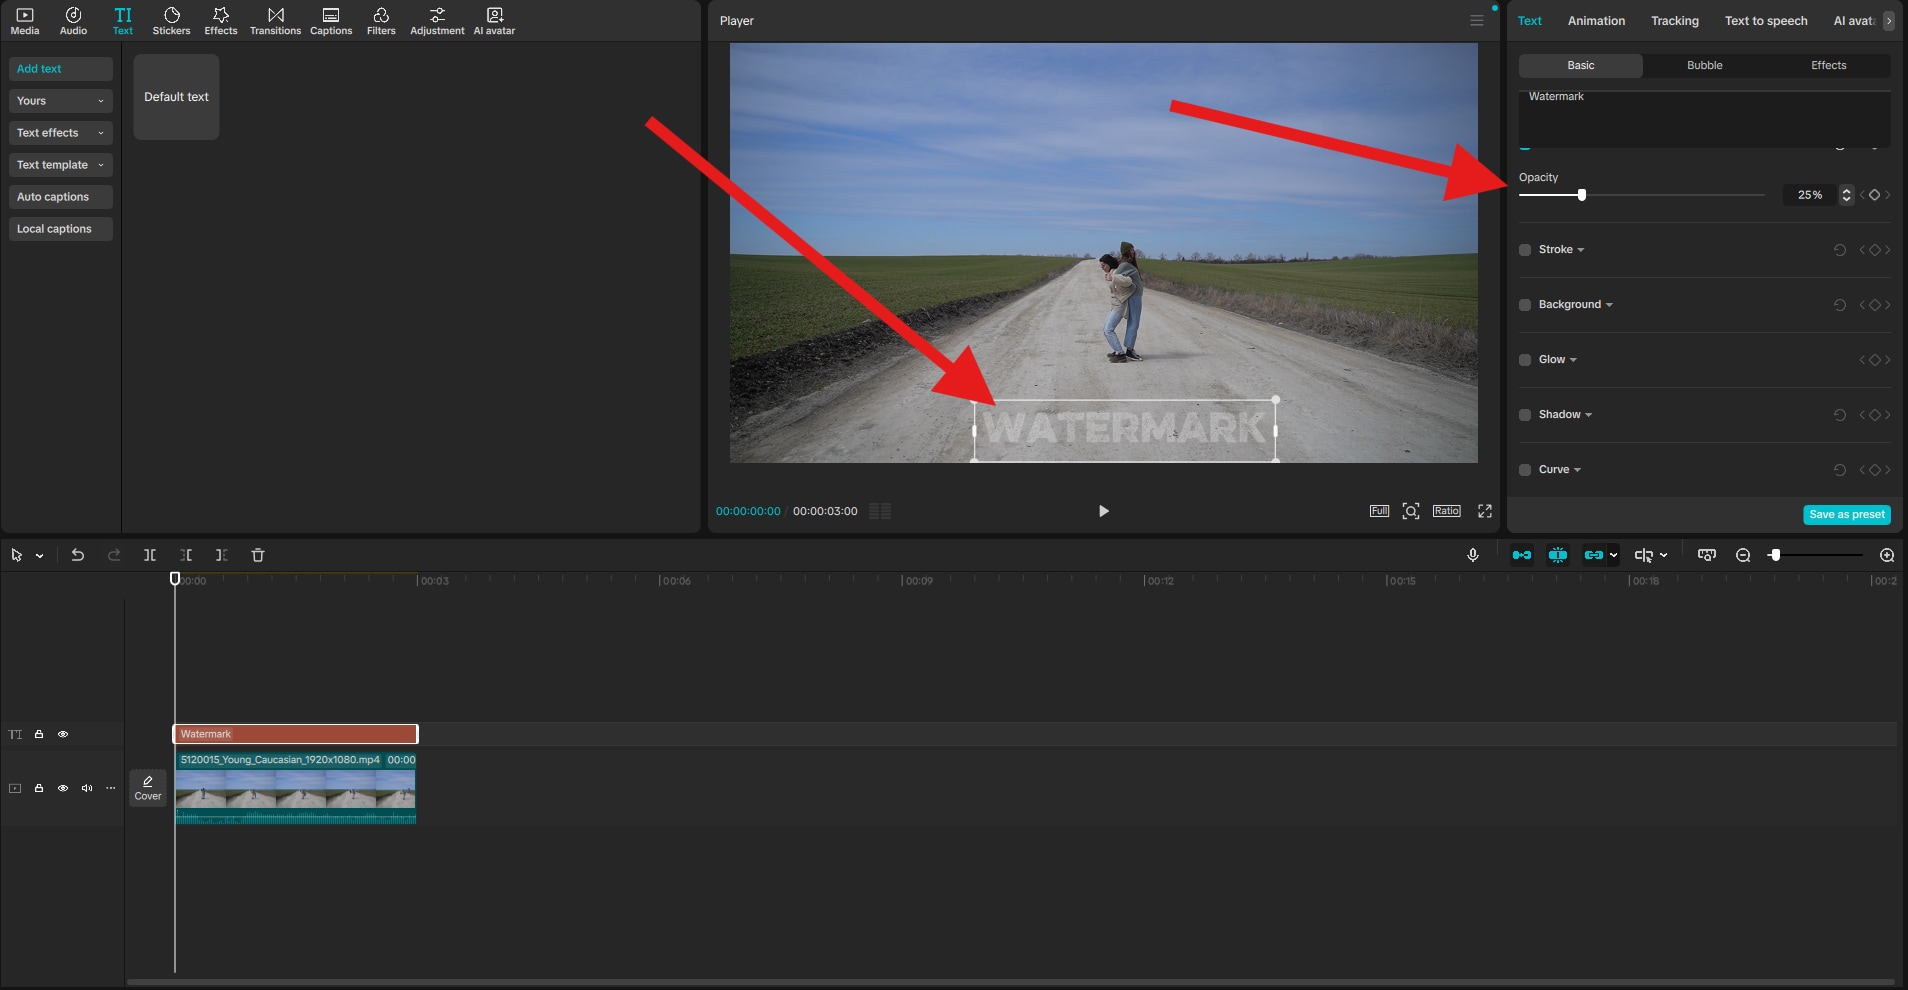
Here's the result.

Method 2 — Use Stickers or Shapes
If you want to go with something different than text, you can use CapCut's built-in features to create a watermark by combining shapes, emojis, or stickers to create a playful watermark. This option is best for creators with casual or entertaining content. Here's how it works.
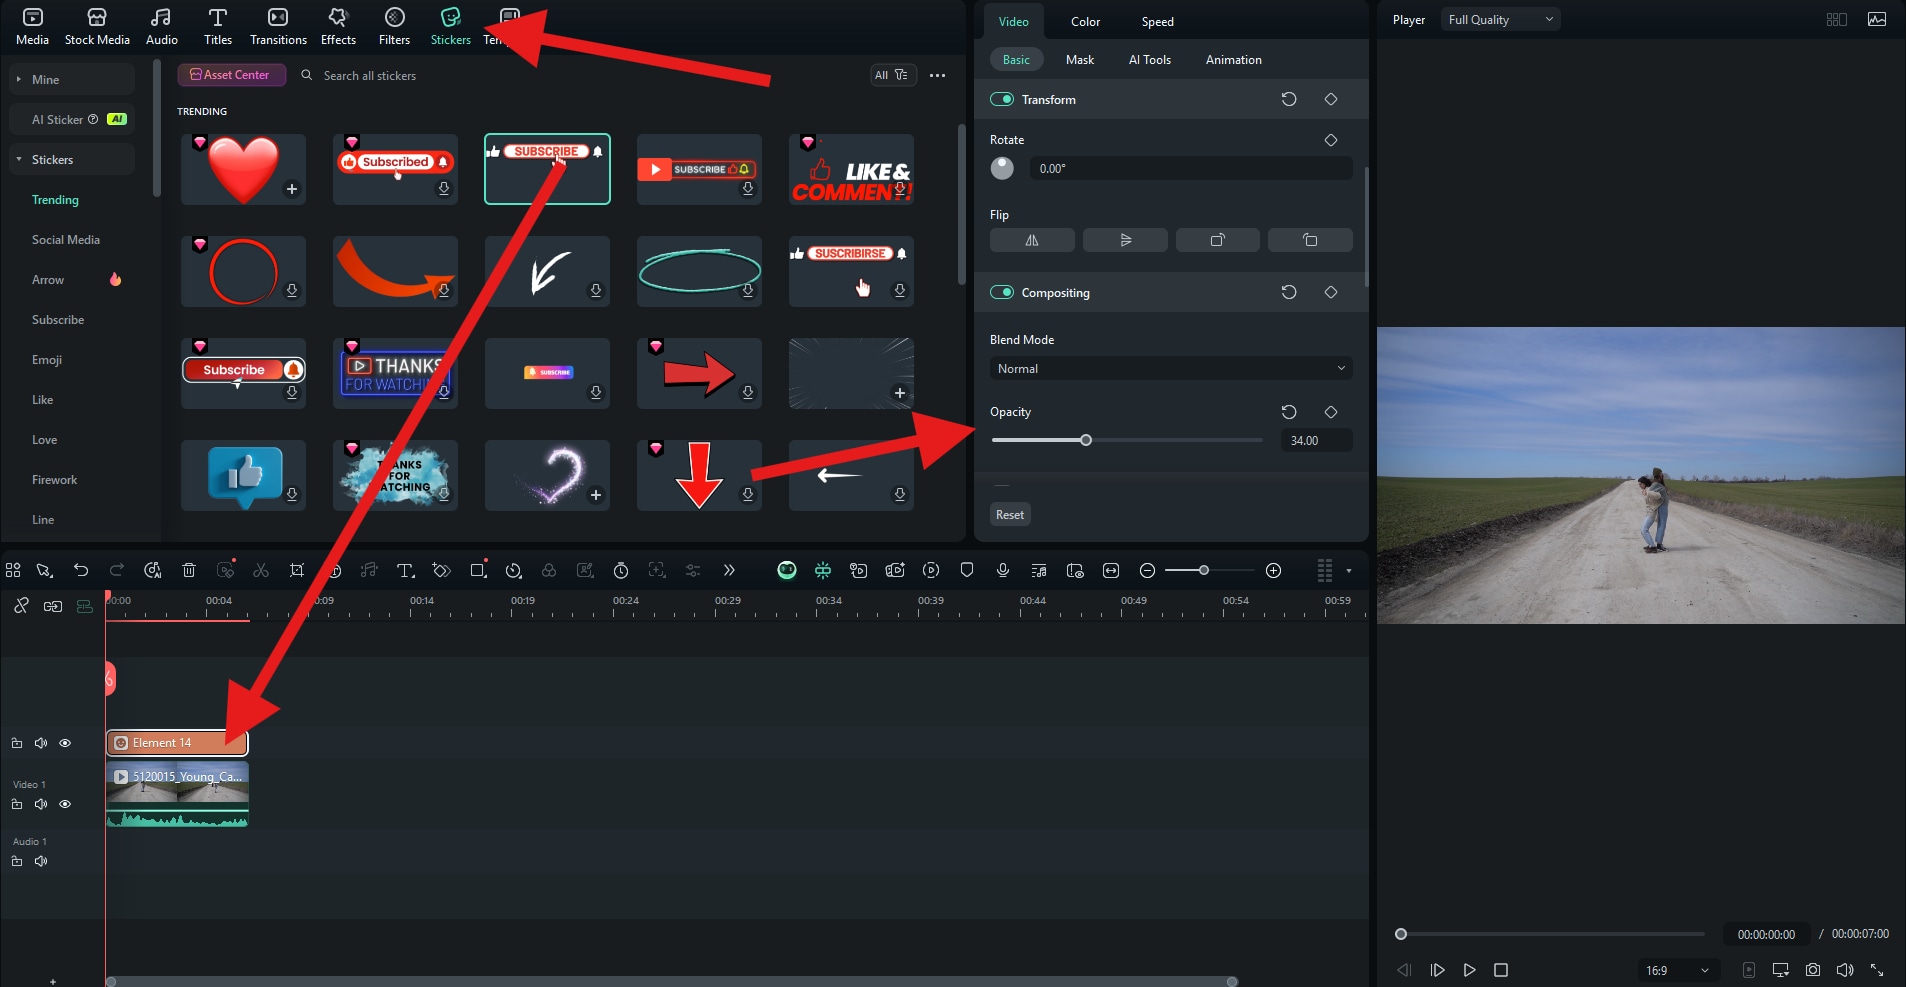
- Go to Stickers and pick something you like. Drag that sticker to the timeline above the clip. You can then adjust the size and position in the preview section of the interface as you see fit.
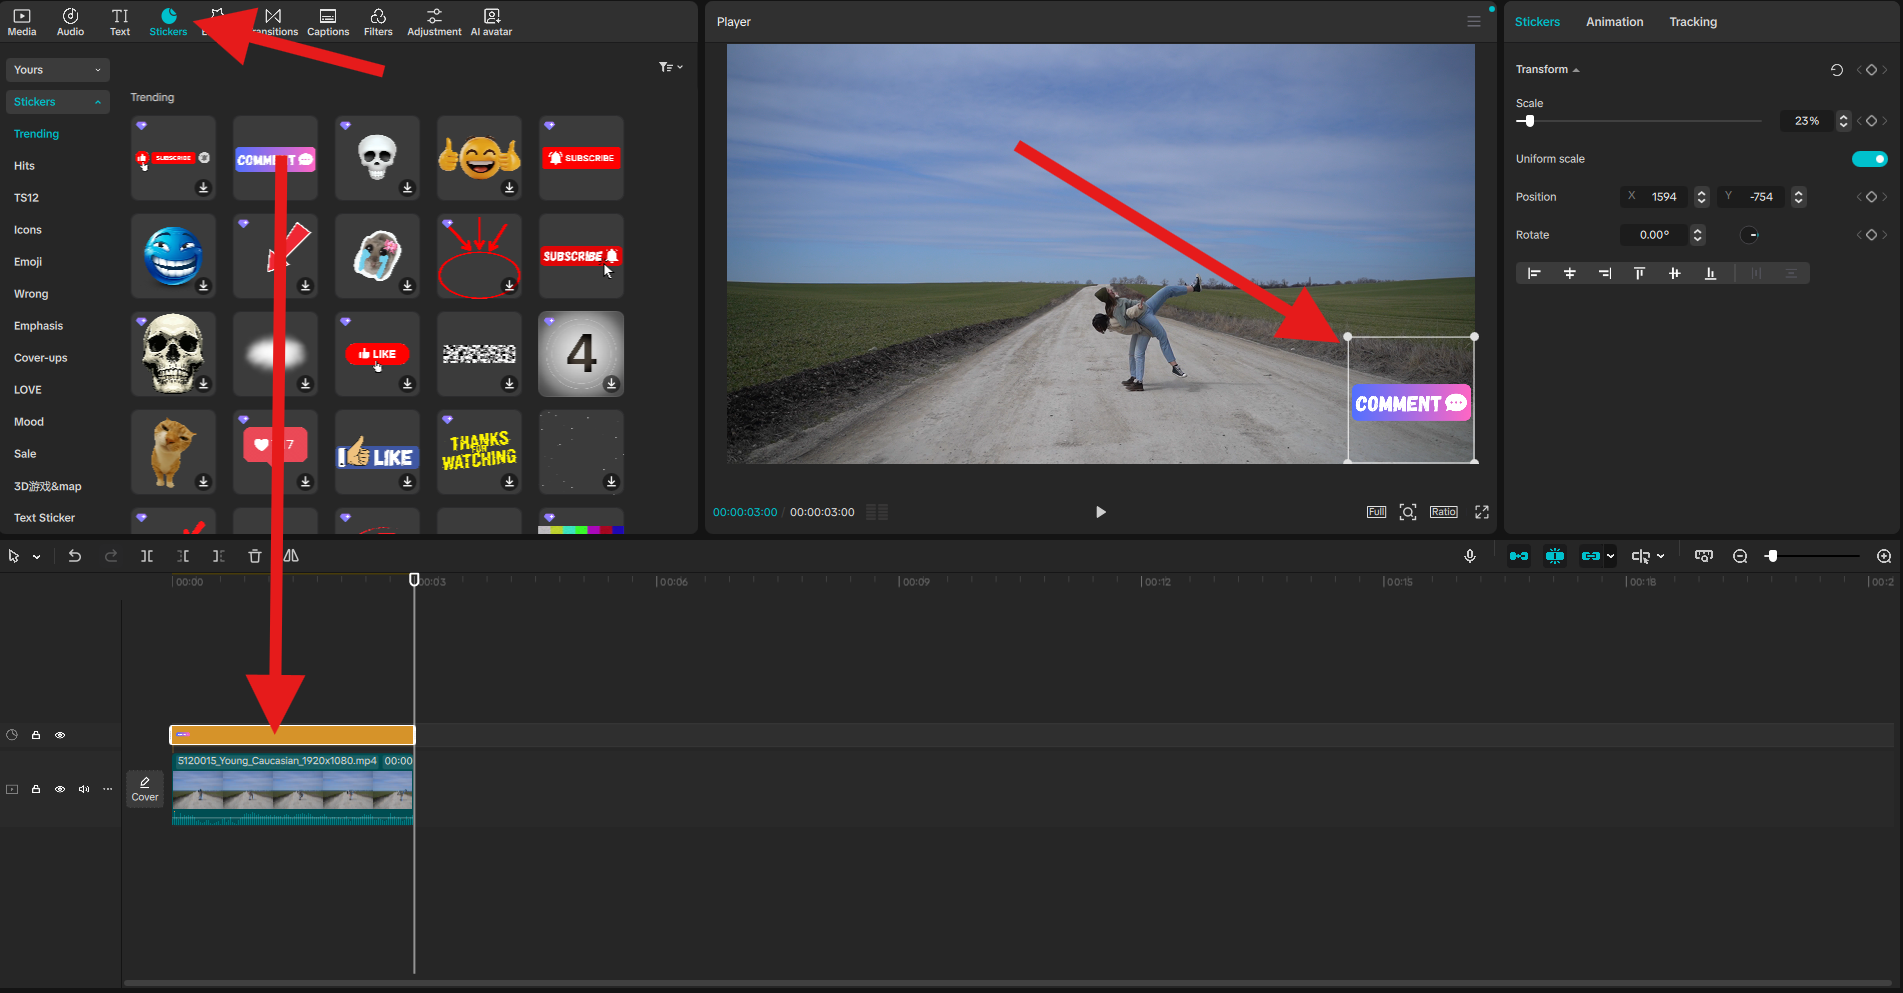
- Right-click on the sticker in the timeline and select Create compound clip.
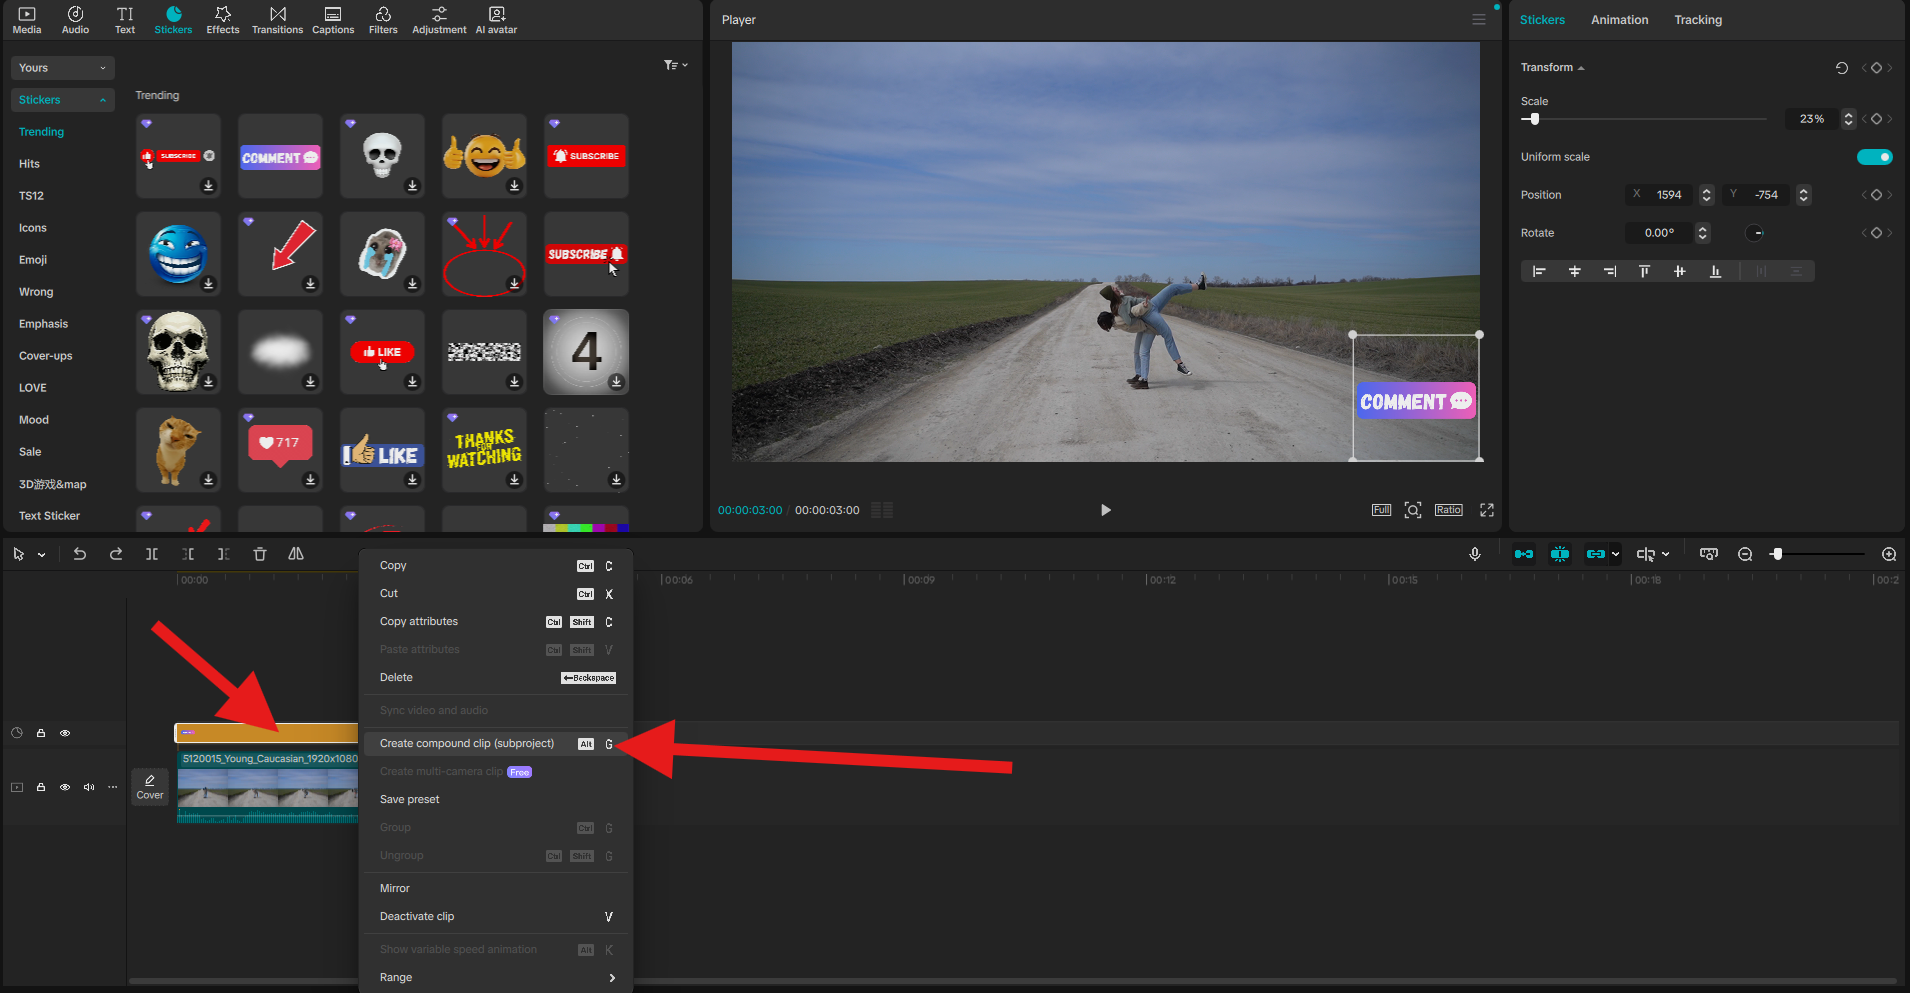
- Go to Video > Basic, and under Blend, adjust the Opacity slider to your liking.
Here's how this one turned out.

How to Add a Logo Watermark in CapCut (Step-by-Step Guide)
In most cases, you will already have a watermark prepared. It might be the logo of your brand, or something similar. Make sure that the file in question has a transparent background. It's generally advisable that the logo watermark image you use should be a PNG, rather than a JPG image.
We'll show you how to add a logo as a watermark in CapCut.
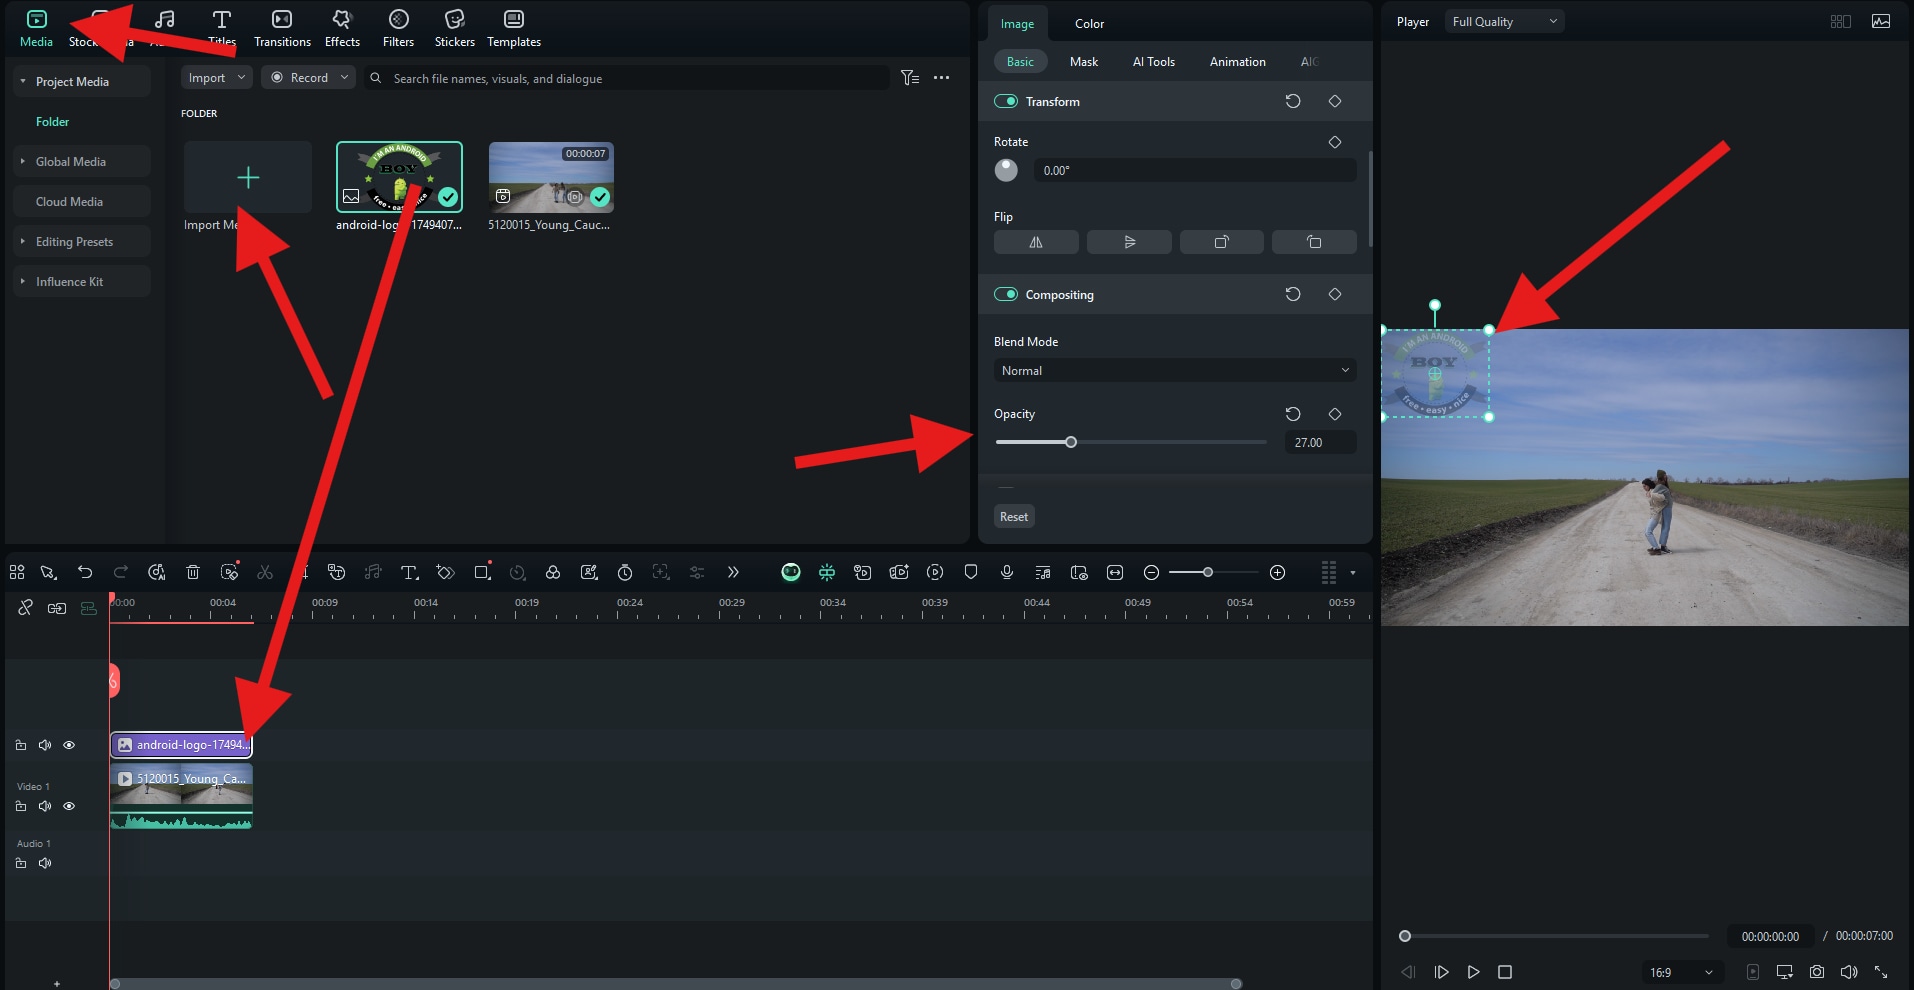
- After you upload your video, click on Import again and add the PNG you want from your hard drive.
- Drag the logo to the timeline above the clip, adjust its size and position, and go to Video > Basic. You can adjust the Opacity slider.
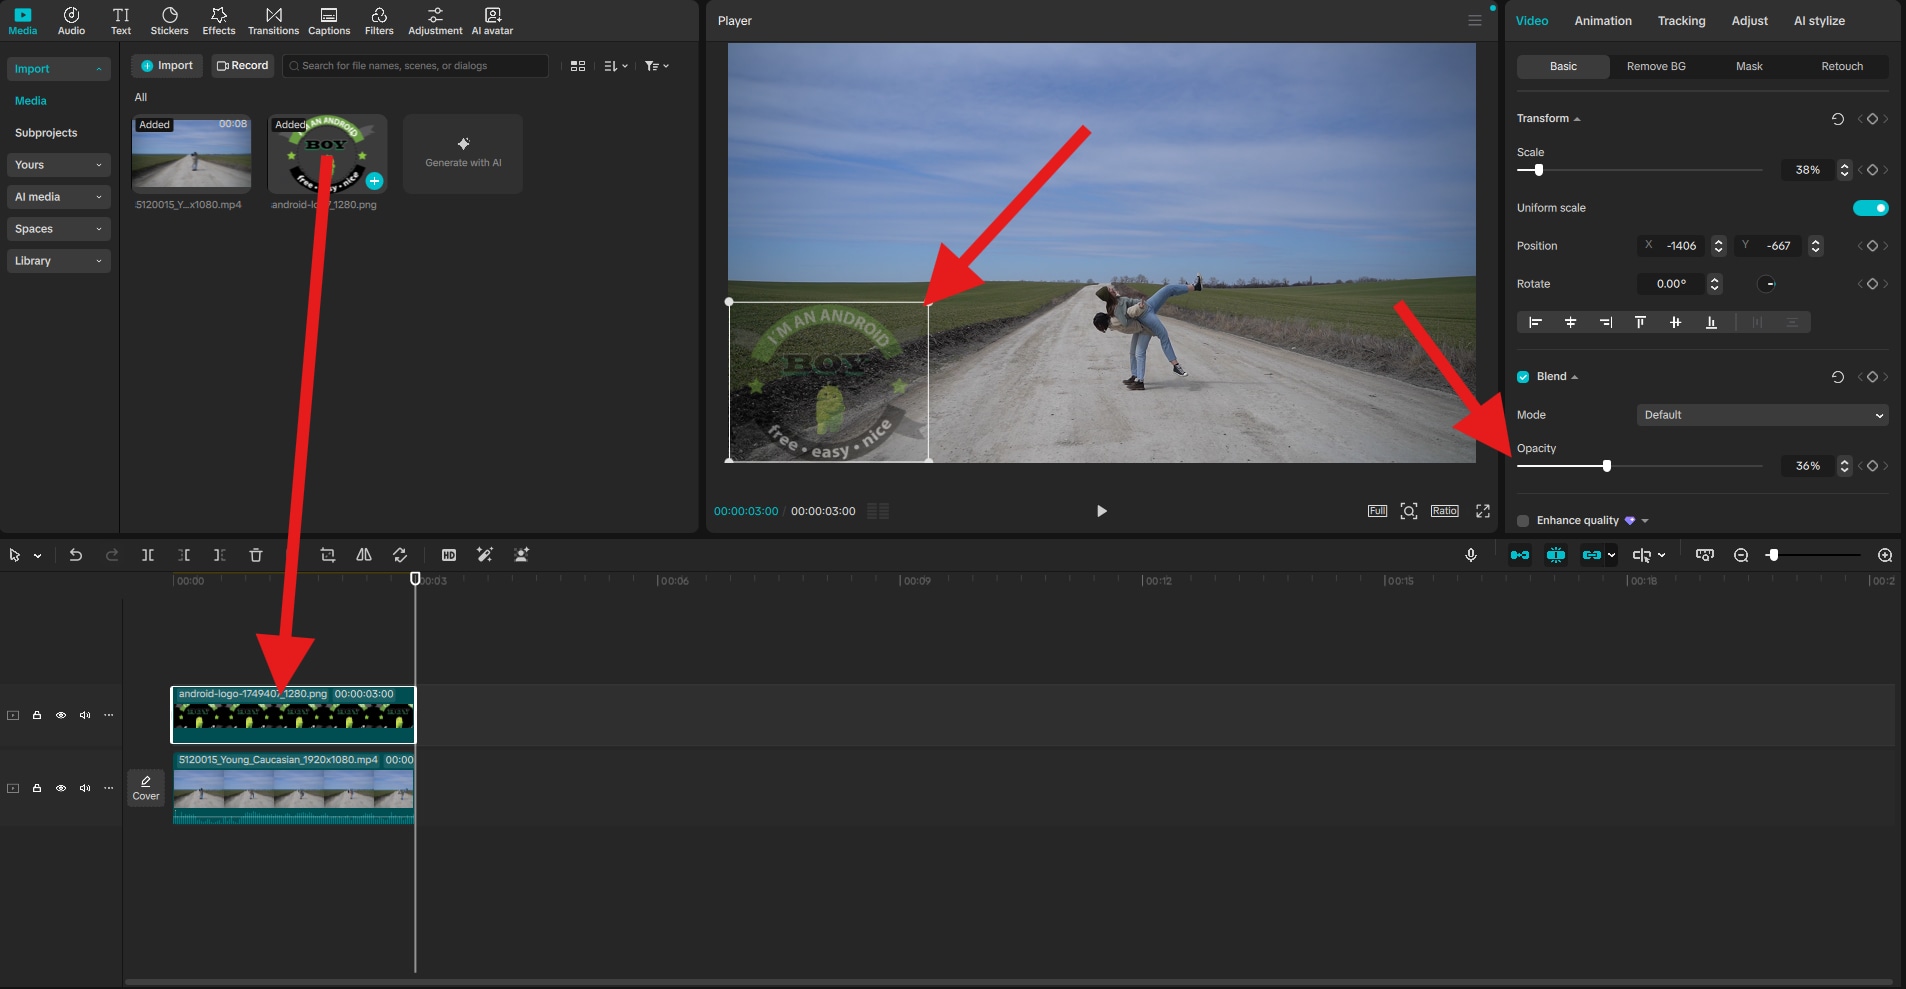
Take a look at the result now.

A More Straightforward Solution: Add a Watermark to Videos with a CapCut Alternative
While CapCut works well for basic watermarking, tools like Wondershare Filmora offer a more efficient and powerful feature to watermark videos. In addition to adding basic watermarks, such as texts, logos, and pictures, with the common method, Filmora offers a more flexible AI-powered way to add watermarks to videos.
 secure download

It lets you upload your video, upload a PNG that you want to use as a watermark, and then write a simple text prompt explaining that you want the PNG image embedded into the video as a transparent watermark. You can add everything, such as sunglasses, people, clothes, dinosaurs, animals, objects, and more, to videos with this feature.
Let's see how it works.
Add a Watermark to Videos in Filmora with AI
- Download and install Filmora on your computer.
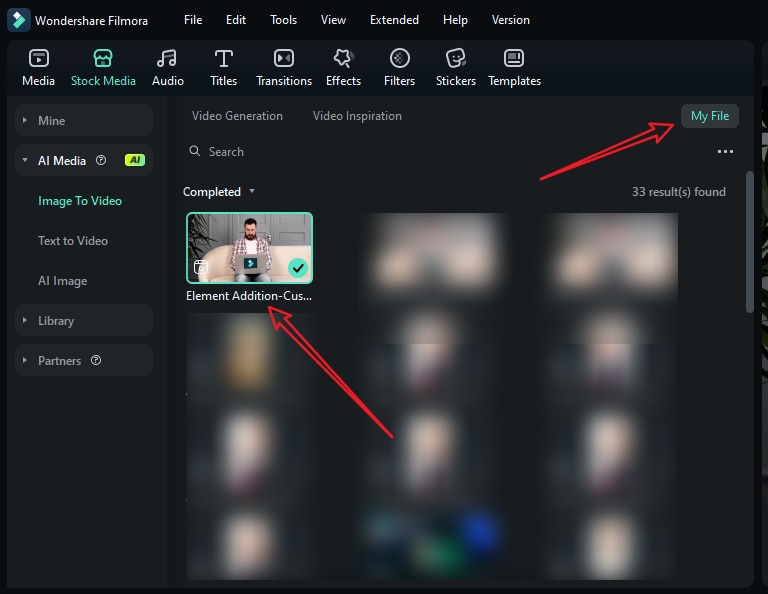
- Start a New Project > go to Stock Media > AI Media > Image to Video > and find Video Element Editing.
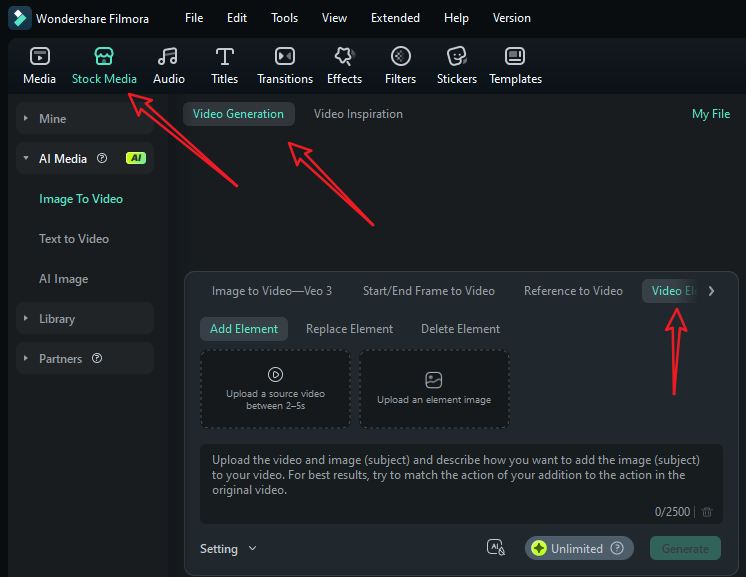
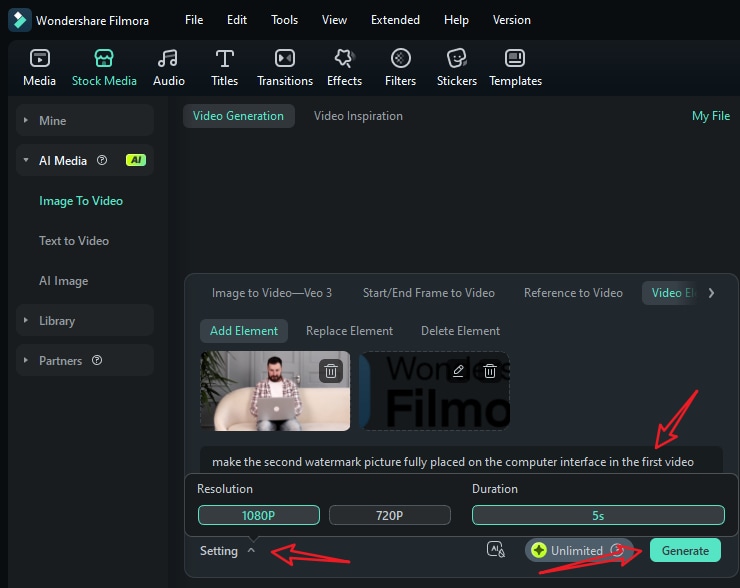
- Upload your short video and a reference picture, type in your prompts, and go to settings to adjust the video resolution. Finally, tap on Generate to start adding a watermark to the video with AI.
- When it finishes adding the person to the video, go to My File > preview the video and add it to the timeline.
- You can then edit the video further. If the video has no background music, just switch to the audio tab > pick a music according to your preference and drag it to the timeline.

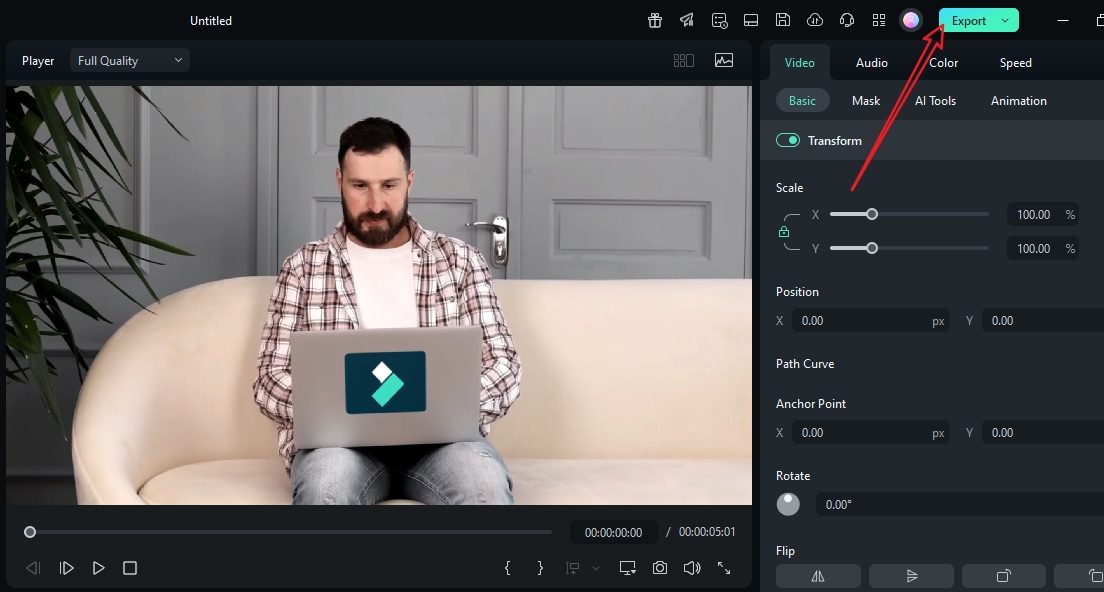
- Playback the video, and tap on Export if you are satisfied.
Add a Watermark to Videos in Filmora Like CapCut
If you are also curious about whether Filmora can add watermarks to videos like CapCut, of course, it can. Let's see how it watermarks videos on PC and phone.
- Download and install Filmora on your desktop or laptop.
secure download
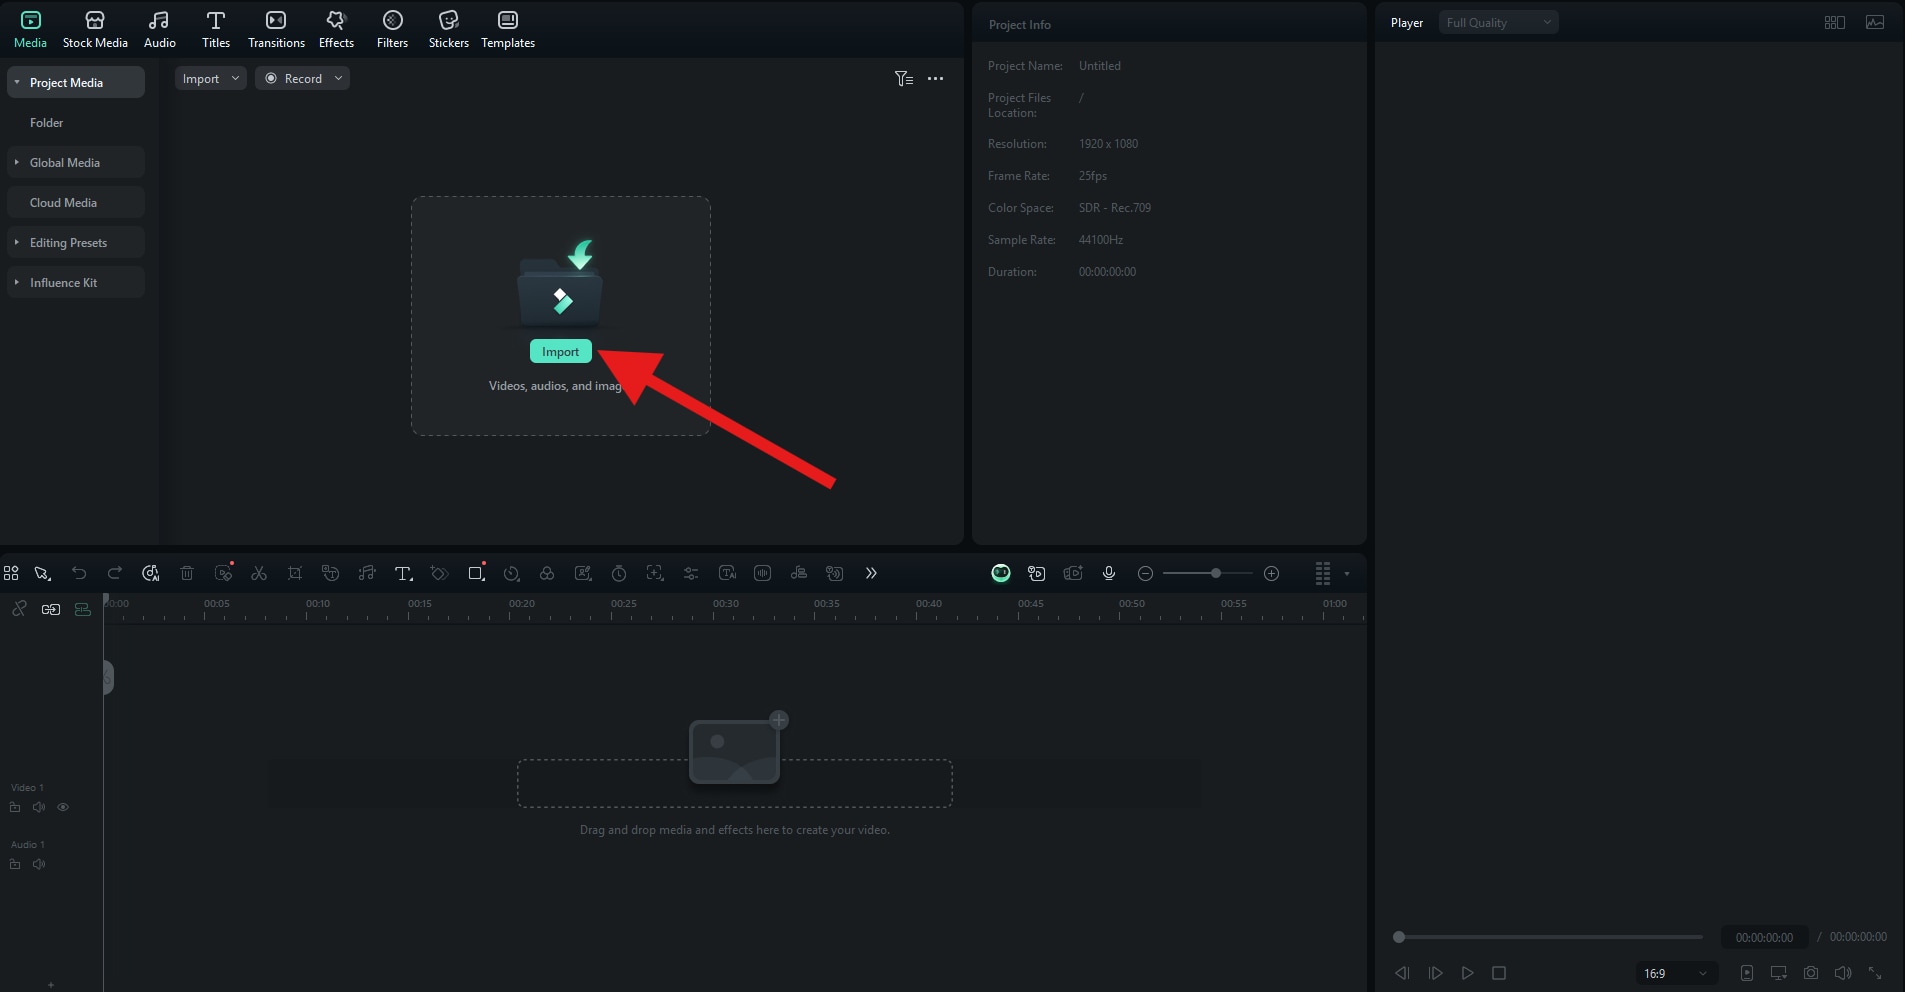
- Open Filmora and create a New Project.

- Click on Import and add a video from your device.
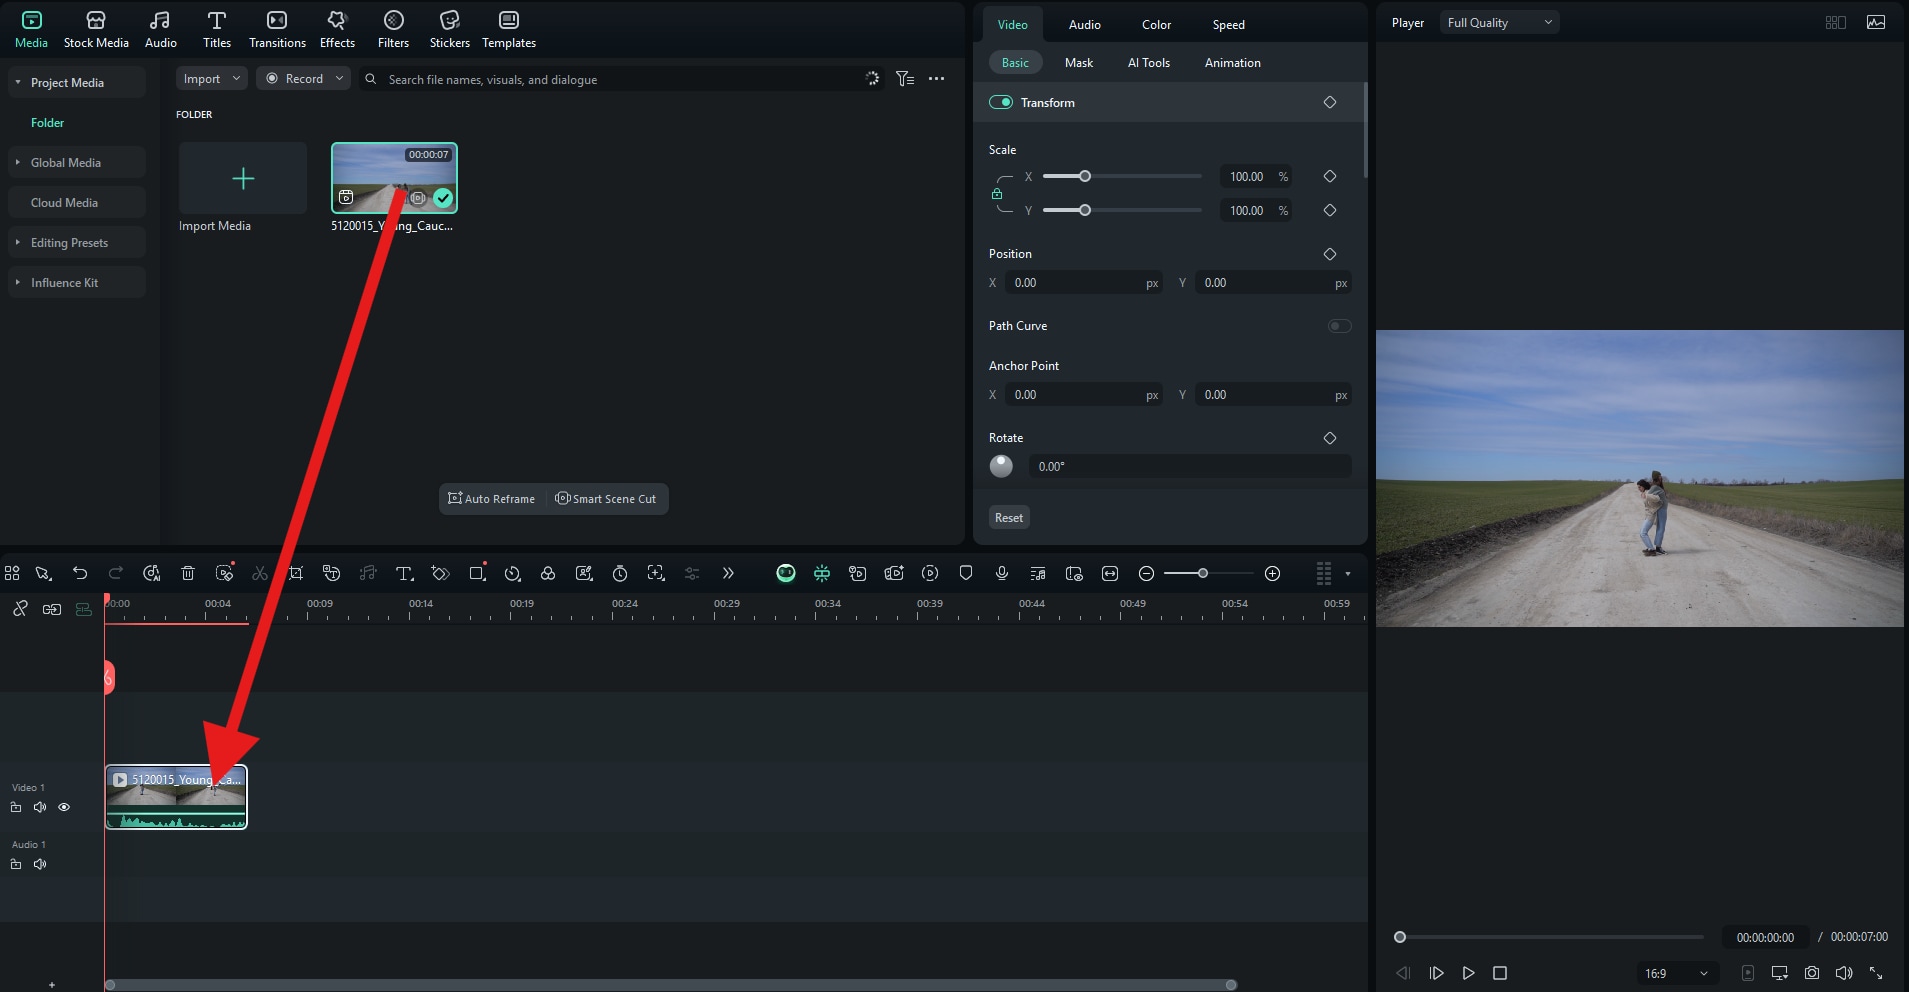
- Just like in CapCut, drag the video to the editing timeline.
- Go to the Titles section and pick an animated title sequence that you want to convert into a watermark. Then, drag that to the timeline above the clip. After that, go to Text > Basic and input the text that you want to use.
- You can adjust the size and position of the watermark in the preview section. Then, go to Video > Basic and under Compositing, adjust the Opacity slider to your liking.
Here's how it turned out.

If you want to add a sticker as a watermark, go to Stickers, pick something that you like, and drag it to the timeline. Then, under Video > Basic, you can adjust the Opacity.
Let's check the result.

If you want to add a logo as a watermark, simply go back to the Media tab, click on Import Media to add your PNG, then drag that PNG to the timeline, adjust the size and position, and change the Opacity.
Let's see the video with a watermark added.

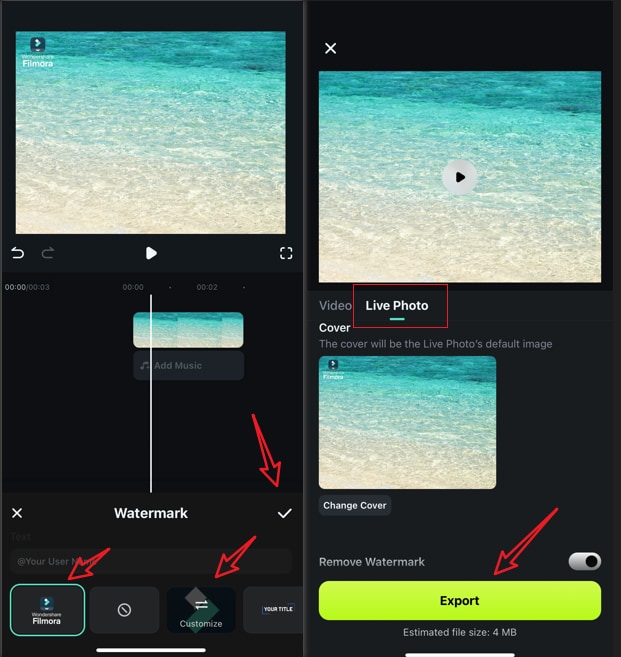
Filmora is also available as a mobile app, adding watermarks to videos on iPhone and Android are quite easy with it. Download and install the app on your phone. Then, create a new project, upload a video, and follow the steps below.
secure download - After downloading the app on your phone, open it and start a new project.
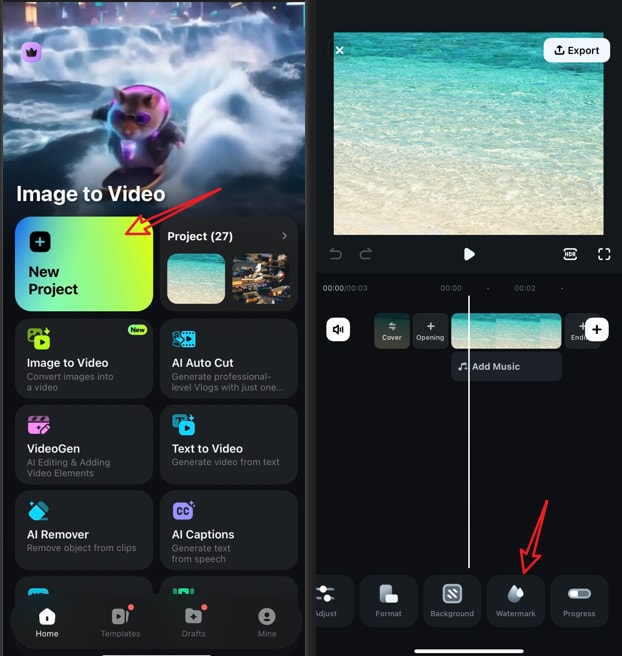
- Import a picture > navigate to the watermark feature > tap on a preset watermark or import your own watermark by tapping the customize feature.
- Accept the changes, take a screenshot or tap on Export to save the photo after adding a logo.
A Comparison Between Adding a Watermark in CapCut and Filmora
Here's a side-by-side comparison of CapCut and Filmora for watermarking videos. Both CapCut and Filmora provide basic methods for adding watermarks to videos, and if you also want to try to put a watermark on a short video with AI and prompts, try Filmora.
| Contrasts | CapCut | Filmora |
| AI-powered Method | ❌ | ✅ (currently supports 5-second videos) |
| Watermark Creation | ✅ (text or stickers) | ✅ (text, logos, and AI-generated) |
| Customization | Many (but limited effects) | Many (advanced effects, animations) |
| Free Export | ✅ (only for free assets) | ✅ (watermark included in free version) |
Conclusion
Adding a watermark is essential for protecting your content and strengthening your brand identity. In this article, we have discussed the steps to add a watermark in CapCut, and we have also provided an AI-powered video watermarking tool, Filmora.
Download Filmora today and effortlessly create sleek, branded video watermarks. No complex editing required!
secure download 