
 100% Security Verified | No Subscription Required | No Malware

Whether you're testing a new look, creating mock-up product shots, or just want to have fun, adding glasses to photos is now as easy as pie with AI. You don't need advanced Photoshop skills. Modern tools let you generate the frames you want and layer them on top of your image, or you can take advantage of built-in sticker libraries and try something in that department. There is also an AI image-to-video tool to convert your photo into a short clip and see how these new shades will look on you in motion. Isn't that awesome?
Below, we'll learn how to add goggles to photos, different ways to achieve your goal using a desktop and mobile app, and there's a bonus section with a stellar AI option. Check it out!
In this article
Filmora – The Best All-in-One Solution to Add Specicles to Photos
Filmora is a famous video editing solution, but it also offers excellent photo-editing tools and AI utilities that make adding glasses to photos a simple task. In just a few clicks or taps, you can get excellent results. Here are the main reasons why this tool should be your top choice.
 secure download

- Rich Glasses Effects and Stickers Libraries: Browse through different types of effects and stickers to find cool pre-rendered sunglasses that you can add to photos, then resize, rotate, and adjust the opacity.
- AI Image: Create the perfect glasses from a simple text prompt, whether you want aviators, round wireframes, ski goggles, or anything else that comes to mind.
- Smart Masking and Cutouts: Cut out any glasses or other objects from photos precisely.
- AI Image-to-Video: Convert your photo into a video or even create a virtual try-on video from your photo and a simple photo of some expensive glasses that you like.
- Plenty of Editing Features: Use powerful image editing features such as overlay, compositing, resizing, filters, and more to make the glasses perfectly match your photo.
How to Use Filmora to Add Glasses or Sunglasses to Photos?
Before you begin following our step-by-step tutorials below, make sure that you download and install both the desktop (Windows and Mac) and mobile (Android and iOS) versions of Filmora. Our guide will also assume that you have created a new project and imported the photo you wish to edit. Let's cover four different methods to add glasses to photos.
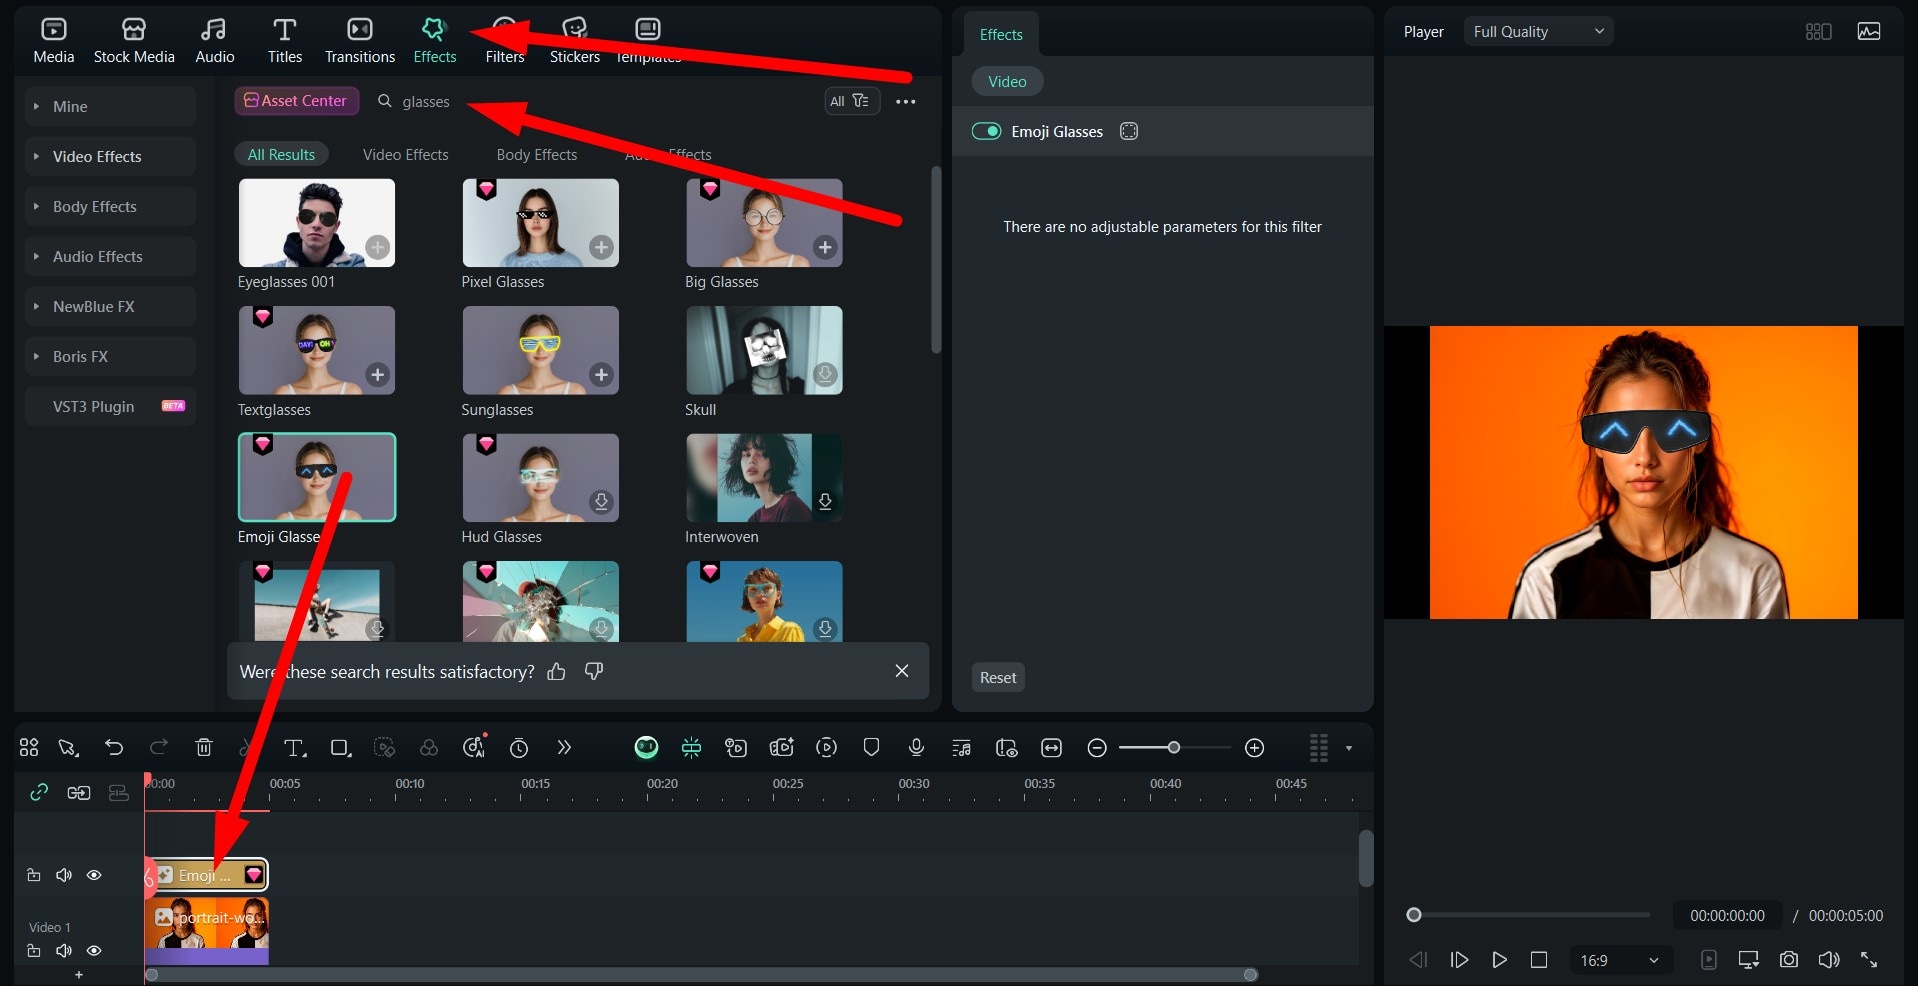
secure download Method 1: Use Filmora's Effects Library on PC
For the desktop version, after you upload your photo, follow the steps below.
- Drag the image to the editing timeline.
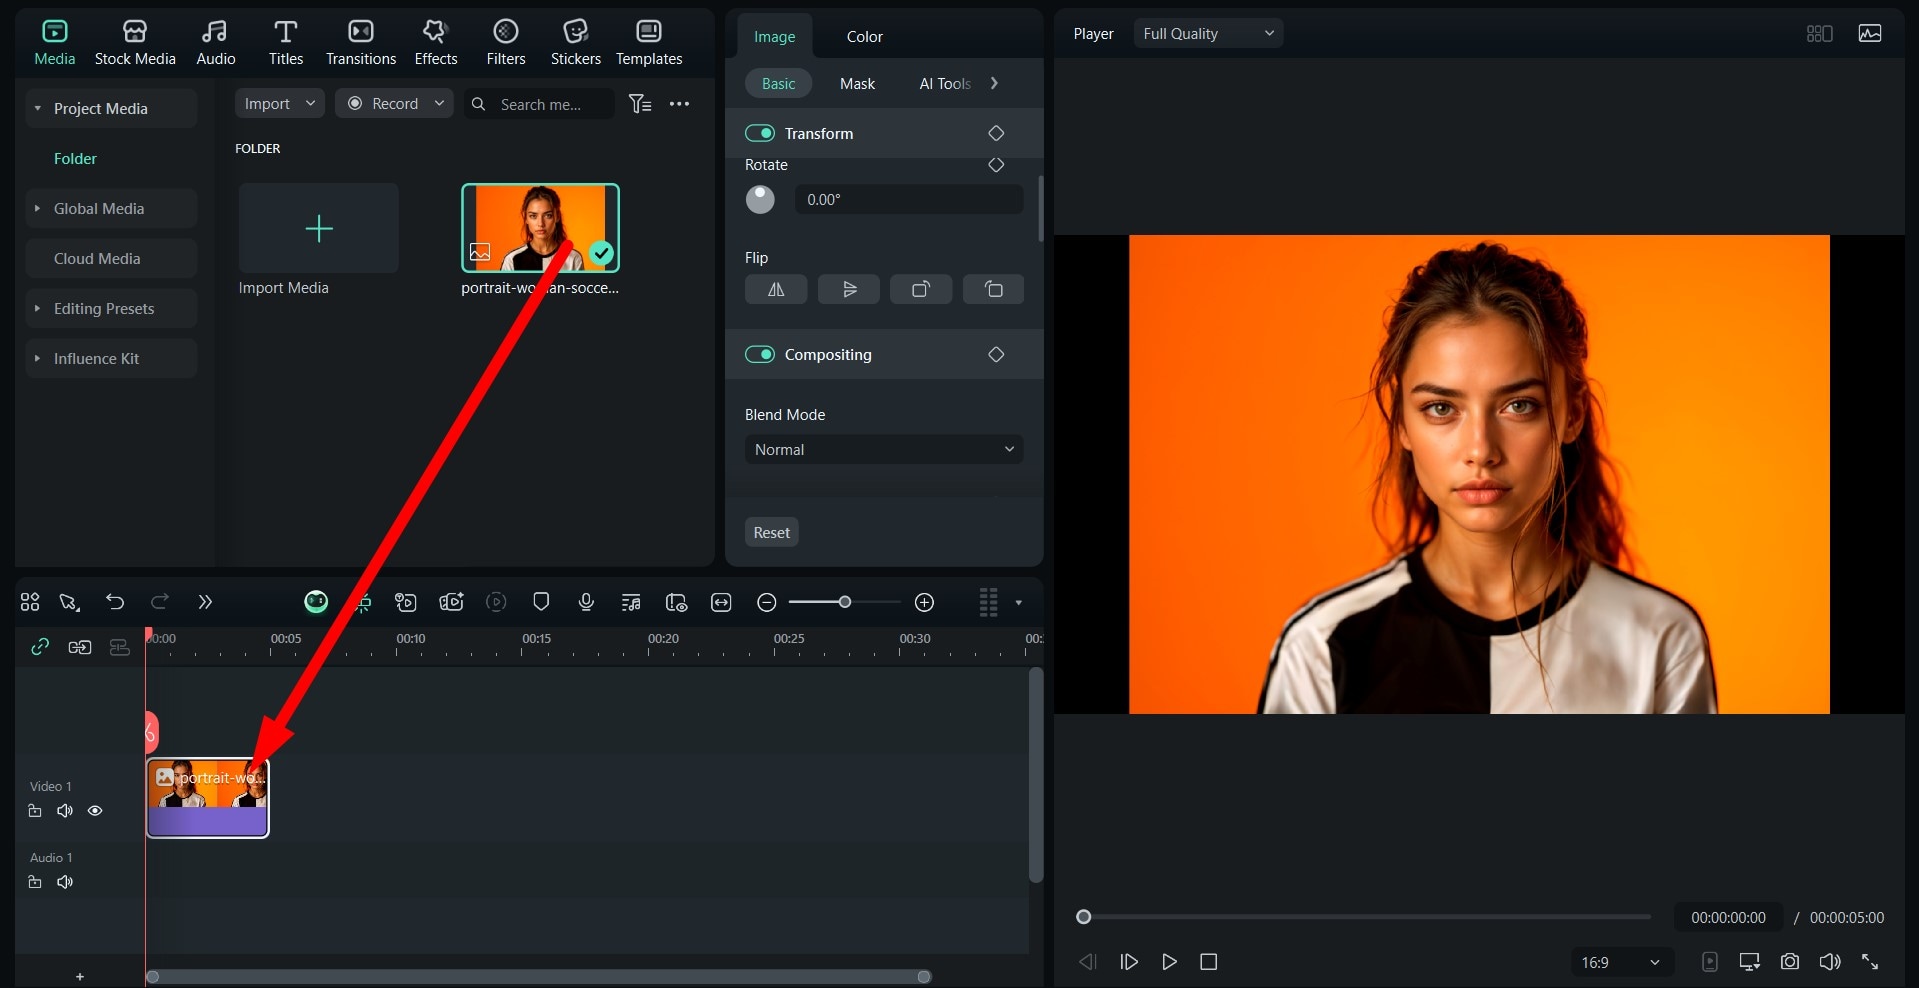
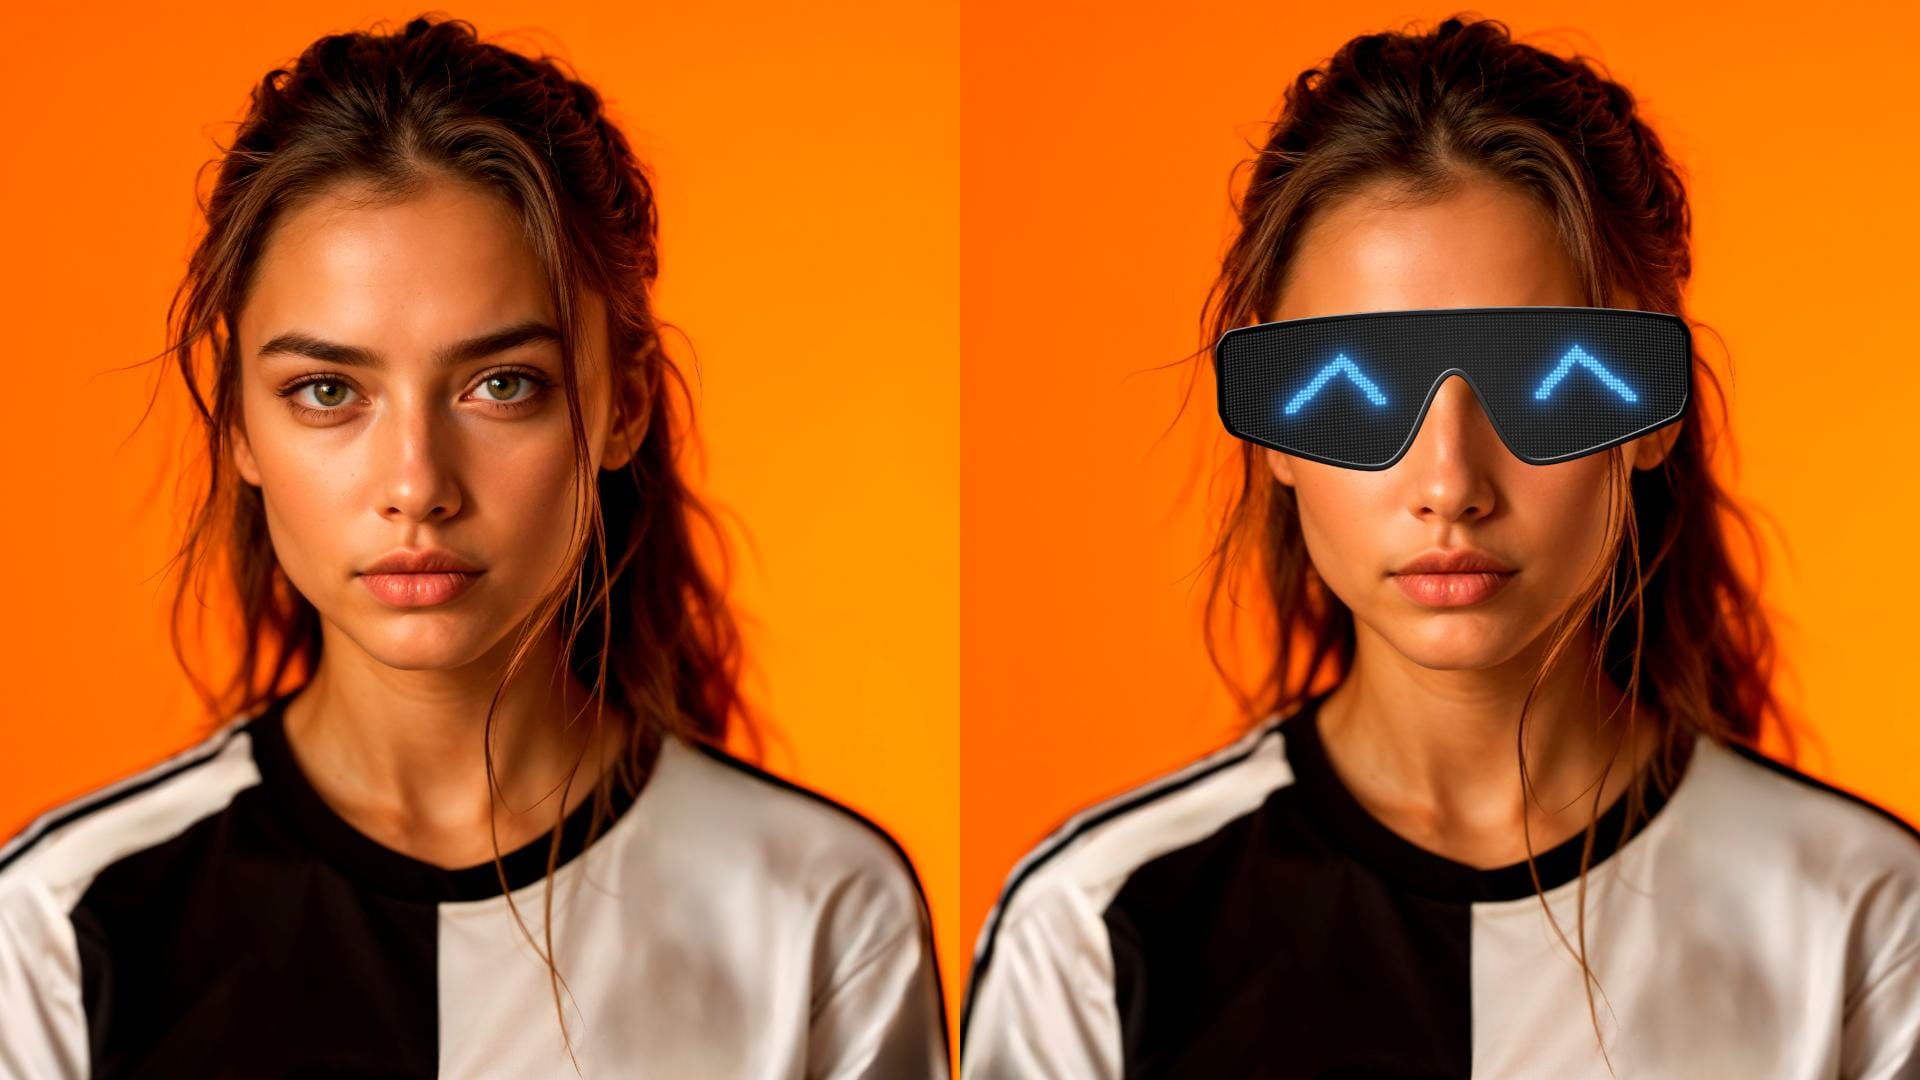
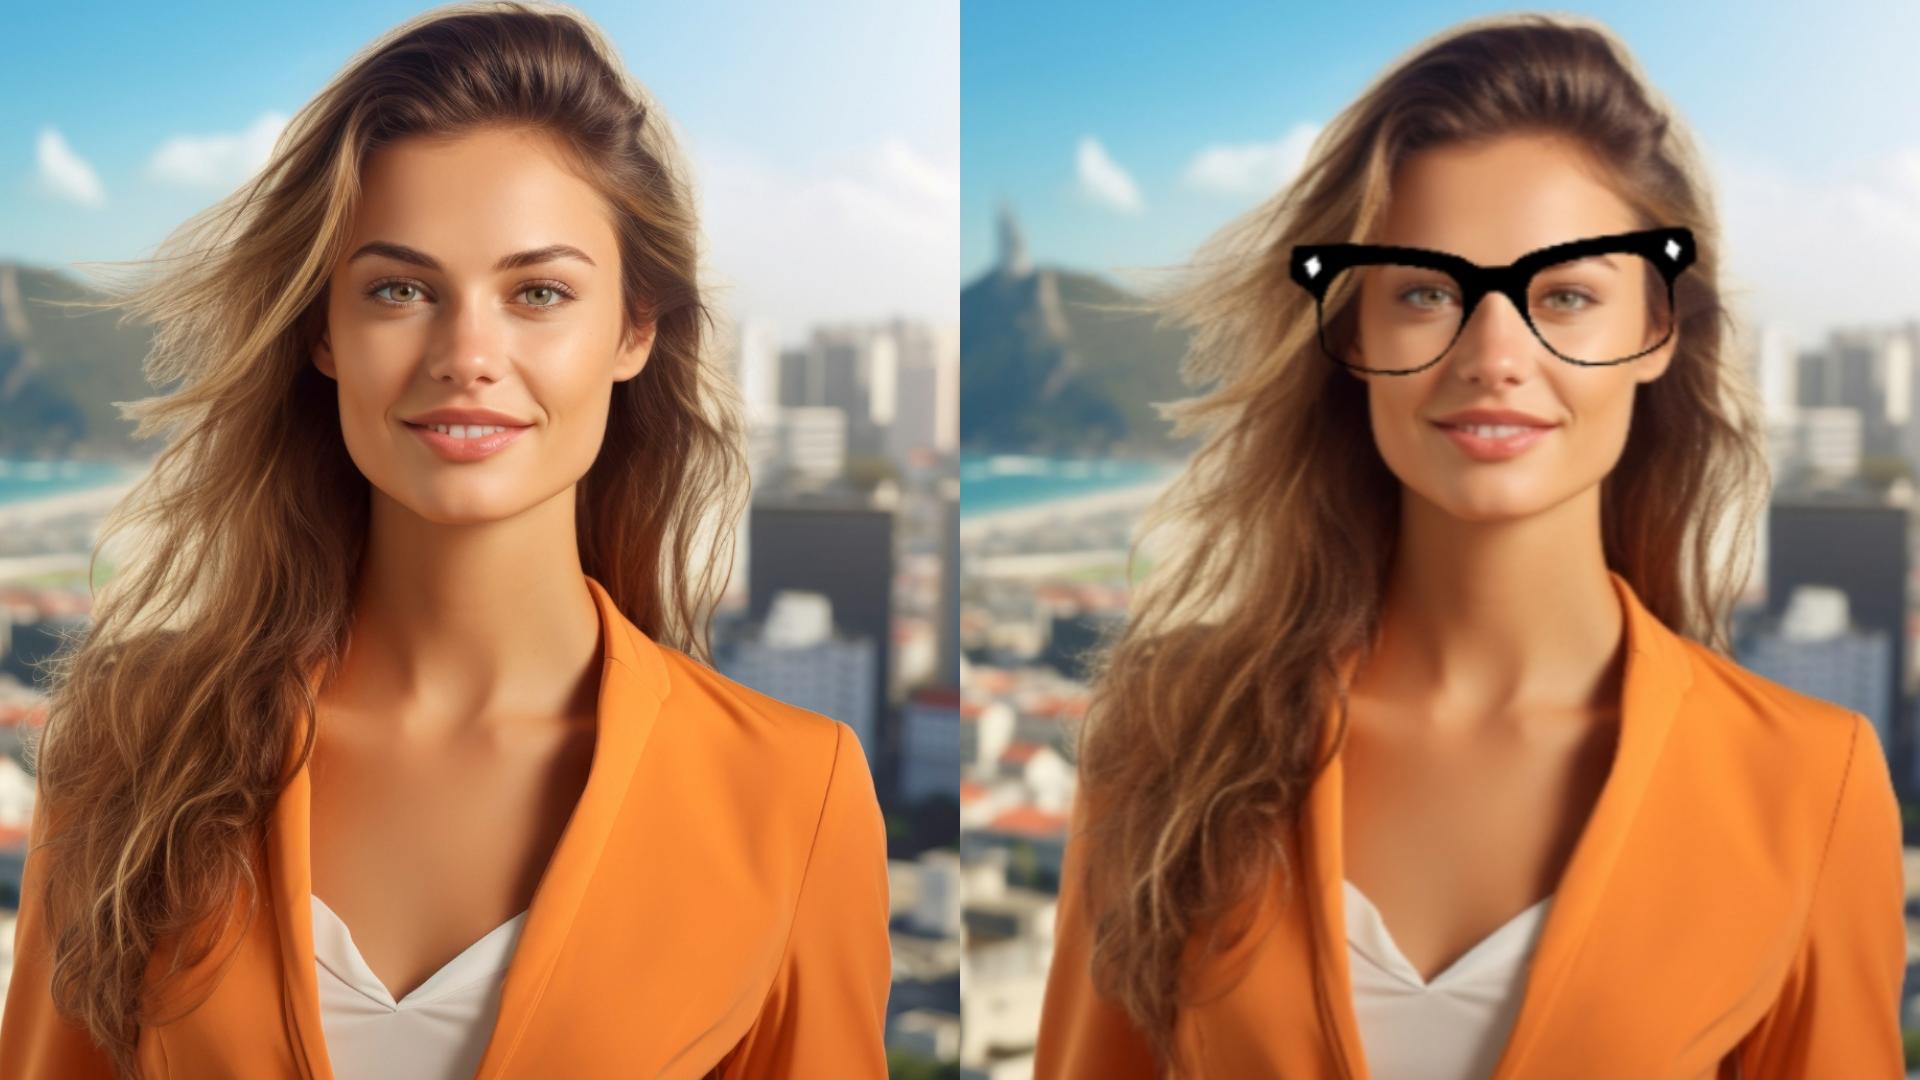
- Go to Effects and search for "glasses" in the search bar. Then, pick the shades you like and simply drag them to the timeline above the image.
- Check out this comparison photo.
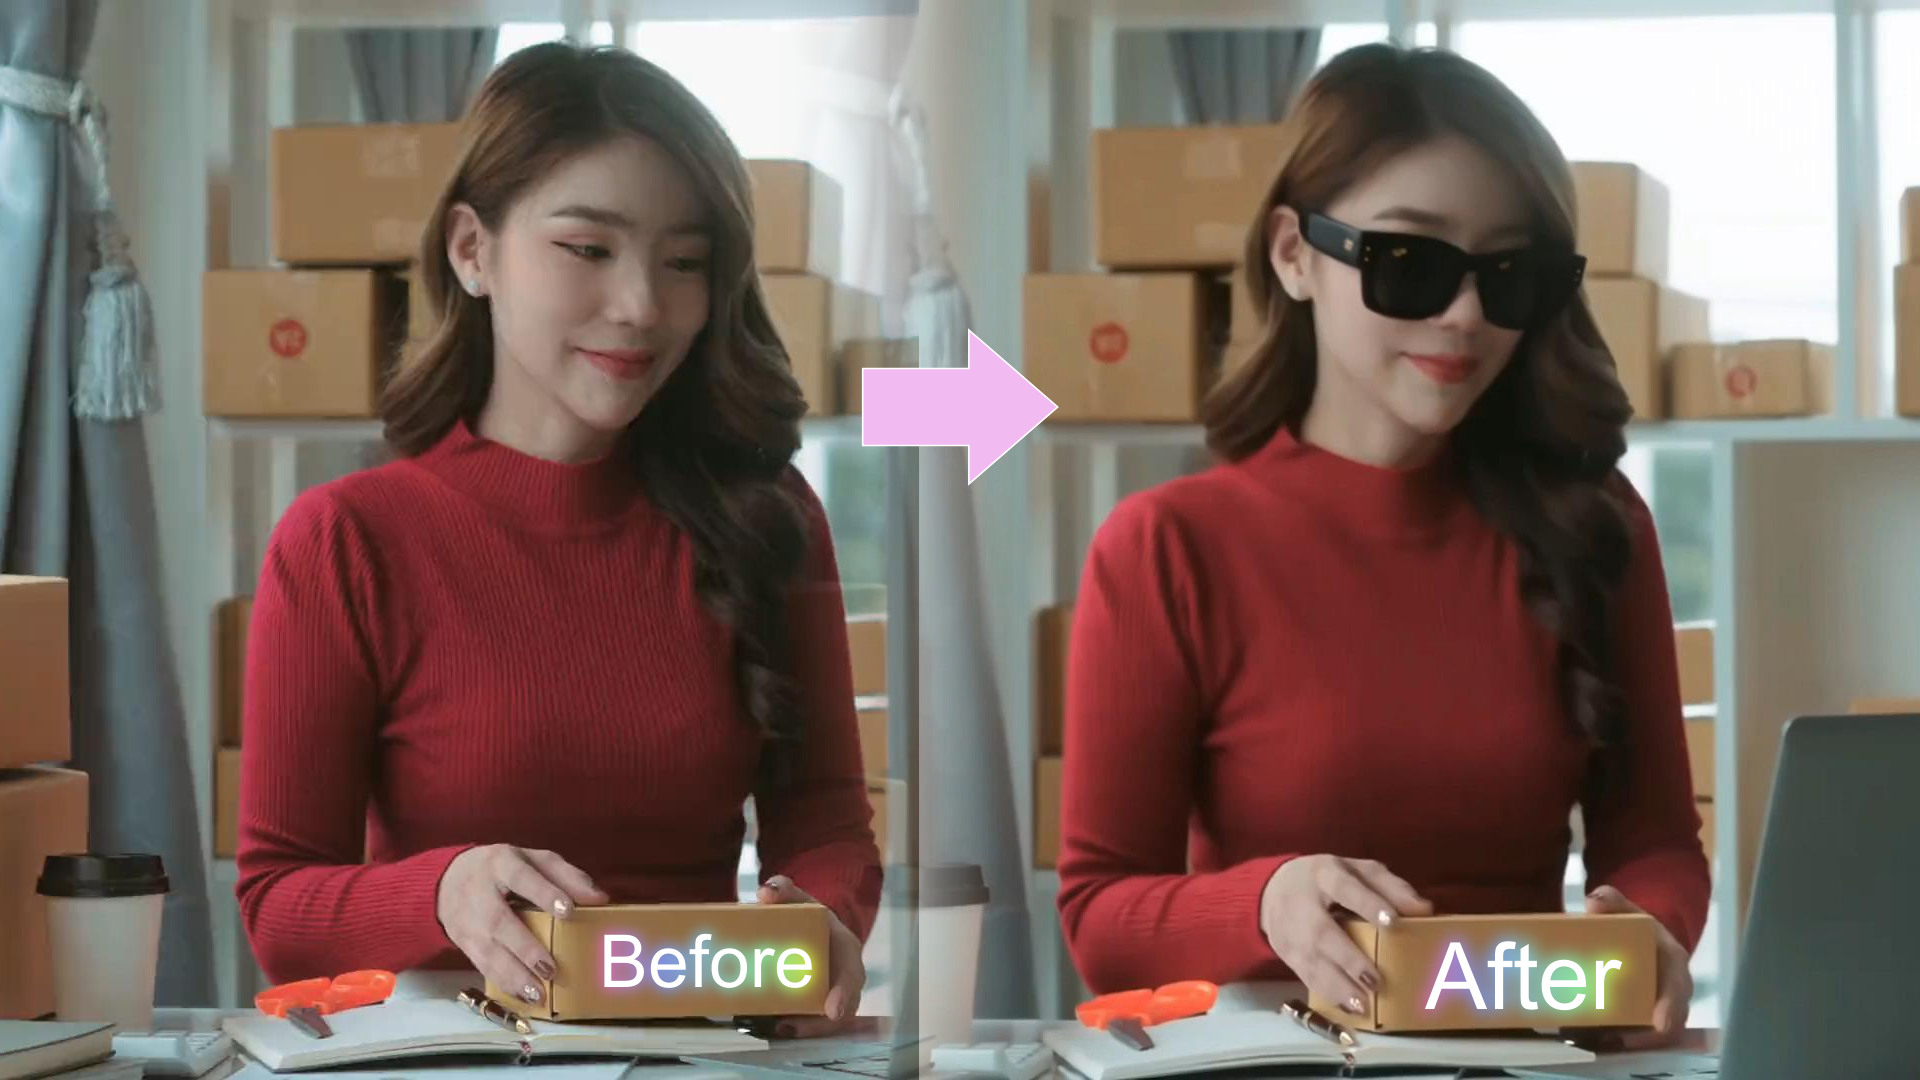
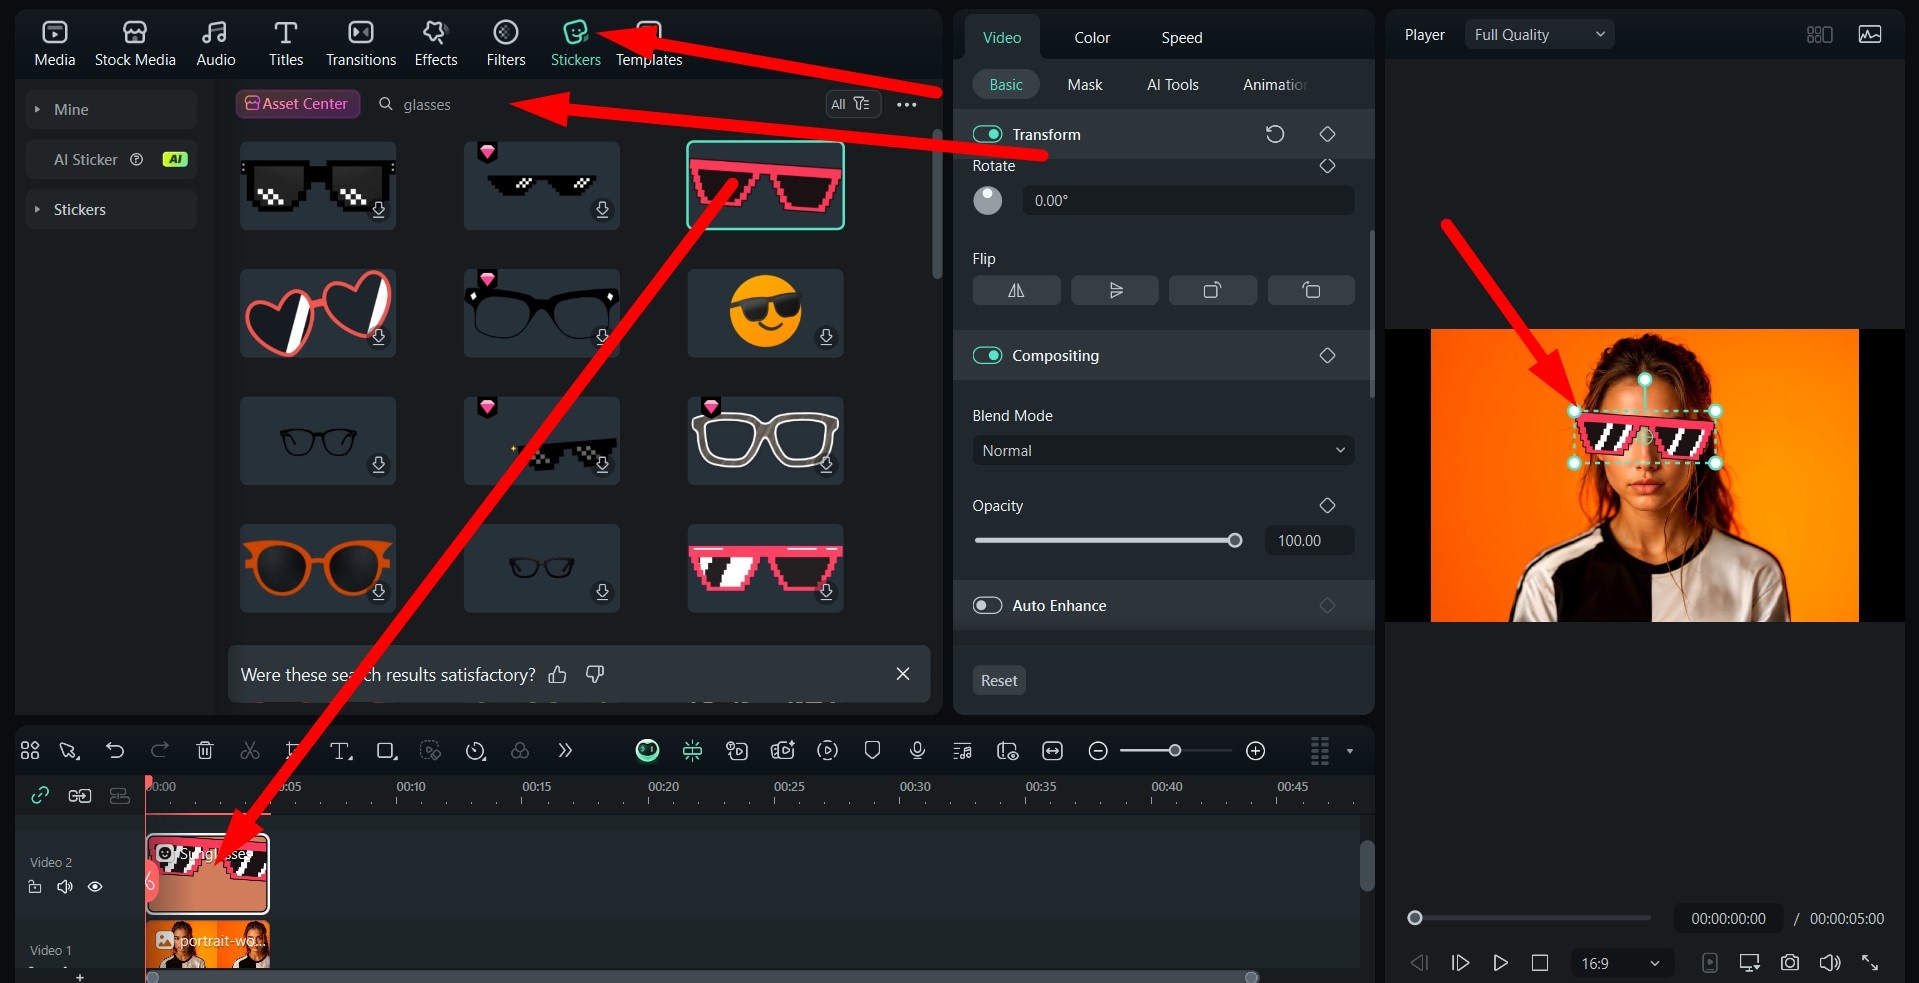
Method 2: Add Glasses Stickers To Your Photo on PC and Mobile
For the PC version, go to Stickers, search for "glasses," drag them to the timeline, and adjust the size and position of the new shades in the preview section of the interface.
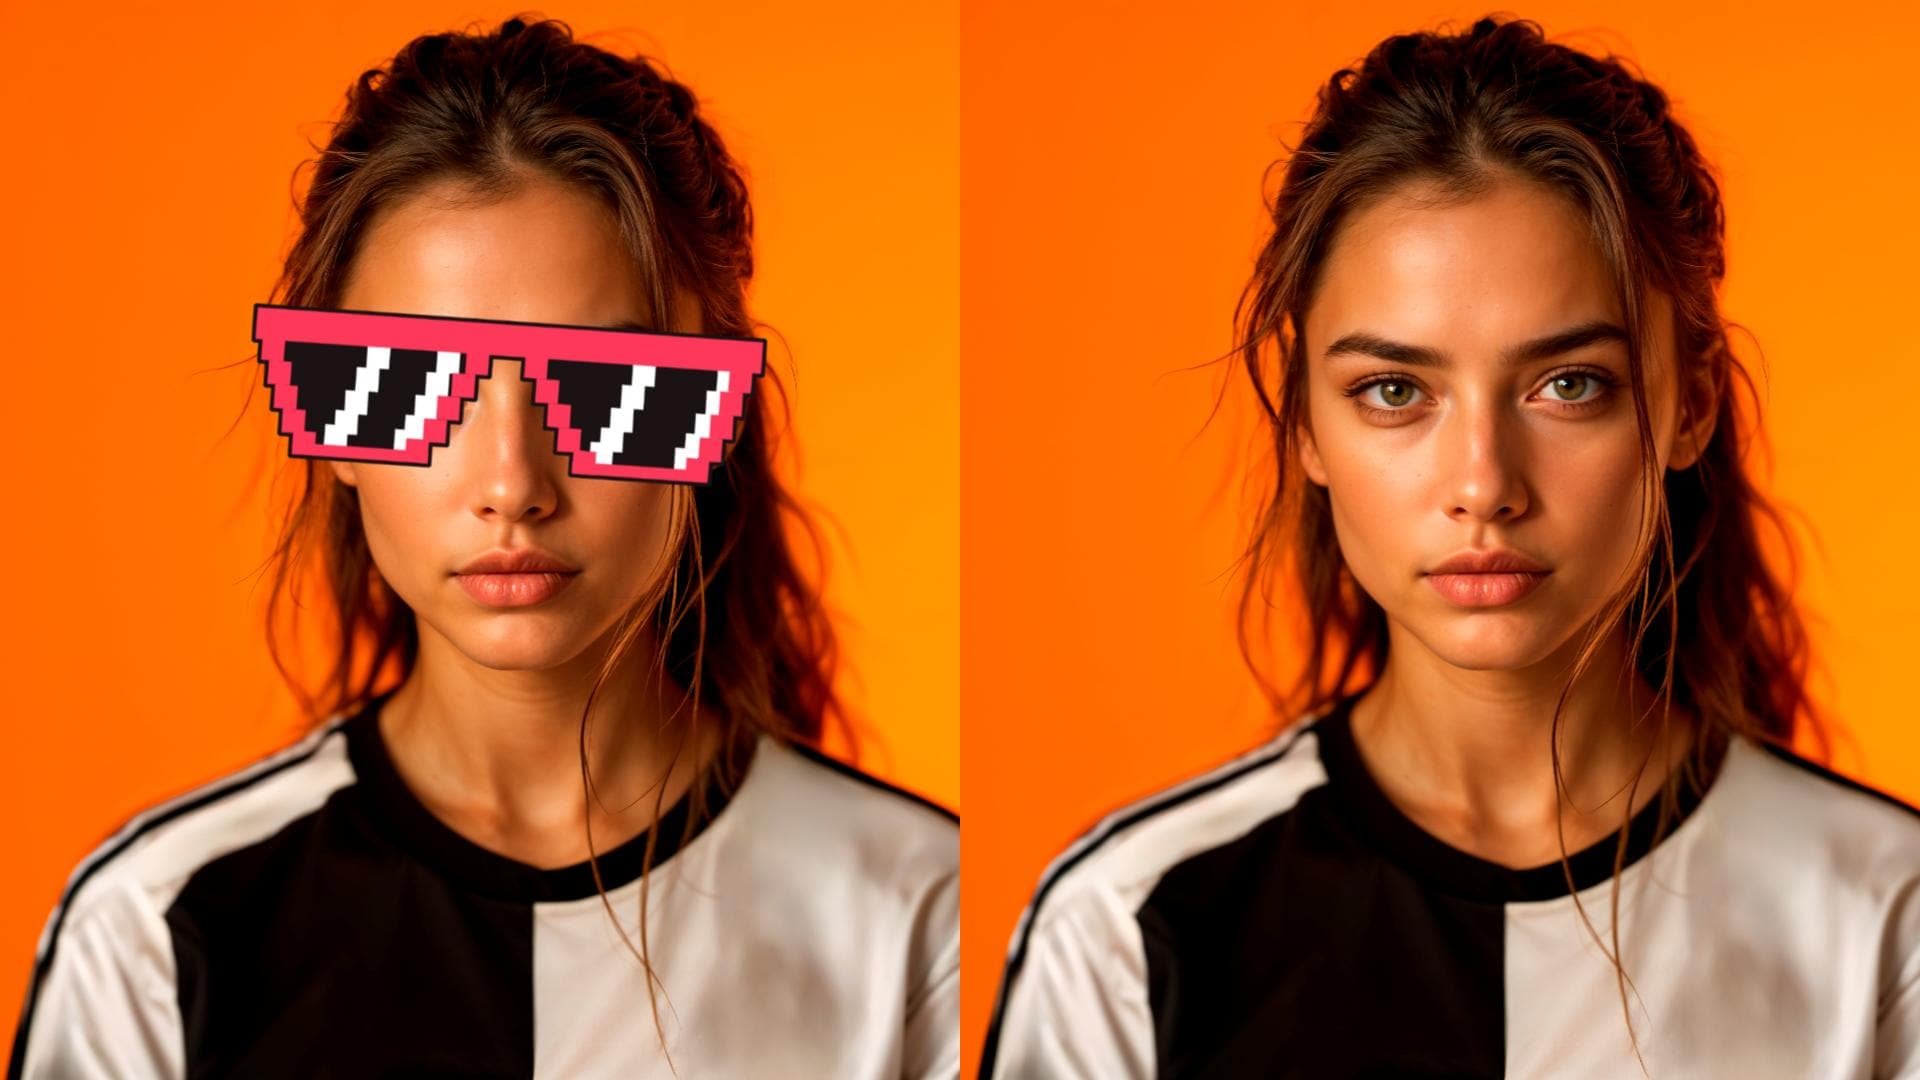
Here's another quick comparison.
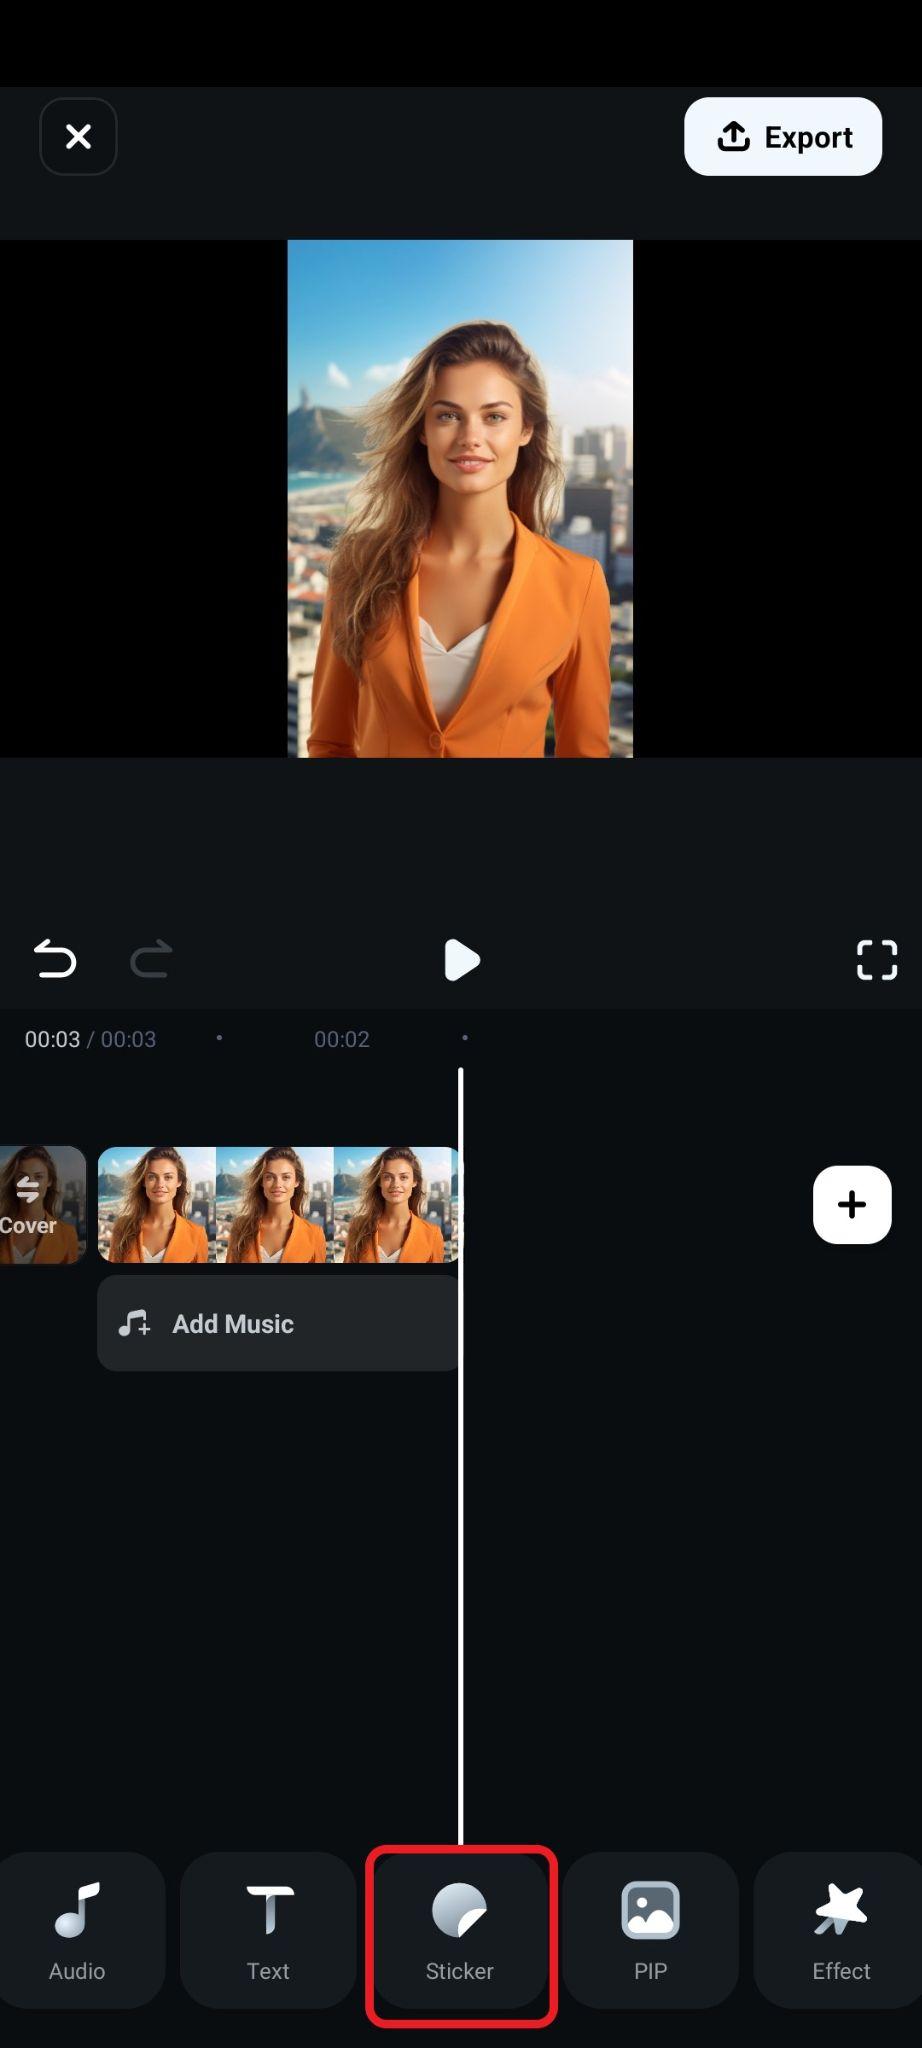
As for the mobile version, follow the steps below.
- Find the Sticker tab in the bottom menu.
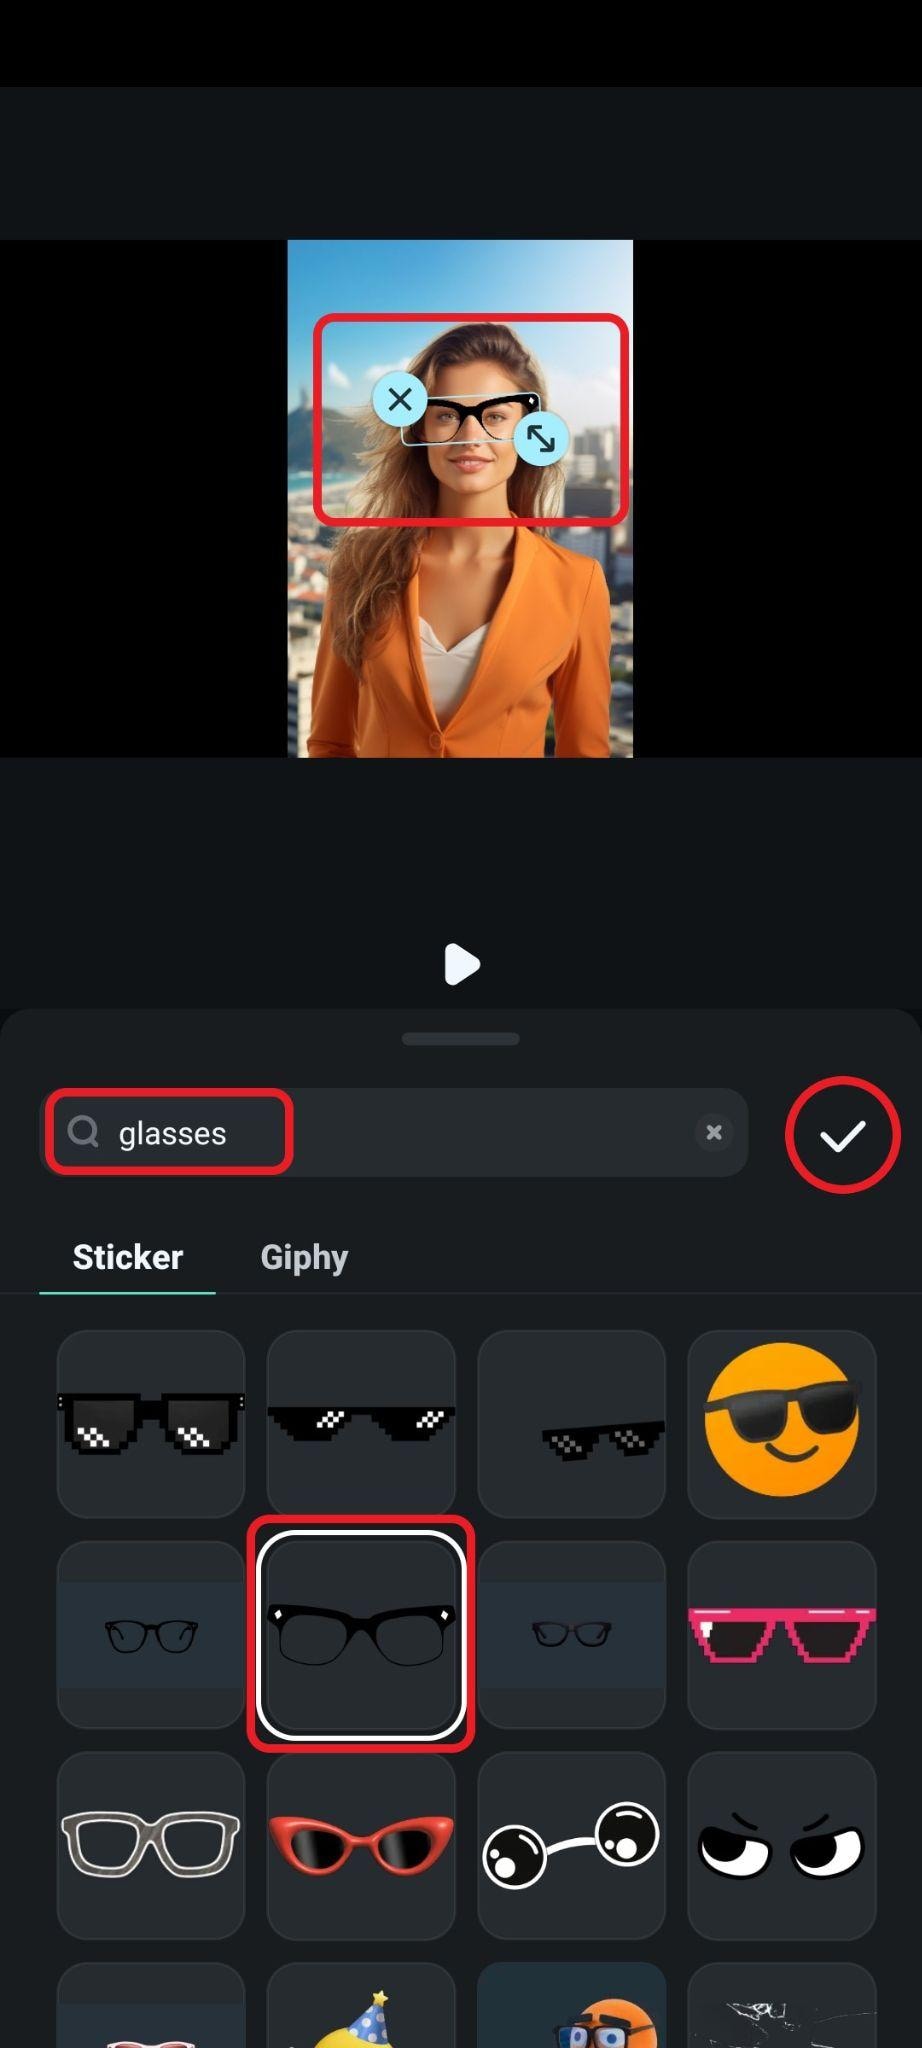
- Just like in the PC version, search for "glasses," then pick a design that you like, adjust the size and position in the preview section, and accept the changes.
- Here's another quick comparison.
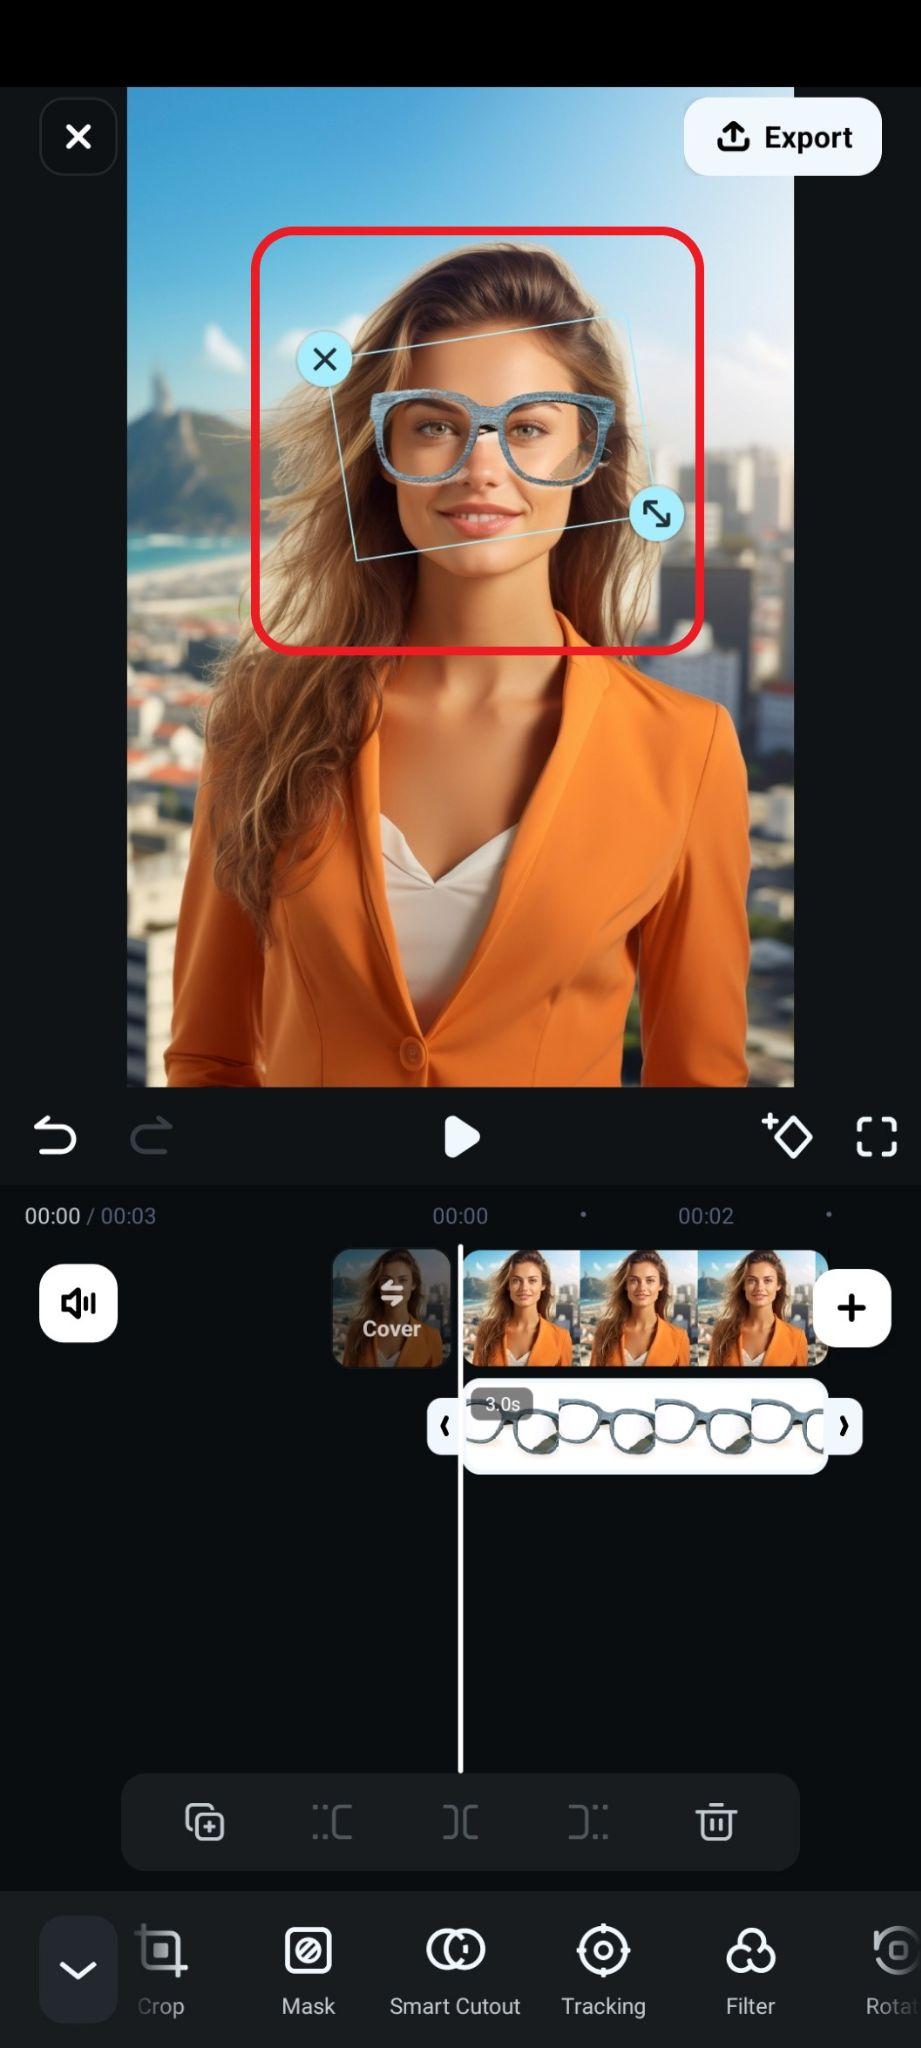
Method 3: Add Specific Glasses To Your Photo With Smart Cutout Feature
Aside from adding sunglasses effects or stickers, you can also use Filmora's smart cutout feature to cut out the specific glasses and then overlay them on a picture. For this method, you will need another image with specific glasses that you like.
secure download Here are the steps to add glasses to your photos on Windows or Mac.
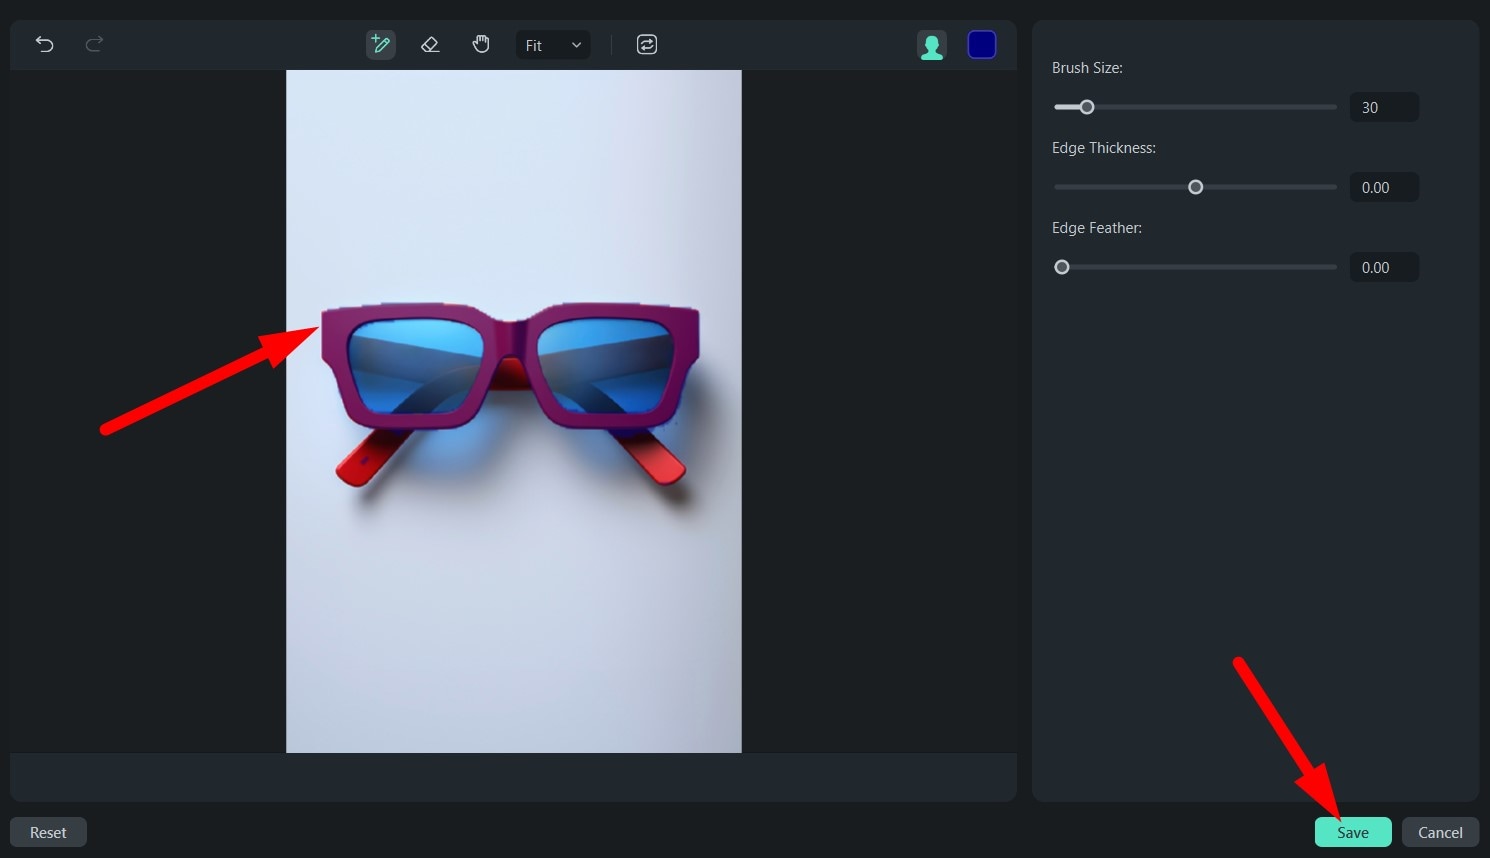
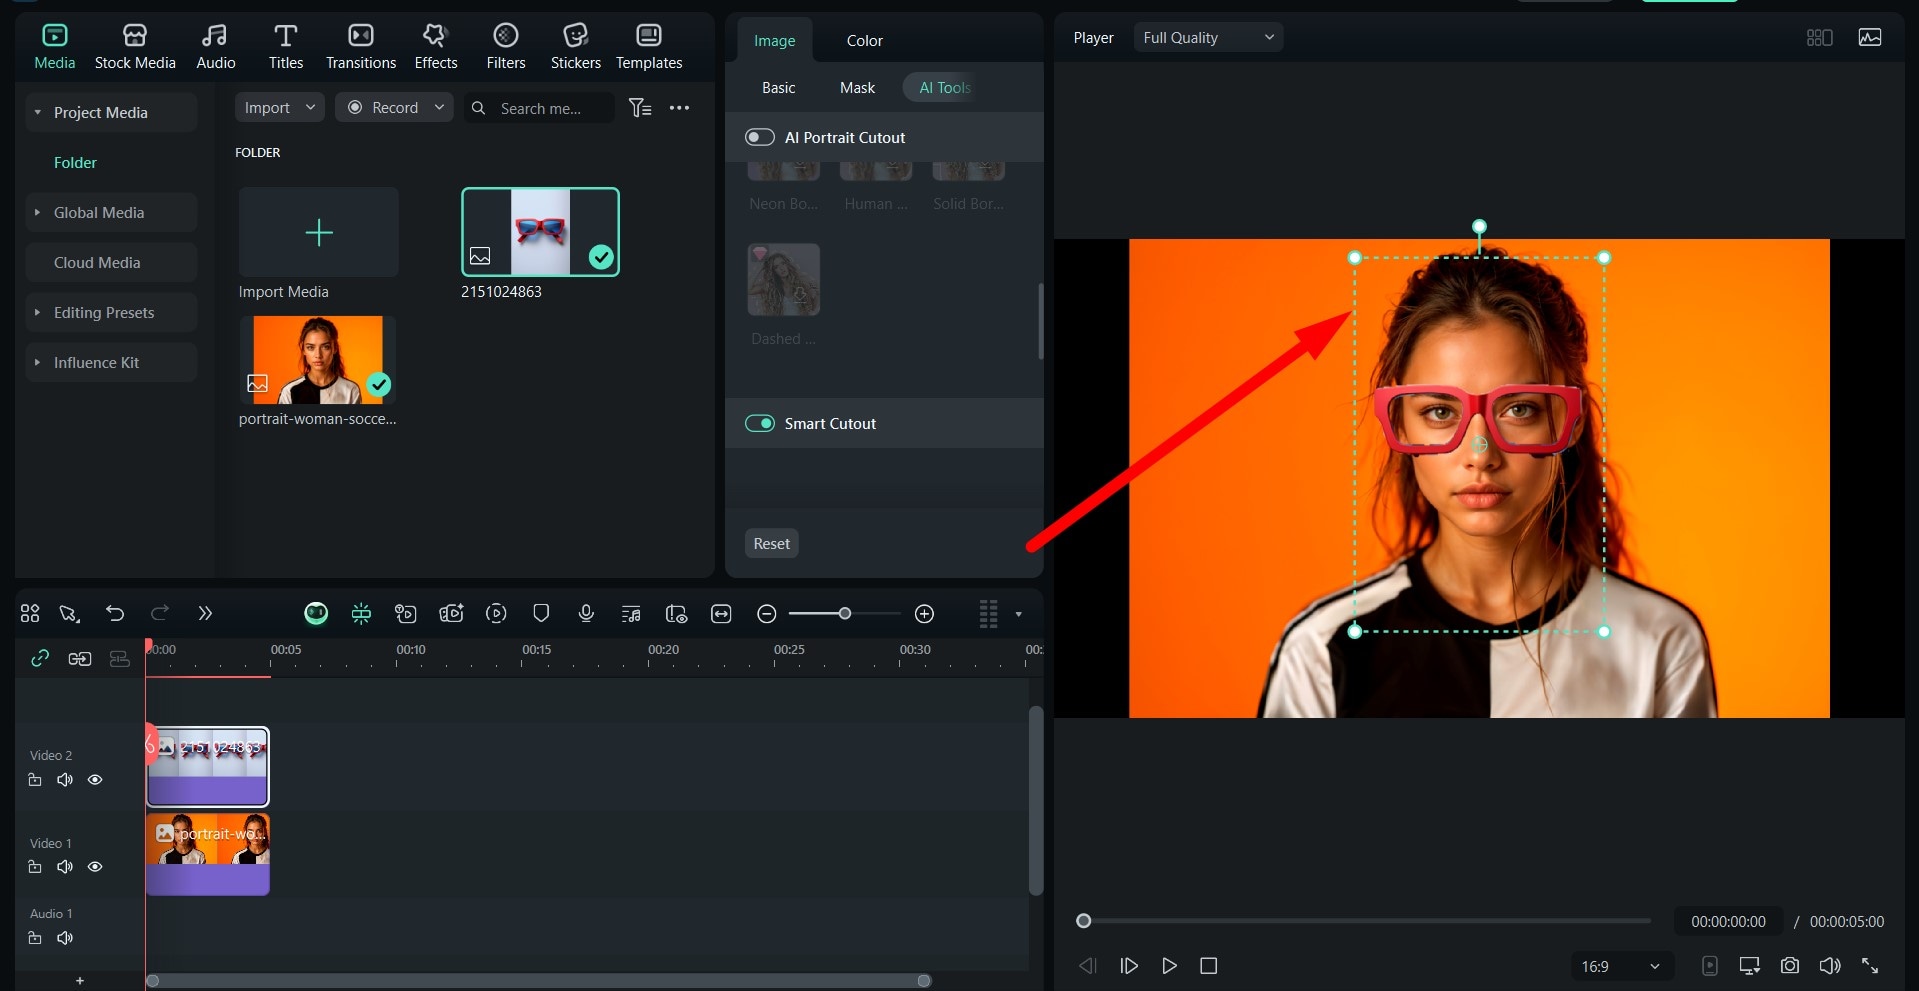
- Import the image of those glasses into your existing project, drag them to the timeline above your photo, and then click on the glasses to select that image, go to AI Tools > Smart Cutout, and simply activate that feature.

- Outline the frames and make sure to use the Eraser tool to eliminate all the parts of the image that you don't want to cut out, and click on Save.
- Reposition and resize the cutout glasses in the preview section.
Here's the result.
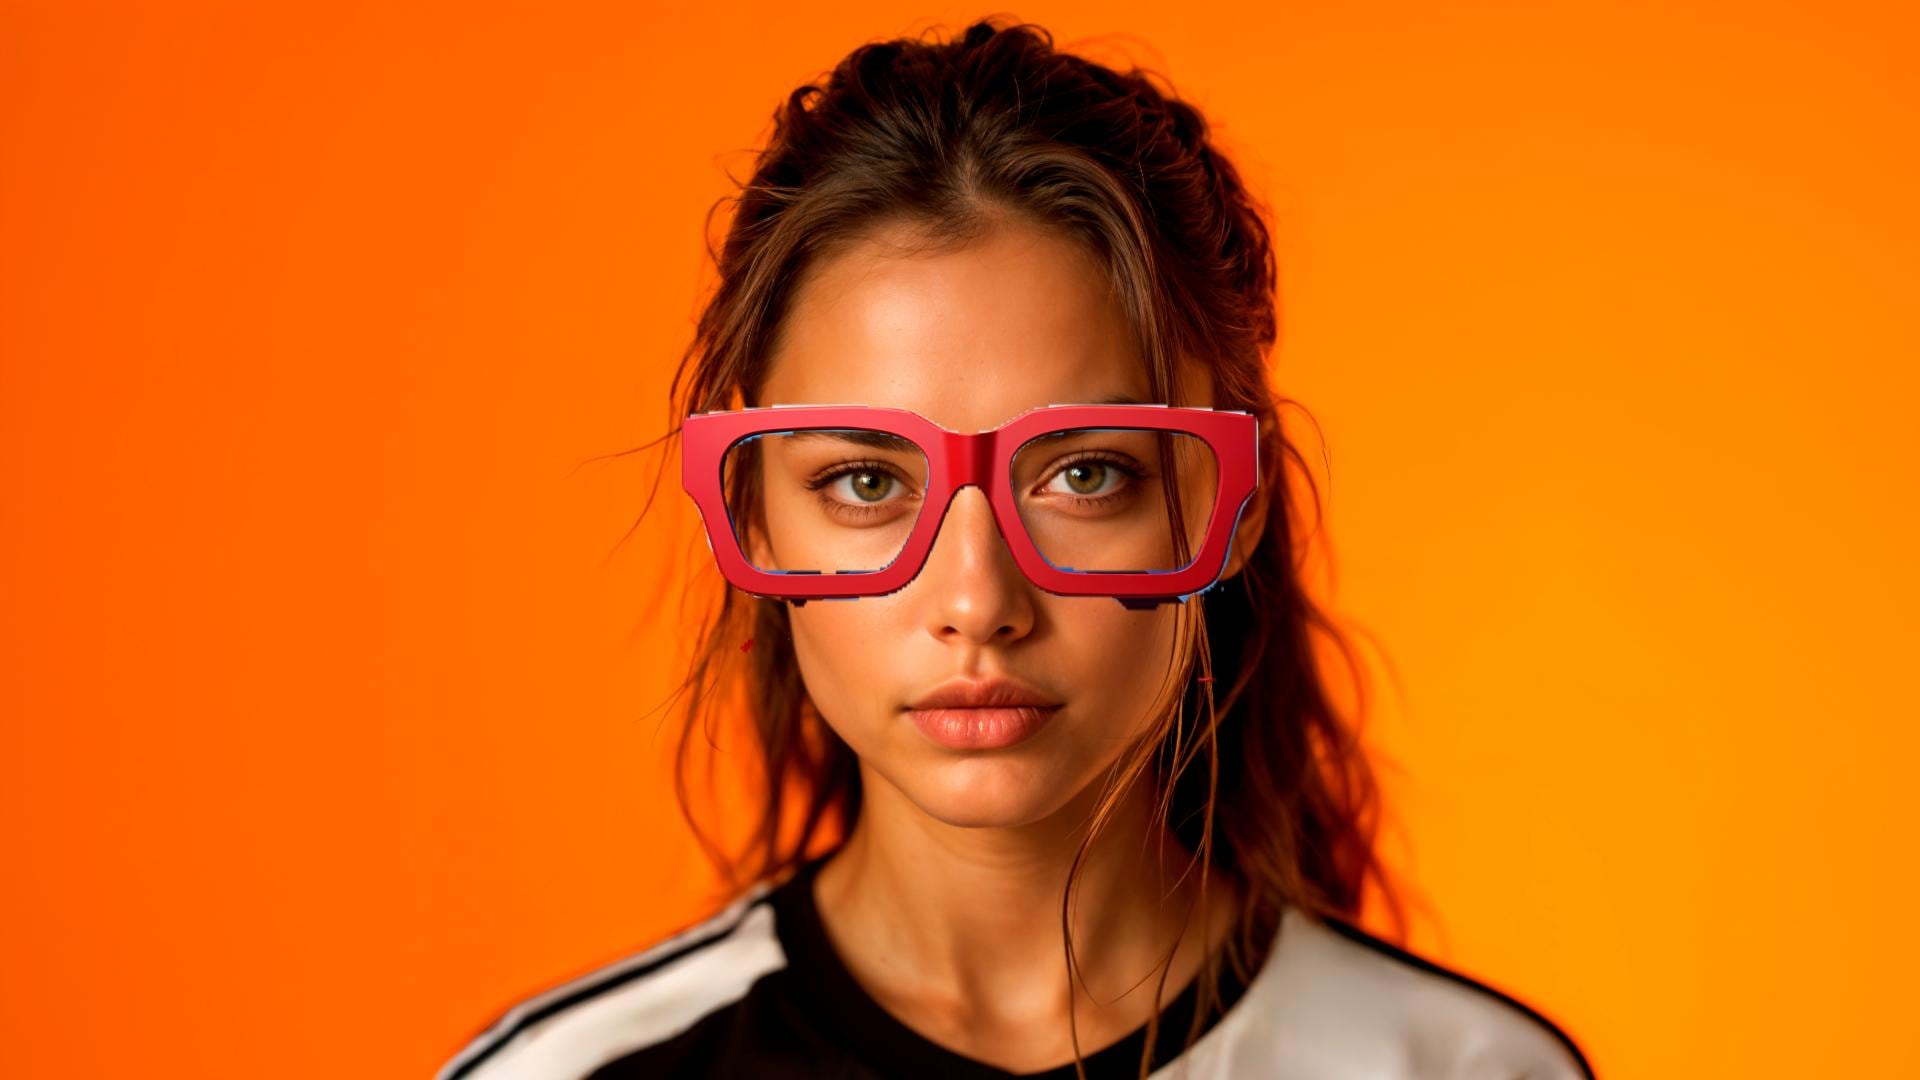
This is an excellent way to see how some designer glasses will look on you.
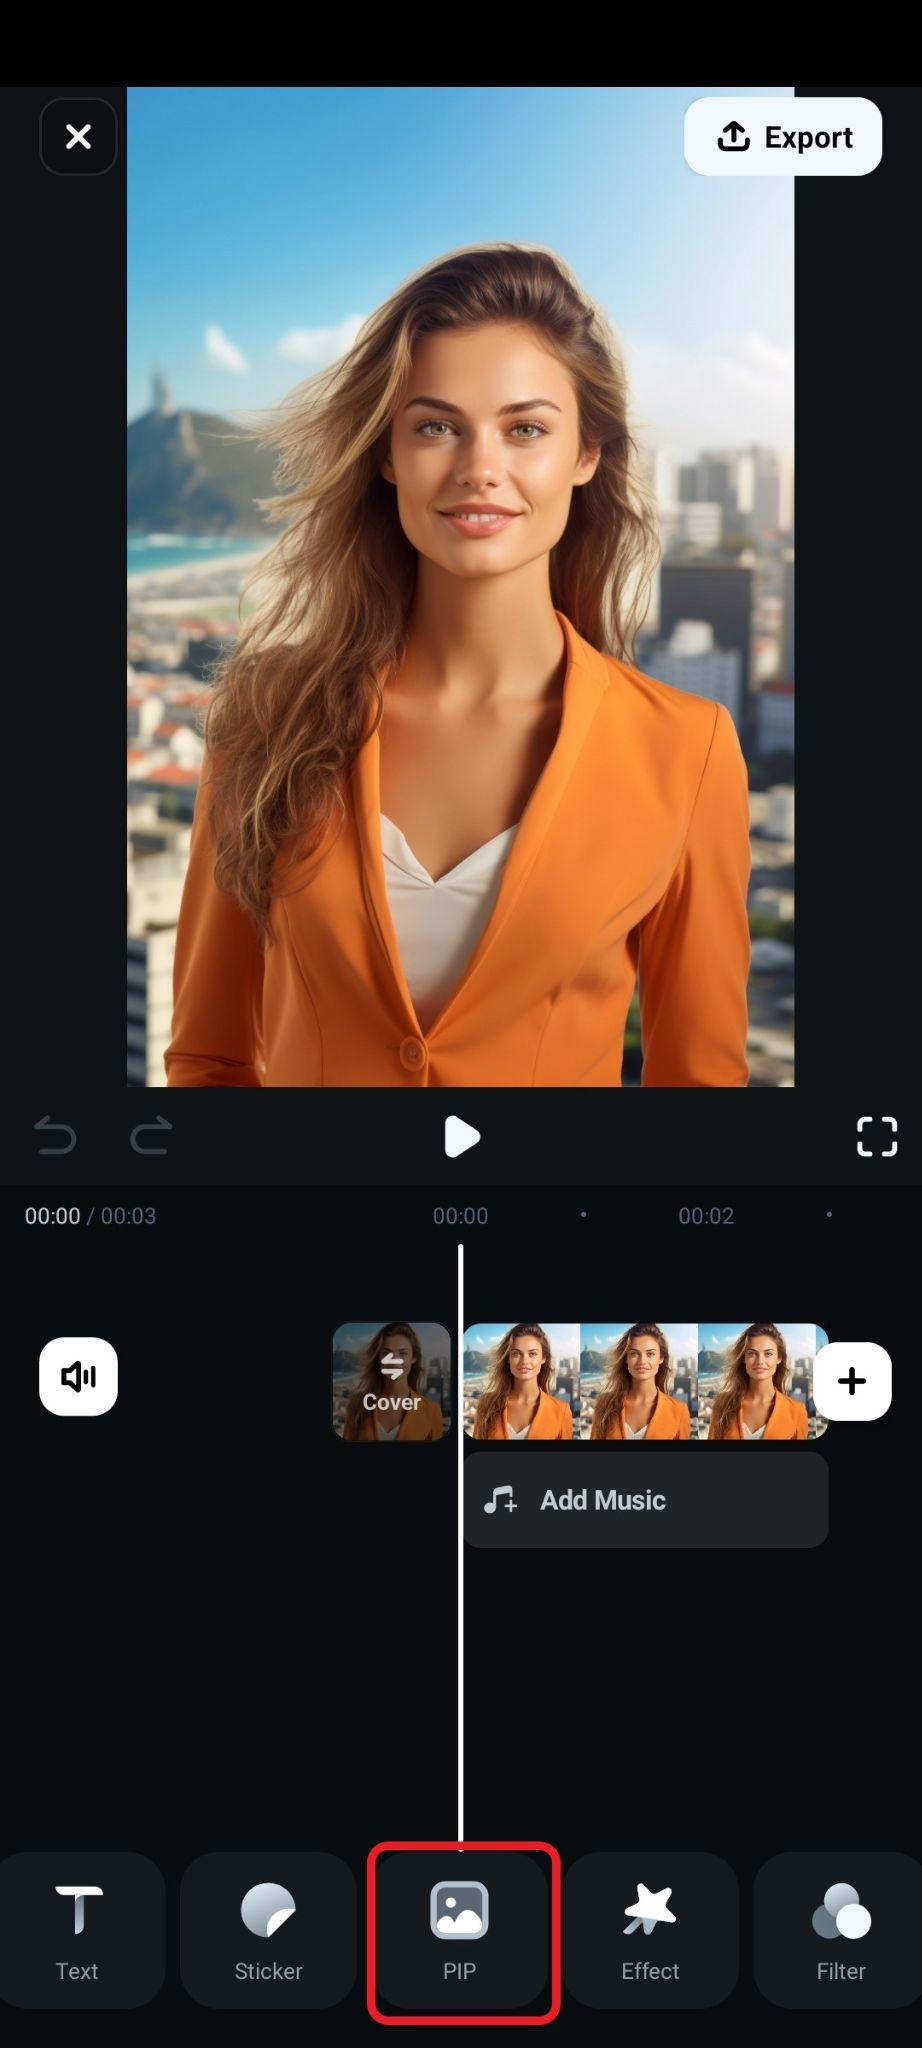
As for the mobile version, follow the steps below.
- Find the PIP (Picture-in-Picture) tab in the bottom menu and proceed to insert the photo with the glasses you like.
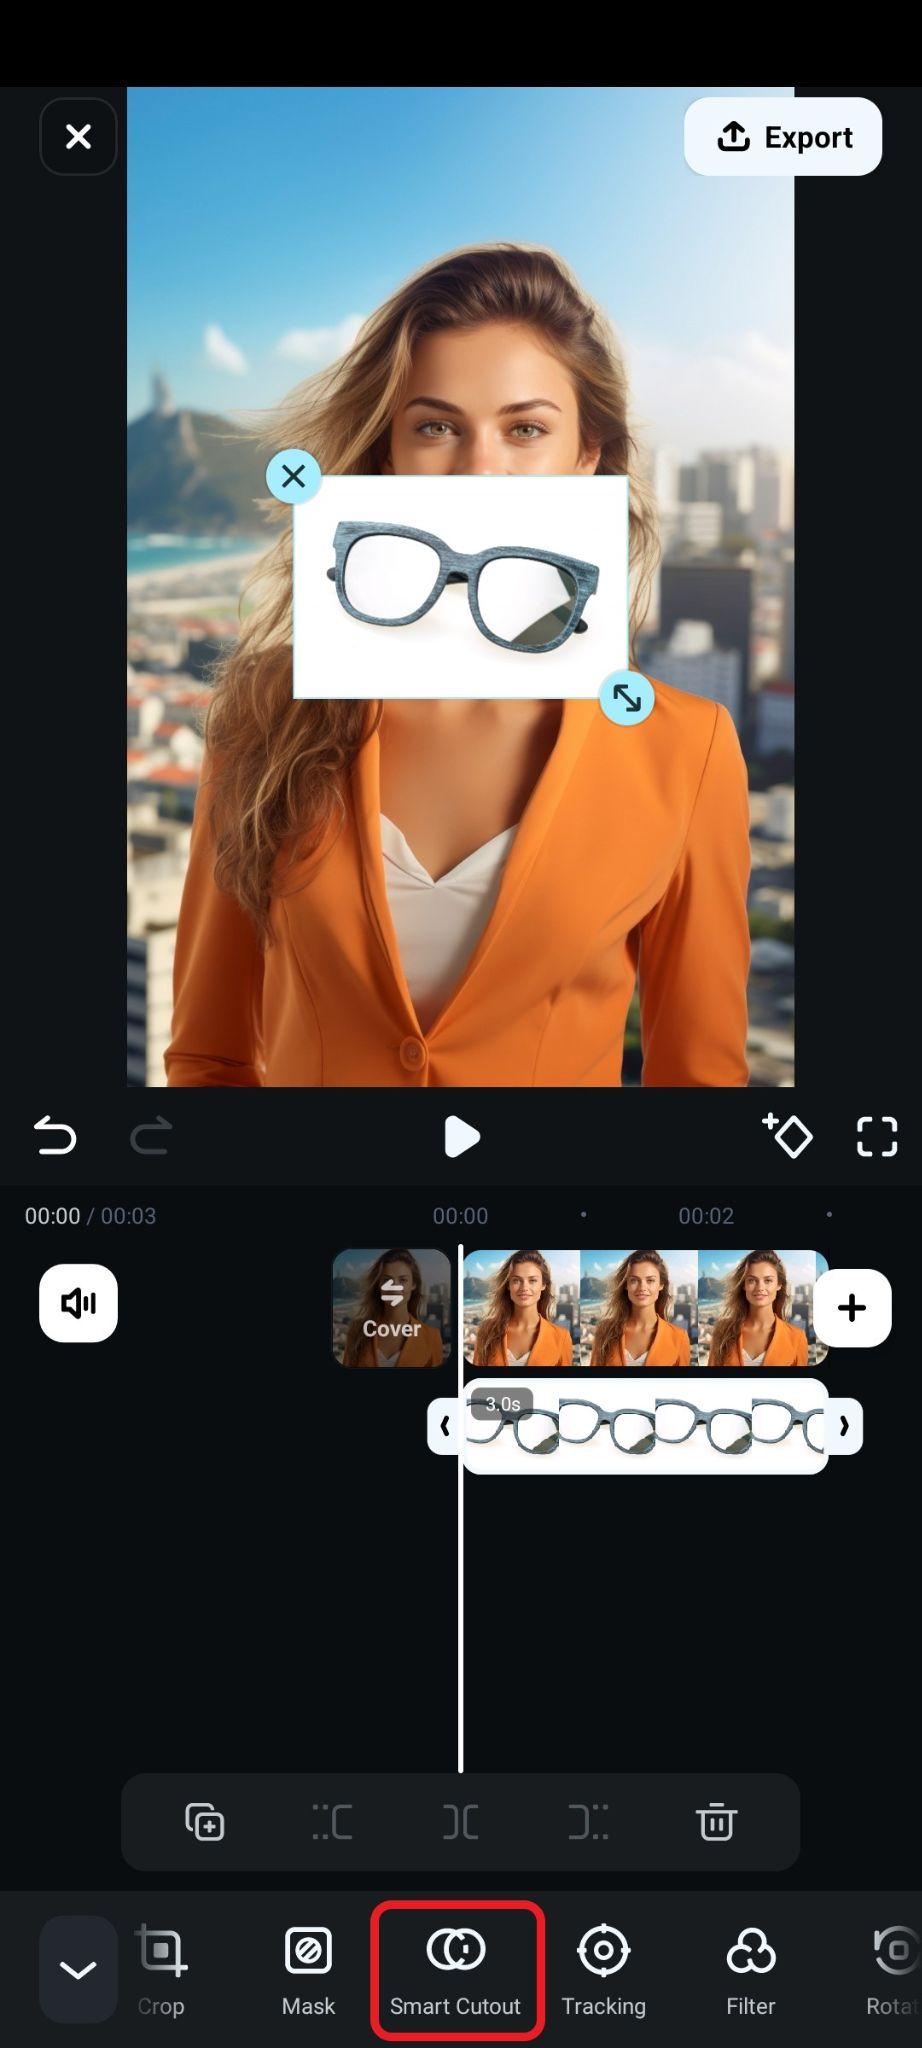
- With the new image added and selected in the timeline, find the Smart Cutout feature in the submenu.
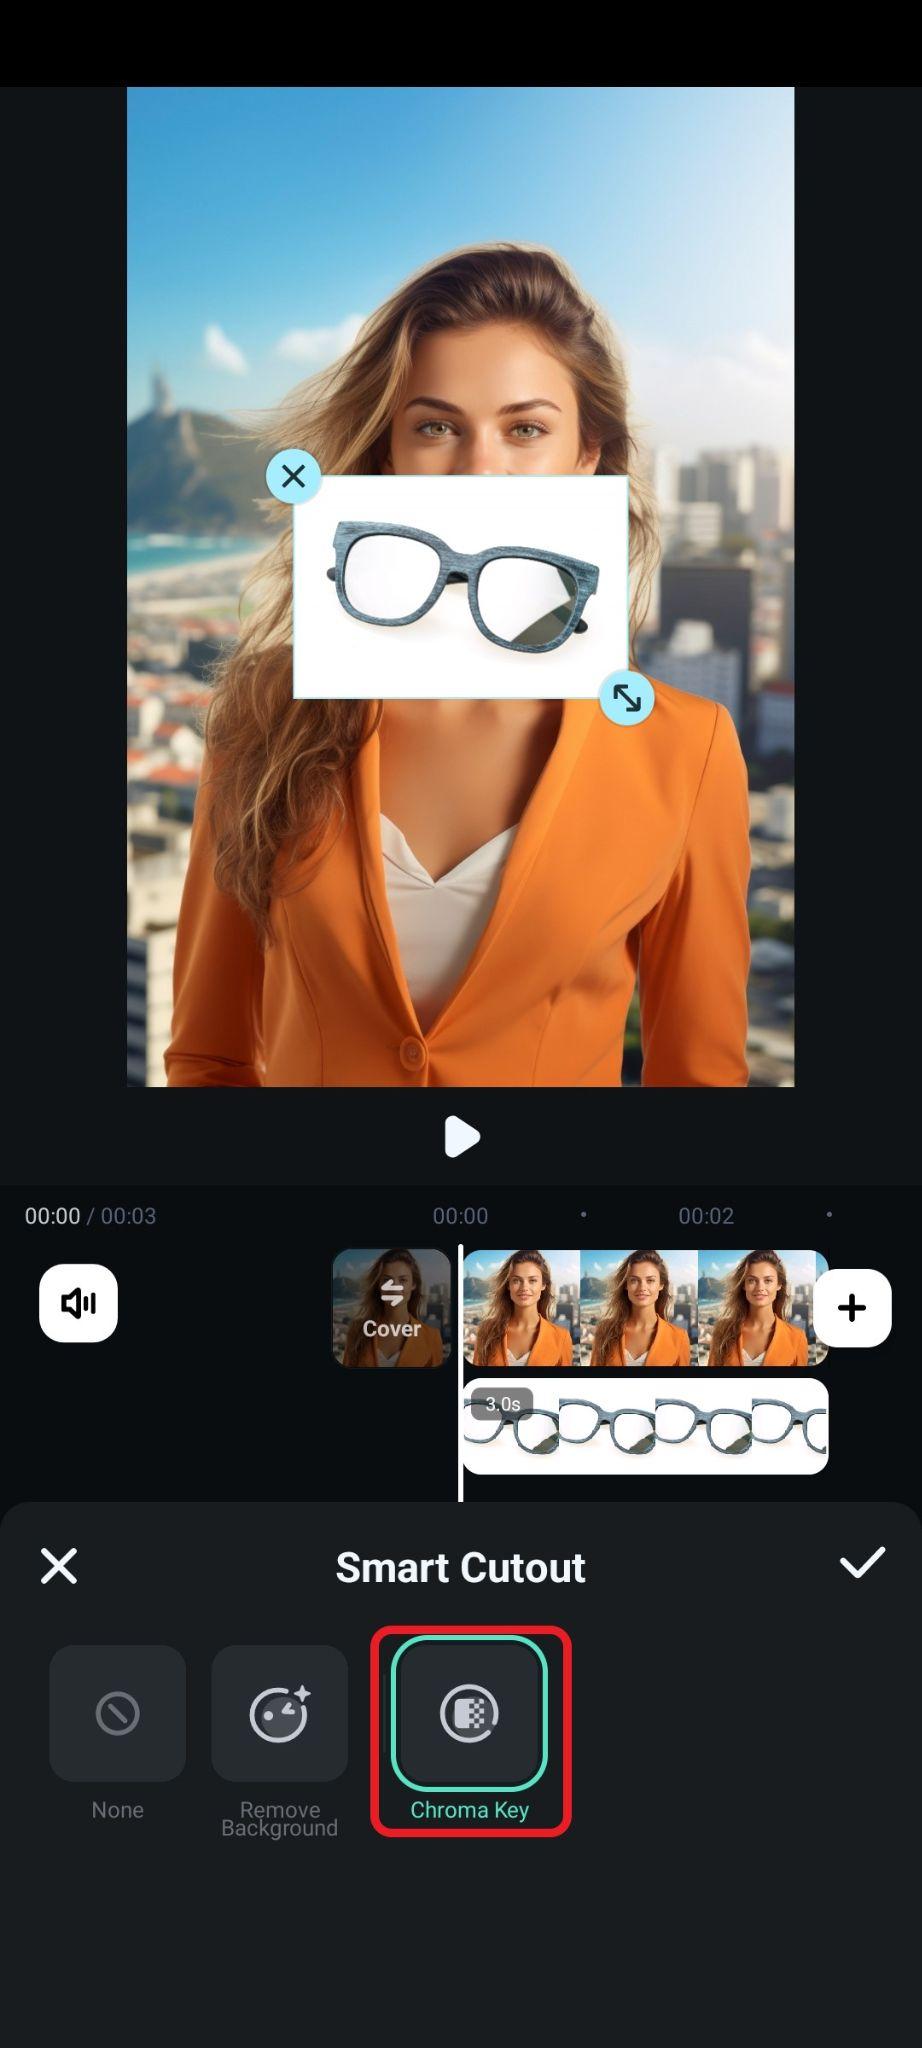
- Select the Chroma Key feature.
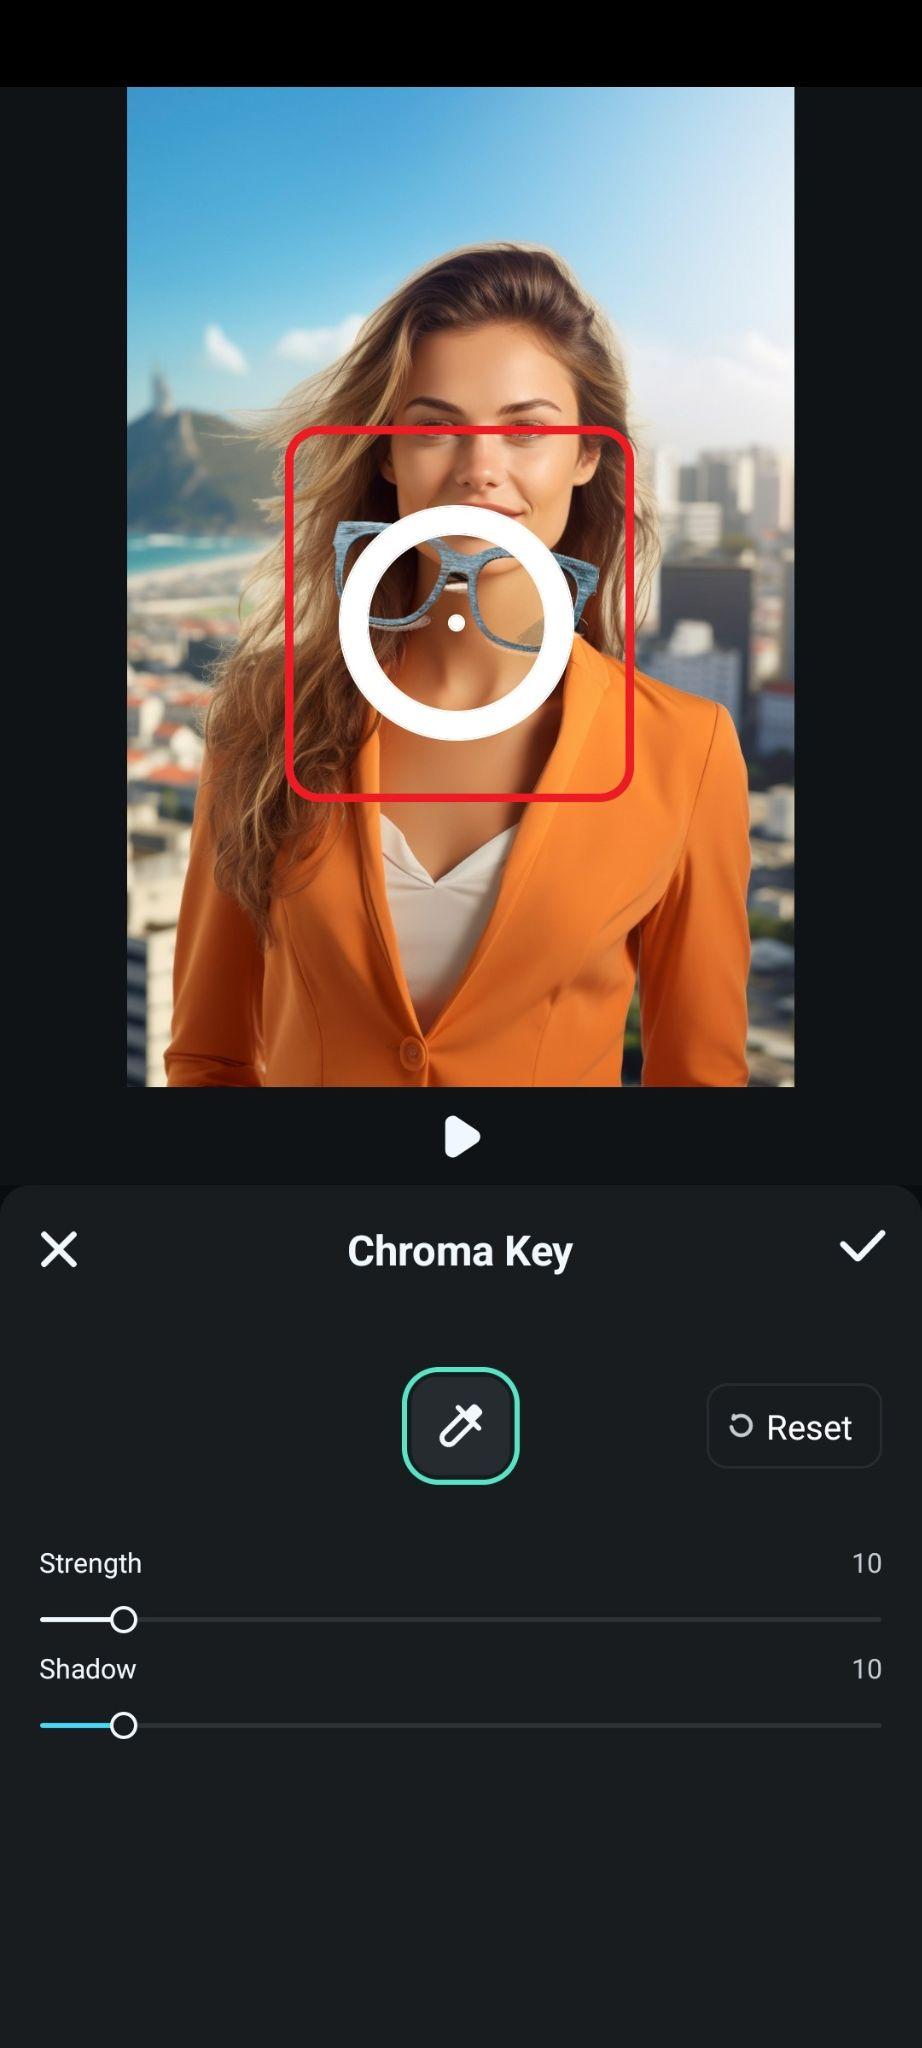
- Adjust the color selection feature until everything that remains in the frame (and accept the changes).
- Finally, adjust the size and position of the frames.
- Check out this result.

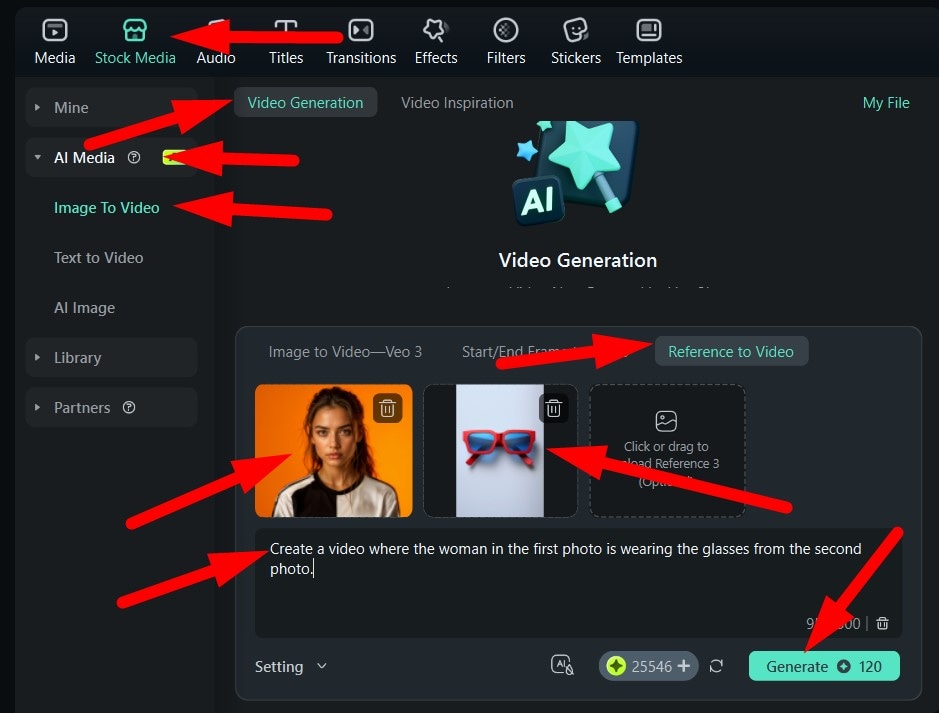
Method 4: Create a Virtual Glasses Try-On Video with an AI Image to Video Generator
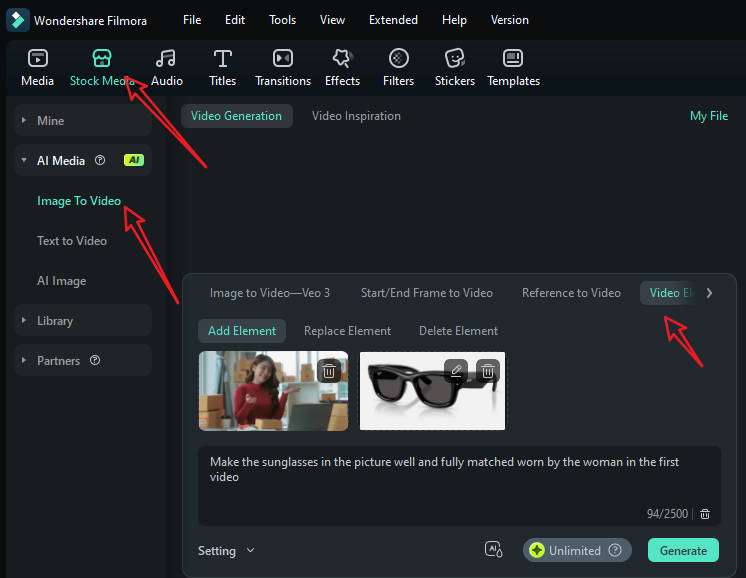
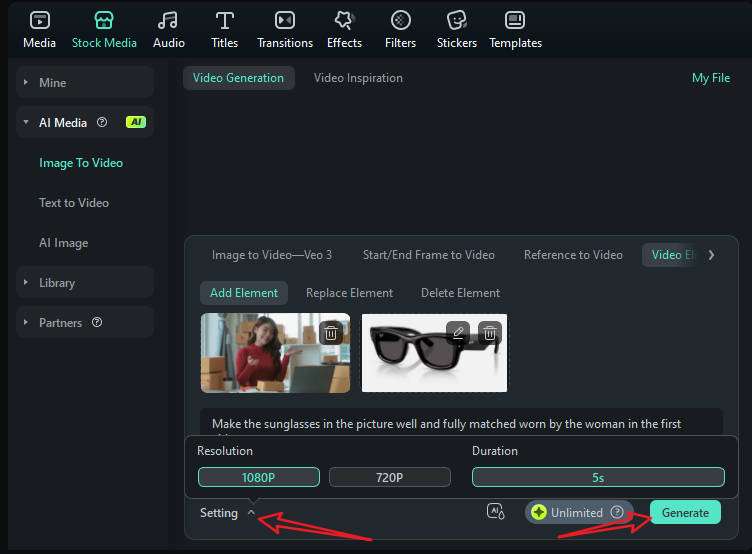
For this method, we will use Filmora's Image to Video feature, which is powered by Google Veo 3 video generation algorithms. Check out how this works on PC.
secure download Go to Stock Media > AI Media > Image to Video. Then, go to Video Generation > Reference to Video, and upload a photo of you (or a model) and the glasses you want to try on. Then, add a simple text prompt and click on Generate.
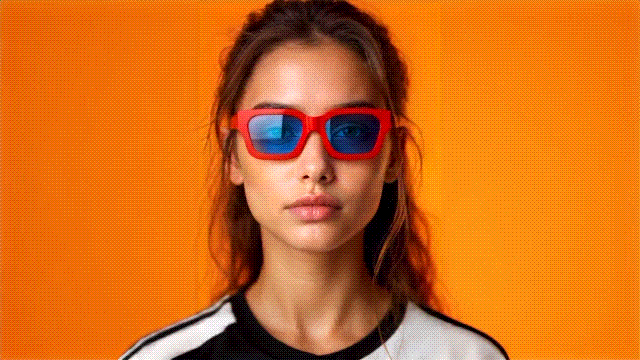
Here's the result.
As for the mobile version, follow the steps below.
- Open Filmora and tap on Image to Video.
- Go to the Blending tab and add two photos (the model and the glasses). Then, add a text prompt, and tap on Generate.
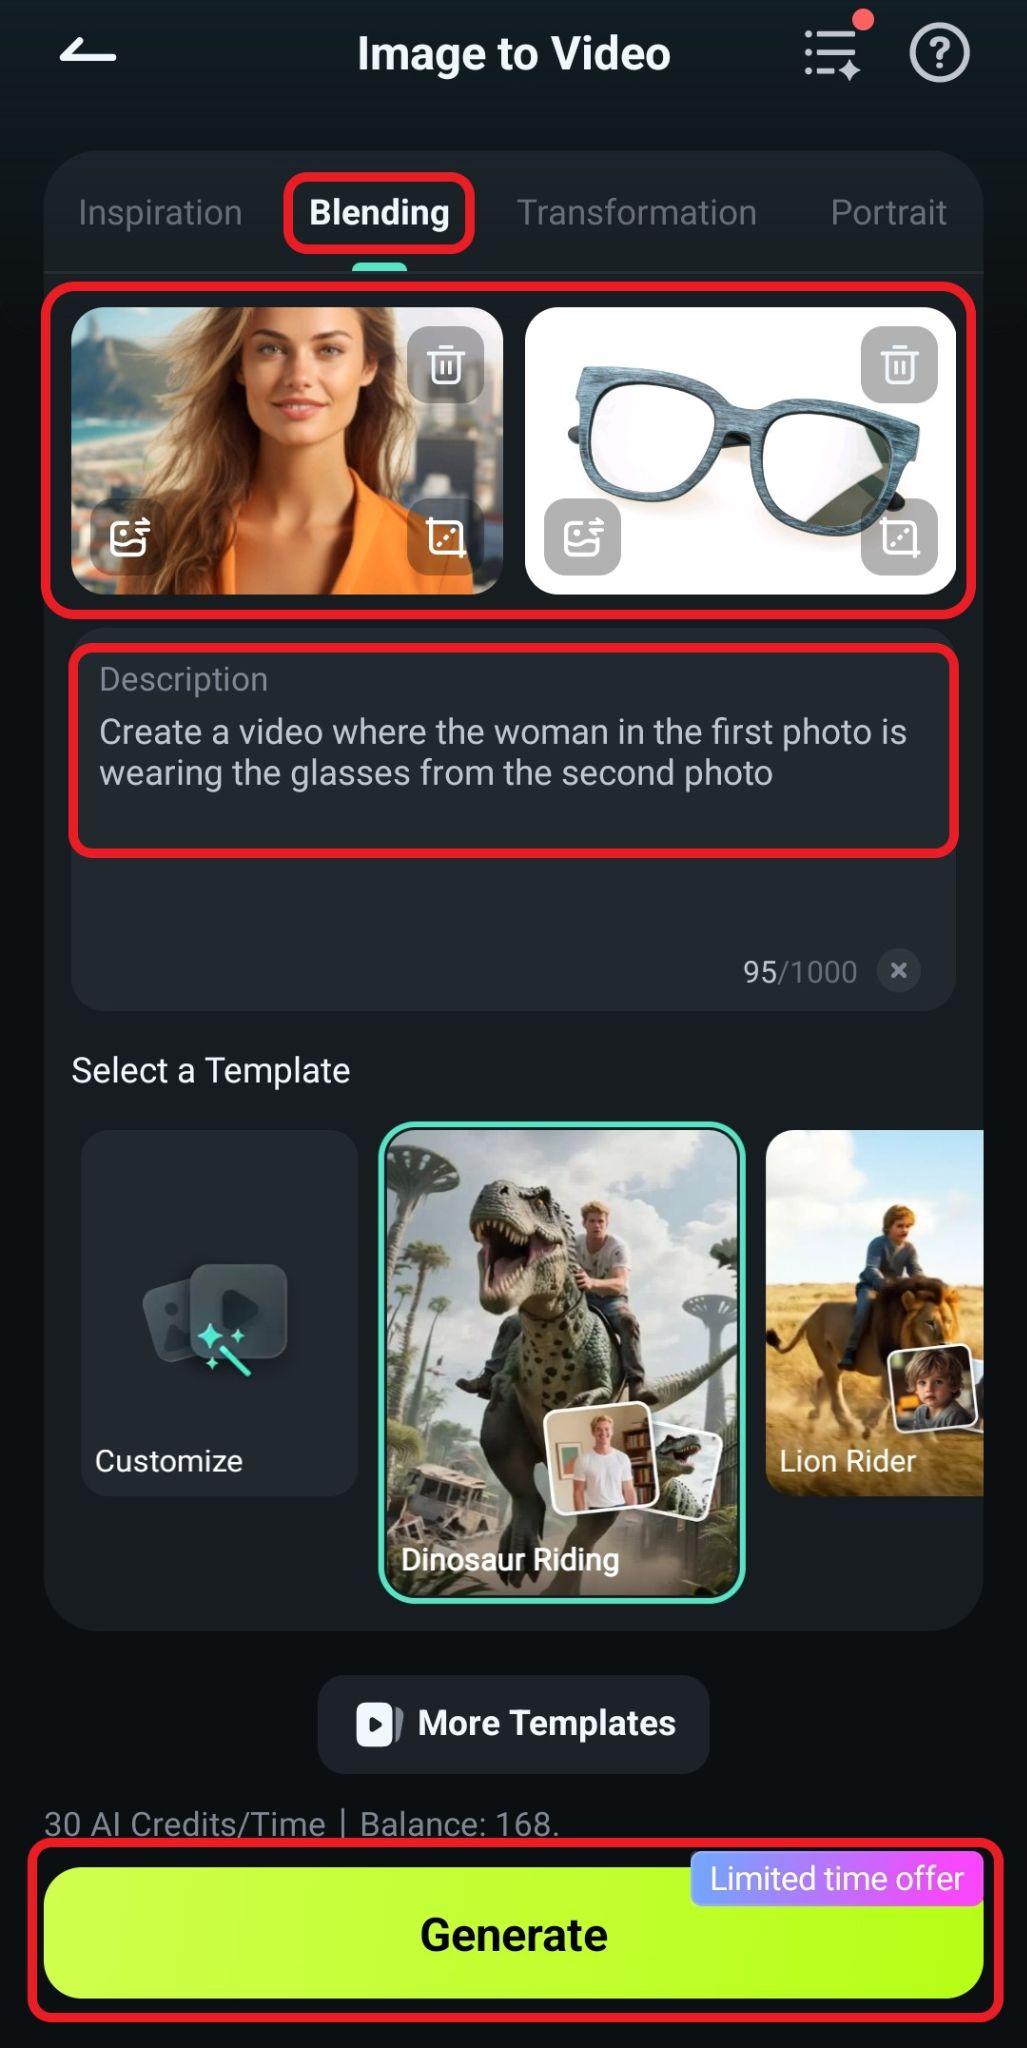
- It's that simple, and the results are stunning. Take a look!

If you think we have exhausted all the possible methods for adding glasses to photos using Filmora, the following bonus section will serve as an excellent surprise.
Bonus: How To Add Sunglasses to Videos with AI?
Filmora has a new feature that lets you add objects to videos with AI in simple text prompts and reference pictures. You can simply upload a short video of yourself without glasses and add a picture of glasses, then type in a simple prompt to let the AI tool perfectly integrate the glasses into the video.
Download Filmora today and try all these features to see why it is the best tool for adding eyeglasses to videos.
secure download - Start a New Project > go to Stock Media > AI Media > Image to Video > and find Video Element Editing.
- Upload your short video and a reference picture, type in your prompts, and go to settings to adjust the video resolution. Finally, tap on Generate to start adding a person to the video with AI.
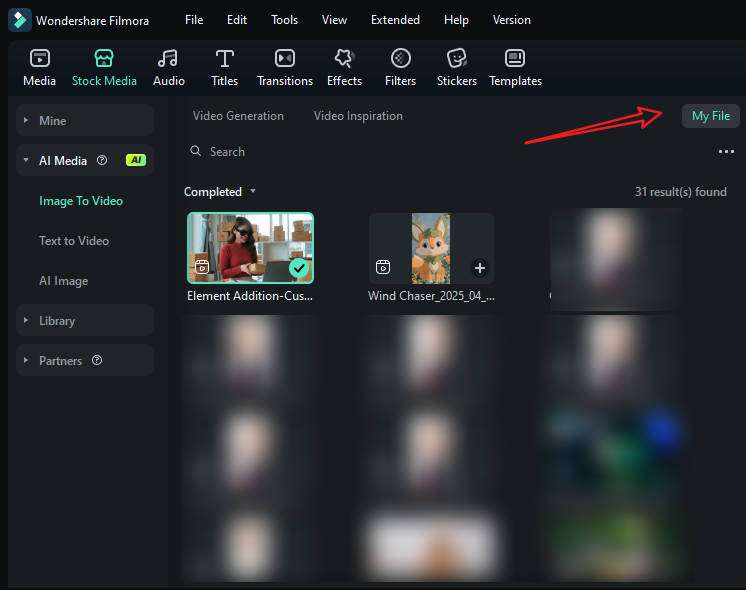
- When it finishes adding the person to the video, go to My File > preview the video and add it to the timeline.
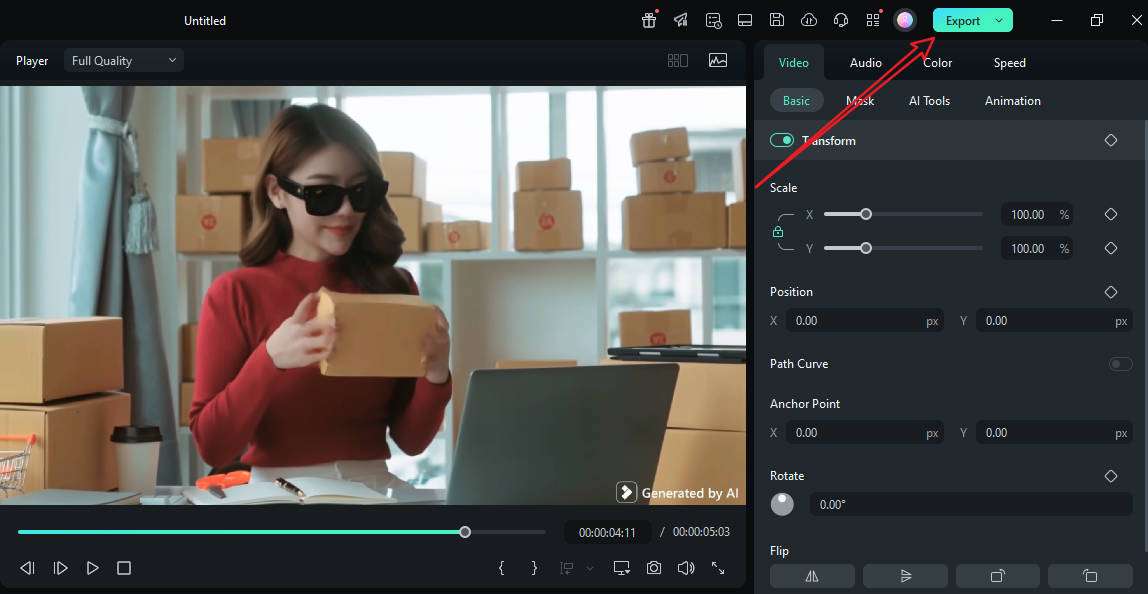
- Playback the video, and tap on Export if you are satisfied.
Let's see the results of adding sunglasses to the video with AI in Filmora.
Conclusion
Adding glasses to photos digitally used to be a long and painstaking task. Now, with simple creative tools, anyone can do it in minutes. Filmora provides several methods to add glasses to photos, both non-AI-powered and AI-powered. Just download Filmora and see its magic.
secure download 