
 100% Security Verified | No Subscription Required | No Malware


 ChatGPT
 Perplexity
 Gemini
 Claude
 Grok
Grok
When dealing with AI, one of the most important aspects of achieving polished and professional results is through prompts. This is what a real photographer would do when choosing how to frame a subject using AI models like Stable Diffusion. These instructions will make results look more realistic and help control its mood and perspective. This article will guide you on which Stable Diffusion camera angle prompts will generate the best results.
In this article

Part 1. Best Stable Diffusion Camera Angle Prompts for Dynamic Perspective
This part will provide you with a list of the best Stable Diffusion camera angles and prompts you can try to generate stunning images:
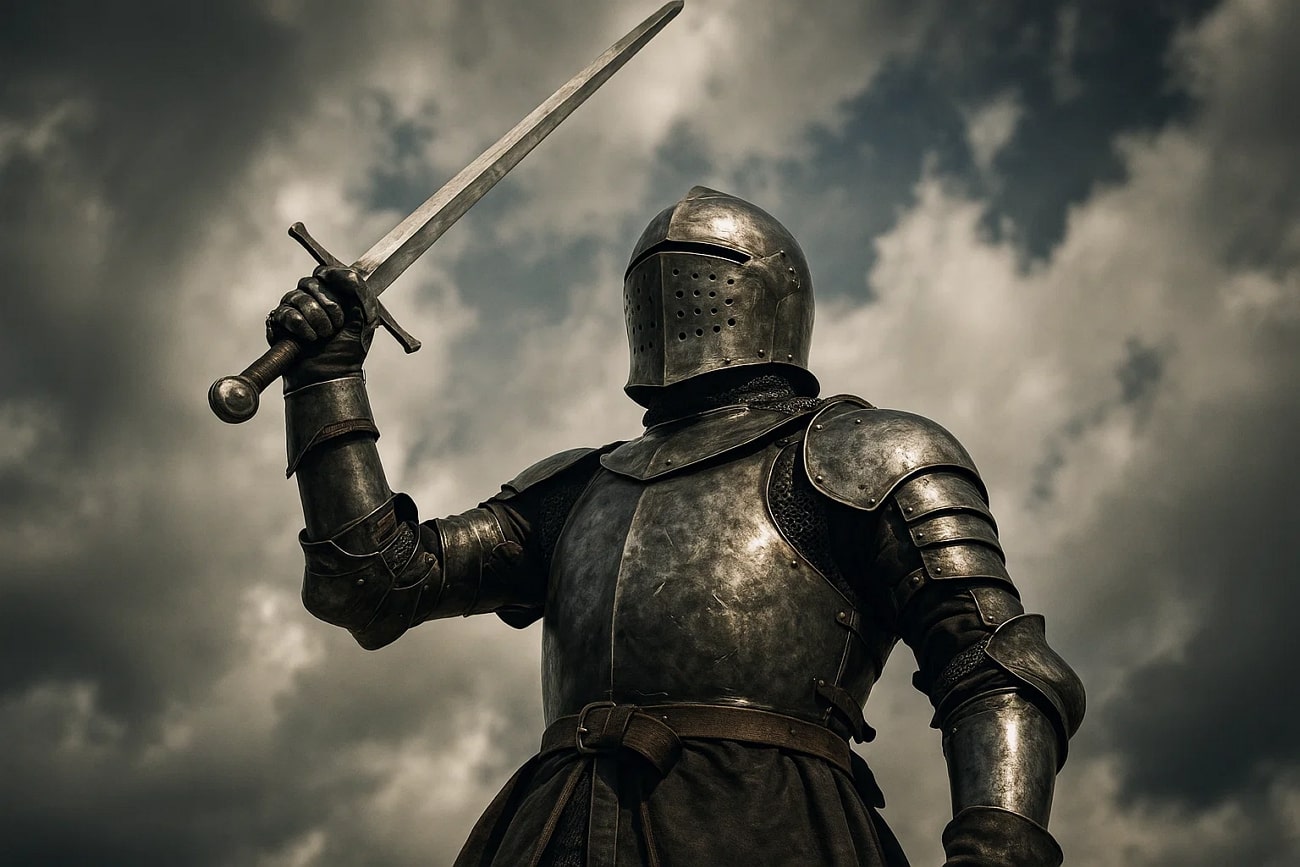
Low Angle
This angle positions the camera lower than the subject, and it makes them appear bigger and heroic.
Best For: Excellent for centralizing the subject in a commanding stance for action scenes.
Examples:
- "Create a cinematic low-angle portrait of a knight holding a sword pointed towards the sky."
- "A grand marble staircase ascends overhead, with steps receding into the light."
High Angle
Using this high Stable Diffusion camera angle portrays your subject as smaller and more vulnerable.
Best For: Perfect for showcasing emotional depth and a sense of oversight.
Examples:
- "Capture a high-angle shot of a child holding a red balloon in a crowded city square."
- "Illustrates a high-angle cinematic shot of a lonely person sitting on a park bench at dusk."
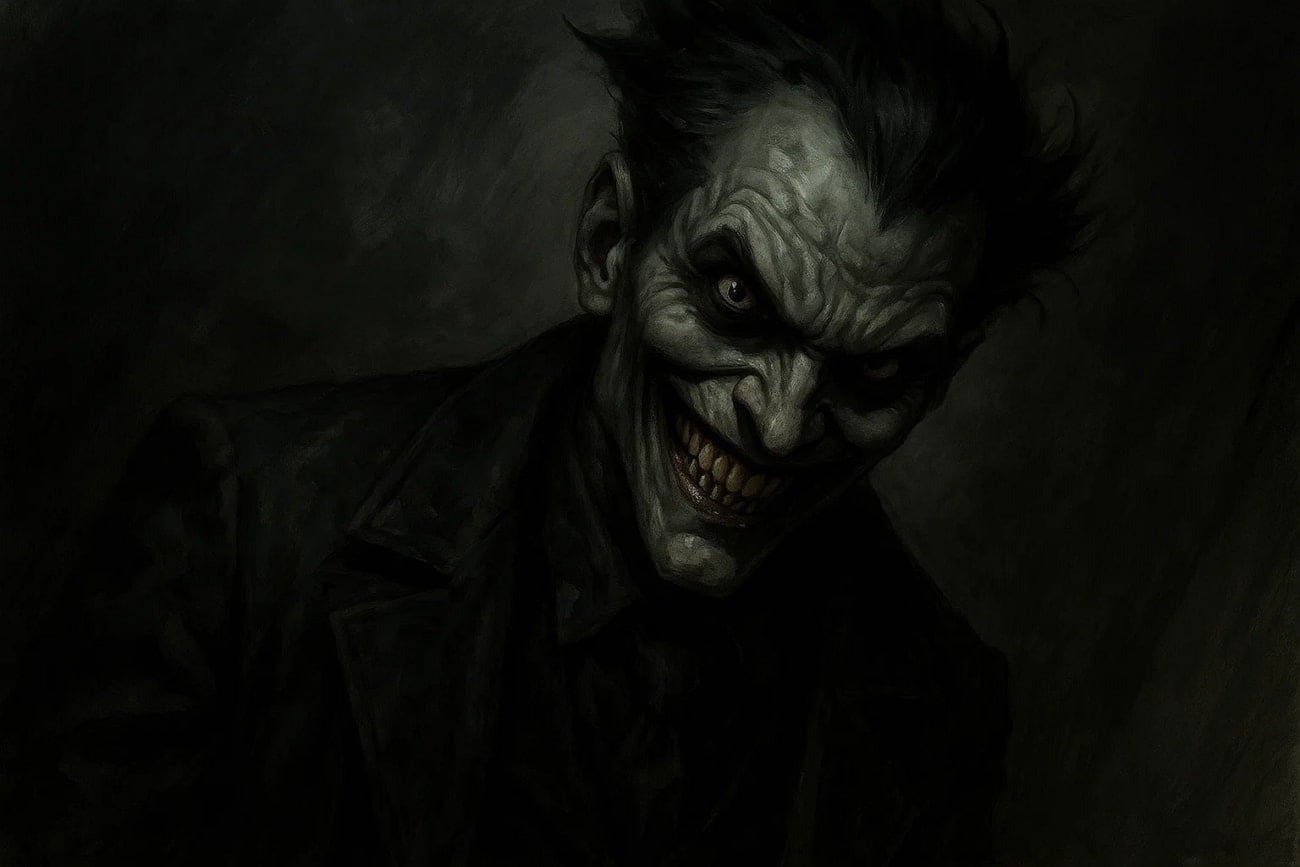
Dutch Angle
Users can achieve a dynamic yet unsettling vibe in their images by using the Dutch angle.
Best For: To add tension, imbalance, chaos, and to intensify the emotional depth.
Examples:
- "A solitary noir detective stands in a rain-soaked alley with flickering neon lights at a tilted horizon."
- "Create an image with a Dutch angle, which portrays a sinister villain with a twisted smile."
Over-the-shoulder
The subject is framed behind the shoulder of another person, which highlights their point of view with this angle.
Best For: Making the scene more realistic and compelling.
Examples:
- "Make an image with a sniper's focused view from behind the soldier's shoulder, looking down the rifle's scope."
- "An over-the-shoulder shot of a traveler standing on a cliff, gazing deep down at vast mountain landscapes."
Eye-level Shot
You can use this Stable Diffusion camera prompt to align the camera with the subject's eye height.
Best For: Ideal for portraying everyday scenes and making them feel relatable and natural.
Examples:
- "Make a portrait of a violinist performing passionately on stage, camera positioned at eye level."
- "An image with a child blowing shimmering bubbles in a sunny park, in a Dutch perspective."
Part 2. Useful Stable Diffusion Prompts for Shot Size to Frame the Subject
Users can utilize the following Stable Diffusion camera prompts to generate some of the best images in varying shot sizes:
Extreme Close-Up
This shot size focuses on smaller details in the image, like the hands or eyes, evoking feelings of emotion.
Best For: Helps readers create powerful images that capture subtle expressions.
Examples:
- "Focus tightly on a single teardrop rolling down a cheek to emphasize raw emotions."
- "Extreme close-up of a cat's eye, whiskers, or paws reflecting a rainy day from the window."
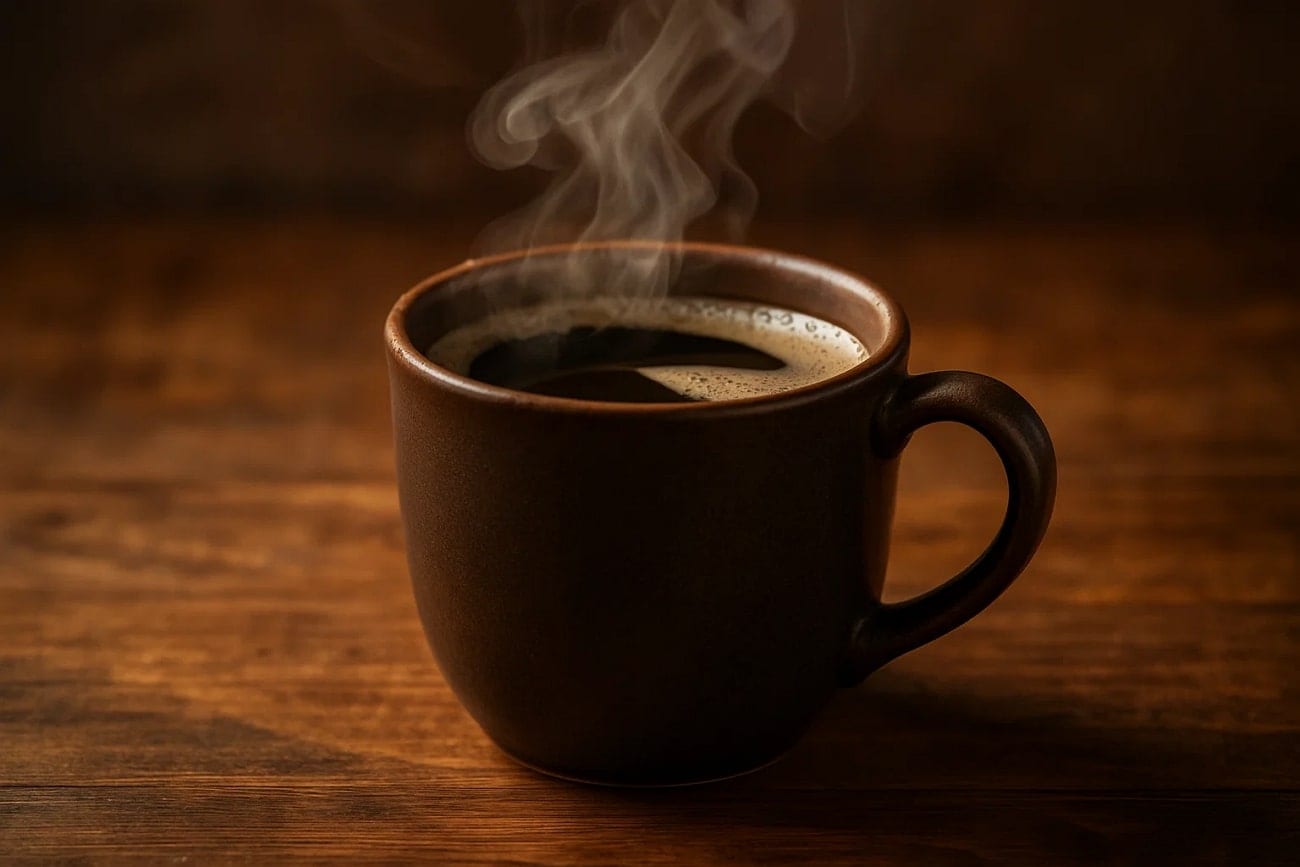
Close-Up
You can frame the face of the subject to show expressions, making the scene more impactful.
Best For: Highlighting emotions, facial expressions, and intricate details in an image.
Examples:
- "Close-up of a dark steaming cup resting on a rustic wooden table, with soft morning light casting gentle shadows."
- "Capture an intimate close-up of a child's wide, sparkling eyes filled with pure curiosity, with gleaming reflections"
Medium Shot
To simulate a situational scene, experiment with the medium shot that shows the subject waist up.
Best For: Portraying a conversational and everyday scenario in your storytelling.
Examples:
- "Show a chef from the waist up as they mix ingredients, like onion, salt, pepper, and more."
- "Medium shot of a traveler with a backpack, gazing at the vast mountains blurred behind him."
Wide Shot
The wide shot Stable Diffusion camera prompts help the reader understand both the subject and the environment.
Best For: Setting contextual setting and delivering cinematic visuals for adventure and traveling.
Examples:
- "Wide shot of a warrior standing in a desert, with full body shot, in the dramatic sunset sky."
- "Capture a skateboarder gliding across an urban street, thus enhancing the subject's swift motion."
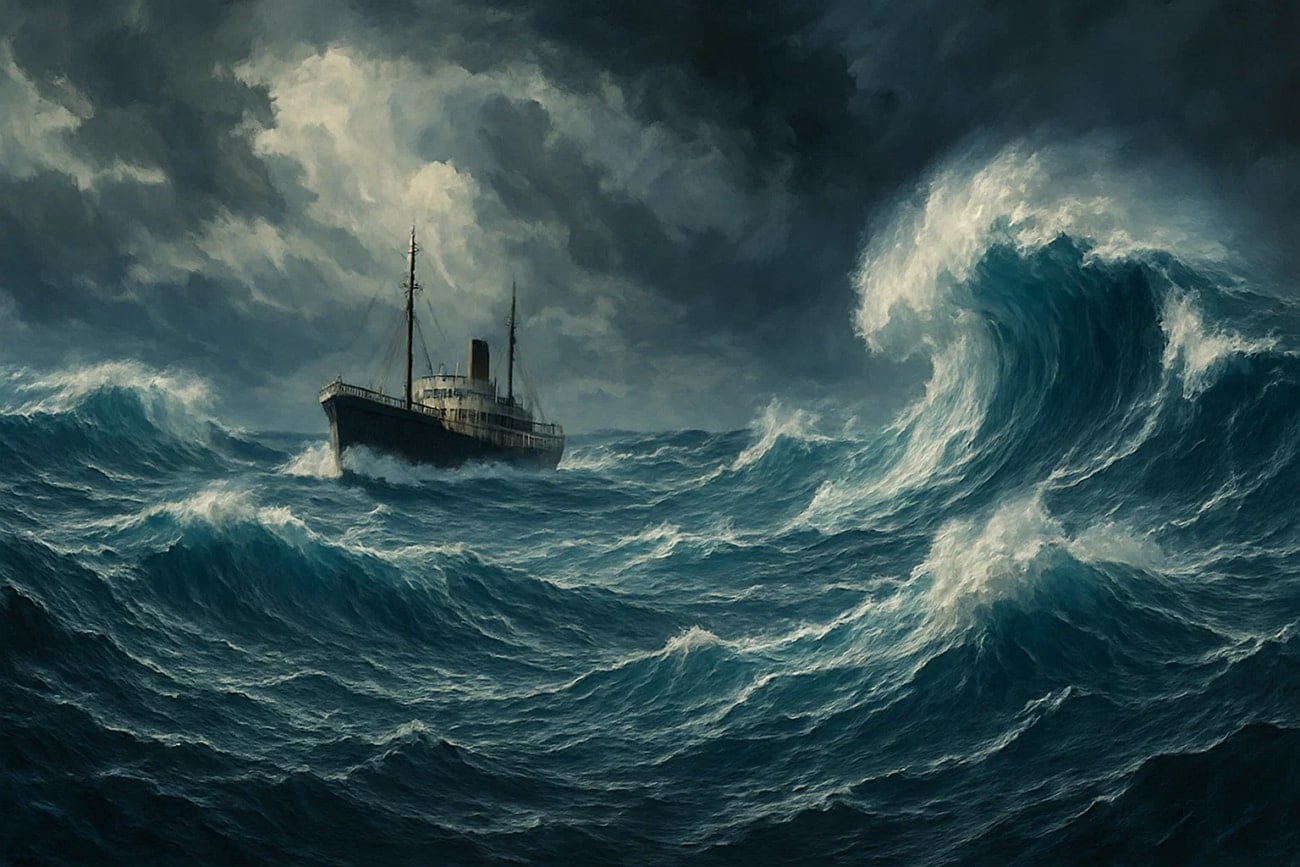
Extreme Wide Shot
Using the extreme shot pulls back the scene to emphasize landscape settings, making the subject appear smaller.
Best For: For creating an epic and cinematic visual representation of isolation.
Examples:
- "Create a snowy mountain range with a tiny chalet tucked in the distance."
- "Extreme wide shot of a ship sailing in the middle of the ocean with huge dramatic waves."
Part 3. Stable Diffusion Camera Position Prompts for Scene Composition
If you are creating images for a dynamic movie or film preview, using the following Stable Diffusion camera angle prompts can help you with that:
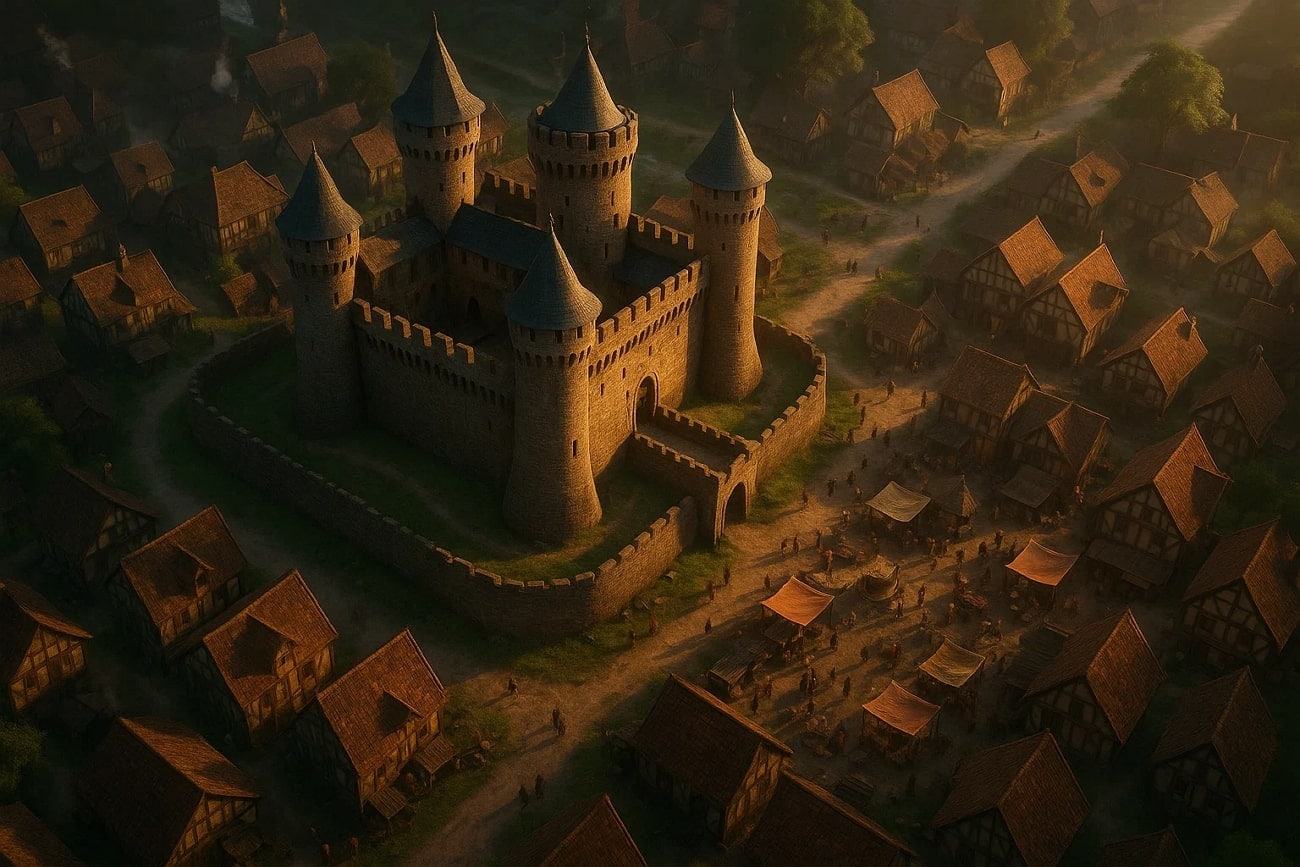
Bird's-Eye View
You can create a scene from an all-seeing perspective, which showcases the image in an overarching viewpoint.
Best For: Create a sense of drama on the battlefield and thrill in a complex scene.
Examples:
- "Create an image to capture a park's winding paths and picnic blankets from high overhead."
- "Bird's-eye view of a medieval castle surrounded by a bustling village with cinematic lighting."
Worm's-Eye View
If you want to make your subject look intimidating, use a worm's-eye view, which is a low angle looking up.
Best For: It's great for heroes or buildings to convey power and dominance in their composition.
Examples:
- "Shoot a pet from the ground, their head and paws towering, drawing viewers closer."
- "Generate an image from-the-ground view of tall redwood trees with sunlight streaming through leaves."
Front-Facing
Another Stable Diffusion camera prompt you can try is the camera looking straight at the subject to create symmetry.
Best For: It's ideal for highlighting all the important facial details without leaving distractions.
Examples:
- "Capture a symmetrical shot of a grand cathedral front with detailed stained-glass windows."
- "Photograph a singer performing, squarely facing the stage, showing emotional impact."
Side View
The side view camera angle captures the subject from the profile, adding elegance and focus to the outlines.
Best For: Having an observation-oriented scene, where form and gesture tell a tale.
Examples:
- "Photograph a pianist's fingers in profile, showcasing both hand technique."
- "Profile portrait of a man reading a book in the candlelight, showcasing elegance."
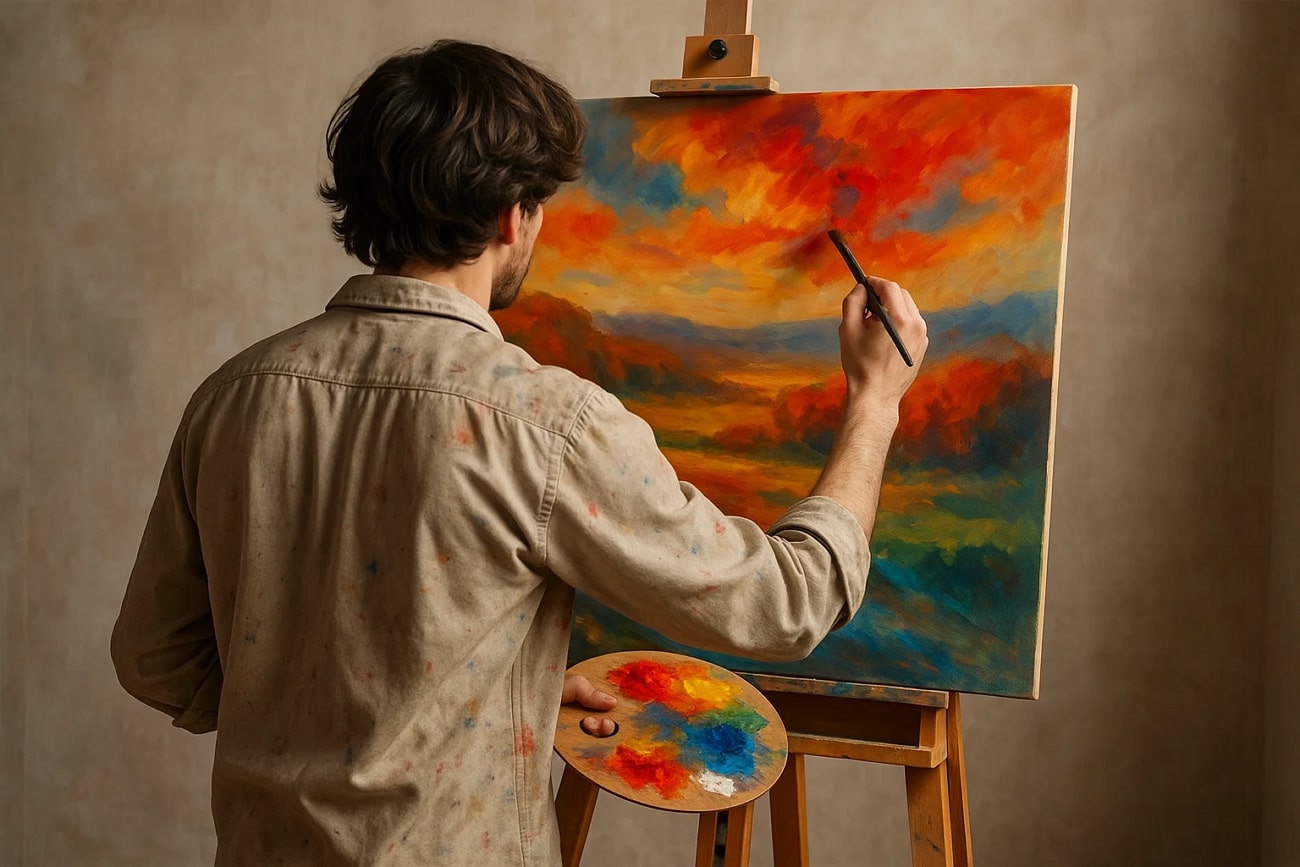
Rear View
Using a rear view portrays your subject from behind in the images, adding a sense of mystery and emotional distance.
Best For: Creating a narrative depth and giving of a walking way theme.
Examples:
- "Rear view of a traveler walking down a foggy forest path, with a few fireflies twinkling around."
- "Capture an artist painting, shot from the back, immersing viewers in their creative perspective."
Part 4. Stable Diffusion Prompts for Lens and Camera Type Effects
To capture that perfect and realistic look in your images, try using the following effects with Stable Diffusion camera angles:
Fisheye Lens
Creators can use fisheye distortion effect to create lens bends, giving the image a surreal or almost bubble-like look.
Best For: Capturing dramatic and exaggerated perspective.
Examples:
- "Photograph a crowded music festival from the stage, letting the fisheye lens wrap the audience."
- "Create sci-fi corridor interior, using the fisheye lens, thus warping architecture with glowing panels."
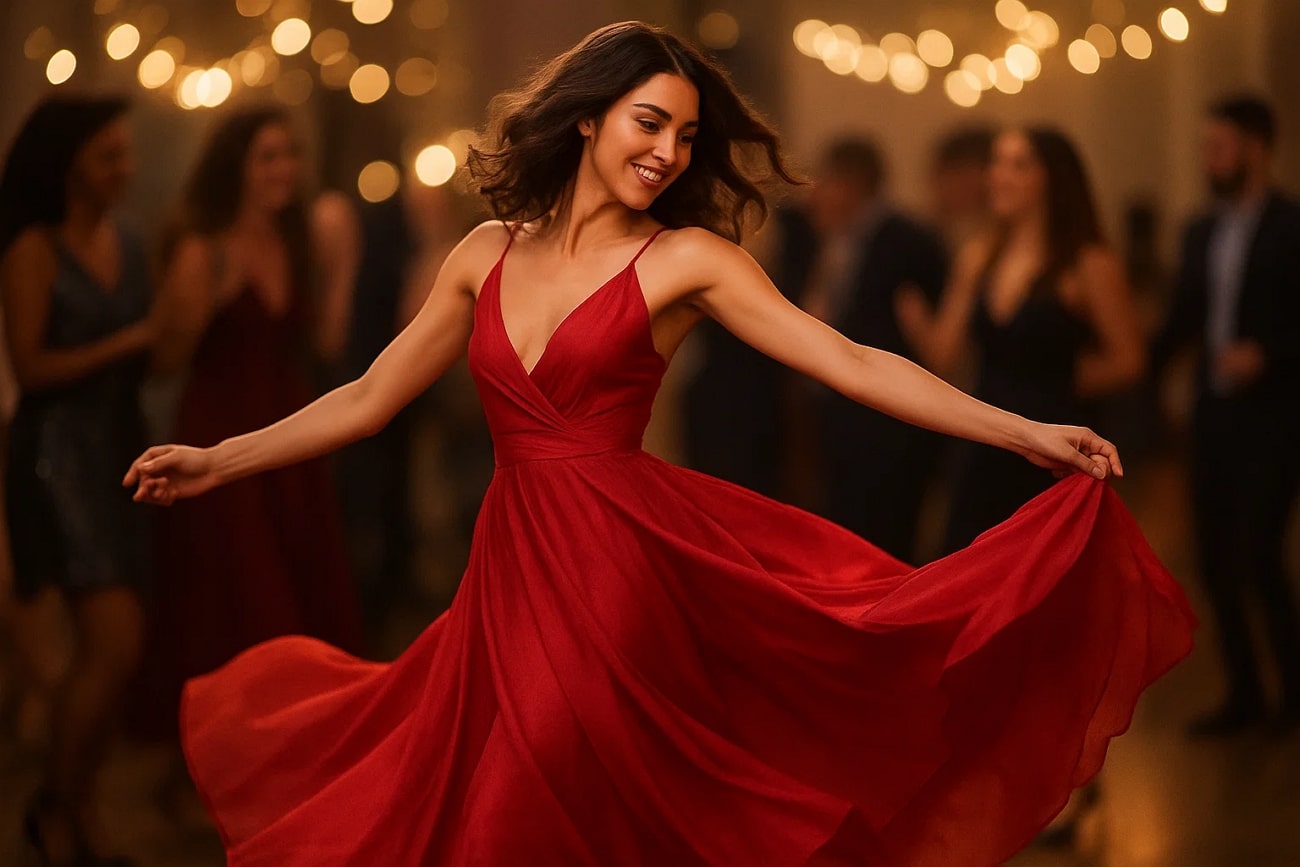
Telephoto Lens
To beautifully blur out the background and bring the subject closer from far away, use the telephoto lens.
Best For: Users who produce images with cinematic isolation and a shallow field of depth.
Examples:
- "Produce a woman in a flowing red dress, dancing gracefully at a party in the telephoto lens effect."
- "Create a distant mountain peeking through haze, with compressed layers and dramatic lightning."
Macro Lens
You can capture the tiniest of details of an image using the macro lens effect when creating an image.
Best For: Creating highly detailed, intimate images that feel realistic.
Examples:
- "Shoot a dew-covered spiderweb in early morning to reveal glistening details."
- "Capture a human eye close-up shot, using macro photography, with glowing iris details."
35mm Film Camera
This Stable Diffusion camera prompt is used to create subtle, grainy, and soft tones in your images.
Best For: Users to evoke vintage style vibes or classic photography aesthetics.
Examples:
- "Image of old bookstore interior, using the 35mm film, producing cinematic shadows and grains."
- "Take a candid shot of a musician tuning their guitar, letting the classic film look add emotion."
DSLR Camera
One of the most professional effects you can try is using a DSLR camera to generate modern, sharp, and true-to-life images.
Best For: It mimics realistic lighting and natural focus blur in your images.
Examples:
- "Frame a delicate landscape at sunrise, using DSLR settings to balance color and exposure."
- "Produce a wedding couple dancing, with natural lighting and motion blur in the background."
Part 5. Use Wondershare Filmora to Edit and Enhance AI Images After Generation
After generating stunning visuals using Stable Diffusion prompts, many creators realize a crucial limitation — while AI can produce rich, diverse images, it lacks the precision, control, and polish needed for realistic and professional results. That's where Wondershare Filmora comes in.
Filmora fills the gap between AI-generated creativity and studio-quality output, letting users enhance, stylize, and bring static images to life with ease.
 secure download

- Image Retouching & Enhancement: Improve lighting, sharpness, and realism with auto-enhance, color correction, and LUTs.
- Visual Styling Without Prompt Guesswork: Apply cinematic effects, retro filters, zooms, and 3D motion — no need to re-engineer prompts.
- AI Background Removal: Instantly eliminate unwanted elements and isolate key subjects with a smart brush.
- Seamless Image-to-Video Conversion: Transform static images into engaging short videos using transitions and sound effects.
- Extensive Effects Library: Browse hundreds of professional visual effects, from glitch overlays to film grain and motion blur.
How to Turn AI Images Cinematic — No Prompt Needed
Let's go through the following comprehensive step-by-step guide given below to create a cinematic image without Stable Diffusion camera prompts:
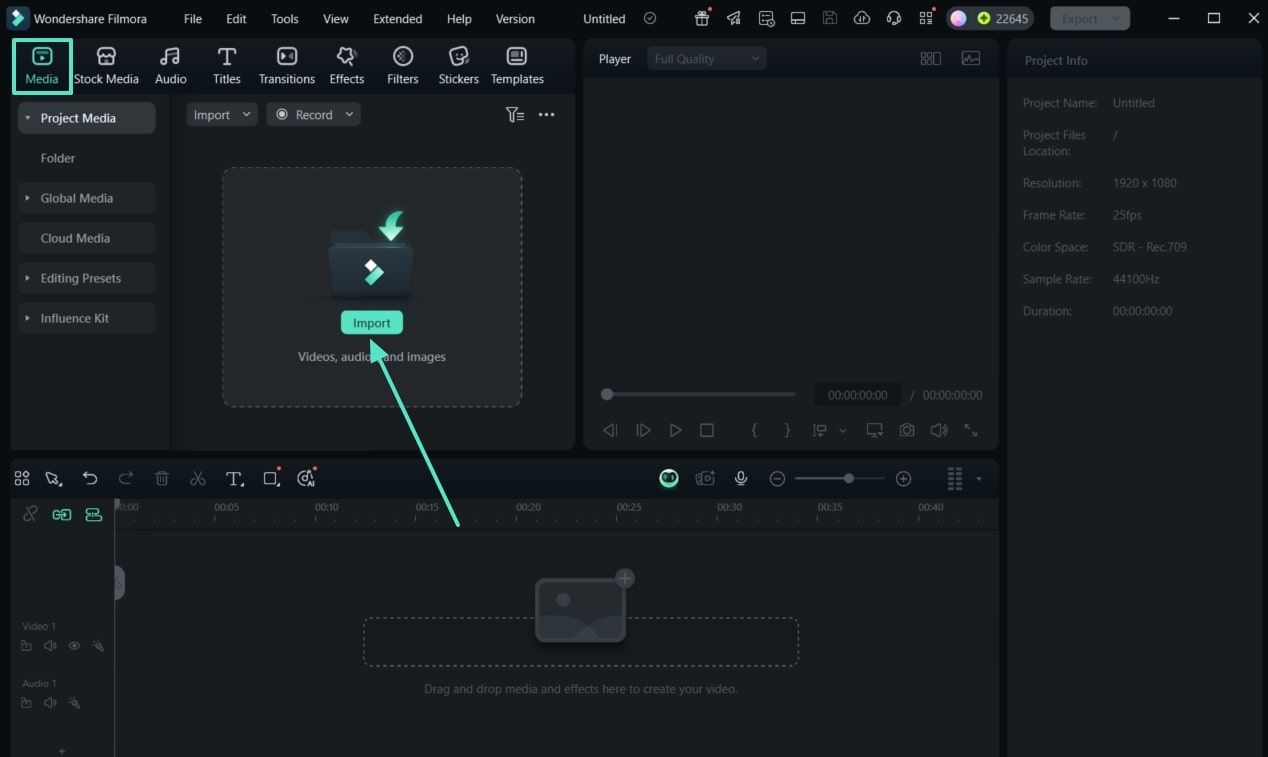
Step 1Launch the Tool and Import the Generated AI Image
- Click the "+ New Project" button from the "Create Project" tab to proceed to the main editing interface.
- From here, press the "Import" button in the "Media" panel, and insert the generated image.
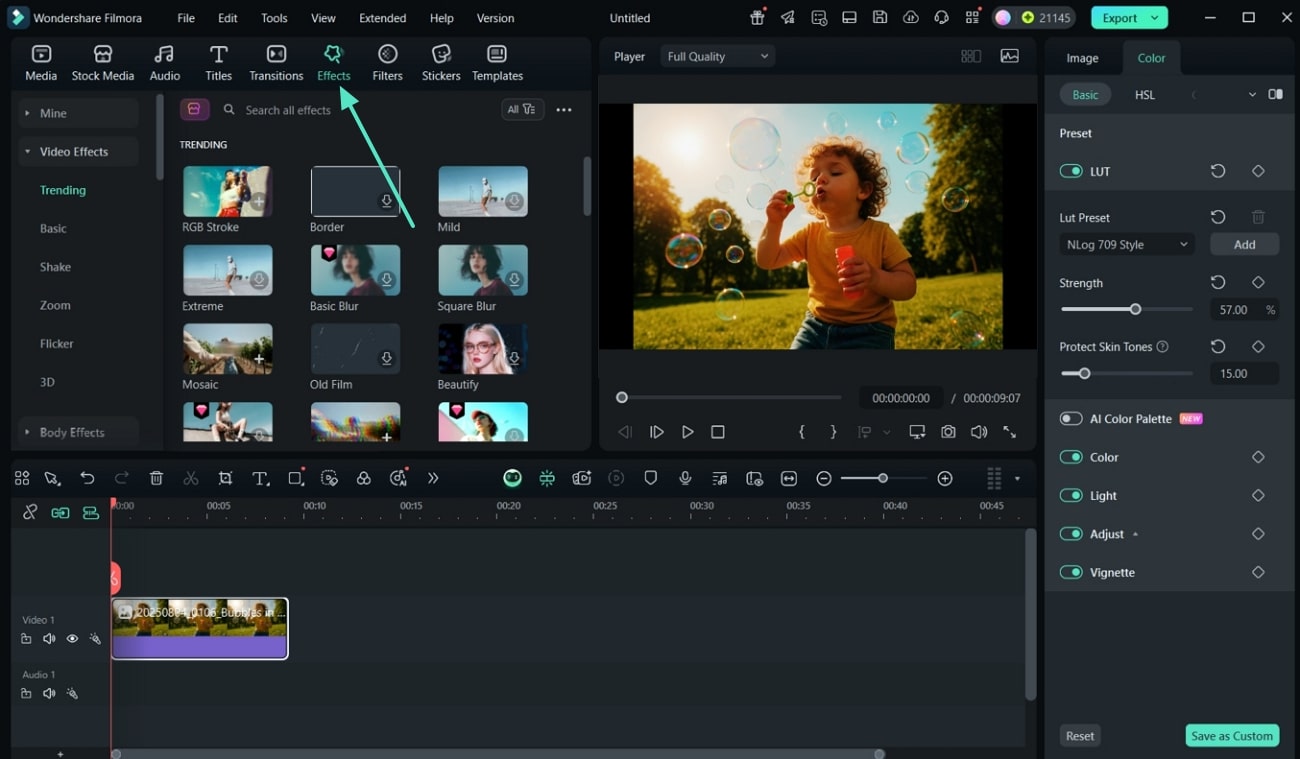
Step 2Head to the Effect Library
- Drag the image to the "Timeline" panel below, and access the "Effects" tab from the above toolbar.
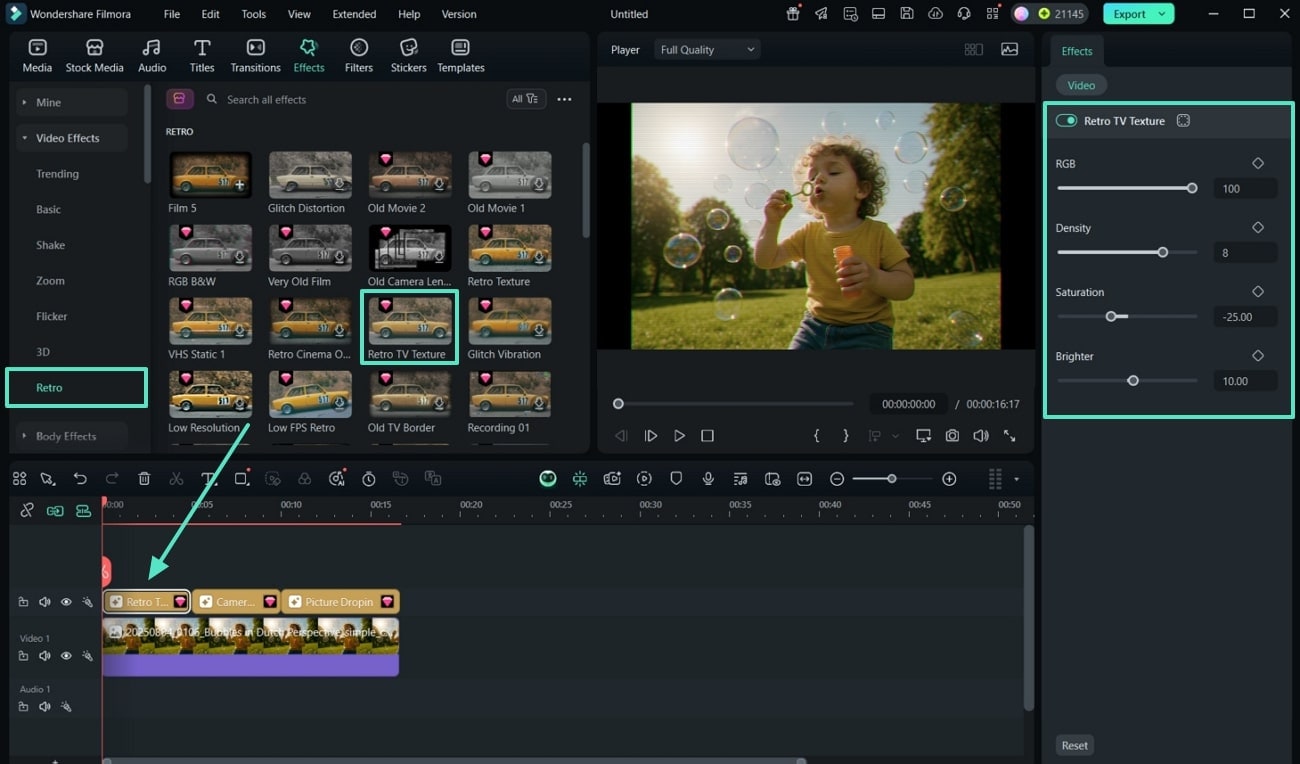
Step 3Apply Desired Effects and Adjust Their Settings
- From the "Retro" effect option, pick a desired effect, and drag it above the added image in the timeline.
- Similarly, choose and add more than one effect, like "Zoom","Shake," and more.
- Select an added effect from the timeline and open its adjustment settings on the right-side panel.
- You can change different parameters like "Saturation,""Brightness,""Density," and more.
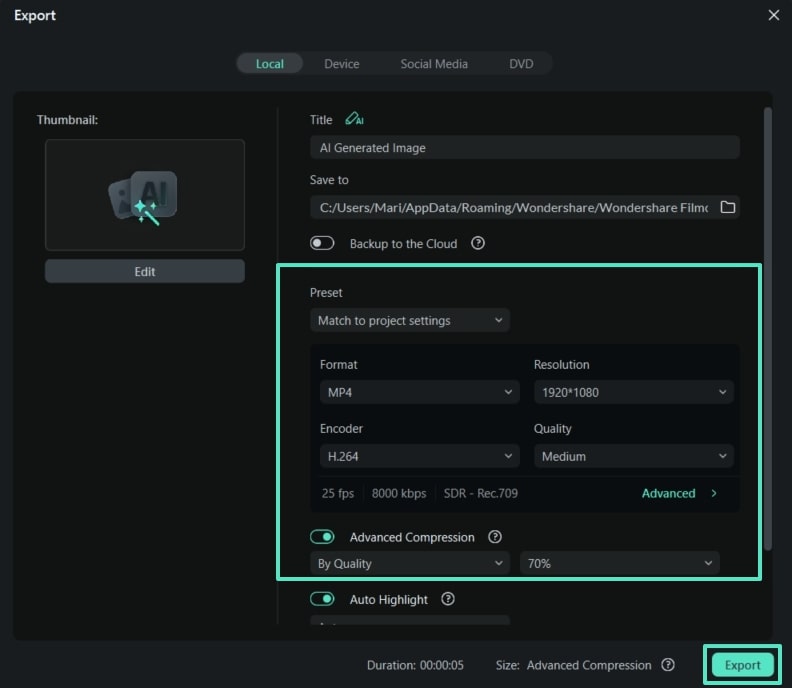
Step 4Preview the Final Result and Export the Image
- Once satisfied, hit the "Export" button, define suitable export settings, and press the "Export" button.
Enhance Stable Diffusion Images with Filmora AI Tools
Filmora doesn't only provide the ability to add effects to basic images similar to Stable Diffusion prompts. If you have a creation through Stable Diffusion camera angle prompts, you can consider using Filmora with the following steps to improve the overall quality of your images:
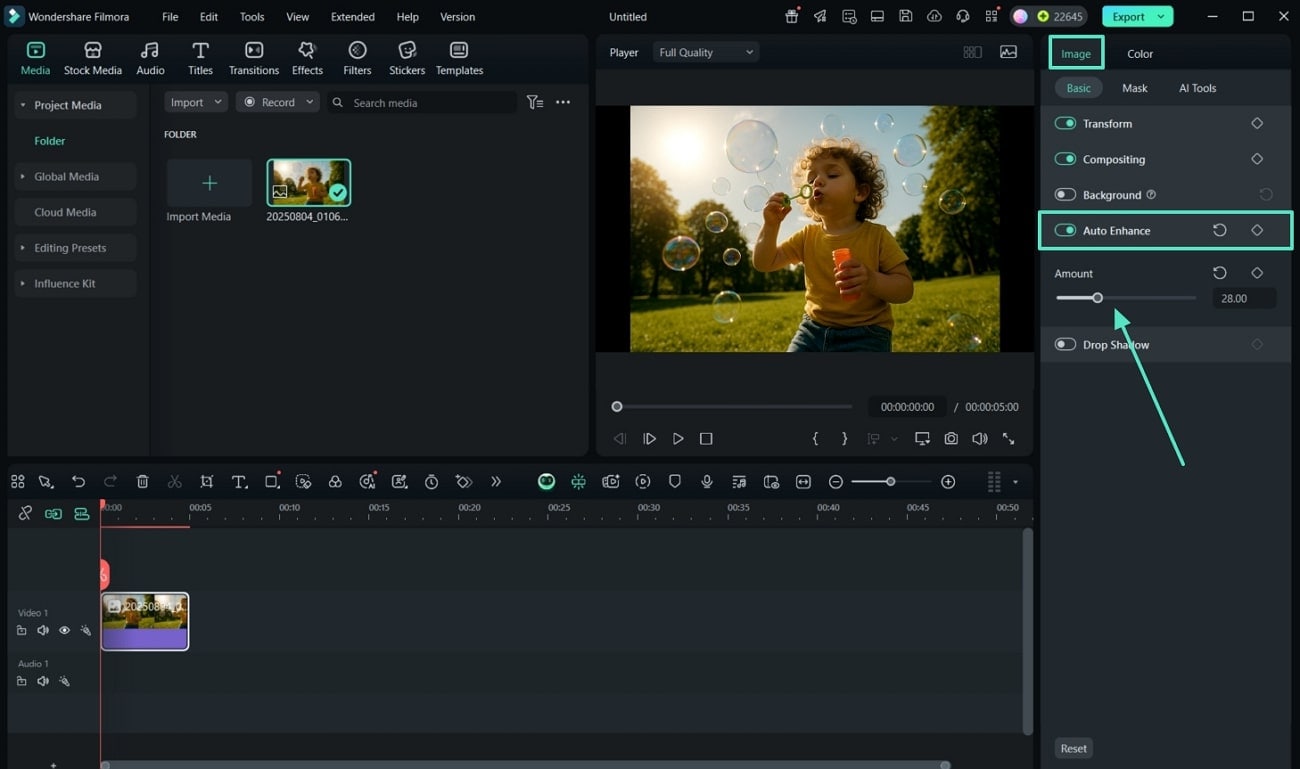
Step 1Enhance Image Using AI Image Enhancer Option
- "Import" and drag the generated image, and head to the left "Image" tab.
- Toggle on the "Auto Enhancer" option under the "Basic" section, and drag the "Adjust" scale.
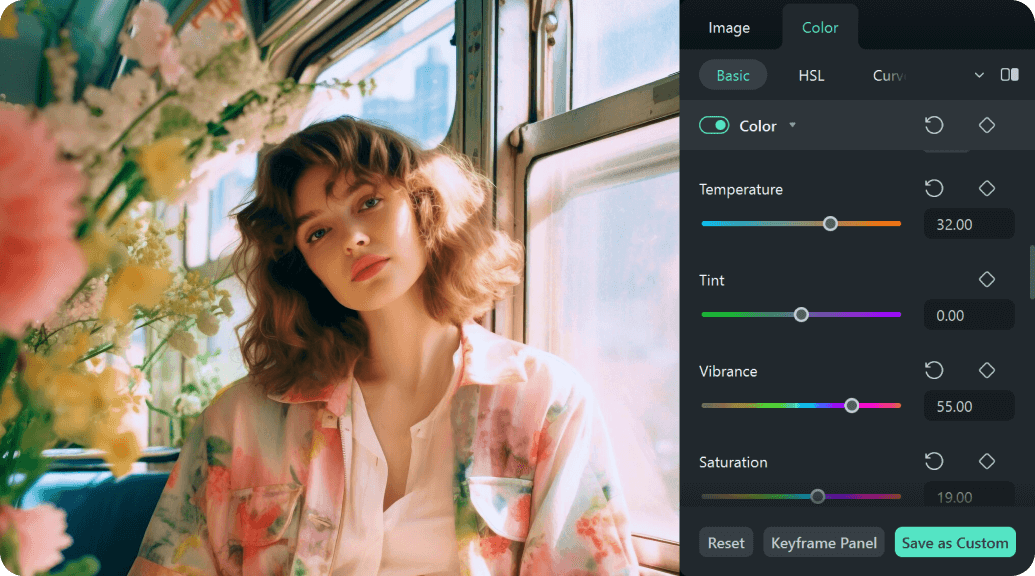
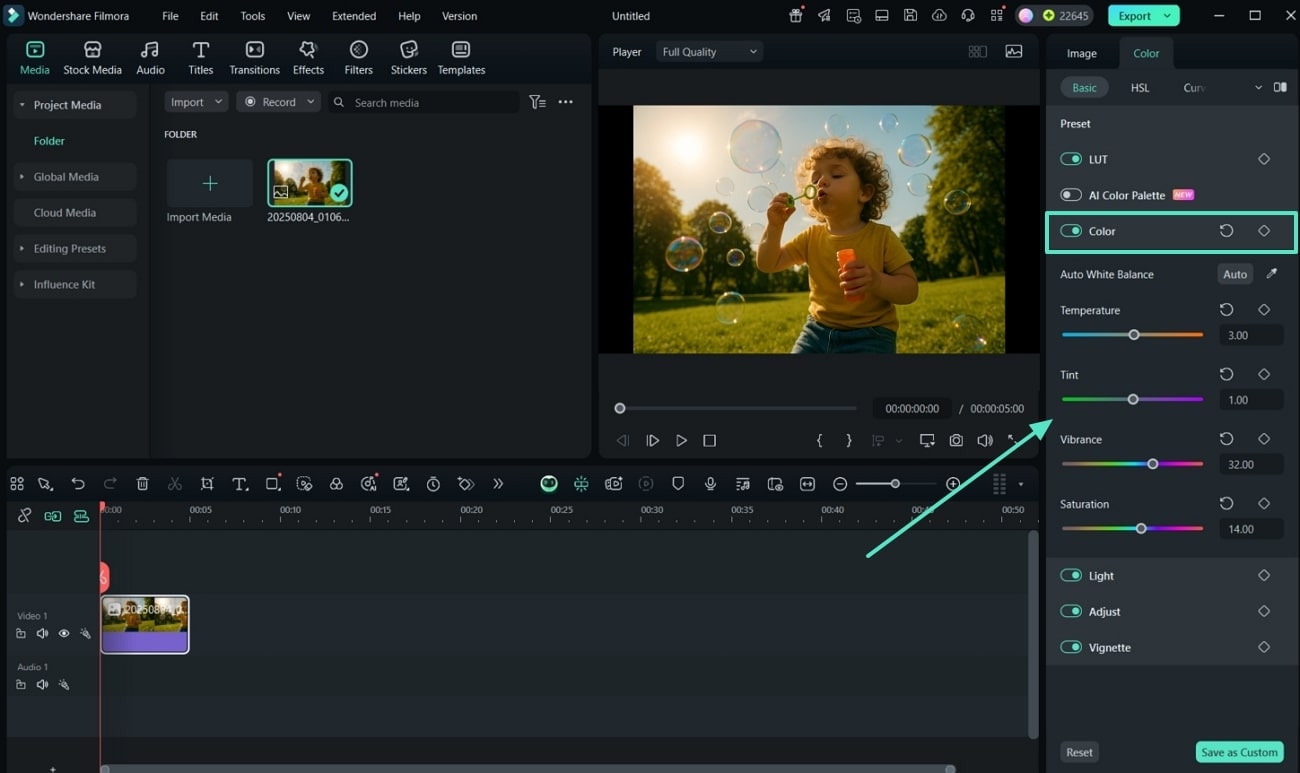
Step 2Color Correct the Image to Suitable Hues and Saturations
- Head to the "Color" tab and enable the "Color" option to make suitable color corrections, such as "Vibrance," "Temperature," or "Tint."
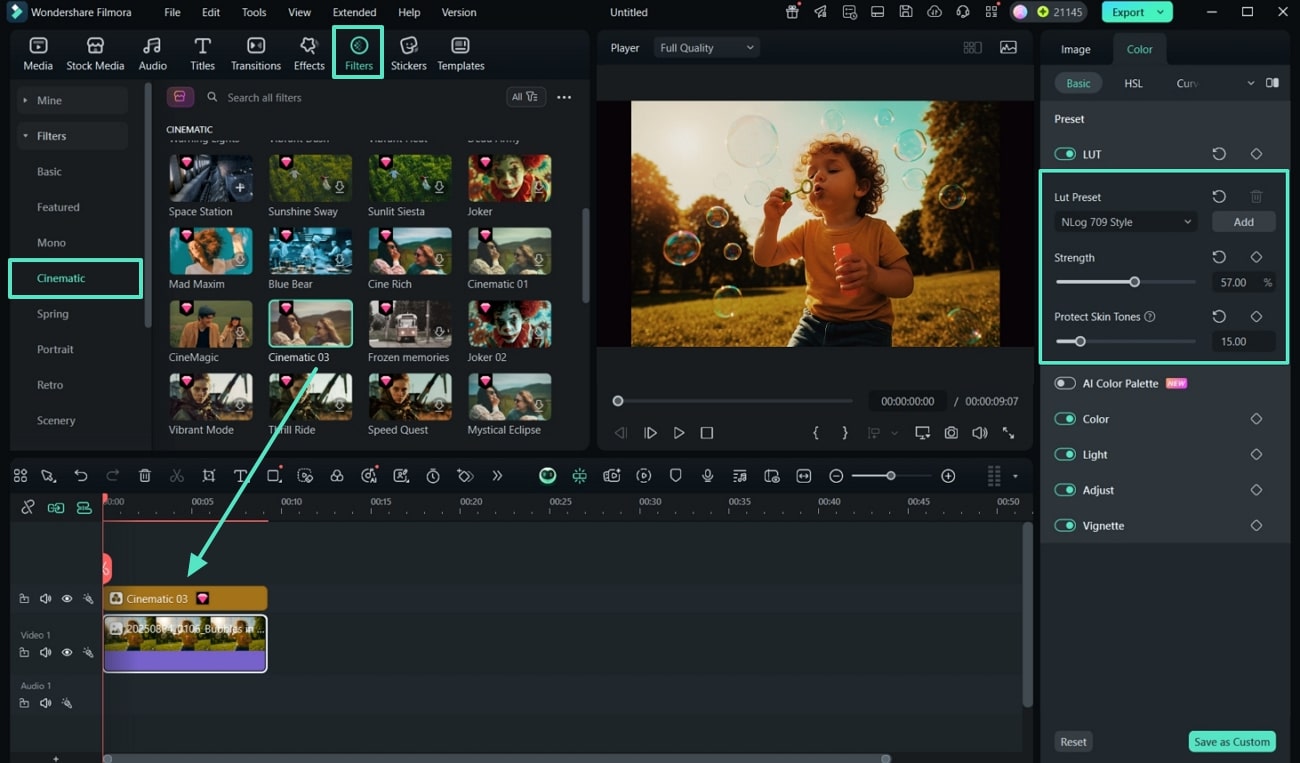
Step 3Apply Cinematic Styles and LUTs
- Open "LUT," and choose "Lut Preset," "Strength," and "Protect Skin Tones" according to your preference.
- Choose the "Filters" tab, select and drag a desired filter above the image to make filter adjustments.
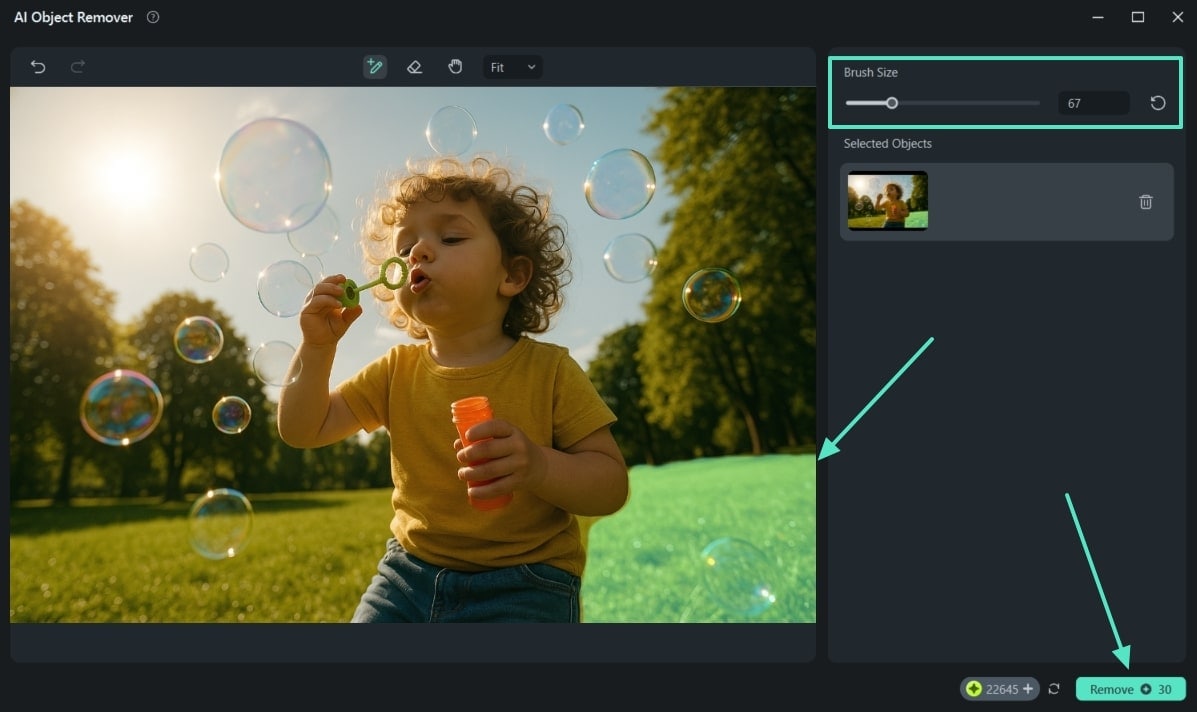
Step 4Remove Unwanted Background with AI
- Go to the "AI Tools" section and press the "Click to Remove Object" option under the "AI Object Remover" section.
- Drag the "Brush Size" scale, scrap it over the undesired area, and hit "Remove."
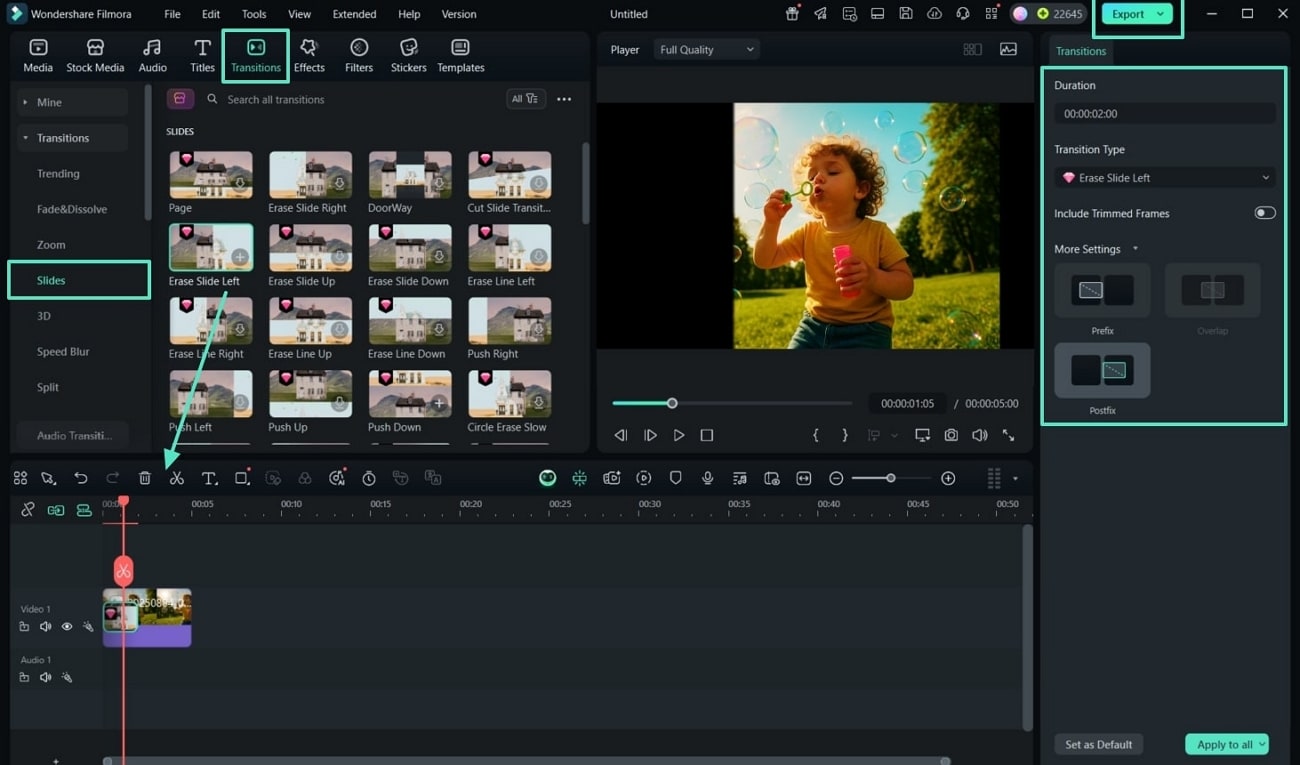
Step 5Turn an Image into a Video Slideshow for Smooth Transition
- Finally, navigate towards the "Transition" tab, and drop the best one onto the image.
- When the "Transition" tab with settings open to the right, make changes, and hit "Export."
Conclusion
To conclude this informative article, users got to learn about the various Stable Diffusion camera angles and prompts. It's clear that prompts give you the power to fine-tune the style and storytelling of your AI art. If you're not an expert in getting the desired image results, turn to Filmora. While it doesn't require you to have knowledge of prompt technology, it makes editing and enhancement easy with diverse functions.
secure download 