
 100% Security Verified | No Subscription Required | No Malware


 ChatGPT
 Perplexity
 Gemini
 Claude
 Grok
Grok
The reason your AI-generated images look flat or unrealistic when using Stable Diffusion often comes down to weak prompting or you're using the wrong model.
Sure, anyone can type in a few words and hit enter. But getting those realistic, high-quality results you've had in mind takes a bit more than that. You need the right structure and know-how to guide the AI in the right direction.
To make sure you don't get disappointed with outputs, this guide will help you create Stable Diffusion prompts for realistic photos, complete with tips and examples you can try right away.
In this article
Part 1. How to Structure Stable Diffusion Prompts for Realistic Photos
The secret to getting realistic results in Stable Diffusion lies in having a solid prompt structure, and that's where many people fall short. One of the most common mistakes people make when creating a prompt is not knowing how to describe what they want to create.
When your prompt is too vague, the AI will have to fill in the details on its own. This guesswork often leads to results that feel bland or nothing like what you imagined, as it tends to fall back on a generic "default" look.
So, how should you write a Stable Diffusion prompt that gives you realistic photos? Here's a simple formula that breaks your prompt into clear, detailed parts.
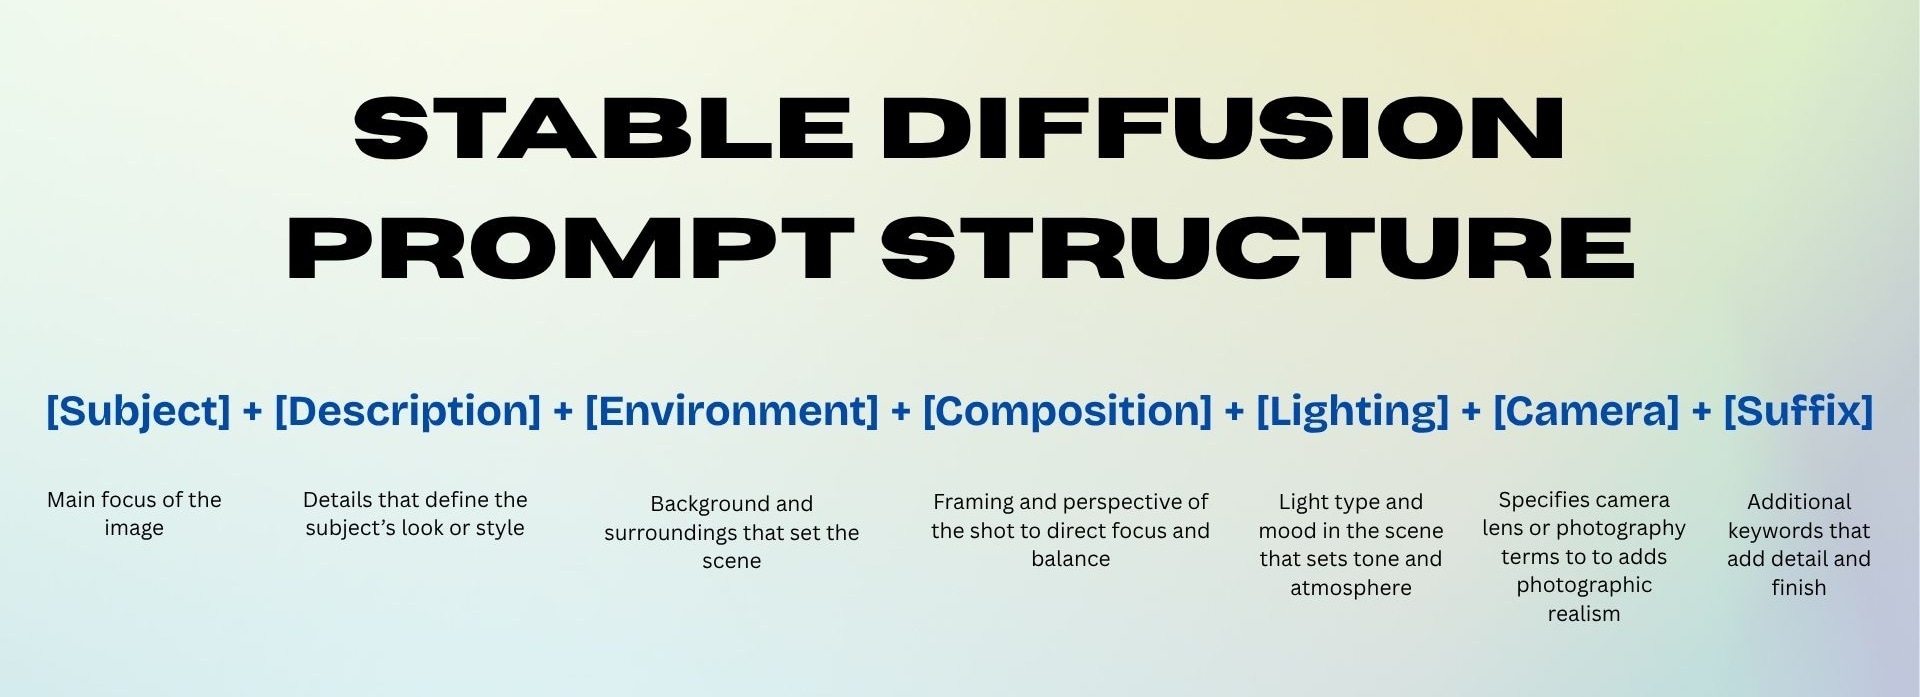
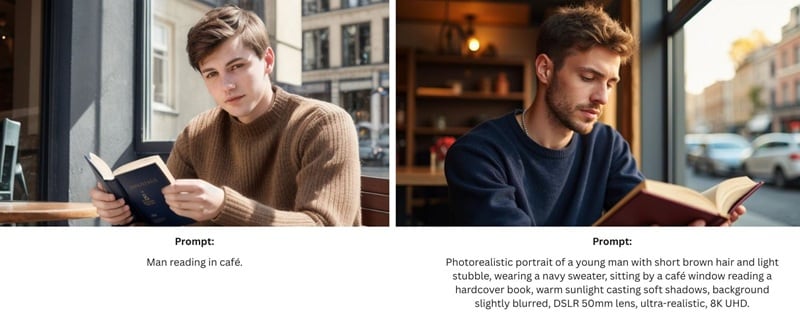
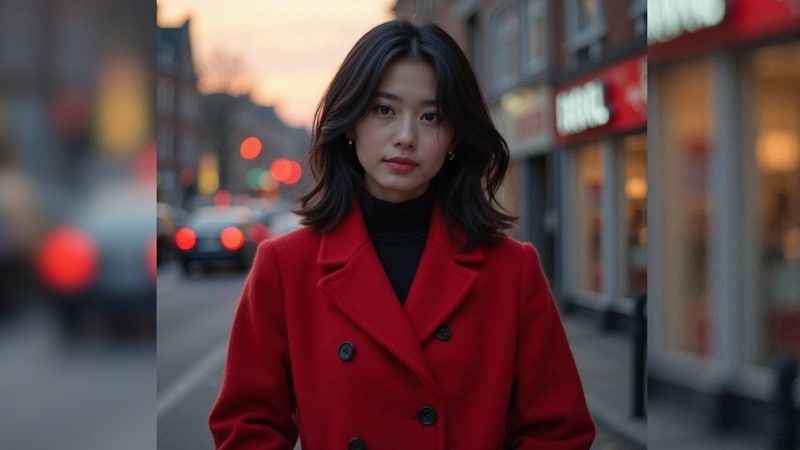
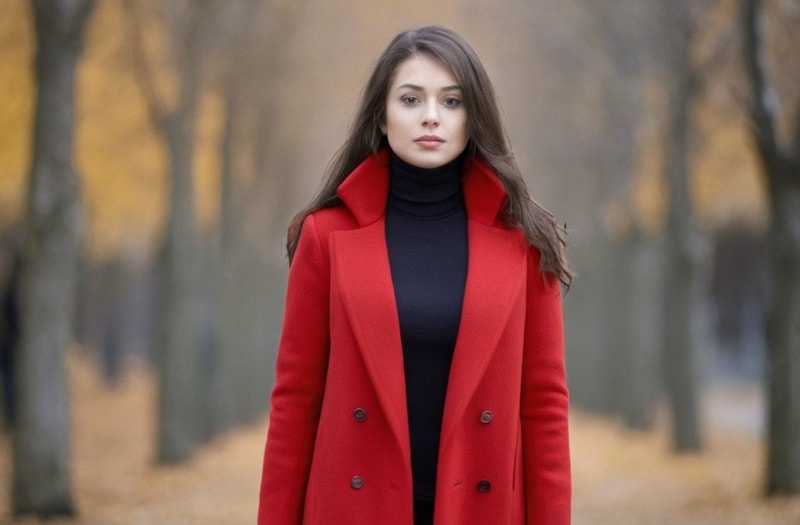
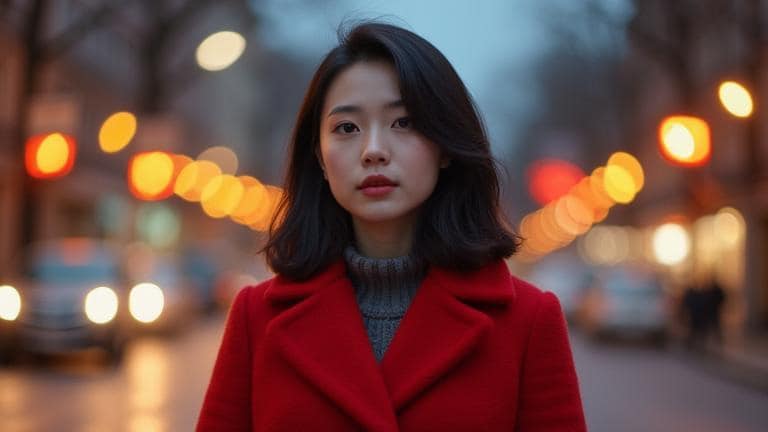
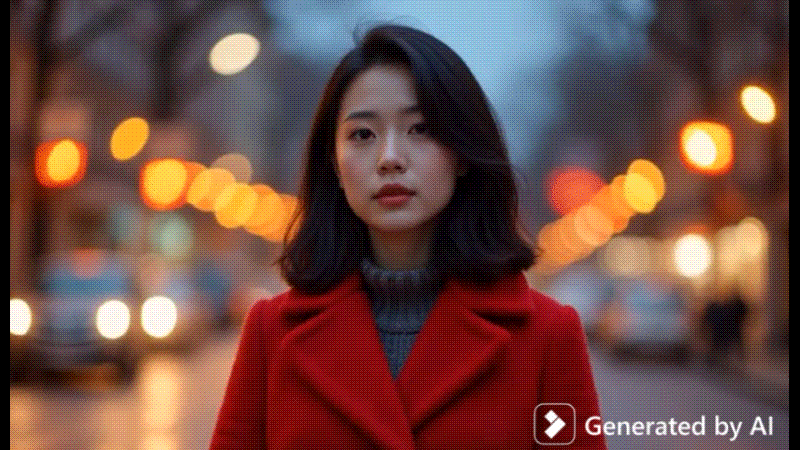
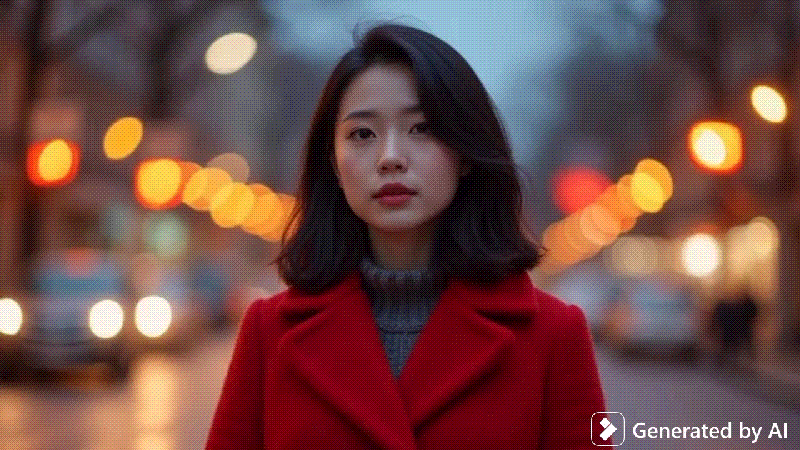
Example: A young woman with shoulder-length black hair, wearing a bright red wool coat and subtle natural makeup, standing in front of a blurred city street at dusk. Centered, close-up portrait with shallow depth of field. Soft golden hour lighting. Shot with a DSLR 85mm lens, ultra-realistic, 4K resolution, photorealistic, hyper-realistic.
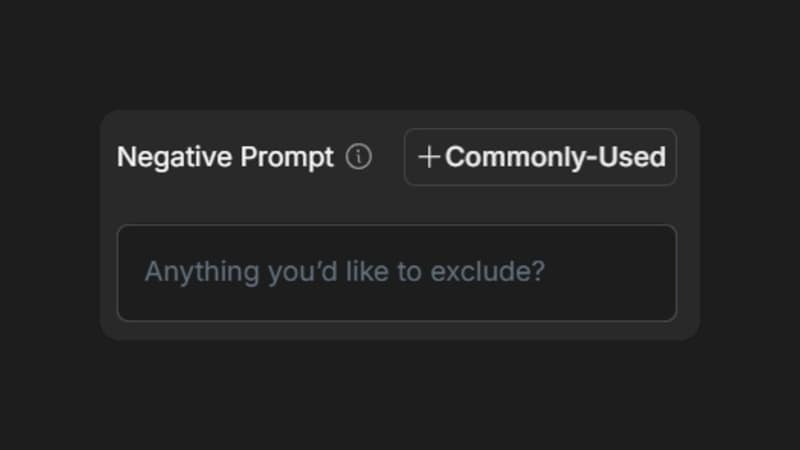
Tip: Use Effective Negative Prompts
Besides knowing what to include in your prompt, it's also useful to tell the AI what you don't want. This is known as a "negative prompt," usually found in the advanced settings. It works like a filter by listing specific flaws, styles, or elements you want to avoid in the final image.
For example, if you're creating a realistic portrait, you could add a negative prompt such as "blurry,""extra fingers,""text,""watermark," etc. This extra guidance helps the AI avoid generating those errors.
Part 2. Elements That Make a Prompt More Photorealistic
In addition to following the basic structure, writing the best Stable Diffusion prompts for realistic photos means including certain key details. They can make the photos look far more realistic and help the AI mimic the depth, texture, and overall feel of real photography.
1. Use "Magic Words" in AI Prompts
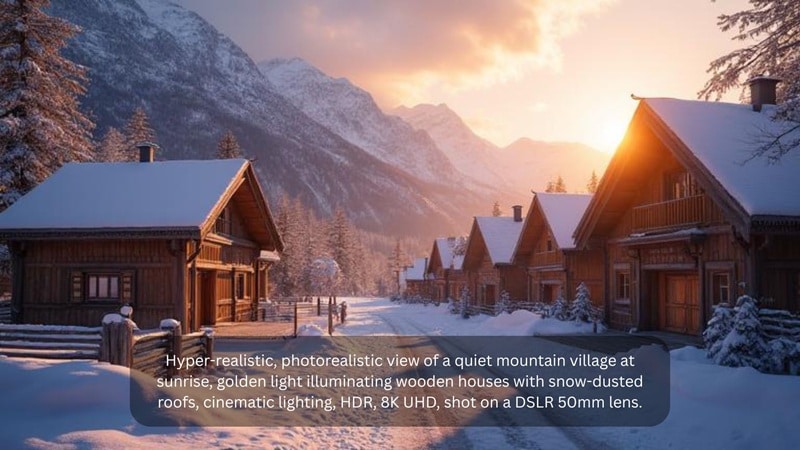
If you want AI images that could pass for real photos, there are certain keywords that signal realism. Some terms you can use are: hyper-realistic, photorealistic, 8K UHD, cinematic lighting, HDR, DSLR 50mm lens.
You can also reference real photographers or styles, like "inspired by the photography of [photographer]," to be more specific.
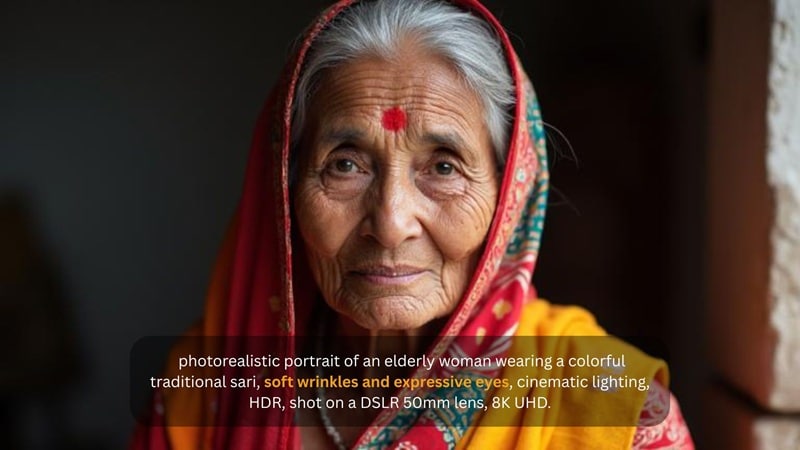
2. Add Human Detail
People aren't flawless, and that's exactly what makes them look real. Adding small imperfections like pores, freckles, skin texture, or even flyaway hair strands can help the AI avoid creating that overly "perfect" plastic look.
You can get even more lifelike results by mentioning subtle wrinkles, natural makeup, or slight asymmetry in facial features, especially when you are generating close-up shots or human portraits.
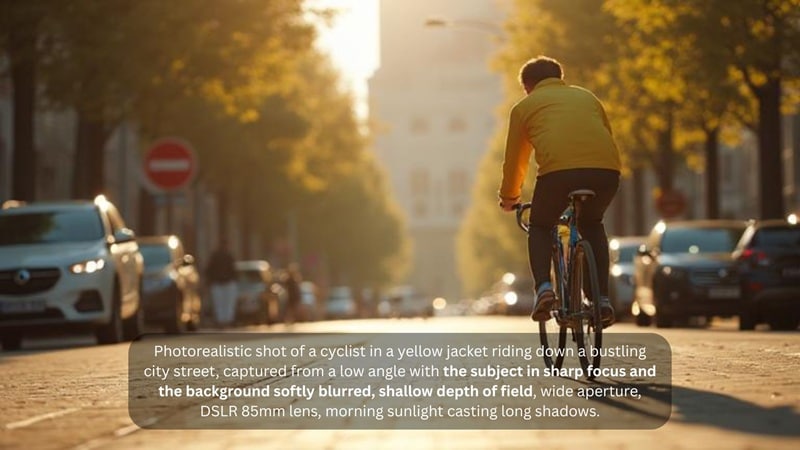
3. Controlling Image Composition
A big part of what makes a photograph look professional is composition. So, you can also take advantage of this to your advantage by telling the AI where to place your subject, choose an angle, and control how much of the background is in view. Take advantage of depth of field by specifying the subject focus.
Part 3. Examples of Bad and Good Stable Diffusion Prompts
Now it's time to put everything you've learned into practice. Below are five examples showing how to turn a simple idea into well-structured Stable Diffusion photorealistic prompts.
1. Photorealistic editorial picture of a woman in a red coat
✅ Good prompt:
Photorealistic editorial portrait of a young woman with shoulder-length black hair, wearing a bright red wool coat, standing in front of a blurred city street at dusk, soft golden hour lighting, DSLR 85mm lens, ultra-realistic, 4K resolution.
❌ Bad Prompt:
Woman in red coat.
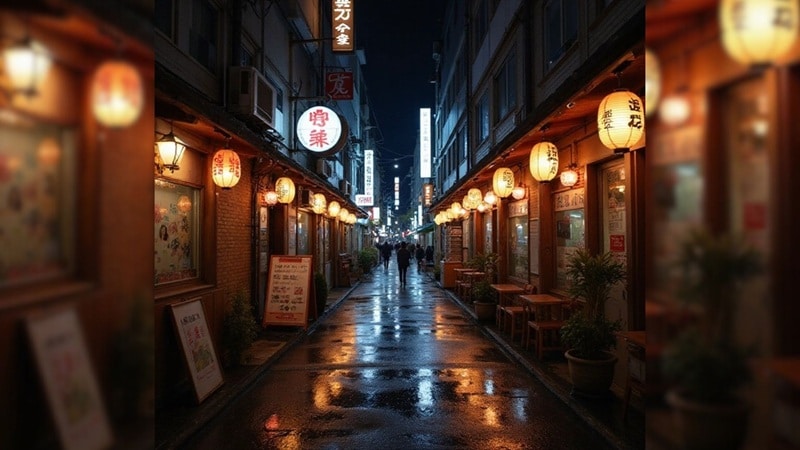
2. A quiet alley in Tokyo
✅ Good prompt:
Photorealistic view of a narrow alley in Tokyo at night, lined with small restaurants and glowing paper lanterns, wet pavement reflecting neon signs, cinematic lighting, shot with a DSLR 35mm lens, high detail, HDR.
❌ Bad Prompt:
Tokyo alley at night.
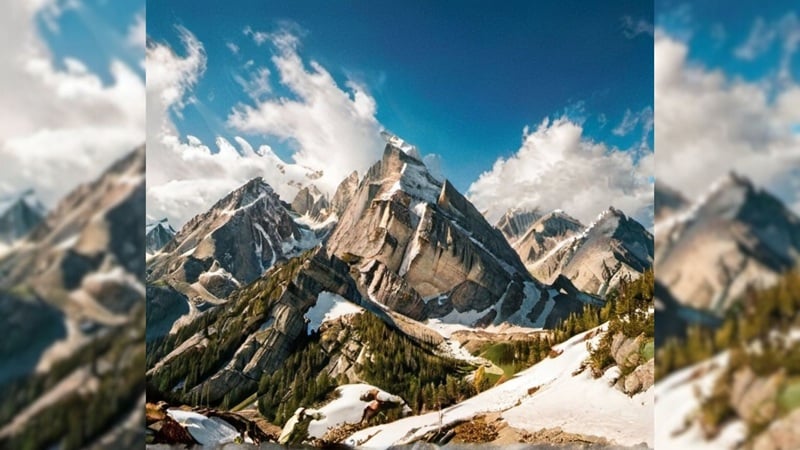
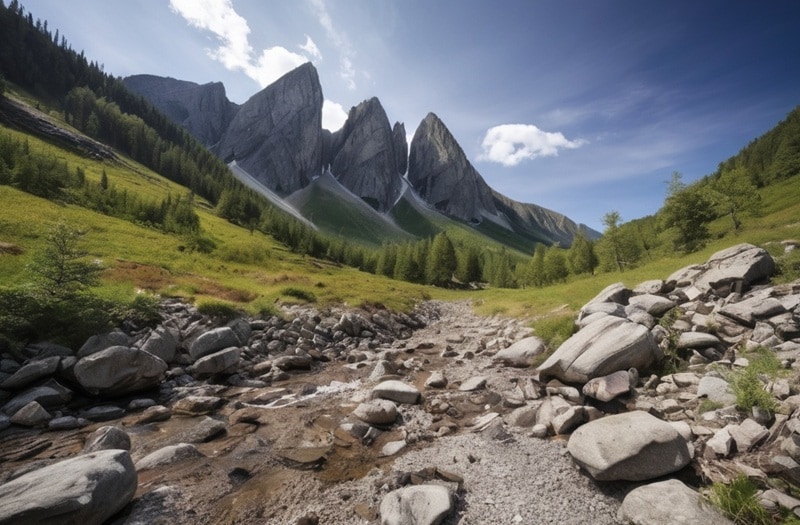
3. A rocky mountain landscape
✅ Good prompt:
Wide-angle view of a dramatic rocky mountain range with snow-capped peaks under a vibrant blue sky, soft morning light casting long shadows, shot on a DSLR 24mm lens, ultra-realistic, 8K UHD.
❌ Bad Prompt:
Mountain landscape with rocky scenery.
4. A home office setup
✅ Good prompt:
Cozy home office setup with a wooden desk, modern laptop, potted plants, and a steaming coffee mug by the window, soft daylight streaming in, shallow depth of field, taken on a DSLR 50mm lens, photorealistic, high detail.
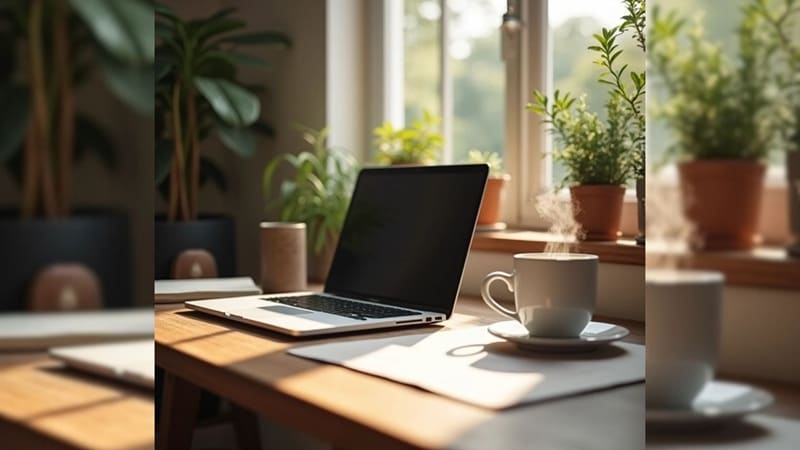
❌ Bad Prompt:
Cozy home office in a modern design.

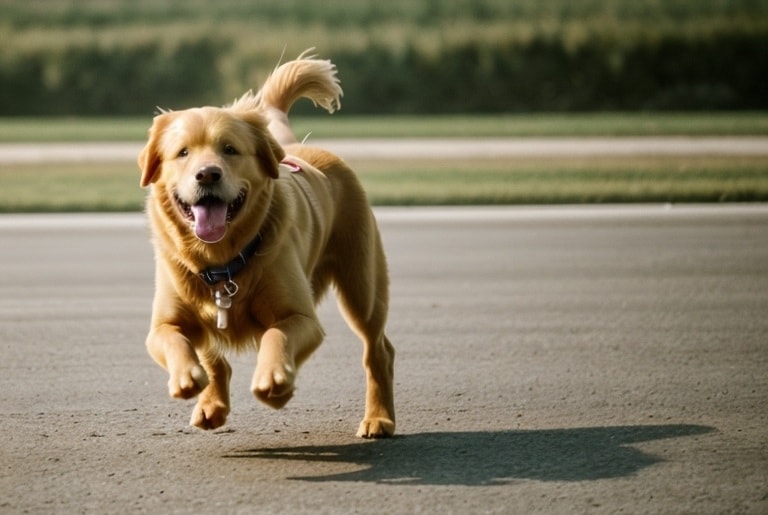
5. A golden retriever running
✅ Good prompt:
Golden retriever with shiny golden fur running across a grassy park, ears flapping, joyful expression, mid-action shot with motion blur, bright sunny day, taken with DSLR 70-200mm lens, ultra-realistic, 8K resolution.
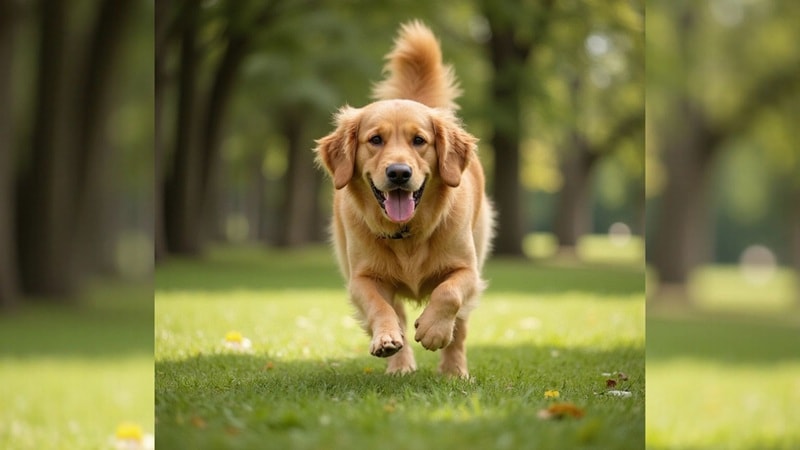
❌ Bad Prompt:
A golden retriever dog is running toward the camera.
Part 4. Pick the Right AI Stable Diffusion Model for Realistic Photos
Aside from working on photorealistic Stable Diffusion prompts, the models you are using can also affect how realistic your final image looks. Some Stable Diffusion models that work better at producing realistic outputs are:
- Realistic Vision - Best for portraits and product photography with ultra-detailed textures, flawless skin tones, and natural cinematic lighting.
- Deliberate - Best for lifestyle shots and editorial-style images.
- DreamShaper - Best for concept art and mixed-style visuals, blending photorealism with imaginative or artistic elements.
- AbsoluteReality - Best for high-accuracy, true-to-life renders of people, architecture, or landscapes.
- Analog Diffusion - Best for vintage and retro-inspired imagery, adding film-like grain, soft lighting, and nostalgic color tones.
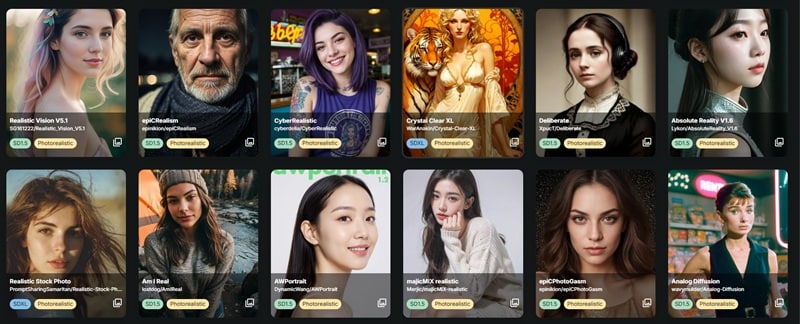
If you're using a platform that allows you to switch between these models, you can try the one that best aligns with the visual style you want to achieve.
Try Simpler AI Tool That Delivers Realistic Results
Another option is to use an AI tool that skips the technical setup yet still delivers high-quality, realistic images. Wondershare Filmora, for example, features AI Image that lets you create realistic visuals in just a few clicks, without worrying about installing models or fine-tuning any parameters.


After generating your image, you can enhance it further with Filmora'sAuto-Enhancerto sharpen details and improve clarity. Or, you can also use AI Image to Video to add motion and effects, turning your still image into an engaging video that's perfect for sharing.
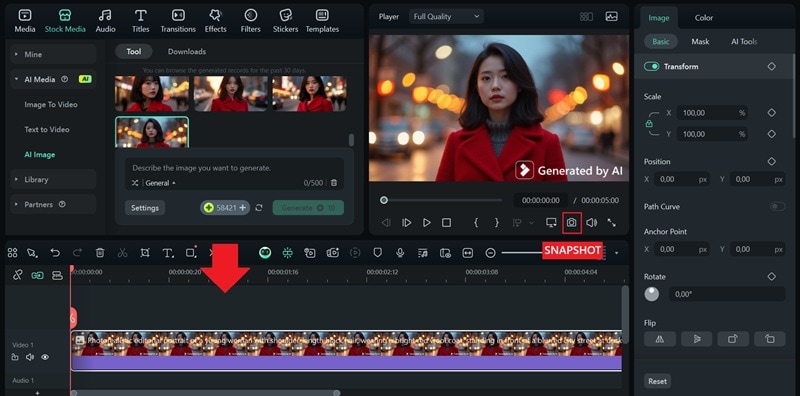
How to Generate Photo-realistic Images Using Filmora:
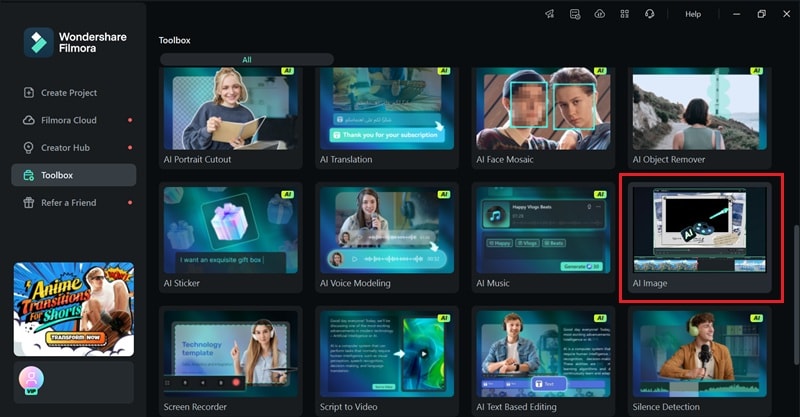
Step 1Access the AI Image Feature in Filmora
From the startup window, go to the Toolbox menu and click AI Image. If you're already working inside the editor, you can also find it under the Stock Media tab.
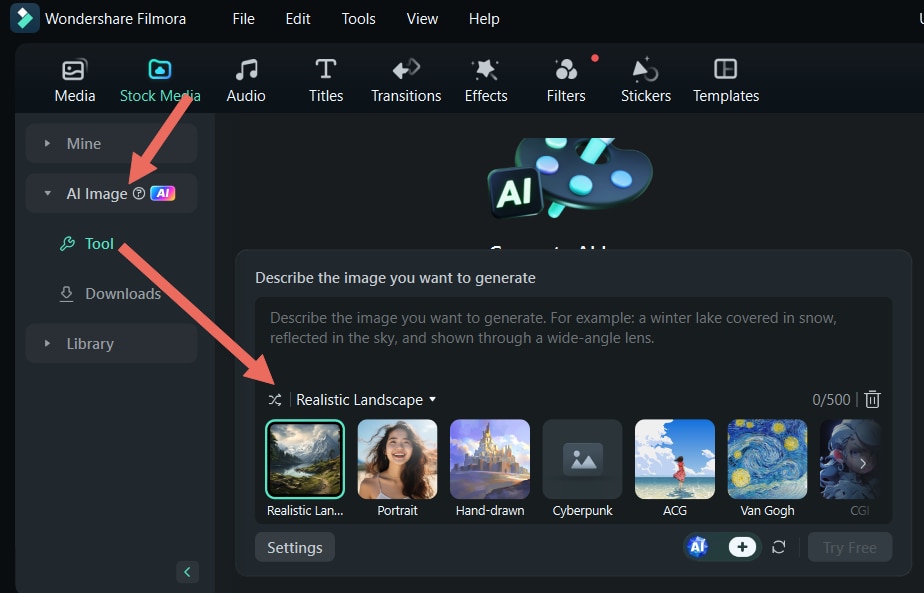
Step 2Describe Your Image
Type your prompt into the text box. You can use the same Stable Diffusion photorealistic prompt we discussed earlier. If needed, open the settings to adjust the aspect ratio, and choose a style such as portrait or realistic landscape.
Step 3Generate and Save Your Image
Click Generate and wait a few moments. Filmora will present a few results based on your prompt. Pick the one you like best, and save it by clicking the Snapshot button.
 secure download
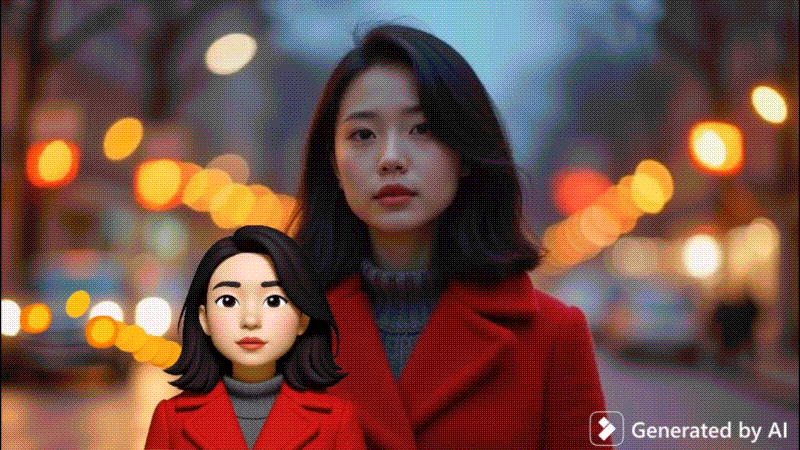
 Bonus: Turn Your Realistic AI Images into Stunning Videos
Once you've created photo-realistic images using the Stable Diffusion prompts we covered, you don't have to stop there. Use Filmora's AI Image to Video feature to transform your still image into a video that catches attention.
The process is just as simple as generating an AI image. All you have to do is upload your picture, then pick from the available templates or type in your own video prompt. Some templates you can try include:
1. Emoji Twin
2. Wings of Fey (Fairy)
3. Monkey Steals Hair

4. Air Kiss
Conclusion
If you want to get photorealistic results from Stable Diffusion, you can't just type a few words and hope for the best. You need to structure your prompts well, add the right visual details, and pick the right model that matches your goal.
Refer to the best Stable Diffusion prompts for realistic photos we've covered above, and you will no longer have to settle for flat AI images. If you'd rather skip the technical setup, you can use Filmora's AI Image to generate high-quality photorealistic images. Then, turn them into dynamic videos with its AI Image to Video feature.
secure download 