Pixel art is making a comeback, and AI is playing a big part in it.
Instead of manually sketching tiny squares, you can now generate retro visuals in seconds. Stable Diffusion makes this process simple: type in a text description, and it produces images that look like they belong in old-school games. Using the right stable diffusion pixel art prompts, you can create characters, objects, or full backgrounds in an authentic 8-bit or 16-bit style.
Still, Stable Diffusion has its limits. It's great for generating still images, but it doesn't handle motion. That means if you want your pixel art to move, you'll need additional tools. Thankfully, newer AI solutions can bridge that gap. These tools make it possible to turn static pixel art into short, animated clips.
In this article
Part 1. Stable Diffusion Pixel Art Prompts for Different Types
The key to creating great pixel art with Stable Diffusion is knowing how to write prompts that guide the model clearly. A well-structured prompt can transform a simple idea into an authentic retro design, while vague input often produces blurry or inconsistent results.
By experimenting with different stable diffusion pixel art prompts, you can generate characters, landscapes, or items that resemble classic games. Each type requires slightly different phrasing to capture the right details.
1. Characters
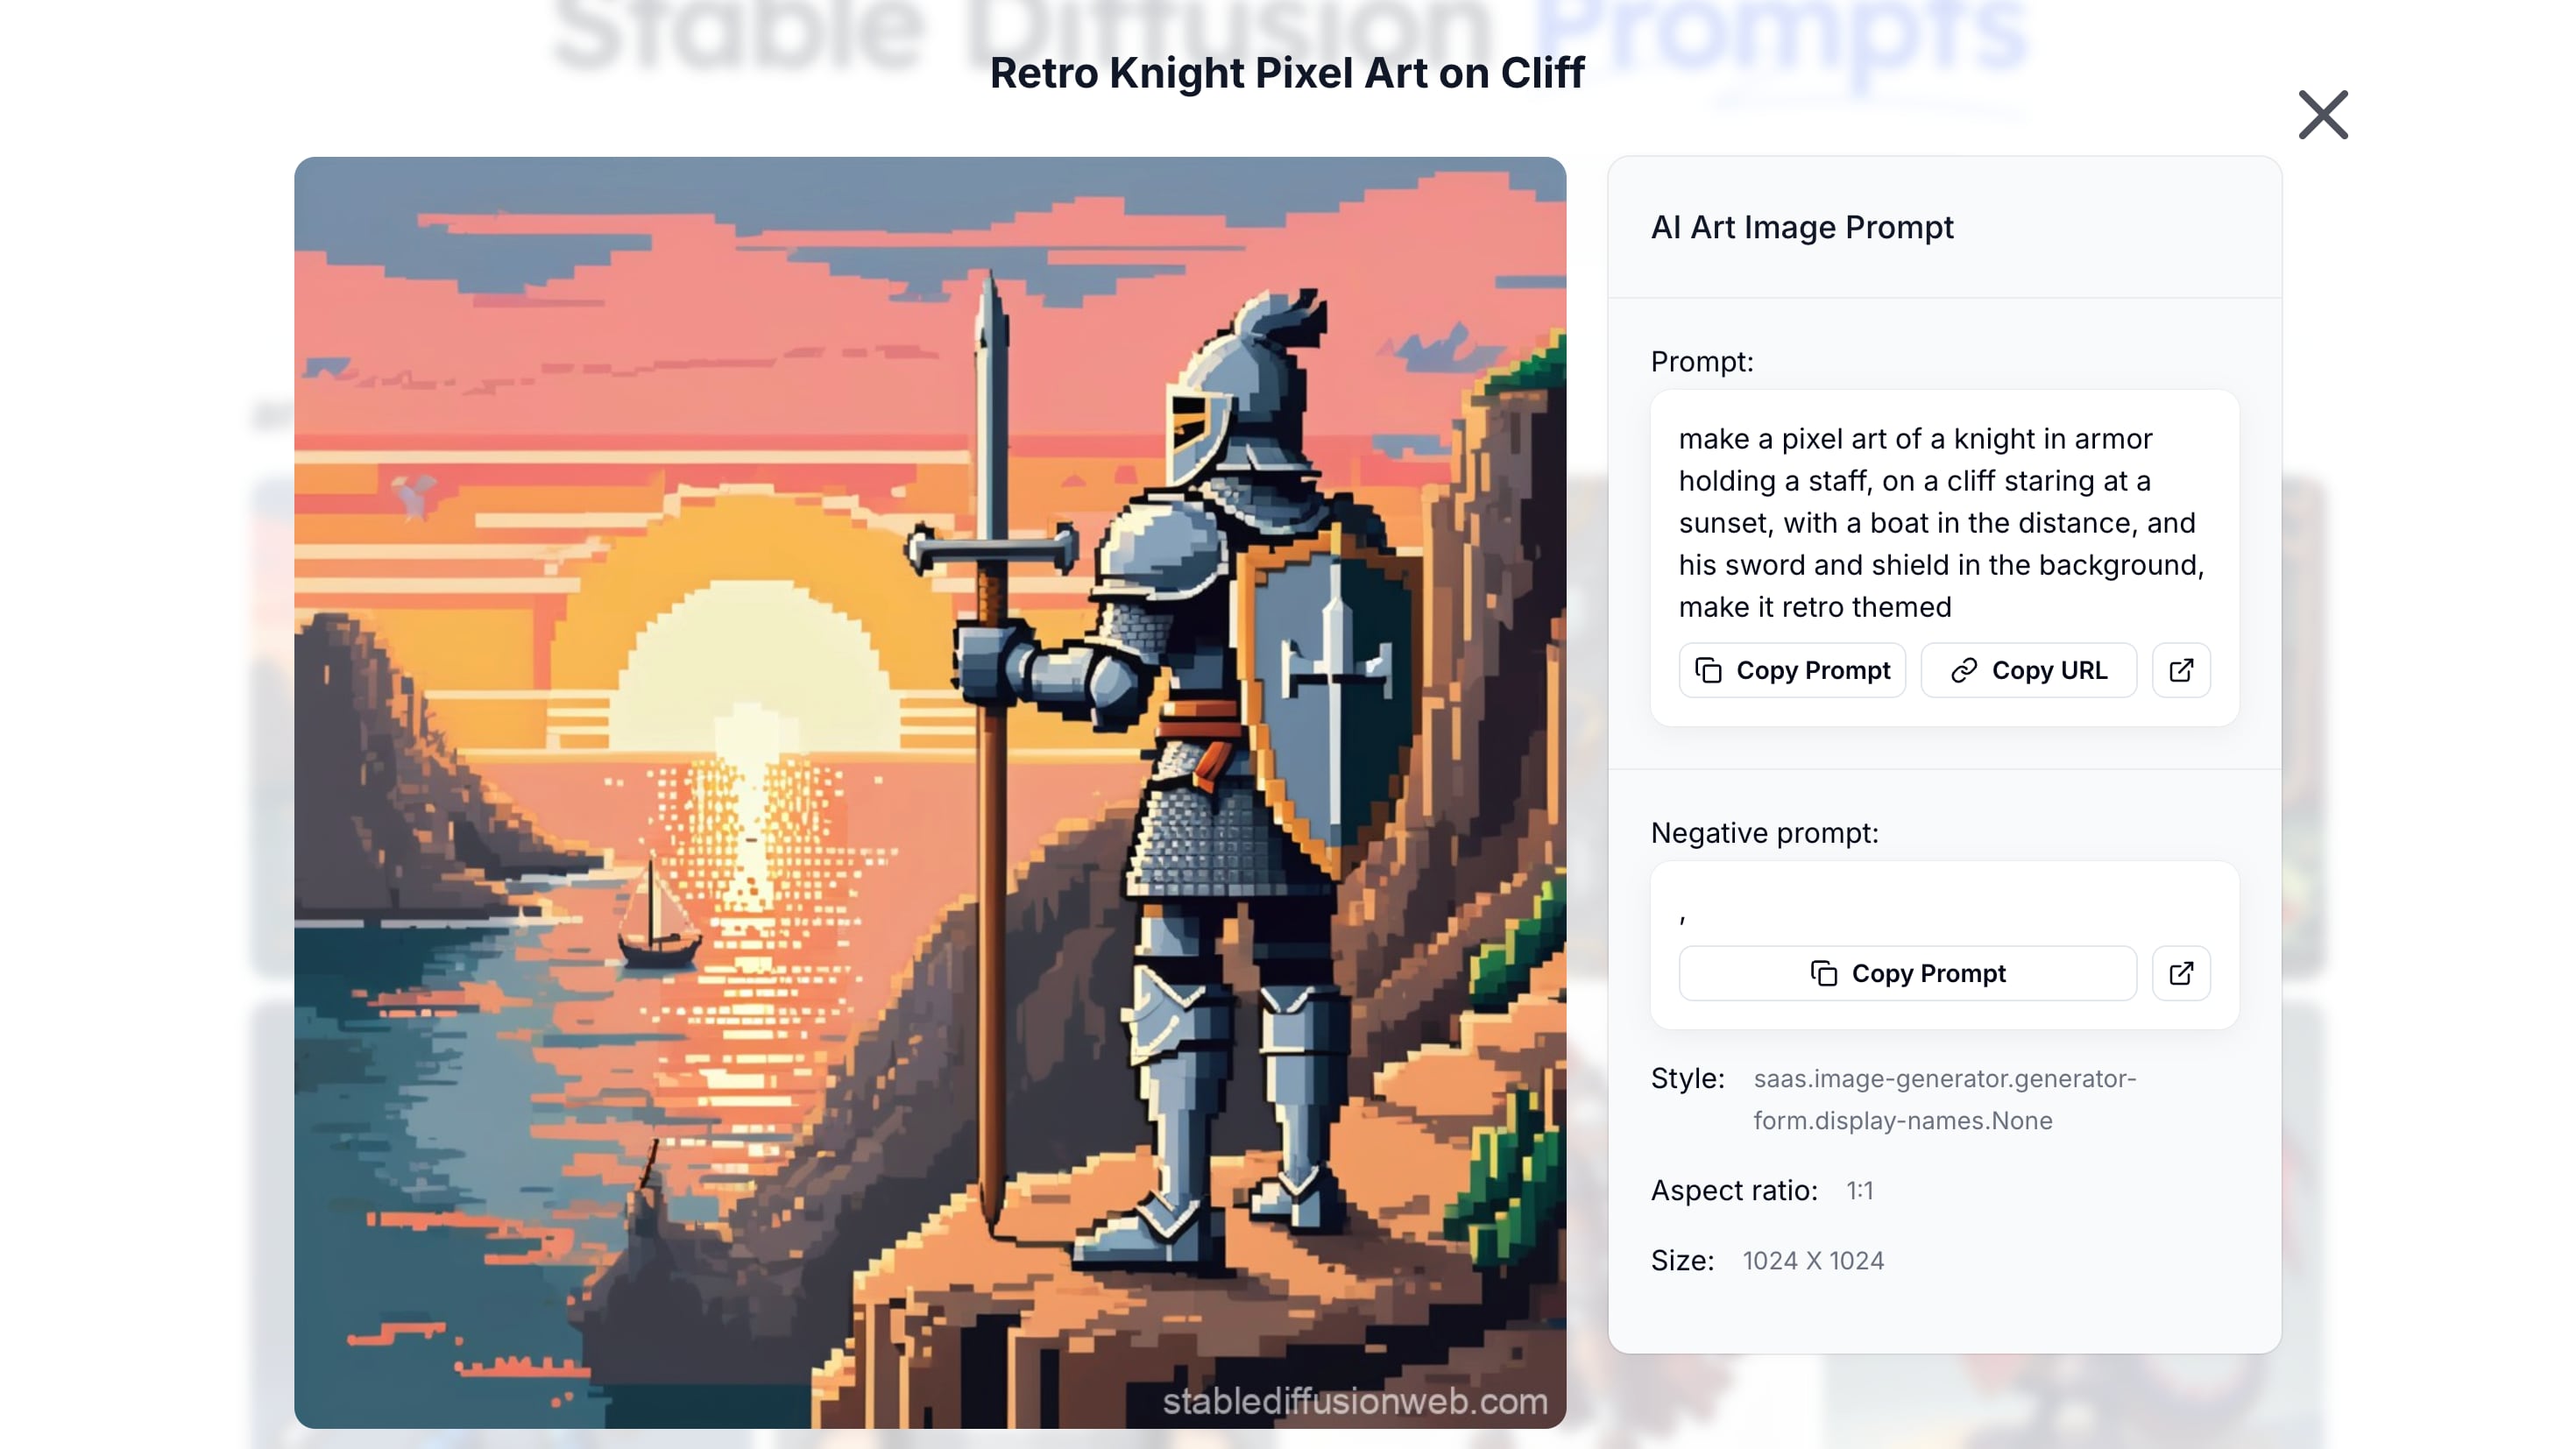
Characters are often the centerpiece of pixel art. Stable Diffusion can generate sprites that look like they belong in an 8-bit or 16-bit adventure. To achieve this, include keywords such as "8-bit," "pixel sprite," and "retro game."
Example Prompt: "8-bit pixel art of a knight in silver armor, holding a sword, NES style, sprite sheet look"
2. Backgrounds
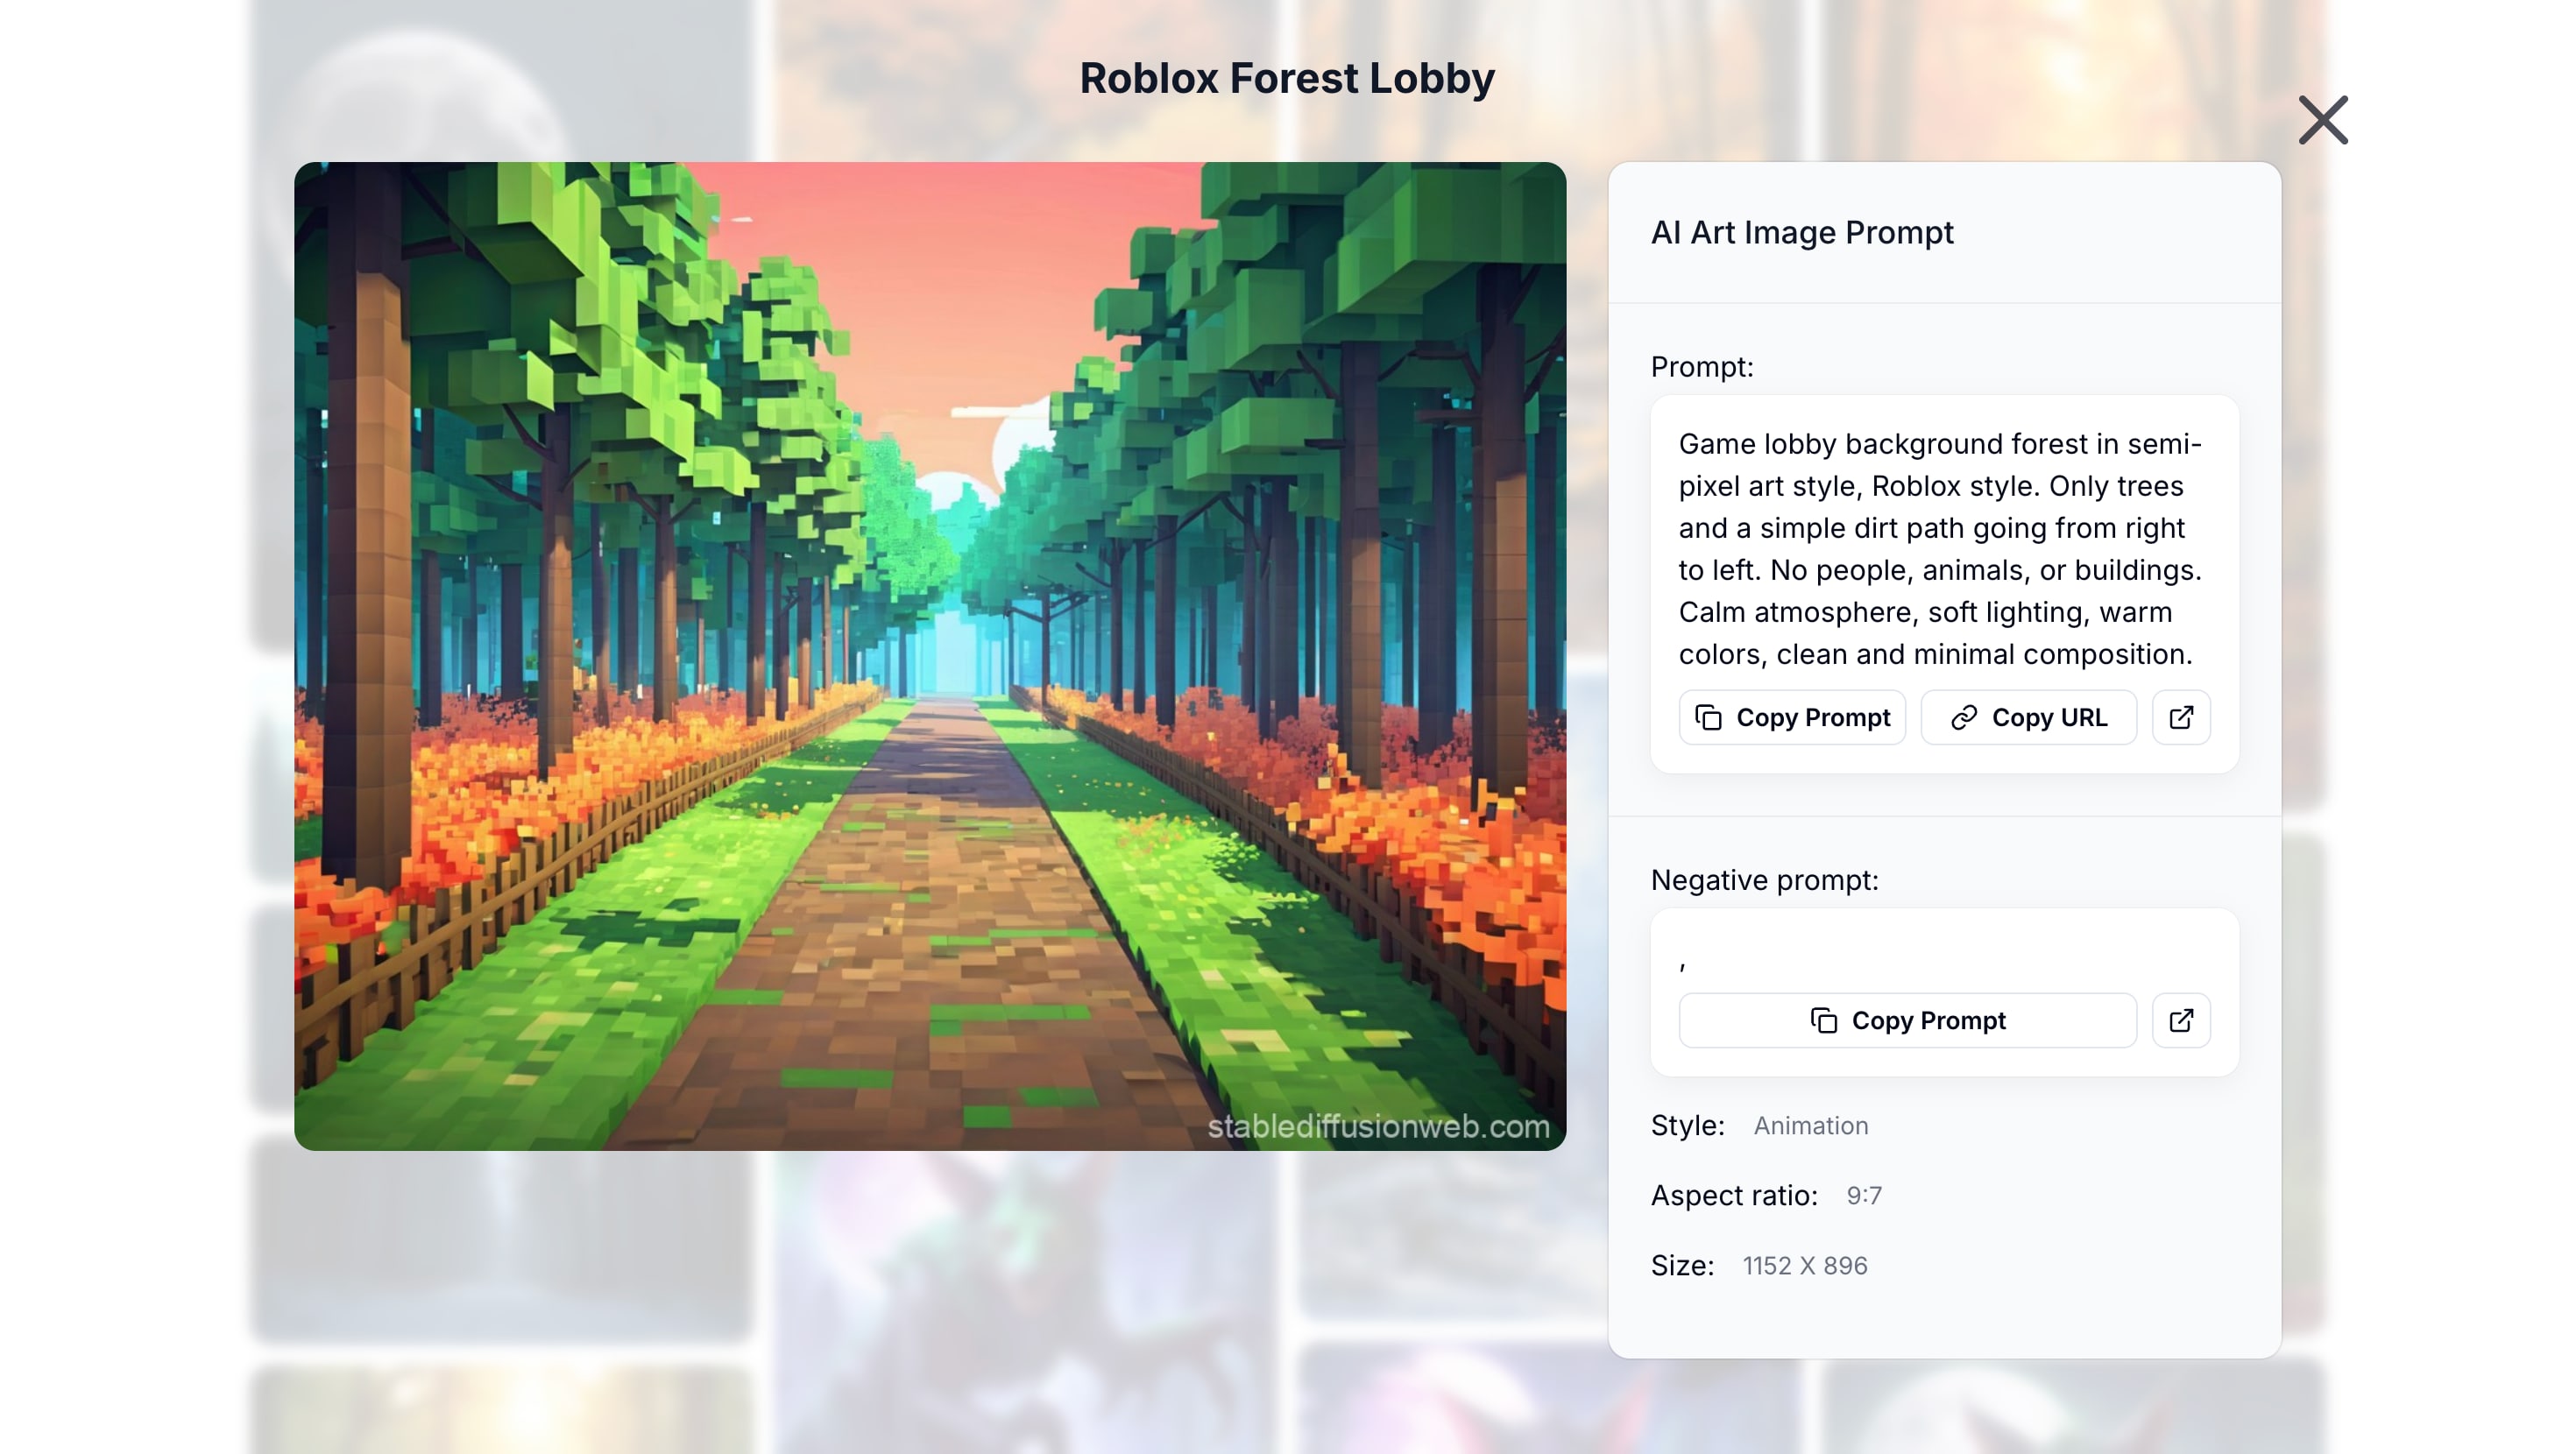
Pixel backgrounds set the stage for a scene, whether it is a forest, cave, or city street. Stable diffusion pixel art works best at smaller resolutions like 256x256, which keep the blocky feel intact.
Example Prompt: "pixel art forest background, retro RPG style, NES aesthetic, low resolution 256x256"
3. Objects and Items
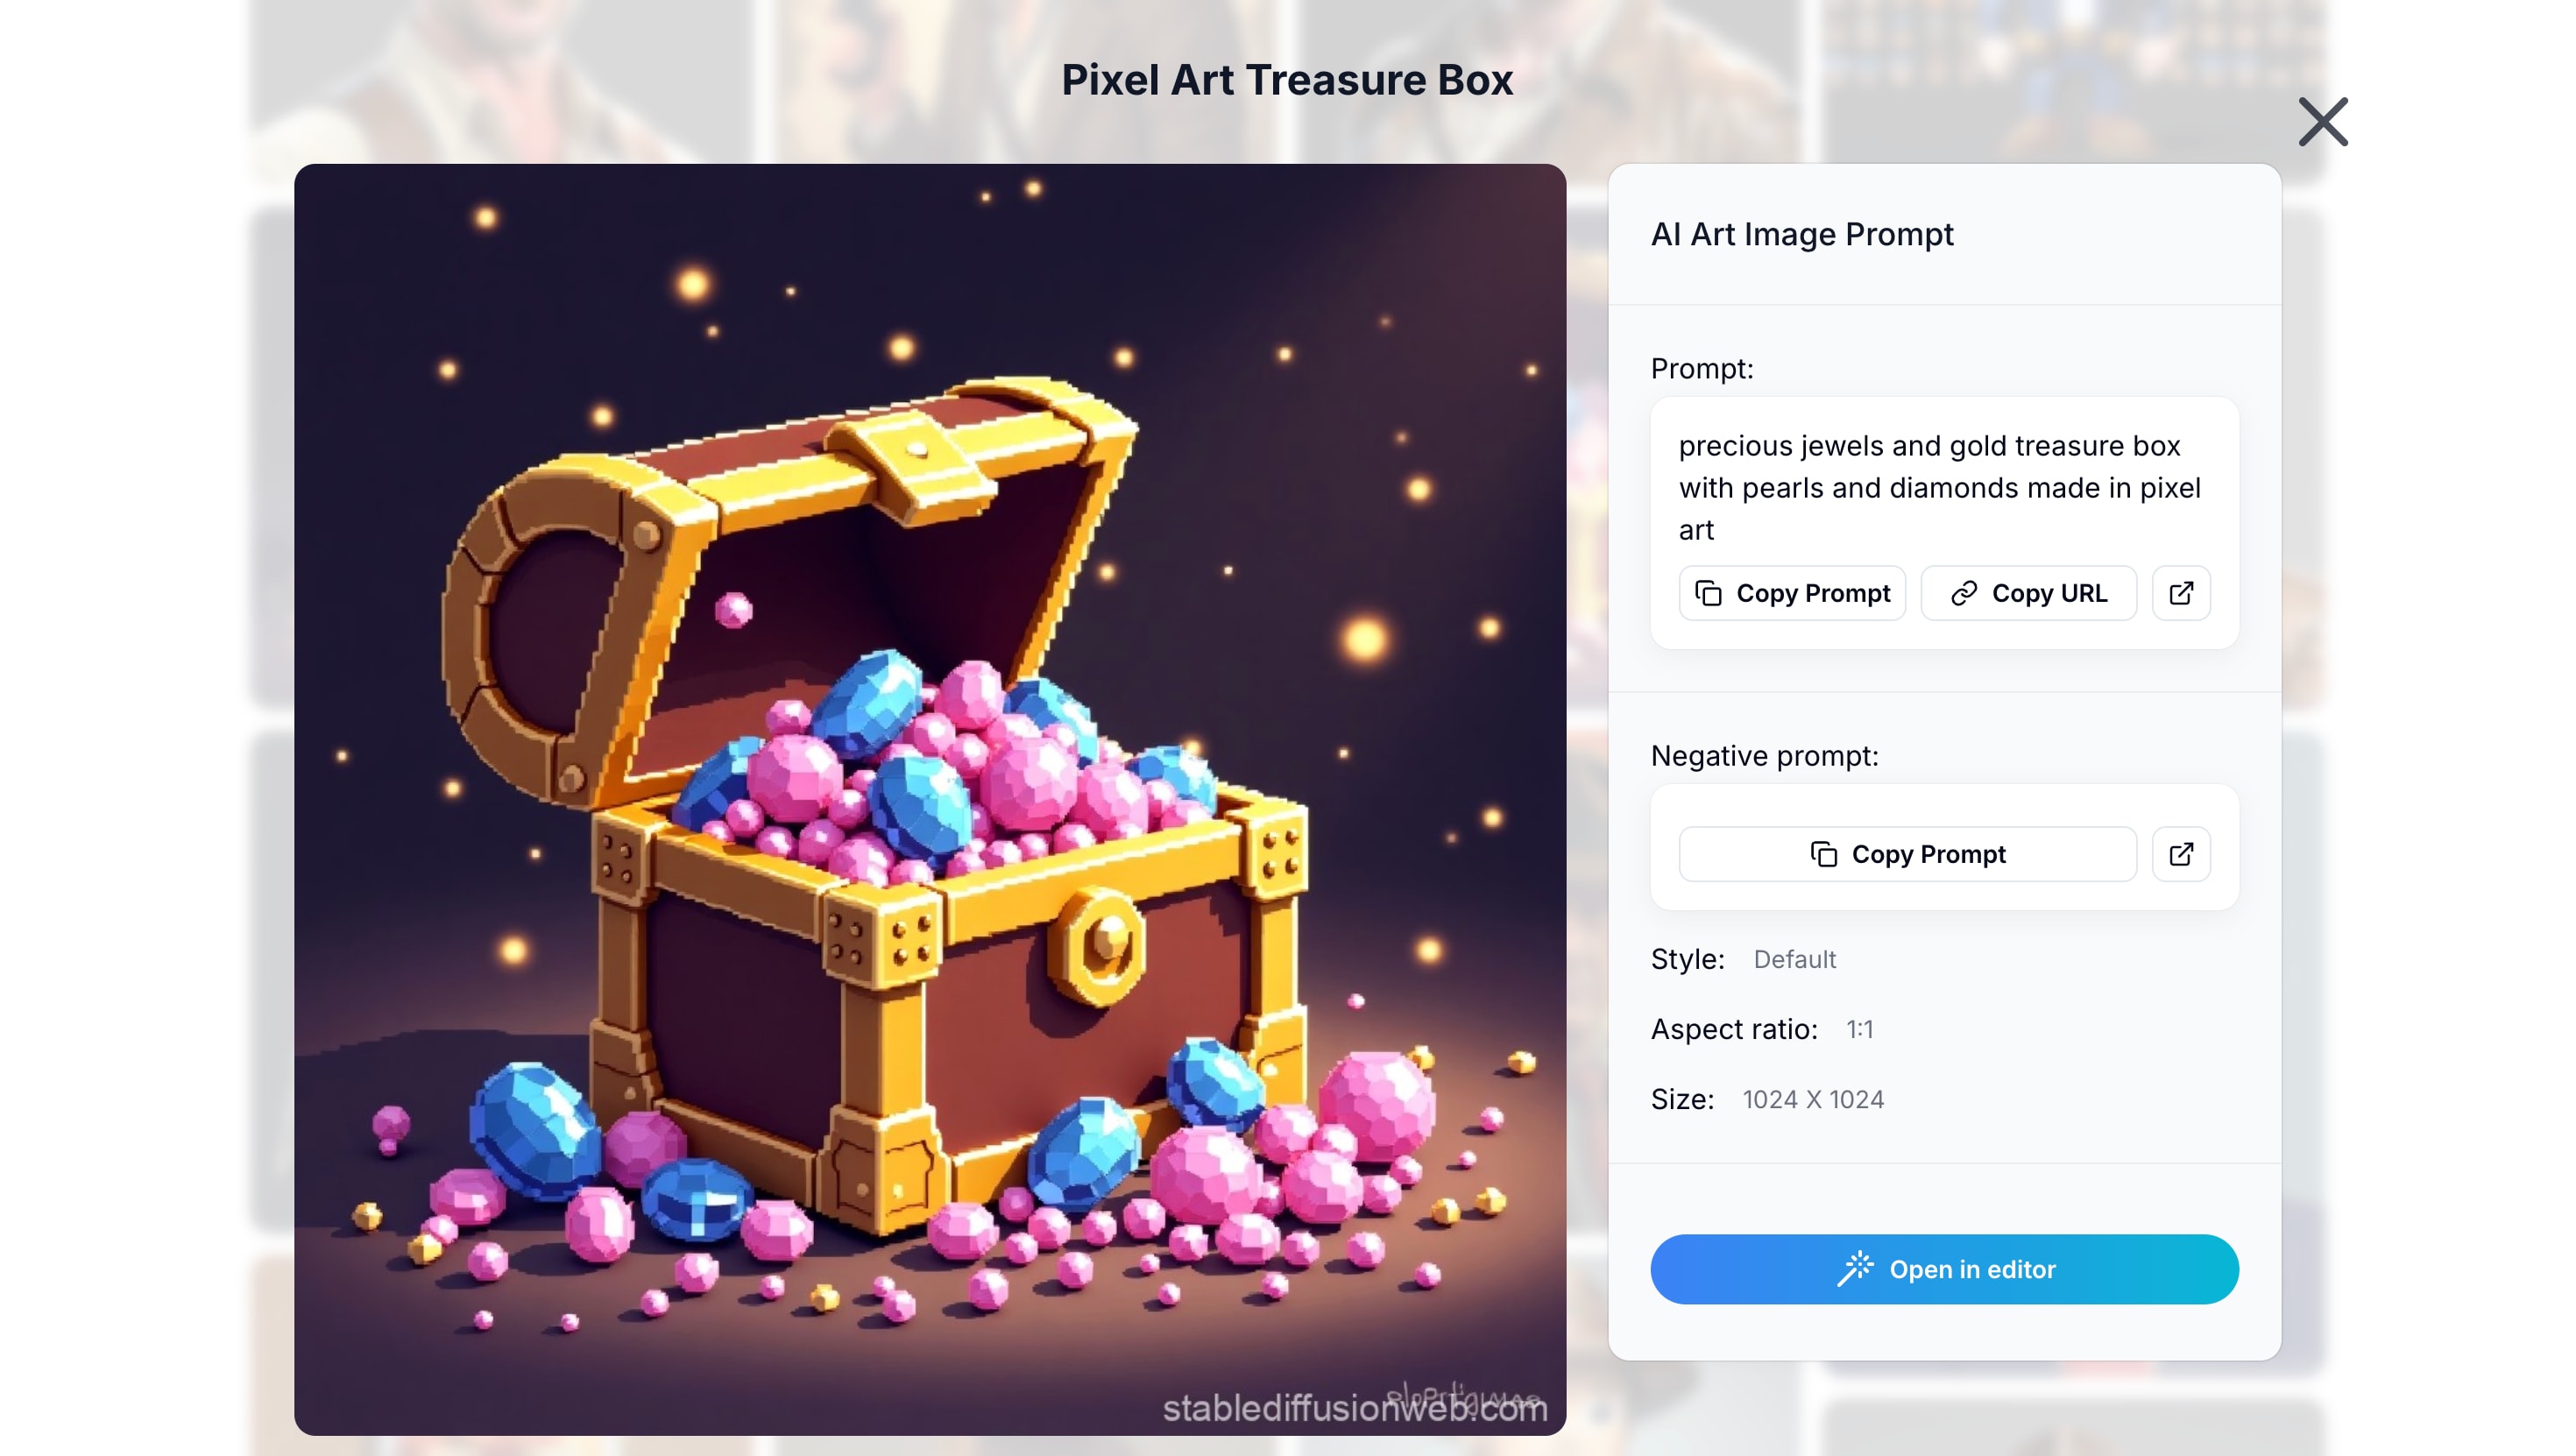
From treasure chests to potions, small objects bring personality to retro visuals. These prompts often work well when kept simple and direct.
Example Prompt: "pixel art treasure chest, glowing coins inside, 8-bit retro game item, crisp edges"
4. Scenes
Full scenes combine characters, objects, and environments into a single frame. These require more descriptive prompts but can look like actual screenshots from an arcade game.
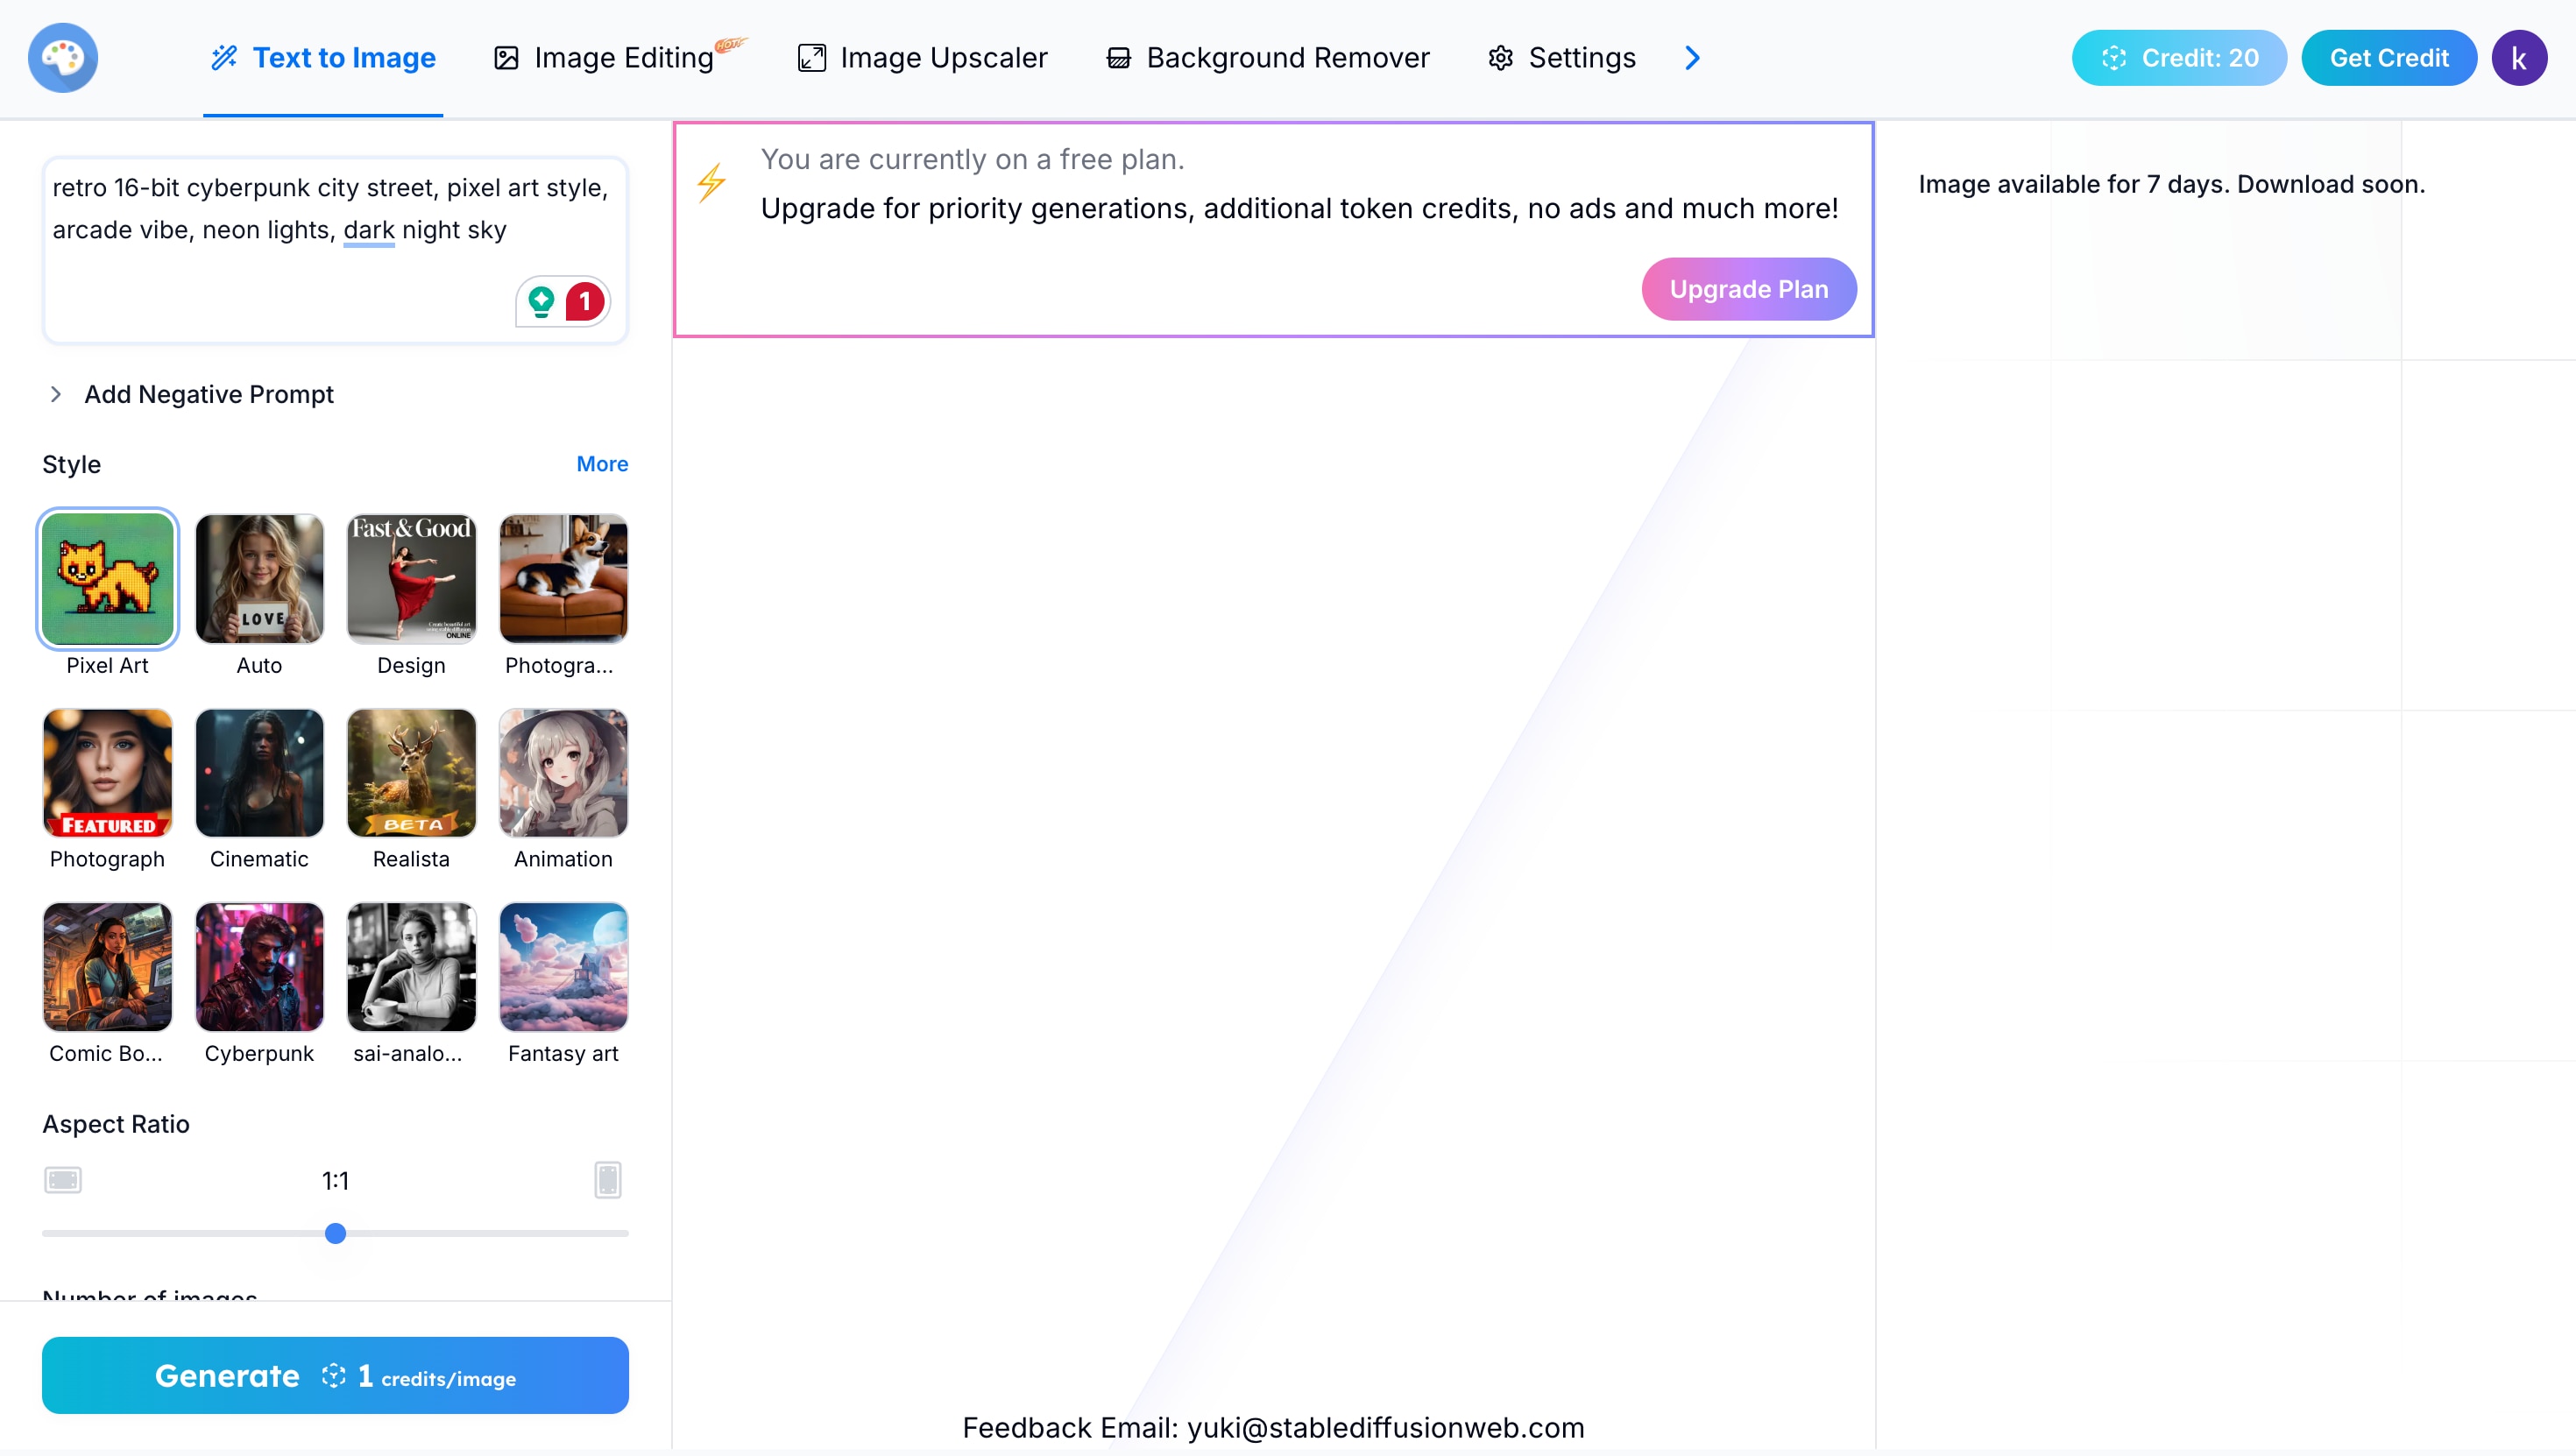
Example Prompt: "retro 16-bit cyberpunk city street, pixel art style, arcade vibe, neon lights, dark night sky"
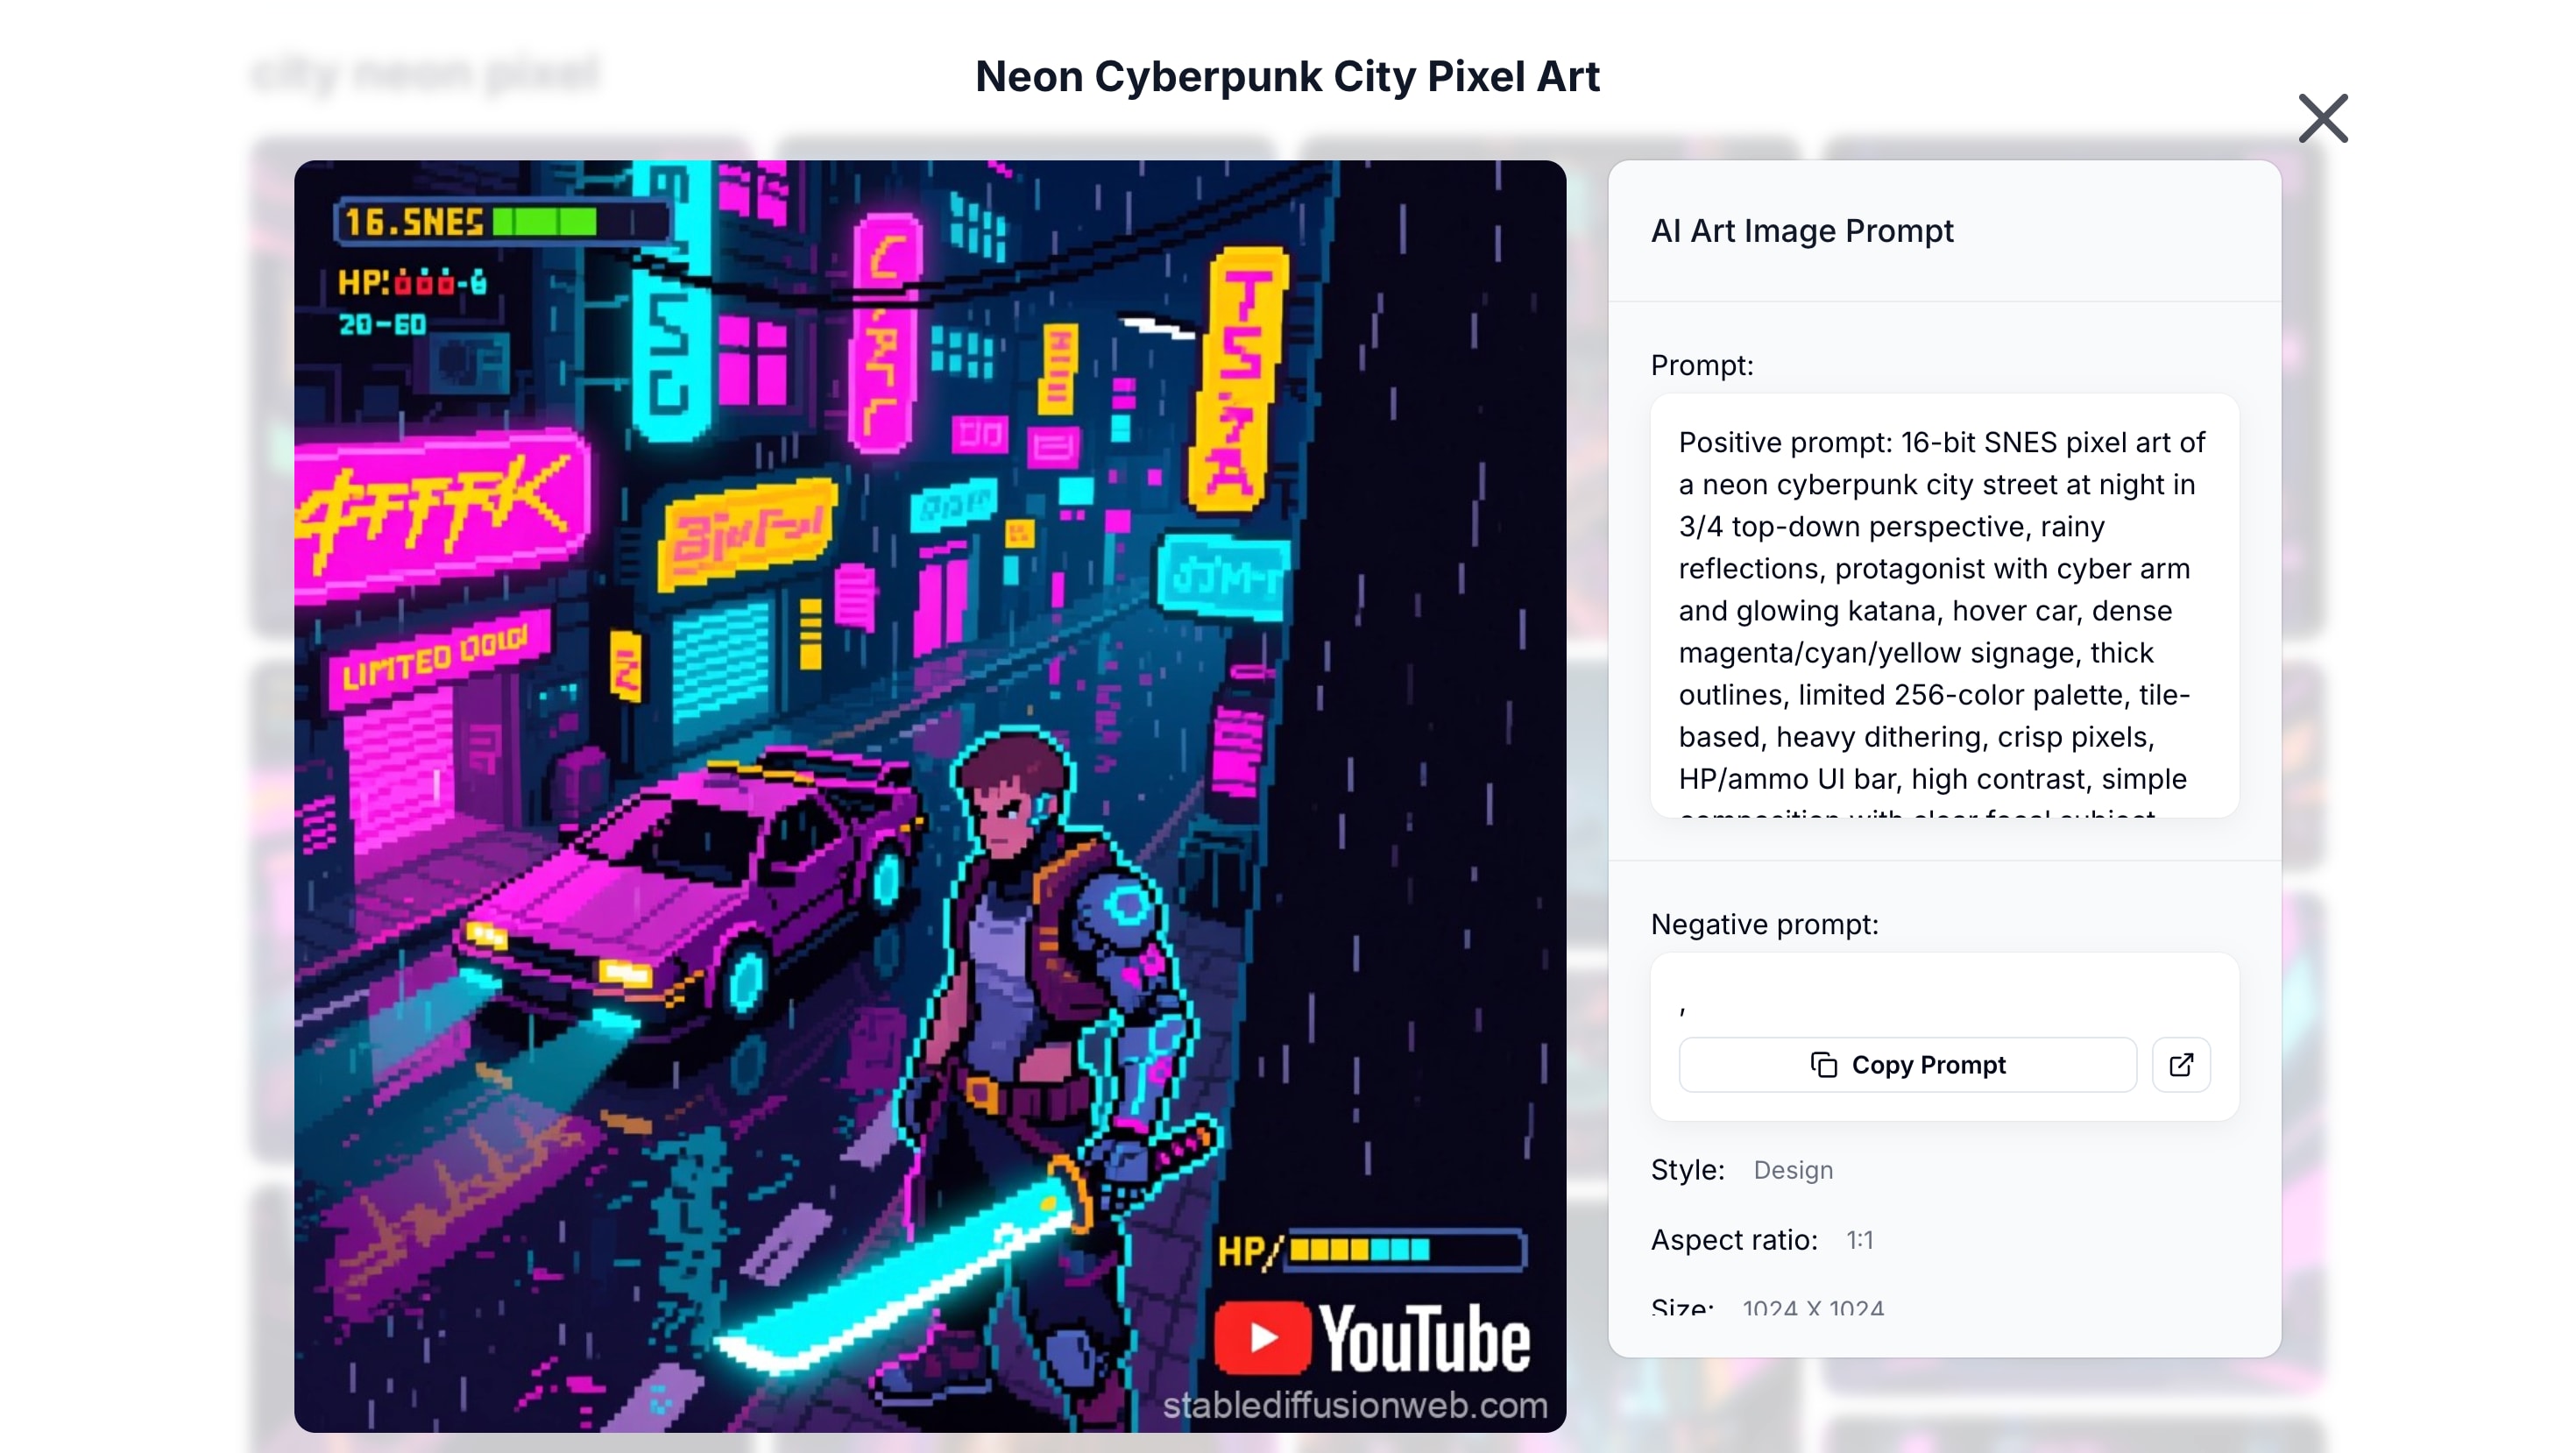
With these examples, you can see how flexible pixel art with Stable Diffusion can be. The right prompts unlock a wide range of creative possibilities while staying true to the pixel aesthetic.
Part 2. How to Create Pixel Art with Stable Diffusion
Once you have an idea in mind, it's time to turn it into an image. Pixel art with Stable Diffusion is straightforward, but a few adjustments can make the results sharper and more authentic. By controlling resolution, writing clear prompts, and adding negative prompts, you'll get artwork that feels true to the retro style.
Step 1. Access Stable Diffusion
You can install Stable Diffusion on your computer if you want full control, or you can start quickly with an online service like Stable Diffusion Online. Both approaches work fine for pixel art.
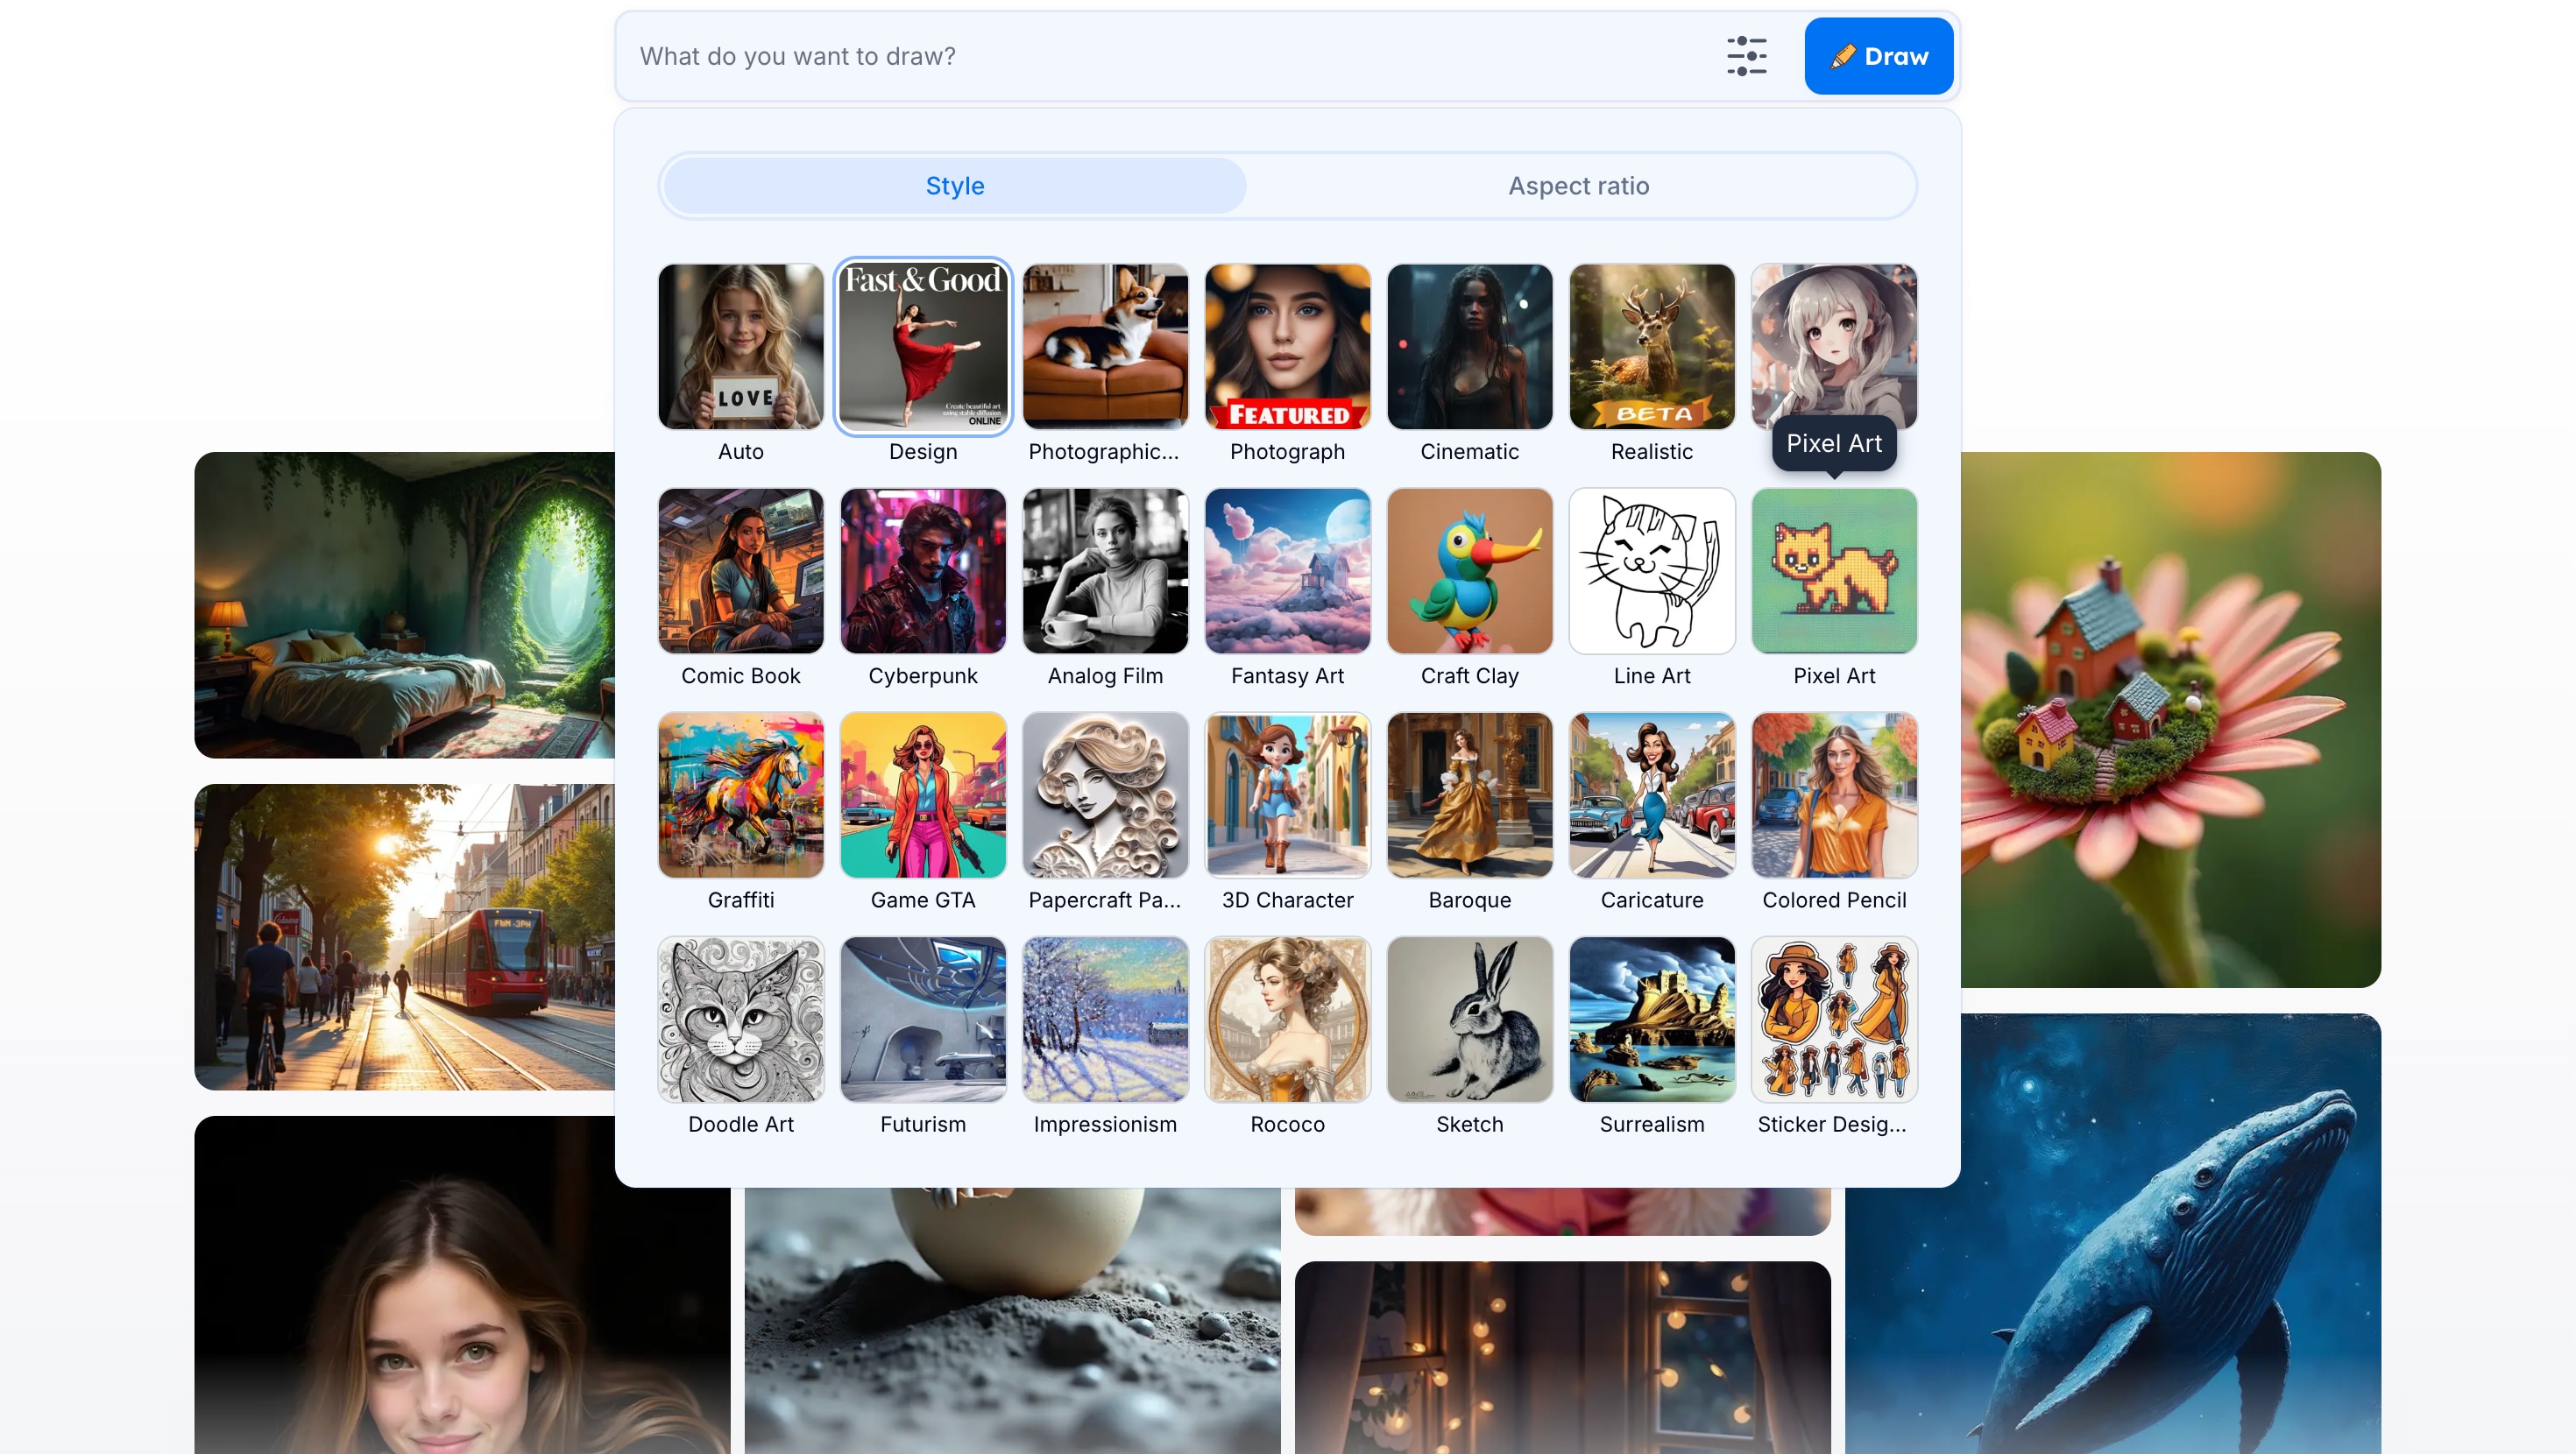
Step 2. Choose Pixel Art Style and Set Resolution
Choose Pixel Art style under the prompts menu. Then, set the resolution. Pixel art needs to be small. A size like 256x256 usually gives that blocky, retro effect. Going bigger often makes the image too smooth, which isn't what you want here.
Step 3. Write the Prompt
Be specific with your wording. Add terms such as "pixel art," "8-bit," "retro game," or "NES style" so the model knows the exact look you're aiming for.
Step 4. Add Negative Prompts
Stable Diffusion tends to smooth things out unless you tell it otherwise. Adding negatives like "no blur, no anti-aliasing, no smooth shading" keeps the artwork sharp and true to the pixel art style.
Step 5. Generate and Refine
Run the model and check the image. If something feels off, tweak the CFG scale or increase the sampling steps. Sometimes a small prompt adjustment is all it takes to get the right result.
Step 6. Save the Image
When you're satisfied, save the image as PNG to preserve the crisp edges. Now you have a ready-to-use piece of pixel art made with Stable Diffusion.
Limitation
Stable Diffusion does a great job of creating pixel art from text prompts, but it does have limits. The biggest drawback is that it only generates static images, so there's no motion or animation built in.
If you want your pixel art to move, you'll need another tool. It can also take some trial and error to refine prompts, especially when you're aiming for very specific retro details. And while the results look authentic, editing them after generation usually requires extra software.
Part 3. Expanding Your Pixel Art Workflow Beyond Stable Diffusion
Stable Diffusion is excellent for generating pixel art, but it stops at still images. If you want to edit, polish, or animate your creations, you'll need another tool. Here, you can use Wondershare Filmora.
Filmora combines AI generation with editing features, so you can move from static images to dynamic visuals without juggling multiple programs.
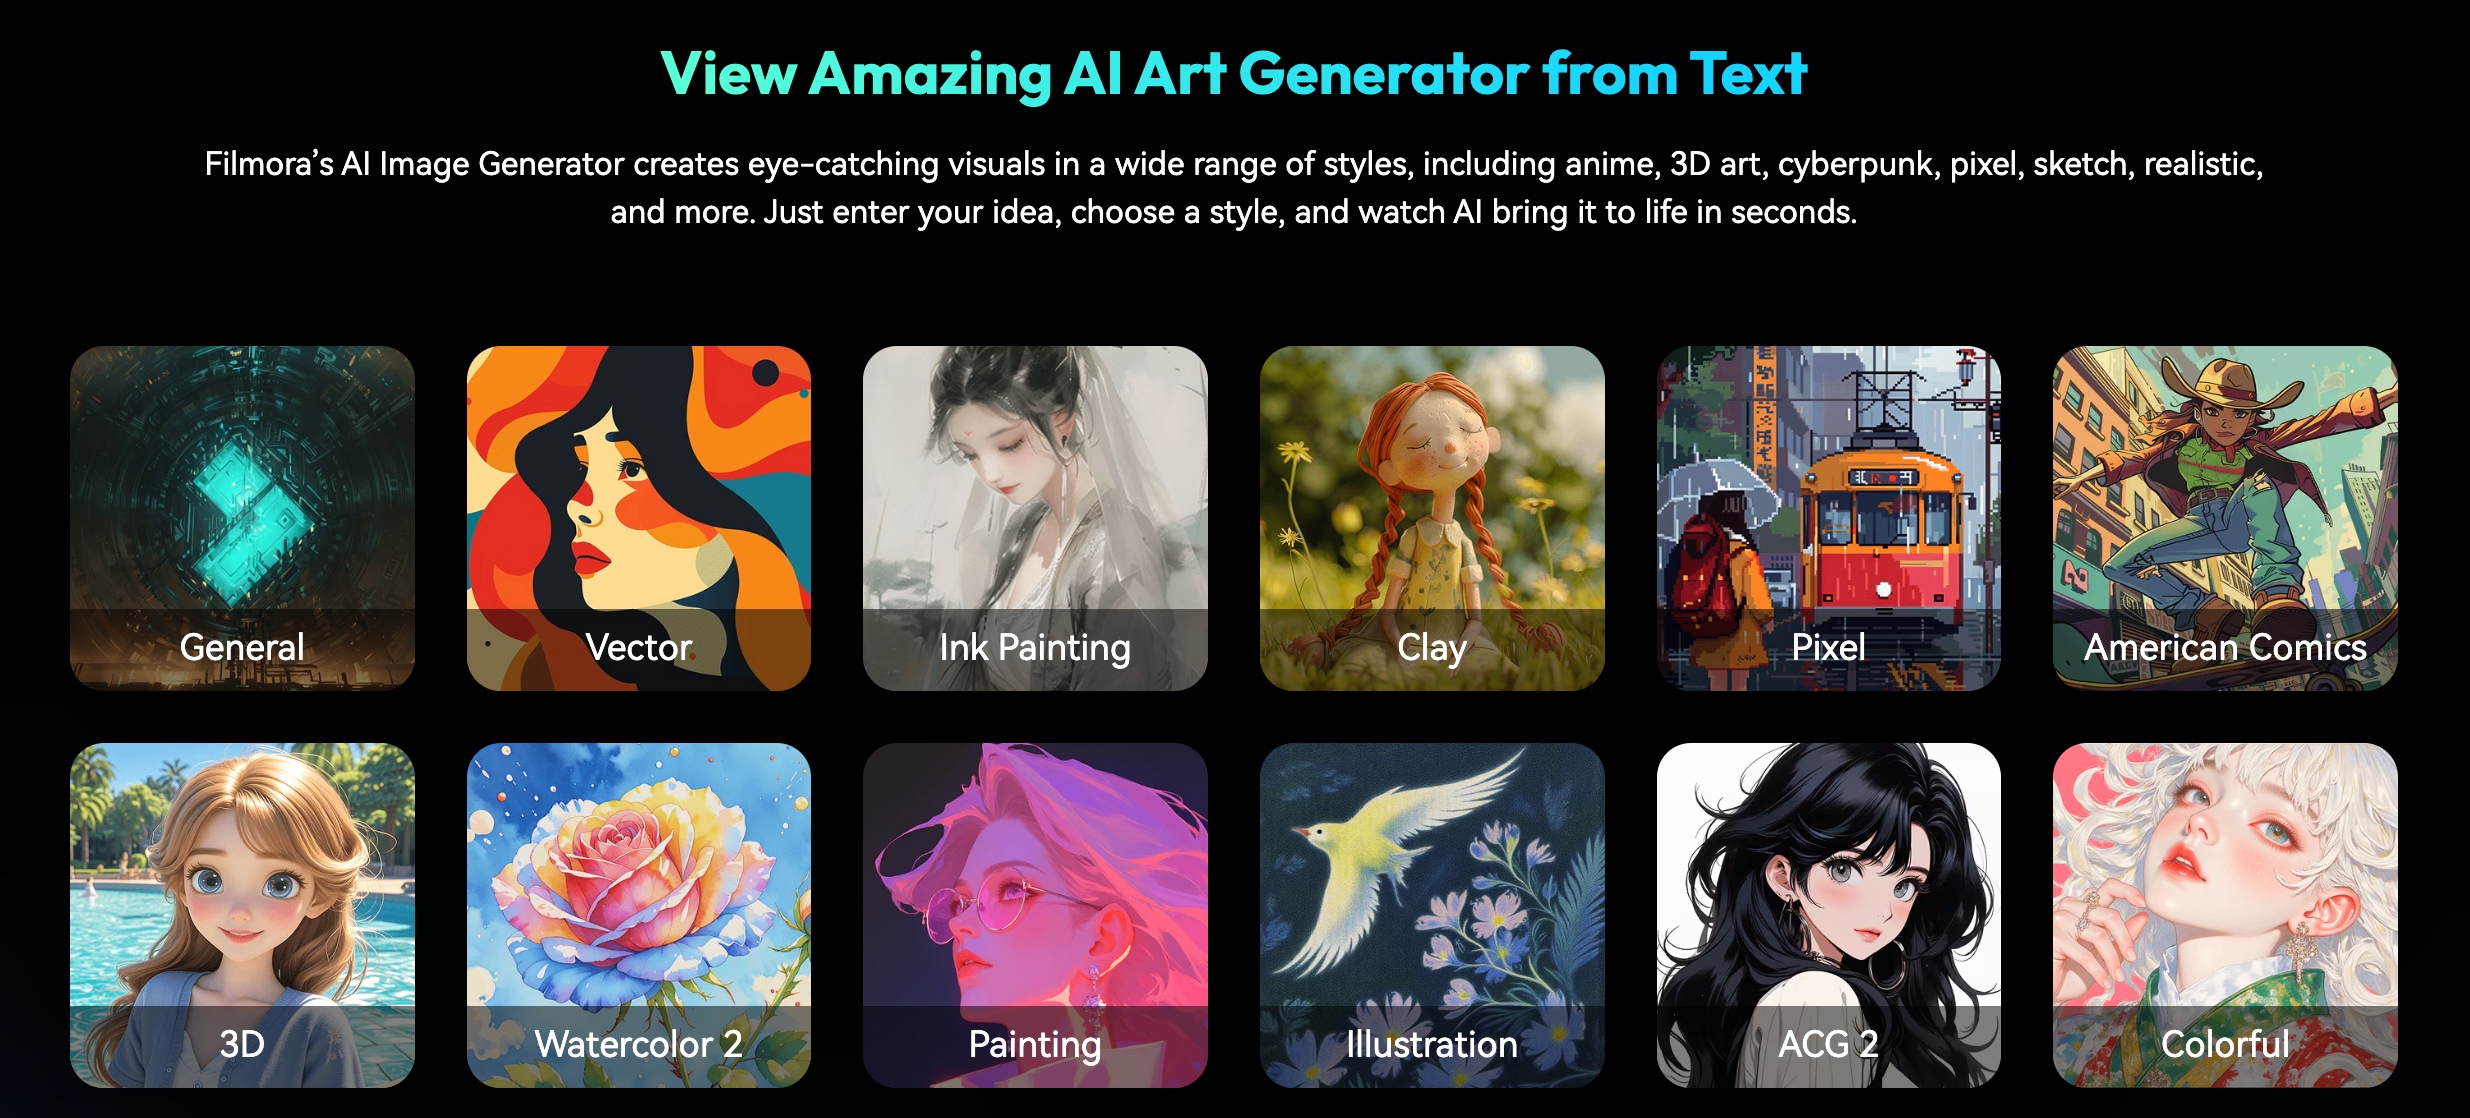
Filmora includes AI features that complement pixel art with Stable Diffusion:
- AI Image Generator: Create pixel-style images directly inside the editor by typing prompts, just like you would in Stable Diffusion. This saves time since you don't need to switch between apps.
- AI Image-to-Video: Take a static pixel art image and turn it into a short, animated clip. This makes it possible to bring your retro-style creations to life in just a few clicks.
The biggest advantage here is speed. Instead of exporting images from Stable Diffusion and then moving them into another program for animation, Filmora lets you do everything in one place. It's beginner-friendly but still powerful enough to handle creative projects for social media, game prototypes, or art portfolios.
Generate Pixel Art with Filmora AI Image Generator
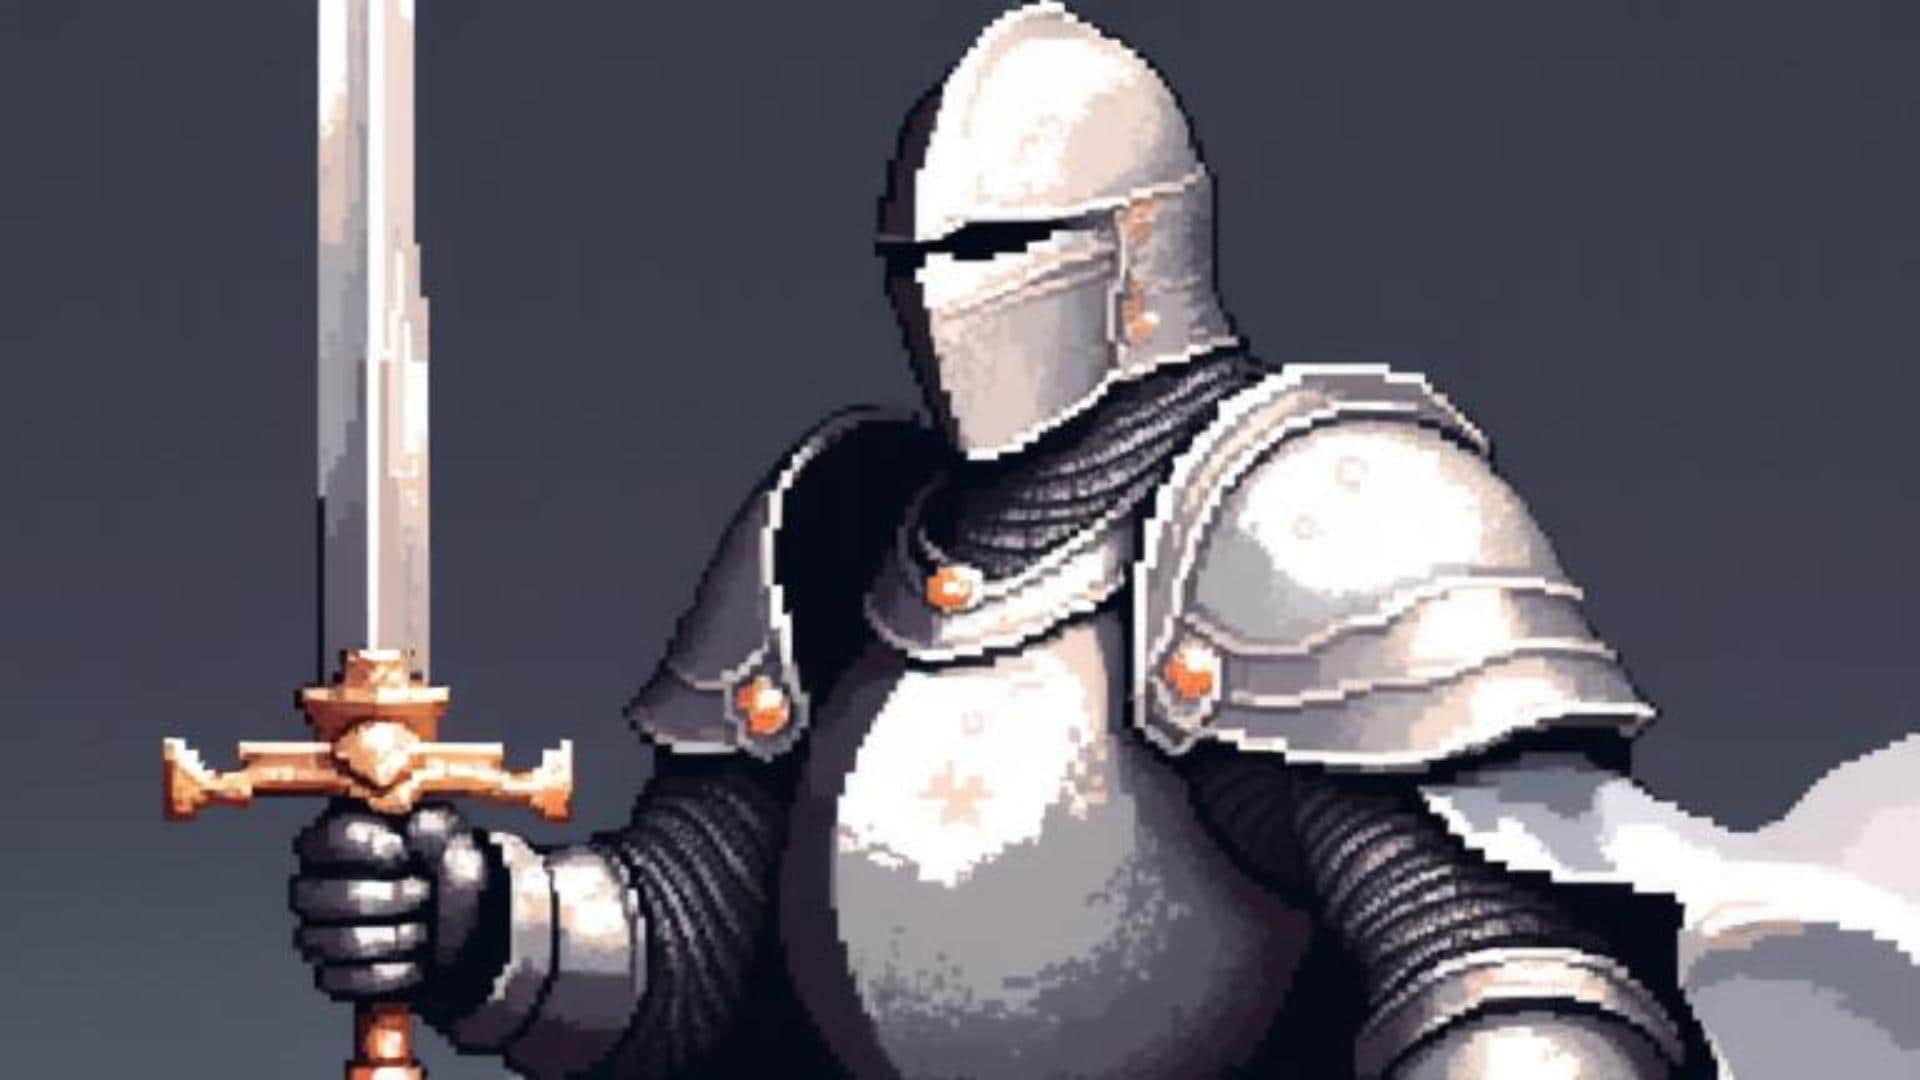
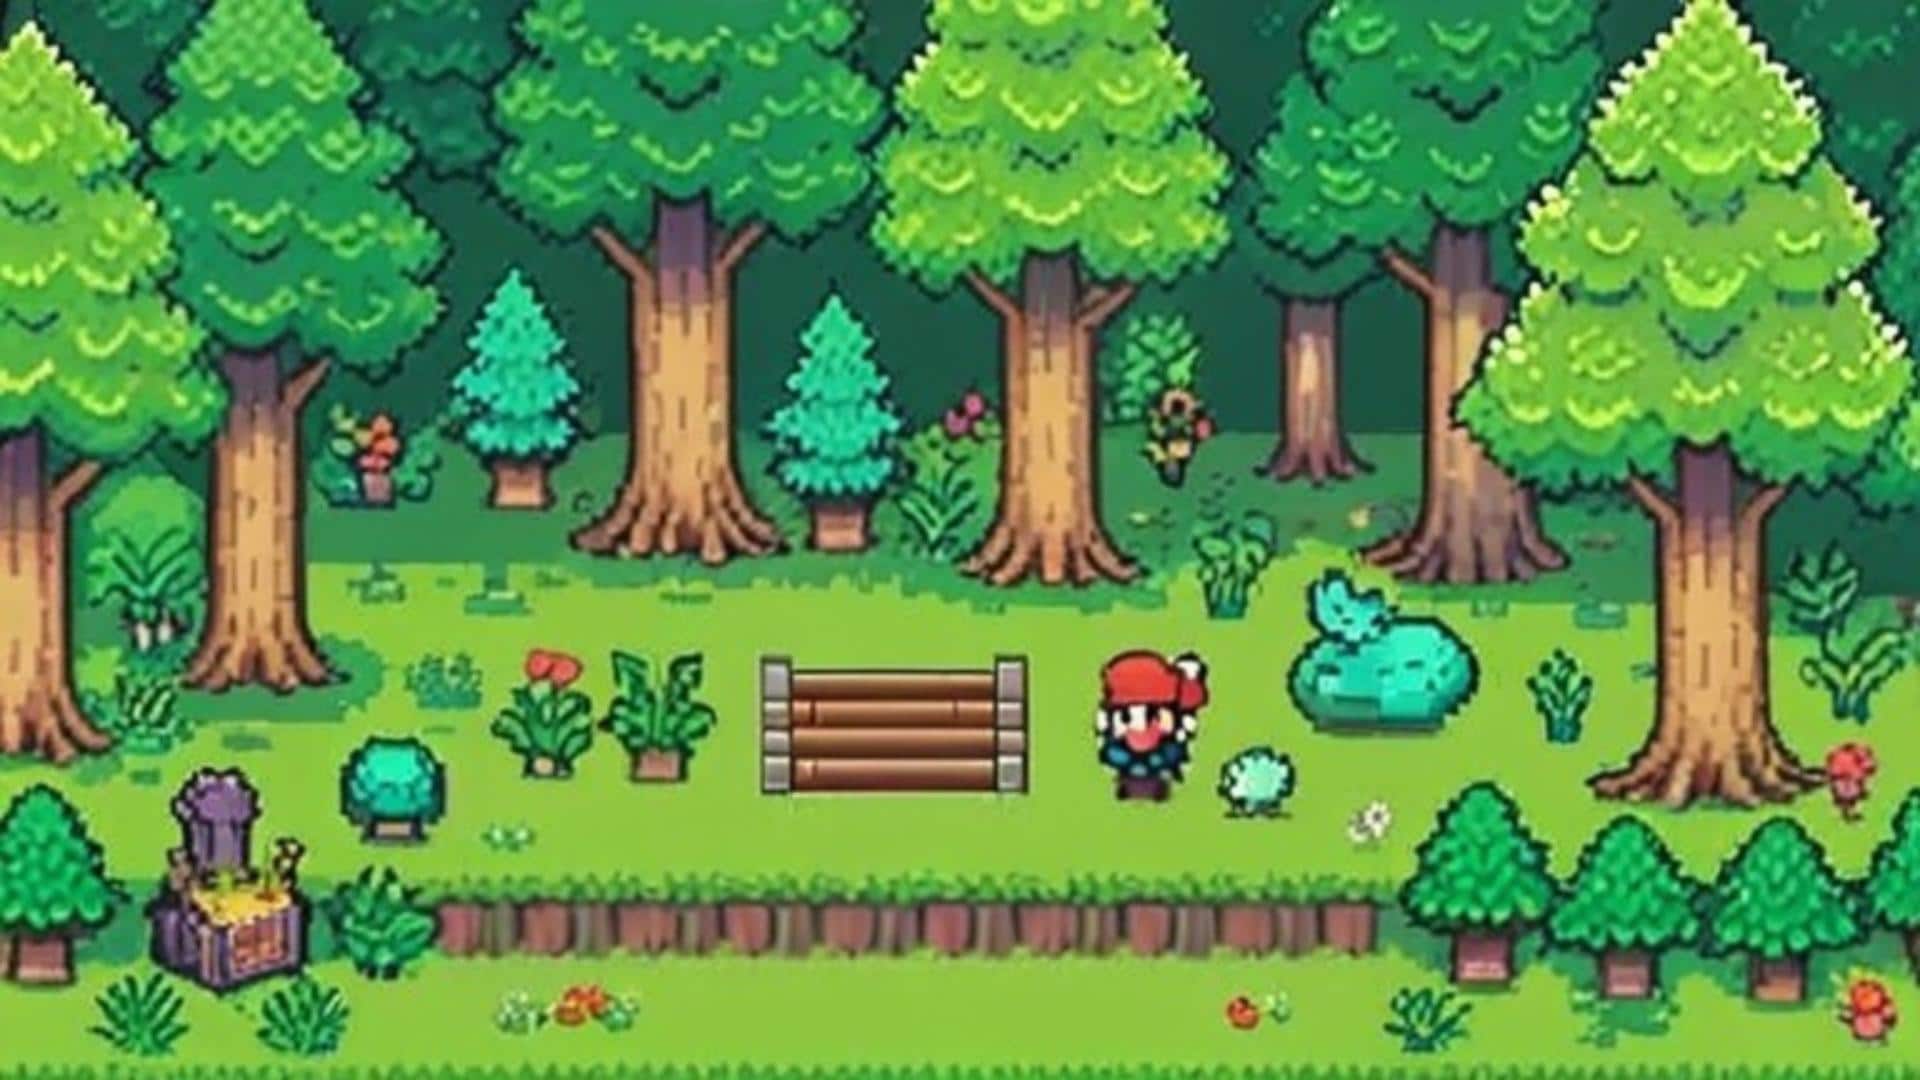
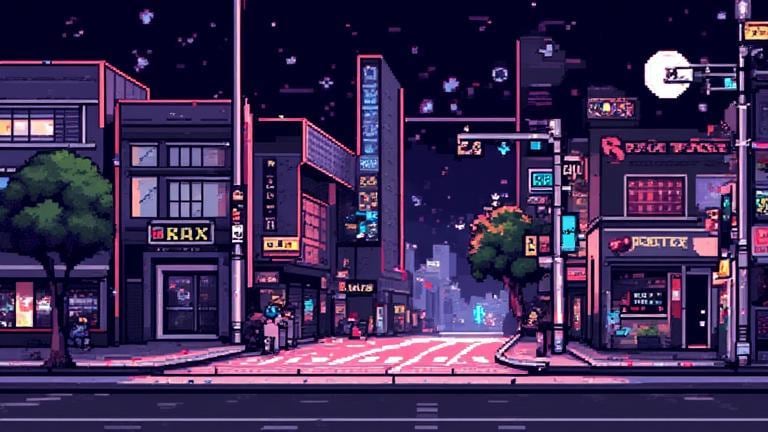
Just like Stable Diffusion, Filmora lets you type in a prompt and instantly get images in a variety of styles. Here's a showcase of what Filmora generated.
Characters
Backgrounds
Objects and Items

Scenes
Want to generate similar images? Follow these detailed steps:
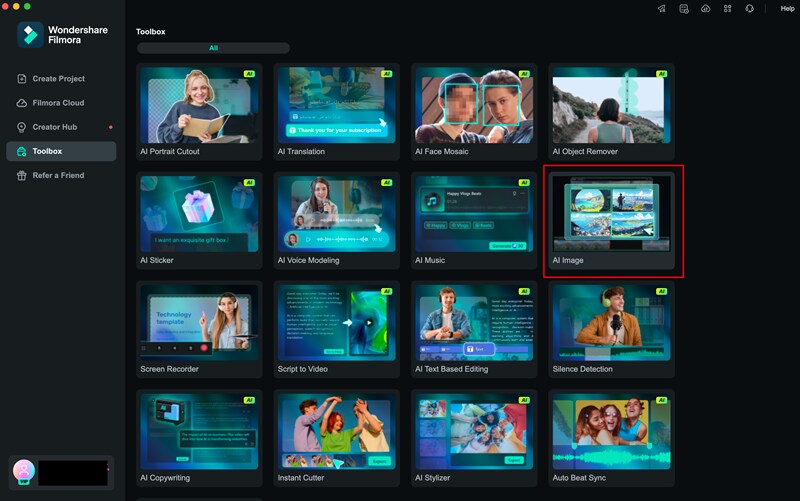
Step 1. Open Filmora
Start by launching Filmora. From the main dashboard, go to the AI Tools panel, where you'll find the AI Image Generator option.
Step 2. Write a Clear Prompt
Inside the editing interface, type in your idea and make sure to include style-focused keywords. For pixel art, terms like "8-bit," "pixel sprite," "retro game style," or "NES aesthetic."
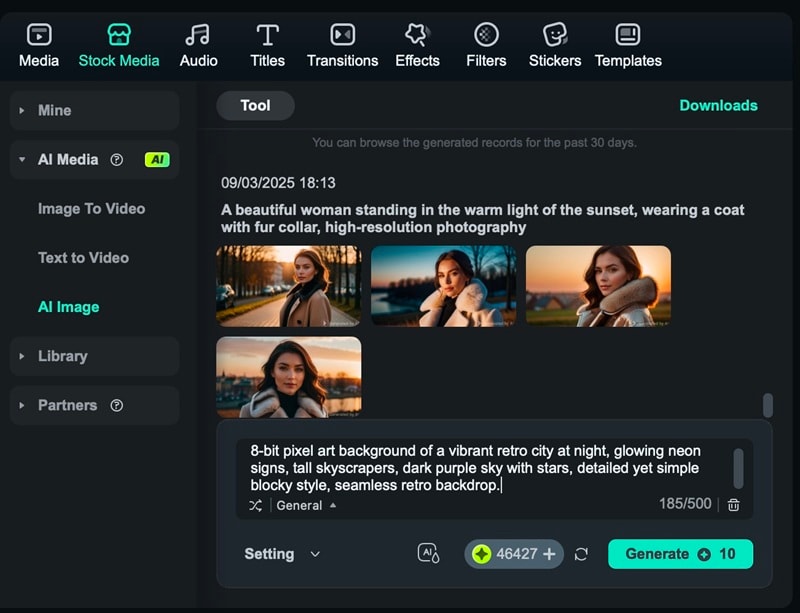
Step 3. Generate the Image
Press Generate, and Filmora will create the pixel art in just a few seconds. The image appears directly in your project, ready to use right away.
Step 4. Refine and Repeat if Needed
If the first result isn't exactly what you want, adjust the prompt and try again. Filmora makes it easy to generate multiple variations until you're satisfied. Each new attempt only takes a few seconds, so you can quickly build a set of pixel images.
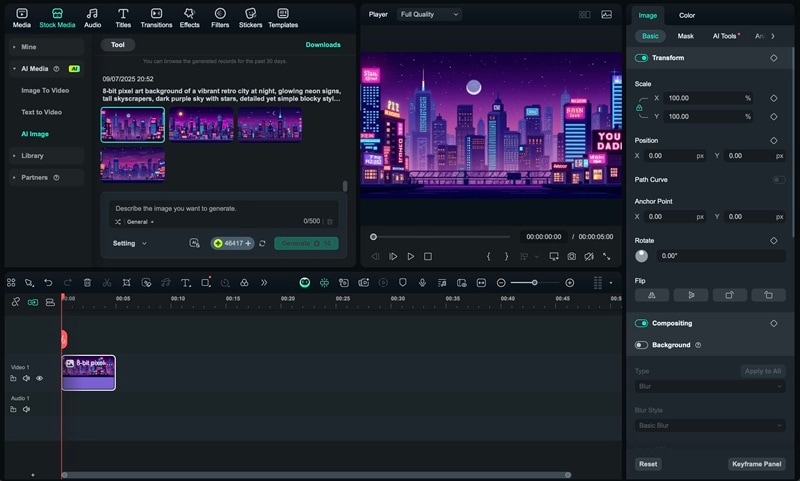
With this approach, you skip extra steps like exporting from Stable Diffusion and re-importing into an editor.
Part 4. Animating Pixel Art with Filmora
Static images are nice, but animation is what makes pixel art come alive. Normally, turning still artwork into video requires complex tools or frame-by-frame editing. Filmora solves this with its AI Image-to-Video feature, which can animate your pixel art in just a few steps.
Step 1. Open Filmora and Access Image-to-Video
Head to Stock Media > AI Media > Image to Video to open the Video Generation section. Select Image-to-Video – Veo 3 if you want to start with a single pixel image.
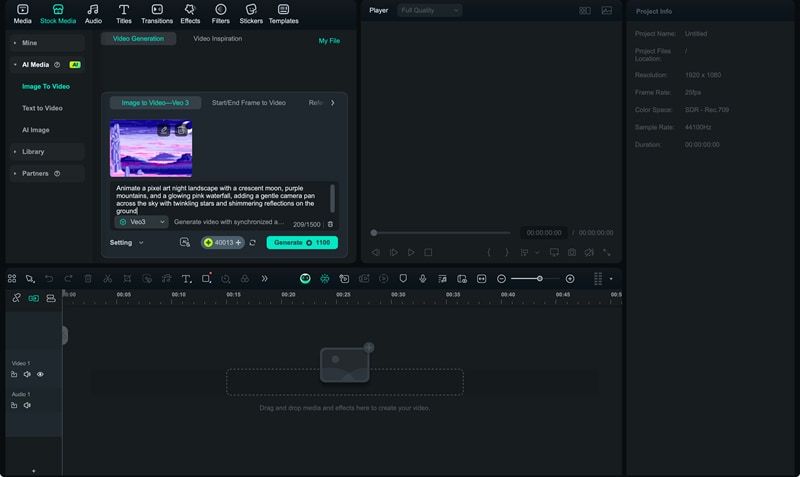
Step 2. Import Your Pixel Art and Add a Prompt
Insert your Stable Diffusion pixel art into the workspace. Enter a short text prompt that describes how you want the animation to look, then select Veo 3 Quality for smoother output.
Step 3. Generate the Video
Click Generate and let Filmora process your input. Within seconds, the tool will create a preview of your animated pixel art.
Step 4. Review and Adjust
Play the generated video to see how it looks. If you want more control, try alternative modes like Start/End Frame to Video (for transitions) or Reference to Video (for guided animation).
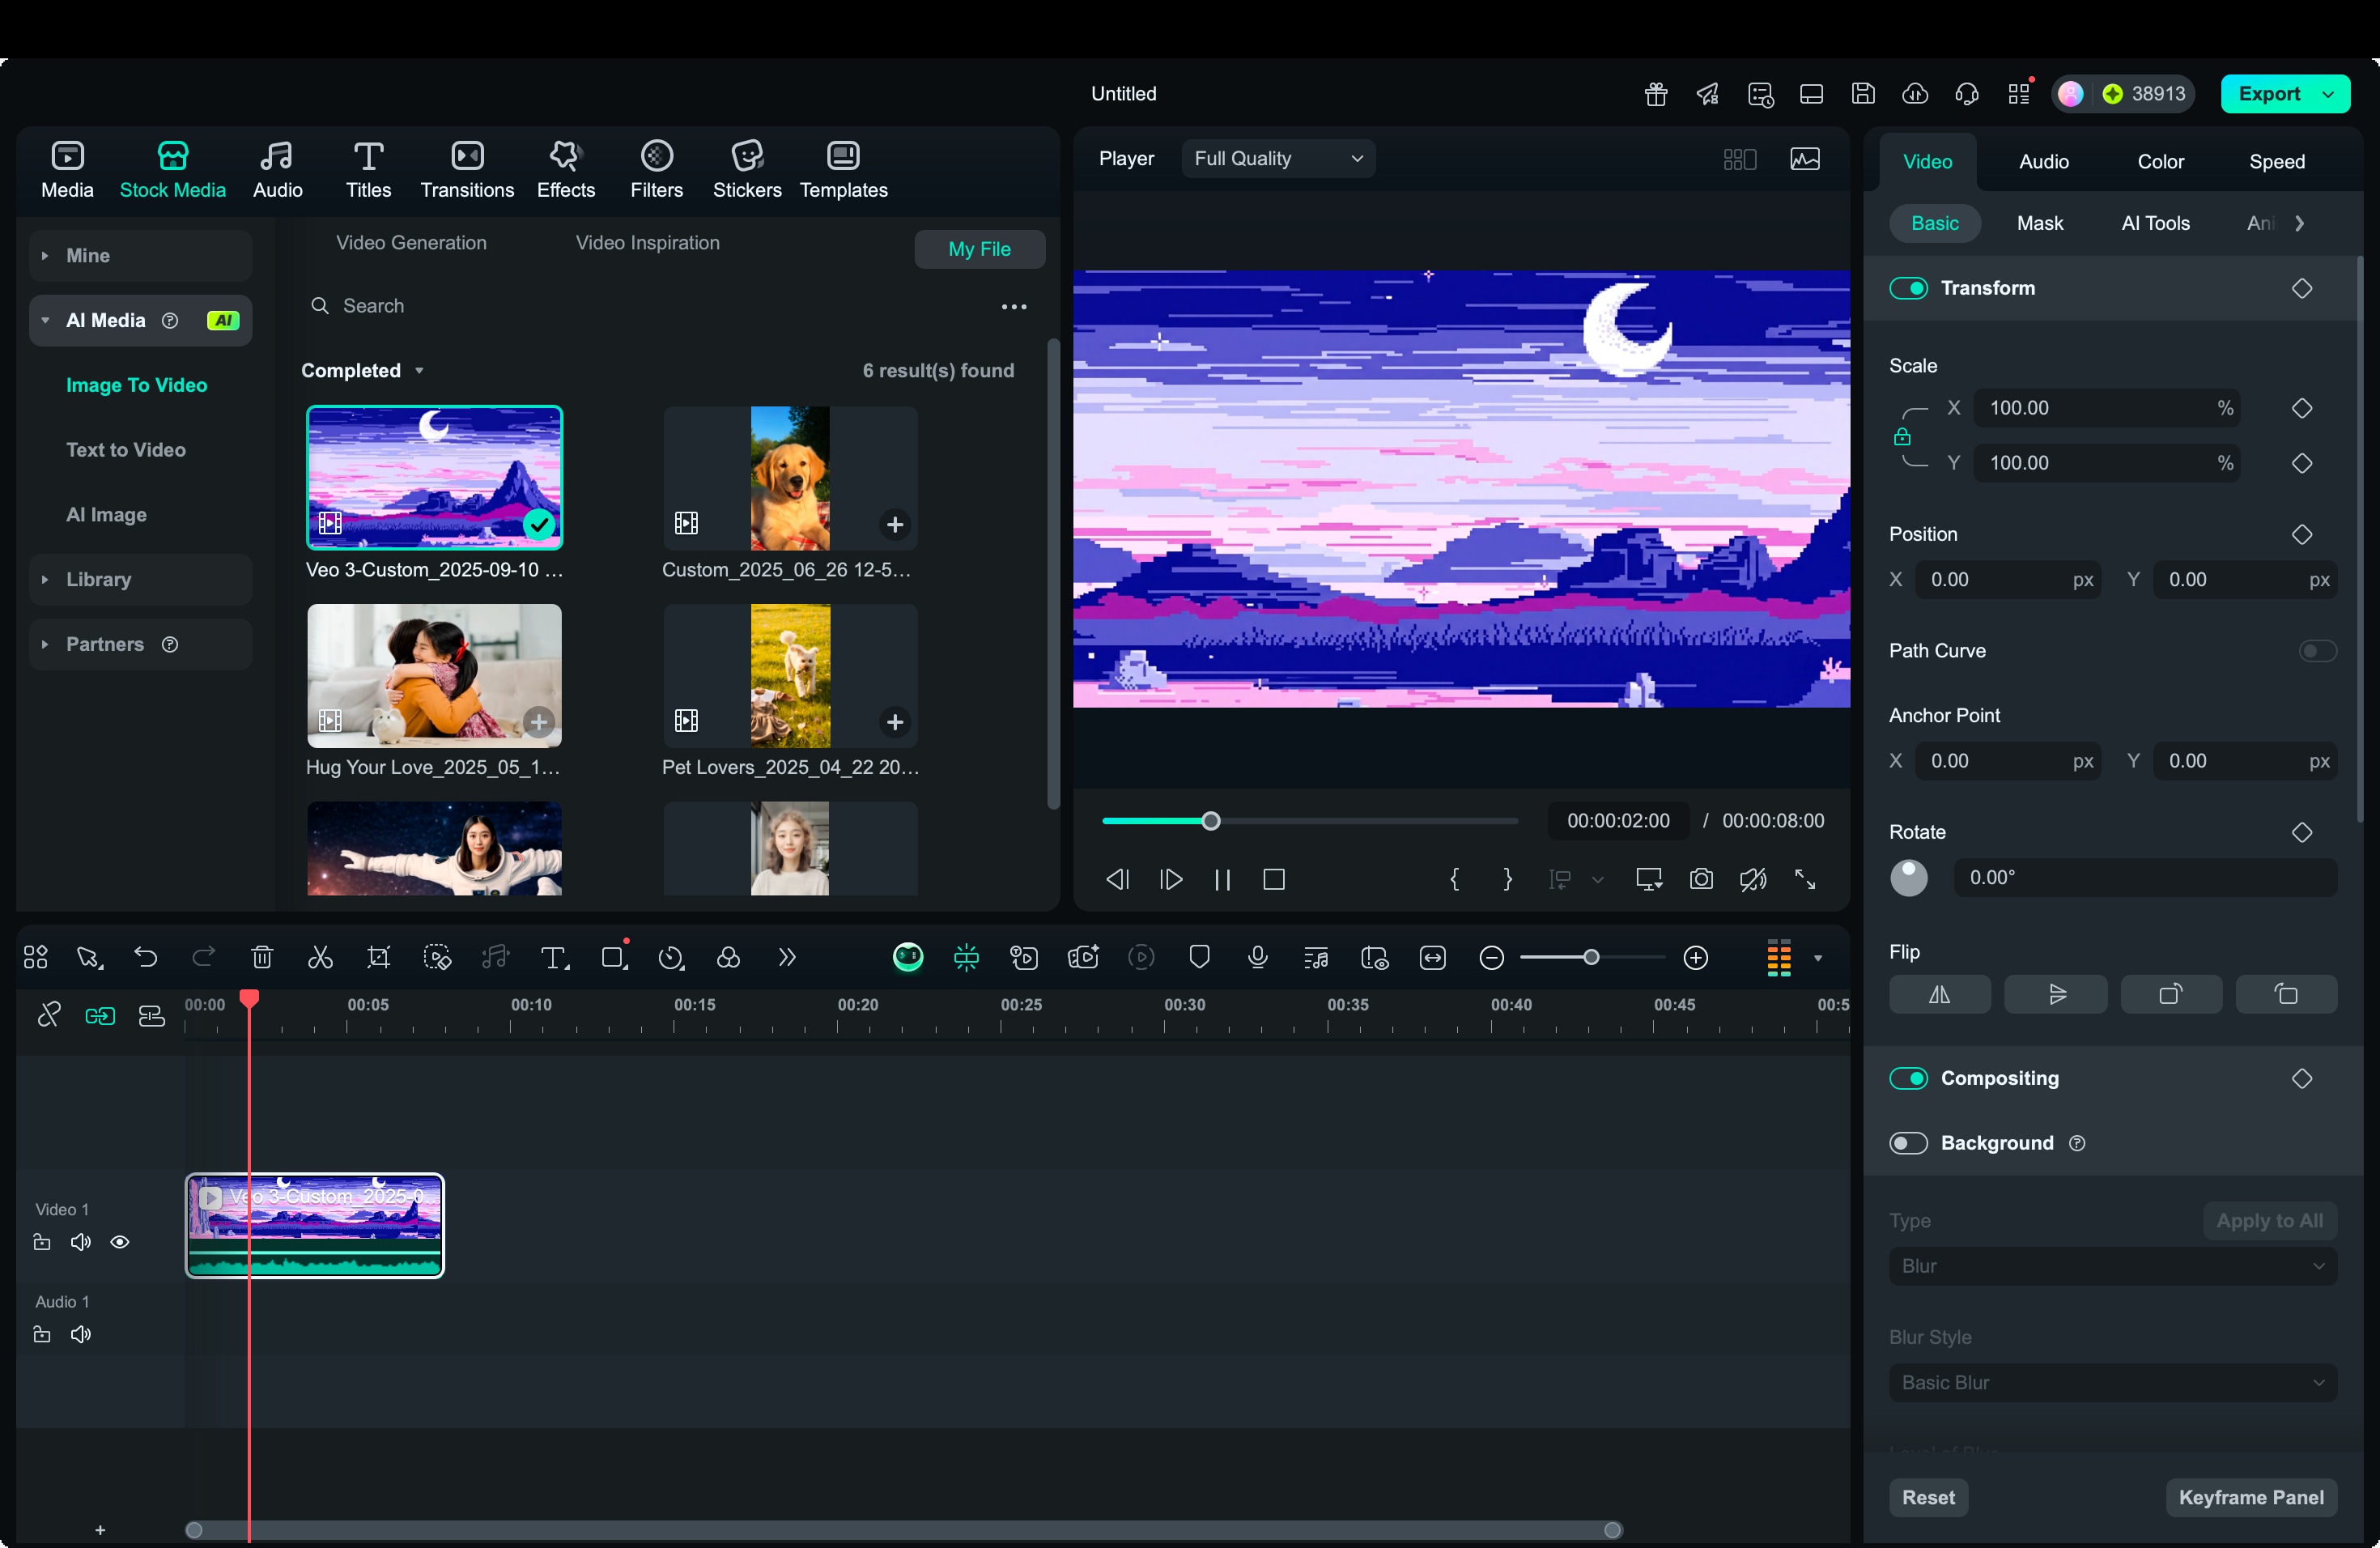
Step 5. Export the Final Clip
Once you're satisfied, hit Export to save the animated pixel art video to your device. You can now use it in projects, share it online, or combine it with other edits inside Filmora.
Bonus. Who Can Benefit from This Workflow
The workflow of generating stable diffusion pixel art and then animating it in Filmora is valuable across many creative fields. It shortens production time, keeps the process simple, and still delivers polished results. Here are some groups that can benefit the most:
- Game developers: Pixel art with Stable Diffusion can speed up prototyping for characters, items, and environments. With Filmora's AI Image-to-Video, these assets can be animated quickly to test how they might look in a real game.
- Content creators: Platforms like TikTok, YouTube Shorts, and Instagram thrive on short, eye-catching visuals. Turning static pixel art into animated clips helps content stand out and match the retro style audiences enjoy.
- Artists: Stable diffusion pixel art prompts allow artists to explore different retro aesthetics, while Filmora gives them a way to present portfolios as dynamic video reels instead of static galleries.
- Educators and hobbyists: Teachers can use pixel art with Stable Diffusion to create unique classroom visuals, then animate them with Filmora to make lessons more engaging. Hobbyists can build fun retro-inspired projects without needing deep design or animation skills.
Conclusion
Pixel art has always carried a sense of nostalgia, and Stable Diffusion makes it easier than ever to create. With the right prompts, you can design characters, items, and scenes that look like they belong in a classic game. But the real magic happens when those static images gain movement.
Filmora's AI tools make that step simple, turning pixel art into short animated clips without extra hassle. Together, these tools give you a complete workflow. You can generate unique pixel art with Stable Diffusion or Filmora to animate it directly in Filmora.


 100% Security Verified | No Subscription Required | No Malware


