
 100% Security Verified | No Subscription Required | No Malware


 ChatGPT
 Perplexity
 Gemini
 Claude
 Grok
Grok
Ever wanted to animate a photo with AI and bring your still images to life? Today's AI animated image tools make it easy to animate pictures with AI, turning portraits into lifelike visuals in just seconds. Whether you're looking to animate an image with AI, create expressions like blinking or smiling, or even use AI to animate photos for content creation, the process is now faster and more accessible than ever.
In this guide, you'll learn how to animate a picture using AI with Wondershare Filmora's powerful tools. We'll walk you through practical tips to ensure your AI-animated still images look smooth, realistic, and consistent. Let's dive in!
In this article
Part 1. What Is AI Photo Animation?
To animate a photo with AI means using artificial intelligence to transform still images into moving visuals. This process involves applying motion effects to facial features, body parts, or background elements, making a static picture appear alive. An AI animated image can simulate a wide range of movements, such as:
- Blinking eyes or smiling mouths
- Head tilts or slight facial movements
- Flowing hair or moving scenery for outdoor shots
Deep learning algorithms power these animations. They are trained to recognize and replicate natural human expressions or environmental motion. You're not just adding effects when you animate a picture with AI. You're giving the photo a sense of motion and emotion. These animations are perfect for:
- Social media content to boost engagement
- Digital storytelling in blogs or personal projects
- Promotional content in digital marketing campaigns
- Bringing historical or vintage photos to life
As AI continues to evolve, photo animation becomes more realistic and accessible. You don't need advanced editing skills—just the right tool and creativity. The following section will show you how to animate an image with AI using Wondershare Filmora's innovative features.
Part 2. How to Animate an Image with AI Using Filmora
Now that you know what AI photo animation is, let's look at how to animate an image with AI using Wondershare Filmora. It offers an AI Idea to Video feature that enables you to add smooth motion with just a few steps. Thus, you can turn your still image into an animated video.
 secure download

The desktop version of Filmora allows you to apply preset animation effects to let the AI generate motion. On Filmora Mobile, you can also access the Transformation mode, which lets you set the start and end keyframes. You can use this tool to define specific movement paths. Let's take a look at both methods.
Method 1. Using Your Phone
On mobile, Filmora’s AI Image to Video feature lets you animate photos with AI by defining how they change from one frame to another. And with the recent addition of Filmora Nano Banana Pro, you can go even further—this advanced AI engine transforms a single image into a cinematic, moving sequence, giving your animations a more dynamic, stylized, and professional look.
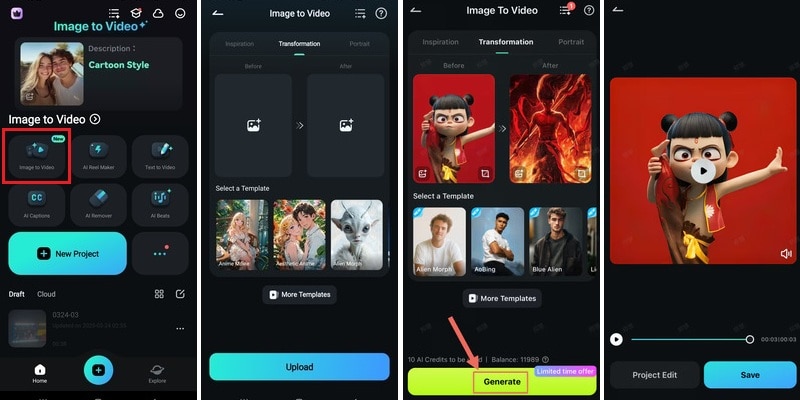
- Open the Filmora Mobile app and tap Image to Video from the main screen.
- Select Transformation mode, then upload your Before and After images. These images will serve as the start and end points of your animation.
- Tap Generate to let the AI process your input and create a video that transitions between the two images.
- Preview the result. If you're satisfied, tap Save to export your animated video.
secure download
If you're animating a single image instead of two, Nano Banana Pro can generate a fully animated clip based on one photo—perfect for users who want fast, high-quality motion without preparing multiple images.
See Your Creativity Come to Life
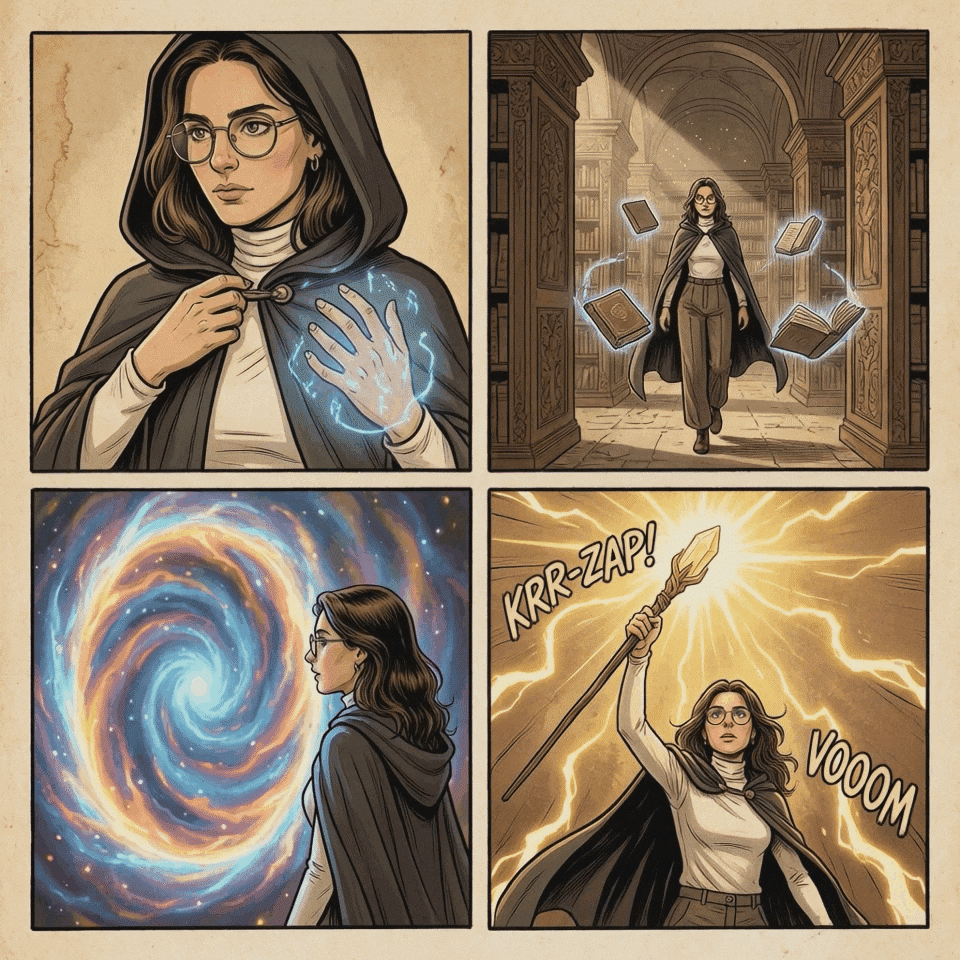
- Moebius Wizard Comic
- Pomeranians Surround

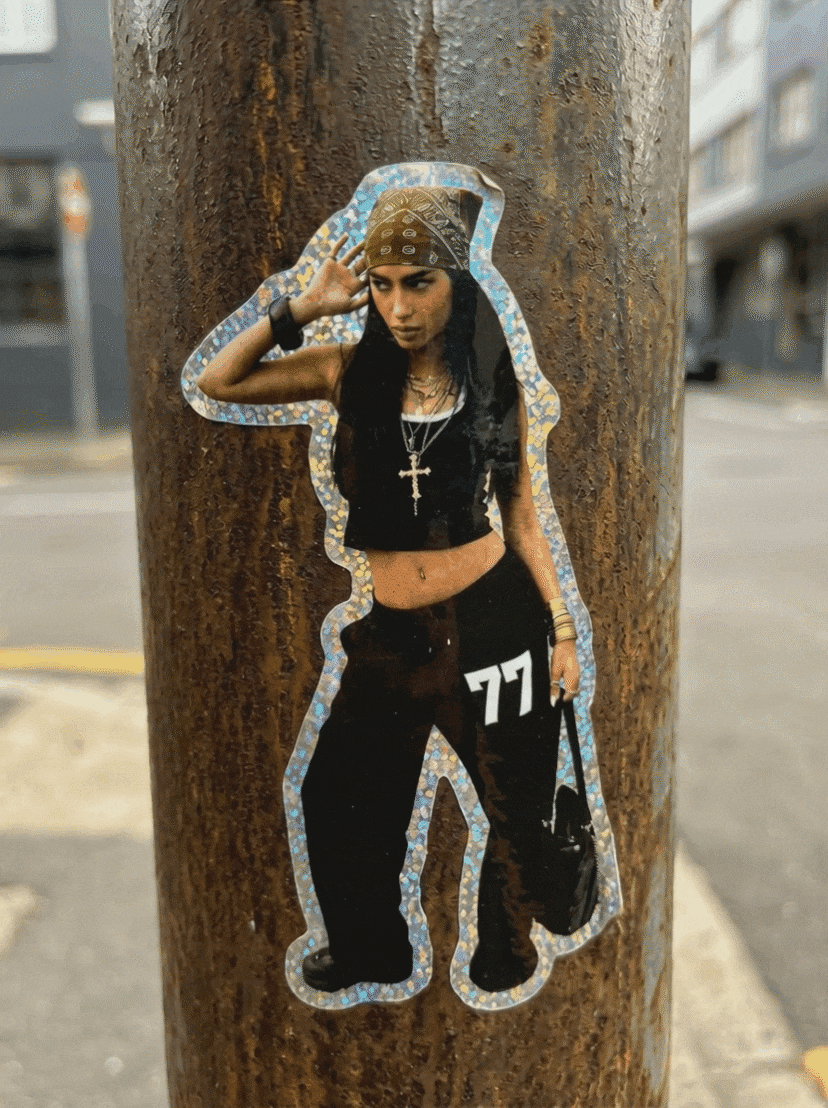
- Holopolo Animated Sticker
Find more templates in Filmora Mobile App
Method 2. Using Your Desktop
Here's how to use AI to animate a picture using the Filmora AI Idea to Video feature on the desktop:
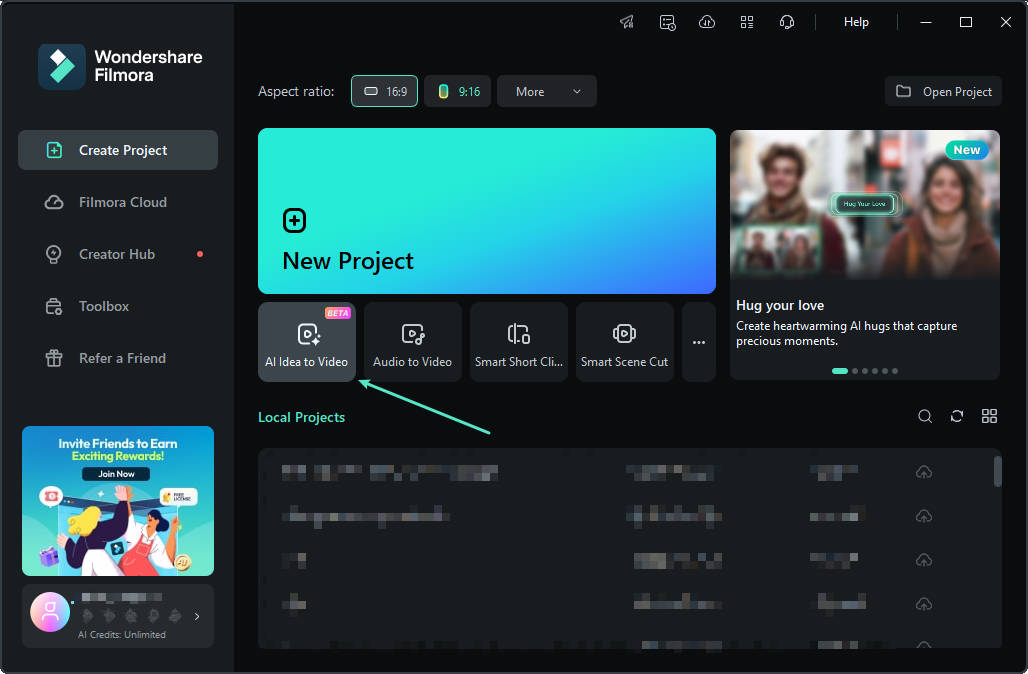
Step1Open "AI Idea to Video"
Find the "AI Idea to Video" feature box on the startup page and click to enter.
secure download
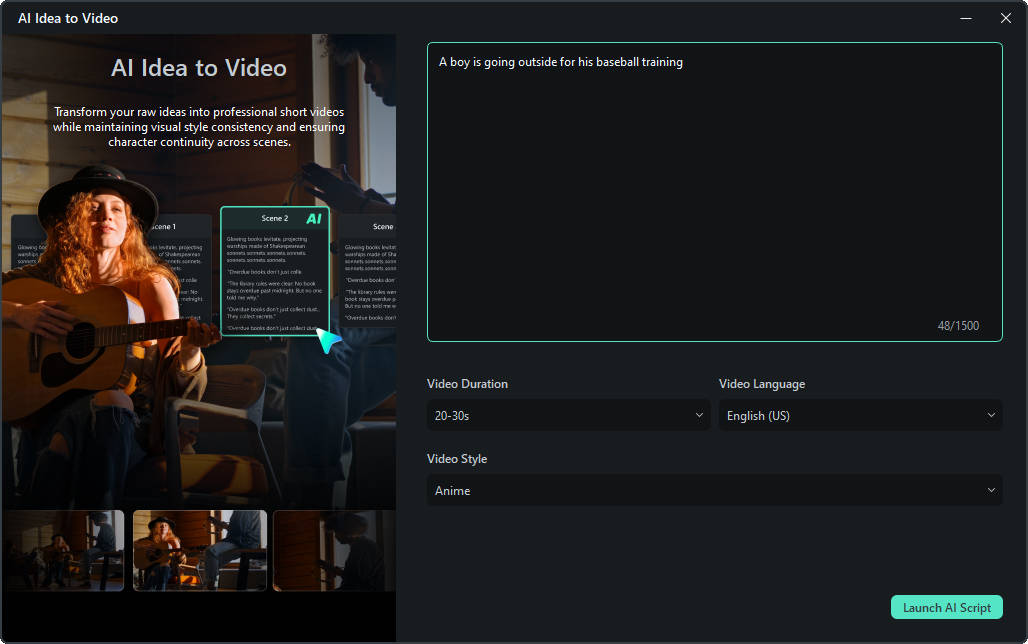
Step 2Edit Your Story Content
Enter the AI Idea to Video feature in Filmora, input your story idea, and customize video length, language, and style. Choose animation durations (Auto, 10–20s, or 20–30s) and a visual style (e.g., Realistic, Anime, Comic) to match your vision. Once ready, click "Launch AI Script" to generate the animation.
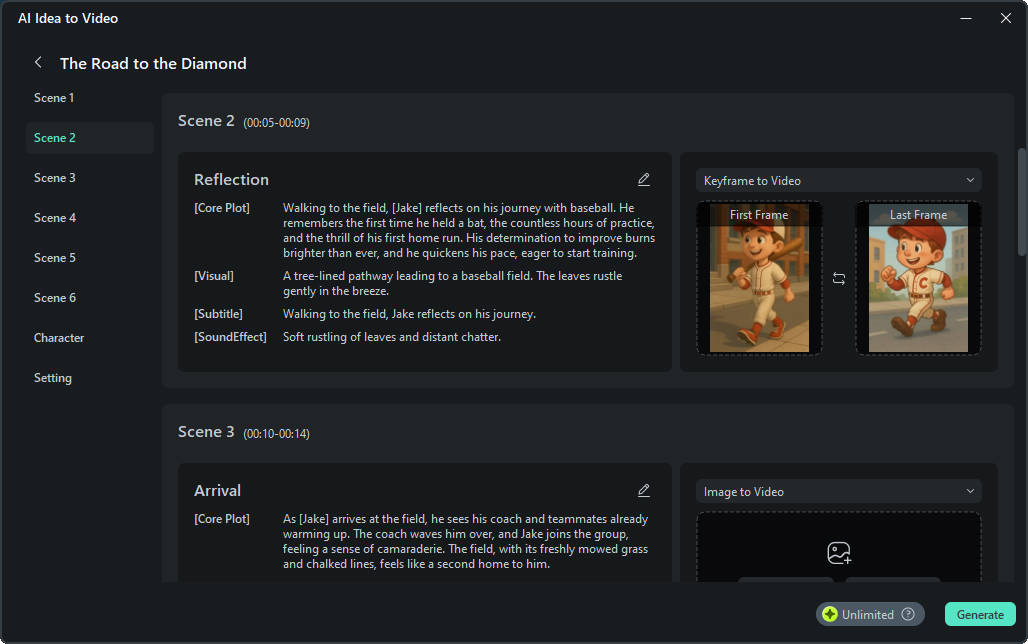
Step3Upload Your Start and End Frames
Prepare two key images—one for the beginning and one for the end of your animation. These could represent different poses, facial expressions, or character positions. Upload them by clicking "Keyframe to Video", and the AI will automatically generate the in-between frames. This ensures smooth transitions and keeps your character visually consistent throughout the animation.
Step4Let AI Generate the Animation In-Between
Filmora's AI engine analyzes your input images and automatically creates smooth transitions between them. This generates a short animation that brings your still images to life with consistent motion and style.
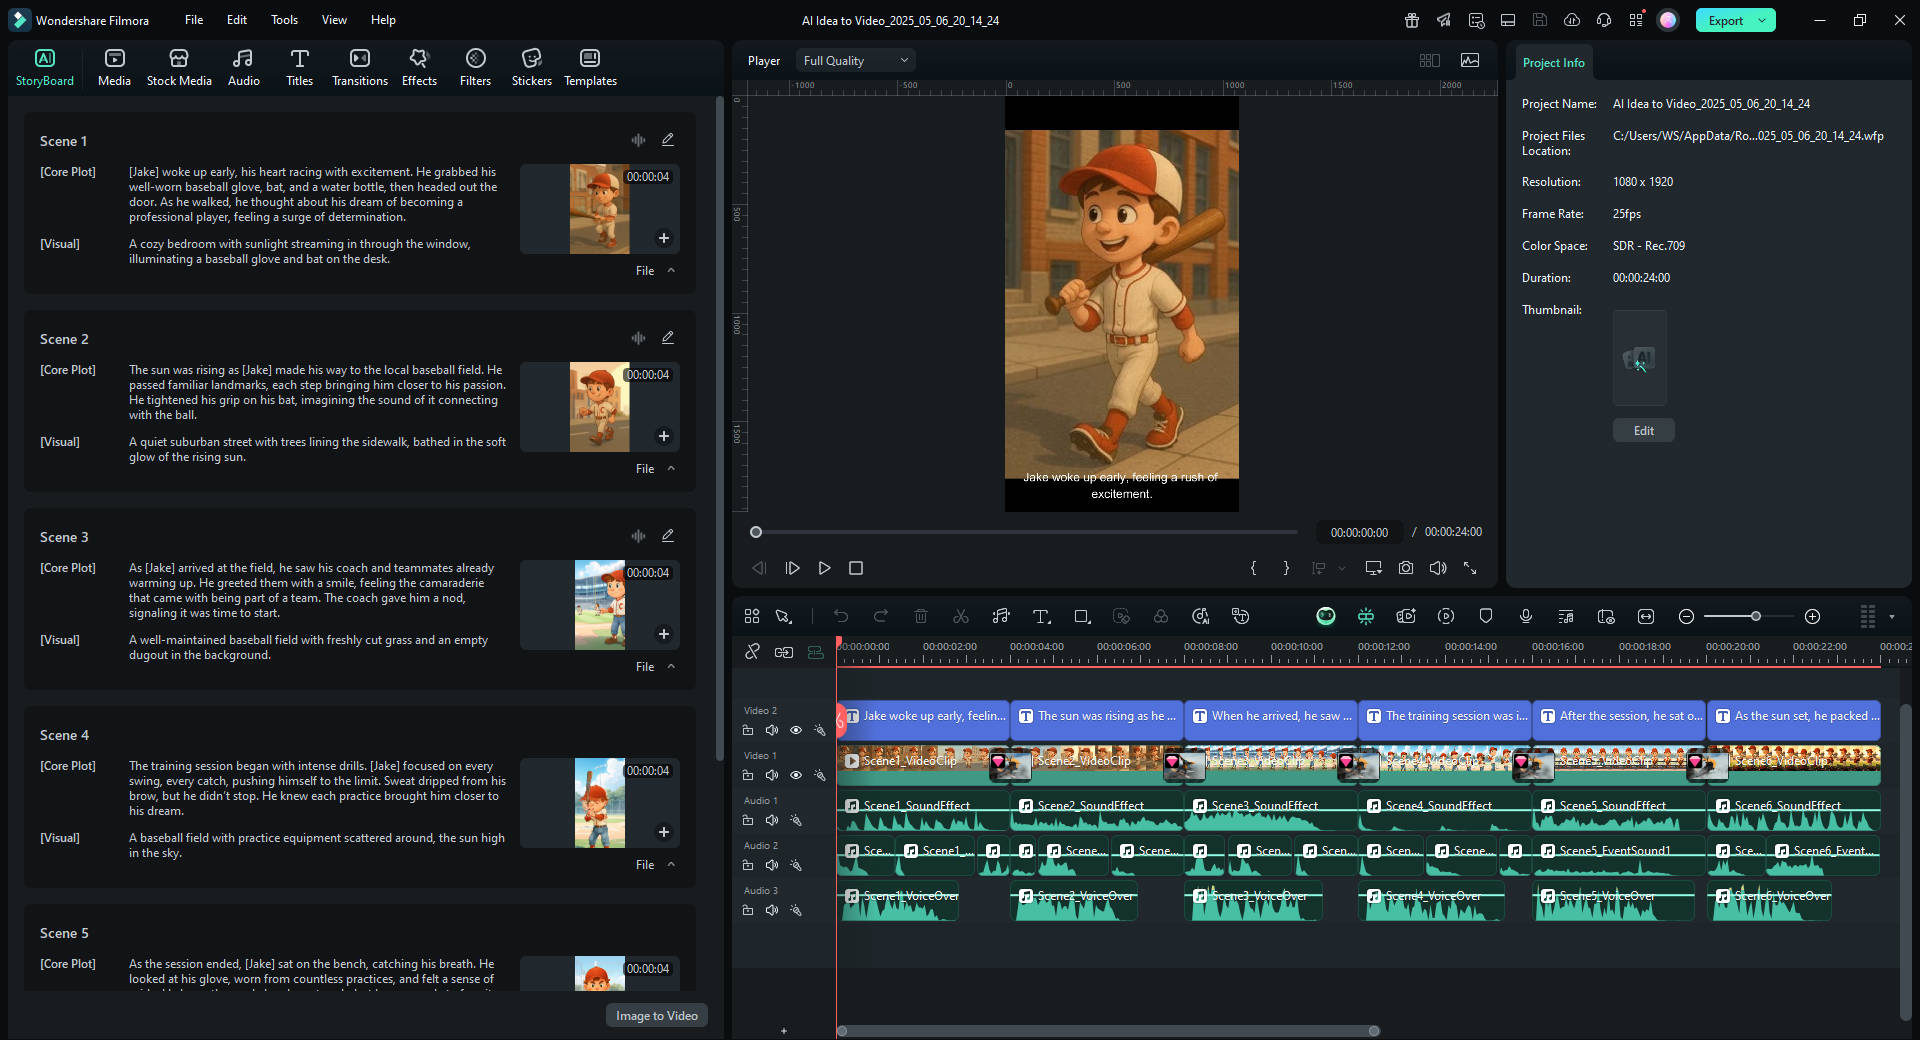
Step5Edit and Enhance Your Animation
Fine-tune your animated output by editing the scenes. You can add sound effects, voice-overs, subtitles, or even insert transitions. Filmora's timeline makes it easy to polish your final video before exporting.
Part 3. Tips to Make Your AI-Animated Image Look Natural
Paying attention to detail is key if you want to use AI to animate still images. Small adjustments can make your animated photo look smoother and more realistic. Here are some helpful tips to elevate your AI-generated animations:
- Use a high-quality, well-lit image: The clearer and sharper your photo, the better the AI can detect facial features and scene details. Avoid blurry or low-resolution images, leading to awkward or unnatural movements.
- Keep your composition simple: Photos with clean backgrounds and fewer visual distractions tend to animate better. Busy or cluttered images may confuse the AI or reduce the visual impact of the final video.
- Choose templates that match your image's mood: Filmora offers various animation templates—romantic, dramatic, eerie, and more. Select a style that complements the tone of your photo for a more natural result.
- Combine music or sound effects for greater emotional impact: Soft background music or ambient sounds can enhance the feeling of movement and help set the tone of your AI animated image.
Conclusion
With the right tools, it's easy to animate a photo with AI and turn your still images into videos. Thanks to Filmora's AI Image to Video feature, even beginners can create animations in just a few steps.
An AI animated image can add motion, emotion, and creativity to your visuals. It's perfect for personal memories, social posts, or creative projects. So if you're ready to animate a picture with AI, try it out using Filmora and bring your photos to life today!
secure download
