- Advanced lens correction with minimal distortion.
- Vast video/audio effects and creative assets.
- Powerful AI for effortless content creation.
- Intuitive, professional yet beginner-friendly.
- Works on Mac, Windows.
Capturing photos and videos that are perfectly true to life is nearly impossible. Cameras often automatically adjust brightness and saturation and may distort images, causing unnatural "bending."
You may notice straight angles appearing curved, backgrounds distorting outward, or wobbly edges. This is known as fisheye distortion, which can significantly affect your footage. Learn how to correct fisheye distortion to keep your shots true to life.
In this article
Fisheye Distortion Explained
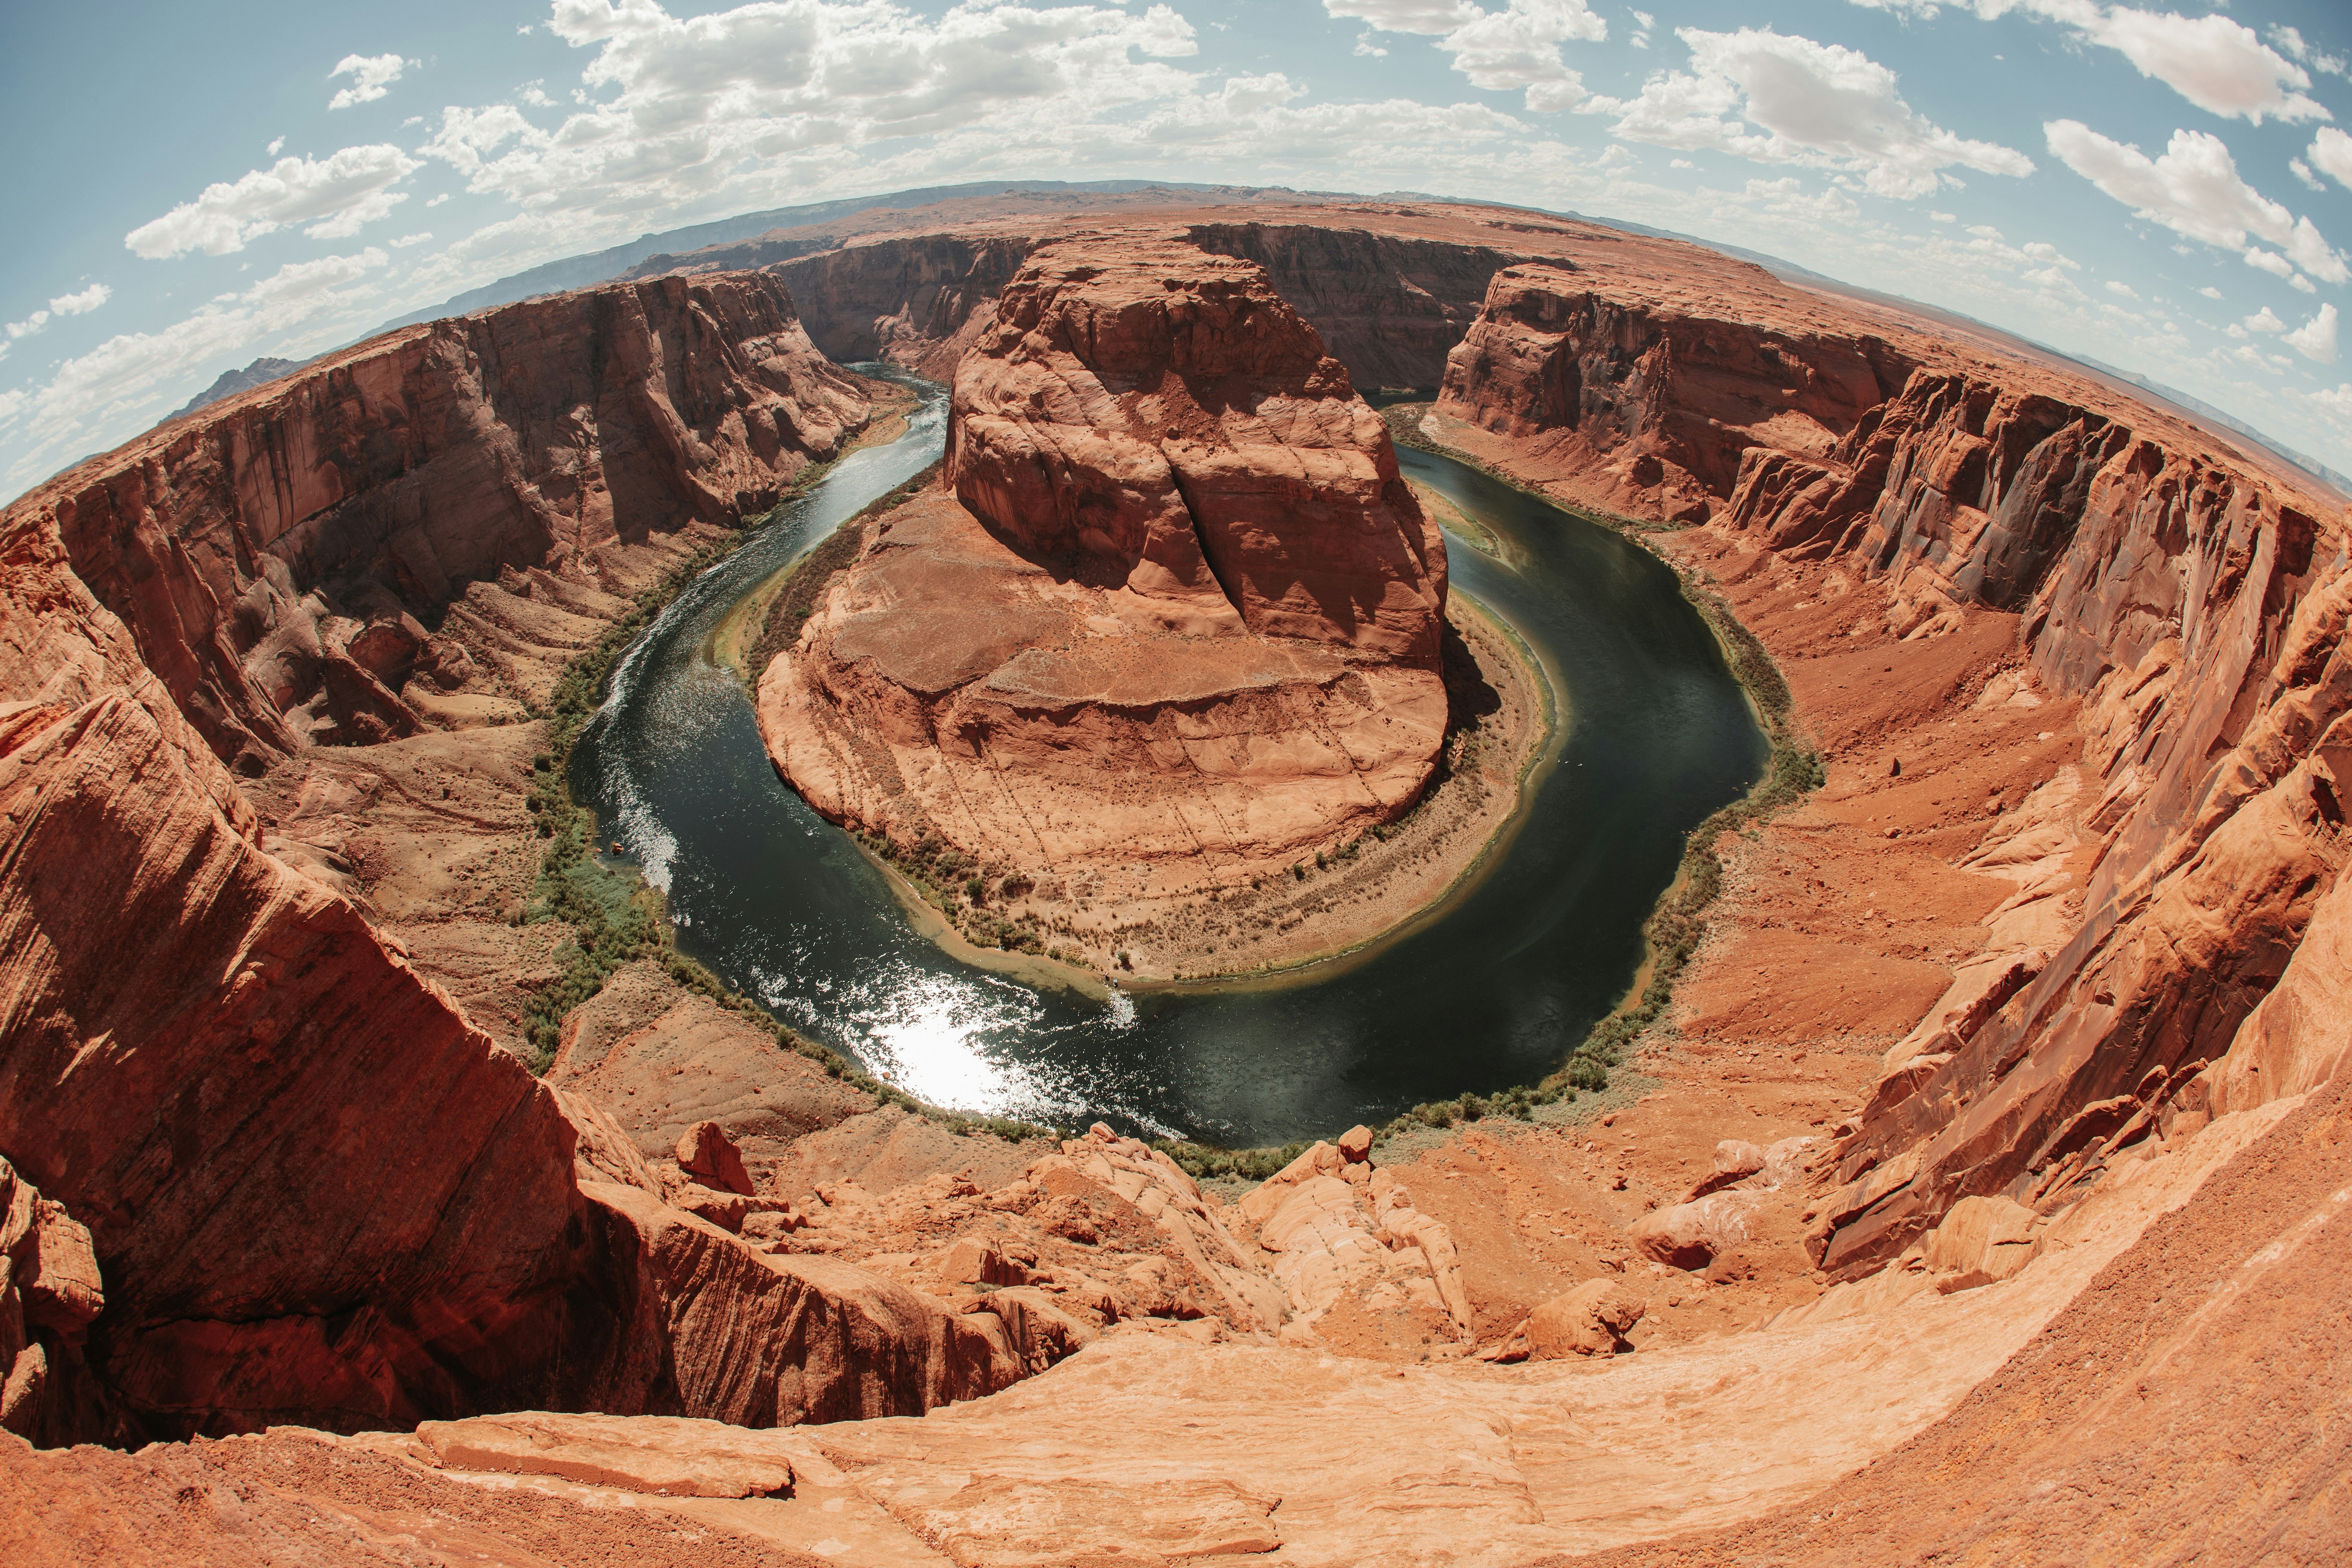
Fisheye distortion is an effect most commonly seen in wide-lens cameras. It causes your footage to have unnaturally bent or stretched edges.
This effect makes the subject at the center of the image appear closer to the viewer while making the elements next to the frame appear to be moving away from the viewer. The farther away from the center the element is, the more out of shape it gets. Straight lines become curved outwards, and the entire effect makes your footage appear spherical.
The extent of the distortion can vary from footage to footage. In some instances, you might notice just slight bending around the edges. In others, the effect is more extreme.
Causes of Fisheyes Distortion
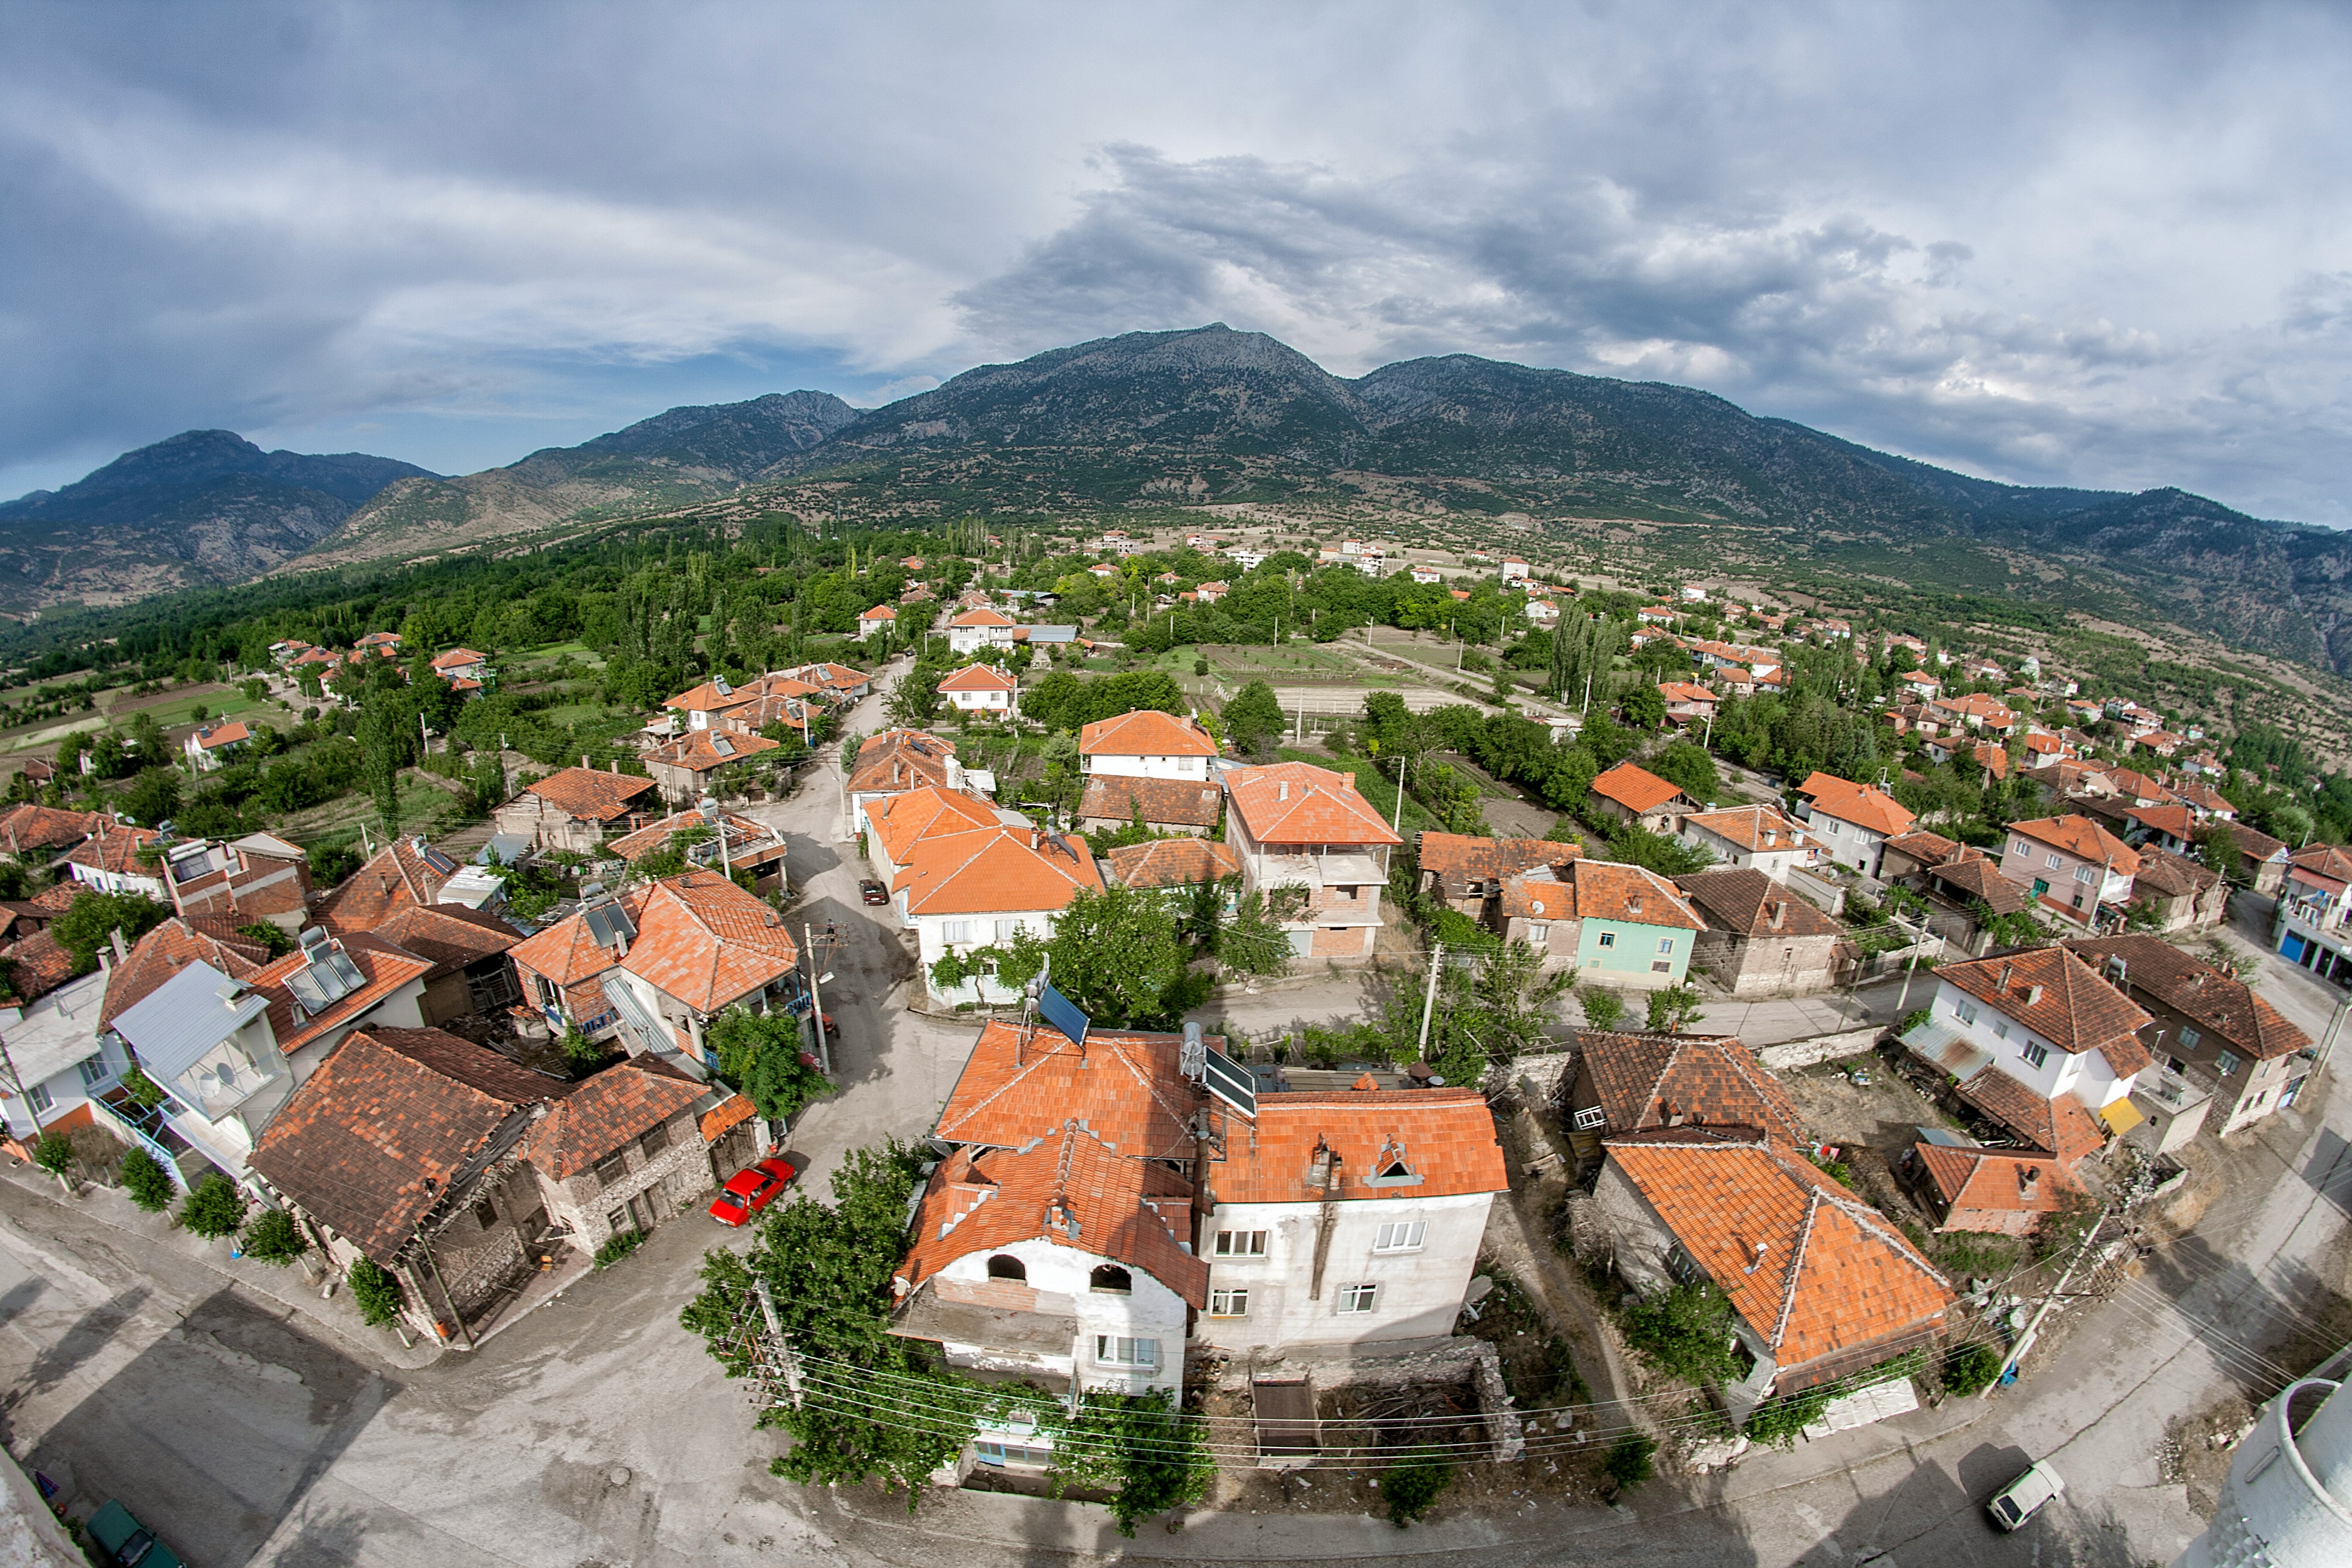
You’ll virtually always have to perform a fisheye lens correction in post-processing because its main cause is your camera’s lens. Though the type of lens you use could minimize or maximize the effect, every lens will create some distortion (especially around the edges of your photos and videos).
The reasoning behind this is simple – a camera lens isn’t just a single piece of glass. Most lenses are made up of a mixture of several convex and concave lenses, among other elements. These multiple lenses are designed to work together to produce a higher-quality image by eliminating glares, minimizing chromatic aberrations, and more.
Still, as the light bounces off of each individual lens, it can create distortion.
Moreover, the fisheye effect is most noticeable with wider lens cameras like the GoPro, as the field of view of the lens is wider than the image sensor of the camera can take. So, the entirety of the image is, in a sense, squeezed into the frame. The problem is similar to zoom lenses, which have short focal lengths.
The Effects of Fisheye Distortion
Photos and videos with the fisheye effect are often considered “specialty” art. Simply put, they aren’t for everyone or all occasions because of the impact they create.
As a general rule, fisheye content tends to be:
- Dynamic – creates the effect of elements closer to the frame appearing to be moving away from the viewer;
- Full of action – creates a sense of motion, making it perfect for action shots;
- Humorous – the fisheye effect on portraits or in wildlife photography could create a humorous effect, simultaneously stretching and shrinking the subject;
- Abstract – the spherical look makes fisheye content appear mysterious and abstract.
Of course, considering that it’s not an effect we’re entirely accustomed to, fisheye in your content can also be very distracting. A romantic wedding photo with fisheye distortion is no longer genuinely romantic.
The viewer would focus solely on the fisheye effect, not on the happy couple. Similarly, a serene video of an old European castle would be compromised by fisheye distortion, distracting from the key elements.
All this is to say that there’s a time and a place for fisheye distortion. It’s a strong effect that can leave a negative impression when used in unsuitable settings.

Camera Techniques for Fisheye Lens Correction
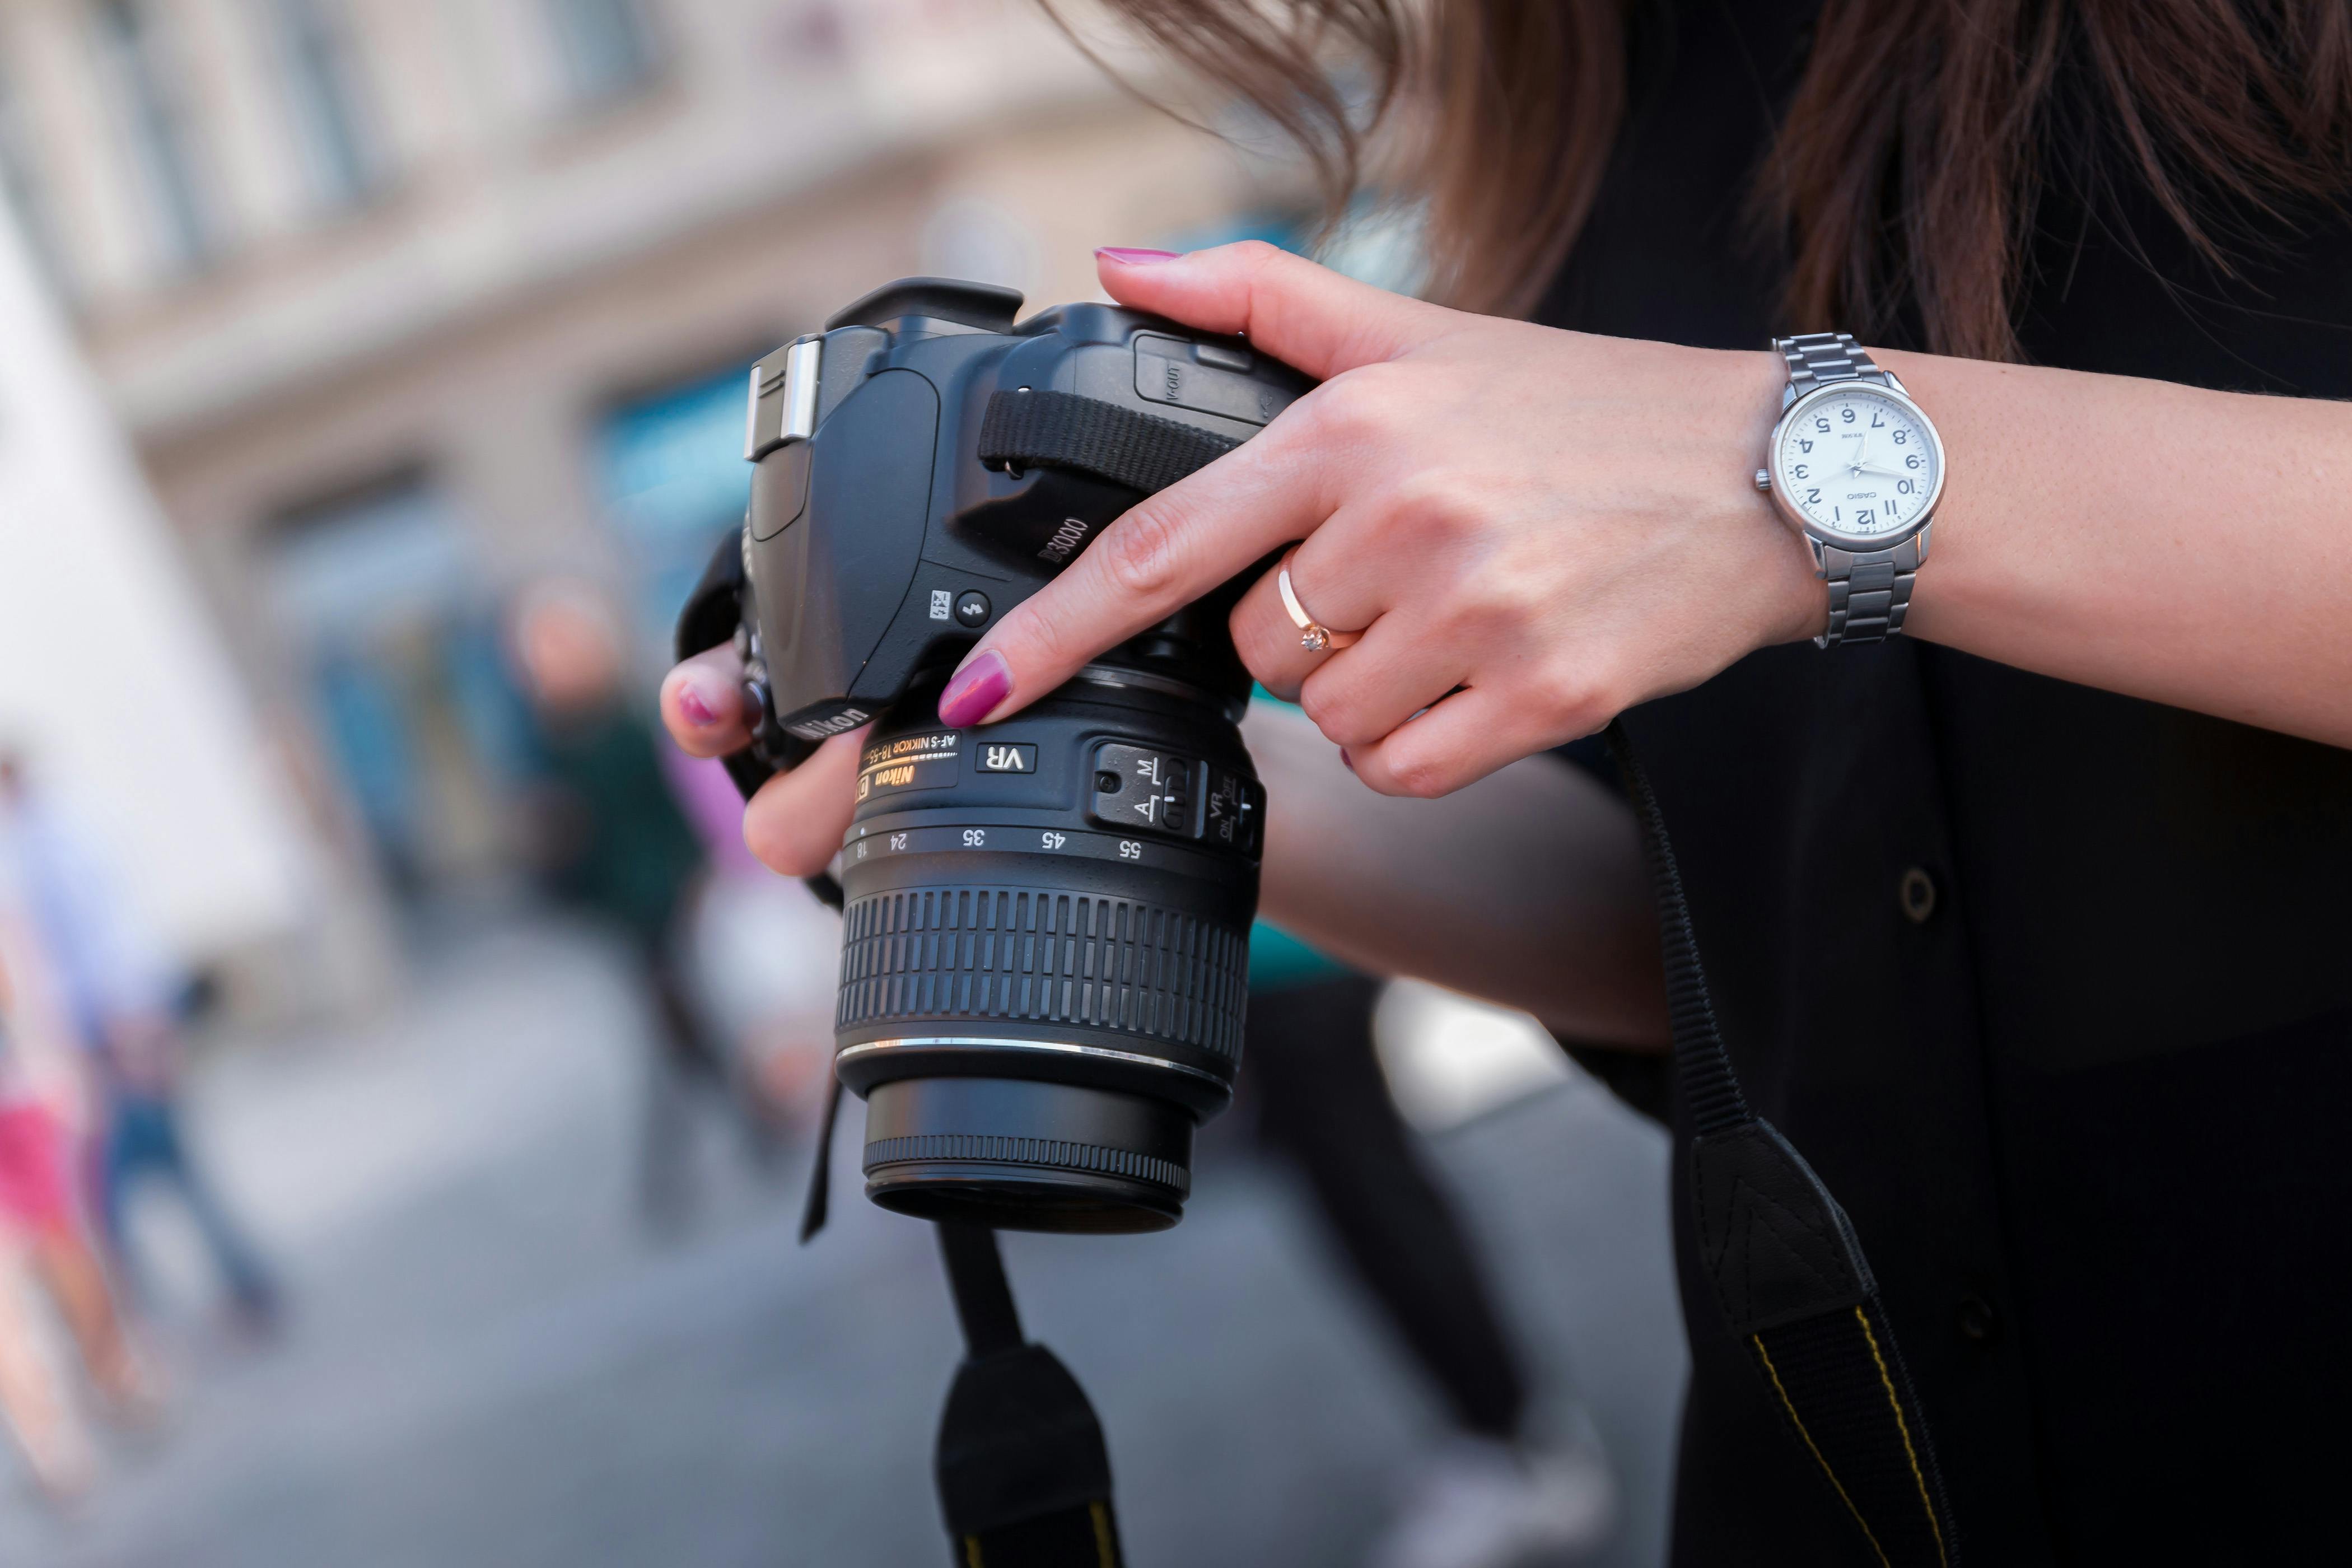
If you don’t want your photos and videos to have distracting effects like fisheye, you’ll need to be careful during your shoots. There are a few camera techniques you should try that can help you minimize the need for fisheye correction in post-processing:
- Avoid wide-angle lenses – wide-angle lenses typically have a more apparent fisheye effect, so they’re best avoided;
- Reduce your field of view – by reducing the FOV, you’re essentially cropping the image and minimizing the fisheye effect that’s most obvious around the edges of the frame;
- Shoot panoramic images/videos – use the panoramic mode to widen your field of view with a longer focal length lens;
- Keep the main subject in the center – fisheye distortion is most evident around the edges, so keeping your main subject in the center can minimize its impact.
If you’re using a designated fisheye lens, you can’t avoid the effect while shooting. You can, however, correct fisheye distortion in Photoshop or a video editing program.
Video/Photo Editing Techniques for Fisheye Lens Correction
Removing fisheye distortion is relatively easy in post-production but requires an advanced editor. Basic editors with little else besides cropping and trimming functionalities won’t cut it.
Wondershare Filmora offers advanced features while remaining user-friendly.
With sophisticated AI capabilities, over 15 million creative video and audio assets, and no less than a hundred advanced editing features, it has everything you need to remove imperfections from your content with ease.
The best part is that you can do anything you want to achieve with Filmora in just a few steps.
Here’s how to remove fisheye distortion:
Step 1: Launch Filmora and click the Login button in the main menu to sign in;
Step 2: Go to New Project > File > Import Media and upload the photo/video with fisheye distortion;
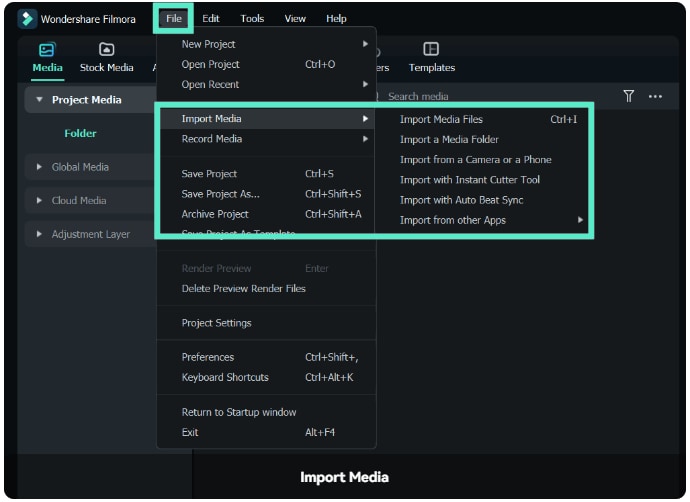
Step 3: Drag the content to the timeline and select it in the timeline;
Step 4: Go to Video > AI Tools > Lens Correction;
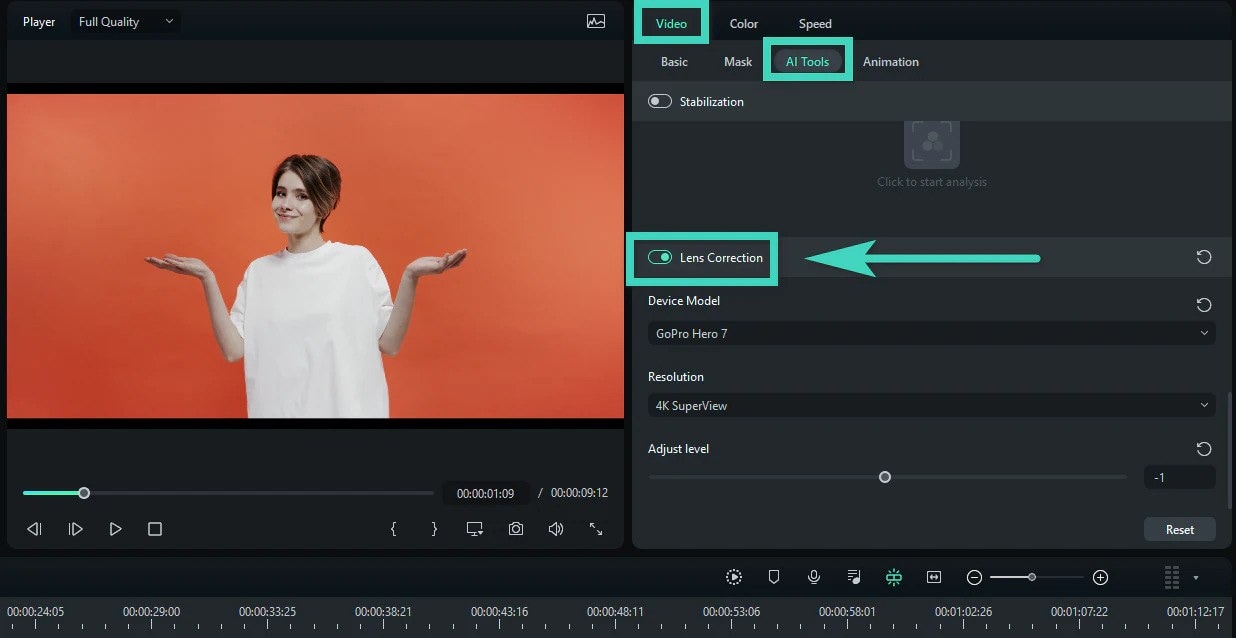
Step 5: Select your camera model from the drop-down menu under Device Model;
Step 6: From the Resolution drop-down menu, select the resolution you used when making the footage;
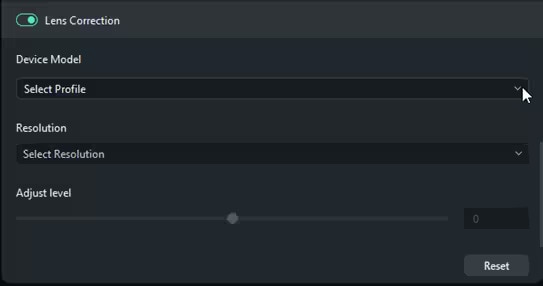
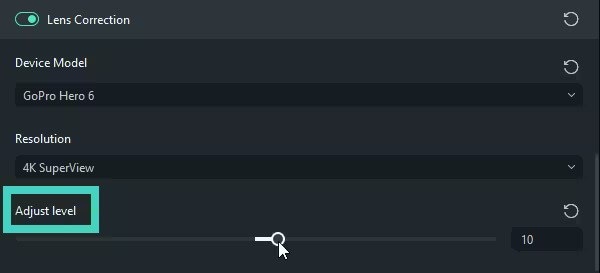
Step 7: Use the slider under Adjust Level to counteract the fisheye effect;
Step 8: Preview your footage and make any changes if necessary.
If needed, you can continue editing your photo/video in Filmora to color-correct, denoise, or enhance it in any way. When you’re satisfied, simply click the Export button and save it locally or share it directly to a platform of your choice.
How to Use Fisheye Lenses Creatively
Although you’ll likely have to perform fisheye image/video correction on much of your content, there are some instances where the fisheye effect can be beneficial.
Here are some examples where fisheye distortion can add to your content:
- Skateboarding videos – skateboarding is the sport that popularized the fisheye effect. It’s perfect for emphasizing unique tricks;
- Underwater videos – considering the name, it should be no surprise that the fisheye effect is ideal for underwater videos. It can add more depth and mystery to your footage;
- Concert footage – the fisheye effect can help you capture a wider area and add more action and movement to music concert footage;
- Landscape images – capturing a vast landscape is only possible with the fisheye effect. It makes your content more mesmerizing;
- Night sky footage – the Milky Way becomes even more fascinating when you have a wider field of view and can capture more of the night sky.
These are just some instances where you don’t want to do fisheye correction in Photoshop.
If you already have footage like in the examples listed above but tried to minimize the fisheye effect while you were shooting, you can bring it back with Filmora.
Just like it can remove the effect, Filmora can also add fisheye. You must follow some of the steps similar to the above – launch Filmora, sign in to your account, create a new project, and upload your media. Then, add the effect like this:
Step 1: Drag your video into the timeline;
Step 2: Go to Effects in the upper left corner, and you’ll see effect categories to the left and effect previews in the panel next to it;
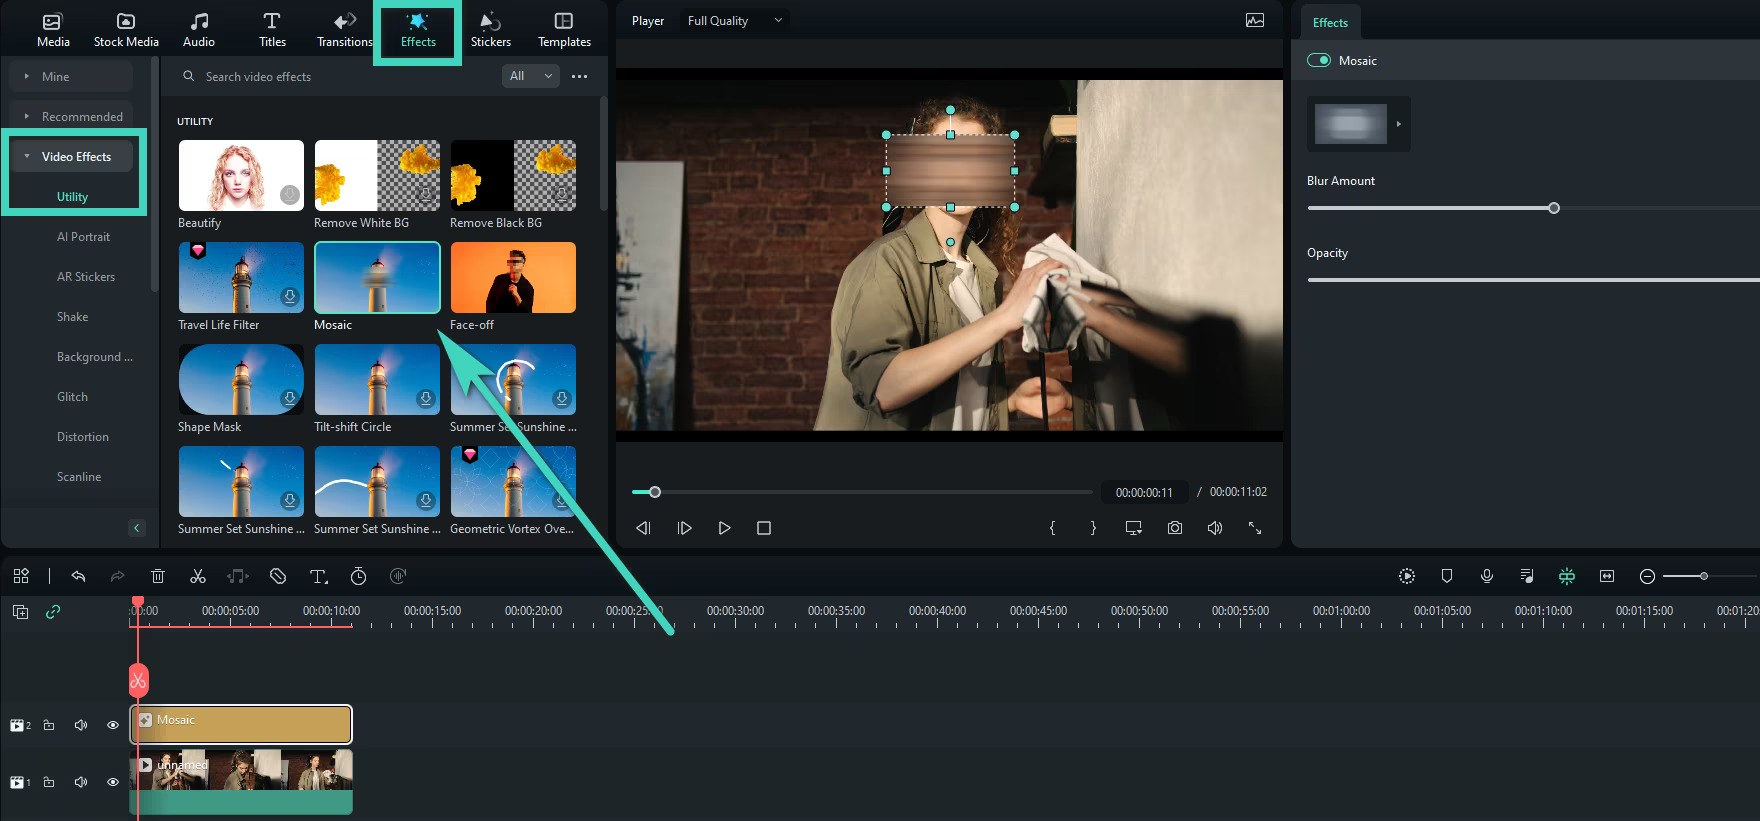
Step 3: Type Fisheye in the search bar and go through all the available options;
Step 4: Drag the fisheye effect you like to the timeline and adjust it as needed.
From there, you can save the video with the fisheye effect or share it directly to platforms like YouTube by clicking on the Export button.
How to Remove Fisheye Effect from GoPro Photo or Video
Mistakes When Performing Fisheye Lens Correction
When performing fisheye lens correction, there are two common mistakes you can make:
- Not correcting the footage enough
- Overcorrecting the footage
If you don’t correct the footage enough and remove just most of it, it will look poorly edited. The viewers will notice some awkward distortion and won’t be sure why. Did you try to hide something that was visible to the camera? Did you poorly remove an object? Are you simply not good at taking high-quality shots?
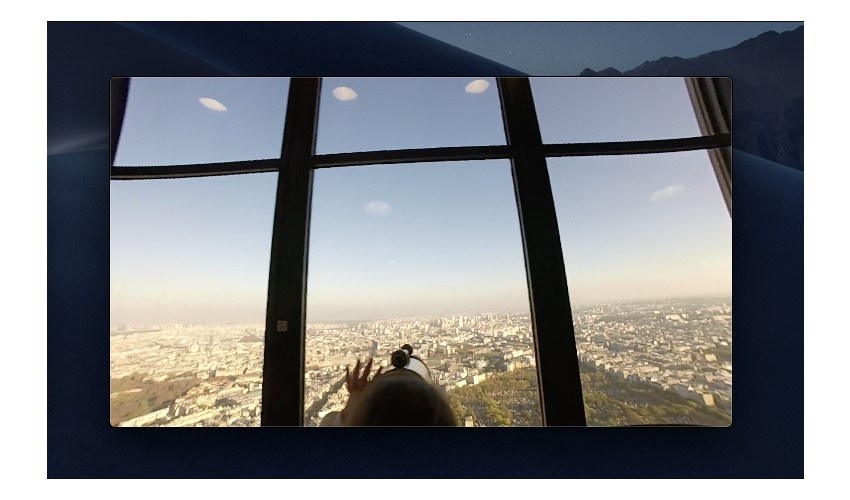
The other end of the spectrum is overcorrecting the footage and turning it from a fisheye to a pincushion distortion. Pincushion distortion is when your photo or video looks like it was pinched. Straight lines at the edges of your content appear to go inwards to the center. The edges appear closer to the viewer, while the center of the footage seems further away. It’s a highly distracting effect that can make your content look poorly made.

Conclusion
There’s a time and a place for the fisheye effect. Concert footage can look amazing with it, and so can underwater photos or skateboarding videos. However, it’s highly distracting when you have it in everyday photography and videography.
Fortunately, you can always remove fisheye distortion with solutions like Wondershare Filmora. In a few simple steps, remove fisheye (or add it if you’d like) and ensure that your content looks flawless.


