
 100% Security Verified | No Subscription Required | No Malware


 ChatGPT
 Perplexity
 Gemini
 Claude
 Grok
Grok
For photographers, designers, and content creators, every photo represents time, skill, and creativity. That's why protecting your visual assets is essential. By creating and adding a watermark online, you not only claim ownership of your images but also build stronger brand recognition whenever your work is shared.
If you are curious about how to create and add watermarks to photos online for free, keep reading, and we'll guide you through the process.
In this article
Step-by-Step: Adding Watermarks to Photos Online for Free Online
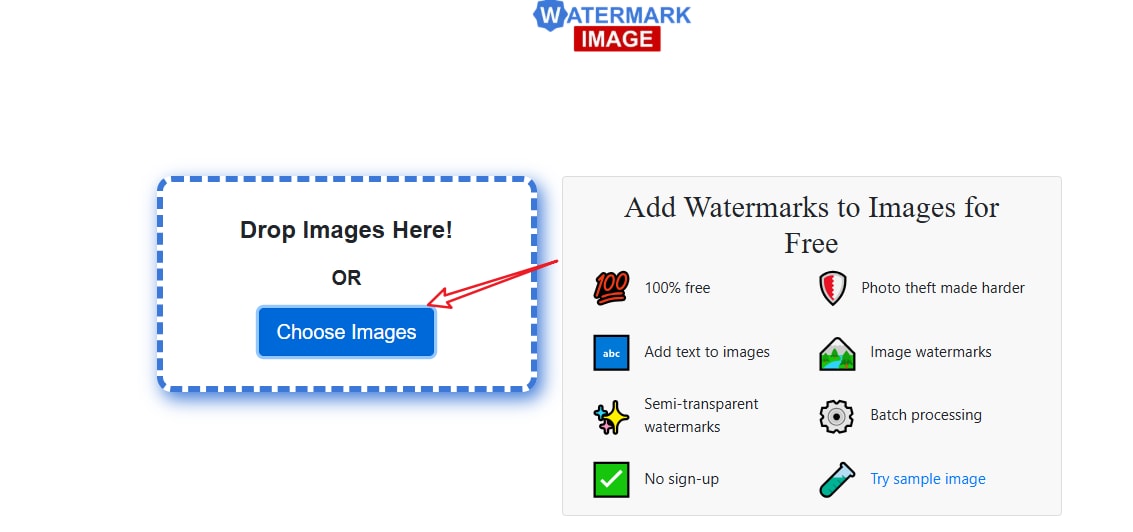
One of the simplest online tools for watermarking photos is watermark image. It's free, browser-based, and it's so easy that anyone can use it.
- Go to the website and tap on Choose Images to upload a picture.
- After uploading a picture, you can choose to watermark the photo by adding a text watermark or an image.
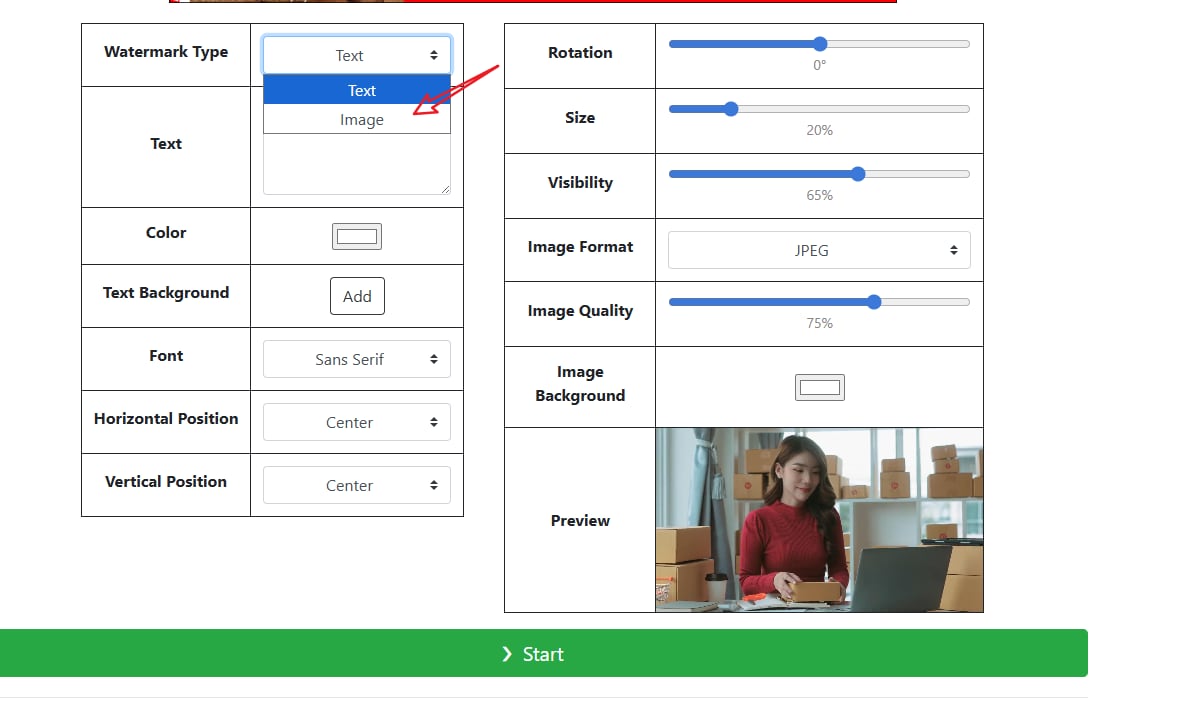
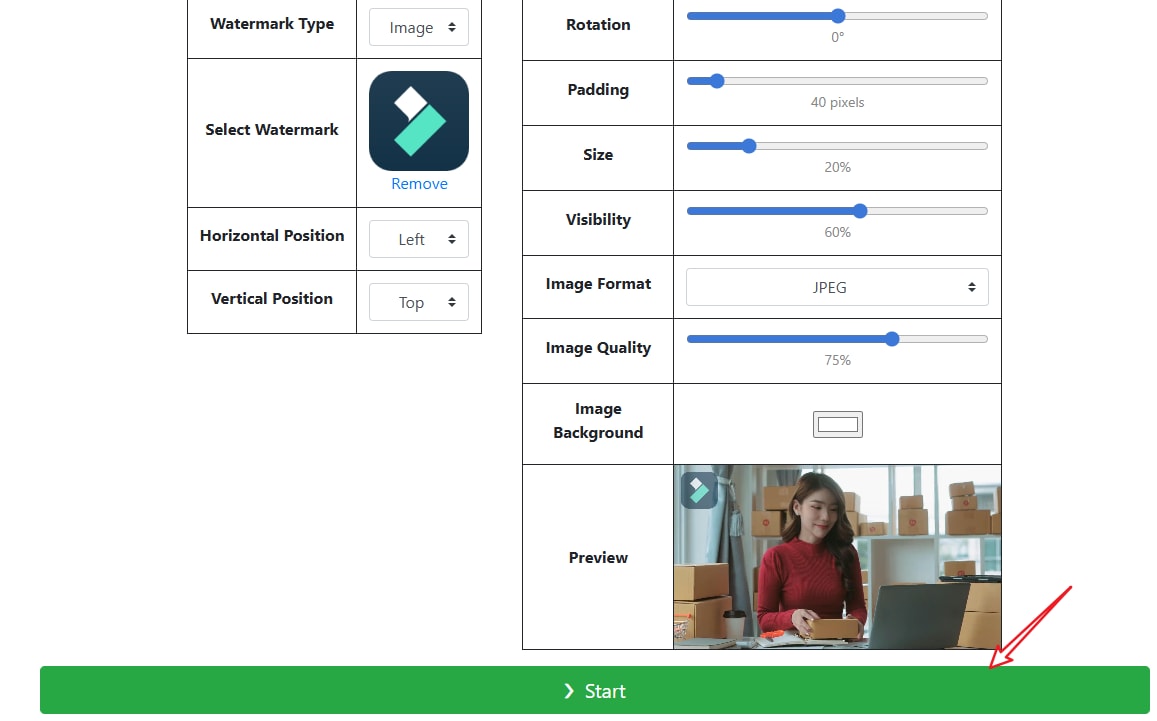
- Here, we choose an image watermark, then upload your watermark, and adjust the position, rotation, size, visibility, image format, quality, and background according to your preference.

- Then you can tap on Start to download the image after adding a watermark online for free.
It is free to watermark a photo online with the tool, but there are ads around the website, and you cannot place the watermark anywhere directly; but need to adjust the locations carefully.
Now that we have learned how to watermark photos online for free, if you want to learn how to watermark a video online without downloading the app or software, you should look for another method.
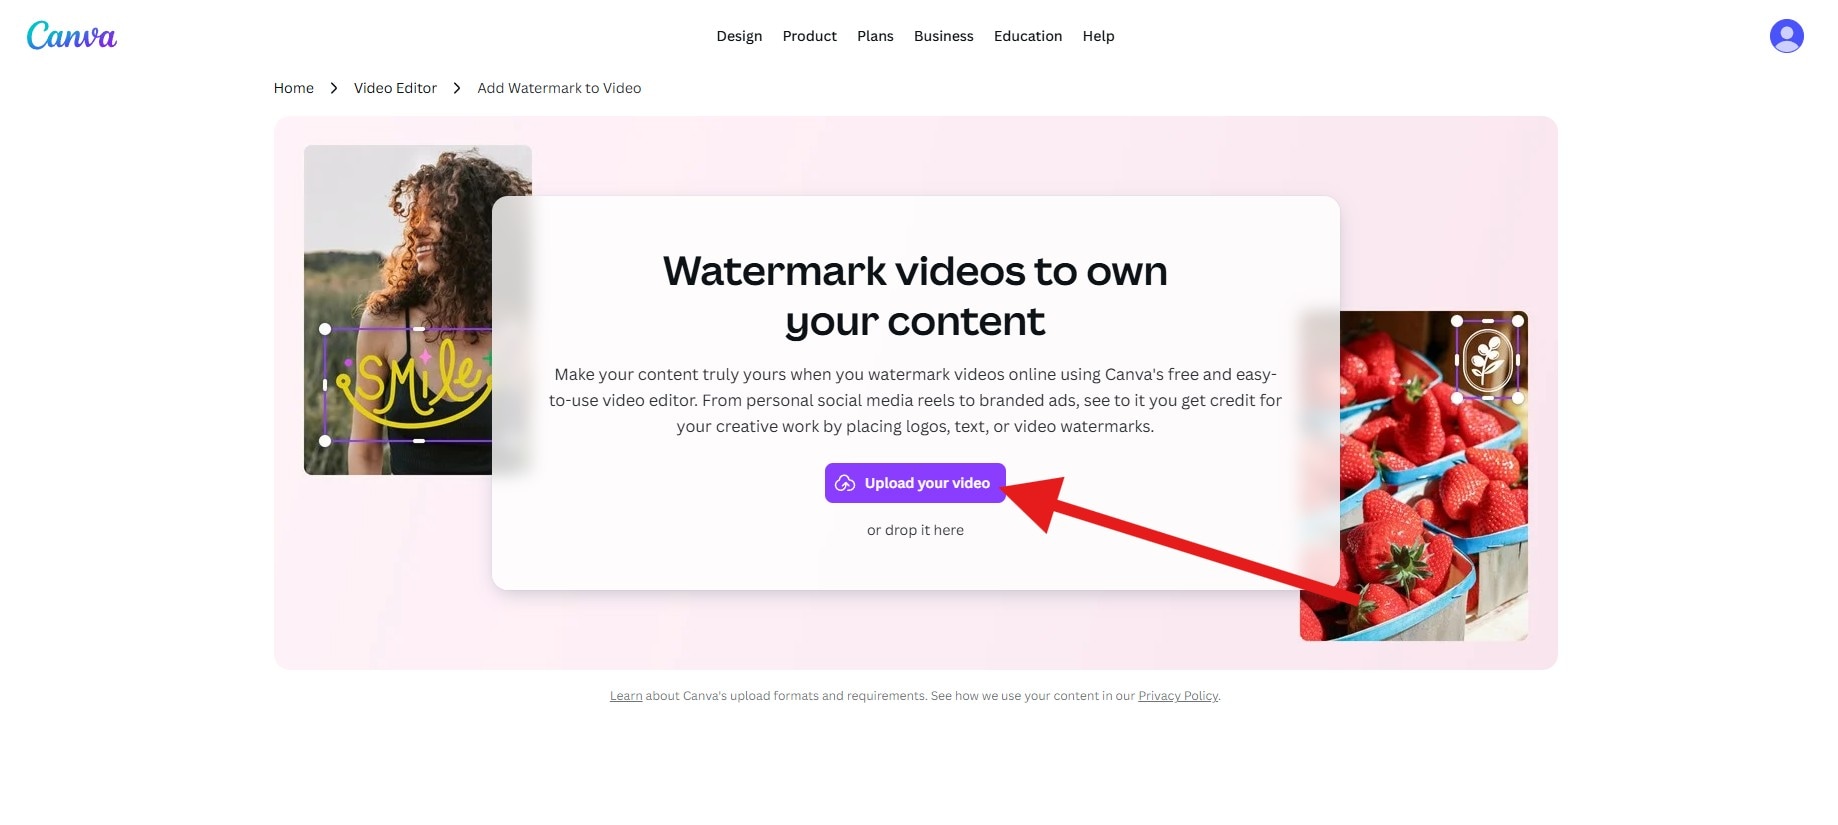
Canva is one of the most popular free tools. It's cloud-based, supports drag-and-drop editing, and offers watermarking features through text and image overlays. Here's what you need to do.
Step-by-Step: Adding Watermarks to Videos for Free Online
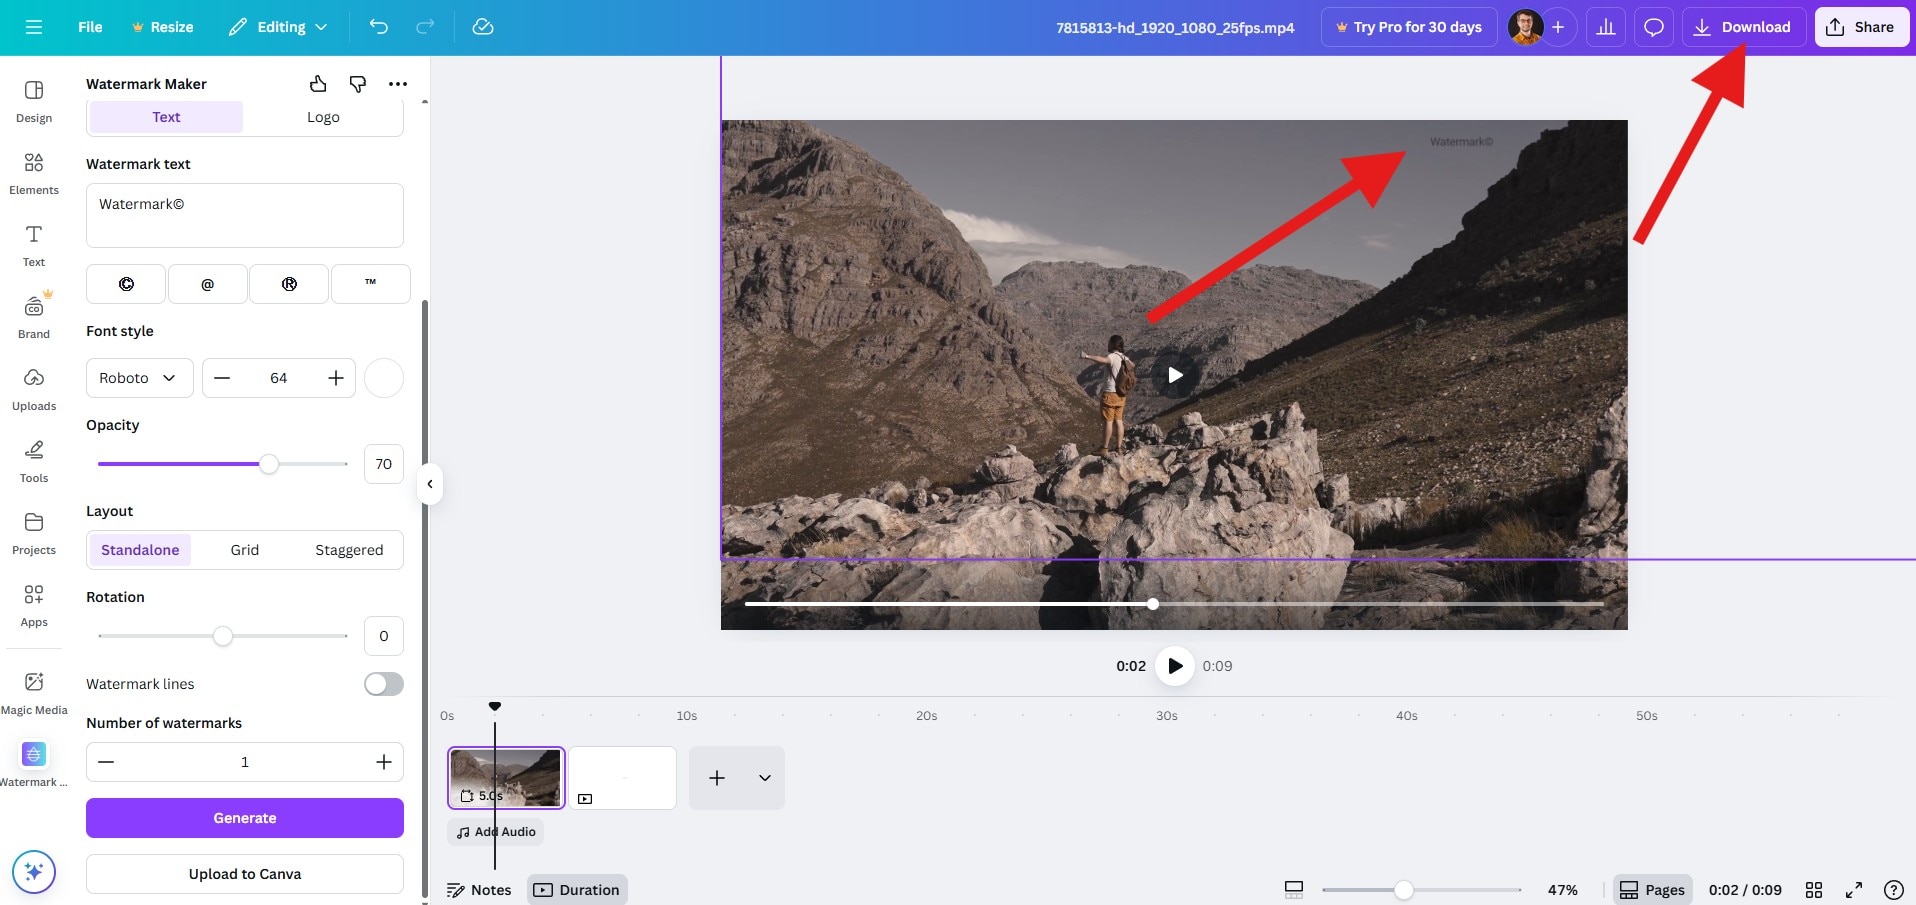
- Go to Canva's landing page for video watermarking and click on Upload your video.
- Find the Apps section and search for the Watermark Maker. Click on it.
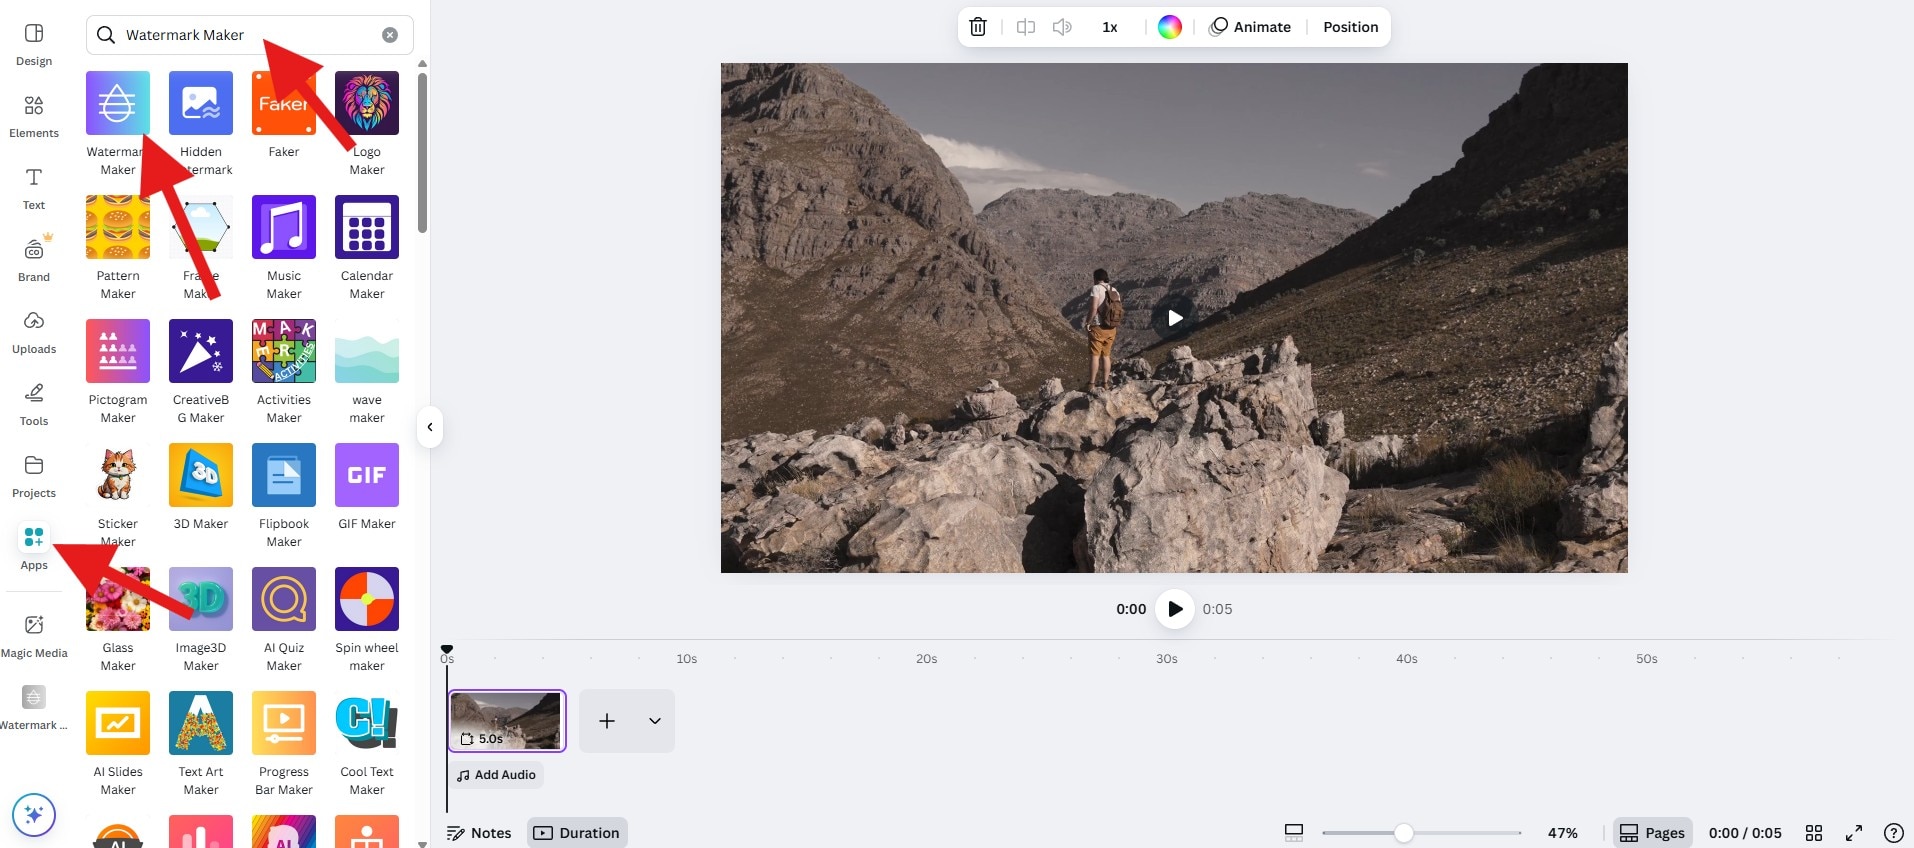
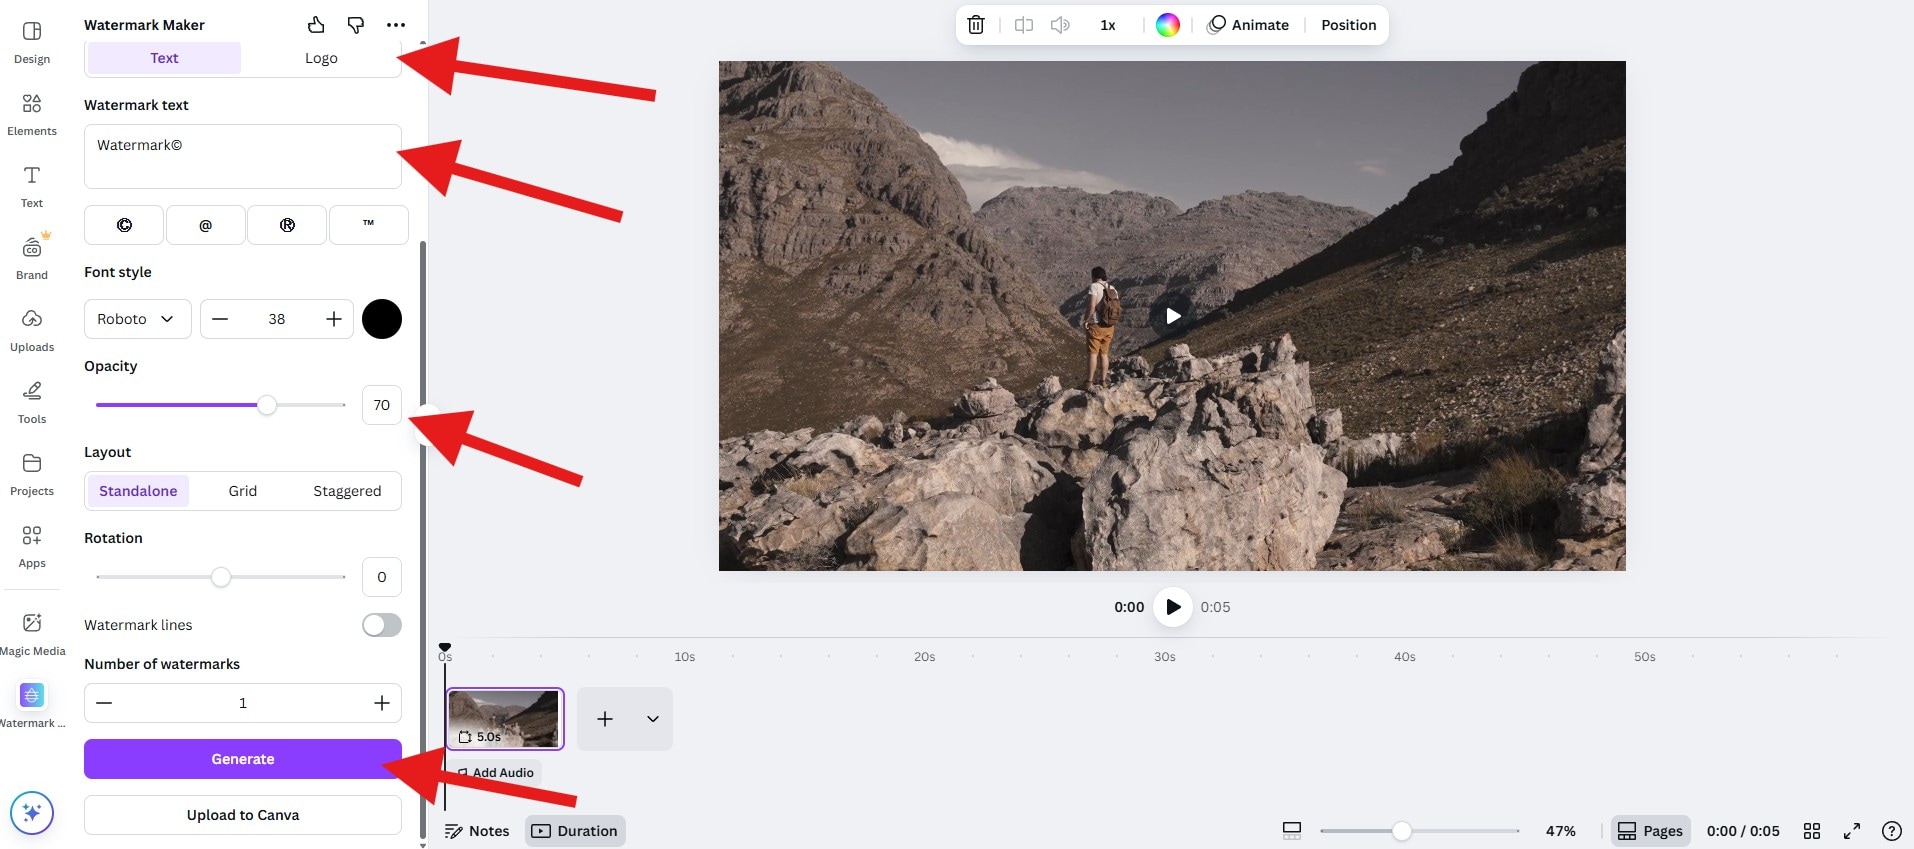
- Select the type of watermark, add your text, adjust the Opacity, and explore other customization options. When you are ready, click on Generate.
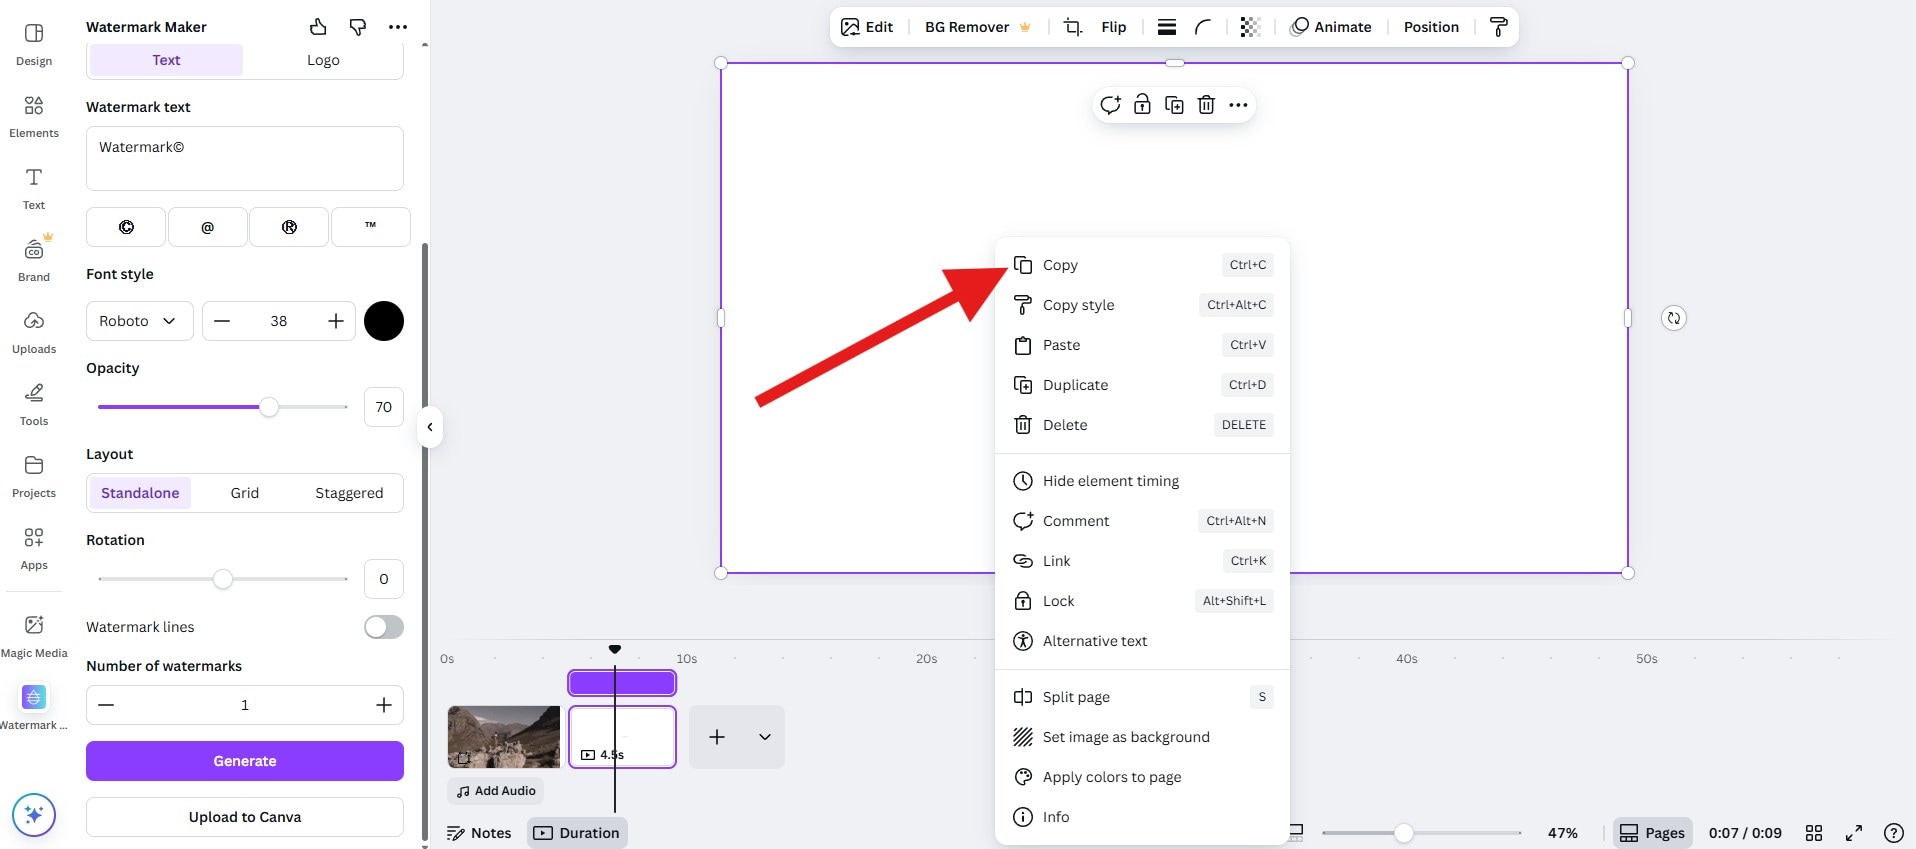
- This will create the watermark in a new clip. Now, right-click on that new page and select Copy.
- Go back to the first clip, right-click, and now select Paste.
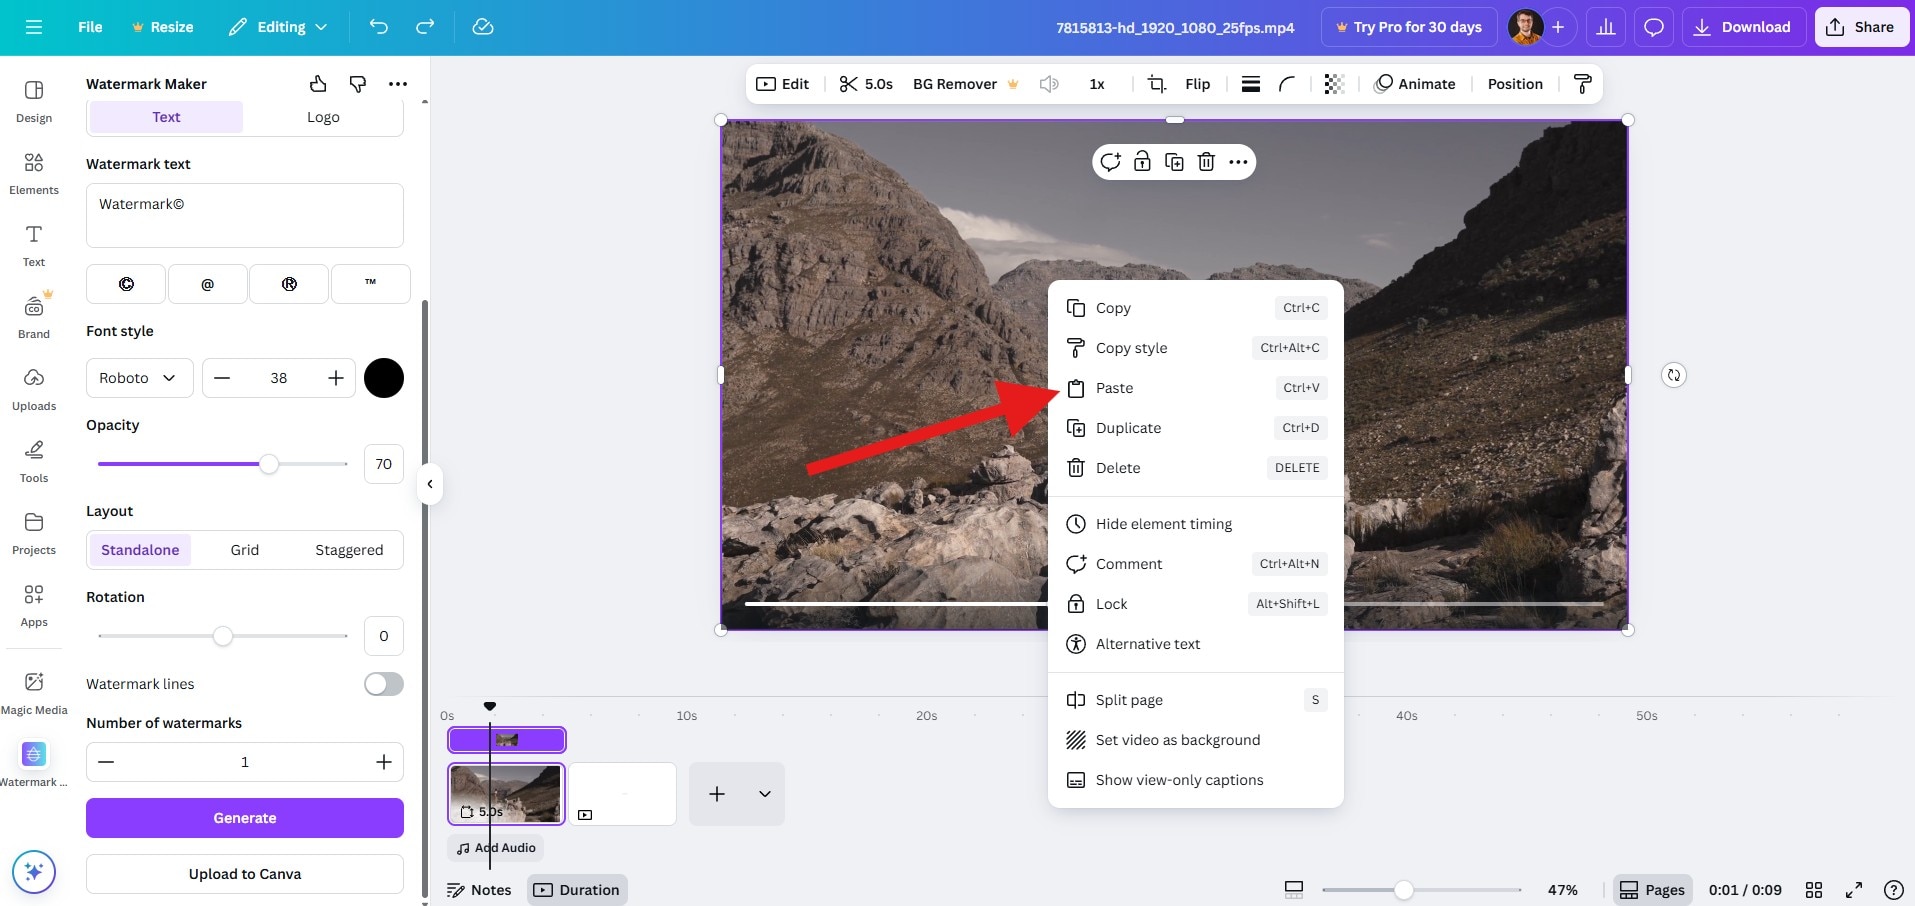
- Adjust the size and position of the generated watermark as you like, then proceed to download your watermarked video.
Here's how it looks.

With online free tools like watermark image or Canva, you can create and add a watermark to pictures and videos successfully with our step-by-step guide. But all those methods require manual adjustments.
If you are also looking for an option that not only supports manual editing for precise results but also an AI-powered method to watermark videos for efficiency, check our best alternative for watermark makers.
Filmora: A Better Alternative for Watermarking Videos and Photos
Filmora isn't just a watermark adder. It's a full creative suite that offers great flexibility for both AI-powered automation and manual customization.
 secure download

- Add text watermarks in different fonts and colors, pick outlines and glow effects, or add animated text watermarks.
- Overlay your photos with logos or images and precisely adjust the watermark's placement, color scheme, and transparency.
- Animate watermarks with fade-in, slide, and glow effects.
- Use AI features to generate your watermark and then add it to your content using simple text prompts.
- To keep things consistent across your content, you can save your projects as a template and use them for batch watermarking to improve efficiency.
- Easily add watermarks to photos and videos on Android, iOS, Windows, and Mac.
Method 1: Watermark Videos with AI
Filmora's AI Video Element Editor allows you to add watermarks to any visual content using simple text prompts. This is part of Filmora's AI Image to Video feature. You can upload a video, a PNG file that you want to use as a watermark, and explain how you want the AI to add it to your content.
- Download and install Filmora on your computer.
secure download
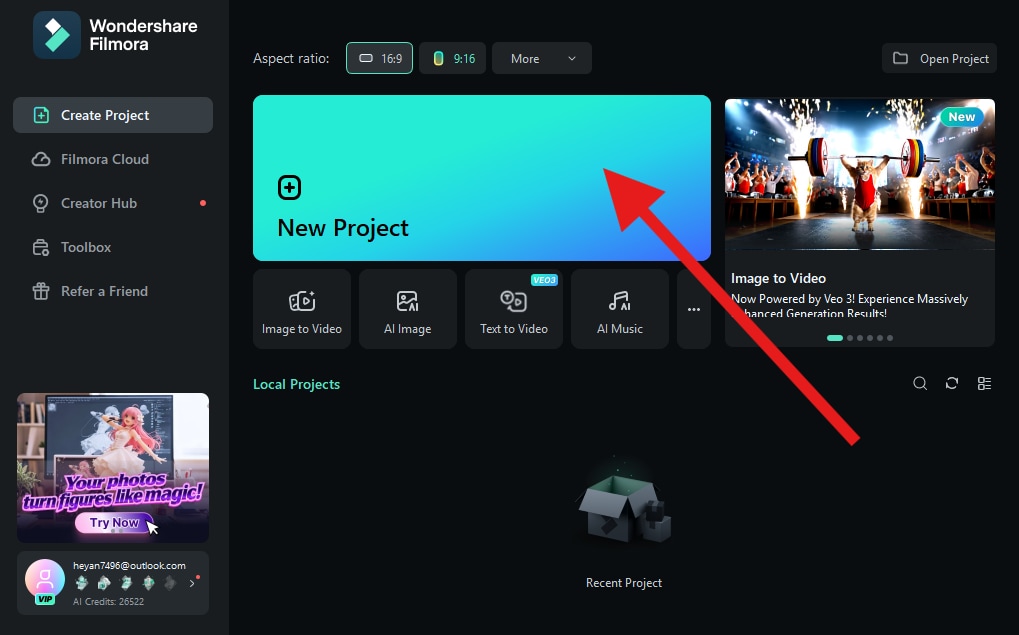
- Start a New Project > go to Stock Media > AI Media > Image to Video > and find Video Element Editing.
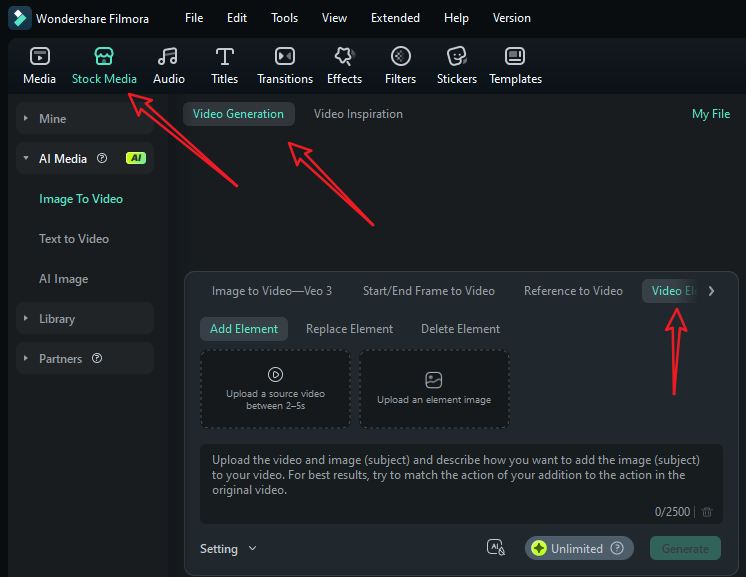
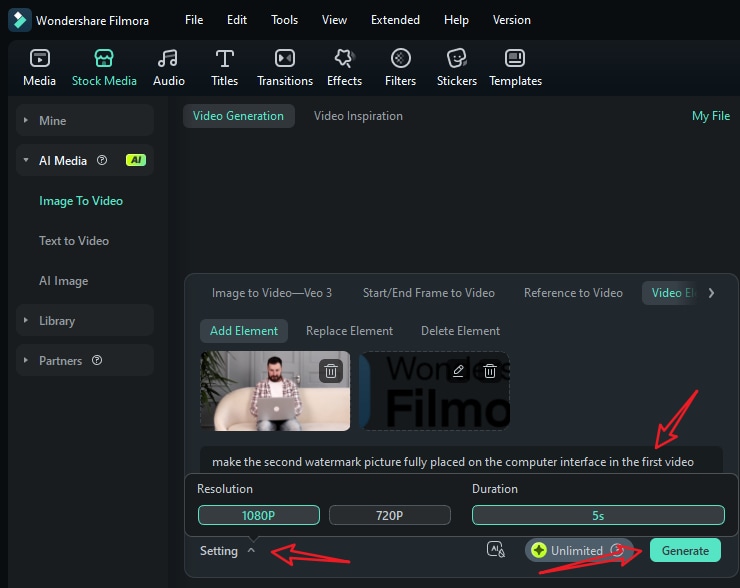
- Upload your short video and a reference picture, type in your prompts, and go to settings to adjust the video resolution. Finally, tap on Generate to start adding a watermark to the video with AI.
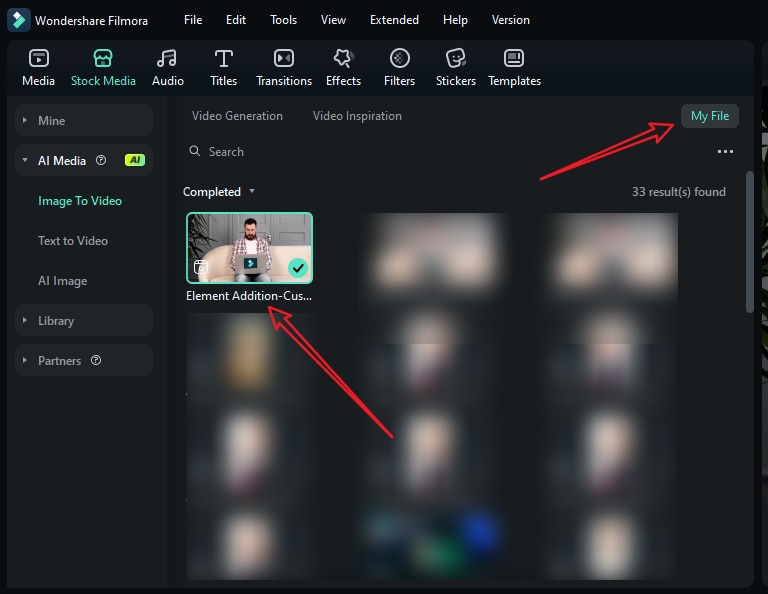
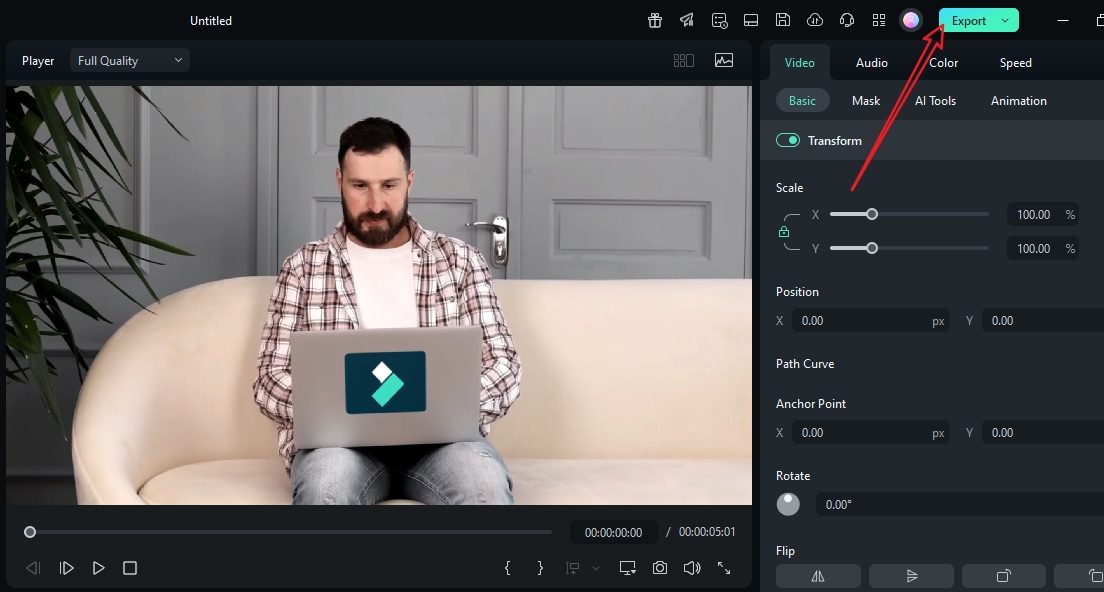
- When it finishes adding the person to the video, go to My File > preview the video and add it to the timeline.
- You can then edit the video further. If the video has no background music, just switch to the audio tab > pick a music according to your preference and drag it to the timeline.

- Playback the video, and tap on Export if you are satisfied.
If you want to know how it works to add a watermark to a video on iPhone and Android with AI, you can also use the Filmora app.
secure download - Launch the app and tap on VideoGen > Choose Add.

- Import your video > import an element you want to add, then you can add the prompts if you want. After that, tap on Generate to start generating the video.
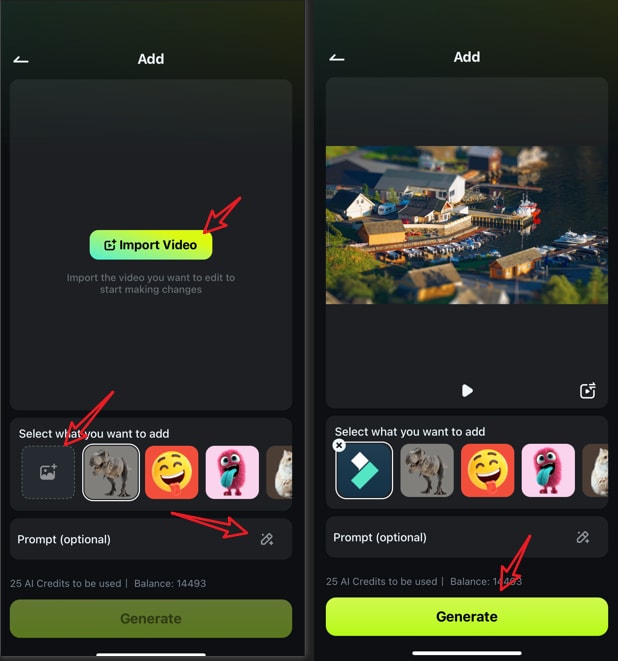
- Save the result directly if you are satisfied.
If you want a custom watermark but don't have one, Filmora's AI Image feature can generate a photo that will become your new online signature. This is especially useful for creators who want to brand multiple videos quickly without spending hours editing.
Method 2: Watermark Videos and Photos with Normal Methods
If you want full control, you need to take the manual route. We have learned how to add text watermarks using free tools, so now, let's consider adding a logo watermark to a video. We'll start with the desktop version of Filmora.
- Download and install Filmora on your desktop or laptop.
secure download
- Create a New Project.
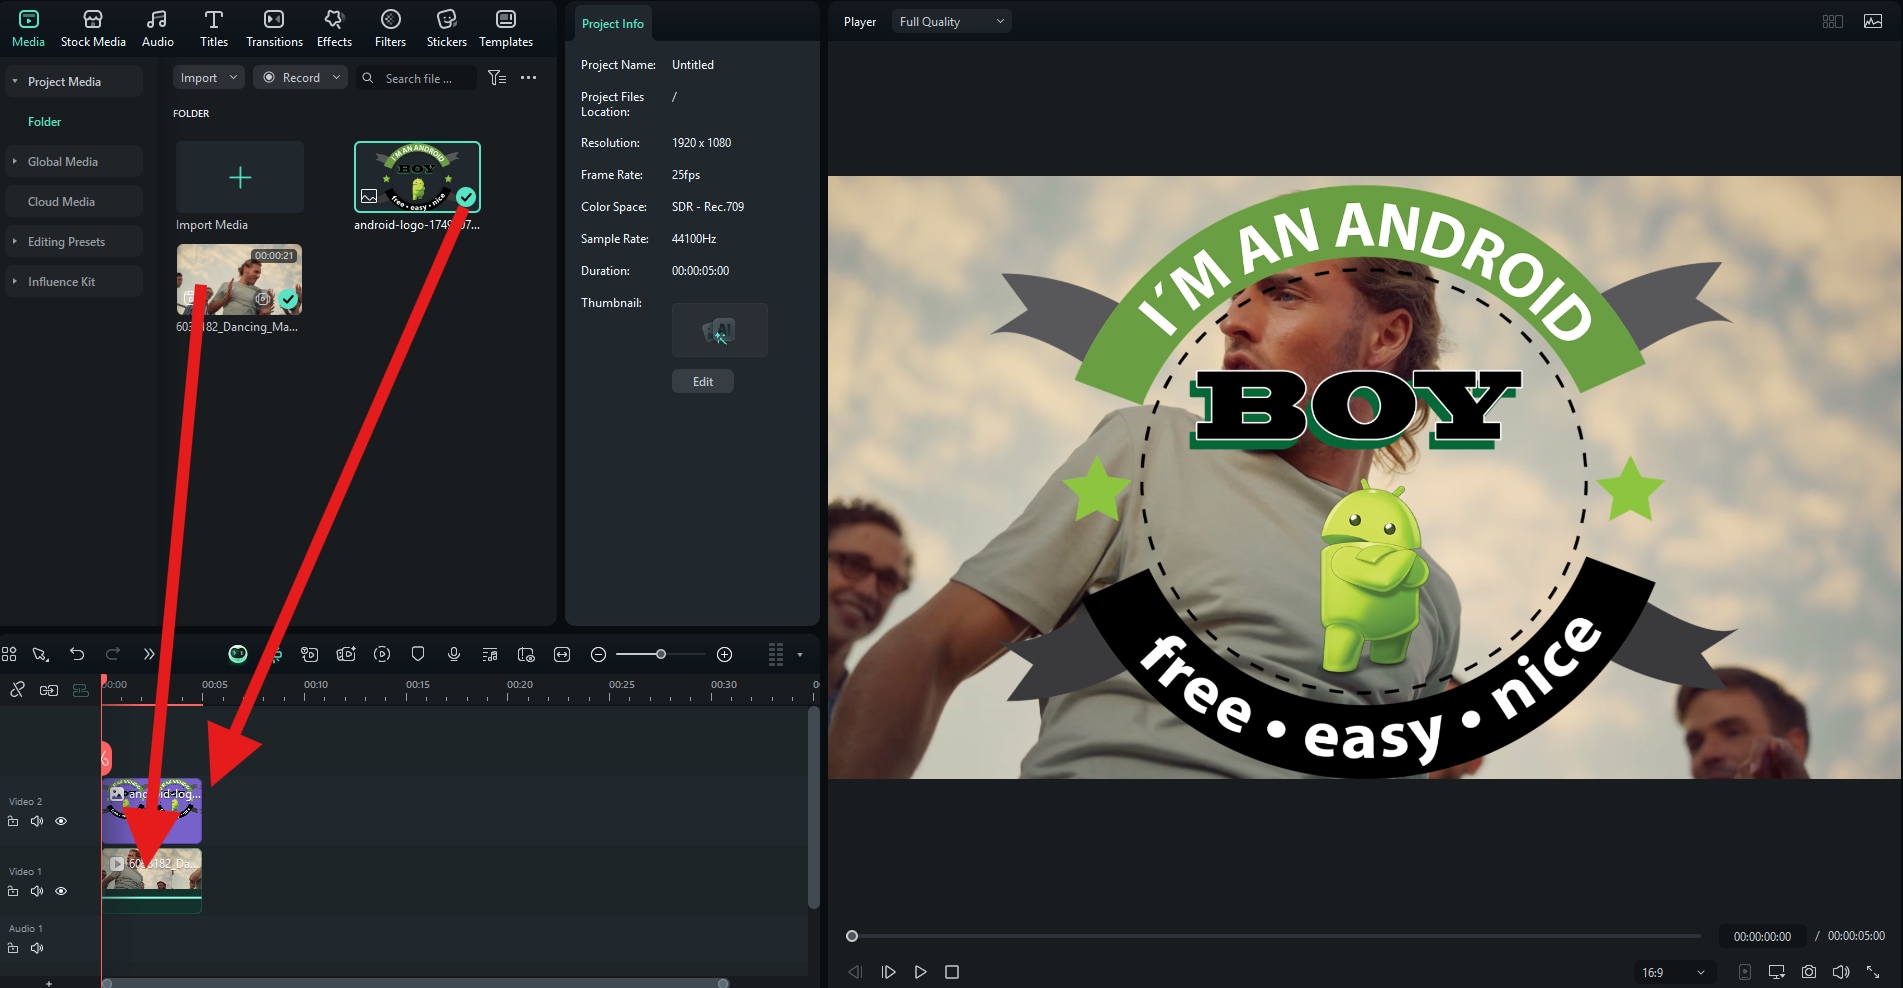
- Click on Import and add a video from your hard drive and a PNG file with your logo.
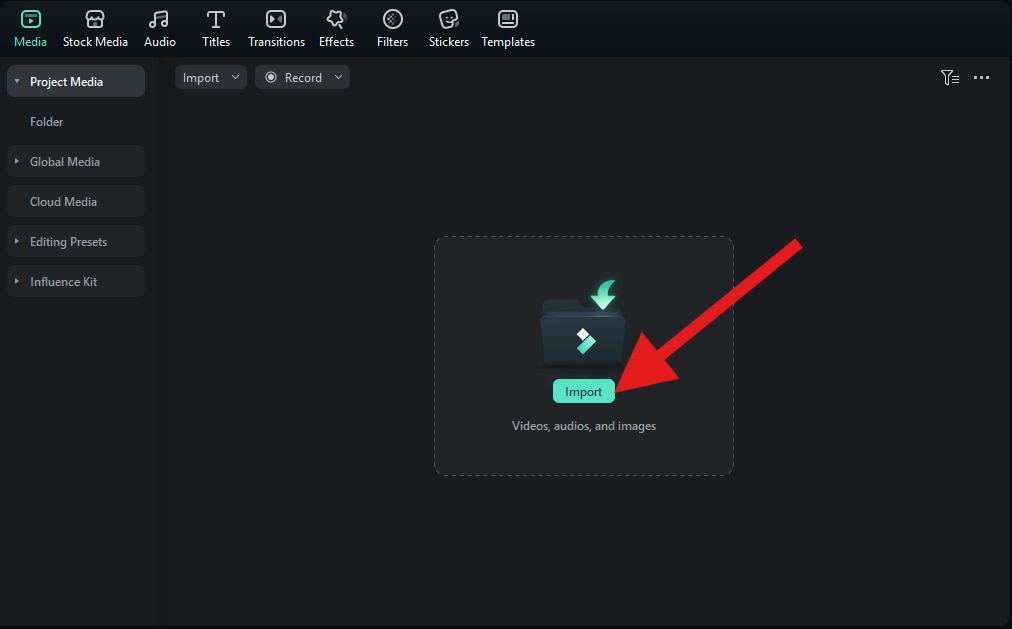
- You now need to drag both files to the video editing timeline so that the logo image is above the video.
- Go to Image > Basic and scroll down to the Compositing section, where you can adjust the Opacity of the logo watermark. After that, position and resize it according to your wishes.
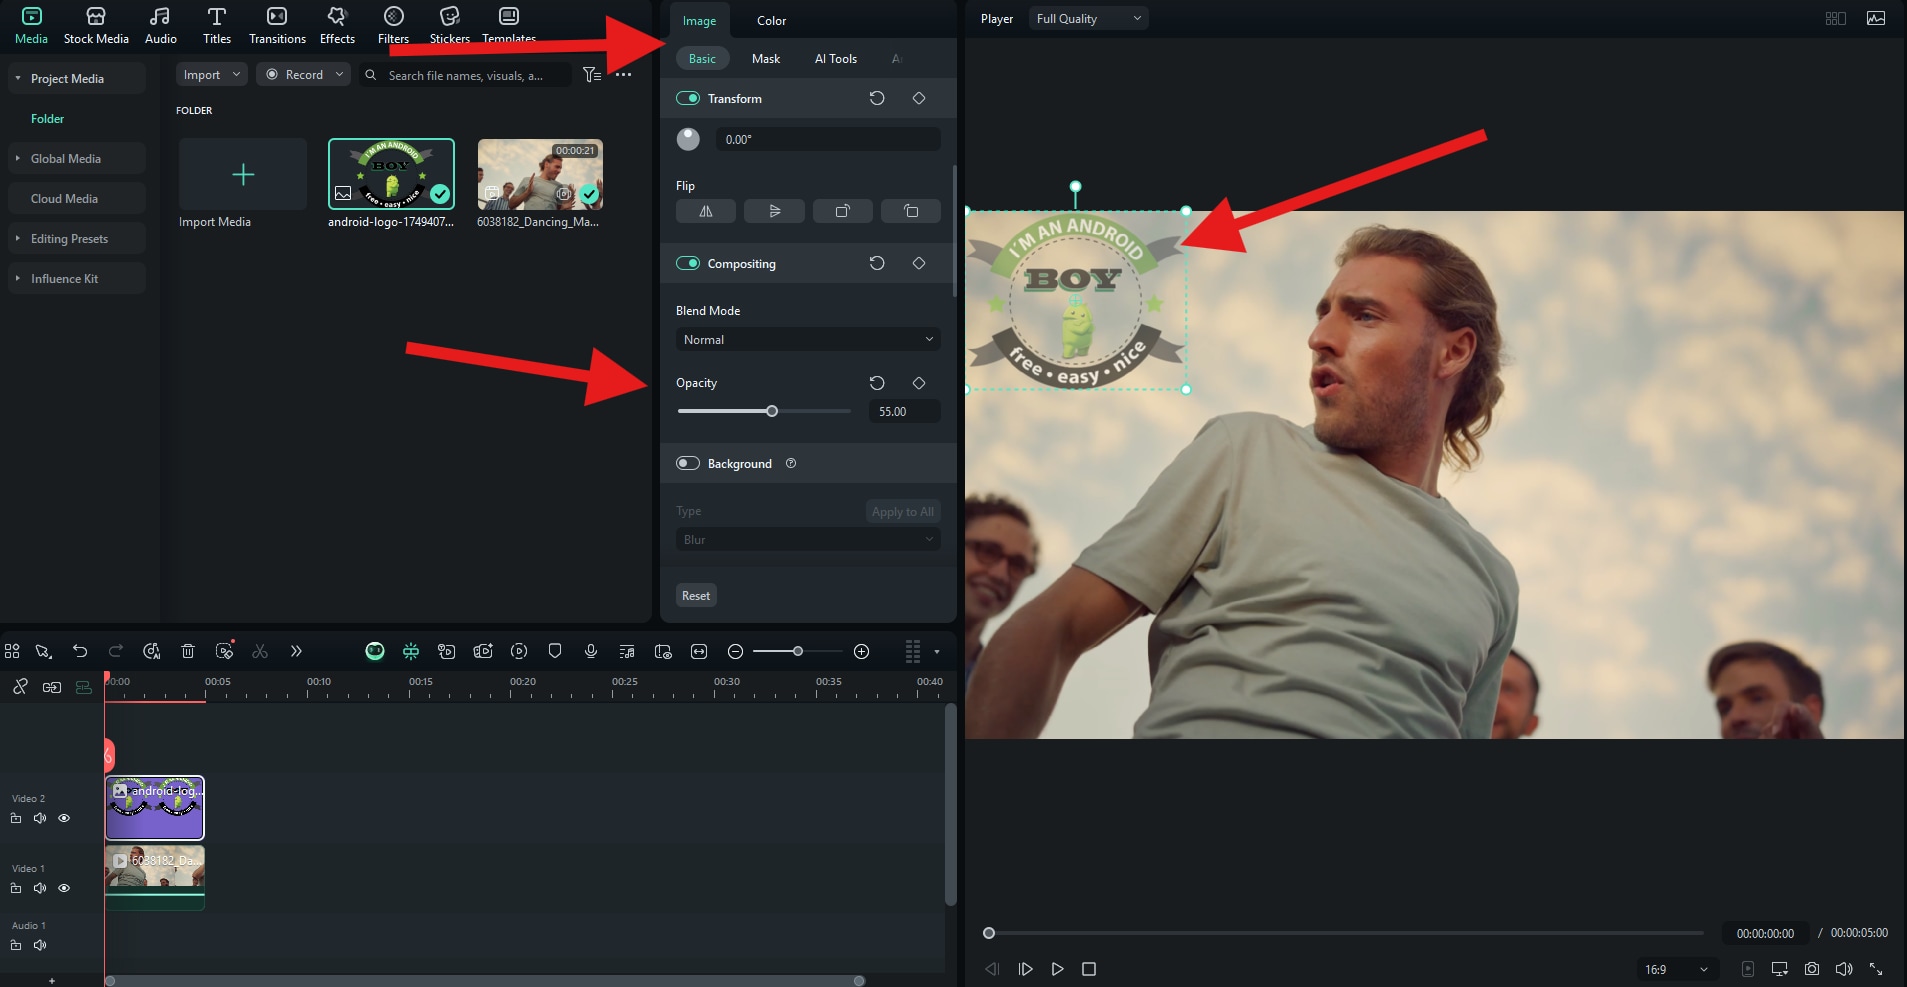
Check out our results.

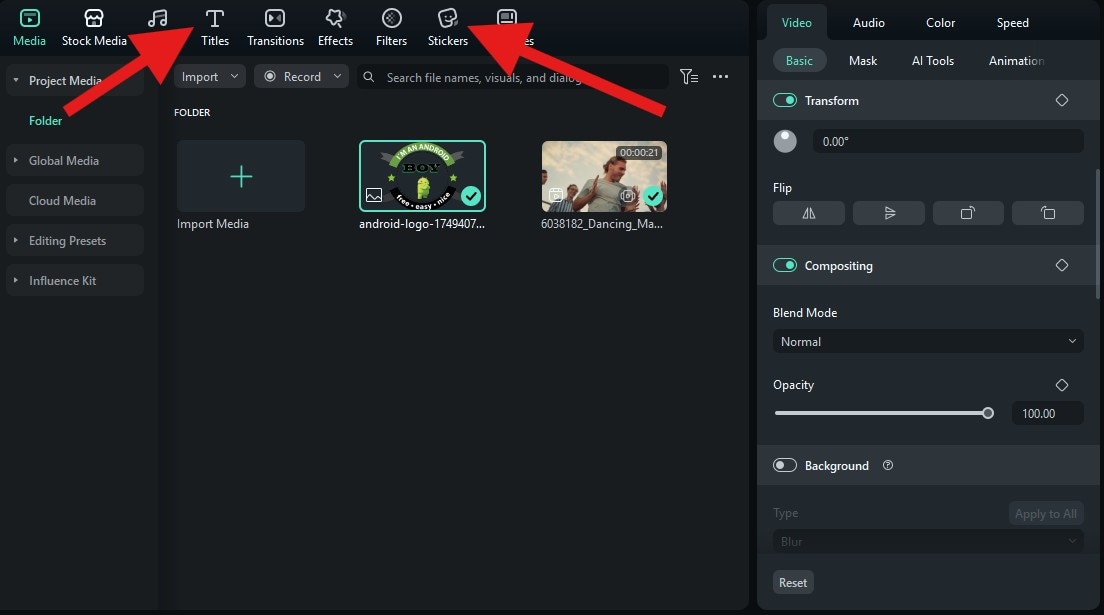
If you want to add stickers, check the Stickers tab and repeat the process. The same goes for Titles. The process of adding them as watermarks above your video is the same.
The Filmora app process is as easy as with the desktop version. Download and install the app on your phone or tablet, open it, create a new project, and import a video to which you would like to add the watermark. There are a few options to explore, so let's get going.
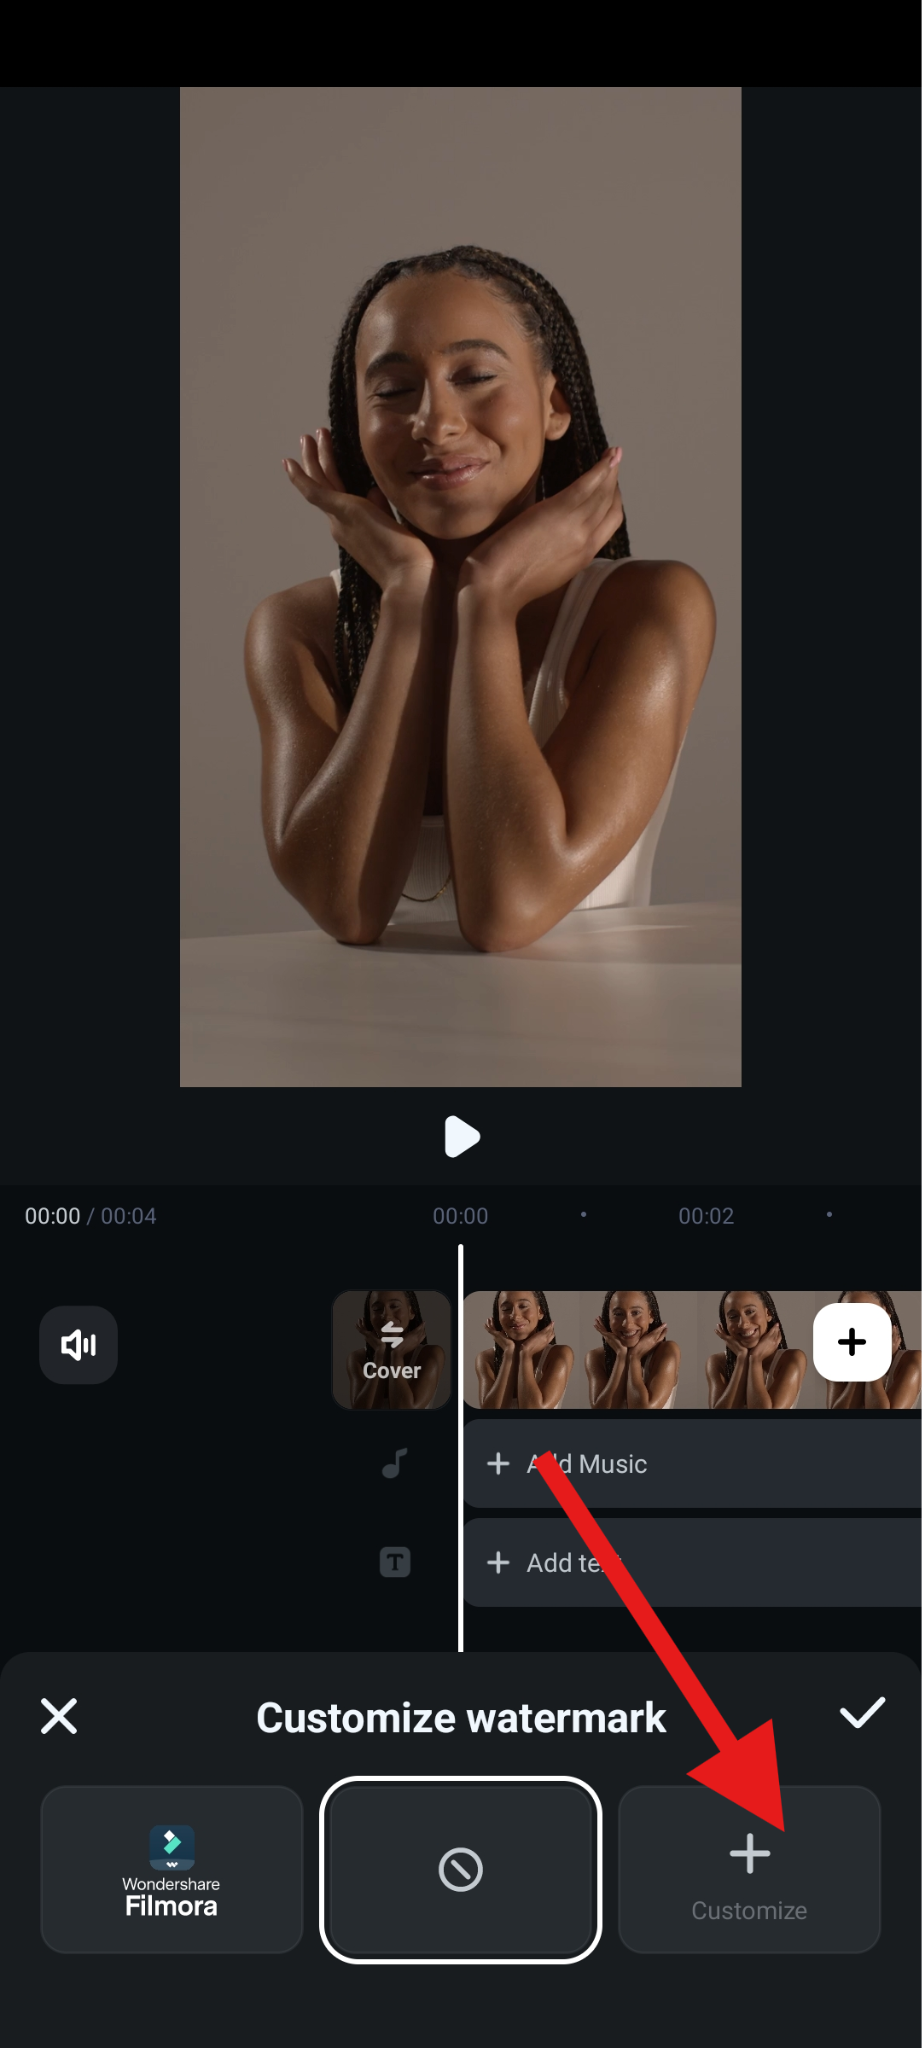
- Find the Customize watermark tab in the bottom menu.
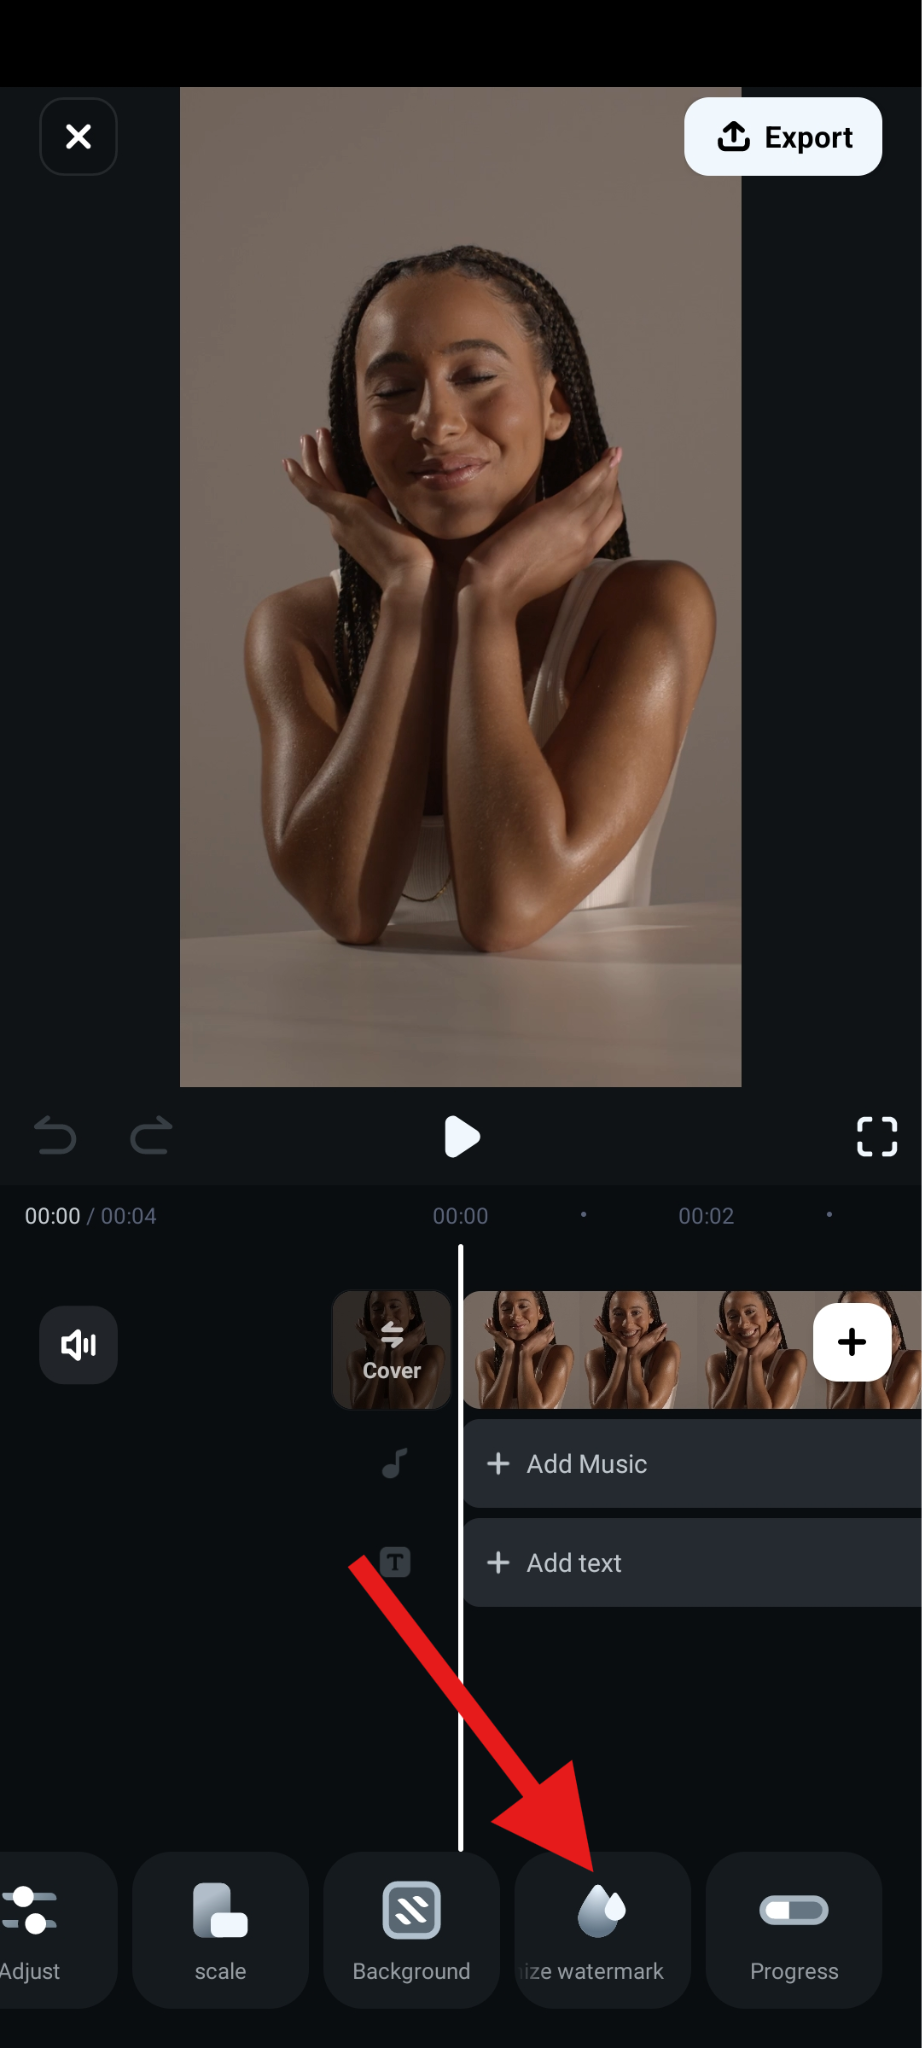
- Now, tap on + Customize. After that, simply pick a logo PNG or an image from your device that you would like to use as your video watermark.
- In the preview section of the interface, you can adjust the size and position of the watermark. Then, you can accept the changes.
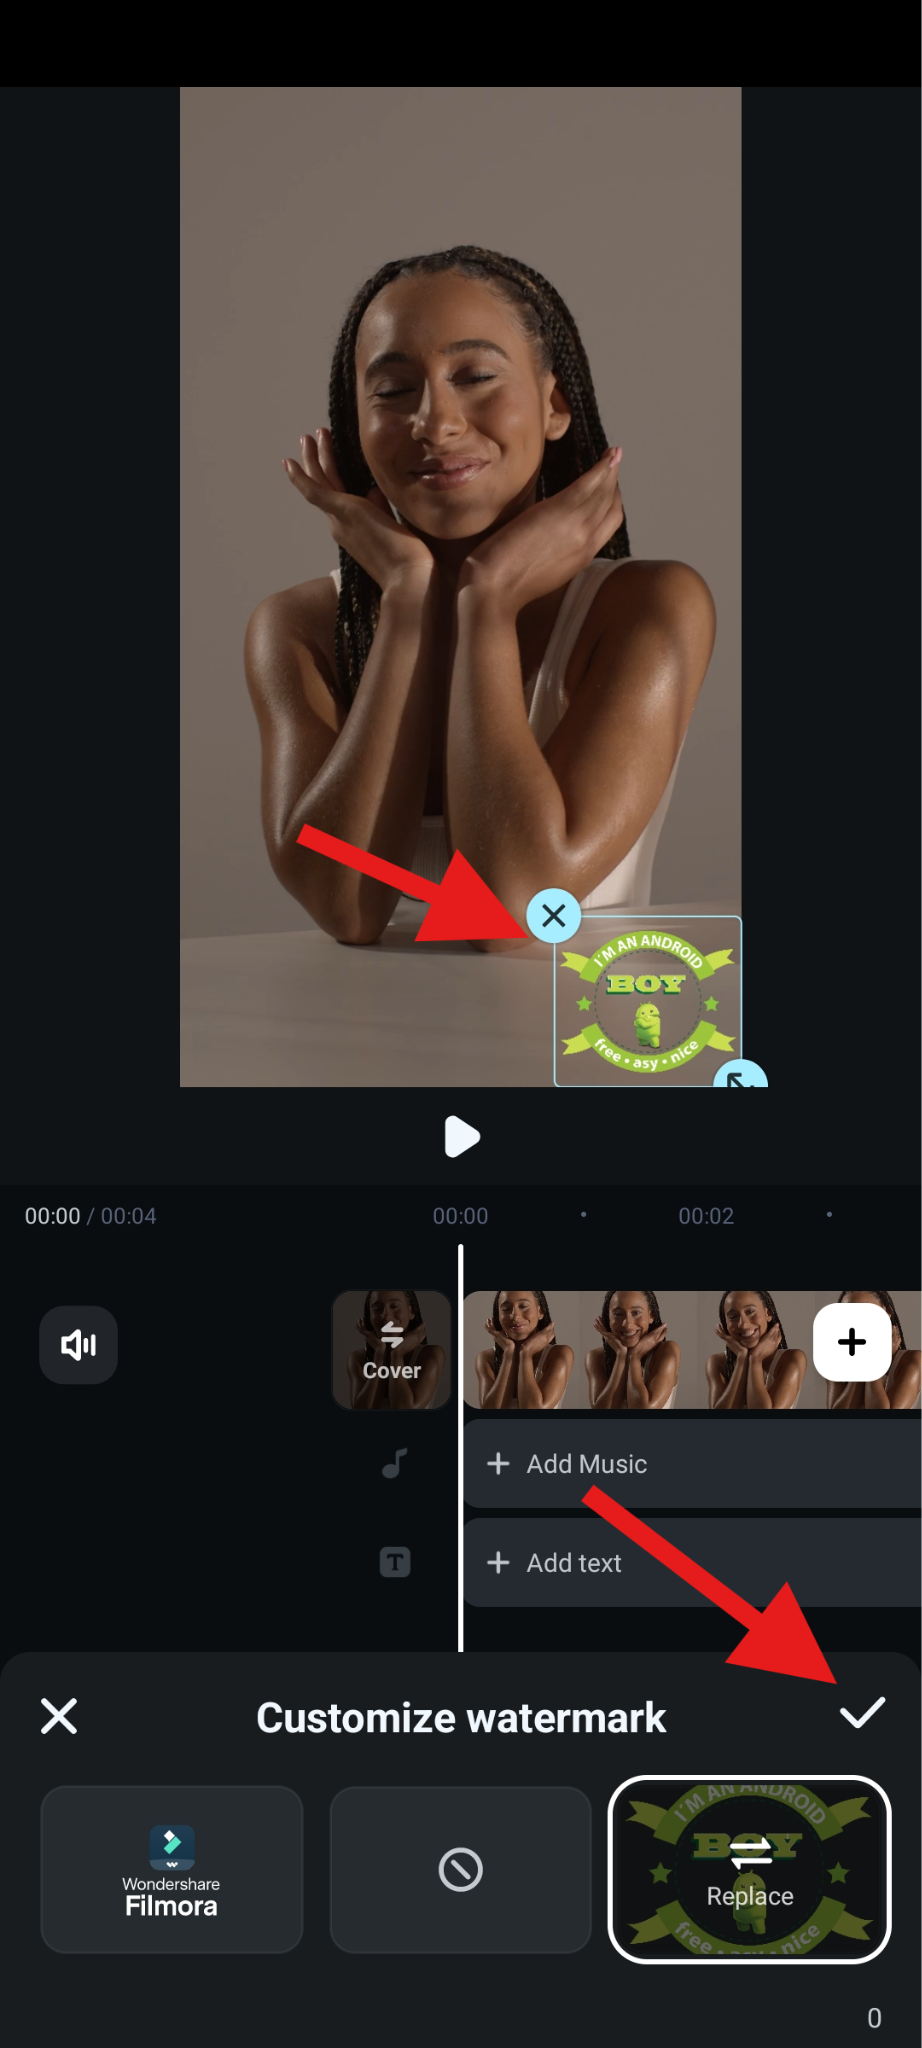
Check out the result.

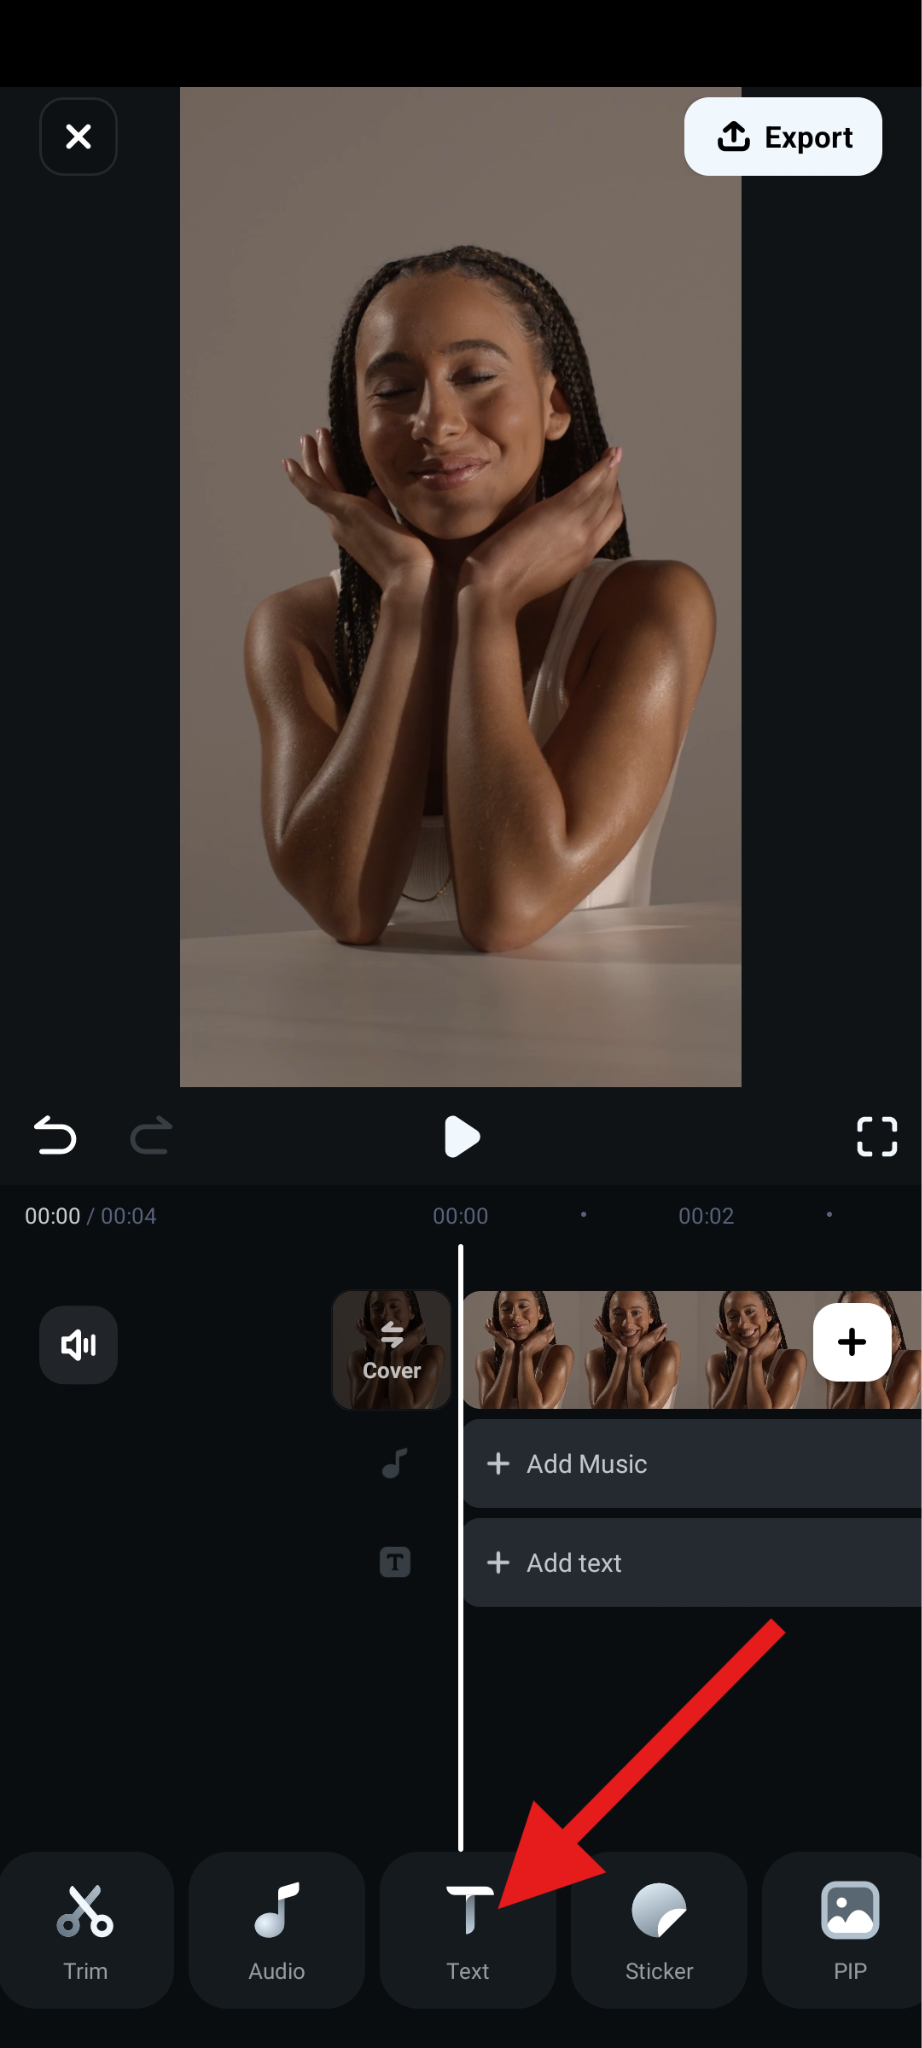
Filmora also offers the option to add a signature to your watermark. Here's how to do it.
- Find the Text section in the main menu. Then, in the submenu, tap on + Add.
- Type the text you want to use as your signature watermark and go to Font > Handwriting. Then, pick a signature font that you like and accept the changes.
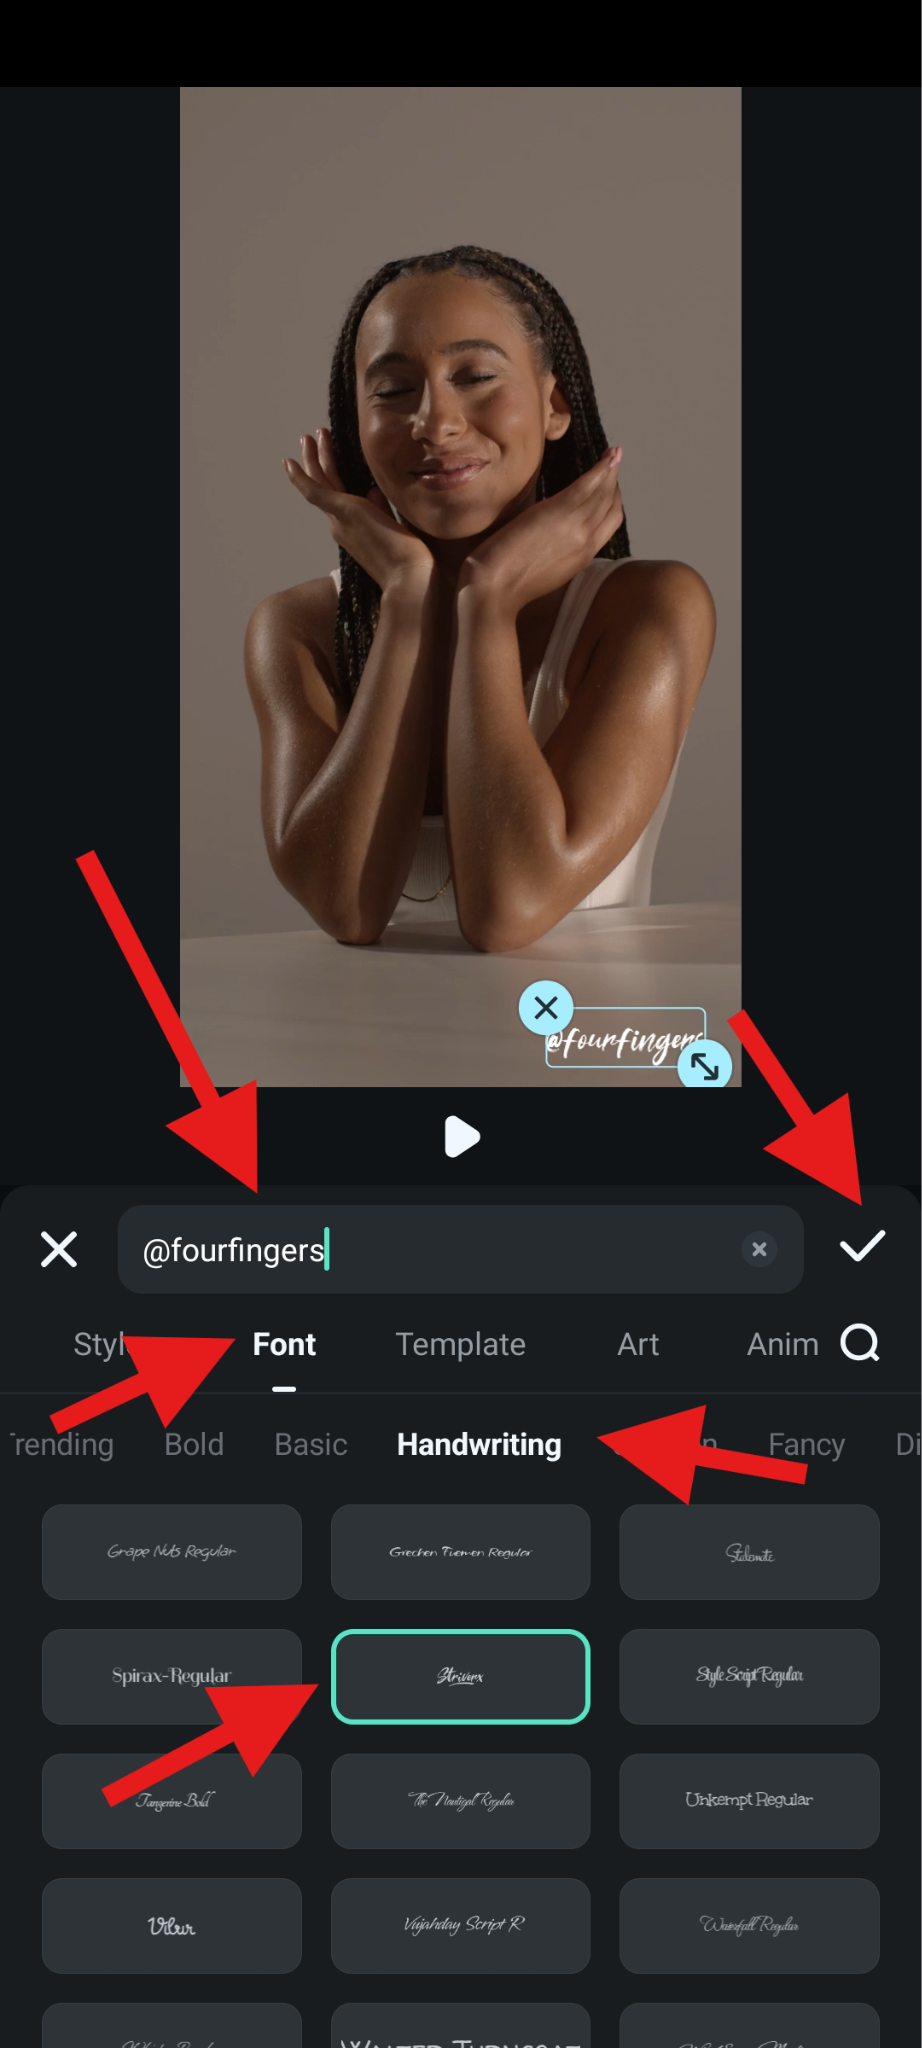
- Check out how this one turned out.

Of course, you can continue exploring the app to find new ways to add custom watermarks to your visual content.
Conclusion
Watermarking online is easier than ever today with free tools. They're perfect for quick fixes when you just need to brand a photo or video before posting. However, free tools come with limits, such as fewer customization options, lower export quality, and no animation features. If you're serious about building a brand, Filmora is the superior choice. It combines simplicity with professional features, works across desktop and mobile, and lets you watermark both photos and videos with text, stickers, or logos.
Download Filmora today and start creating professional watermarks that make your brand stand out.
secure download 