
 100% Security Verified | No Subscription Required | No Malware


 ChatGPT
 Perplexity
 Gemini
 Claude
 Grok
Grok
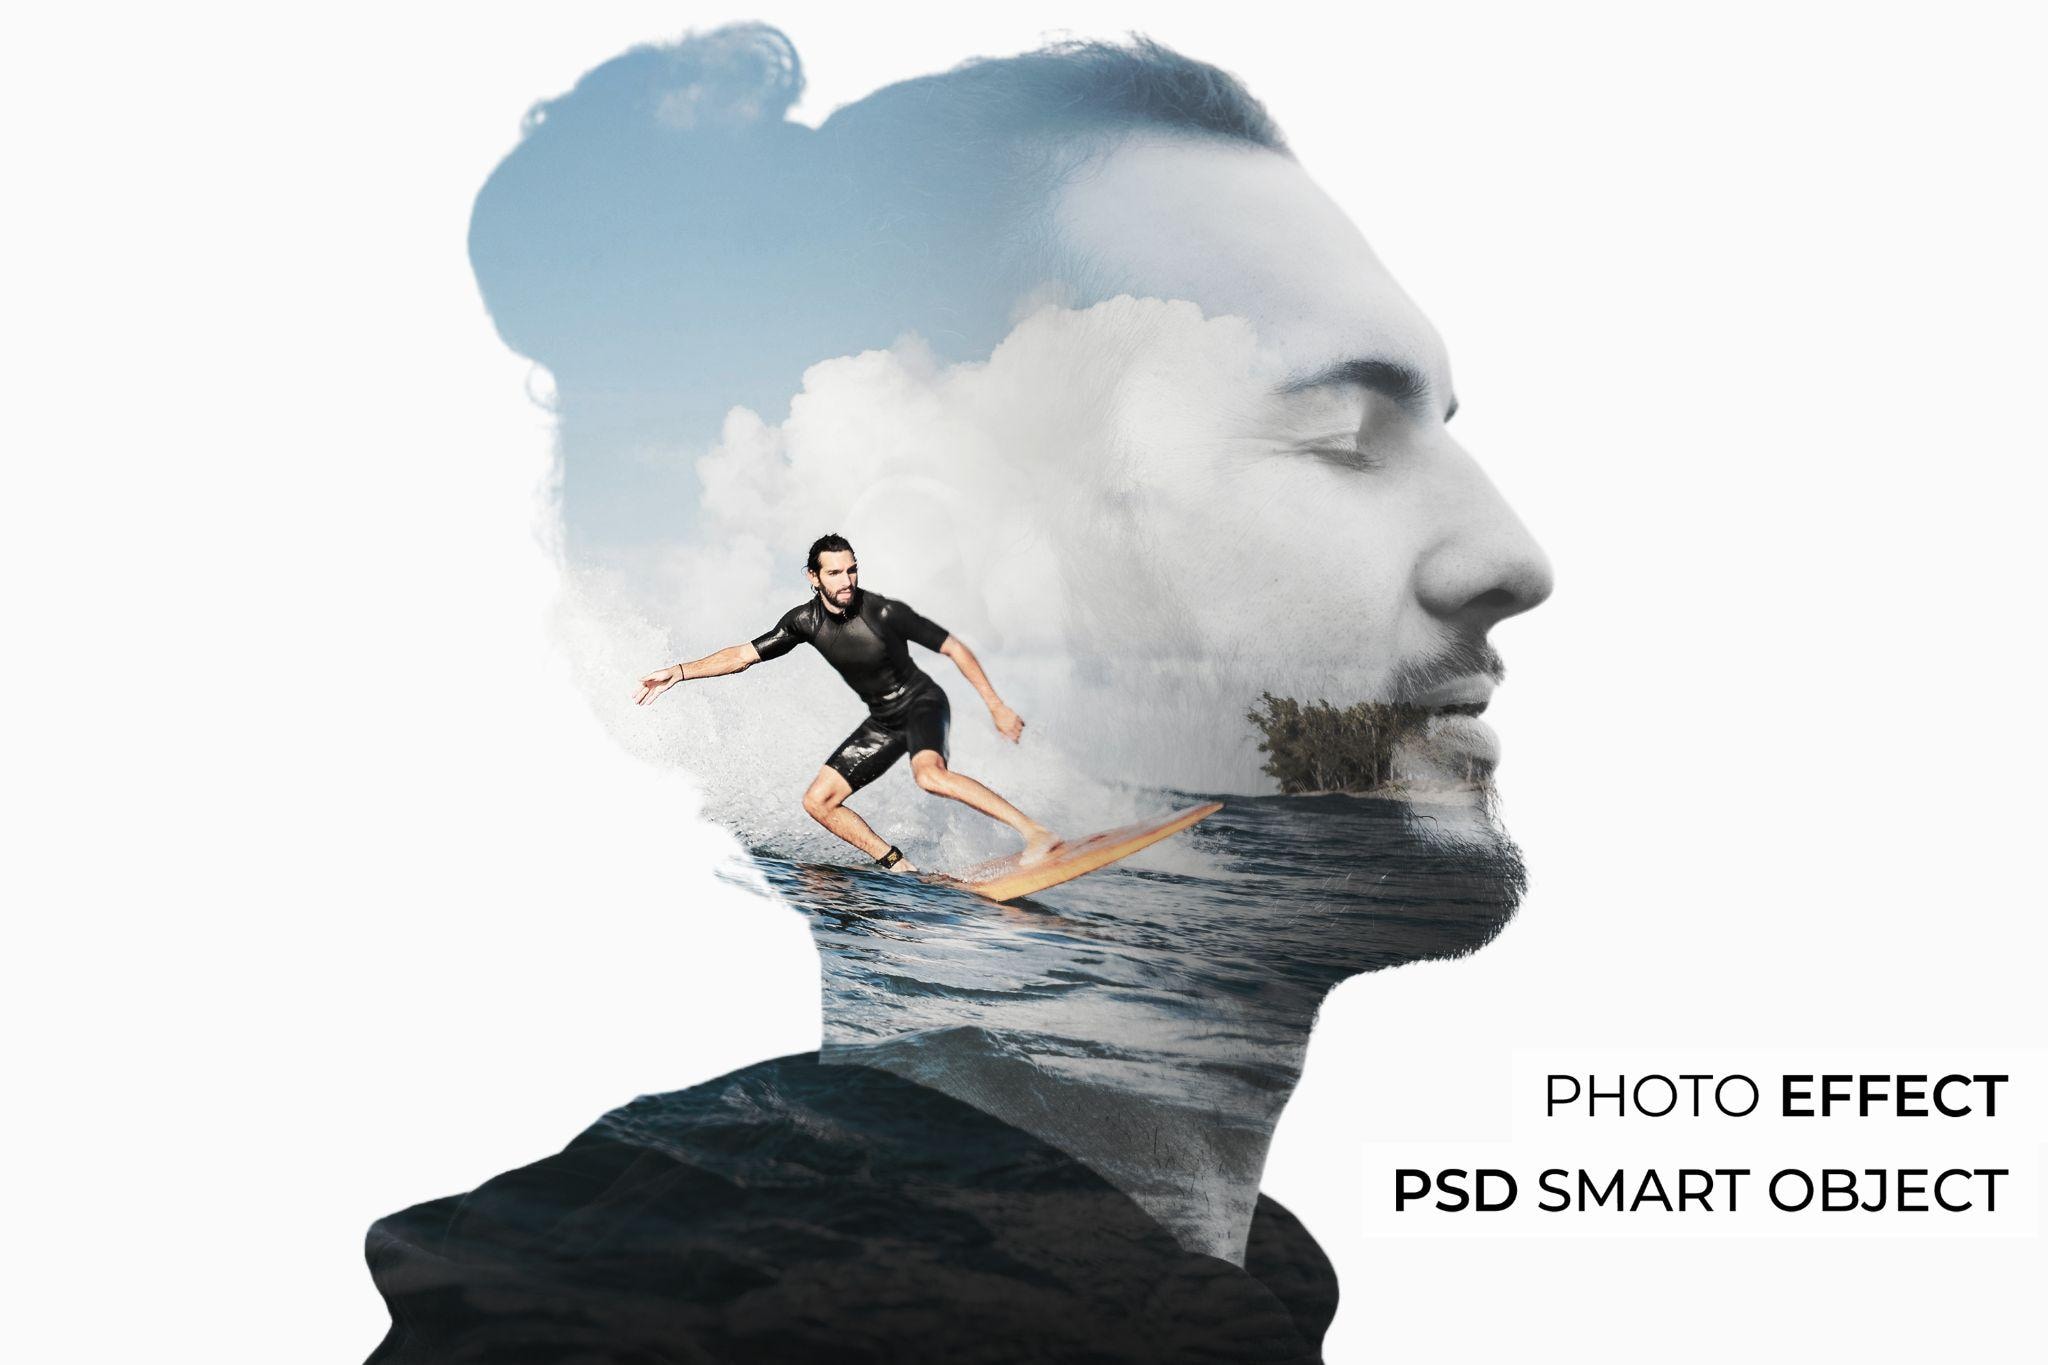
The double exposure effect is one of the most artistic and beautiful ways to blend two images together and create a breathtaking work of art. As one of the most powerful image editing software solutions on the planet, Photoshop offers users the option to edit images and create a double exposure effect. In essence, double exposure blends two images into a single composition, merging subjects and textures in creative ways.
Today, we will give you a rather simple guide to create a double-exposure effect in Photoshop. Also, knowing that Photoshop has a rather steep learning curve, near the end of the article, we have a bonus section with an easier alternative.
In this article:
A Short Double Exposure Tutorial in Photoshop
Double exposure in photography is defined as a technique where two images are combined to form a single photo. The final result is achieved by superimposing one image over the other. The result is a blend of scenes, subjects, or textures, and if done right, you can create stunning works of art.
If you want to achieve the double-exposure effect in Photoshop, make sure that you have the program installed on your desktop or laptop device. Use it to import an image where you want to add double exposure, and follow the steps below.
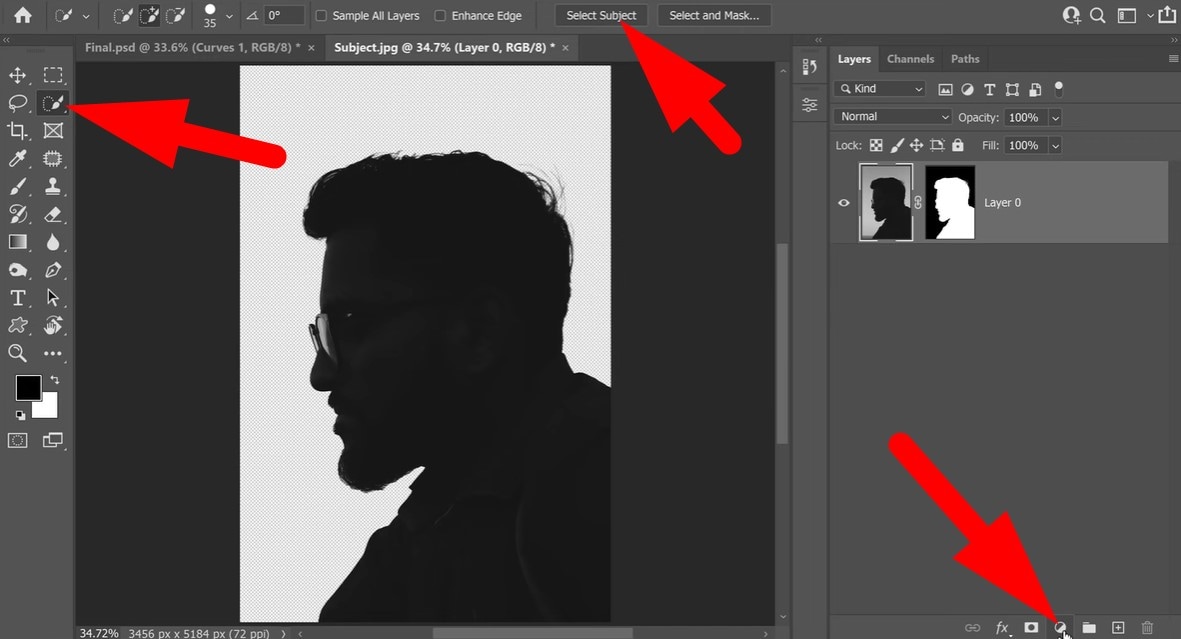
- Use the Quick Selection Tool on the left and click on Select Subject. Once the subject is properly selected, click on the Masking Tool at the bottom right.
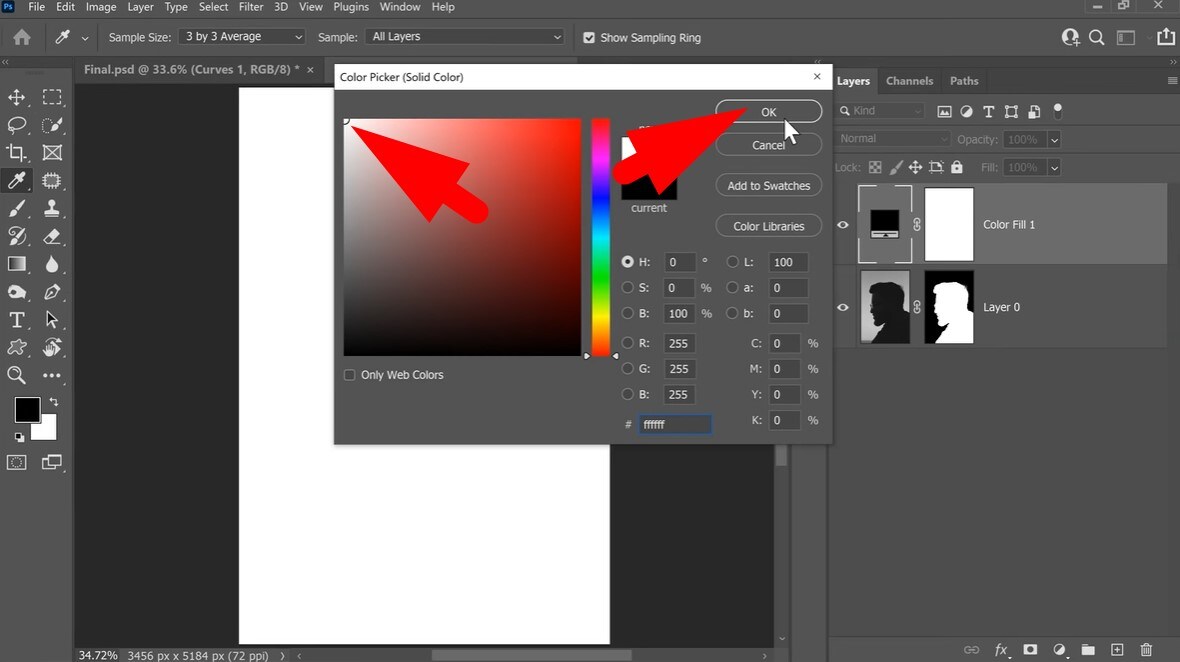
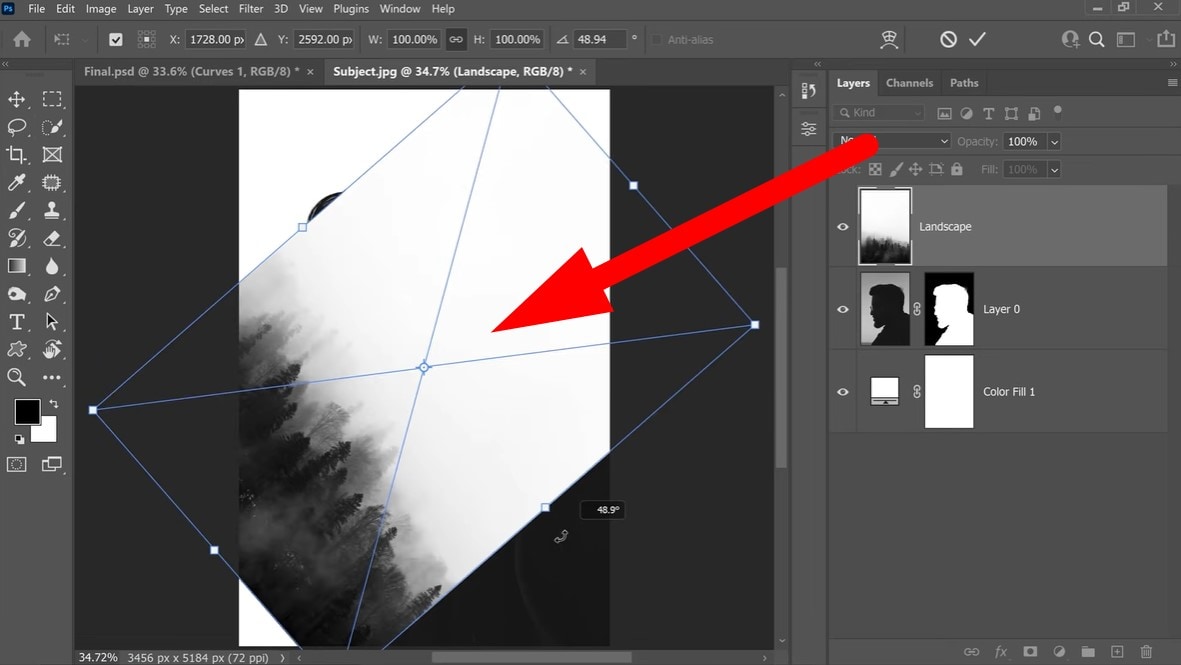
- Click on the Adjustment Layer icon right next to the Masking Tool icon and select the Solid Color option.

- Select the White color and click on OK.
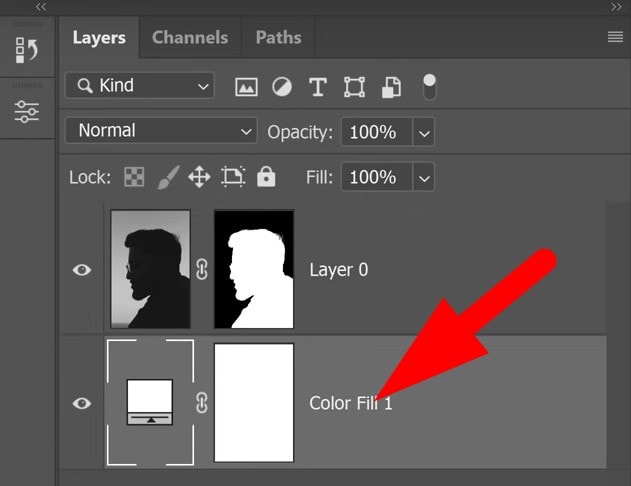
- Make sure that the new Color Fill layer is below the subject layer as shown in the screenshot. If it's not, drag it down.
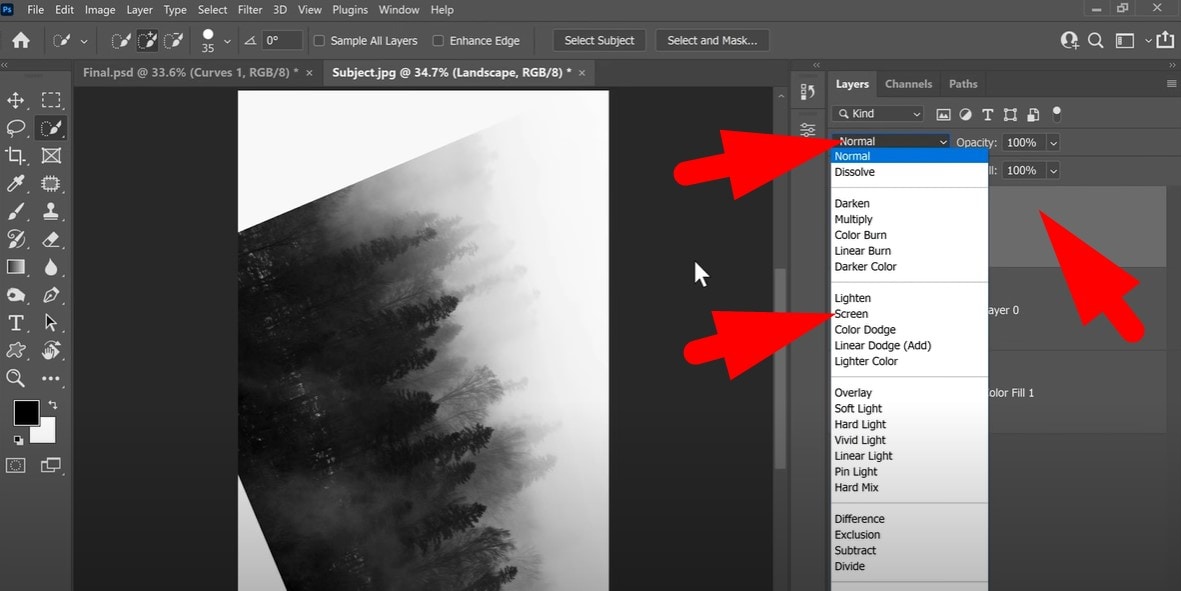
- To import the second image, simply drag and drop it over the subject layer. You can adjust its orientation as you see fit.
- Make sure that the new layer is on top and selected. Then click to change the blend mode, and select the Screen option.
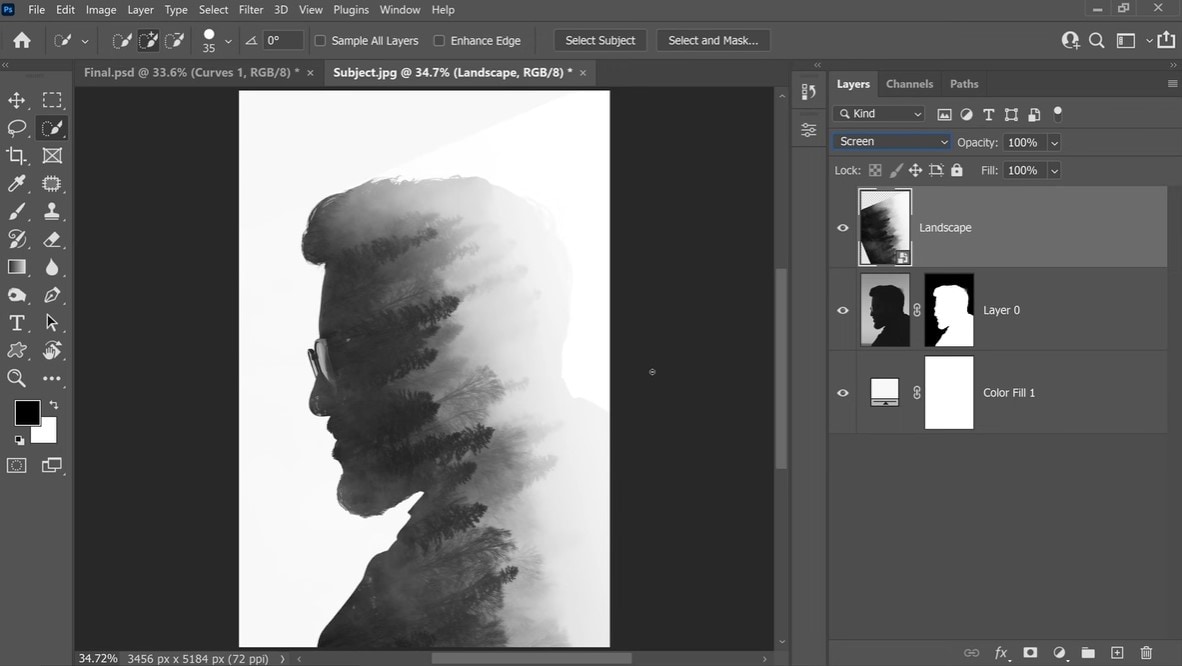
- Review the results and go to File > Save at the top-left corner to save your project.
That was a little complicated, but at least we know how to do it now. Please note that you can further customize your double-exposure photo.
If you are an image editing expert, using Photoshop to make a double exposure photo is a good idea. But if you're fresh to the scene, you might want to try an easier alternative. Fear not, as we have a perfect solution.
Try an Easier Alternative to Photoshop on PC
One of the easiest tools for creating a double-exposure effect is Filmora. Although it is a video editing tool, Filmora is equipped with all the image editing features you need. You can use it to adjust color wheels, HSL sliders, and LUTs. There are also several AI tools to aid your editing process, like the Object Remover, Auto Enhance, and Lens Correction features.
 secure download

You can even use it to generate images from prompts, change image styles, and convert images to short videos.
It takes only three steps to create the double exposure effect in Filmora. Download and install the software on your Windows or Mac device, then open it. Next, create a new project, import two images, and drag them to the timeline. After you're done with that, follow the steps below.
- Make sure that the two images are placed one on top of the other in the timeline.
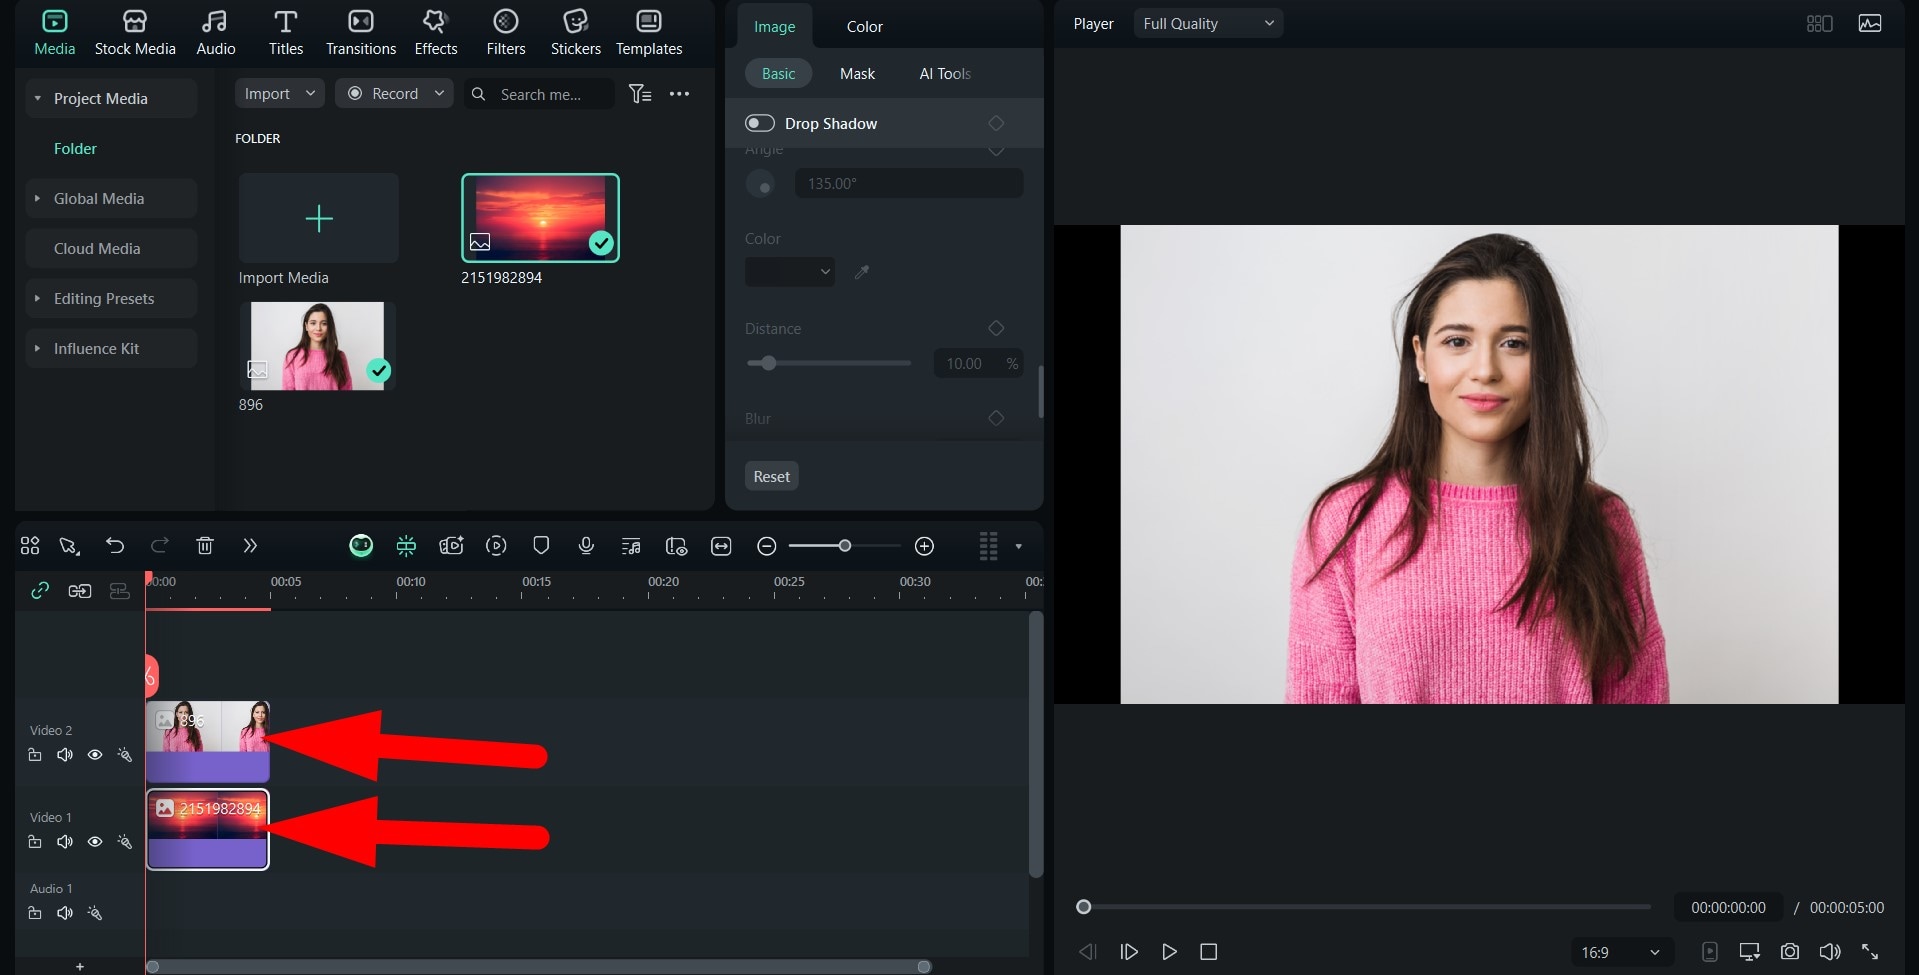
- Select the image with the person and go to Image > AI Tools and activate the AI Portrait Cutout feature to eliminate the background of that image.
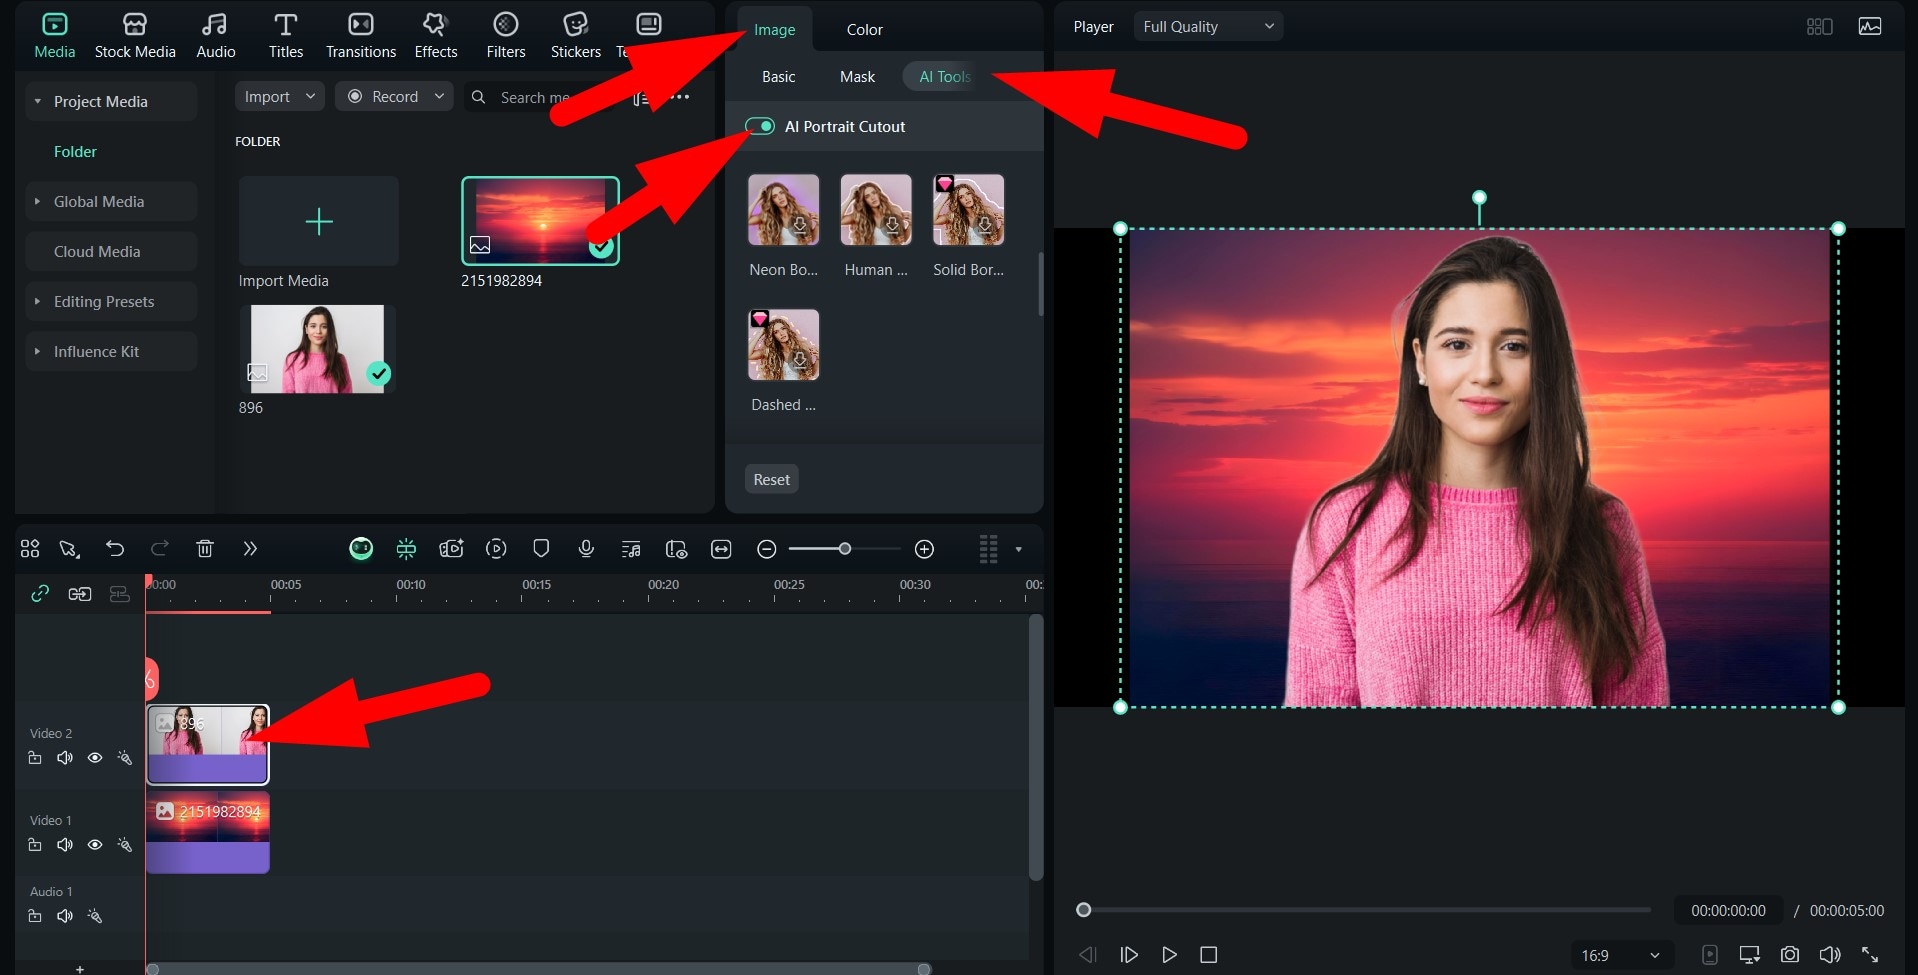
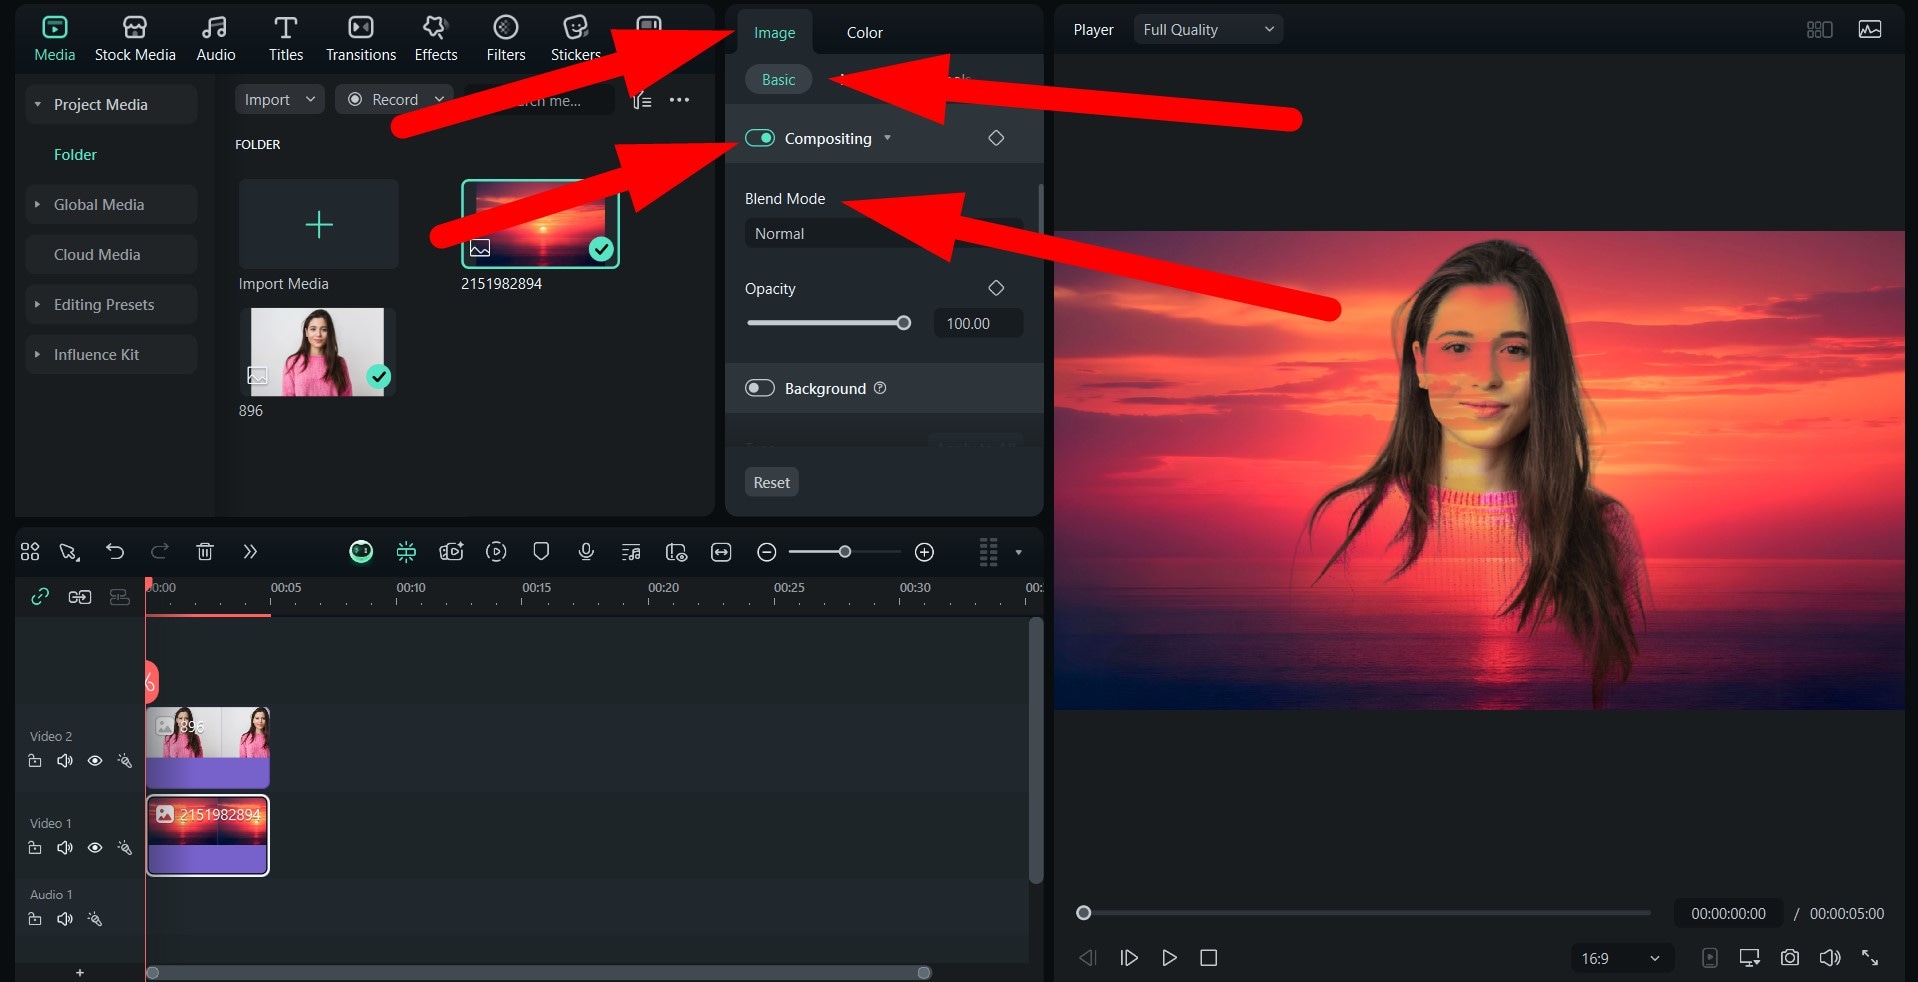
- Finally, go to Image > Basic and activate the Compositing feature. After that, pick a Blend Mode that you like.
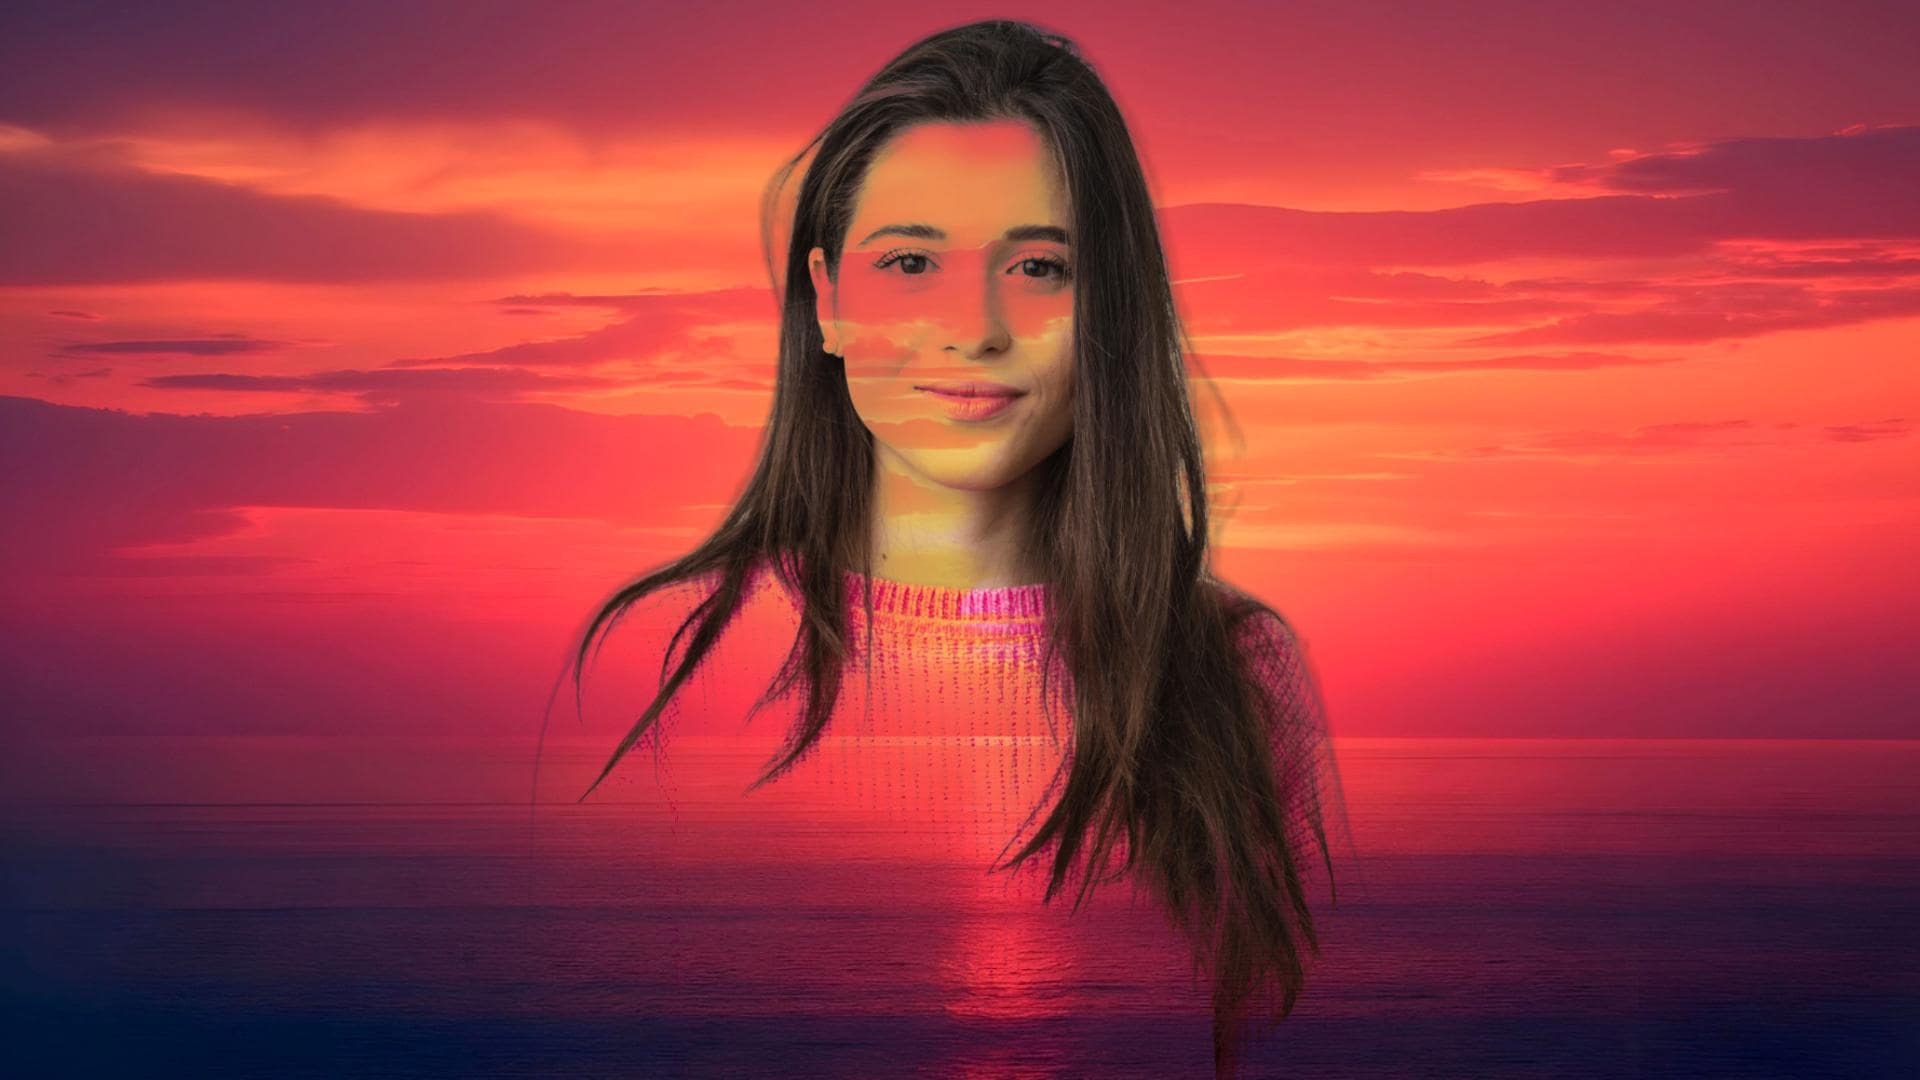
- Take a look at this awesome double exposure image we were able to create in these simple three steps.
Be More Creative: Fuse Your Pictures into a Video
As a central hub for creativity, Filmora offers an AI feature that lets you blend images and convert them into videos. It's called Image to Video, and it works on Windows, Mac, Android, and iOS. Here are the steps to merge pictures and create a video using the app version.
- Download and install the Filmora app on your phone, open it, and follow the steps below to artistically merge two pictures and create a video.
secure download
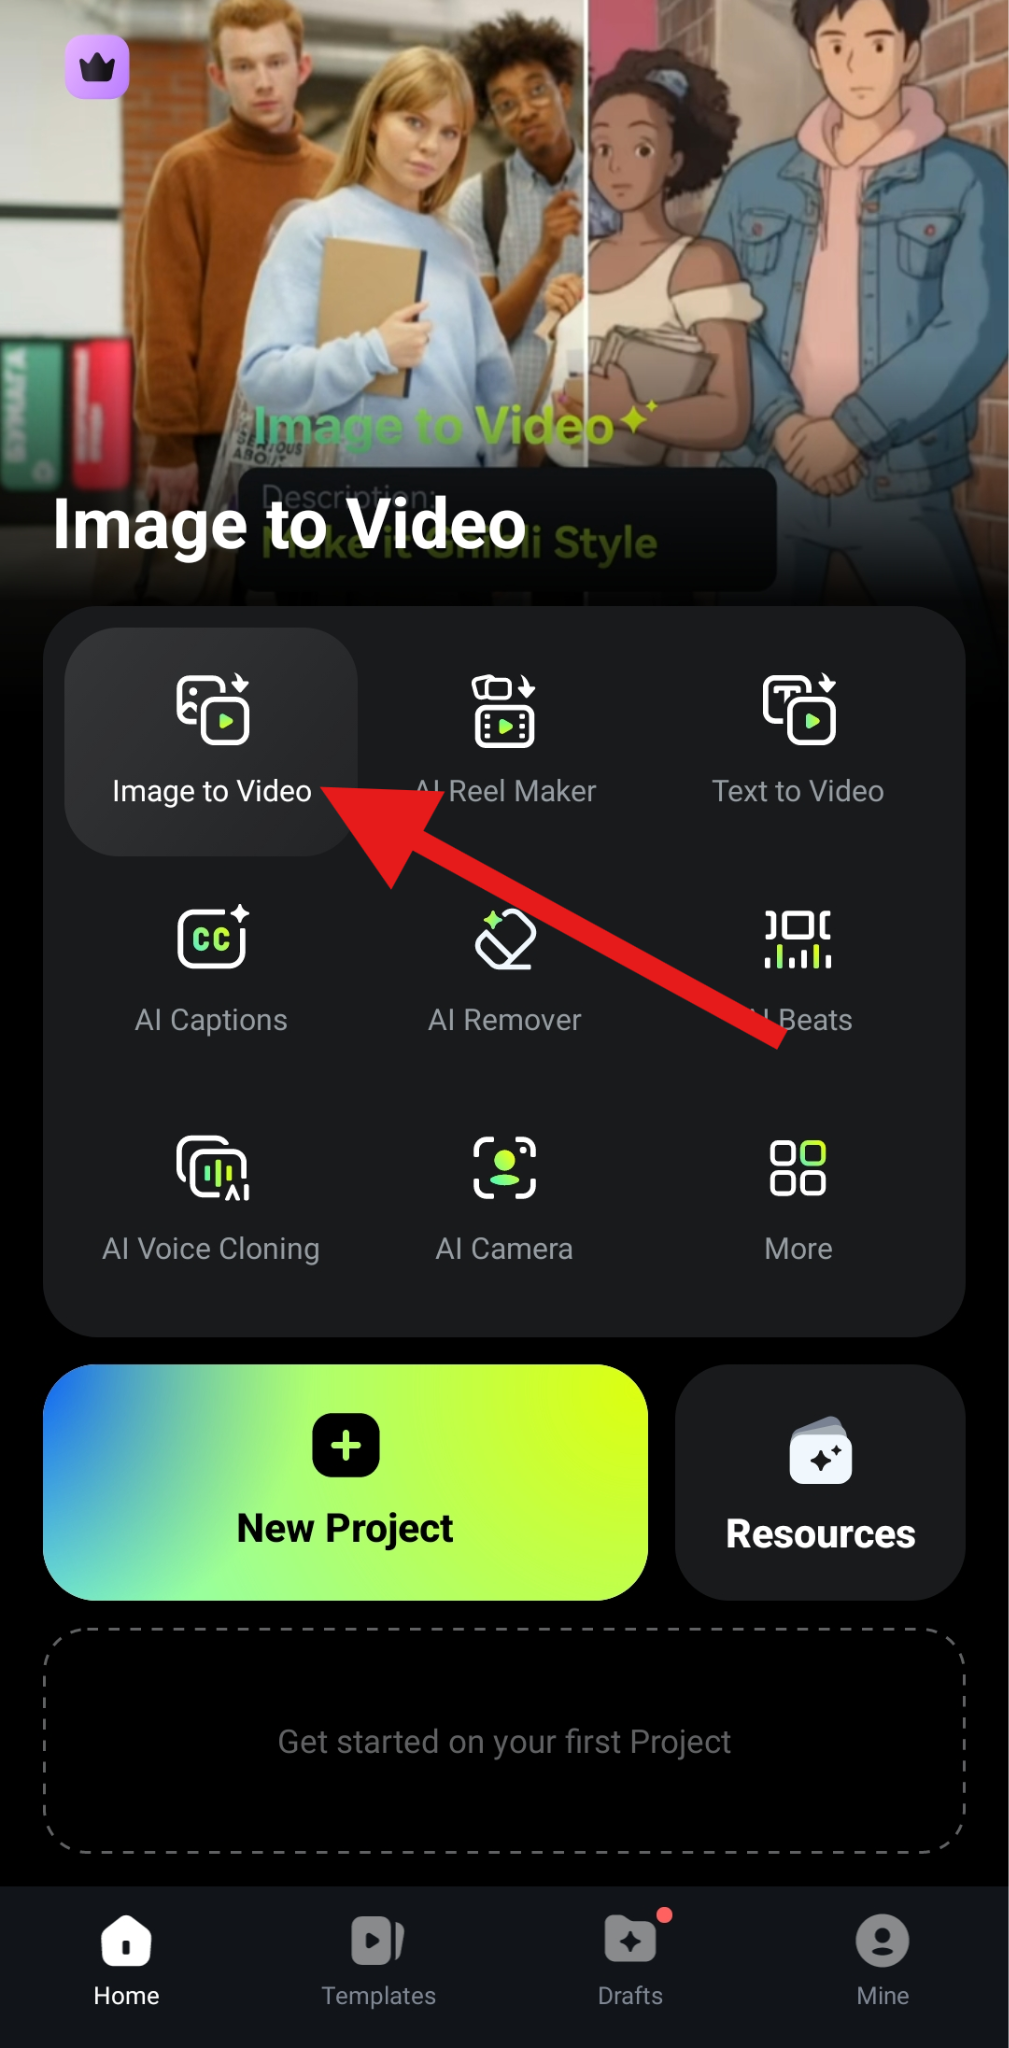
- Tap on Image to Video on the home screen.
- Now, go to the Blending section, and upload two photos. Add a prompt explaining what you want the AI to do, and then tap on the big Generate button.
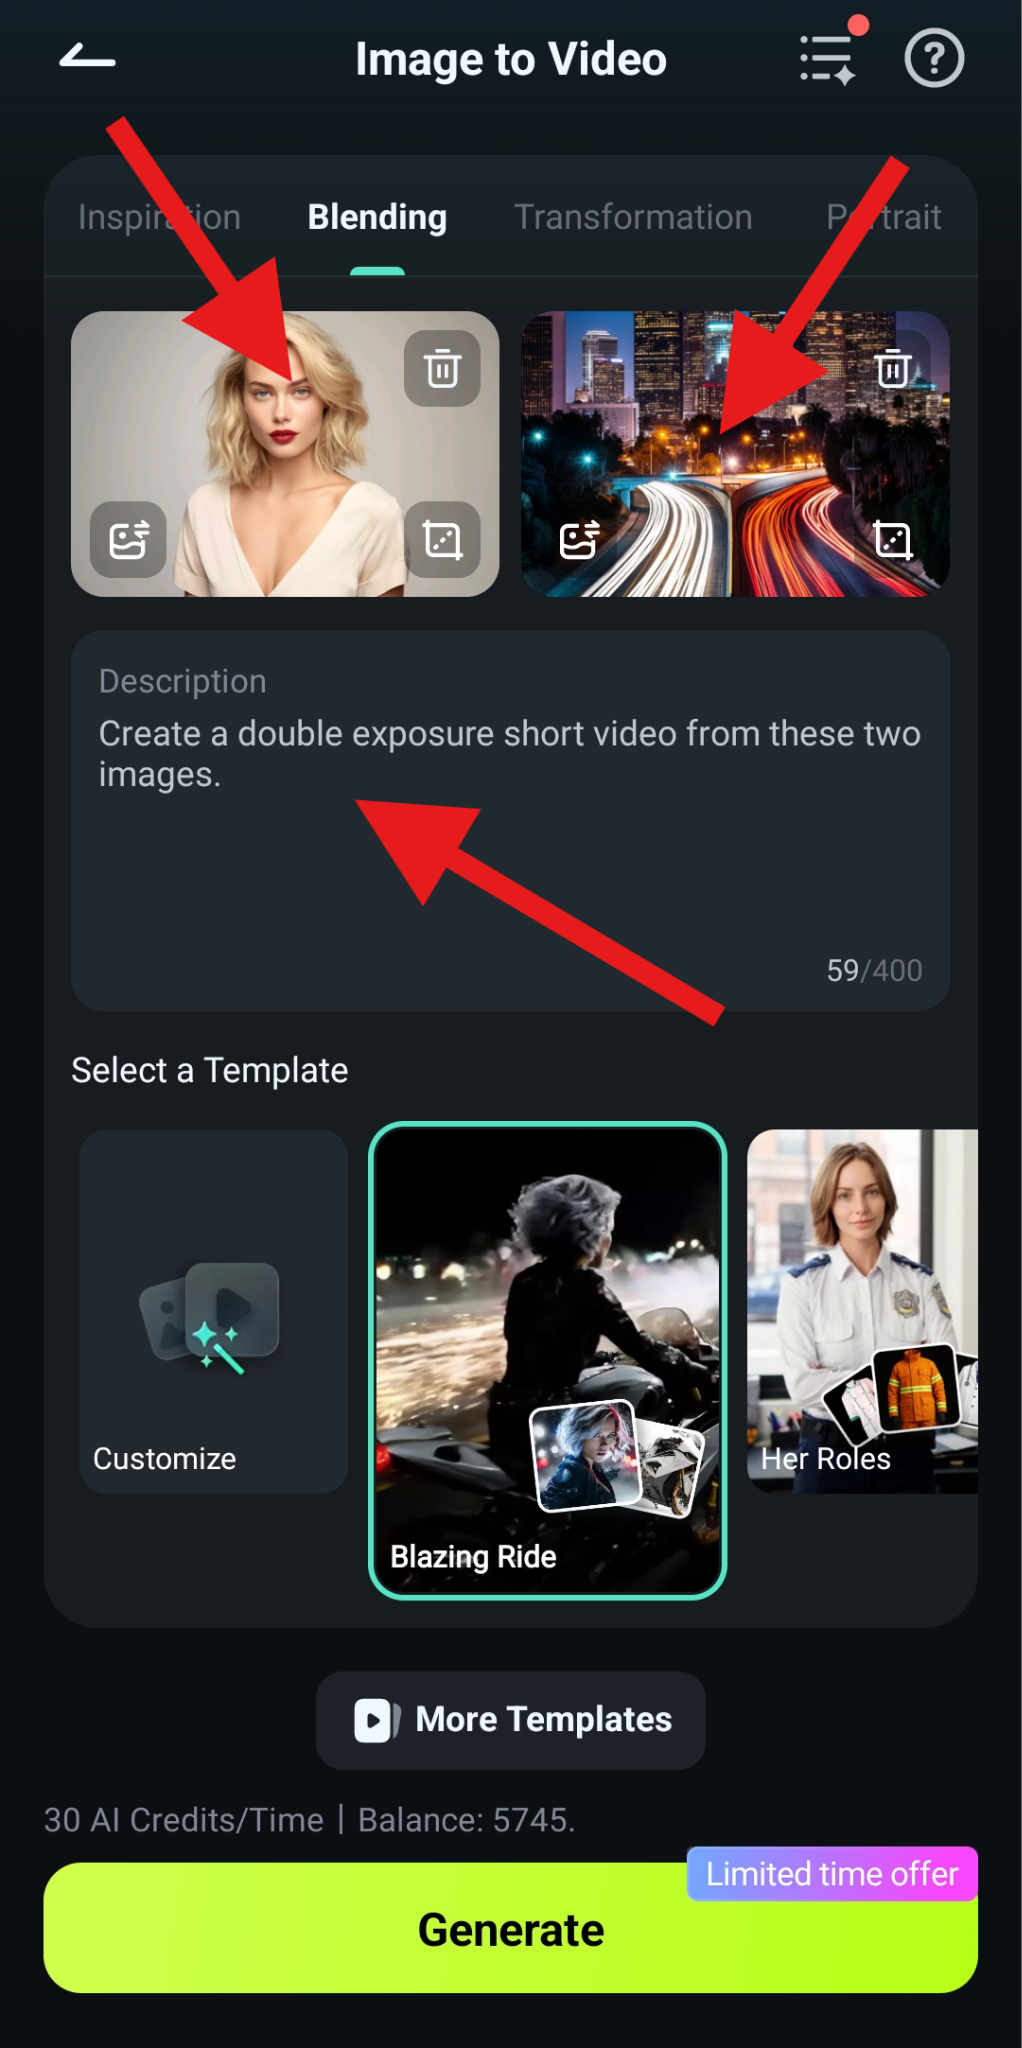
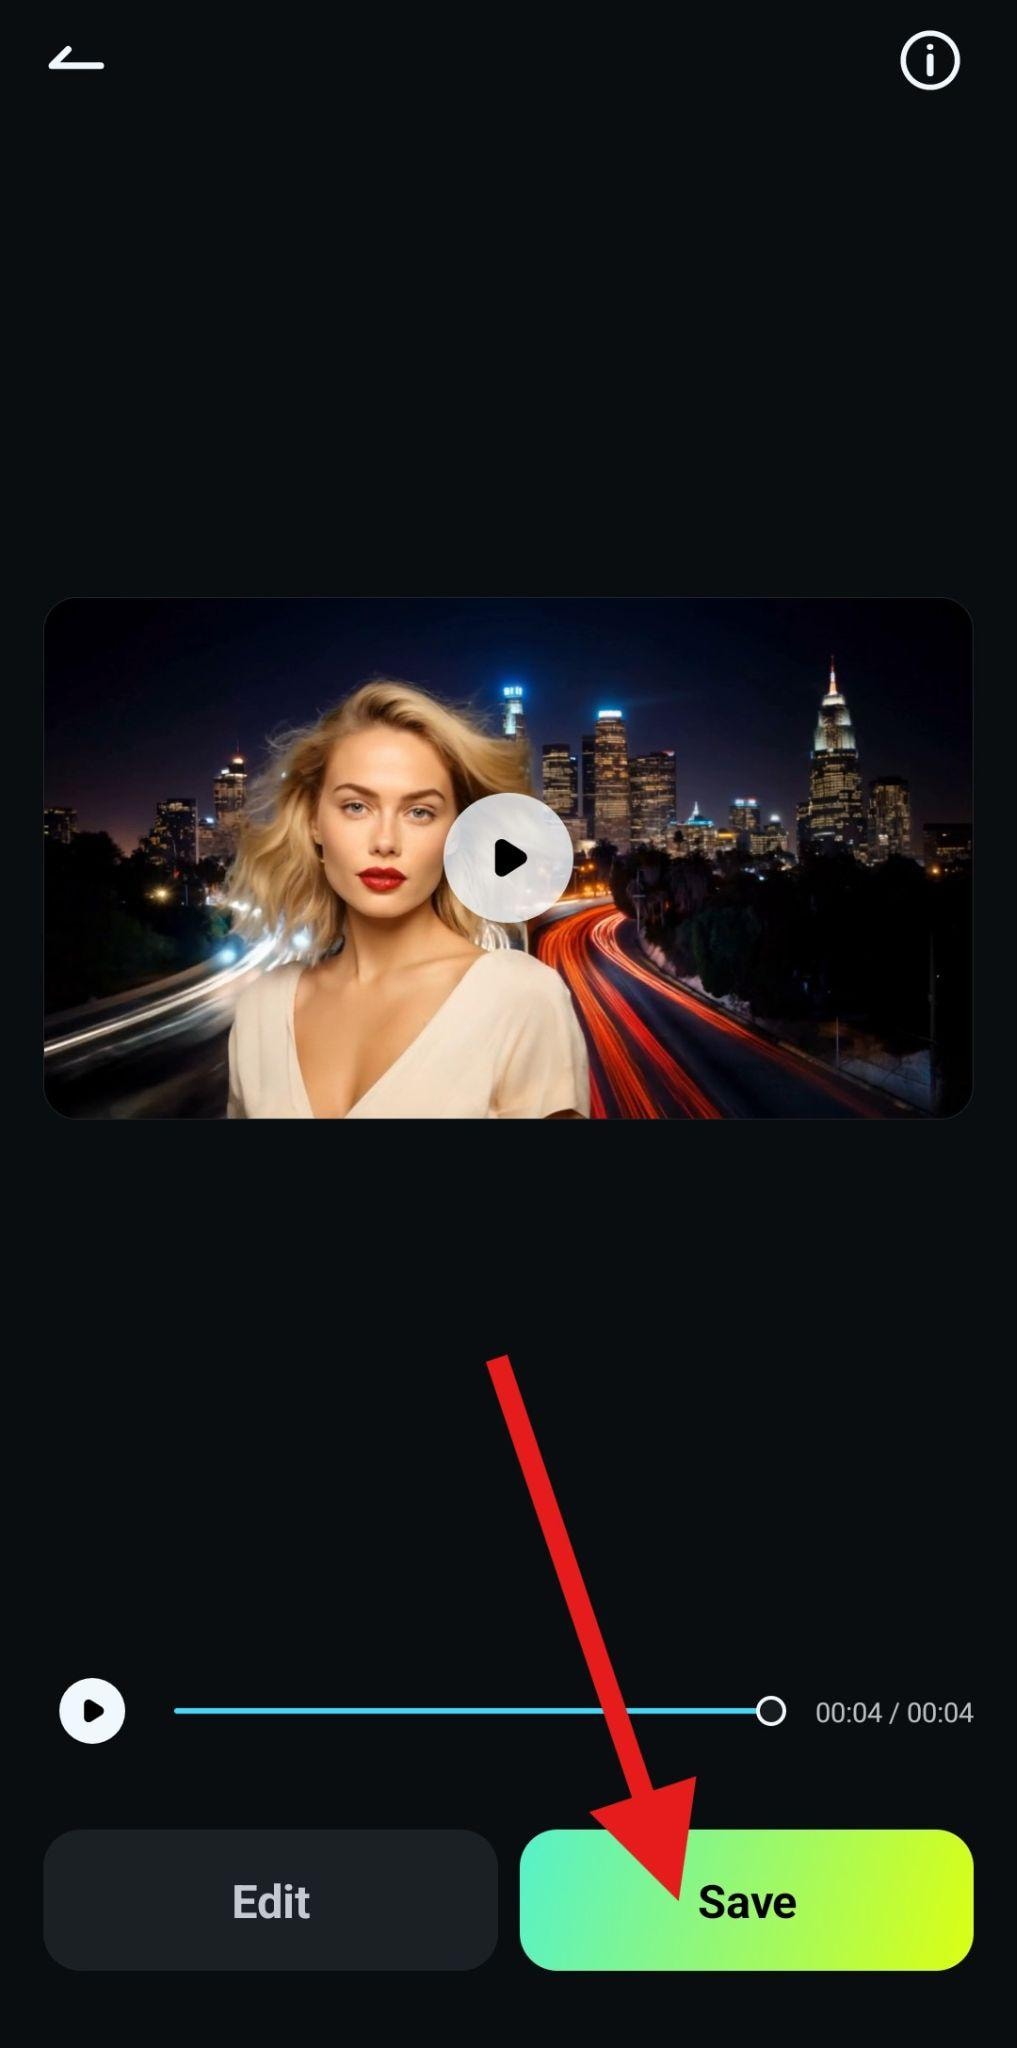
- The AI process will begin immediately, and after a few minutes, you can review the result and tap Save to add the video to your mobile storage.
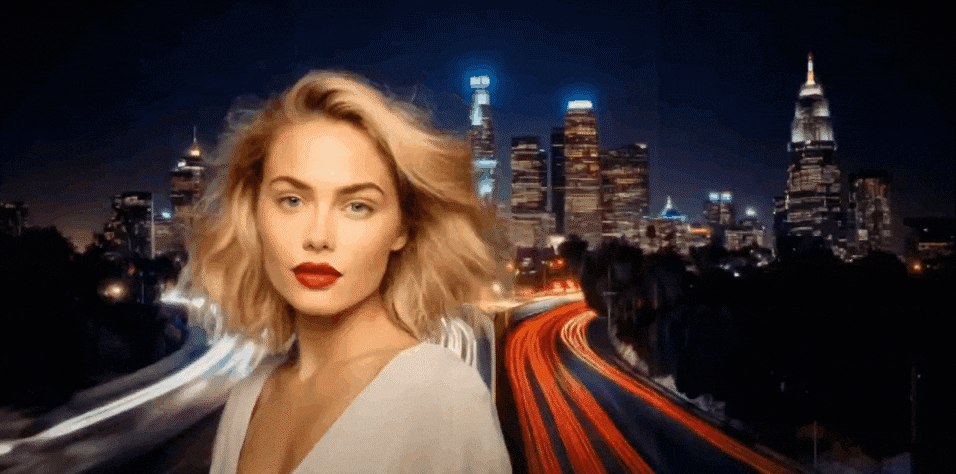
- Take a look at this artistic short clip that we were able to create in less than a minute.
Photoshop vs. Filmora: Which One Should You Use?
Here is a quick comparison table that outlines the main differences between Photoshop and Filmora so that you can make an informed decision about which tool is best for your specific needs.
| Features | Photoshop | Filmora |
| Skill Level Required | Intermediate to Advanced | Beginner to Intermediate |
| What is it Best For? | Photo editing, graphic design, and creating digital art | Video and photo editing, and creating posts for social media |
| Output Formats | JPEG, PNG, PSD, TIFF, GIF, PDF, and more image formats | JPG, PNG, GIF, and other video formats. |
| AI Tools | A few, unless you are using plugins. | Many. AI Image, Image to Video, Idea to Video, AI Image Stylizer, AI Portrait Cutout, AI Object Remover, etc. |
Conclusion
In this article, we have discussed how to make a double exposure photo in Photoshop step by step. If you are also a video lover and curious about how to fuse photos into a video with AI, you can try Wondershare Filmora, as it not only makes it easier to make double exposure photos but also blends pictures and transforms them into a video seamlessly with AI.
secure download 