

Do you need your Blender project to have no background for a logo, product mockup, or video compositing? It's possible to render a transparent background in Blender (both Eevee and Cycles), but the settings can be confusing. This definitive guide simplifies the process, providing clear, step-by-step instructions on how to get a transparent background in Blender for both images and video, ensuring you nail that perfect alpha channel.
Part 1. How to Render a Transparent Background in Blender (Eevee & Cycles)
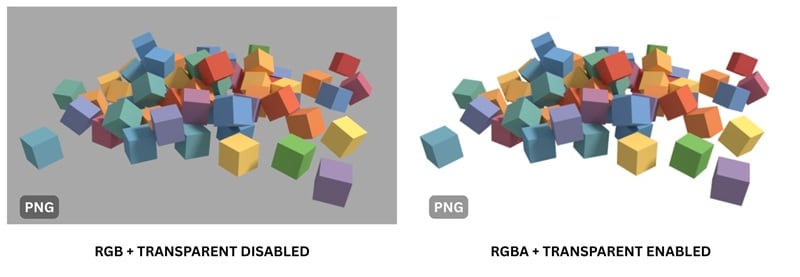
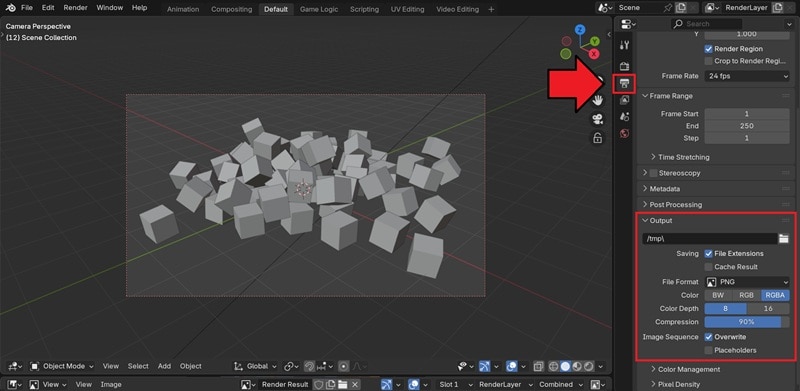
When rendering an image with no background in Blender or any other program, the key is in the file format that supports RGBA (which includes transparency), and ensure the transparency is enabled.
PNG is the popular choice for image formats since it preserves transparent areas (unlike JPEG, which always adds a solid background).
Follow the steps below to get a transparent render in Blender. The process works the same in Eevee, Cycles, and the Workbench engine.
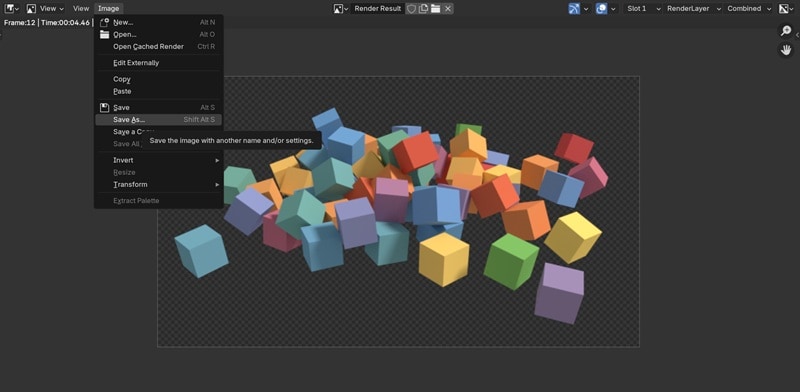
Once you've enabled transparency, go ahead and save it as usual. To render with a transparent background in Blender, select Render > Render Image or press F12 on your keyboard.
After saving your render as a PNG with transparency enabled, you can place the object or character image on any backdrop later on any platform you want!
Part 2. Advanced: How to Create a Transparent Material in Blender using Alpha
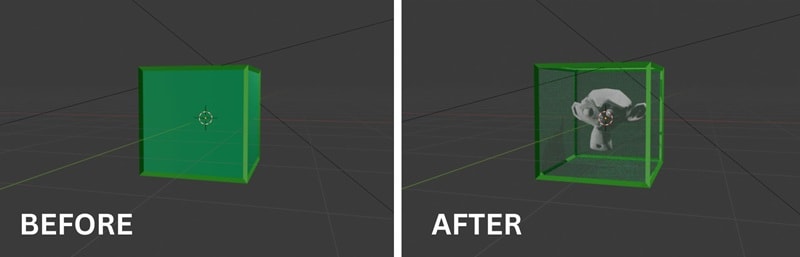
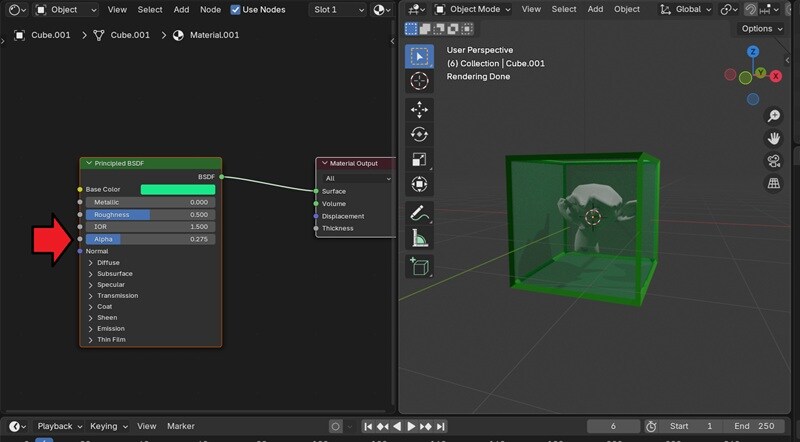
You have learned how to render a transparent background in Blender. Now, to take things a step further, you can also make a transparent material for your objects. The easiest way to create transparency in Blender is by adjusting the Alpha value.
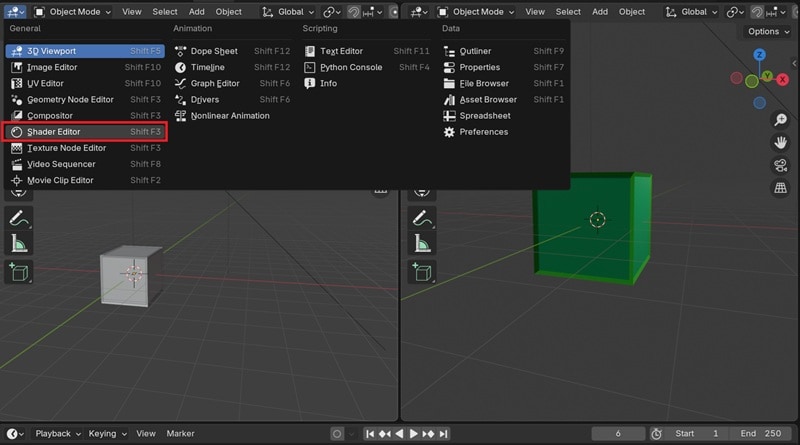
How to Make a Transparent Material in Blender
The tutorial above applies to Blender 4.5. If you're working with an earlier version, you can check the video here.
Part 3. Filmora Alternative: The Easiest Way to Remove Video Backgrounds (No Blender Rerender)
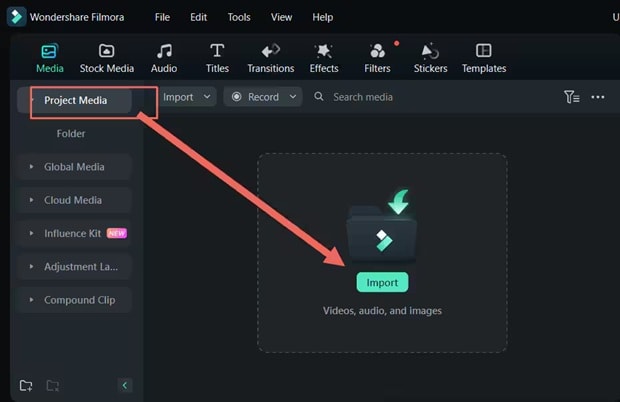
If you've already rendered images or videos from Blender, or if you're working with existing media that needs a transparent background, you don't always have to render a transparent background in Blender again and navigate through its complex settings. A simpler option is to use an editor like Wondershare Filmora.
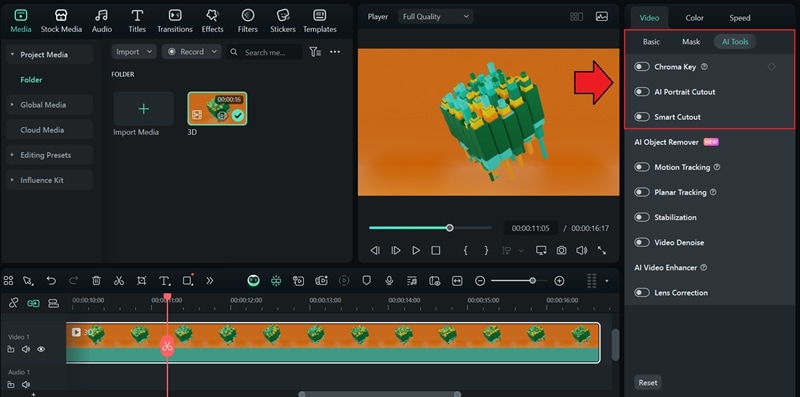
Filmora offers multiple ways to remove video backgrounds with ease, depending on how much control and flexibility you need. For example, you can utilize the Chroma Key (Green Screen) feature for solid colors or the Smart Cutout for complex scenes.
- Using Chroma Key (Green Screen): Ideal for clips with a solid color background. Simply pick the color you want to remove, and Filmora will cleanly cut it out.
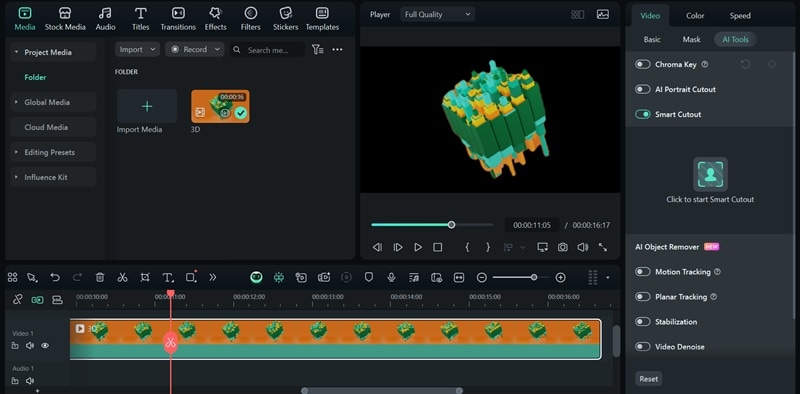
- Using Smart Cutout: Draw or select the area you want to isolate, and Filmora automatically removes the rest of the background with precision.
- Using AI Portrait Cutout: Ideal for people-focused videos. With just one click, it removes the background around the subject.
How to Make a Transparent Background in Filmora
Enable the tool you want to use and fine-tune the settings as needed. The background will be removed automatically, and you can adjust the result for a cleaner finish.
Conclusion
Many of you are probably confused about how to make a transparent background in Blender because of its complicated settings that feel overwhelming at first. But with the tutorial above, you should be able to render transparent backgrounds and even create transparent materials without problems.
If you already have your media ready or want a faster route, you can also use Wondershare Filmora to do the job for you. Since many of its tools are powered by AI, you can remove backgrounds quickly and get clean, professional results without spending too much time on technical details.
Frequently Asked Questions
-
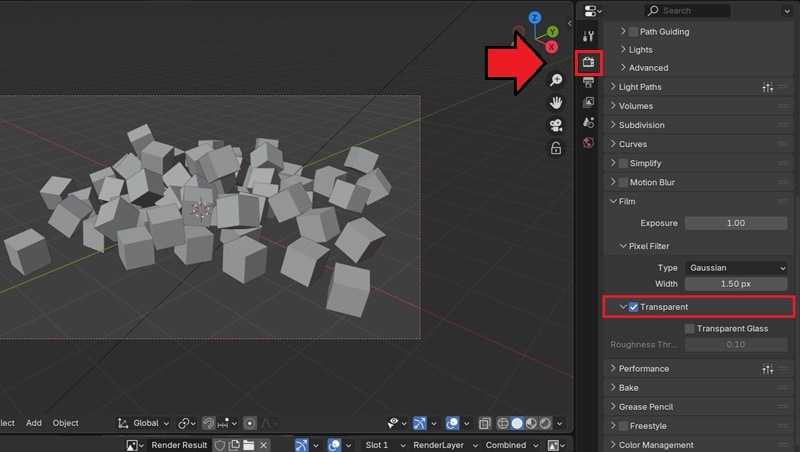
Why is my render background black in Blender?
If your render shows a black background, it usually means transparency isn't enabled. Go to Render Properties > Film and check the Transparent box. This will remove the default background color. -
Can I render a transparent background in Blender using Shader Nodes?
Yes, you can control background transparency with Shader Nodes. In the Shader Editor, switch to the World tab and add a Transparent BSDF shader. Then, use a Mix Shader to combine it with the existing Background shader. By adjusting the Fac (Factor) value, you can decide how much of the background is visible or transparent. -
Is it possible to have a transparent background on a video in Blender?
Yes. Blender can render videos with transparency if you pick a format that supports an alpha channel, such as WEBM or QuickTime (MOV) with RGBA enabled. This lets you export video files with transparent backgrounds for compositing in other editors.
