People resize videos for many reasons, the most common one being to reduce file size. Others might be to meet a specification, or for compatibility. When you resize a video file, you reduce its file size considerably- making it load faster on devices, reduce processing time, and save a lot of space. Most people prefer watching videos that are smaller in size compared to larger ones, that’s why some social media sites like Instagram, Tiktok, etc have preferred video resolutions, so if you are a user on these sites you might want to resize your video to fit.
The biggest concern most people have about resizing videos is whether it will retain its quality, another concern is that you don’t want to crop out your video while resizing. If the format of the video is mp4, wmv, avi, etc which usually have very large size, resizing it might be a bit of a problem because the video quality will reduce a lot, but if it’s a WebM video file, you can still achieve a good video quality even after multiple compression or changing its resolution, that’s because its codecs- VP8 and VP9 were designed specifically for that, and it’s supported by all browsers.
In the course of this article, we’re assuming you already have a WebM video and you want to resize it, and still maintain its quality so you can upload on your favourite websites without any hassles. We have handpicked some proven methods to help you with that, let’s see them:
Method 1: Resize WebM file with Wondershare Filmora
Wondershare Filmora Video Editor is a great video editing software that comes with a lot of features. You can easily perform basic editing techniques in a few minutes. It also comes with lots of filters to make your videos pop.
For video resizing, Filmora offers you a couple of options: First you have an option of changing the resolution just before you export your video; you also have the option of cropping your videos to your preferred size and cutting out redundant parts of your videos to save space; but the third option is what we’ll show you in this guide, because we imagine you already have your video exported and you just want to resize. You can easily do that by changing the aspect ratio and we’ll show you in a few steps:
For Win 7 or later (64-bit)
For macOS 10.14 or later
Step 1: Go to the official Wondershare Filmora website and download the software.
Step 2: Install Wondershare Filmora on your PC and double click to launch.
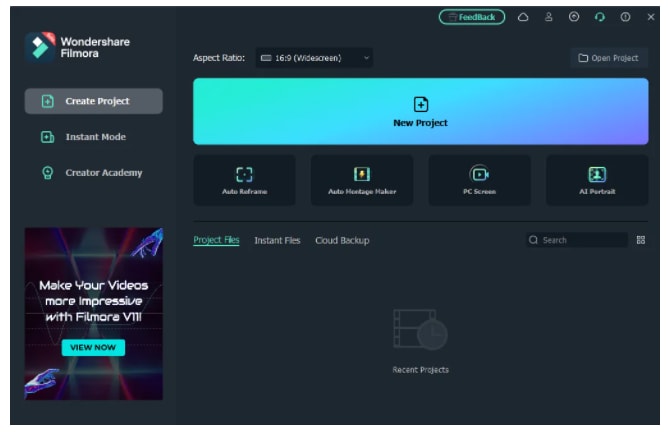
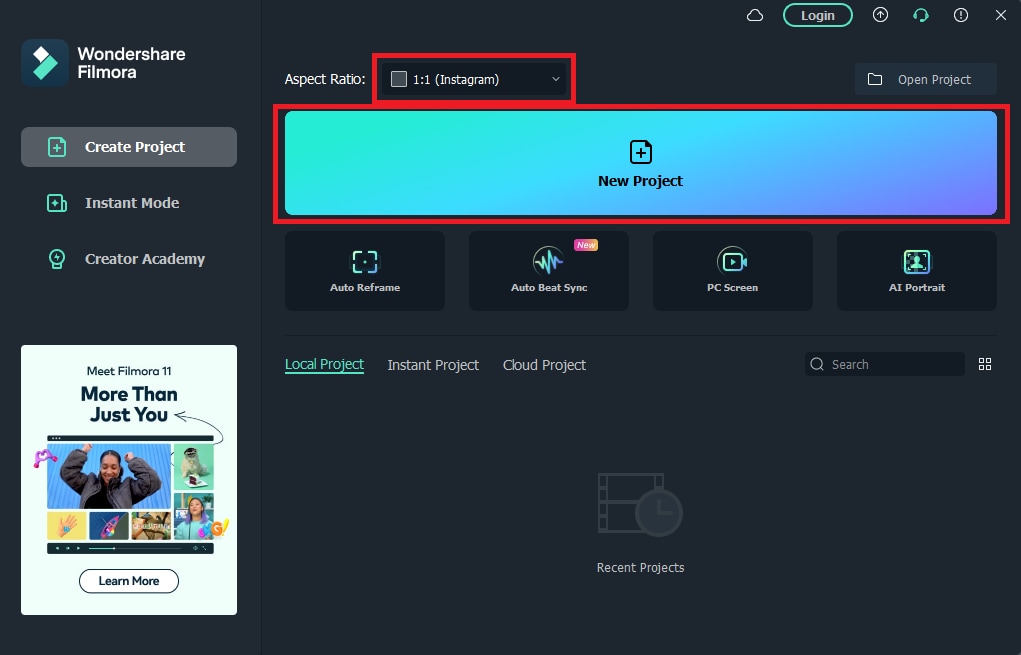
Step 3: Change your aspect ratio. When you launch Filmora, you’re allowed to choose your preferred aspect ratio on the start page.
Select your preferred aspect ratio from the list of options- 16:9 (widescreen), 4:3 (standard), 1:1 (Instagram), 9:16 (portrait). For example, if you import a 16:9 video file into Filmora, and set it to 1:1 aspect ratio then, the final output file will be 1:1, which is the perfect aspect ratio for Instagram posts.
You’ll see below that I selected 1:1 for instagram. After you are done selecting your preferred aspect ratio, hit ‘New Project’.
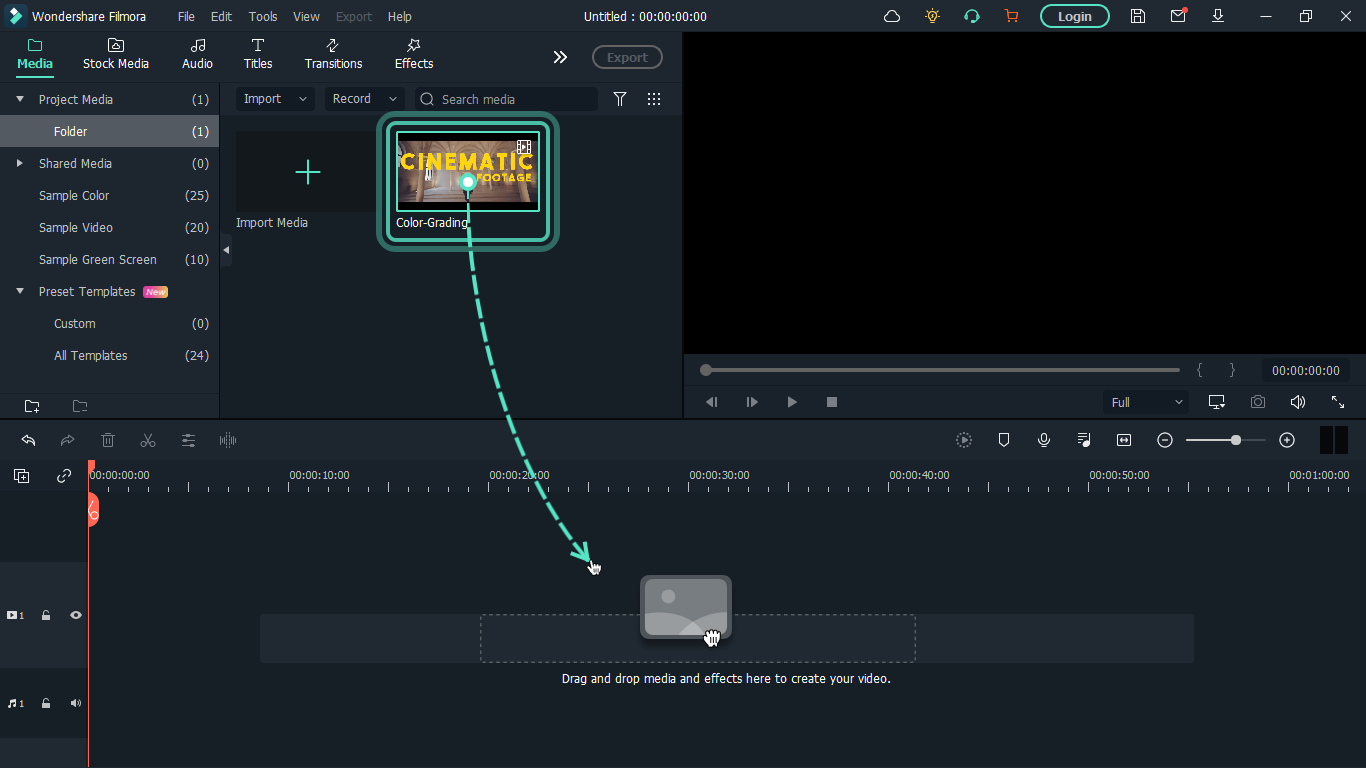
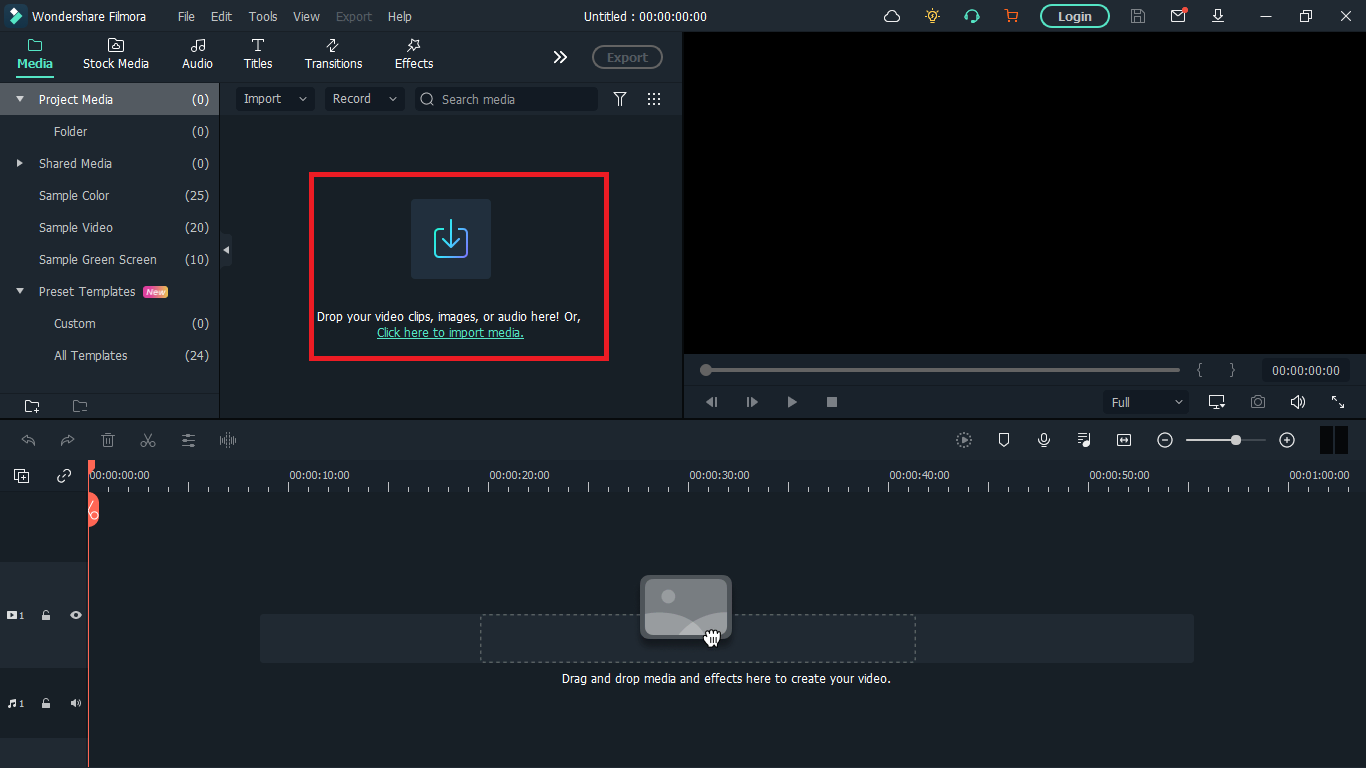
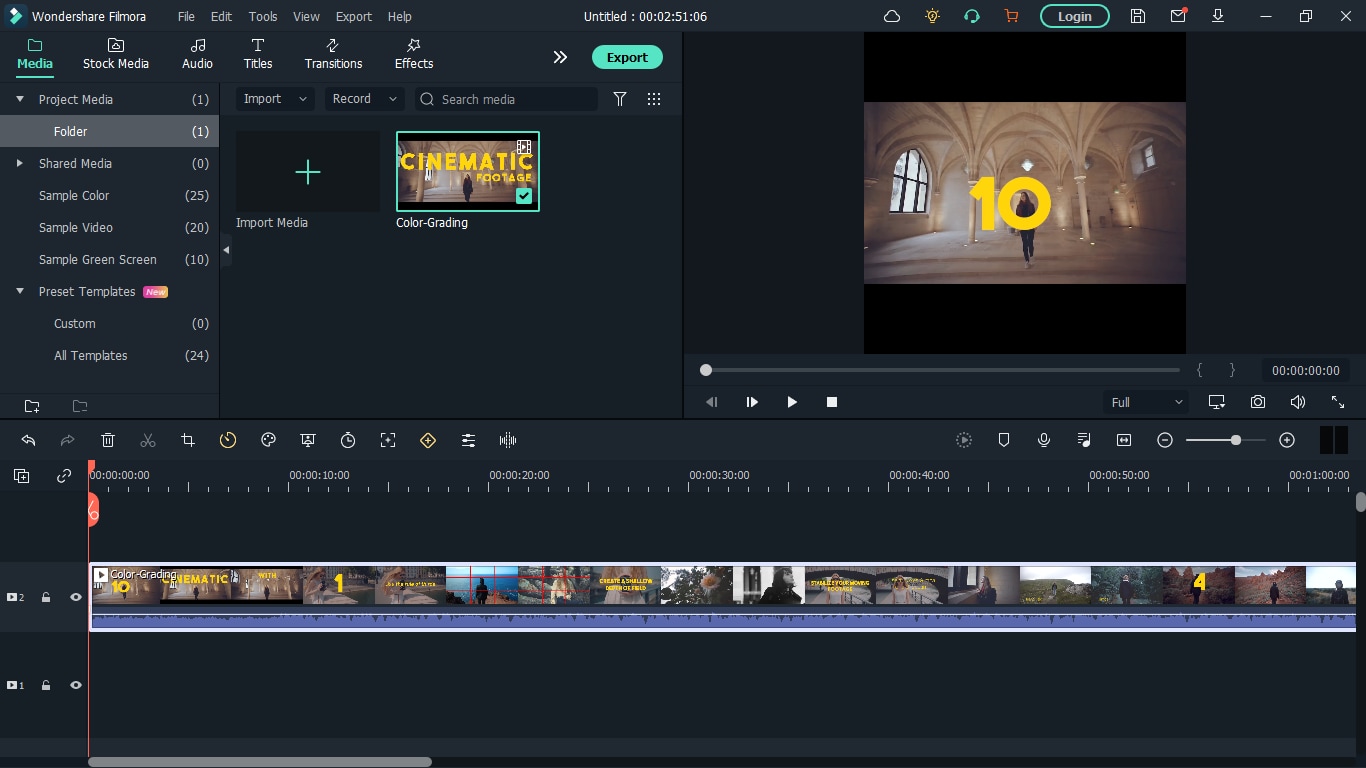
Step 4: Import your WebM video. After you must have selected your preferred aspect ratio, the next step is to import the video you want to resize; you can do this by clicking on the import icon shown below. Once done, drag the video to the timeline also shown below.
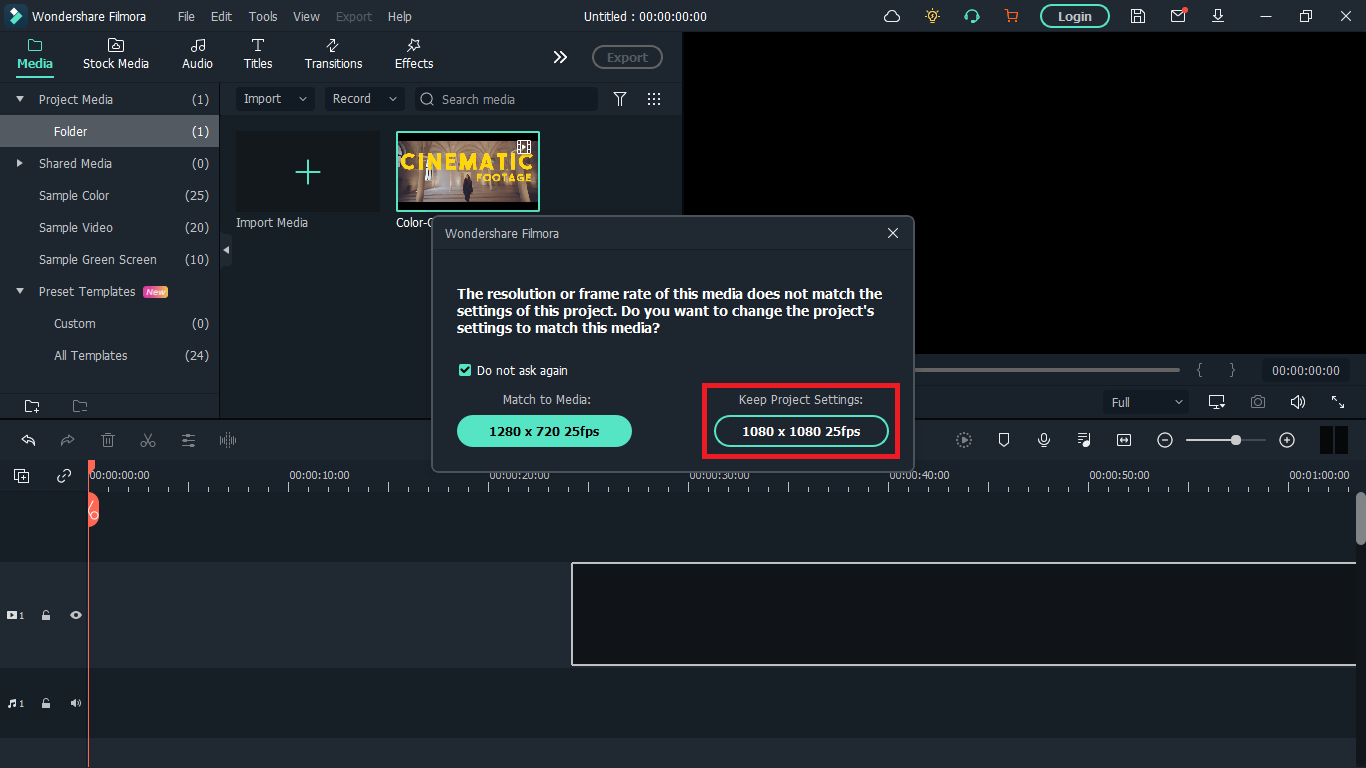
A floating window will appear and you’ll be asked to change project settings to match the media. Click on ‘Keep project settings’. Filmora will change the aspect ratio of the original video you imported to your preferred aspect ratio.
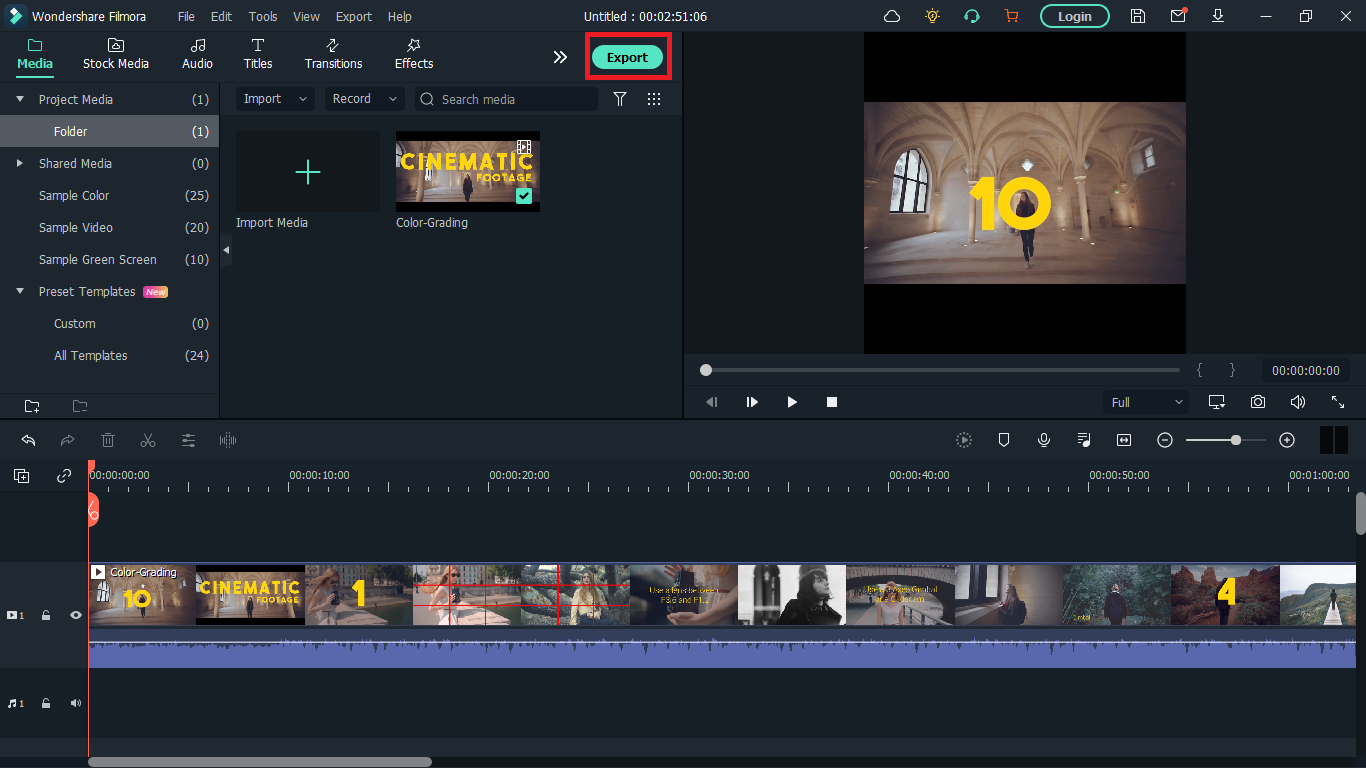
Step 5: Save your video. Once the video is now properly placed in the timeline, next thing is hit ‘export’ to save your video. You can go to the ‘format tab’ to change the video output format to WebM or whatever format you choose then hit ‘Export’.
Method 2: How to resize WebM file with VLC
VLC is a free and open source multimedia player. It is arguably the best media player out there and that’s for a reason- it can play almost everything without the need for any external codecs.
The playback feature is amazing but that’s not the only thing it can do. VLC outshines most other media players because of some extra features it possesses. It resizes and converts media files, downloads and adds subtitles, records screen, as well as is customizable in settings and expandable via plugins.
What we want to use in this guide is its media resizing feature, so let’s show you how you can use it in these steps:
Step 1: Download VLC Media player from the official VLC page and install it on your windows or Mac PC.
Step 2: Launch VLC after installing by double-clicking on the software.
Step 3: Click "Media" in the toolbar.
Step 4: Select "Convert / Save". You can also tap shortcut keys Ctrl + R to quickly open a new window.
Step 5: Click "Add". You can load one or more video files. Here, I'll choose a colour grading video on my desktop. You can see it has the extension ‘.webm’. After loading the video file you want to resize, click "Convert / Save" again.
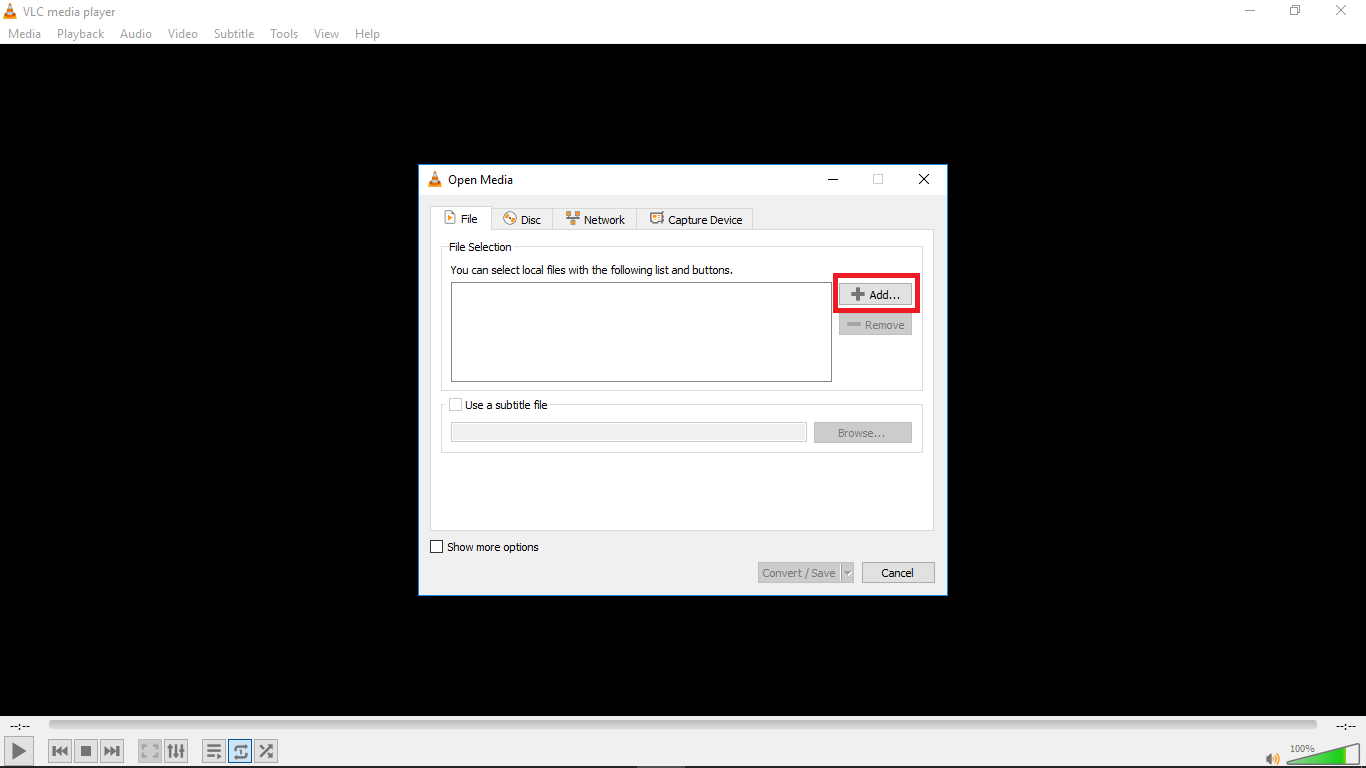
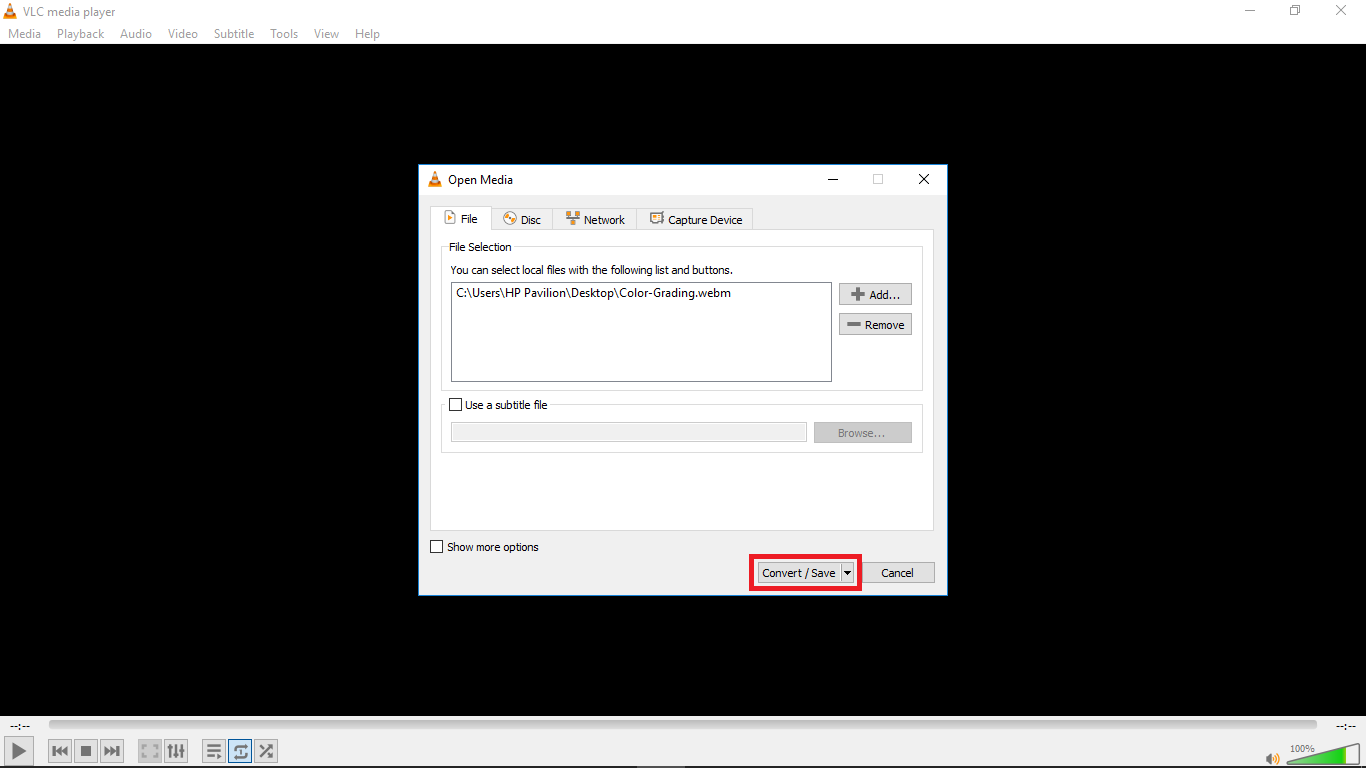
Step 6: Choose your desired output profile type. With VLC, you can resize video to MP4, WebM, TS, and other formats.
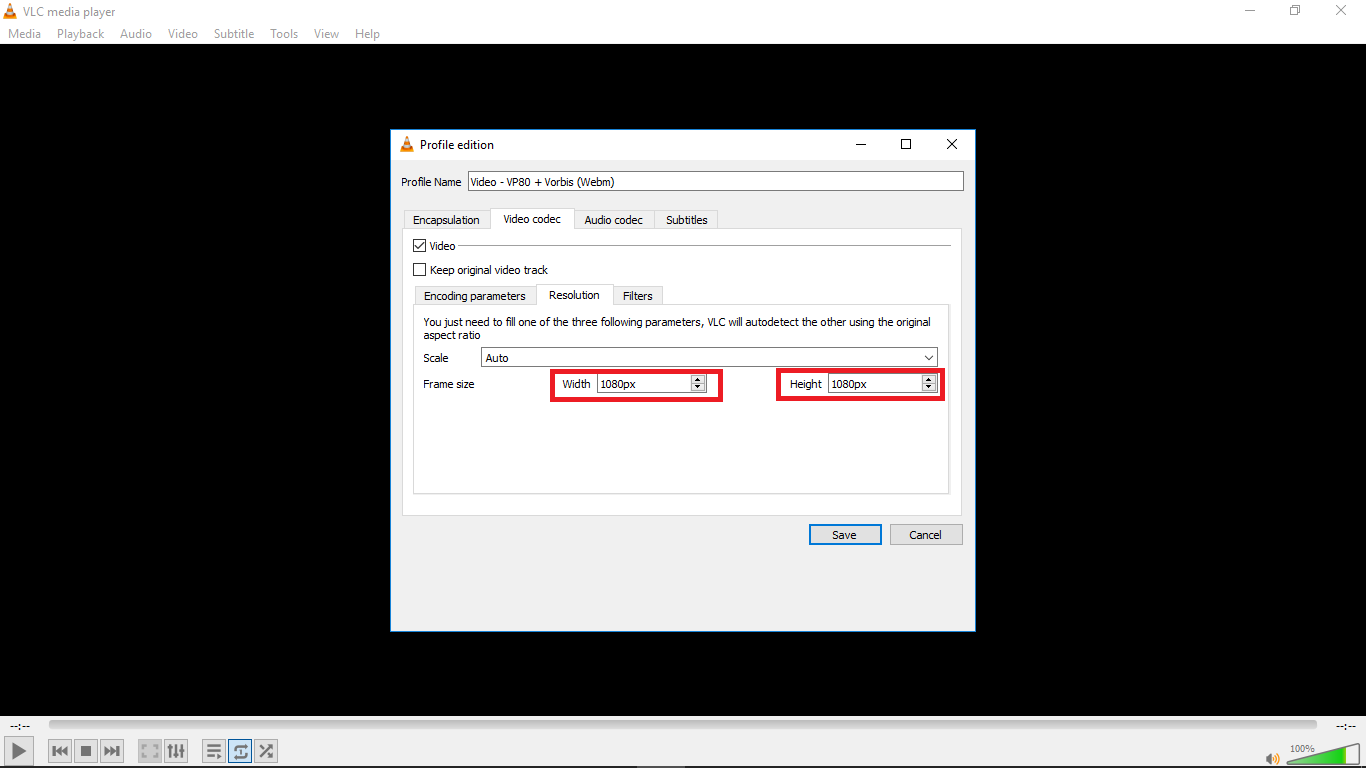
Step 8: Click the settings icon to access the settings window and select the video codec where you can adjust parameters like frame rate, bitrate, resolution, etc to change video file size. I changed the frame rate of my video to 30fps which is ideal for high quality videos. Also click the resolution tab and set your desired resolution then click save.
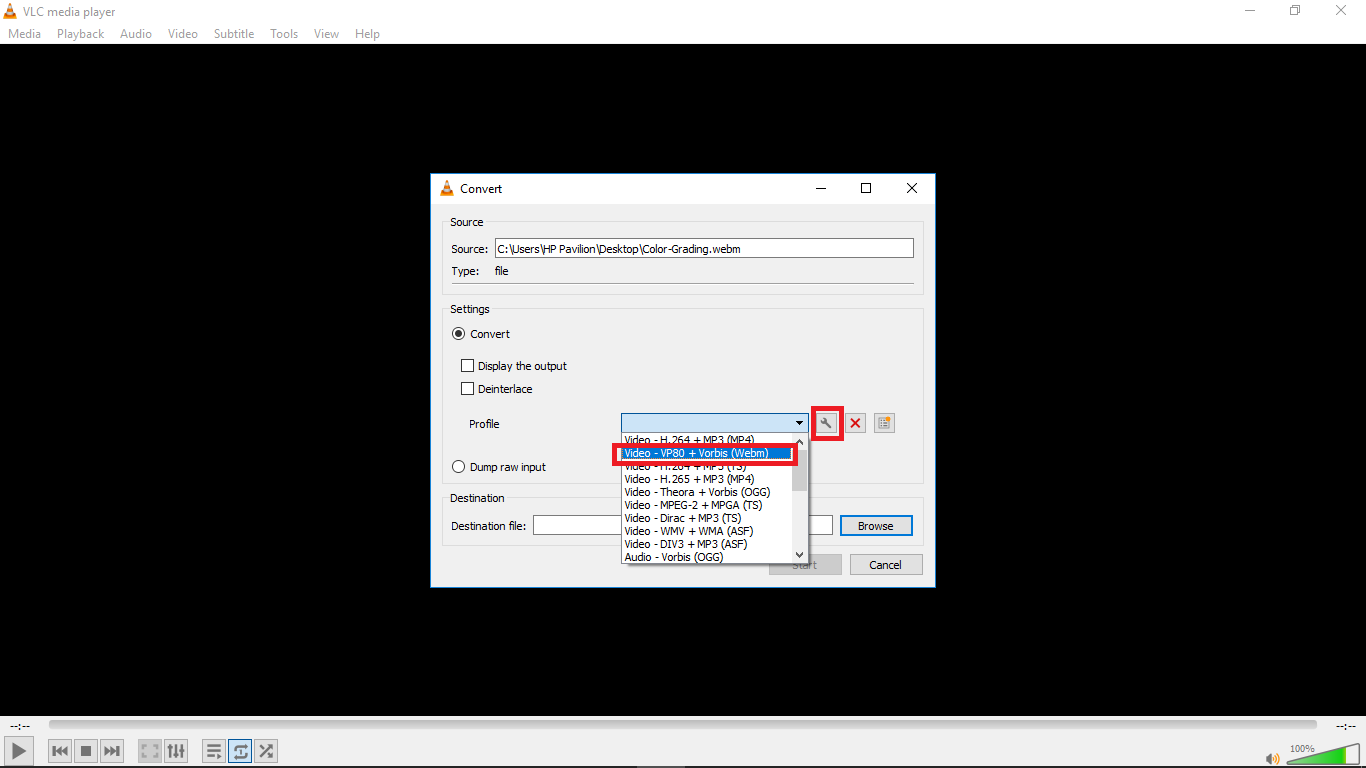
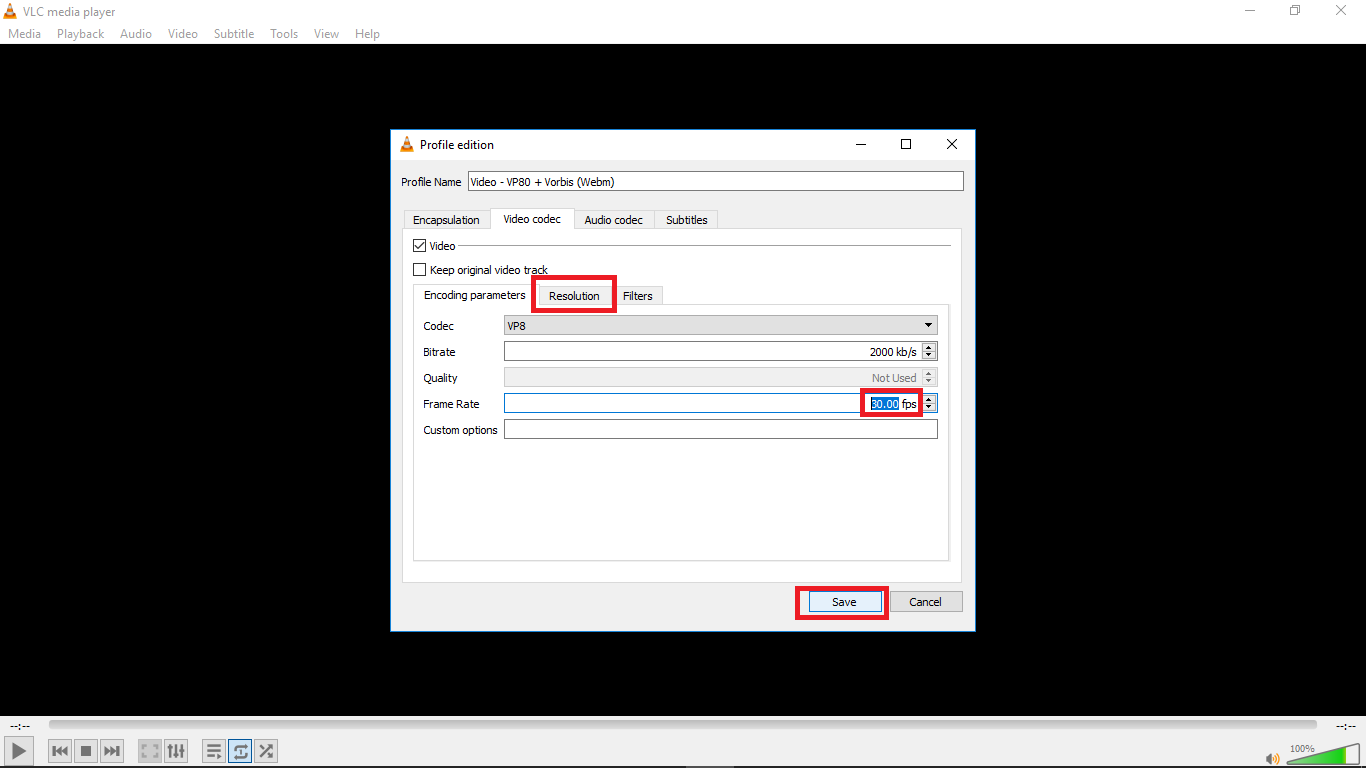
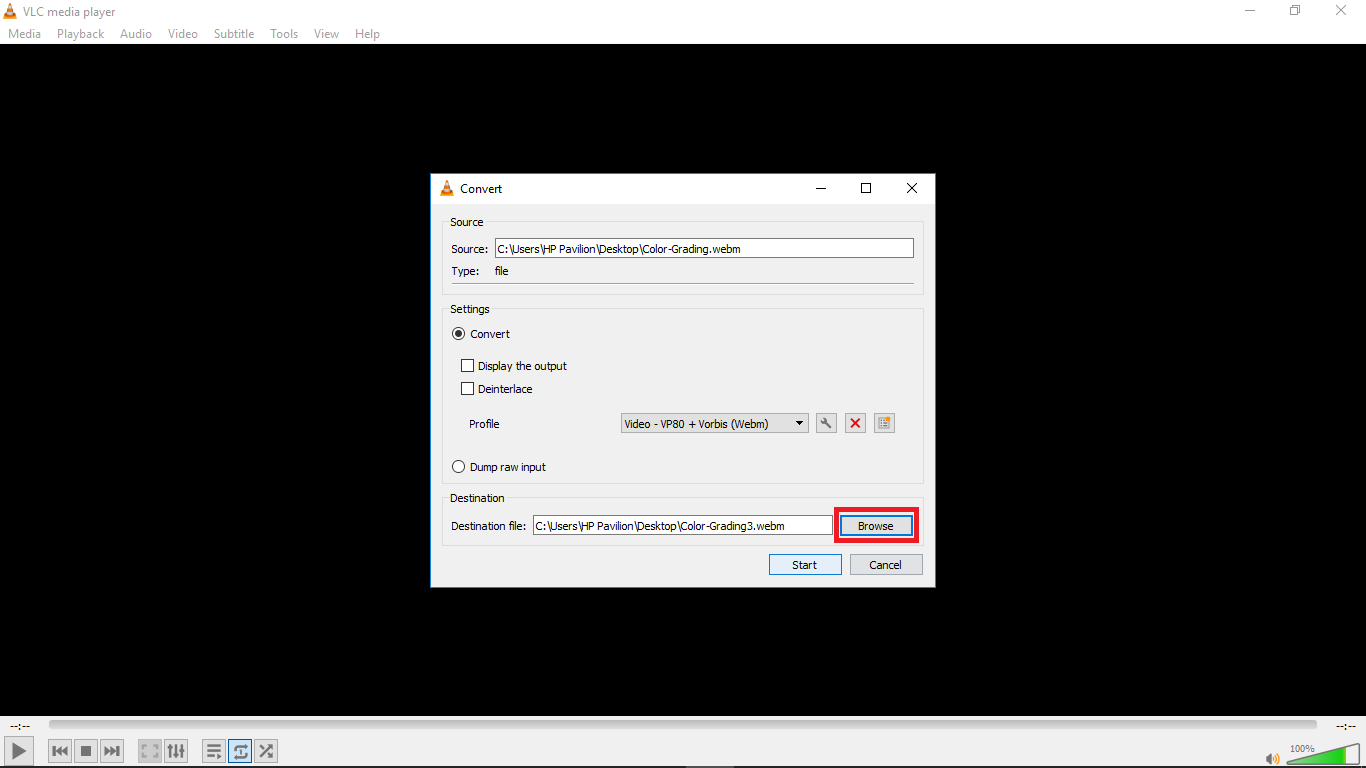
Step 9: Select the destination folder and click start. VLC will resize the video and retain most of its quality.

Method 3: Resize Videos With Ezgif
An alternative way to resize videos is by using Ezgif Video Resizer. If you are looking for a quick way to resize your WebM videos, this is a great tool. Ezgif is a free online video resizer with a very simple interface that can aid easy navigation for new users. The whole video resizing operation is pretty quick so you don’t have to worry about wasting so much time.
Ezgif supports various video formats like MP4, MOV, FLV, WEBM, MPEG, 3GP and more. Aside from the basic size change, it also allows you to rotate, crop, cut, mute, speed, reverse and add subtitles.
Here’s how you can resize your WebM video with Ezgif in a few steps:
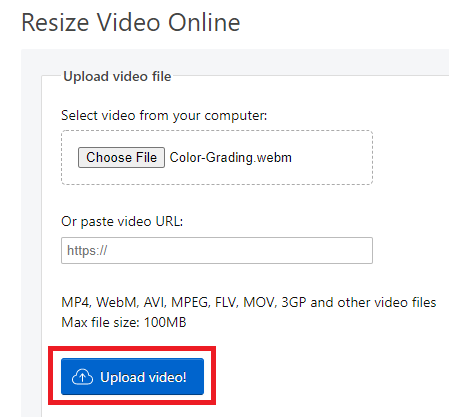
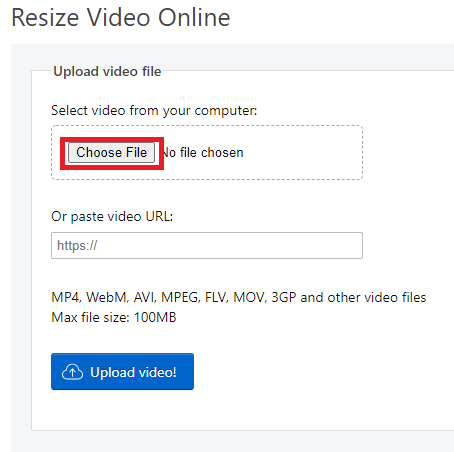
Step 1: Go to Ezgif Resize Video on your web browser and add your WebM file by clicking "Choose File" or pasting the video URL.
Step 2: Click "Upload Video". You’ll see that I chose a colour grading video with the .webm extension which I want to resize. After clicking ‘Upload Video’, a floating window will appear with the video details displayed.
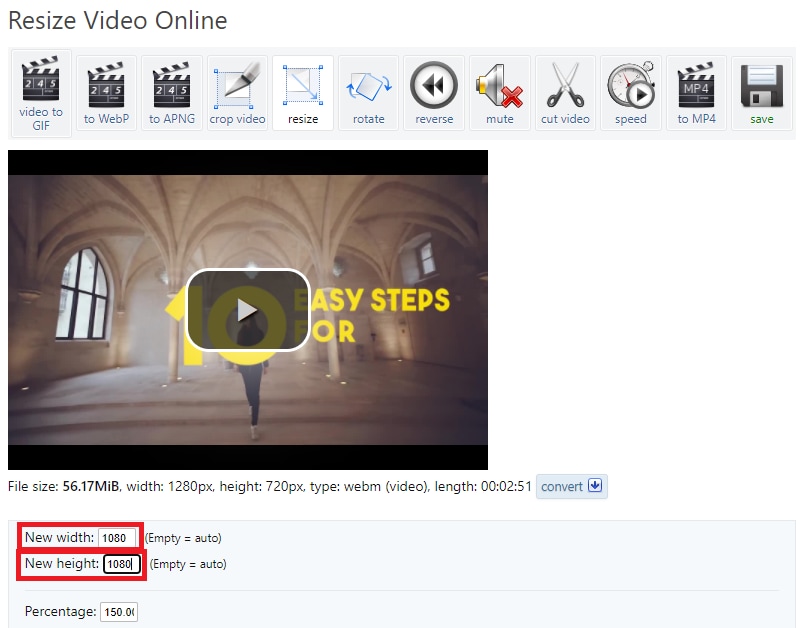
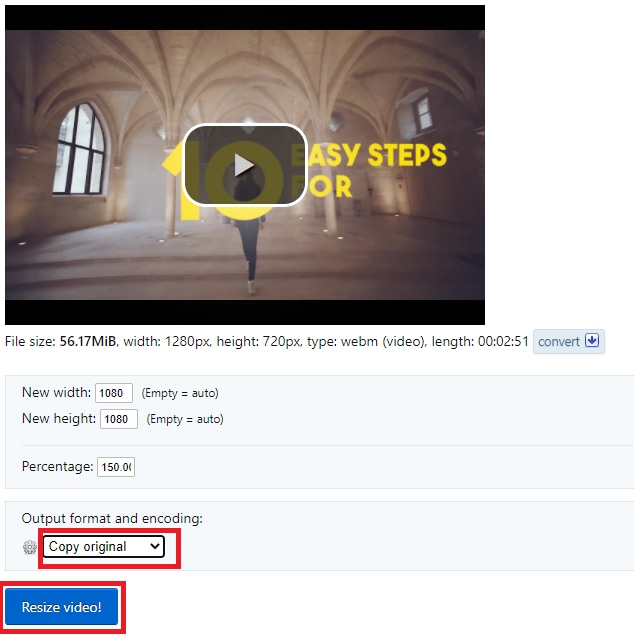
Step 3: Type in specific "New width" and "New height" to confirm a new size.
Step 4: Check "output format and encoding" and press "Resize video!" to save your WebM file.
Whether you are a content creator or a social media influencer, resizing videos is one thing you’ll be doing regularly and these tools will come in handy. Maybe you are a video editor and your client wants a different video format after you are done exporting, these tools will definitely save you all the stress of readjusting and hours or re-exporting.


 100% Security Verified | No Subscription Required | No Malware

