
 100% Security Verified | No Subscription Required | No Malware


 ChatGPT
 Perplexity
 Gemini
 Claude
 Grok
Grok
Creating engaging presentations is all about capturing attention and adding videos can instantly make your slides more exciting and impactful. Since YouTube is packed with great video content, it’s no surprise that many people wonder, “How do I embed a YouTube video in PowerPoint?”
Thankfully, the process itself is not as difficult as you thought it was going to be! If you scroll down, we’ll walk you through detailed methods on how to insert a YouTube video into a PowerPoint and show you how simple it is to put YouTube content directly on your slides for maximum impact.
In this article
Part 1.Different Methods to Add YouTube Videos to PowerPoint
Before we start answering the question of, “How do I embed a YouTube video into a PowerPoint?”, there are a few things you should keep in mind to make the process smooth and hassle-free:
- You need the internet: If the video is online, your connection has to be too.
- Permission matters: Make sure you’re using videos you have permission to share—this keeps things legal and respectful.
- Not all videos work: Not all YouTube videos can be embedded due to restrictions, so double-check before getting too attached to one.
With that out of the way, let’s talk about how you can actually insert YouTube videos into PowerPoint. There are three different methods you can use, and we’ll break them down step by step below.
Method 1: Insert YouTube Video via Built-in PowerPoint Tools
Here’s the easiest way to add a YouTube video to your slide directly in PowerPoint:
1. Go to the slide where you want the video to appear.
2. Click the "Insert" tab at the top of the screen, select the "Video" category, then choose "Online Videos" from the options.
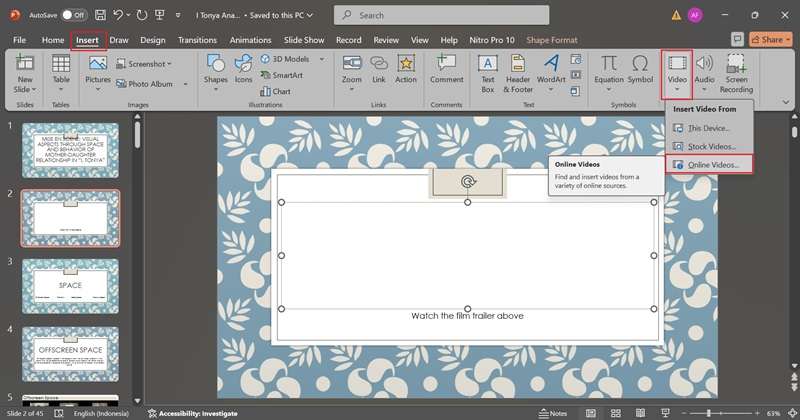
3. Paste the YouTube video link into the box that pops up and hits "Insert".
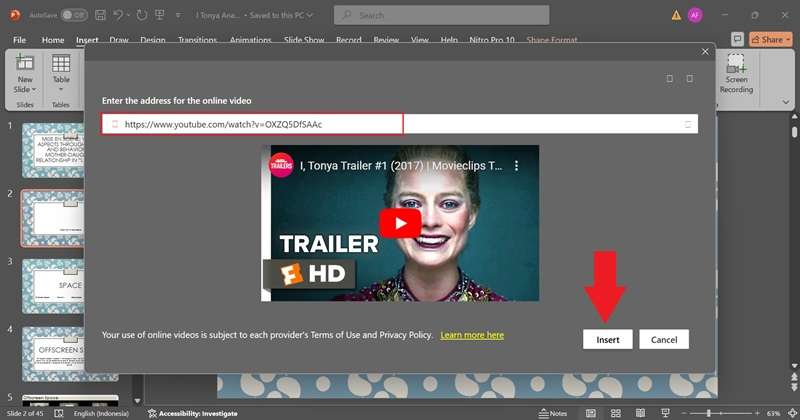
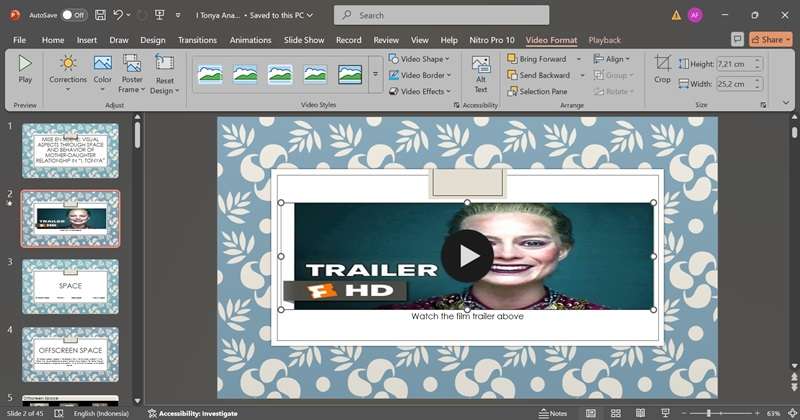
4. Wait a few seconds and the video will appear on your slide! You can resize and move it around to fit perfectly where you want it. Now, the YouTube video is ready to play directly in your presentation.

Method 2: Embed YouTube Videos Using Embed Code
Other than using a YouTube link, you can also learn how to embed a video in PowerPoint from YouTube by using the embed code. Here's how to do it:
1. Find your YouTube video and click the "Share" button under the video.
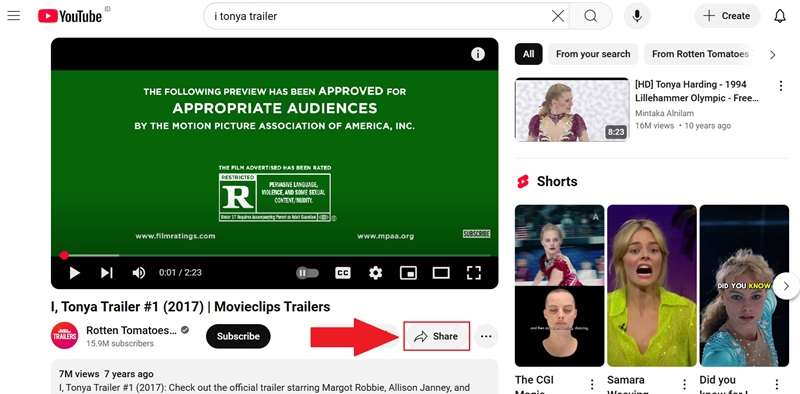
2. Select "Embed" and copy the code that pops up.
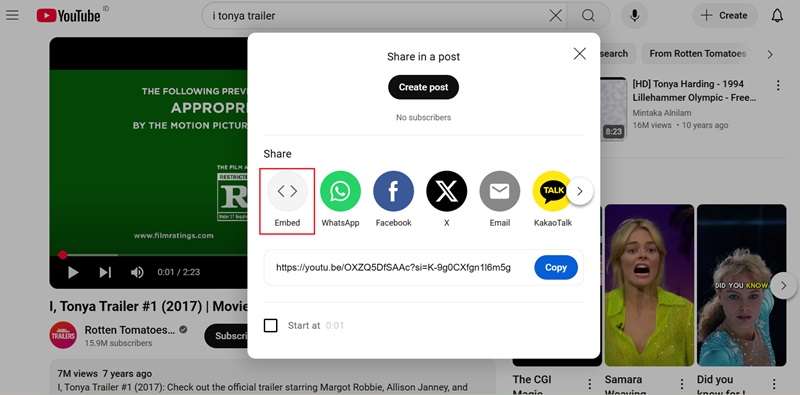
3. Just like in the previous method, open PowerPoint and go to the slide where you want the video to appear. Click the "Insert" tab, select "Online Videos", paste the embed code in the box, and click “Insert”.
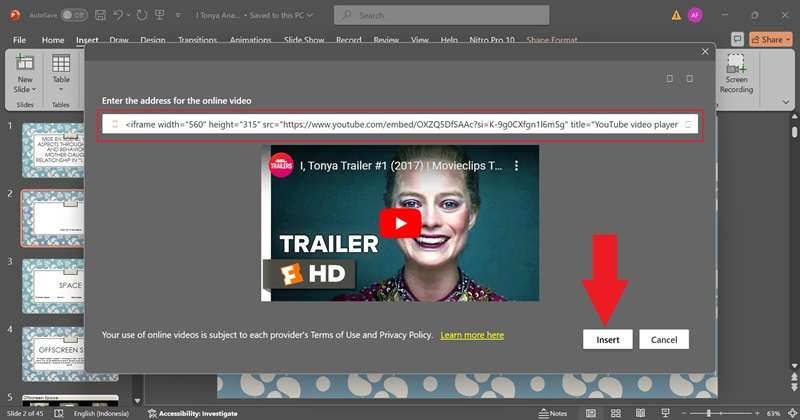
4. When the video shows up on your slide, resize and move it around until it looks just right. And that’s it—your video is now embedded and ready to play.
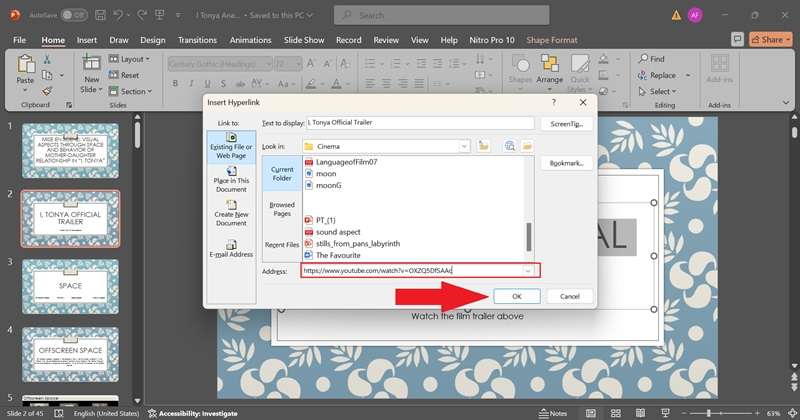
Method 3: Insert YouTube Videos as a Hyperlink
Lastly, you can also insert YouTube videos into your PowerPoint by using hyperlinks. This method is super simple and works great if you just need to link to a video. Here's how to do it:
1. Copy the YouTube video link you want to use.
2. In PowerPoint, highlight some text or click on an object (like a shape or image) on your slide.
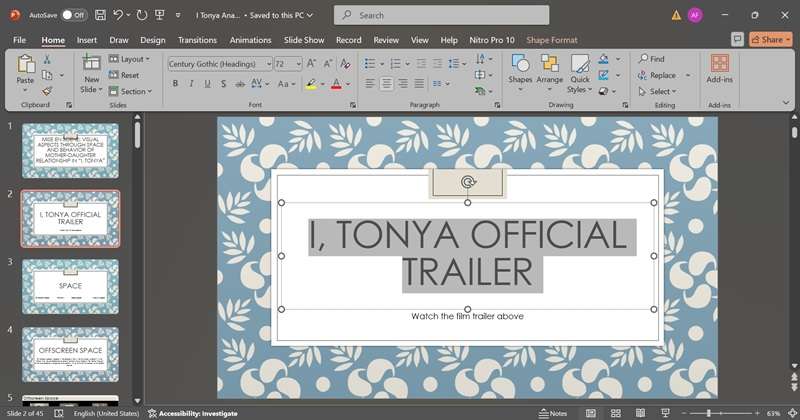
3. Right-click on the text or object and select "Hyperlink".
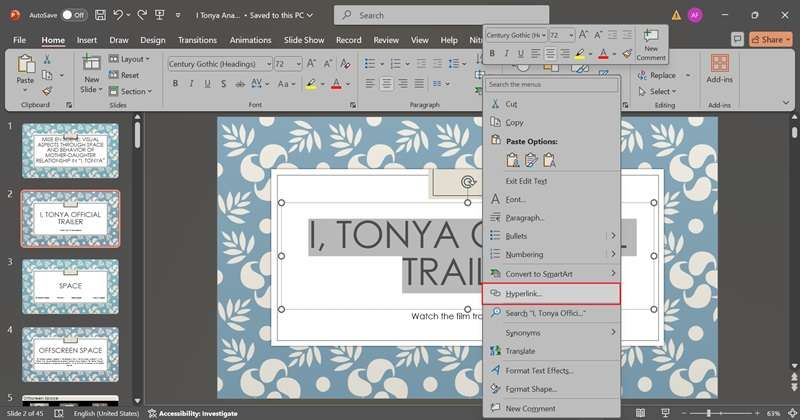
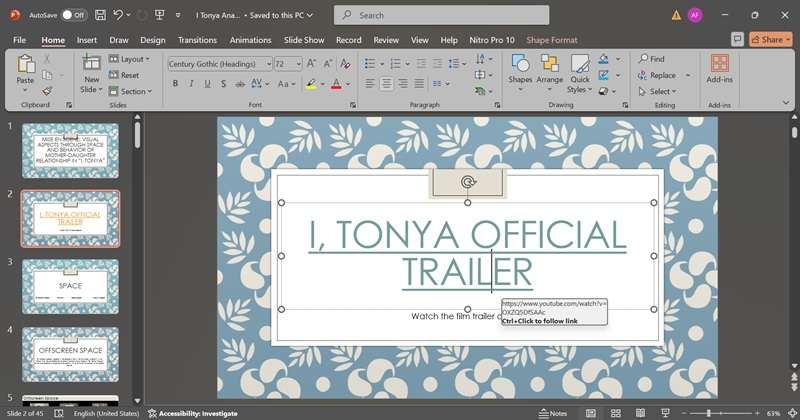
4. Paste the YouTube link into the address box and click "OK".
5. And that’s it! Now, when you click the hyperlinked text, it’ll open the YouTube trailer in your browser.
Alternatives to Embedding YouTube Videos
If the methods above don’t work, don’t worry—you’ve got other options:
- Download and insert the video directly into your slide (as long as it’s legal to do so).
- Screen record the video and add the clip to your presentation.
- Or skip YouTube altogether and use your own videos to make it even more personal!
Part 2. Craft Amazing Presentation Videos Using the Best Video Editor
Like we mentioned earlier, if you can’t embed a YouTube video into PowerPoint, you can add your own videos instead. This way, you’re not stuck with just YouTube content—you'll have full control over what appears in your presentation by creating something unique that fits your message perfectly.
But to do that, you’ll need a solid video editor, and Wondershare Filmora is hands down one of the best options out there.

Here’s why Filmora is perfect for making presentation videos:
- Instant Video Creation: Skip the hassle of starting from scratch by using Filmora AI features like AI Copywriting and AI Text-to-Video.
- Easy Voiceovers: Record and manage narration right inside the editor, making your presentations more engaging and professional.
- All-in-One Editing Tools: Trim, cut, add effects, and customize your video however you like.
- Massive Stock Library: Get access to royalty-free music, stock footage, stickers, and effects to enhance your video.
- AI-Powered Features: Use tools like AI Color Palette, AI Voice Enhancer, and Automatic Captions to make your video look and sound amazing with minimal effort.
 secure download

On top of all that, Filmora is super affordable, even with all these awesome features! It offers flexible pricing plans and even a free trial, so you can test it out before deciding to buy or subscribe. Plus, it works on both Windows and macOS, making it accessible for you to use it no matter your device.
So really, there’s no reason not to use Filmora! Now, let’s dive in and learn how to create a video for your presentations. Just follow this simple guide to get started:
Step 1. Open Filmora and access the AI Copywriting feature
Before you get started, make sure you’ve downloaded and installed the latest version of Filmora on your computer. Once that’s done, open the program and go to the "Toolbox" section on the left panel. Then, click on "AI Copywriting", and a new window will pop up.
secure download

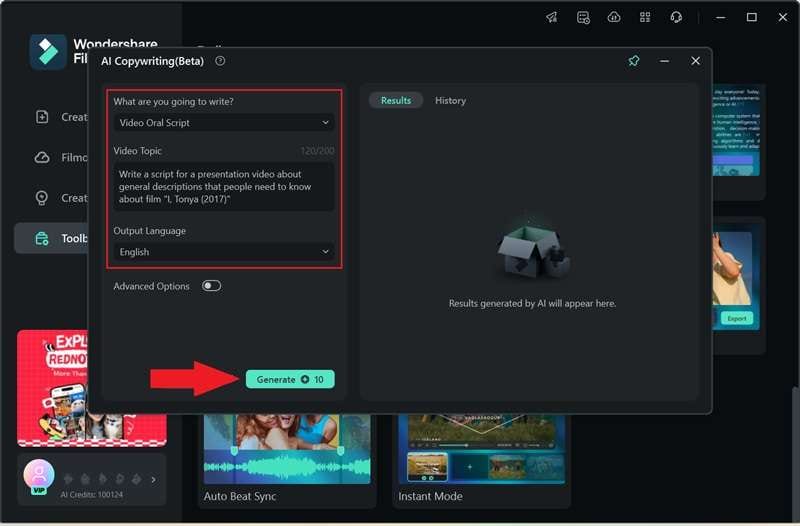
Step 2. Generate video script
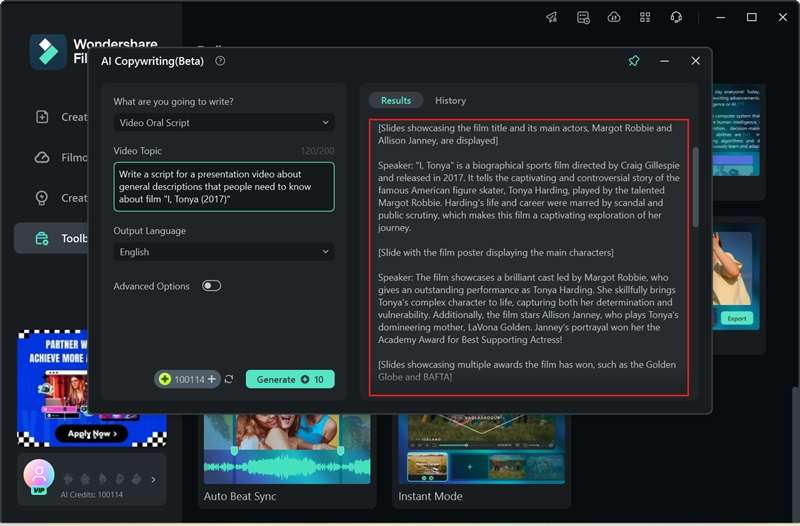
In the next window, select "Video Oral Script" as the content type and enter your description in the "Video Topic" section. Don’t forget to choose the output language. Once everything looks good, click "Generate", and the AI will create your script for you!
Once the AI finishes generating, you’ll see the results on the right side of the screen. Just copy the script, and you’re ready to use it to create your video!
Step 3. Create a video based on the script using AI Text-to-Video
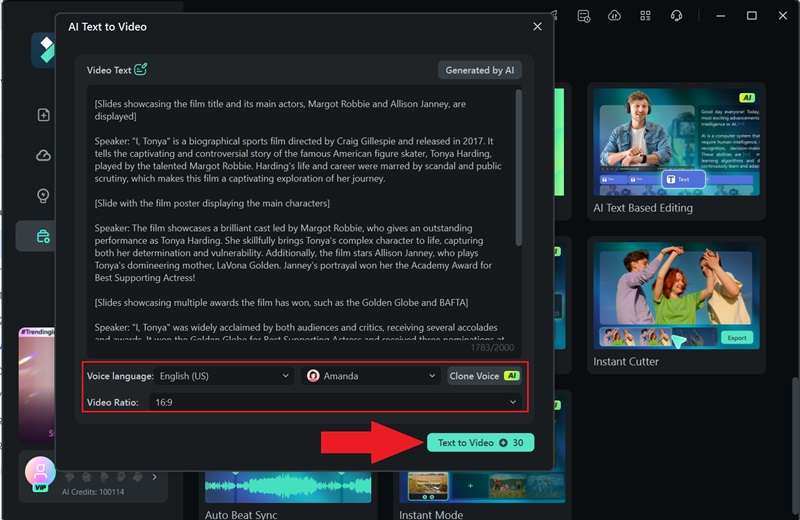
Now that you have your script, it’s time to start creating your video in Filmora! You can edit it manually, or if you’re short on time and want a quick solution, use the AI Text-to-Video feature. Just go to the "Toolbox", find the feature, and click on it to get started.
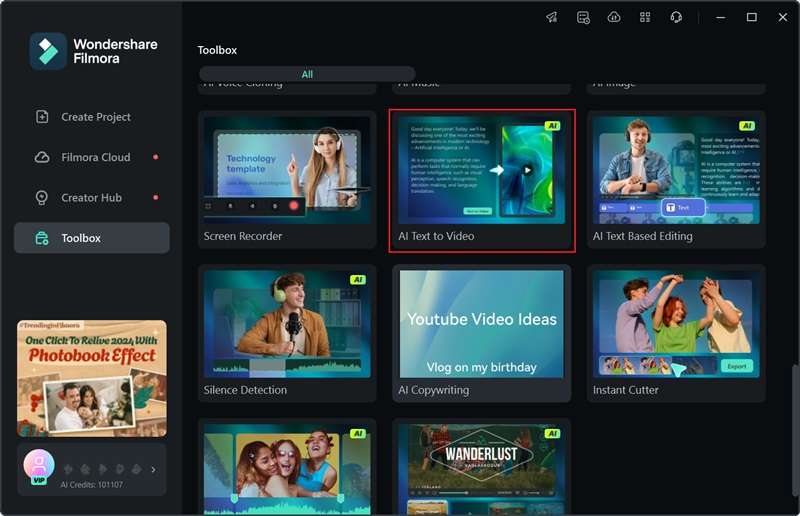
In the next window, paste the script you created earlier using Filmora’s AI Copywriting tool. Customize the settings by selecting the "Text Language", "Video Ratio", and "Video Voice" to match your preferences. When everything is set, click "Text to Video" to generate your video.
Step 4. Edit your video
Once the process is complete, your video will open in Filmora’s editing window and appear on the timeline, ready to preview. Hit play to check if everything looks right, and use the timeline to make any edits if needed.
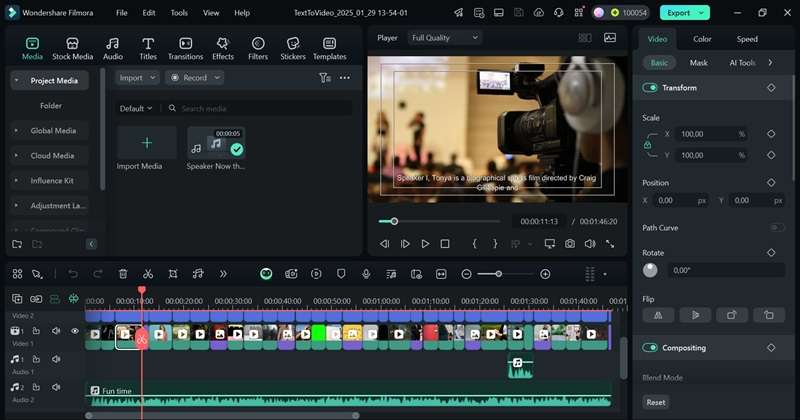
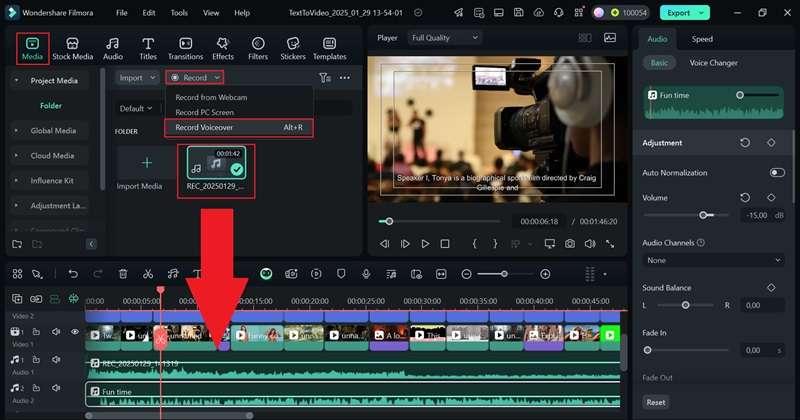
For example, in this video, there’s no narration yet—just footage, subtitles, and background music. In that case, you can record your own narration by using Filmora’s built-in recorder. Just go to the "Media" tab, click "Record", and select "Record Voiceover". Once you’re done, simply drag the voiceover to the timeline.
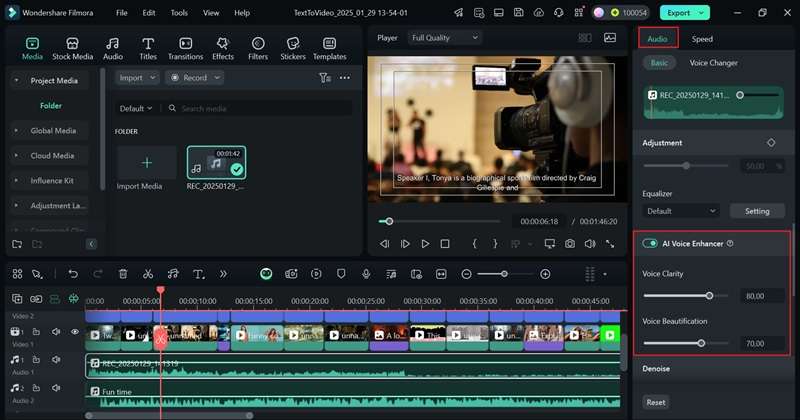
Now that you have both music and narration, it’s important to make sure your voiceovers are clear. Thankfully, Filmora’s AI Voice Enhancer makes this easy! Just click on your narration clip in the timeline, open the property panel on the right, and go to "Audio". Turn on “AI Voice Enhancer”, then adjust the sliders until the sound is just right.
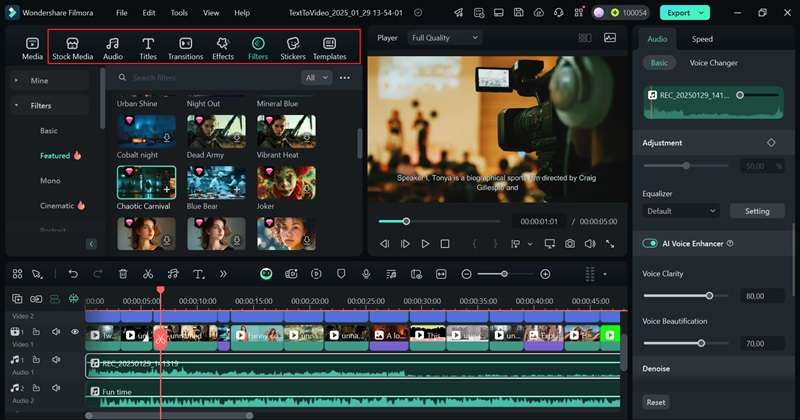
You can explore other creative elements like filters, transitions, stickers, and effects to make your video more visually engaging. Browse through the options, pick the ones that match your style, and apply them to your video. Have fun experimenting—don’t be afraid to get creative and make your content stand out!
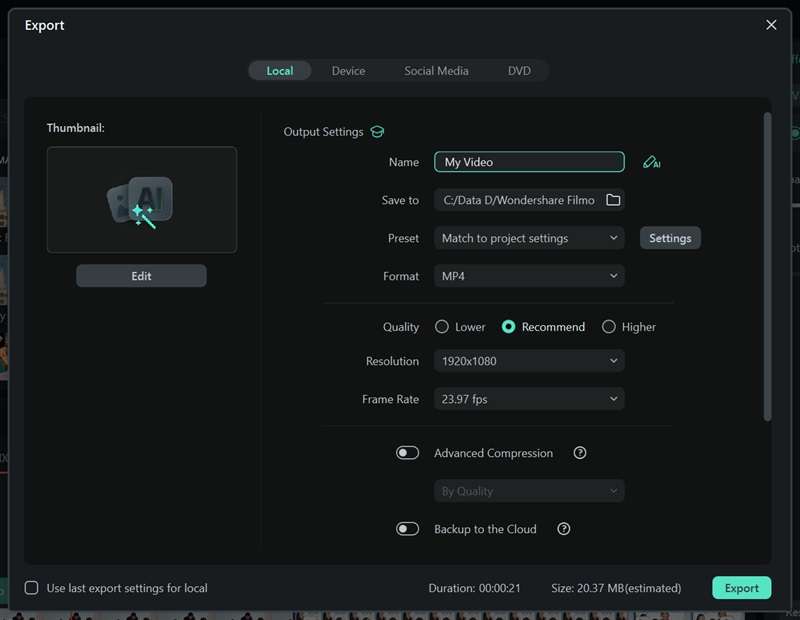
Step 5. Save your video
When your video is good to go, click "Export" in the top-right corner. To save it to your device, choose "Local". Before finishing up, make sure to update the title, description, format, and resolution so everything looks perfect!|
Part 3. How to Insert Your Video into PowerPoint
As you can see, making a video for your presentations with Filmora is super easy and even fun! It’s not just a great backup when a YouTube video won’t embed—it also gives you full control over your content, so your presentation looks exactly how you want.
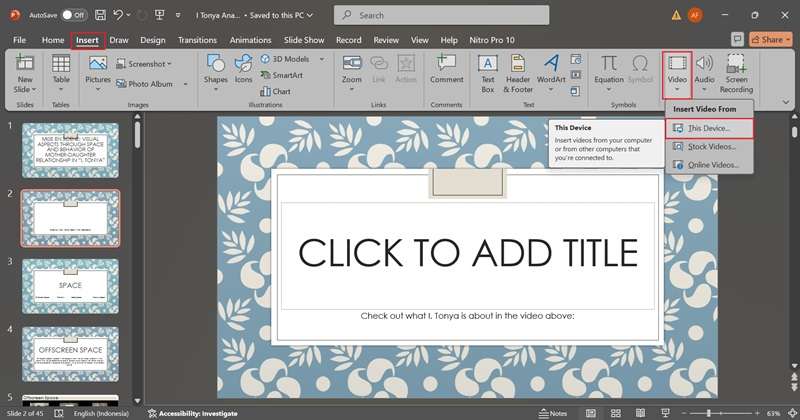
Now that your video is ready, let’s add it to your PowerPoint! Just follow these simple steps:
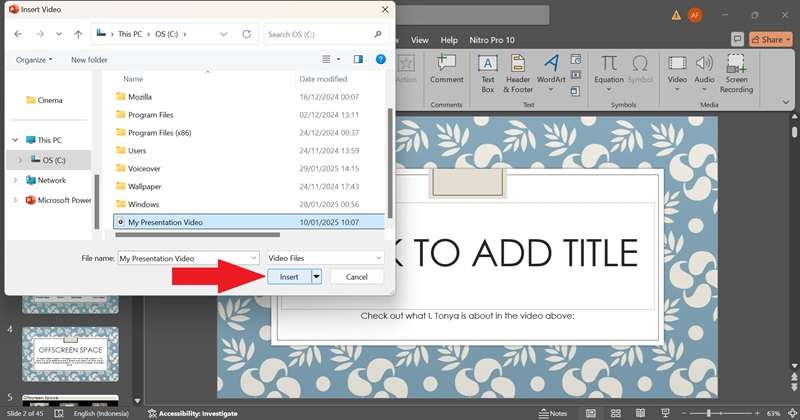
- Open your PowerPoint presentation and go to the slide where you want the video to appear.
- Click the "Insert" tab, then select "Video" > "This Device".
- Find the video file you saved and click "Insert".
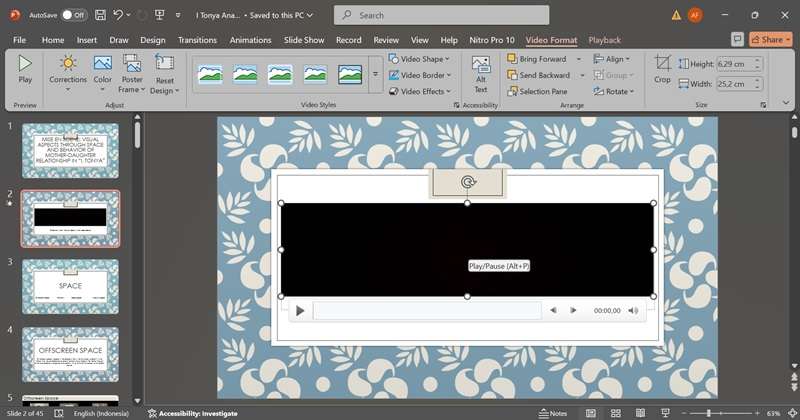
- Resize and position the video on your slide, then hit play to make sure everything looks good.
Conclusion
Adding YouTube videos to your PowerPoint can make your presentation more engaging and easier to follow. So, this guide is here to help anyone wondering, “How do I embed a YouTube video into PowerPoint?” or “How do I put a YouTube video in PowerPoint?”. After explaining three different methods of how to embed a video in PowerPoint from YouTube, there are still cases where the video cannot be embedded.
When that happens, the best solution is to create your own video using Wondershare Filmora. The process is simple and fun, especially with the Text-to-Video feature for quick, high-quality video creation. Plus, with a massive stock library and advanced editing tools, you can easily enhance your video and take your presentation to the next level!
