

 TL;DR:
To adjust isolated colors in a frame without affecting the entire image, editors can utilize Adobe Premiere Pro's HSL Secondary for granular mask control or switch to Wondershare Filmora for a simplified, hardware-light workflow.
● Premiere Pro is best suited for workflows requiring precise luminance keying and mask edge refinement via denoise and blur sliders, but extreme adjustments risk edge banding, GPU artifacting, and dropped performance when stacking Lumetri layers.
● Filmora is optimized for users prioritizing processing speed, achieving selective color shifts through direct pixel-sampling eyedroppers and HSL sliders rather than relying on complex Color/Gray mask views.
● When executing heavy grading adjustments, Filmora applies AI Skin Tone Protection to automatically prevent unnatural facial saturation, bypassing the overlapping mask conflicts that frequently occur on fine textures like hair or fabric.
Ask AI for a summary
 ChatGPT
 Perplexity
 Gemini
 Claude
 Grok
Grok
Colors can transform a story. You can change a shirt's color, brighten flowers, or make a sky look more vivid. These small edits shape how viewers feel about a scene. And during the process, you must work closely with hue, saturation, and lightness (HSL) to create the mood you want.
However, many creators struggle to adjust only one part of the frame. Skin tones, skies, and objects need careful control to look natural, after all. If you have been struggling with this problem, selective color adjustments through HSL can solve it.
This detailed guide will walk you through everything you need to know about HSL Secondary Premiere Pro for advanced, selective color grading. We'll cover the tools, a step-by-step process, and show you a simpler, faster alternative in Wondershare Filmora for professional results without the technical complexity
Part 1: Difference between standard HSL tools and HSL Secondary Premiere Pro
Hue, saturation, and lightness (HSL) adjustment is the basic process of color grading. Hue is color, Saturation sets the intensity, and Lightness controls brightness or darkness. Together, they define every visible tone in a frame. Understanding the difference between HSL and HSB (Hue, Saturation, Brightness) is key: while HSL models light in relation to darkness, HSB describes the color's visible brightness. Adjusting the premiere saturation, premiere hue, or lightness directly shapes the mood and realism in your footage.
Difference between standard HSL tools and HSL Secondary in Premiere Pro
| Aspect | Standard HSL | HSL Secondary (Premiere) |
| Scope | Affects the entire image | Affects only selected hue ranges |
| Use Case | Global look, basic correction | Selective edits (skin, clothes, sky) |
| Control | Sliders for hue, saturation, and lightness | Eyedropper + masks + sliders + refinements |
| Flexibility | Less precise for specific regions | Higher, you can isolate colors without touching the rest |
| Risk | Too broad, may break tones | Requires careful keying and masking |
| Workflow | Quicker for simple corrections | More steps, but more control |
Adobe HSL Secondary Premiere Pro is used after primary correction to refine details. Primary sets exposure and balance; secondary isolates and corrects problem hues without affecting the whole image
Part 2: In-Depth Explanation of HSL Secondary in Premiere Pro
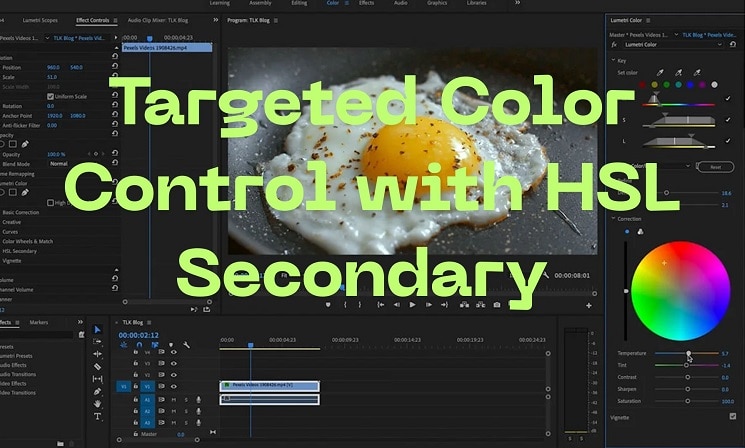
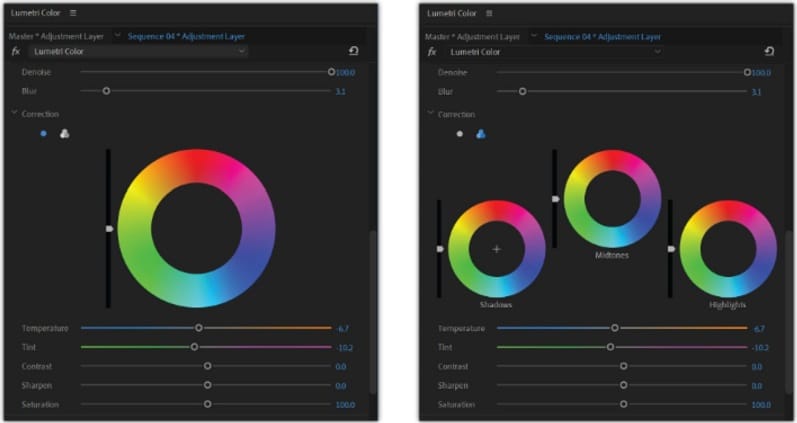
The HSL Secondary section in the Lumetri Color panel gives editors selective control over colors. Unlike global adjustments, it doesn't shift the whole image. Instead, it isolates one hue or luminance range and applies changes only there. This makes it a natural step after primary correction, once exposure and balance are already fixed.
Why It Matters
- Enhance one color (for example, make a blue sky richer).
- Tone down saturation where global curves reach broadcast limits.
- Key a specific luminance range to separate a subject from the background.
Key Tools in the Panel
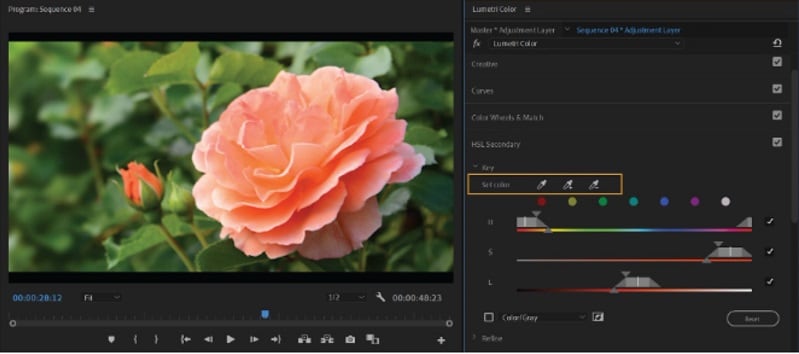
- Eyedroppers: Select a target color. The plus/minus eyedroppers add or remove tones for accuracy.
- HSL Sliders: Adjust hue, saturation, and lightness ranges. Top triangles expand or limit the range, while bottom triangles soften transitions.
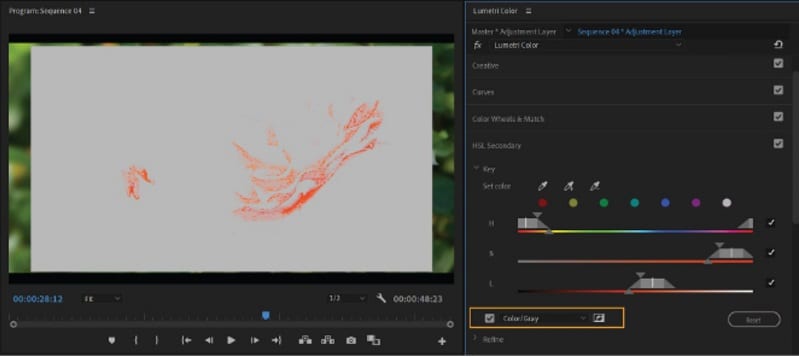
- Mask Views: Options like Color/Gray or Color/Black preview the affected pixels, so you know exactly what is selected.
- Refine Options
- Denoise reduces noise inside the mask.
- Blur softens mask edges for smoother blending.
- Correction Controls: Mid-tone or three-way color wheels, plus sliders for temperature, tint, contrast, sharpness, and saturation.
Part 3: Step-by-Step Guide: Using HSL Secondary Premiere Pro
After you learn the tools, here's how to use them in practice.

Pro Tips
- Keep adjustments subtle to avoid unnatural results.
- Protect skin tones by using gentle changes.
- Use blur to prevent harsh mask lines.
Practical Uses
- Change a shirt color without touching the background.
- Brighten the sky for more dramatic landscapes.
- Lighten skin tones to achieve a softer, polished look.
Part 4: Common Problems & Solutions
When using HSL Secondary Premiere Pro, several challenges often arise. Below are the typical problems and how to fix them.
- When the Key Doesn't Cover the Desired Area (Mask Issues): HSL keys often miss-shade areas or include unwanted regions. Use the add/subtract eyedroppers, adjust HSL sliders, and preview with Color/Gray to refine. If coverage is still uneven, apply a manual mask to restrict the effect.
- Noise and Artifacts When Pushing Sliders: Large changes in hue, saturation, or lightness can create banding or noisy edges. The denoise and blur sliders reduce these problems. Keep changes small to maintain natural results.
- Crashes or Unexpected Behavior in New Versions: Some editors experience glitches or artifacting, often linked to GPU acceleration. Adobe notes this under current known issues. Update GPU drivers, clear cache, or switch to software rendering if instability occurs.
- Limitations of Mixers and Masks: HSL Secondary is less effective on fine textures like hair or fabric. Multiple overlapping masks can conflict, and stacking Lumetri layers reduces performance. This limitation is one area where users often look for a simpler workflow like Filmora.
Part 5: Alternative Tool: Filmora's Simpler HSL Color Grading Workflow
Working with Premiere Pro HSL Secondary gives precise control, but the workflow can be slow and highly technical. Wondershare Filmora offers a faster route with similar capabilities, presented in a way that is easier to use.
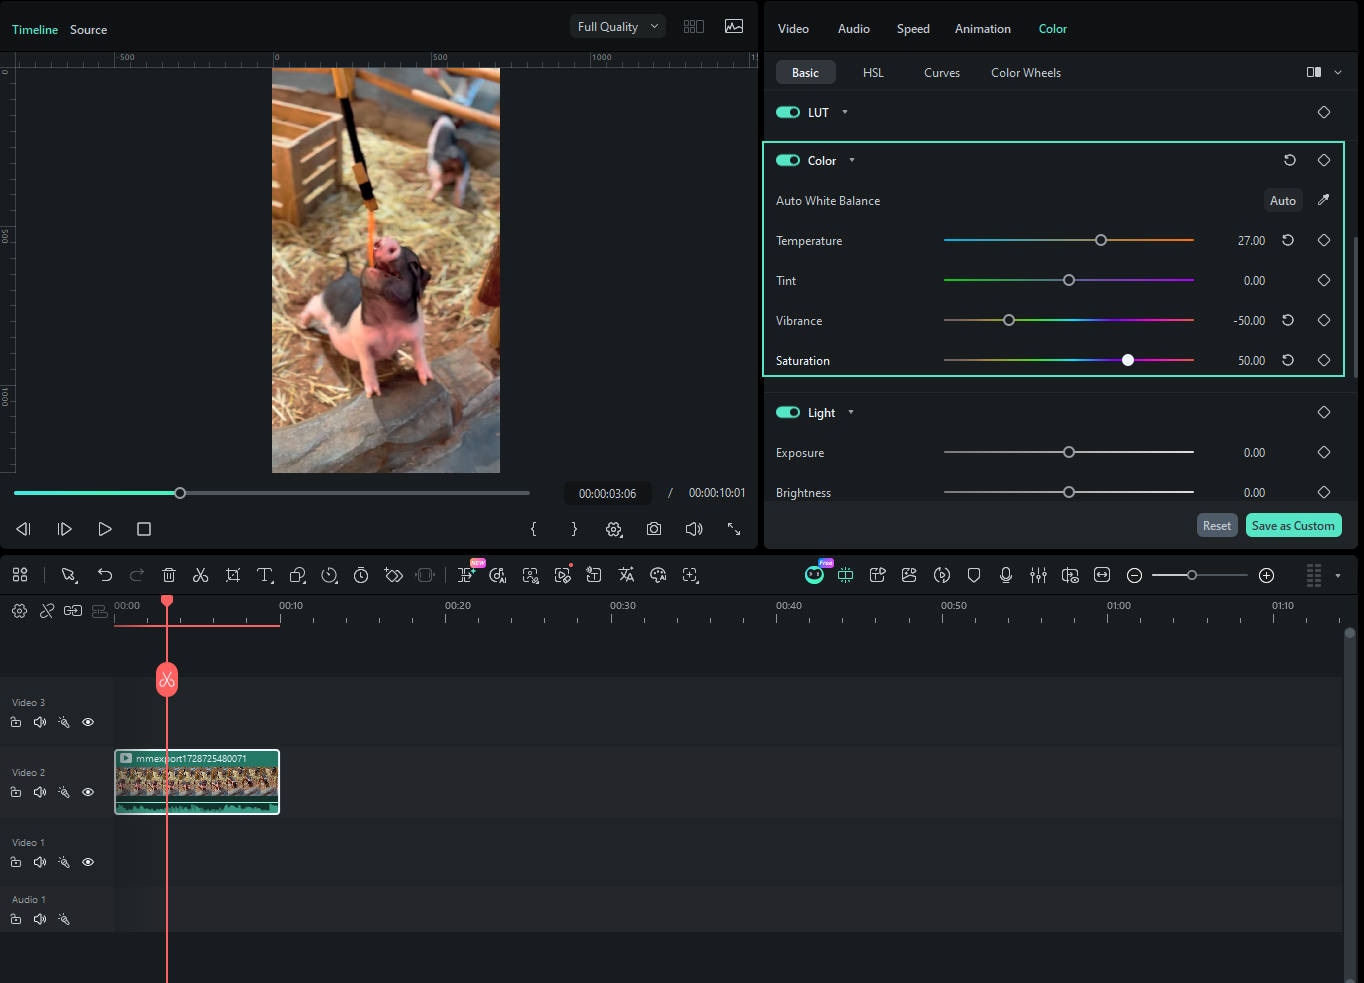
Filmora is a powerful video creation suite with color correction and grading tools to help you create the perfect look for your videos. It's been built for simplicity, so you don't have to juggle hundreds of complex panels. Just slide the sliders, and see your changes in real-time. This makes it possible to polish footage without the stress of mastering steep technical workflows.
HSL Secondary Tools in Filmora
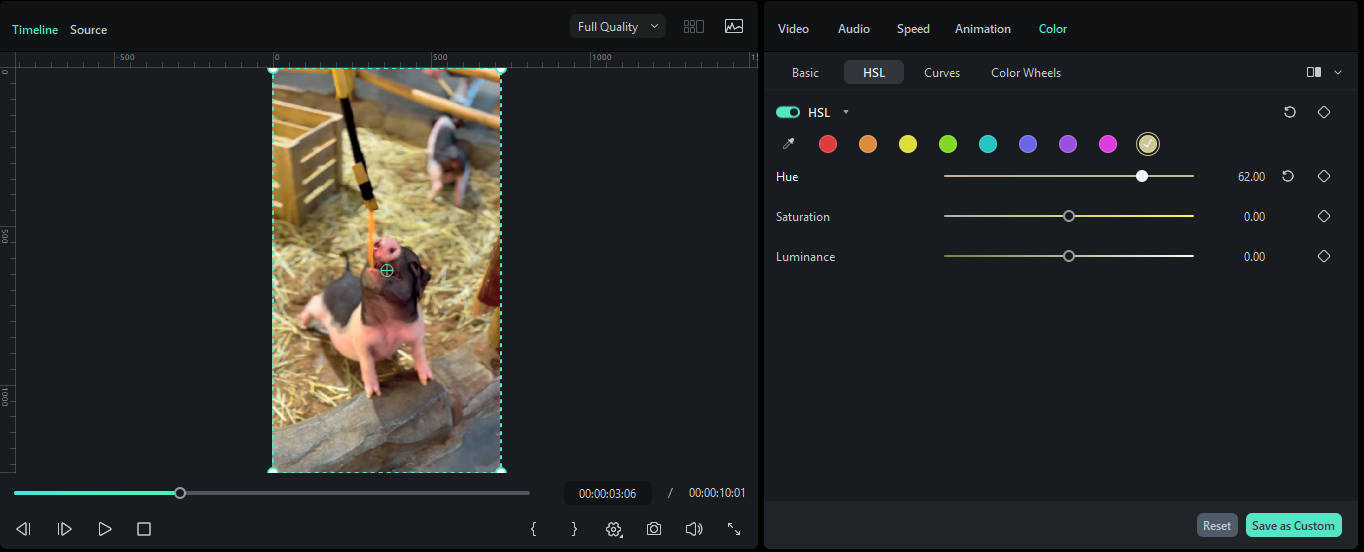
- Precision Eyedropper Selection: Filmora simplifies selective editing with an intuitive eyedropper tool. Instead of guessing color ranges, you can sample pixels directly from your video to lock in specific hues instantly, ensuring "what you see is what you get" accuracy.
- Selective Color Adjustments: The advanced Filmora provides you with HSL sliders, which are made to adjust hue, saturation, and brightness in a specific colour, the same way Premiere isolates particular tones.
- Color Wheels & Curves: They provide independent control for shadows, midtones, and highlights on your video tracks, which allow you to style a cinematic look.

- AI Skin Tone Protection: This feature ensures that even when strong color changes are made elsewhere in an image, faces appear natural and do not become too saturated with color, reducing the need for masks.
- LUTs and Presets: As Filmora is compatible with LUTs you are able to use or safe custom grades across projects (just like in Premiere).
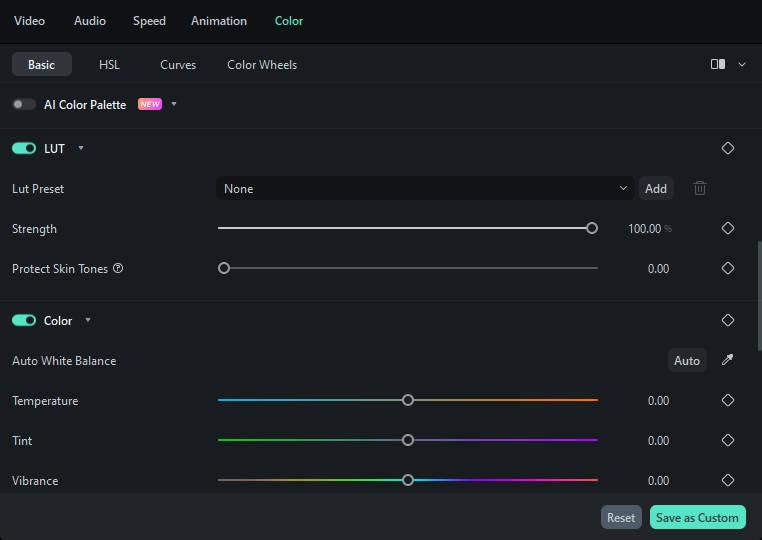
The difference with Filmora is the way it's designed; everything happens with straightforward drag'n'drops and sliders, with no complex editing options in sight. This makes the software accessible for beginners while providing depth for experienced editors.
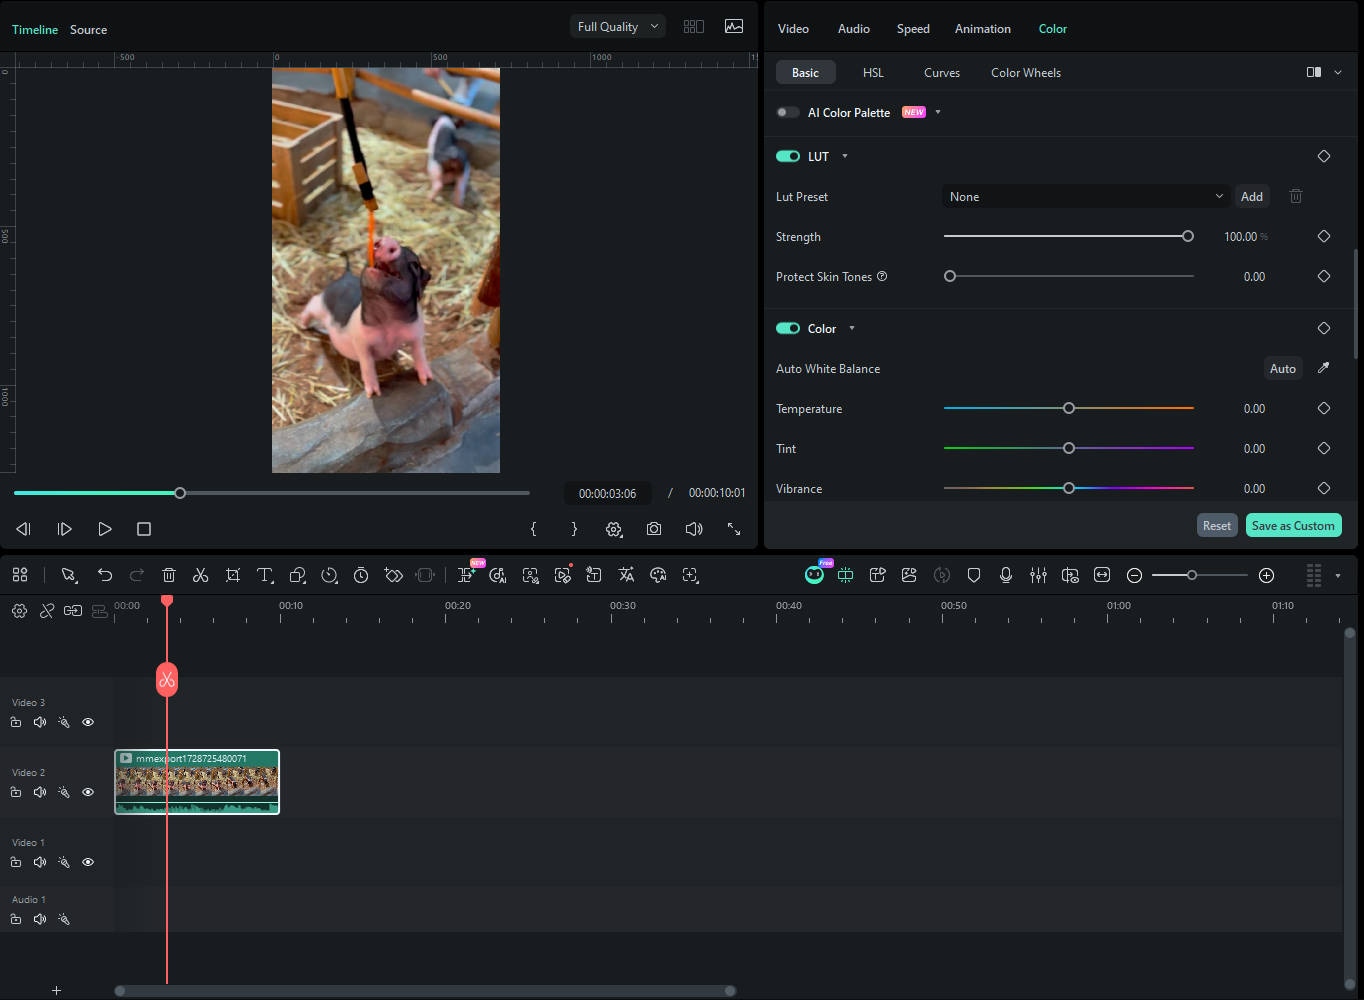
How to Use Filmora HSL Adjustment Step-by-Step
Part 6: Comparison: Premiere Pro HSL Secondary vs. Filmora's HSL Tools
Here's how Premiere Pro's HSL Secondary stacks up against Filmora's HSL/color tools.
| Feature / Workflow | Premiere Pro (HSL Secondary) | Filmora (HSL / Color Tools) |
| Purpose / Scope | Targets specific hue/luminance ranges within a clip. | Offers global and per-color adjustments via HSL sliders, curves, and LUTs. |
| Color Selection / Keying | Uses eyedroppers (set/add/subtract) to sample a hue, then refine via range sliders. | Uses HSL sliders to adjust hue, saturation, and luminance directly without explicit keying tools. |
| Refinement / Mask Control | Supports mask previews (Color/Gray, Black/White), denoise, and blur to smooth the mask. | Less complex mask tools; emphasis on slider adjustments, curves, and LUT presets. |
| Correction & Grading Tools | After keying, allows use of color wheels, sliders (temperature, tint, contrast, sharpen, saturation) for the isolated region. | Has a full color correction toolkit: curves, wheels, LUTs, and basic controls like exposure, contrast, etc. |
| Ease & Speed | More steps and technical details require refined masking and keying work. | More streamlined; changes apply quickly via sliders and preview updates in real time. |
| Performance / Hardware Load | Stacking multiple HSL/secondary effects can tax processing and slow down previews. | Generally lighter on the system as fewer masks and keying steps are used. |
| Learning Curve | Steep—requires understanding of keying, mask edges, and partial color isolation. | Easier for beginners—slider-based interface, less manual masking. |
Conclusion
The discussion revealed how selective grading changes the way a story feels. Starting with the basics of Premiere hue and saturation, we saw how HSL Secondary Premiere Pro isolates details that global tools cannot. The workflow proved effective for tasks like refining skies, balancing skin, or shifting clothing tones, though challenges such as noise and masking errors remain.
Filmora showed that similar results can be reached with fewer steps, thanks to intuitive HSL sliders, LUTs, and curves. The outcome is clear: precise control is possible, but the path can be complex or simple, depending on the editor's goals.
