

 TL;DR:
Animate individual letters in Adobe After Effects by utilizing Text Animators with Range Selectors, applying JavaScript-based expressions for automated motion, or bypassing manual keyframing entirely with Wondershare Filmora's drag-and-drop templates.
● To execute a sequential letter-by-letter effect, apply a Position or Scale Animator, set the Range Selector Shape to Ramp Up or Square, and keyframe the Offset value from -100% to 100%.
● Resolve post-render text jittering by changing the text layer's Kerning from Optical to Metric in the Character panel, and enable Render at Maximum Depth in your export settings to prevent color banding on glowing fonts.
● When automating animations with JavaScript expressions like wiggle or loopOut, any renamed layers or properties will break the code and require manual text updates inside the expression to restore functionality.
Ask AI for a summary
 ChatGPT
 Perplexity
 Gemini
 Claude
 Grok
Grok
Nothing grabs attention like a moving text. In After Effects, you can create a letter animation in different styles just like how you want it. You can make each letter appear one by one, bounce, fade, or even follow a motion path.
This flexibility surely helps in making your content stand out even more. You can use it in your video intros, title sequences, brand promos, and anywhere you need to give your text more energy. Let us show you how to make a letter animation in After Effects, using different methods available.
Introduction to After Effects Text Animation
After Effects has long been a favorite among motion designers and editors for creating any kind of animation, including detailed letter animations.
There are a few methods to make a text effect in Adobe After Effects that we are going to discuss here:
- Using Text Animators, which let you control things like position, opacity, scale, and rotation for every letter.
- Using 3D settings and extrusion to turn your text into 3D by adding depth, lighting, and more dimensions.
- Using animated text presets and expressions, which help you create animation faster without building everything from the ground up.
One thing to note, though, is that creating text effects in After Effects can be a bit overwhelming at first, despite the level of control it offers. You need to understand the behavior of each setting to get the results you want.
For this reason, we are trying to break everything down in a way that's easy to follow. And for beginners or those seeking efficiency, we will also introduce Wondershare Filmora, which provides powerful yet simpler text animation solutions. You can read on or skip ahead to that section anytime.
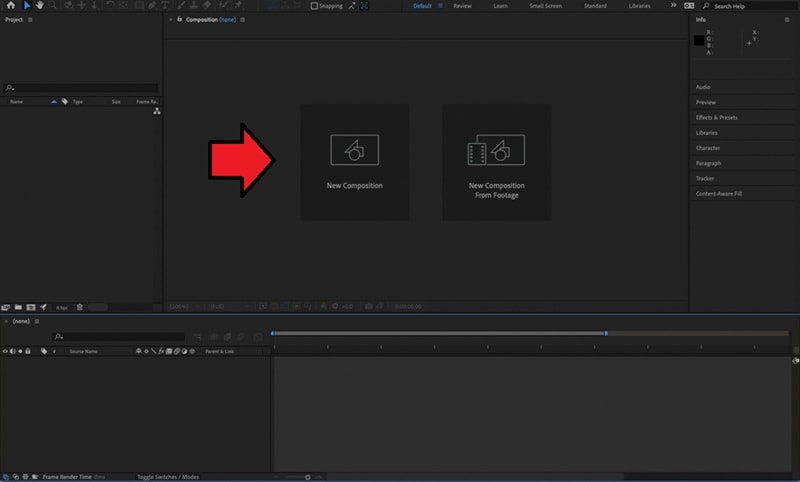
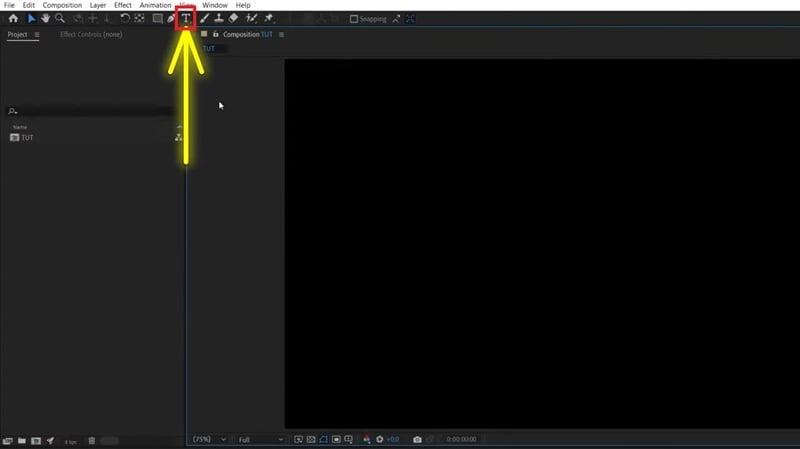
Setting Up Your Project & Basic Text Layer in After Effects
First things first, you need to set up your project and create your first text layer. This is where you'll prepare everything before jumping into the animating part.

Method 1: Animating Individual Letters in After Effects (Letter by Letter Animation)
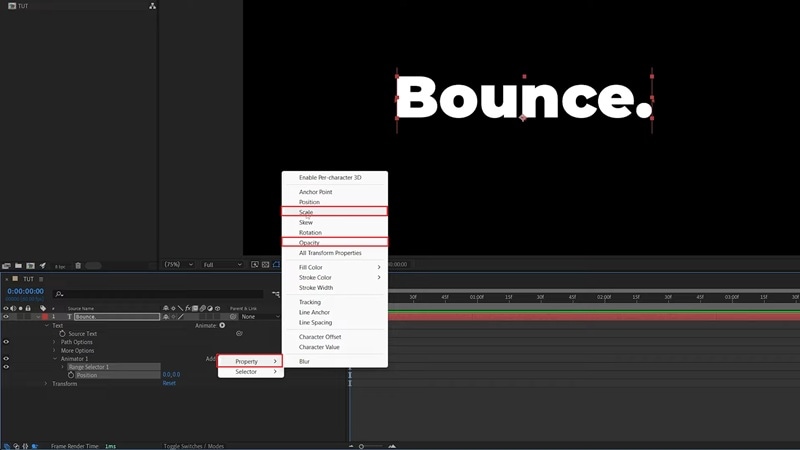
The first method for creating letter animation in After Effects is by using the Text Animator feature. This feature revolves around two main parts: Animators and Selectors.
- Animators control what changes, like position, scale, rotation, or opacity.
- Selectors decide which parts of the text are affected and when.
Note: You can stack multiple animators to create complex effects.
The point is to set different positions or "states" for your text, then animate between them to get the effect you want, like a bounce, slide, or glitch. You can also have your letters scale up, shrink down, or rotate for a more dynamic motion.

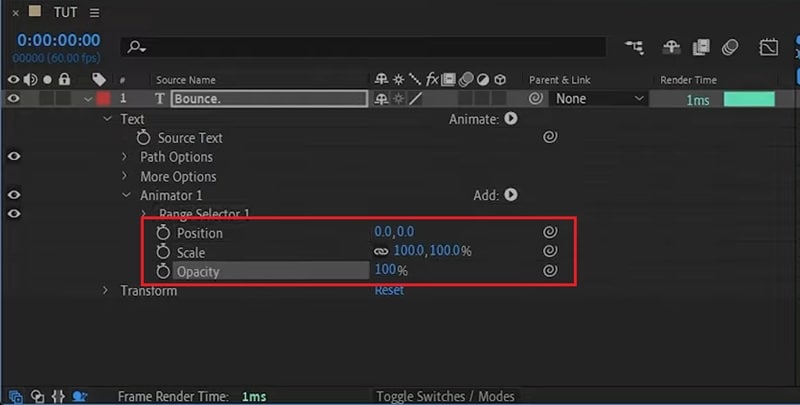
Animators Properties (Position, Scale, Opacity)
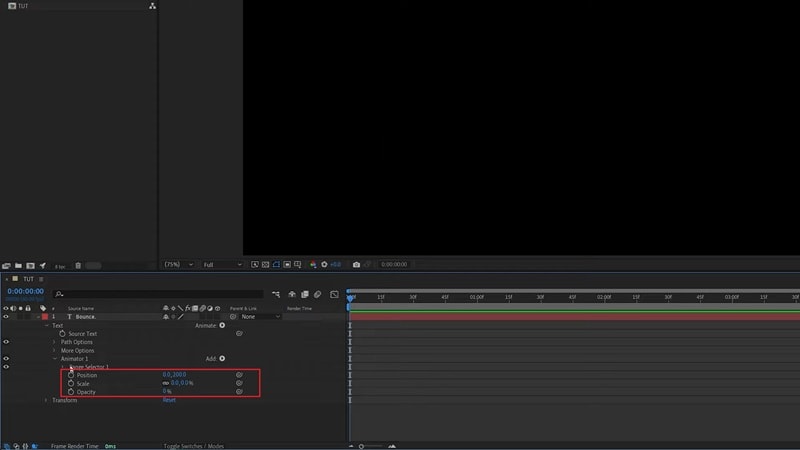
When you first add a Text Animator, the animation is controlled by properties such as Position, Scale, or Opacity. These determine what kind of change happens to your text.
- Position: Moves each letter along the X, Y, or Z axis. You can make characters slide in from any direction or bounce by adjusting the vertical position.
- Scale: Changes the size of each letter. Increasing the scale makes text pop or grow, while decreasing it can create a shrink or zoom-out effect.
- Opacity: Controls the visibility of your text. You can fade characters in, fade them out, or combine opacity with other properties for layered transitions.
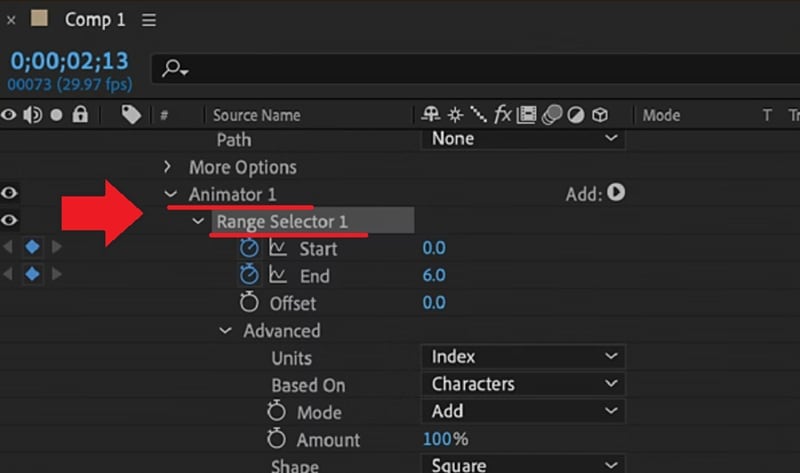
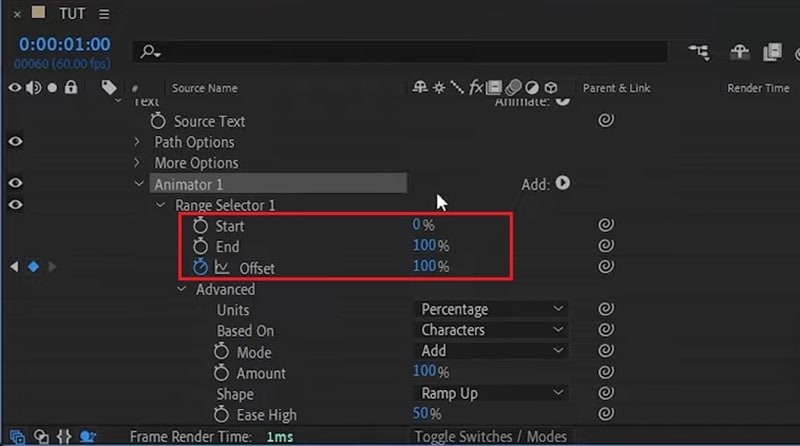
Range Selector (Start, End, Offset)
Range Selectors in Text Animators include several key values you can adjust to control which parts of your text are affected and when the animation happens:
- Start: Defines where the animation begins within your text. Increasing this value moves the starting point forward, so fewer letters are included at the beginning.
- End: Determines where the animation stops. Lowering this value limits how much of the text is affected at once.
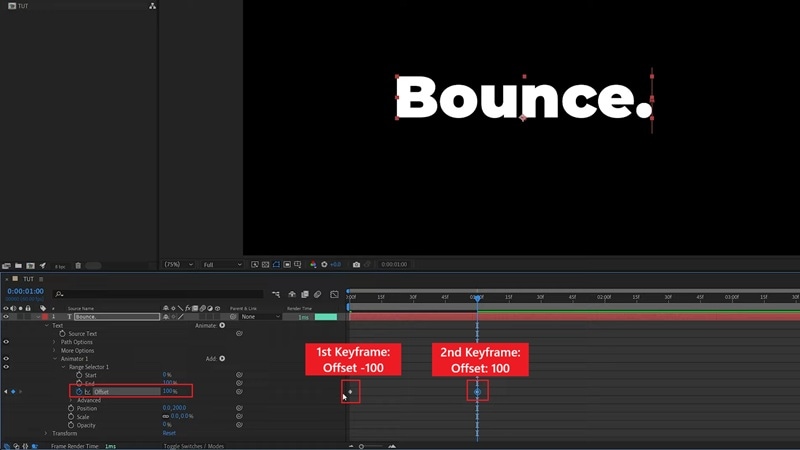
- Offset: Shifts the entire selection range forward or backward over time. This is the setting you'll often keyframe to make the animation travel smoothly from one letter to the next.
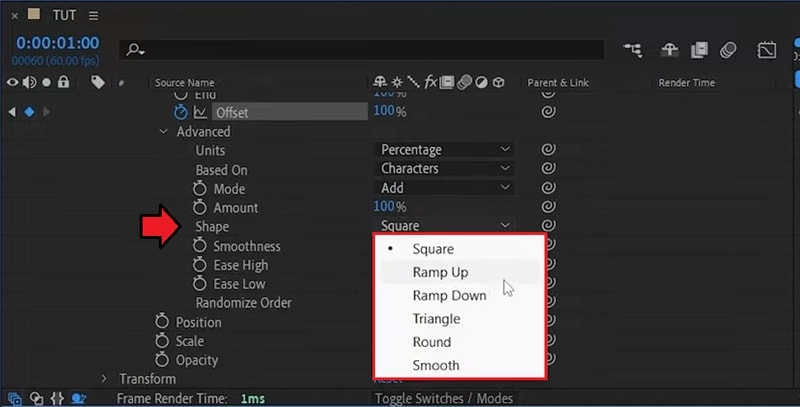
Applying Different Shapes (Square, Ramp Up/Down)
Inside the Range Selector's Advanced settings, you can experiment with different Shape options that change how the animation's influence is distributed.
- Square: Applies the animation to one character at a time in a sharp, blocky sequence without overlap between letters.
- Ramp Up: Creates a gradual build-up, where the animation starts slow and then moves smoothly across the text from left to right.
- Ramp Down: The opposite of Ramp Up. It starts fast and eases out toward the end.
- Triangle: Animates both ends toward the center (or vice versa).
- Round: Adds a curved transition for a more flowing, circular motion.
- Smooth: Blends the animation evenly across letters.
Example: Creating a "Bouncing Letters" Effect
To put your knowledge into practice, let's try making a bouncy text in After Effects, following this tutorial.

- Position (Y-axis): increase the second value (e.g., 200 px for 200 font size).
- Scale: 0.
- Opacity: 0.
- At start: -100%
- 1 second later: 100%
- Shape: Ramp Up
- Ease High: 50%
- Ease Low: 50%
- Expand Animator 2 > Range Selector 1.
- Move both Offset keyframes forward by about 10 frames.

- Position: negative value (half of Animator 1). Example: first = 200px → second = -100px.
- Scale: 150%.
- Opacity: delete the property.
Method 2: Creating 3D Animated Letters in After Effects
For the second method, let's level things up a bit. Since After Effects is a full-featured motion graphics and compositing tool, you also have the flexibility to build true 3D text, not just flat animations.
Creating a 3D text effect in After Effects is a bit different from the previous method because now you'll be working with 3D layers, extrusion (to give your letters real depth and turn them into 3D objects), cameras, lighting, and more depth controls.

Example: How to Create a Spinning 3D Text Effect
- Position (Y-axis): increase the second value (e.g., 200 px for 200 font size).
- Scale: 0.
- Opacity: 0.
- At start: -100%
- 1 second later: 100%
- Shape: Ramp Up
- Ease High: 50%
- Ease Low: 50%
- Expand Animator 2 > Range Selector 1.
- Move both Offset keyframes forward by about 10 frames.
- Position: negative value (half of Animator 1). Example: first = 200px → second = -100px.
- Scale: 150%.
- Opacity: delete the property.
You can experiment with different rotation patterns for variety. Try rotating on only one axis, or animate Z-rotation.
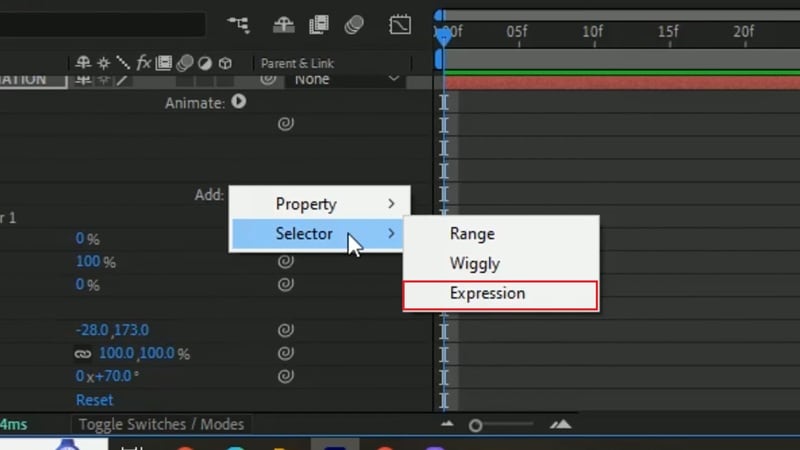
Method 3: Advanced Effects with Expressions & Presets in After Effects
To make your After Effects text effects even more stylized, you can also play around with expressions or apply text animation presets.
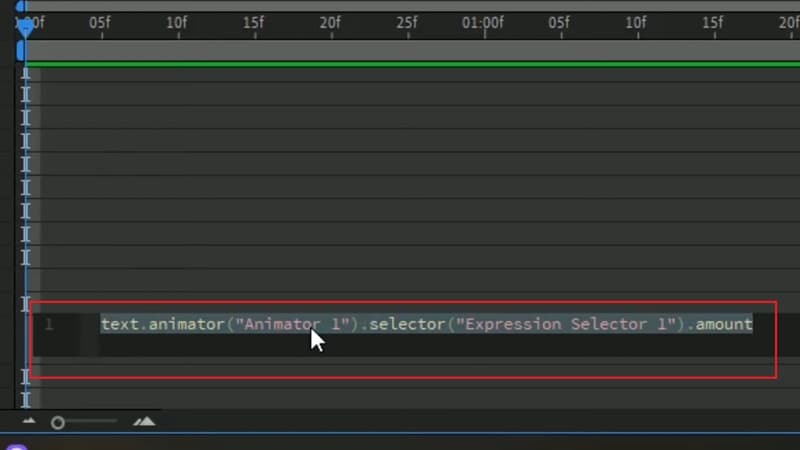
Add Motion with Expressions
Expressions are basically short lines of JavaScript-based code that automate movement and connect different properties. When you enter an expression, it gives you way more control over how your text behaves in AE without building a ton of keyframes.
But because of this flexibility, expressions can be a bit more technical. You'll need to understand the basic syntax and know which expression creates the type of movement you want.
To add expressions:
Below are some of the most common expressions you can start with.
| Movement | Expression Code |
| Wiggle | wiggle (frequency, amount) |
| Loop Offset | loopOut("offset") |
| Loop In | loopIn() |
| Loop Out | loopOut() |
|
Show More
Show Less
|
|
Check out more expression codes for After Effects here or watch the tutorial here.
Apply a Built-In Text Animation Preset
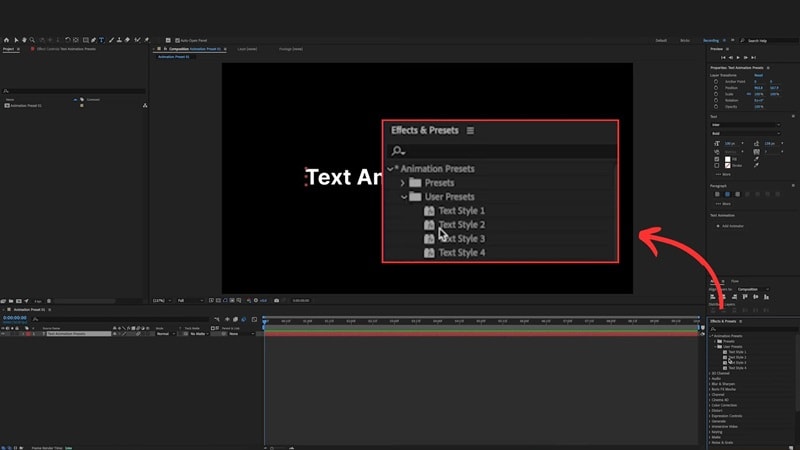
Text animation presets are pre-designed motion templates in After Effects that you can apply to your text with a single click. You can add text animation presets in After Effects the same way you apply any other preset.
Everything is organized inside the Effects & Presets panel. You can quickly try different looks without building from scratch, though they may feel a bit limiting if you're aiming for a very specific look, especially compared to using expressions.
To apply a text animation preset in After Effects:
- Open the Effects & Presets panel.
- Browse the Animation Presets for the text category.
- Drag your chosen preset onto the text layer in the timeline or the Composition panel.
Once applied, go to the Effect Controls panel to adjust its settings and tailor the animation to your liking.
Note: If you've created a custom look you want to reuse later, you can save it as your own preset. Simply select the properties or effect groups you customized in the Effect Controls panel, then go to the Animation menu and choose Save Animation Preset.
A Faster, Easier Alternative: Creating Animated Letters with Filmora
A lot is happening behind the scenes when you build letter animations in After Effects. If you end up thinking that it's overwhelming or you simply are not ready to deal with it yet, you can still create animated letters in a way that feels much easier to learn.
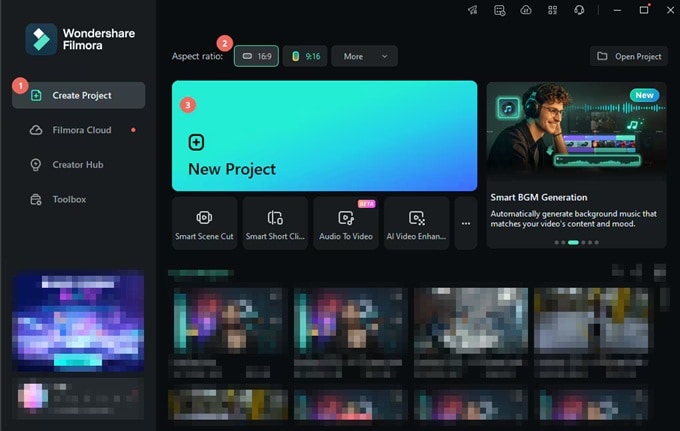
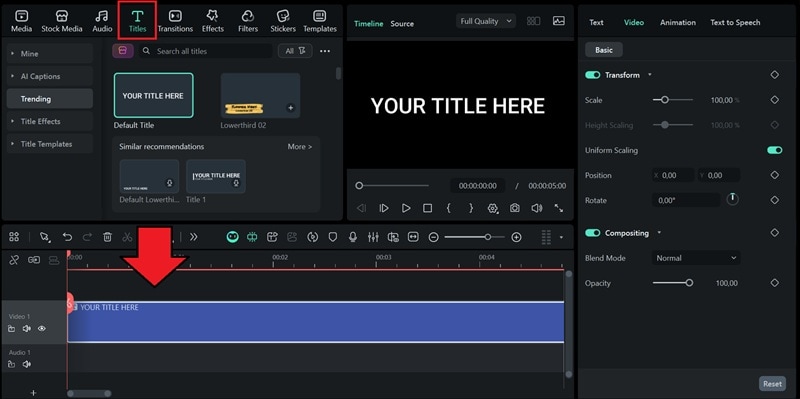
A quicker path to animating text is by using Wondershare Filmora. It's a simpler video editor alternative to After Effects that gives you different kinds of professional-looking text animations without the heavy setup. You can pick a style, drop it onto your timeline, and customize it however you like.
- Drag and Drop Presets: Choose from more than 200 animated text templates, including basics, openers, lower thirds, and fun 3D styles. Drag one onto your timeline, and you're set.
- Easy Customization: Change the text, font, size, spacing, and animation timing directly in the editor. No expressions or complicated controls. It gives you simple sliders and options.
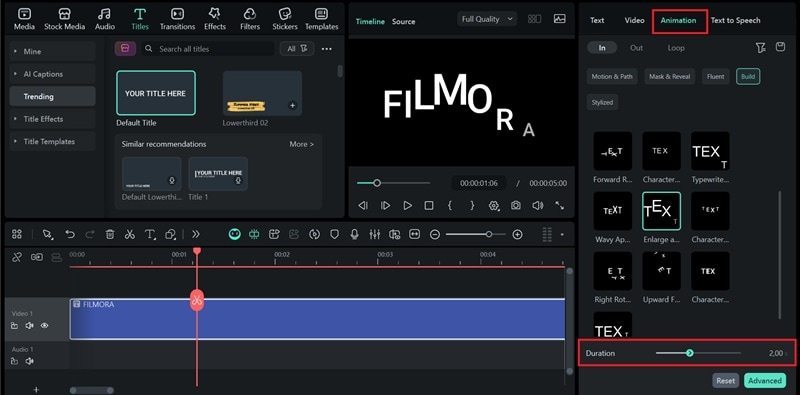
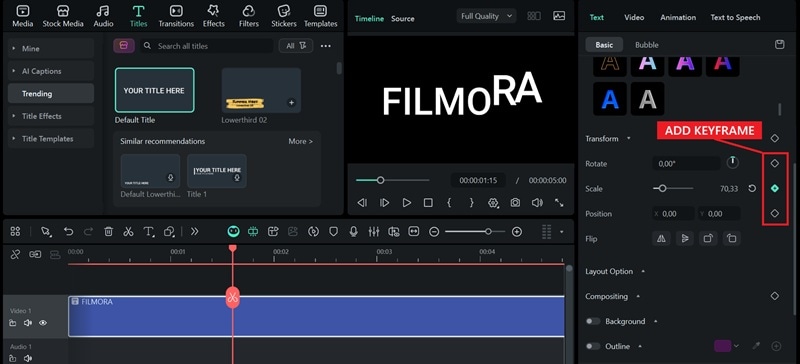
- Keyframing When You Need It: If you want extra detail in your animation, Filmora also includes advanced keyframing tools. You can fine-tune the movement, scale, opacity, and more for custom animated letter effects.
- All-in-One Workflow: Everything happens in one place, right inside your editing timeline, so you don't have to jump between multiple panels or tools. You get clean, fast results with less effort.
How to Make Letter Animation in Filmora

- Choose a preset such as typewriter, fade, bounce, slide, or 3D motion.
- Click to preview and apply it instantly.
Optimizing Your Letter Animation in After Effects
Still not satisfied with how your letter animation looks in After Effects? You can still polish it with a few simple adjustments, whether you want smoother movement or tighter timing.
Timing & Easing (Graph Editor)
In After Effects, there are a few advanced settings that help refine the flow of your letter animation:
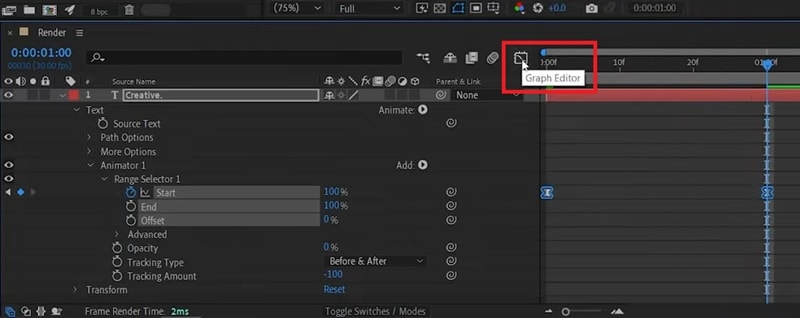
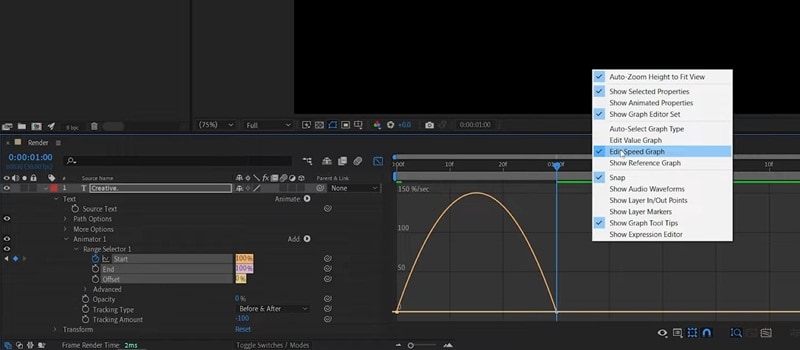
1. Graph Editor
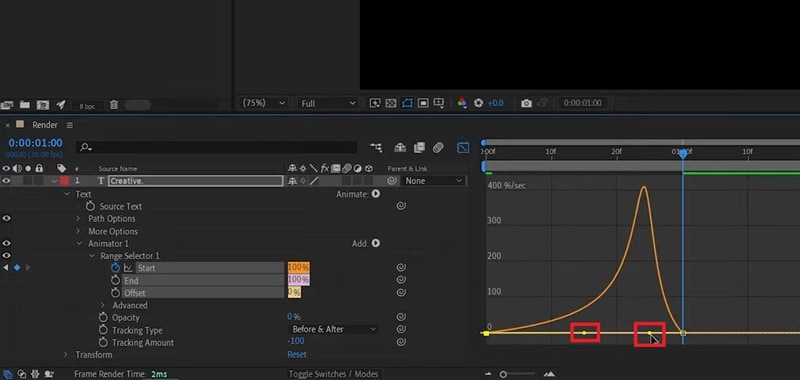
Graph Editor is a tool that helps you shape the speed of your animation. You can use it to fine-tune how fast or slow your animation moves between keyframes.
To access the Graph Editor in After Effects:
2. Easing
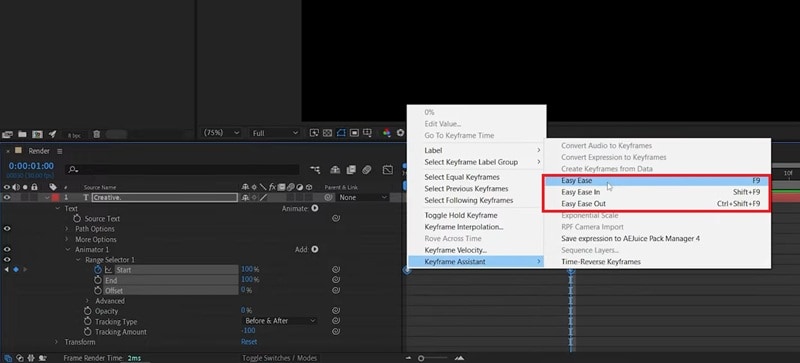
Easing is a technique that smooths out the start and finish of your animation so it looks more natural, instead of an abrupt or rigid jump. There are a few types of easing you can adjust:
- Easy Ease: Automatically softens the beginning and end of your keyframes so the movement flows smoothly.
- Ease High: Controls how smoothly each character lands into its final position. Increasing this value makes the animation ease in gently rather than stopping abruptly.
- Ease Low: Affects how the animation starts. Raising this value makes the letters ease out from their initial position instead of moving instantly.
To adjust easing in After Effects:
- Select the keyframes
- Right-click on the selected keyframe, choose Keyframe Assistant, and select the Ease type you want to apply (Easy Ease, Ease High, or Ease Low).
Motion Blur
Adding motion blur is a small detail, yet it can make a big difference in how your animation feels. It adds a stronger sense of movement and makes each letter transition appear smoother.
To apply it, simply enable the Motion Blur switch in the Timeline panel here.
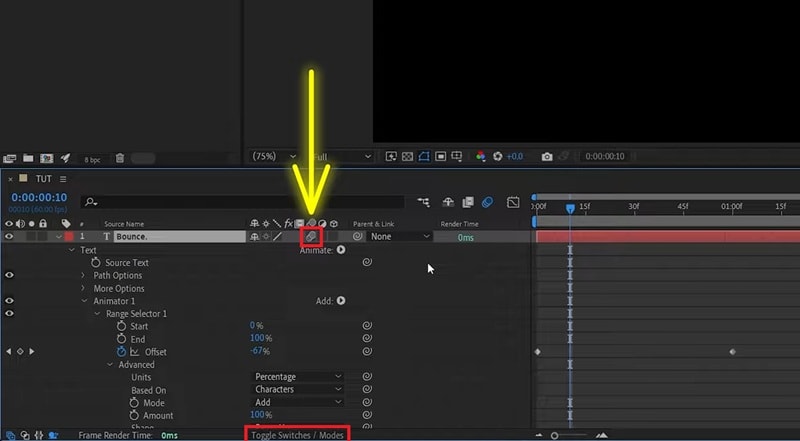
If you can't see these icons, click "Toggle Switches / Modes" at the bottom of the panel to reveal them.
Render Settings
Another thing that you should pay attention to when applying text effects in After Effects is the render settings. No matter how good your work looks inside the software, incorrect export settings can make the final output look choppy or low-quality.
You can follow these recommended settings to keep your letter animation in After Effects smooth:
| Setting Category | Recommended Option |
| Format / Codec | H.264 (MP4) or Apple ProRes 422/4444 |
| Resolution | 1080p minimum |
| Frame Rate | 24 fps, 30 fps (general use), 60 fps (very smooth motion) |
| Bitrate (H.264) | 15–25 Mbps (for 1080p) |
|
Show More
Show Less
|
|
Also, don't forget to enable "Render at Maximum Depth," especially if your letters have glow or shadows, to reduce banding. And, turn on "Use Maximum Render Quality" to help with scaling and fine details, which matter most for small text or thin fonts.
Common Problems & Solutions
Getting used to motion design takes time, so it's completely normal to run into a few issues while learning letter animation in After Effects. We've listed some of the most frequent problems users face, along with quick fixes you can try.
1. "Jittering Text" after rendering in After Effects

If your text starts to jitter or flicker after rendering, there are a couple of common causes to check:
- The font type. After Effects can behave unpredictably with certain fonts, especially decorative or heavily stylized ones. Try switching to a standard font like Arial or Times New Roman to see if the problem goes away.
- Bug in Essential Properties. There's a known bug where text can randomly jitter during rendering, especially after editing the text from an Essential Graphics panel.
For the second problem, the issue appears when Optical Kerning is enabled. During render, After Effects may briefly switch the text back to Metric Kerning, which causes a quick flicker or jitter in a few frames.
How to Fix:
If you're using Essential Properties for text, make sure the kerning is set to Metric instead of Optical before rendering.
- Select your text layer.
- Open the Character panel.
- Change Kerning from Optical to Metric.
- Re-render your composition.
2. Text not appearing in After Effects
Selecting the text layer but seeing nothing in the preview usually means a setting was changed by accident. The text might be masked, placed behind another layer, or styled in a color that blends into the background.
In that case, adjusting the layer order or changing the text color often solves it. Another possible cause is a glitch in the Character settings. To bring the text back, you can try resetting it.
How to Fix:
- Turn on the text layer's visibility (eyeball icon).
- Go to the Character panel.
- Right-click and choose "Reset Character."
- Set the text color to something that contrasts with the background.
3. Animation text presets and expressions not working
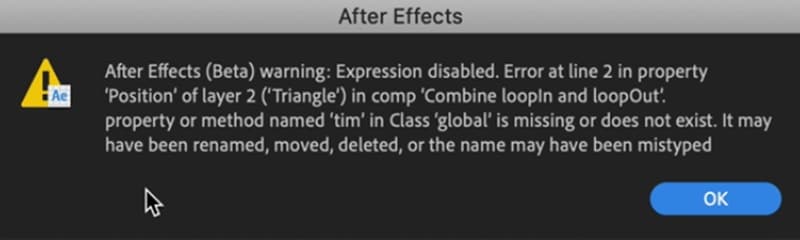
When an expression fails, After Effects usually shows an error message and places a small warning icon next to the expression. It helps you see which layer or property is causing the problem.
To quickly locate all expressions with issues:
- Select one or more layers in the Timeline panel
- Right-click (Windows) or Control-click (macOS) and choose "Reveal Expression Errors."
Some expressions depend on a specific layer name or property name. If you rename a layer or property that the expression refers to, After Effects may not always update the expression correctly, which leads to errors.
How to Fix:
- Open the expression and update the text so it matches the new layer or property name.
- Make sure the expressions use the same language/strings as your After Effects version.
- Re-enable the expression after correcting the name.
Conclusion
Now you've got a solid start to letter animation in After Effects! You know how each method works, so creating eye-catching text for your project should be much easier now. Just follow whichever method suits your workflow better.
Even if you feel like After Effects takes too much time, tools like Filmora can help you get clean animated letters more easily. Everything is already organized for you, so you can focus on styling your text without digging through complex settings.
FAQs about After Effects Text Animation
-
How to animate letters in After Effects individually?
The best method to animate letters in After Effects individually is by using the Text Animator feature. You can control properties like position, scale, rotation, and opacity for each character. After adding an Animator, use the Range Selector to decide which letters move and keyframe the Offset value to create a smooth letter-by-letter animation.
-
Can I use After Effects for kinetic typography?
Yes. Kinetic typography is a popular motion design style where text moves, scales, or shifts rhythmically to match audio or emphasize meaning. After Effects is perfect for this kind of effect because it gives you full control over timing, transitions, and complex text animation like this.
-
What are some free After Effects text animation templates?
You can find free text animation templates for After Effects on sites like Mixkit and Jitters. They offer many simple titles, openers, and other typography packs you can import straight into the software. If you prefer having a large collection ready inside your editor, Filmora also comes with a vast built-in template library filled with animated titles you can apply instantly.
