

 TL;DR:
Crayo AI is a web-based video generator utilizing Google Veo-3 technology to quickly transform text prompts into complete videos with synthetic voiceovers, making it ideal for rapid content creation, while Wondershare Filmora is the recommended offline alternative for creators requiring precise multi-track editing and high-resolution control.
● Crayo AI requires a paid subscription starting at $19/month with no free tier, and it restricts technical flexibility by preventing users from adjusting video quality, frame rates, or export resolution.
● Wondershare Filmora is best suited for users on Windows, Mac, Android, or iOS who need advanced post-production tools, offering 4K platform-specific exports, pre-made templates, screen recording, and voice cloning, though its free version applies a watermark to the final output.
● While both editors integrate Veo-3, Filmora's editing workflow allows creators to manually refine AI-generated assets on a magnetic timeline by applying specific post-processing actions like AI stabilization, video denoise, and audio ducking.
Ask AI for a summary
 ChatGPT
 Perplexity
 Gemini
 Claude
 Grok
Grok
Creating high-quality videos quickly is a challenge for many creators, especially when staying on top of fast-moving trends. Producing engaging content can be time-consuming and technically demanding—but AI tools like Crayo AI Video Editor promise to simplify the process. Crayo AI offers a range of features to streamline video creation, though it has some limitations.
In this article, we'll take an in-depth look at Crayo AI's key functionalities and introduce a powerful alternative to help you create videos faster and more efficiently.
Part 1. A Comprehensive Review of Crayo AI: Overview of Features
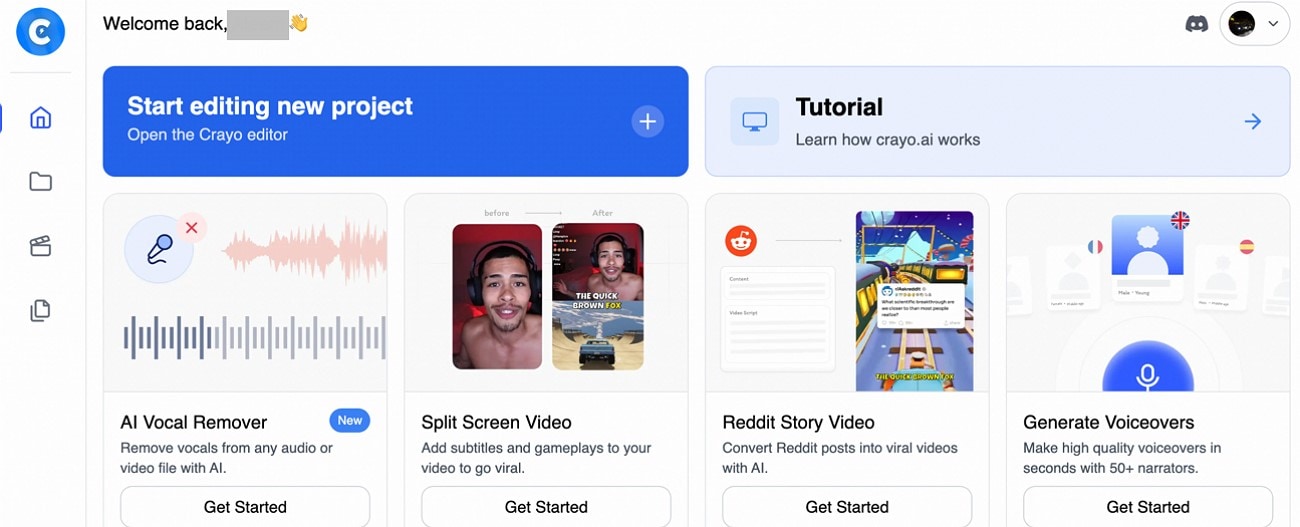
Crayo AI video editor is a cutting-edge video editor that uses AI to make creating videos faster and easier. The tool offers the ability to generate multiple types of content depending on the needs of its users. Besides being a video generator, it also provides various content creation functionalities for its users.
Understanding Features of Crayo AI
Crayo AI comes packed with a variety of advanced features that streamline the entire video creation process. Let us explore its key features and capabilities that make this tool the right online choice for video generation:
Crayo AI also offers a convenient downloading facility, allowing users to easily save and export their finished videos effortlessly. It lets you download TikTok and YouTube videos to your devices by simply pasting their links.
Pricing Plans
| Plans | Pricing |
| Hobby | $19/month |
| Clipper | $39/month |
Part 2. Easy Guide to Using Crayo AI Video Editor For Generating Content
Having learned about the features of this AI video editor in detail in this Crayo AI review, let us explore the guide to using this tool for video generation. Mentioned below are the steps for creating stunning videos using this AI-powered tool:
- After accessing the tool on your web browser, log in to your Crayo account.
- Next, head to the left side of the dashboard and select your video creation option.
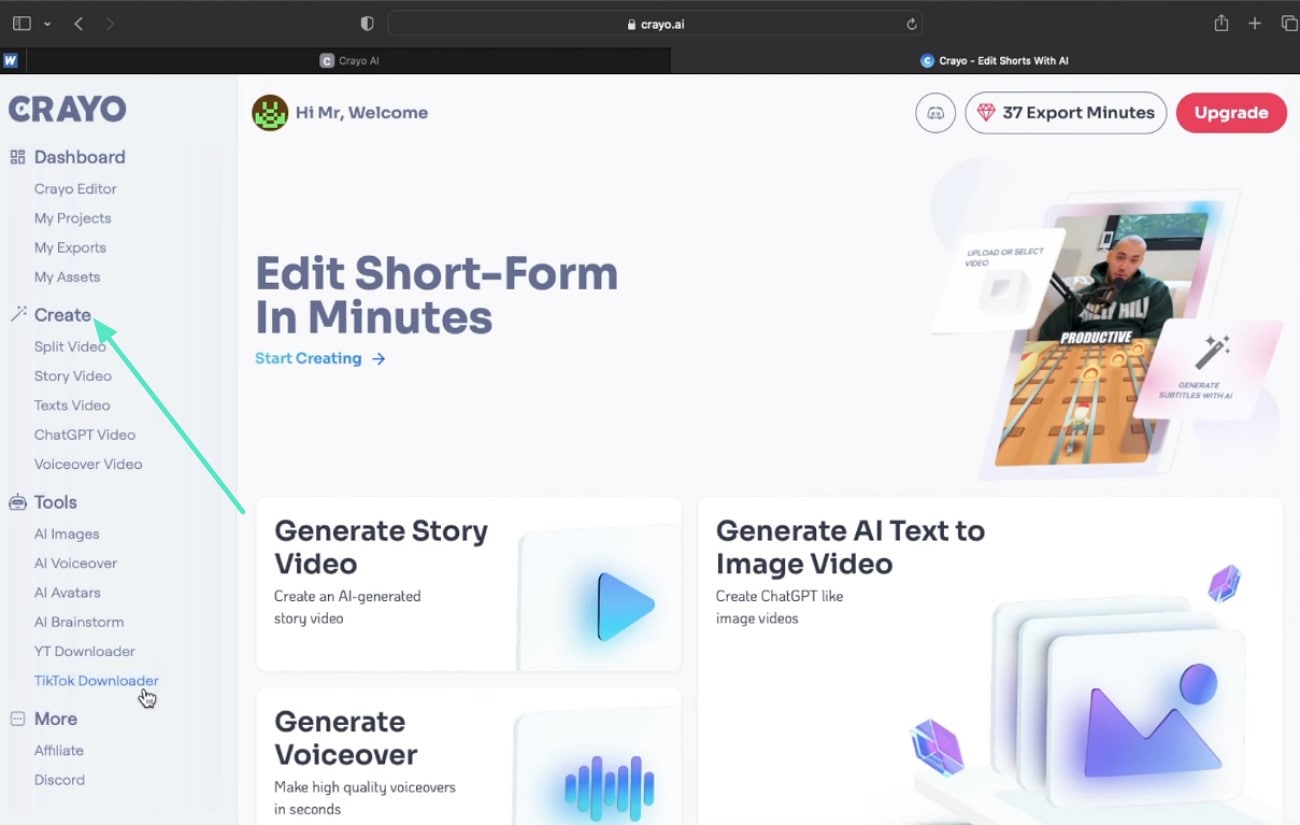
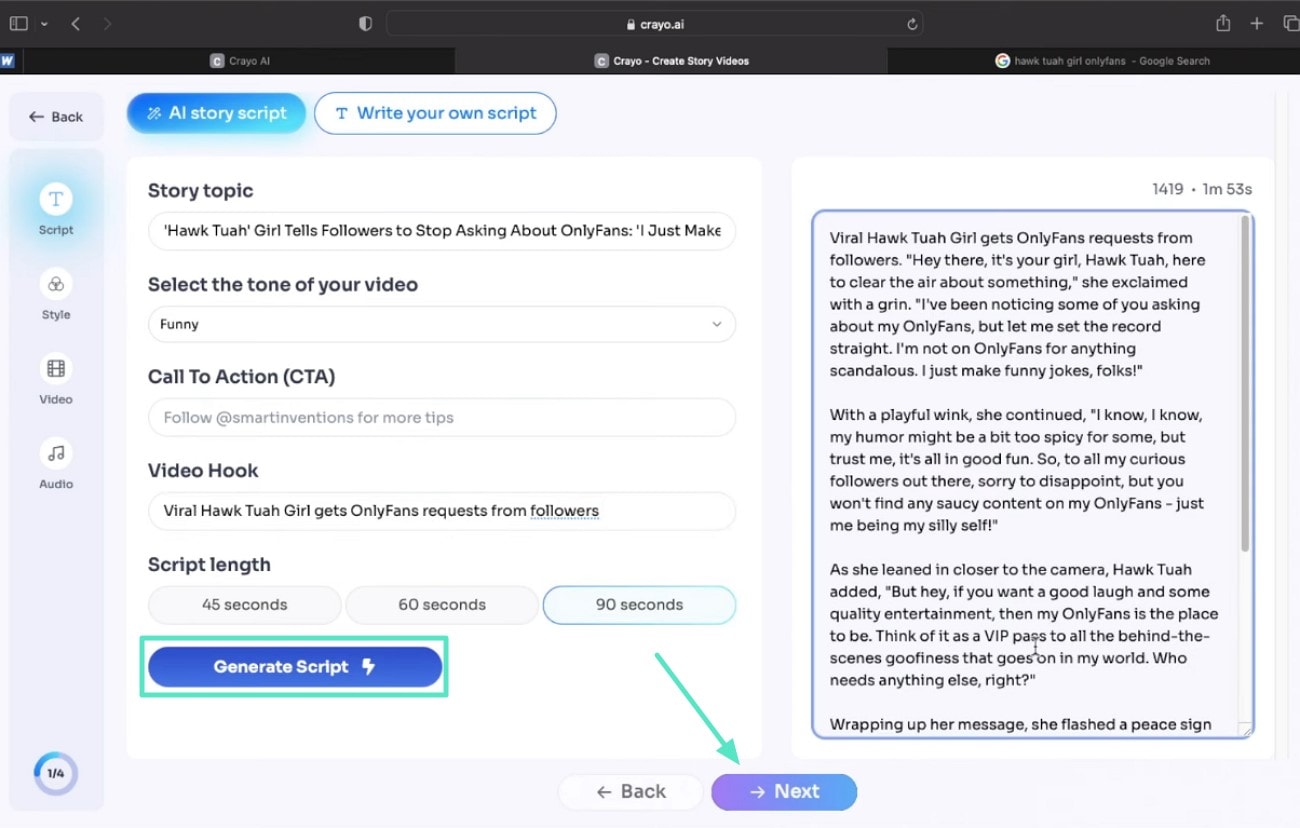
- Enter the topic of your video in the designated field.
- Select other options such as tone and script length by choosing the respective options.
- Click on the "Generate Script" option located within the interface, then press "Next."
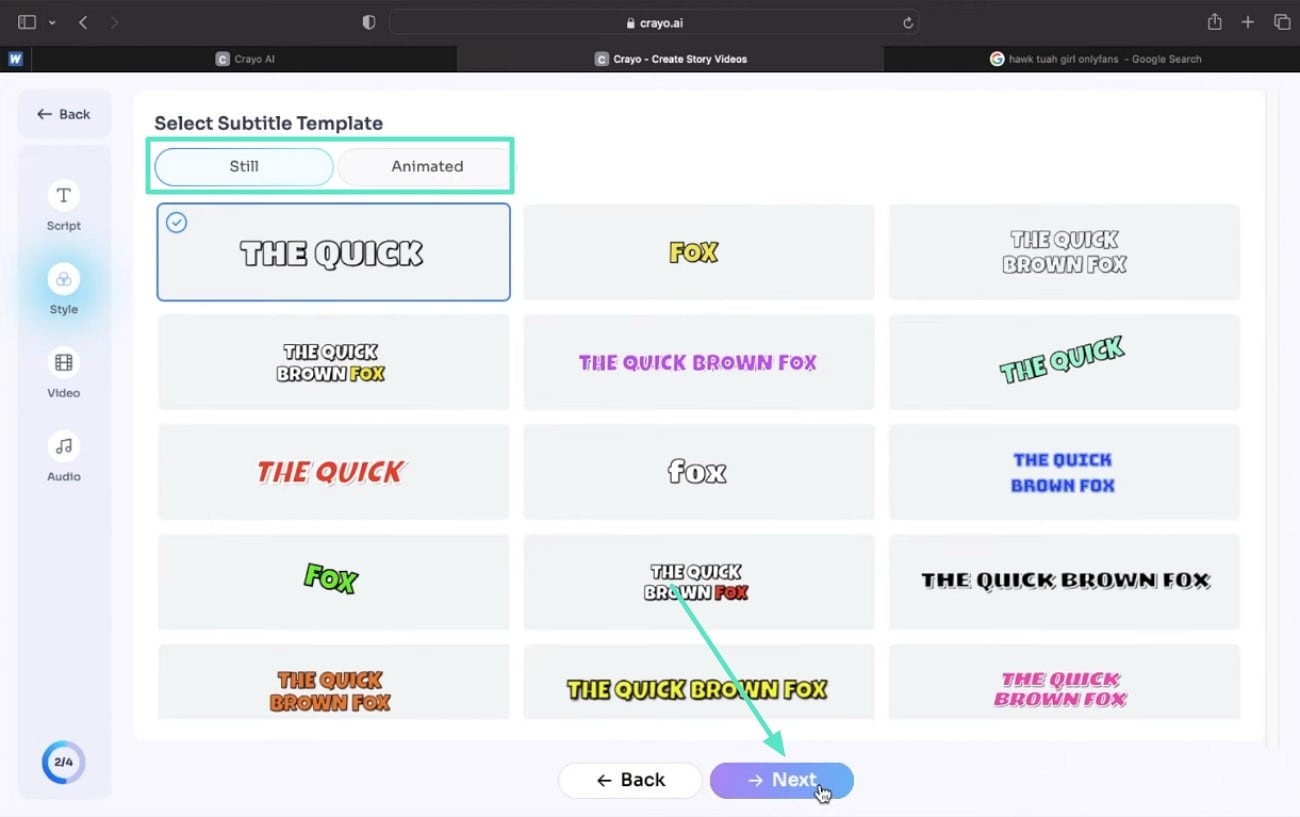
- Choose the subtitle style for your video from the options provided.
- Enable the "Still" or "Animated" section and continue by clicking "Next."
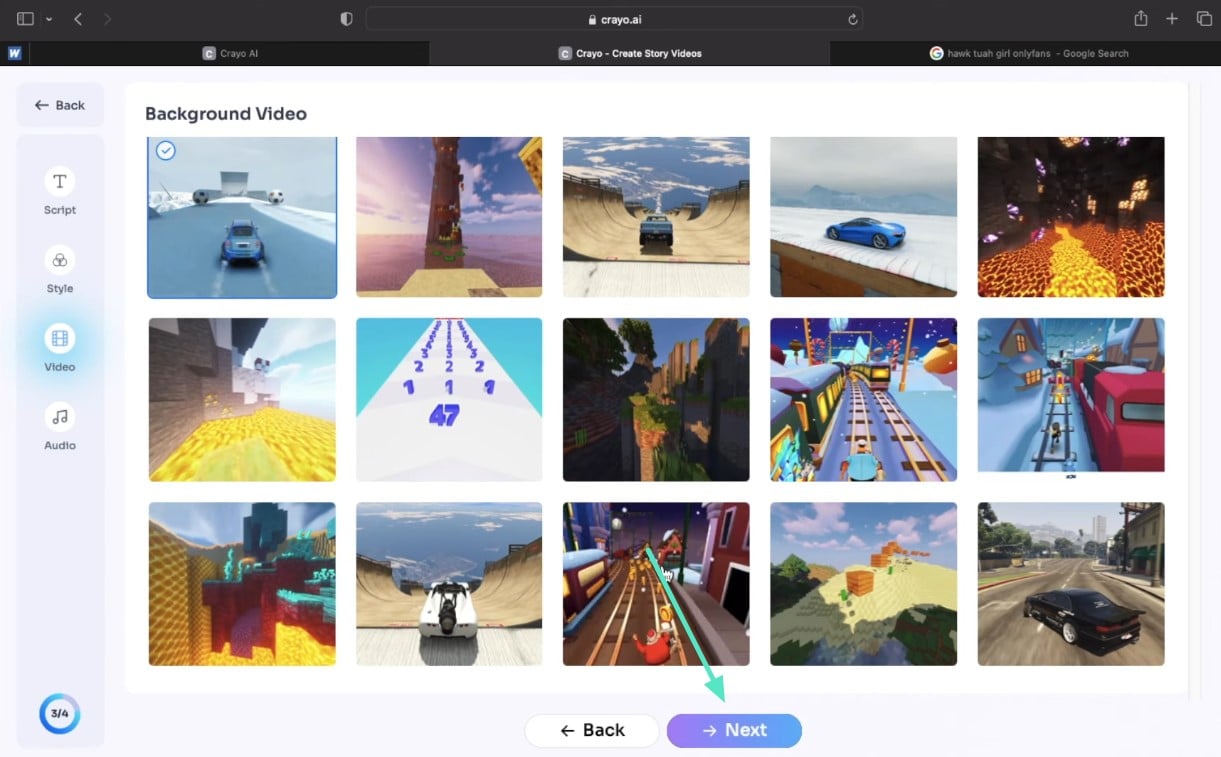
- Choose the background video from the options provided by the tool.
- Confirm your selection by hitting the "Next" button on the Crayo AI interface.
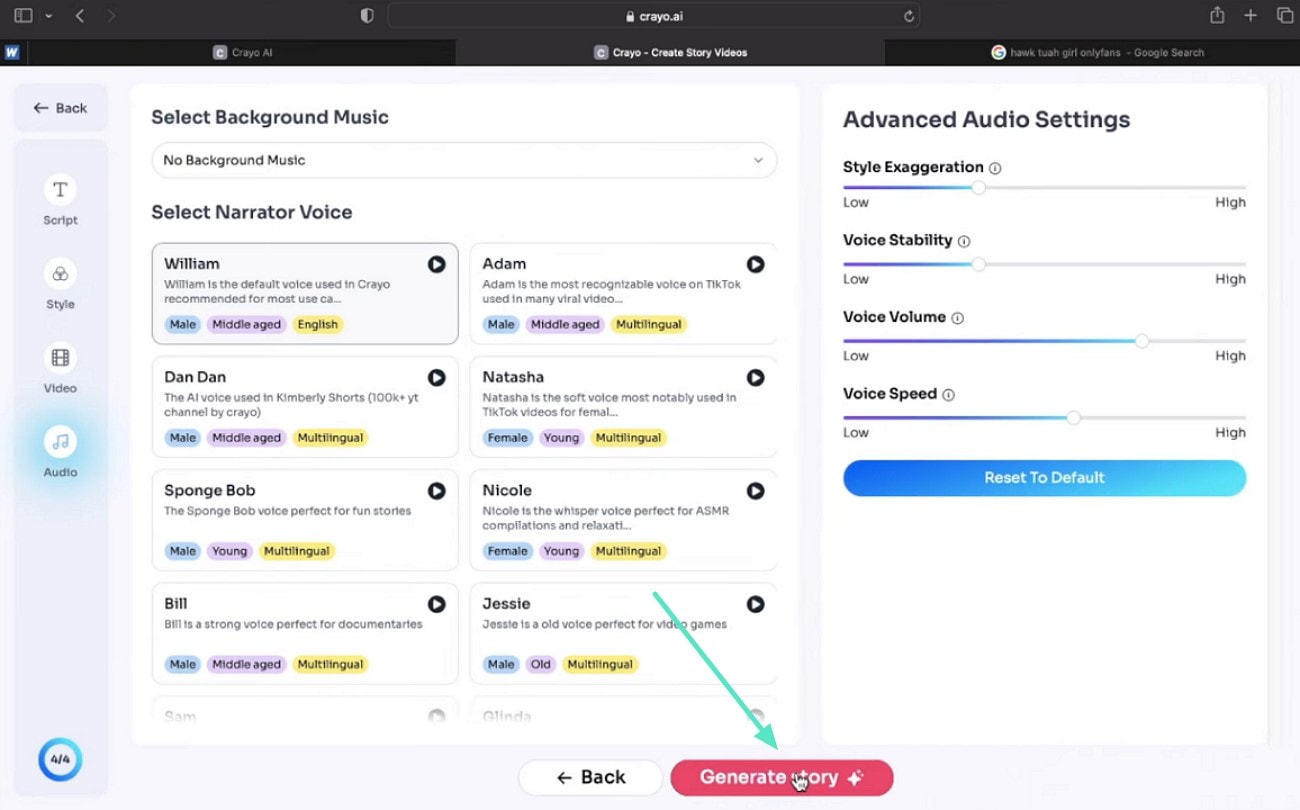
- Select the background music of your choice from the music library offered by the tool.
- Configure audio settings such as speed and volume and press the "Generate Story" button to execute the generation process.
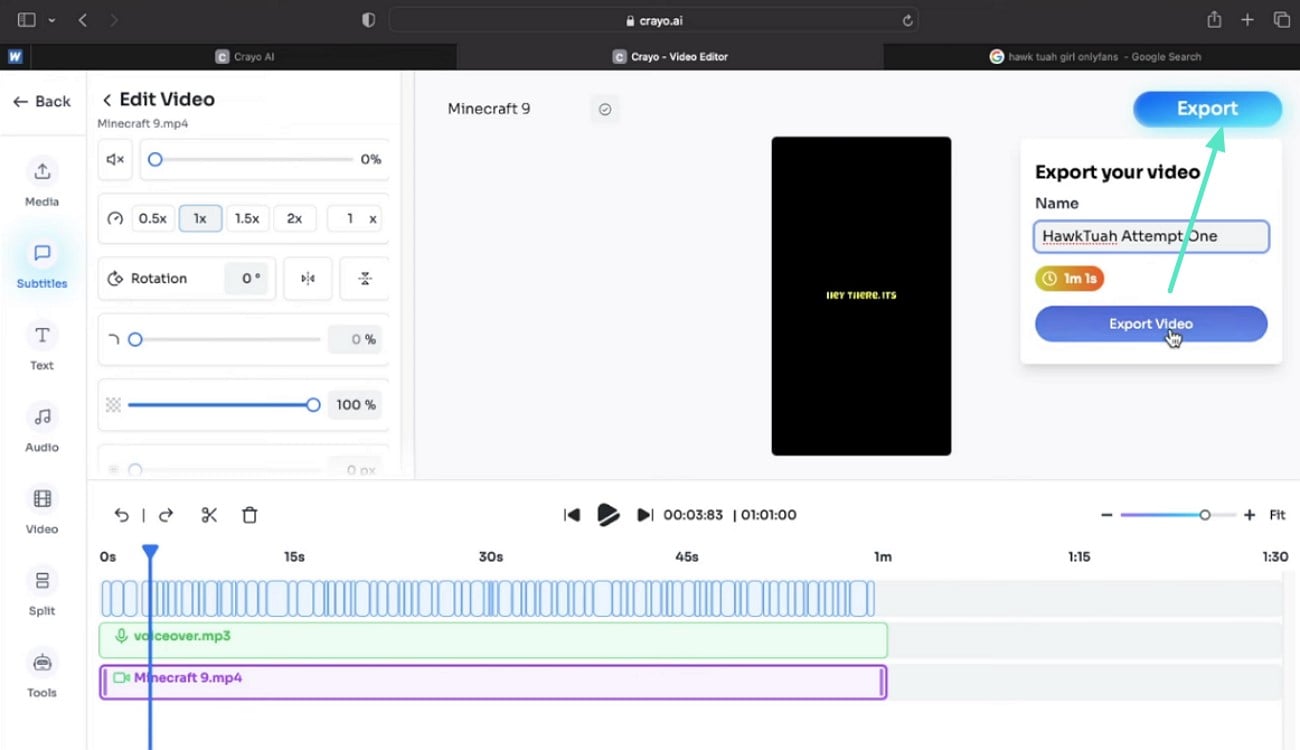
- The generated video will appear in the editing interface where you can adjust video content and captions.
- When satisfied, head to the top-right corner and press the "Export" button.
Part 3. Pros and Cons of Using Crayo AI Video Editor
After discussing the video generation guide for this AI-powered tool, let us explore some of the pros and cons of using Crayo AI video editor for generating content:
- Performs various advanced video editing tasks, such as applying a split-screen effect instantly.
- Changes the aspect ratio and speed of the video according to your preferences.
- Posts your generated video directly to your social accounts with a customized video cover.
- "My Assets" library saves your applied assets for instant access.
- The advanced video editing features are limited compared to other professional video editors.
- No free plan is available, restricting users from giving it a quick try.
- Doesn't allow adjustment of video quality, frame rates, and resolution.
Part 4. Transform Your Ideas into Videos Fast with Offline Editing Solutions
Opting for an online tool like Crayo AI for video generation might be a quick solution to generate content, but it does come with various limitations.
Limitations of Online Tools You Should Know
- Instantly accessible with no installation required but often lack advanced features.
- Limited editing flexibility restricts creative control over video elements.
- Export options are confined to fewer formats and lower resolutions.
- Challenging to create dynamic effects or advanced animations, limiting video polish.
- Dependence on an internet connection can affect performance and accessibility.
Reasons to Opt for an Offline Video Editor
- Works offline, allowing uninterrupted editing without internet dependency.
- Can incorporate AI-generated assets while offering extensive manual control.
- Provides a rich selection of animations, transitions, filters, and logo reveal templates.
- Supports high-resolution exports suitable for various platforms, including YouTube, short videos, and advertisements.
- Offers greater precision and customization, enabling professional-quality video production.
For users who prefer precision over speed, Wondershare Filmora is the right offline Crayo AI alternative. It complements AI video generation by offering a more precise, offline editing experience. It enhances AI-generated content by offering a more controlled and detailed editing experience, with features such as dynamic effects, smooth transitions, and fine-tuned audio controls.
Its intuitive interface makes it accessible for both beginners and professional editors, allowing anyone to craft polished videos effortlessly. Additionally, it provides multiple export options so creators can save their projects in the format they prefer. With its competitive pricing, this offline solution delivers high-quality results without breaking the budget.
Coherent Features Offered By Filmora
If you are looking for a tool that is instantly accessible and generates videos faster, you can opt for Crayo AI Video Editor. However, if you are looking for precise editing with an extensive set of features, Wondershare Filmora is the tool you need.
Mentioned below is a comparison table that shows how Filmora surpasses the functionalities of Crayo:
| Feature | Wondershare Filmora | Crayo AI Video Editor |
| Video Generation | Offers AI-powered video generation from text as well as images with Veo 3 integration and template options. | AI-powered video creation with Veo 3 integration, but no templates offered. |
| Voiceovers | Supports AI voiceovers, plus manual voice recording and advanced audio editing, along with voice cloning. | Allows you to record voiceovers for your video with no AI-powered audio editing abilities. |
| Image Generation | Offers AI-integrated image generation from text, choosing different image style options. | Generates images from text. |
| Content Ideas | Offers you AI-powered script generation to craft captivating videos. | Brainstorm video ideas for your videos. |
| Downloading and Exporting | Multiple export options, including 4K, varied formats, and platform-specific presets. | Easy export with standard format. |
- Robust support for multi-track video and audio editing with a magnetic timeline.
- Powerful color grading and correction features for vibrant visuals.
- Motion tracking and AI portrait to make the subject the center of attention in videos.
- Large asset library with effects, filters, and transitions to enhance the visuals.
- Support across multiple platforms, including Windows, Mac, iOS, and Android.
- This Crayo AI alternative offers customizable titles and text animation for visually engaging storytelling and branding.
- Offers diversity in content creation by offering an in-house screen recording facility.
- The variety of templates offered within Filmora makes video editing more creative and unique.
- A watermark is added to the result generated through the free version of this tool.
For more details, please visit the purchase page where various pricing plans are available.
Windows, Mac, Android, iOS
Step-by-Step Guide to Create and Edit Videos Effortlessly With Filmora
After learning all the details about Filmora in this Crayo AI review, let us explore the step-by-step guide to generate and refine videos using this comprehensive tool:

- Begin by launching Filmora on your device and accessing the homepage.
- From here, locate the "Image to Video" feature and click on it to proceed.
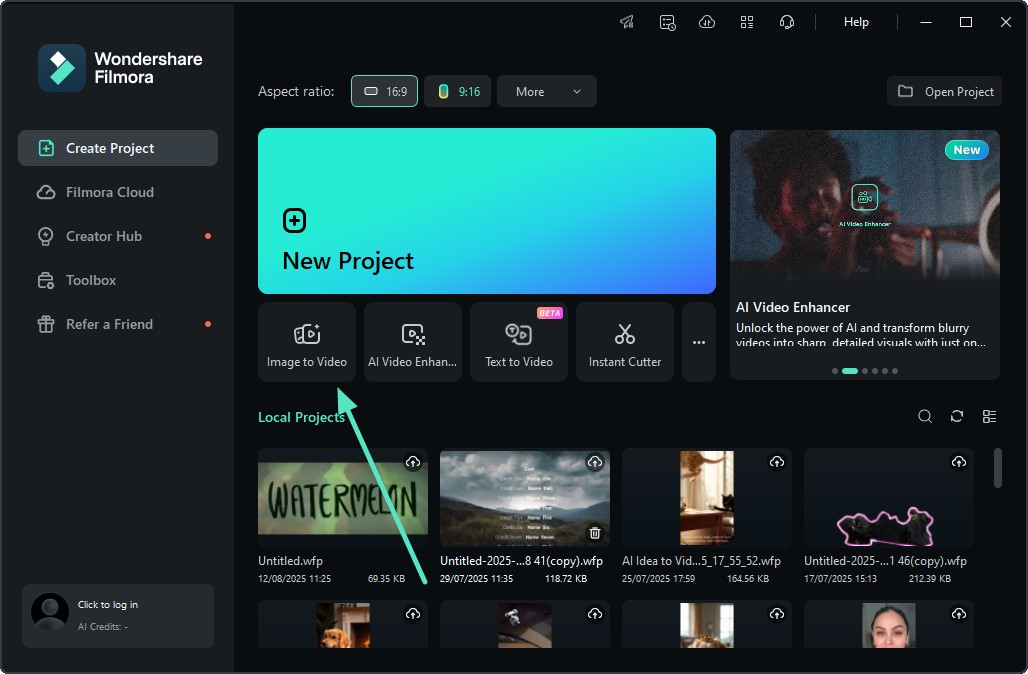
- Enable the "Video Generation" section located below the toolbar.
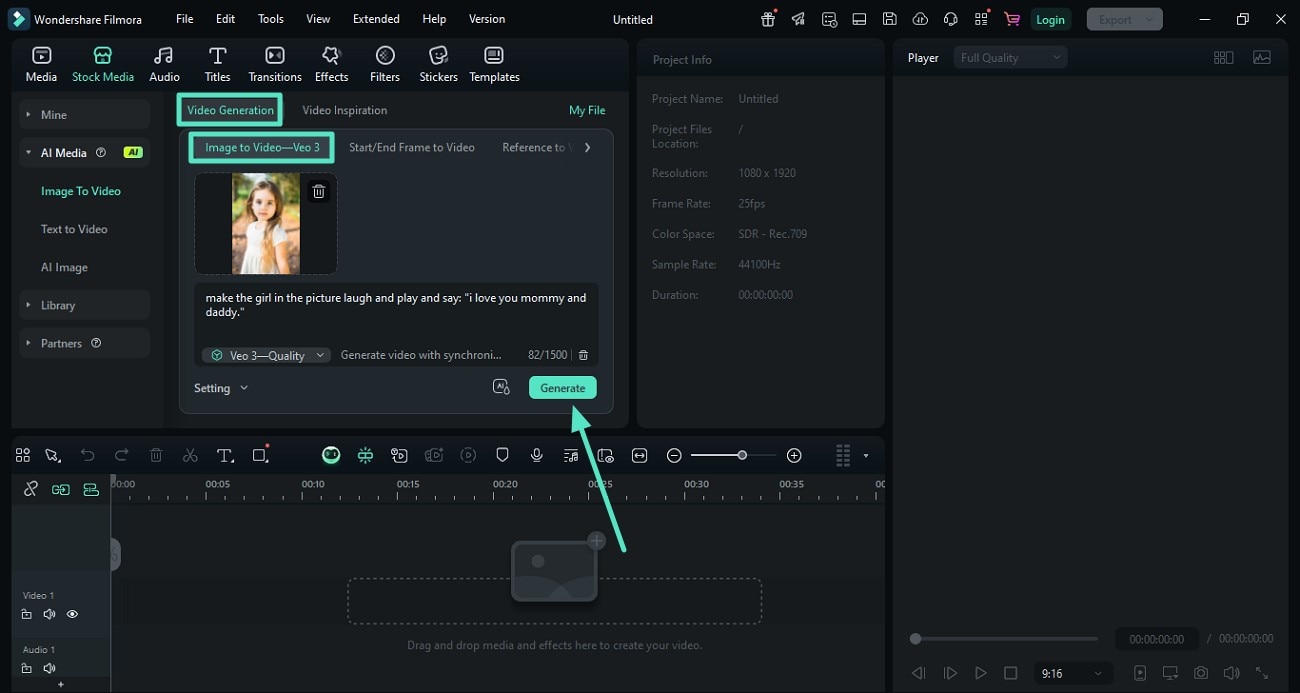
- Access the "Image to Video- Veo 3" option and import the image you want to turn into a video.
- Specify your requirements in text form in the text field located.
- Hit the "Generate" button to execute the process.
- Drag the generated video to the editing timeline to further enhance it.
- Head to the "Video" panel and enable the "AI Tools" section.
- Turn on "Stabilization" and "Video Denoise" to remove jitters and unwanted artifacts.

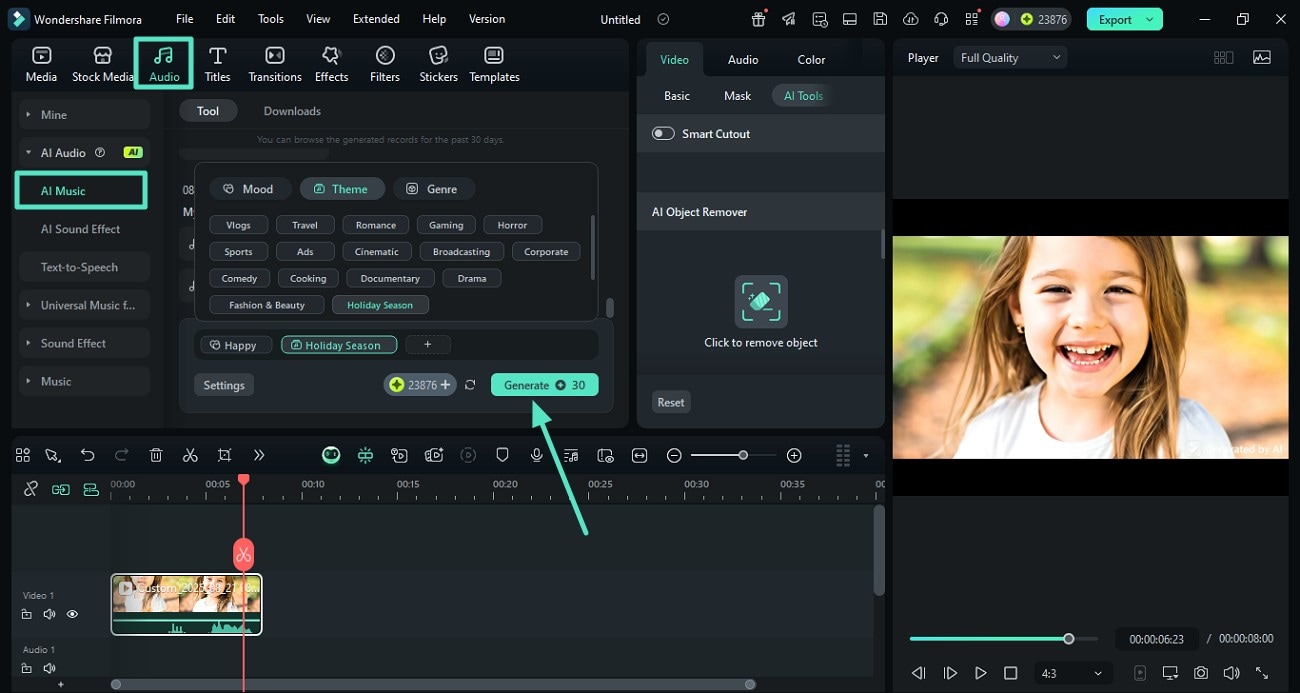
- In the Veo-3 interface, the system can automatically generate audio matching the video content.
- Go to the "Audio" section and enable "AI Music" to fine-tune the generated audio if needed.
- Click "Generate" to produce background music and sound effects synced with your video.
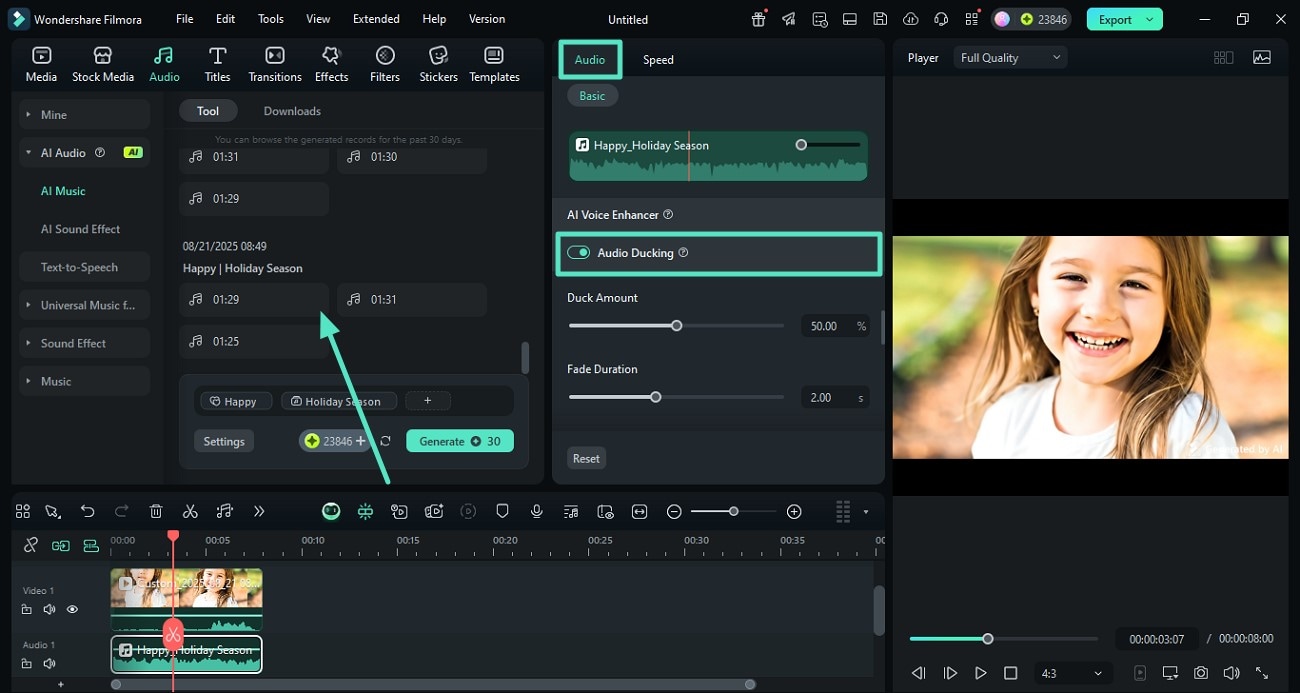
- Head to the "Audio" panel again and enable "Audio Ducking" to make the music fade during dialogues.
- Apply more audio adjustments using the same panel on Crayo AI's interface.
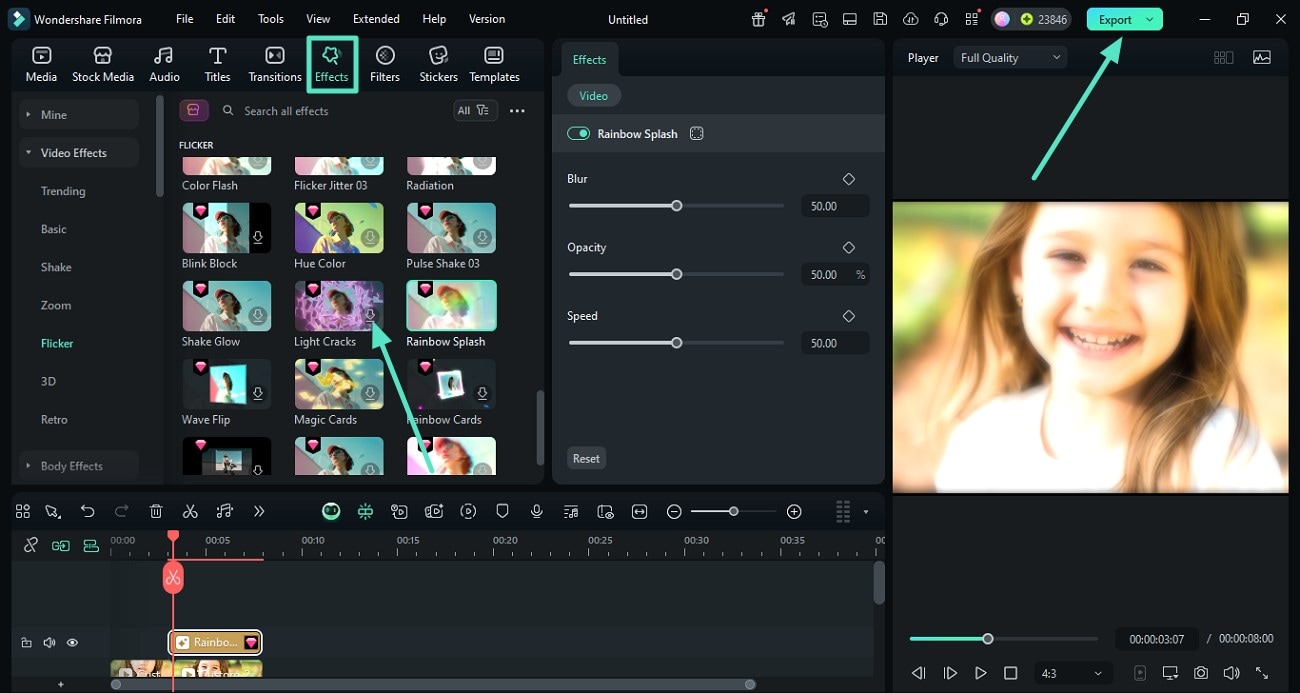
- Navigate to "Effects," select your favorite one and press the "+" icon to apply.
- Press the "Export" button to save the final video to your device.
Conclusion
To wrap it up, this article discussed a complete review of one of the popular online video editors, Crayo AI Video Editor. The article covered all the important details and functionalities of this video creation tool. However, the tool comes with certain limitations that restrict users from creating content of their choice. For these, tools like Wondershare Filmora are used, which provide complete ease of use along with high-quality results for their users.
