

Audio effects in Premiere Pro transform raw sound into professional-quality audio. From removing background noise to adding cinematic reverb, these tools give you precise control over every aspect of your soundtrack.
This guide covers 5 essential audio effects every editor should master: parametric EQ, compression, reverb, delay, and noise reduction. You'll learn when to use each effect and follow step-by-step tutorials with real project examples.
Whether you're fixing dialogue issues or creating immersive soundscapes, these techniques will elevate your video's audio quality immediately. For editors seeking a faster workflow with one-click presets, we'll also briefly compare Filmora's simplified audio tools at the end.
Part 1. Common Audio Effects for Premiere Pro and Their Purposes
Whether you're editing a podcast, a vlog, or a short film, understanding these audio effects in Premiere Pro is essential to enhance your sound quality creatively. The following table summarizes the common effects and their main purposes:
| Category | Description and Purpose |
| Amplitude and Compression | It manages volume levels and dynamic range to ensure balanced audio levels. Effects like "Amplify" boost or reduce signal strength in real time. |
| Delay and Echo | Add depth and spatial echo effects to create a sense of space or time-based repetition. |
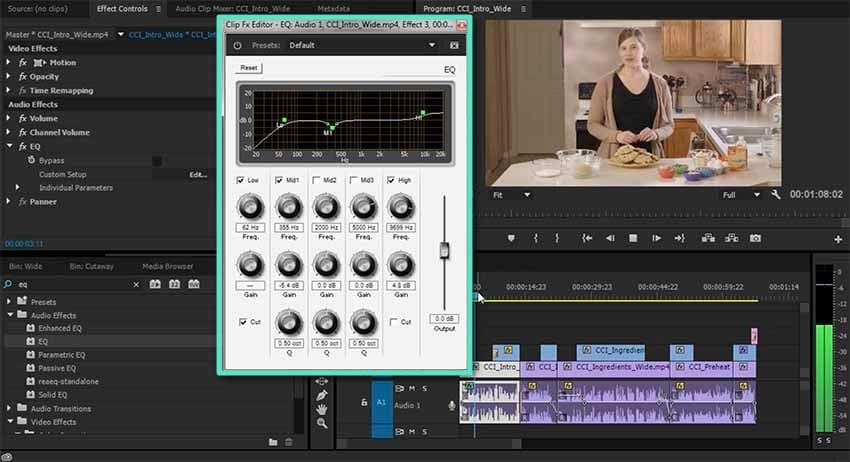
| Filter and EQ | Modify frequency components to shape tonal qualities. For example, the Parametric Equalizer allows boosting highs or cutting lows to clean up or stylize sound. |
| Modulation | Introduce movement and texture with effects like chorus or flanger, adding dynamic variation to the audio. |
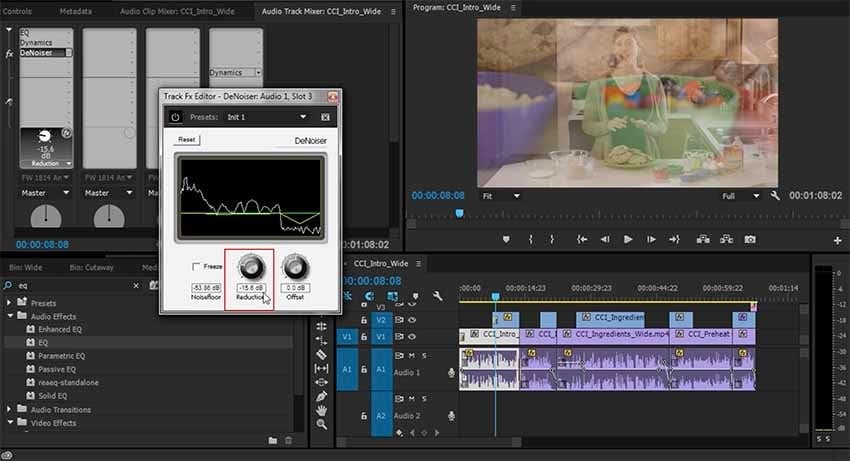
| Noise Reduction/Restoration | Remove unwanted background noises such as hums, hisses, or light traffic sounds, improving clarity. |
| Reverb | Simulate acoustic environments, giving the impression that audio is played in spaces like halls, rooms, or studios. |
| Special | Unique and creative sound design effects providing distinctive audio manipulations. |
| Stereo Imagery | Enhance the stereo sound field, widening or narrowing the perceived space of the audio. |
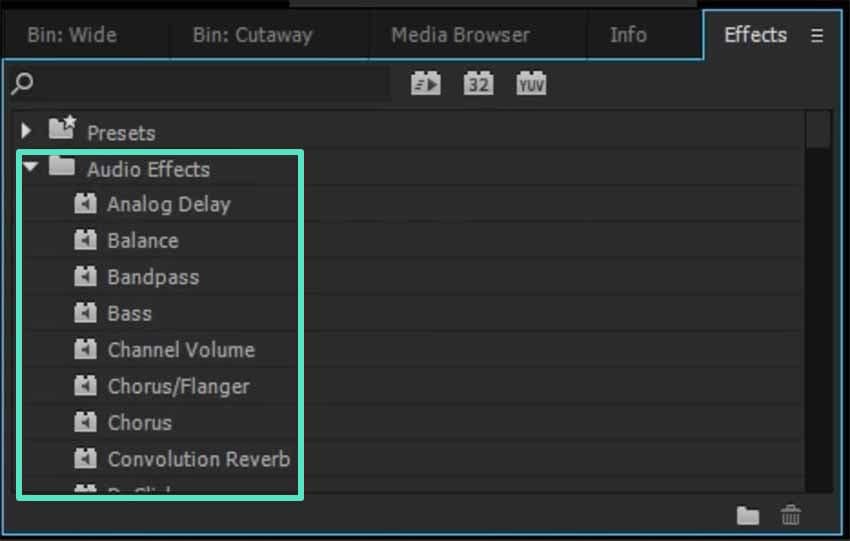
Note: These effects are accessible through the "Effects" panel under the "Audio Effects" folder and can be applied directly to your clips. Each effect offers detailed parameters that you can adjust to customize the sound creatively and precisely.
Part 2. How to Apply Audio Effects for Premiere Pro Step-by-Step
Applying Premiere Pro audio effects is a fundamental skill to enhance your audio tracks creatively and technically. By following a clear step-by-step process, you can easily add and customize effects. Follow the steps mentioned below to learn how to apply these effects to the audio of your video:
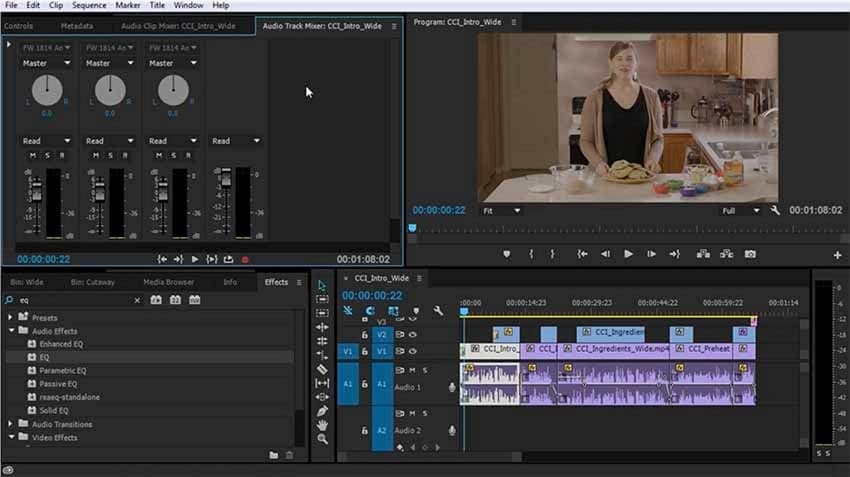
- After importing your media to Premiere Pro, open the "Effects" panel.
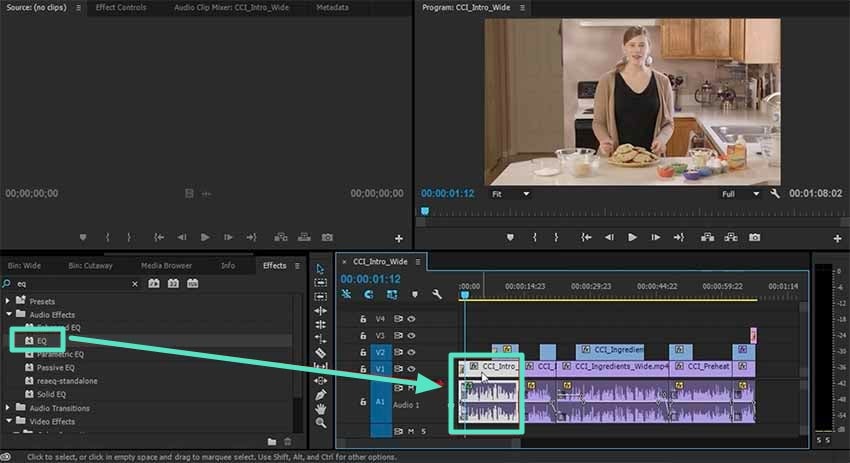
- Expand the "Audio Effects" folder and choose your desired effect from the list.
- Drag the selected audio effect directly onto the video clip in your timeline.
- Once applied, a small fx indicator will appear on the clip.
- Double-click the clip to open the Effect Controls window.
- Adjust the parameters and preview changes in real time.
- Save the customized settings as a preset for future use.
Part 3. Advanced Tips to Maximize Audio Effects for Premiere Pro
To take your audio editing in Adobe Premiere Pro to the next level, exploring advanced tips can greatly enhance your workflow and sound design. Here are some of the handy tips that you can consider to make the most out of your audio effects in Premiere incorporation:
- Chain Multiple Effects: Combining effects like EQ and Reverb adds layers of depth and texture to your audio, creating unique sound signatures to match your project's atmosphere.
- Use Keyframes: Automate changes in your audio effects over time with keyframes, allowing smooth transitions in volume, filter frequencies, or intensity for dynamic and evolving soundscapes.
- Leverage Essential Sound Panel: This panel provides automated options for mixing, repairing, and enhancing audio, simplifying complex adjustments with presets tailored for dialogue, music, and sound effects.
- Sync Sound with Transitions: Timing sound effects to visual cuts or transitions adds cinematic polish, making your edits more immersive and rhythmically engaging.
- Explore Third-Party Plugins: Professional plugins like iZotope RX, Waves, and FabFilter offer advanced control and specialized tools beyond Premiere's native effects, perfect for detailed audio restoration and creative processing.
Part 4. A Simpler Alternative - How to Use Audio Effects in Filmora
While Premiere Pro offers professional-grade audio control, many creators find themselves spending more time navigating complex menus than actually being creative. If you're looking for a more intuitive approach that delivers similar results faster, Wondershare Filmora provides a compelling alternative.
Let's explore how Filmora achieves the same audio enhancements with a streamlined workflow - perfect for content creators who prioritize efficiency without sacrificing quality.
Steps to Add Audio Effects in Filmora
As discussed, Filmora is one of the most reliable tools that offers extensive audio effects along with enhancements. To learn how to apply audio effects to your videos, read the steps mentioned below:
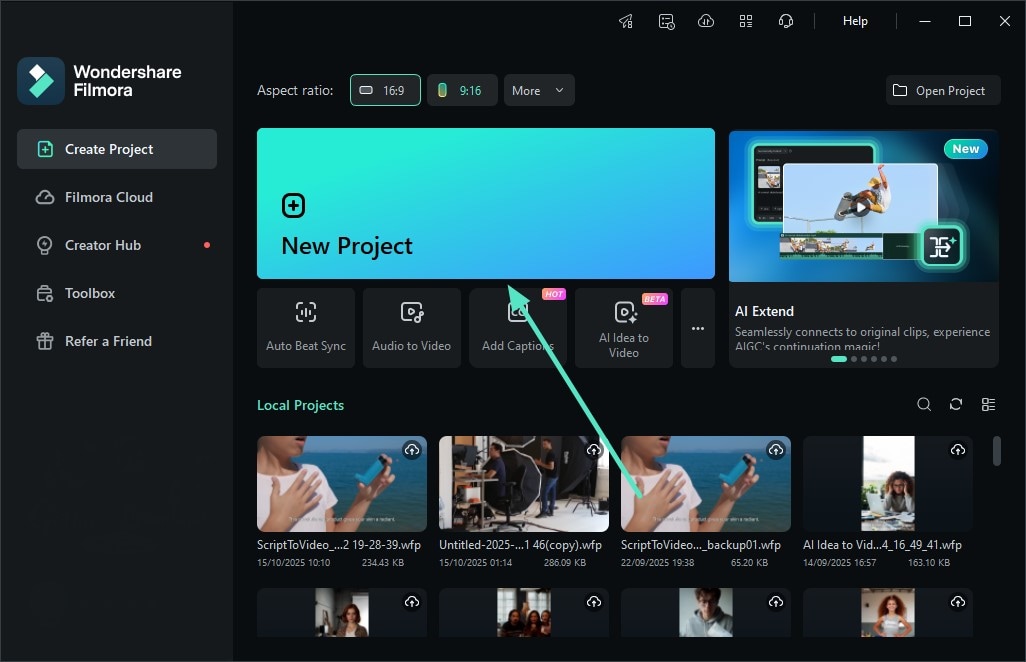
- Launch Filmora on your device and select "New Project" from the homepage.
- Next, import your video file into the interface and drag it to the editing timeline.
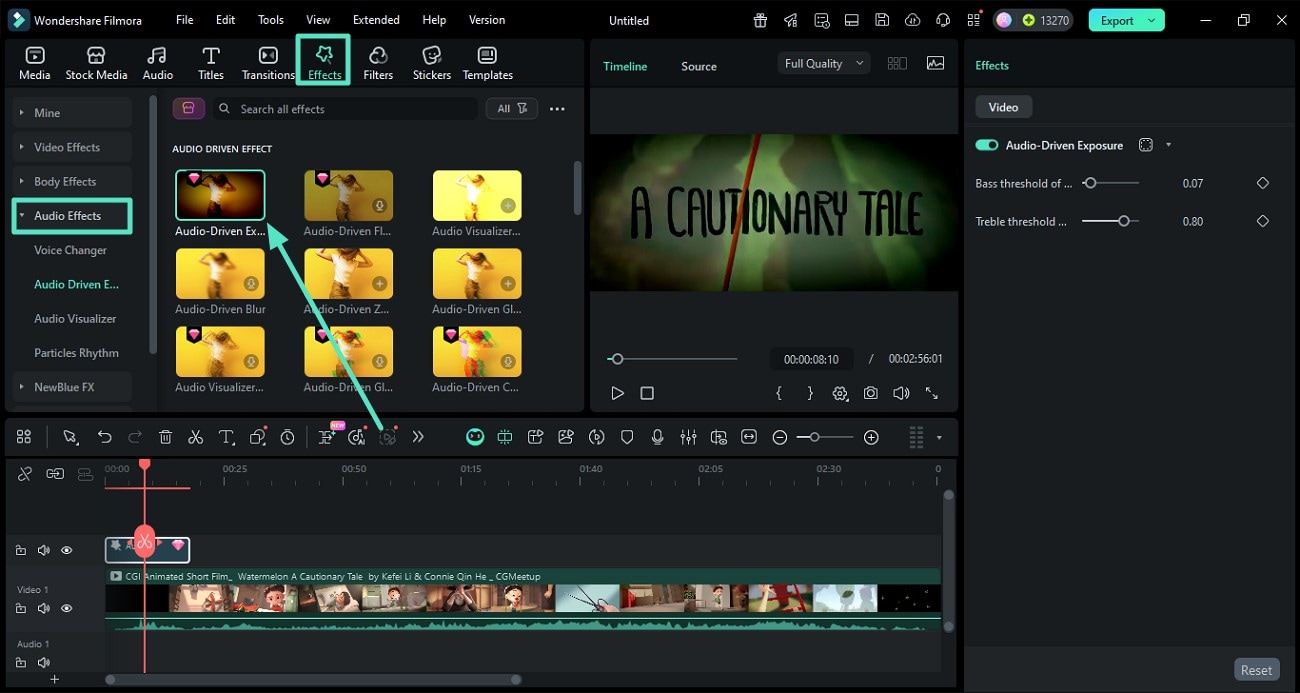
- Once the video is added, navigate to the menu bar and click the "Effects" option.
- Locate the "Audio" category on the left panel to access the library.
- Choose an audio effect and drag it onto the timeline to apply it.
- Use the adjustment panel on the right to fine-tune its attributes.
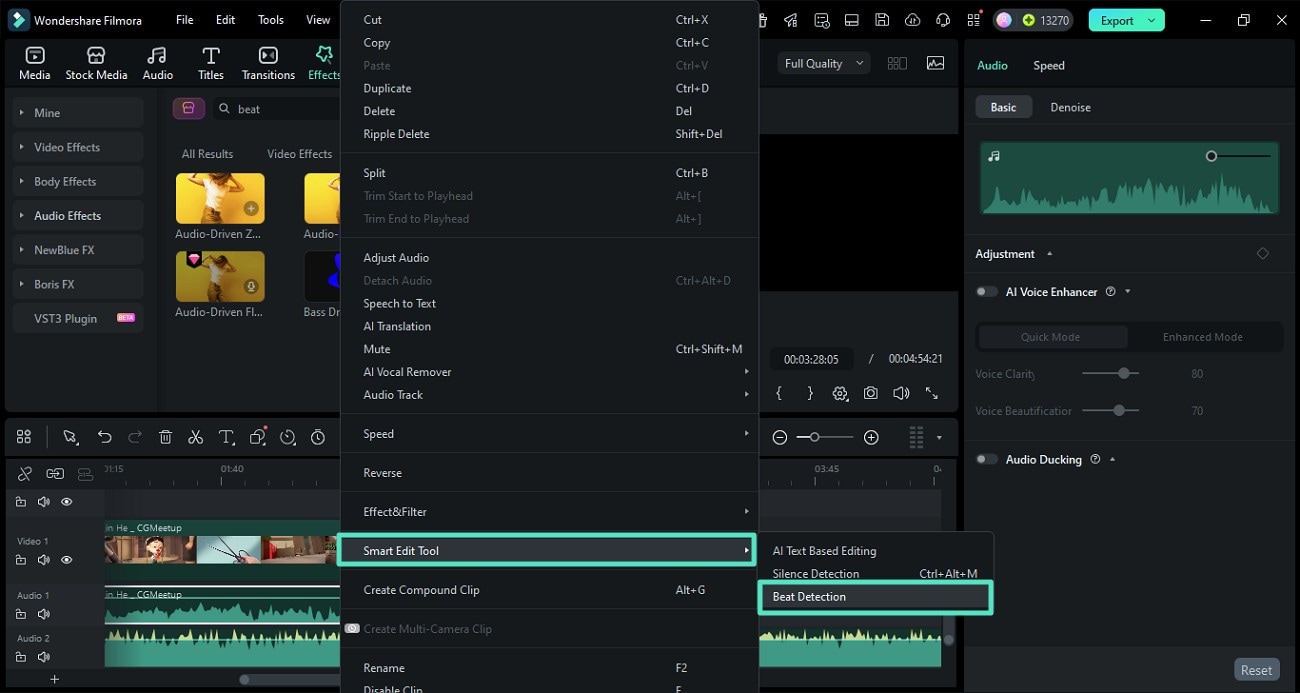
- After the audio effect is applied, right-click on the track to reveal the options list.
- Expand the "Smart Edit Tool" and select "Beat Detection."
- The beats in your audio will be automatically detected and synced to the timeline.
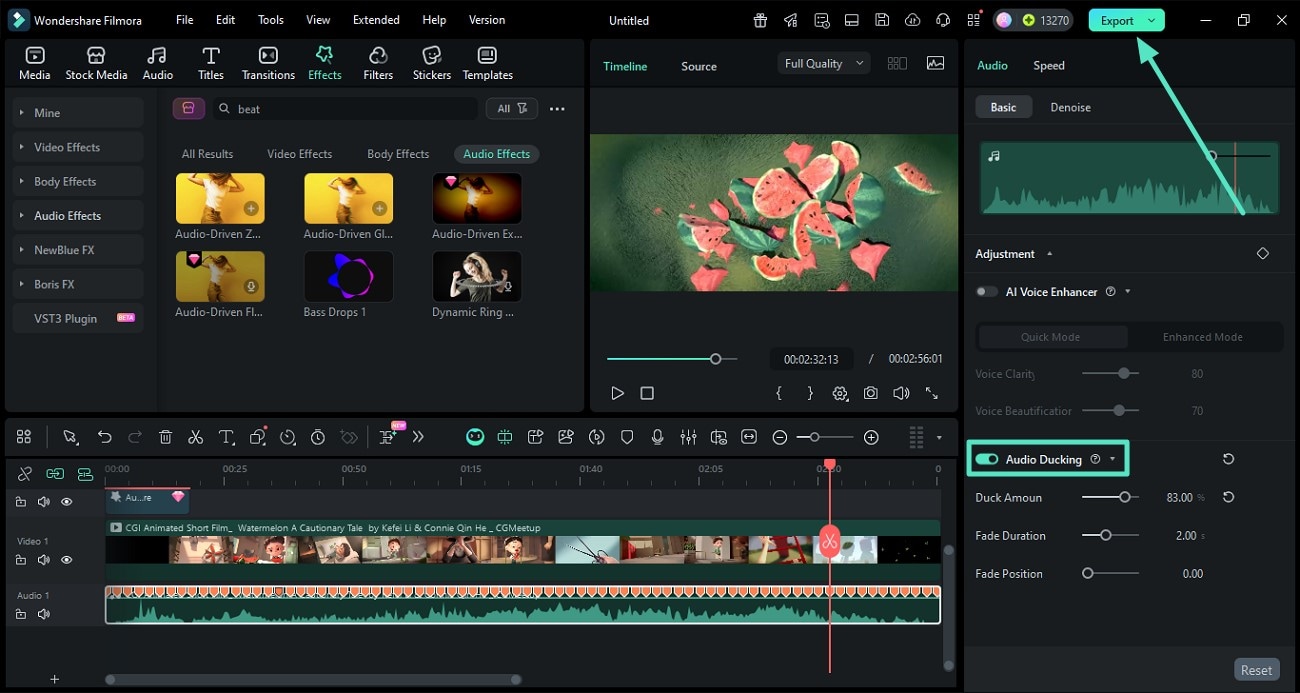
- To highlight dialogue in your video, head to the adjustment panel on the right.
- Toggle on the "Audio Ducking" option and adjust the sliders as needed.
- After all sound refinements are done, click the "Export" button to save your video.
Part 5. Comparing Audio Effects for Premiere Pro vs. Filmora
Now that you've seen both approaches in action, let's break down which tool better suits your specific needs. This comparison isn't about which software is "better" - it's about matching features to YOUR workflow and goals.
Whether you're editing film projects, YouTube videos, or podcasts, here's a data-driven comparison to help you decide:
Audio Effects Features
Both offer essential audio tools, but Filmora provides additional AI-powered audio features that enhance creativity and simplify editing for users. Mentioned below is a tabular comparison between the audio effect features offered by both software:
| Audio Effects Features | Wondershare Filmora | Premiere Pro |
| Audio Effects Library | Built-in audio effects with AI support | Limited audio effects library |
| Audio Denoise | AI Audio Denoise for easy noise removal | Enhance Speech with manual control |
| Audio Ducking | Yes | Yes |
| Audio Equalizer (EQ) | Included with AI presets | Advanced parametric EQ |
| Voice Enhancer | AI Voice Enhancer | Enhance Speech feature |
Pricing and Subscription
Subscription and pricing models significantly affect accessibility to software. Filmora offers more cost-effective and flexible options compared to Premiere audio effects, especially for casual users.
| Pricing Features | Wondershare Filmora | Premiere Pro |
| Free Trial | Unlimited duration with watermark | 7-days free trial |
| Annual Subscription | $34.99/year | $599.88/yr |
| Perpetual Subscription | $49.99/one-time-purchase | Not available |
| Platform Support | Windows, Mac, iOS, Android | Windows, Mac |
User Experience
User experience and the learning curve are crucial for productivity and quick adoption, especially for beginners. Filmora emphasizes simplicity and intuitive design, whereas Premiere Pro caters to professionals with complexity and depth.
| Aspects | Wondershare Filmora | Premiere Pro |
| Interface Friendliness | Intuitive, user-friendly, with a clean layout | Professional but complex, steeper learning curve |
| Learning Curve | Beginner-friendly, quick to master | Requires weeks/months to learn completely |
| Workflow Efficiency | Magnetic timeline with auto snapping | Manual snapping, more manual controls |
| Ideal User Base | Beginners to professionals | Professionals only |
| Tutorials and Support | Extensive built-in tutorials and AI guidance | Only technical Resources |
Quick Recommendation:
- Premiere Pro: Choose if you're working on cinema or TV projects with large budgets and need deep integration with After Effects.
- Filmora: Choose if you're a content creator focused on YouTube, social media, or need faster turnaround times.
Both tools can achieve professional audio results - the difference lies in workflow speed and learning investment.
Part 6. Best Practices for Using Audio Effects for Premiere Pro
Ensuring high-quality audio in video editing requires careful monitoring and thoughtful processing. Mentioned below are some of the tips you can utilize when using audio effects in Adobe Premiere Pro:
- Monitor Audio Levels: Always keep an eye on audio meters to prevent clipping or distortion, which can degrade sound quality and distract viewers.
- Use Headphones: Editing with reference or studio headphones allows you to detect subtle sound details, unwanted noise, and channel imbalances that might be missed on regular speakers.
- Avoid Over-Processing: Applying excessive effects can make audio sound artificial or unnatural. Subtle enhancements usually yield the best results, preserving the integrity and realism of voices.
- Save Presets: Create and save presets for common audio scenarios such as interviews or background ambiance. This practice speeds up workflows by enabling consistent sound quality across multiple projects.
- Preview on Multiple Devices: Regularly check your final mix on various playback systems to ensure the audio translates well across listening environments and devices.
Conclusion
To sum it up, this article discussed a complete overview of how to add audio effects for Premiere Pro. Even though the platform gets the job done, there are various drawbacks to using it. For this reason, Filmora is one of the most reliable alternatives. The tool offers an intuitive and easy-to-use interface along with extensive functionality to add and modify audio effortlessly.
