

 ChatGPT
 Perplexity
 Gemini
 Claude
 Grok
Grok
“I’m editing a video for my YouTube channel and just noticed how bad the audio is. My microphone picked up a lot of rustling from my background. Is there a way to remove background noise in Premiere Pro, or do I need to find a different solution?”
Depending on the sensitivity of your microphone and your filming environment, your videos could have a lot of distracting noise that will annoy your viewers. Wind rustling, dogs barking in the distance, your AC humming – unless you have a very specific niche, you don’t want any of that in your content.
Now, there are many dedicated audio editing tools out there that could help you deal with this, but you might not need them if you already have a good video editor at your side.
Find out whether you can use editors like Premiere Pro to remove background noise and, if so, how.
In this article
-
- Reduce Background Noise in Premiere Using the DeNoise Effect
- Remove Background Noise in Premiere Pro Using the Essential Sound Panel
- Reducing Background Noise in Premiere Pro With CrumplePop Audio Denoise
- Reduce Background Noise in Premiere Pro With the Median Effect
- Remove Background Noise in Premiere Pro Using Adobe After Effects
Top 5 Methods for Removing Background Noise in Premiere Pro
Though it’s not the most powerful audio editor out there, Premiere Pro does let you refine your audio in a few different ways. Here are the top five methods you can use to reduce background noise in Premiere.
| Methods | Best for | How to Steps |
| Method 1: Using the DeNoise Effect | Quick, basic noise reduction | details>> |
| Method 2: Using the Essential Sound Panel | Users new to audio editing | details>> |
| Method 3: Using CrumplePop Audio Denoise | Advanced noise reduction with AI | details>> |
| Method 4: Using the Median Effect | Reducing occasional noise (clicks, pops) | details>> |
| Method 5: Using Adobe After Effects | Advanced users needing refined audio control | details>> |
1.Reduce Background Noise in Premiere Using the DeNoise Effect
The DeNoise effect was specifically developed for reducing background noise in Premiere Pro. It’s a convenient tool that’s effective and easy to use. However, it is a bit outdated and it affects the entirety of your audio – as in, it can impact the quality of both the primary audio and the background noise. So, the volume of your dialogue, for instance, can be reduced.
Fortunately, Adobe also gives you Gain control, which lets you increase the volume once you’ve denoised your audio.
Here’s how to remove background noise in Premiere using the DeNoise effect:
Step 1: Launch Adobe Premiere Pro and go to File > Import to upload your video and drag it to the timeline;
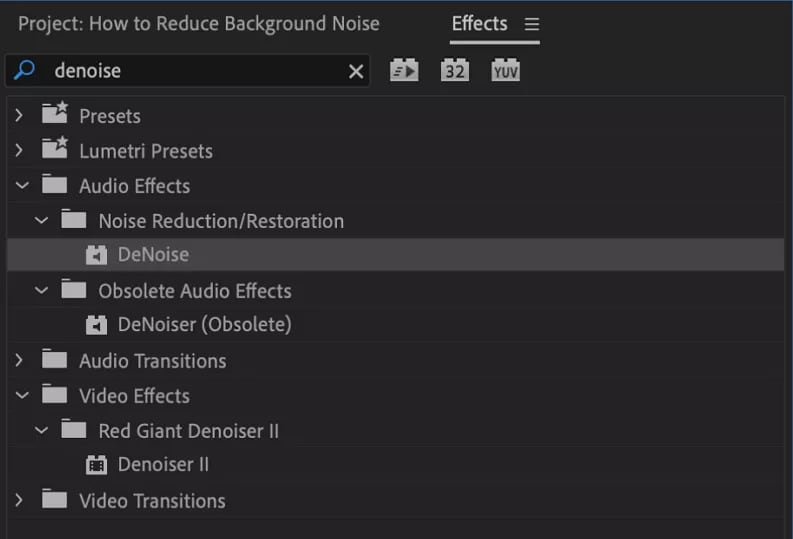
Step 2: Go to Effects > Audio Effects > Noise Reduction/Restoration > DeNoise. Alternatively, go to Effects and search DeNoise;
Step 3: Drag the DeNoise effect to the audio clip in the timeline;
Step 4: Go to Effect Controls, find DeNoise, and click Edit;

Step 5: Adjust the slider to remove noise.
Remember that you might need to play around with the slider (and Gain control) until you get the best results. Keep reviewing your audio as you adjust to ensure your main dialogue volume is high enough.
- Remove background noise precisely with AI.
- Clean audio based on noise type.
- Edit audio separately after noise removal.
- Remove wind, reverb, hum, and hiss easily.
- Reduce noise for clear sound.


2.Remove Background Noise in Premiere Pro Using the Essential Sound Panel
As mentioned, using the DeNoise effect is a bit of an outdated feature. There’s an arguably easier way to remove background noise from audio in Premiere Pro by using the Essential Sound Panel.
As its name suggests, this panel has all the essential tools for mixing and repairing your audio. You can seamlessly navigate it using nothing more than checkboxes and sliders, so it’s relatively easy to use.
Here’s how to take out background noise in Premiere Pro using the Essential Sound Panel:
Step 1: Open your project and drag it to the timeline;
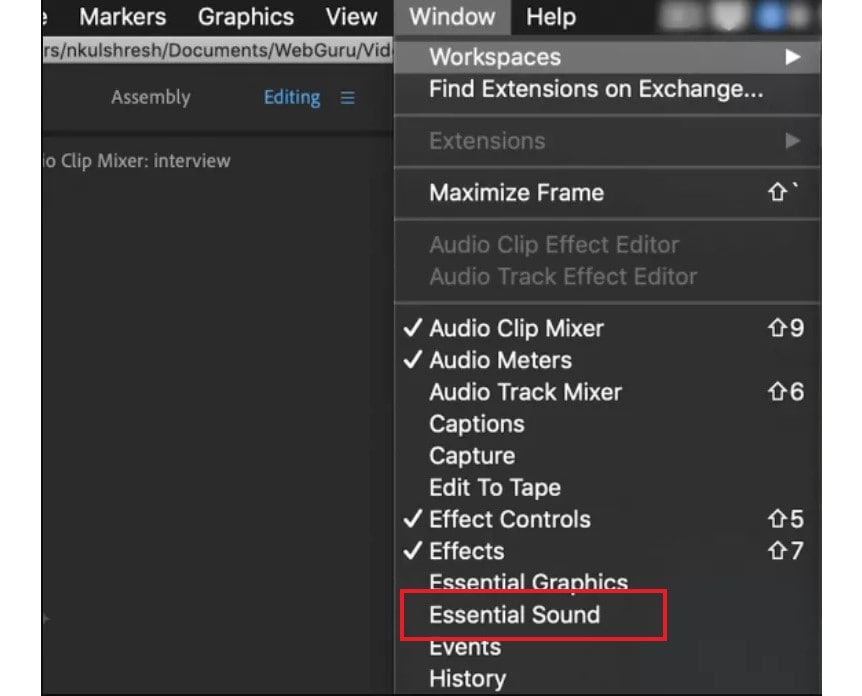
Step 2: Go to Window > Essential Sound;
Step 3: When the panel opens, select your audio, then click Dialogue;
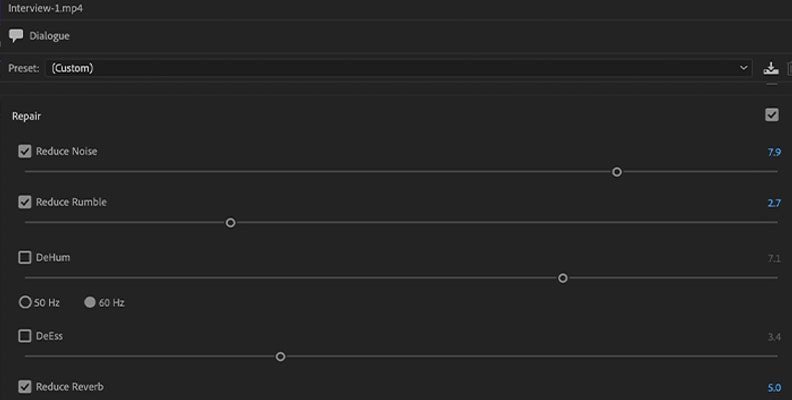
Step 4: In the new window, use the sliders for Reduce Noise, Reduce Rumble, DeHum, DeEss, and Reduce Reverb to remove background noise from your audio.
Like with the DeNoise effect, you’ll want to be careful when adjusting the sliders for background noise. While the Essential Sound panel is a bit more effective at keeping your dialogue clear, you could still encounter issues with sound distortion if you try to overcorrect your audio.
So, try your best to only remove the specific type of background noise that’s the most noticeable – rumble, humming, etc. As a general rule of thumb, it’s always better to have some background noise and keep the dialogue audible than to completely eliminate distracting sounds and, in the process, reduce the quality of the dialogue.
3.Reducing Background Noise in Premiere Pro With CrumplePop Audio Denoise
If you want to stick to using Adobe Premiere to remove background noise but aren’t satisfied with the built-in capabilities, you could check out a plugin like CrumplePop.
CrumplePop is an all-around audio editing suite with some impressive capabilities. It uses AI to seamlessly eliminate distracting noise, enhance your voice clarity, remove echoes, and more.
It integrates with all the popular video editors, including Adobe Premiere Pro, Final Cut Pro, Media Composer, DaVinci Resolve, and others, and it’s available for both Mac and Windows devices.
Here’s how to reduce background noise in Premiere Pro using the CrumplePop plugin:
Step 1: Go to the CrumplePop website or BorisFX website and download and install the plugin;
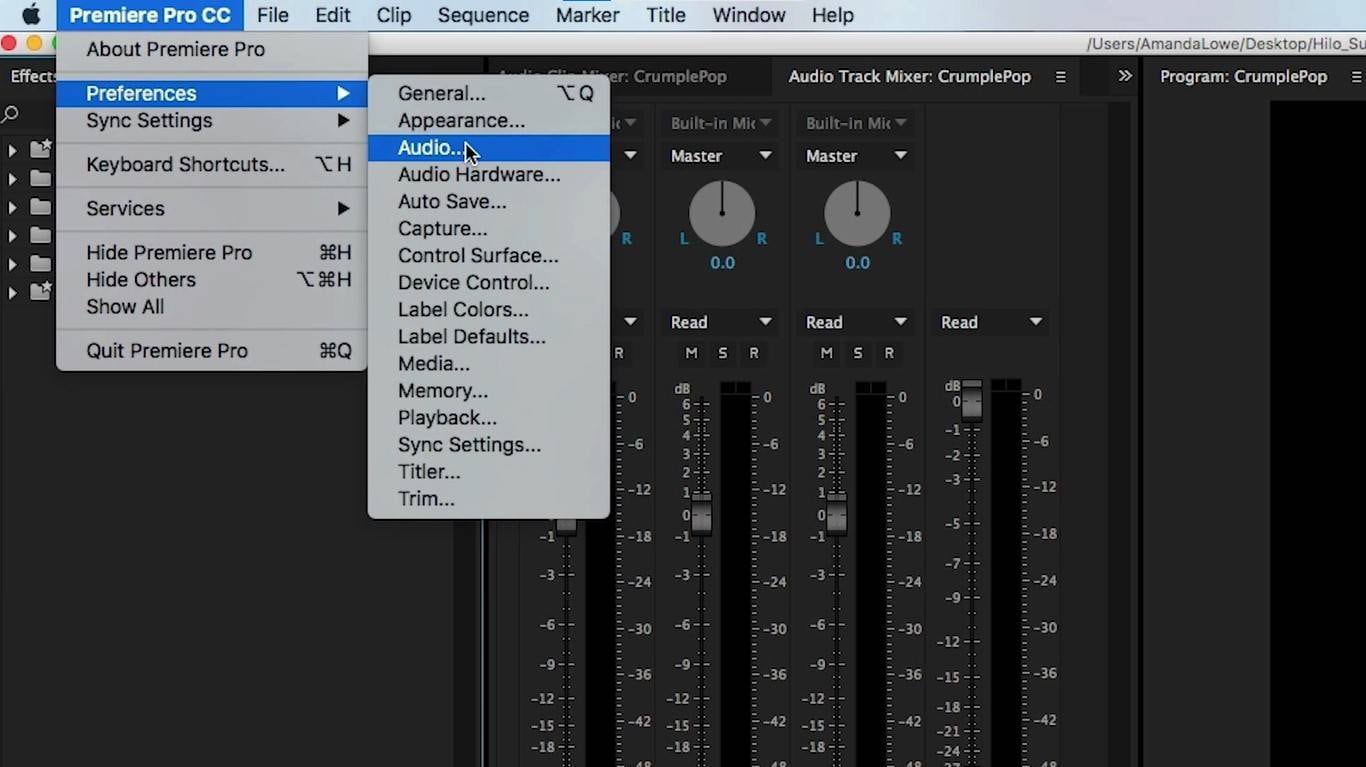
Step 2: Launch Premiere Pro and go to Preferences > Audio;
Step 3: Select Scan for Plugins and enable CrumplePop Audio DeNoise;
Step 4: With the plugin installed, import your video to Premiere Pro, then go to the Effects Panel and search for AudioDenoise;
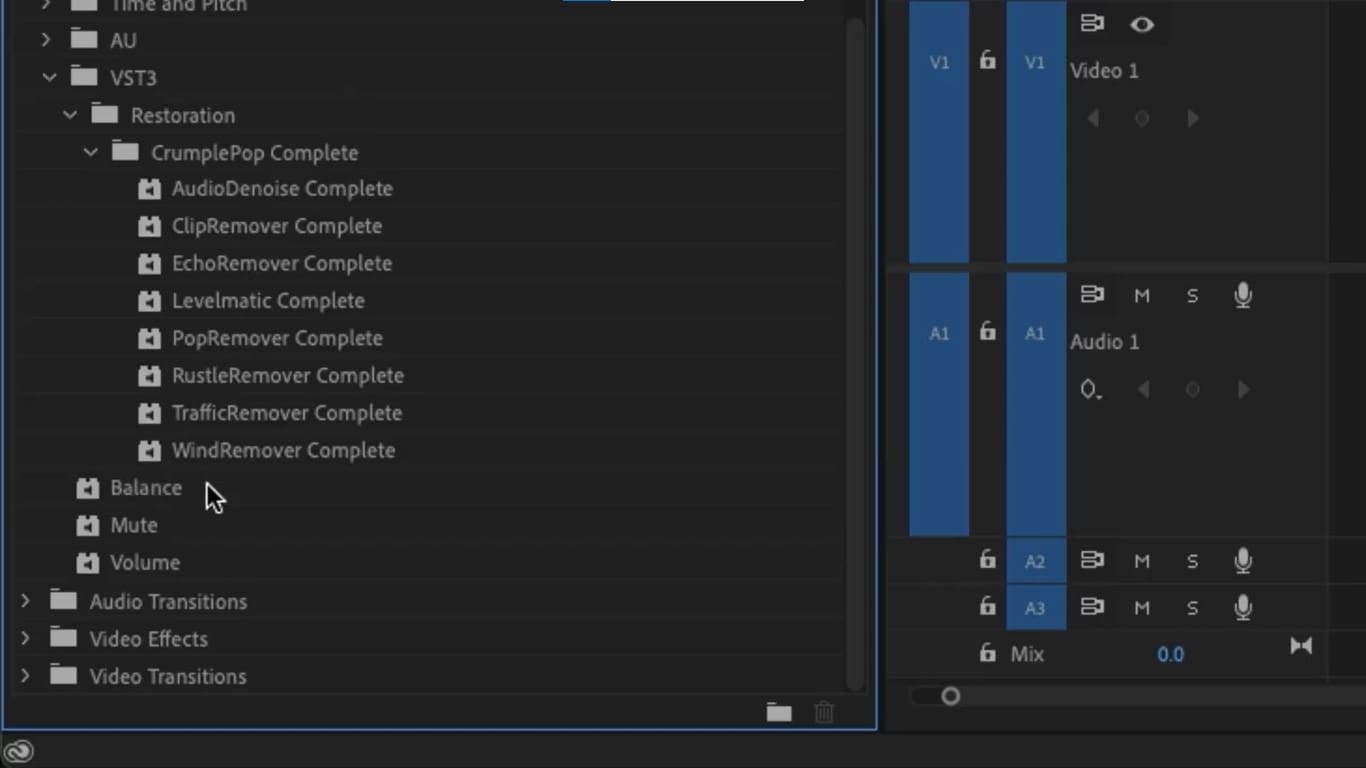
Step 5: Drag AudioDenoise to the timeline to see CrumplePop panel to remove background noise;
Step 6: Use the main Knob to adjust the strength of background noise removal.
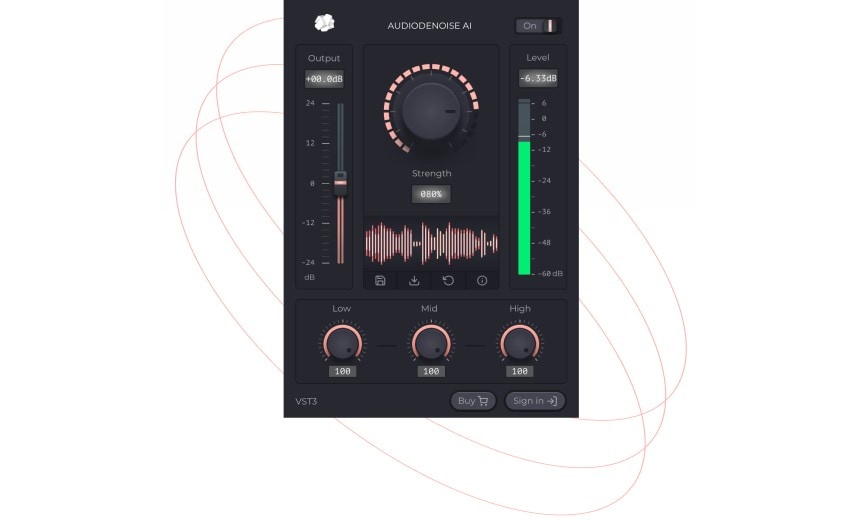
If needed, you can use the slider on the left-hand side to adjust the dialogue volume after you’ve removed unnecessary noise from it.
4.Reduce Background Noise in Premiere Pro With the Median Effect
If you’re not dealing with incessant background noise like wind rustling but instead with occasional audio disruptions like clicks, pops, and the like, you might be able to remove these sounds with the Median effect.
In a nutshell, this tool is used to smooth out your audio and create a more comfortable experience for your viewers.
Here’s how to get rid of background noise in Premiere using the Median effect:
Step 1: Open your project in Premiere Pro and go to Effects > Video Effects;
Step 2: Go to Noise & Grain and select Median;
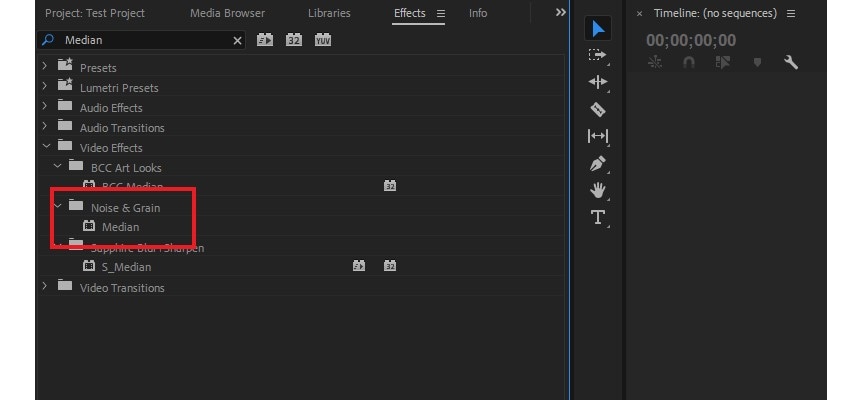
Step 3: Drag Median to the timeline and adjust the Radius.
The Median effect works by assessing the entire audio and finding its median value. When there’s a sudden noise that stands out in the audio clip, it smooths it out to match the surrounding audio. That’s why it’s best to use it for infrequent and loud background noise instead of for constant humming or buzzing noise.
5.Remove Background Noise in Premiere Pro Using Adobe After Effects
If you have both Adobe Premiere Pro and Adobe After Effects, you could use the latter to clean up your audio. You can use Dynamic Links to connect the two tools and gain access to all the features from Premiere Pro only.
While After Effects is mainly used for animations and visual graphics, it does have an excellent selection of audio tools that could prove to be most useful.
Here’s how you can go about removing background noise in Premiere Pro with After Effects:
Step 1: Open Premiere Pro and upload your video;
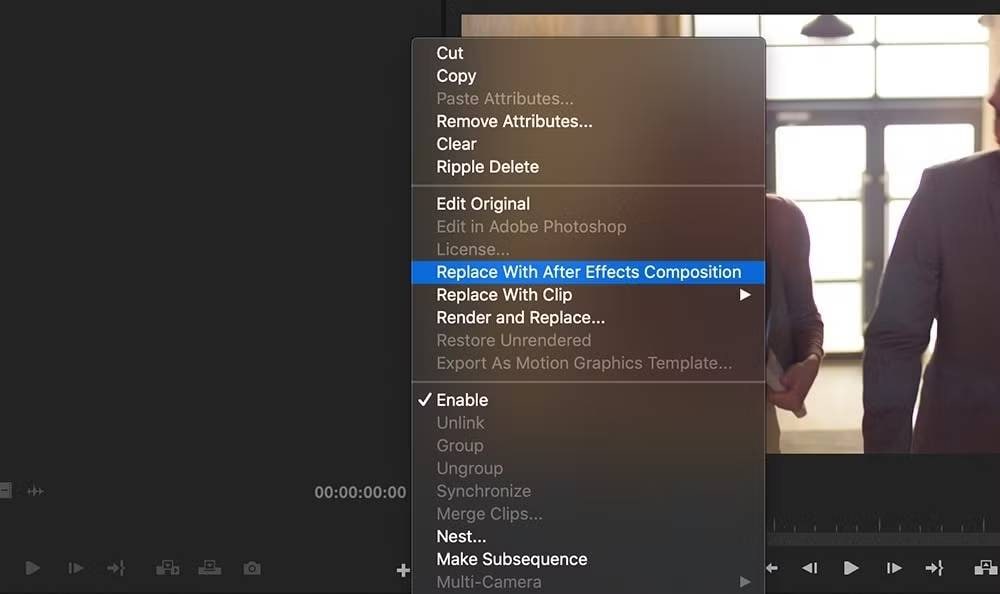
Step 2: Right-click on the clip in the timeline and select Replace With After Effects Composition;
Step 3: Go to Effects & Presets, select Remove Grain, and drag the effect to the timeline;
Step 4: Adjust grain settings.
Thanks to Dynamic Links, your clip will automatically be adjusted in Premiere Pro after you add effects in After Effects.
Challenges of Removing Background Noise in Premiere Pro
Although there are several ways to remove background noise in Premiere Pro, they all leave something to be desired. Here’s an overview of some of the main challenges you could encounter:
- Reduced audio quality – when removing background noise in Premiere Pro, you’ll frequently find that the rest of the audio is impacted, often being of lower quality and lower overall volume;
- Difficulties navigating Premiere Pro – like many Adobe solutions, Premiere Pro is designed for experienced editors. Beginners may find it very difficult to navigate;
- Ineffective noise reduction – being primarily a video editor, Premiere Pro doesn’t have extensive audio editing capabilities and can often fail to completely remove background noise;
- Slow processing – this tool is highly resource-intensive and can slow down your device. If you have a lower-end device, you’ll likely encounter major lagging issues and could have frequent tool crashes.
Premiere Pro can be a good tool to use in a pinch if it’s the only thing you have available. However, much simpler alternatives could be better worth your while.
A Simpler Alternative to Consider: Wondershare Filmora
Wondershare Filmora is the top alternative to using Premiere Pro for background noise reduction. Like Premiere, it’s primarily a video editor with countless tools and features designed to enhance the visual appeal of your content. However, its audio editing capabilities are quite different.
Filmora uses sophisticated AI to deliver outstanding audio quality and help you adjust the sound in your videos however you see fit.
It thoroughly analyzes your audio and helps you eliminate background noise and refine the dialogue with the utmost ease. With it, you can enjoy countless benefits:
- Improved audio quality – use AI to enhance and refine audio, improve voice clarity, and fine-tune vocal richness;
- User-friendly design – whether you’re an experienced audio/video editor or a complete novice, you’ll find Filmora to be intuitive and easy to navigate;
- Advanced noise reduction – enjoy five distinct denoise options to quickly eliminate background noise and retain audio quality and clarity;
- Lightweight solution – as long as your computer meets the minimum system requirements, Filmora’s performance will be unaffected. You can easily use it on lower-end devices without lags or other issues.
Prioritizing exceptional user experience, Wondershare Filmora keeps things simple while allowing you to take advantage of sophisticated features like a pro.
How to Remove Background Noise from Audio With Filmora
Removing background noise is a piece of cake with this tool:
Step 1: Install Filmora and log in to your Wondershare account;
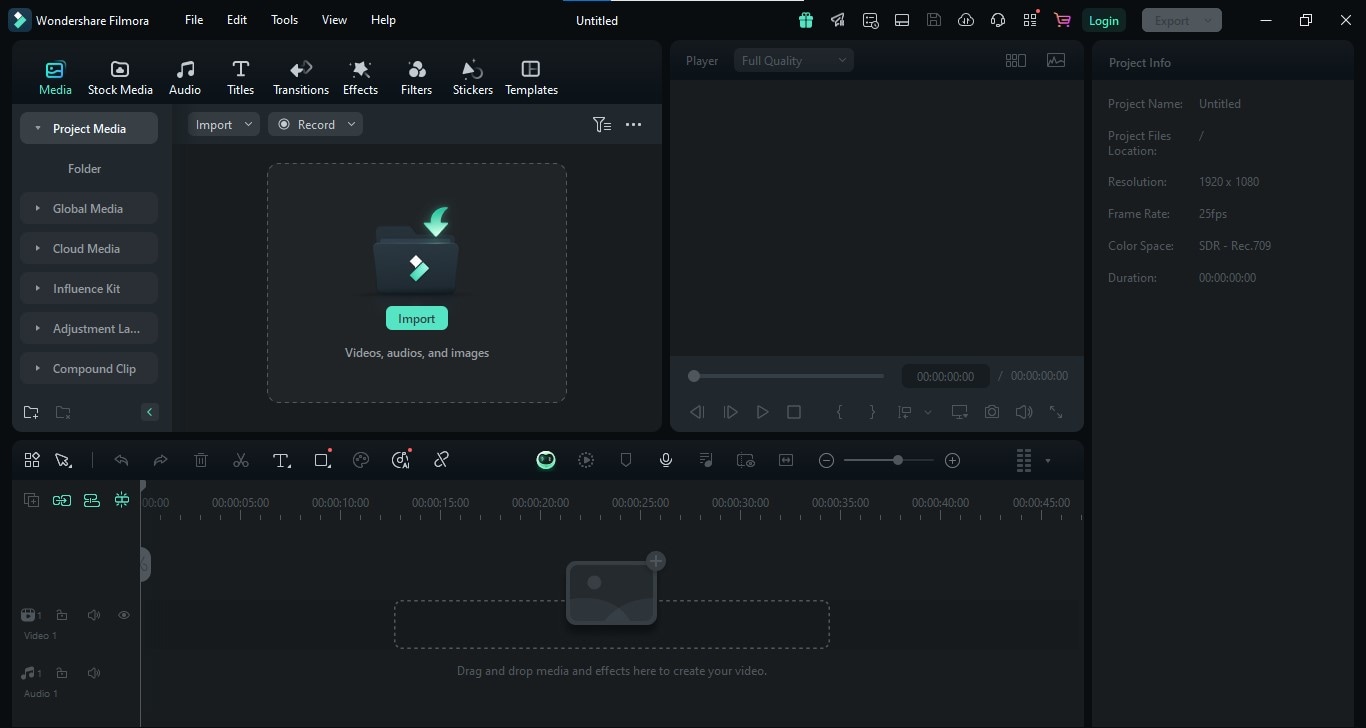
Step 2: Go to New Project, click Import to upload your video, then drag the video to the timeline;
Step 3: Select your video in the timeline and go to the Audio panel on the right-hand side;
Step 4: Scroll down and select Denoise;
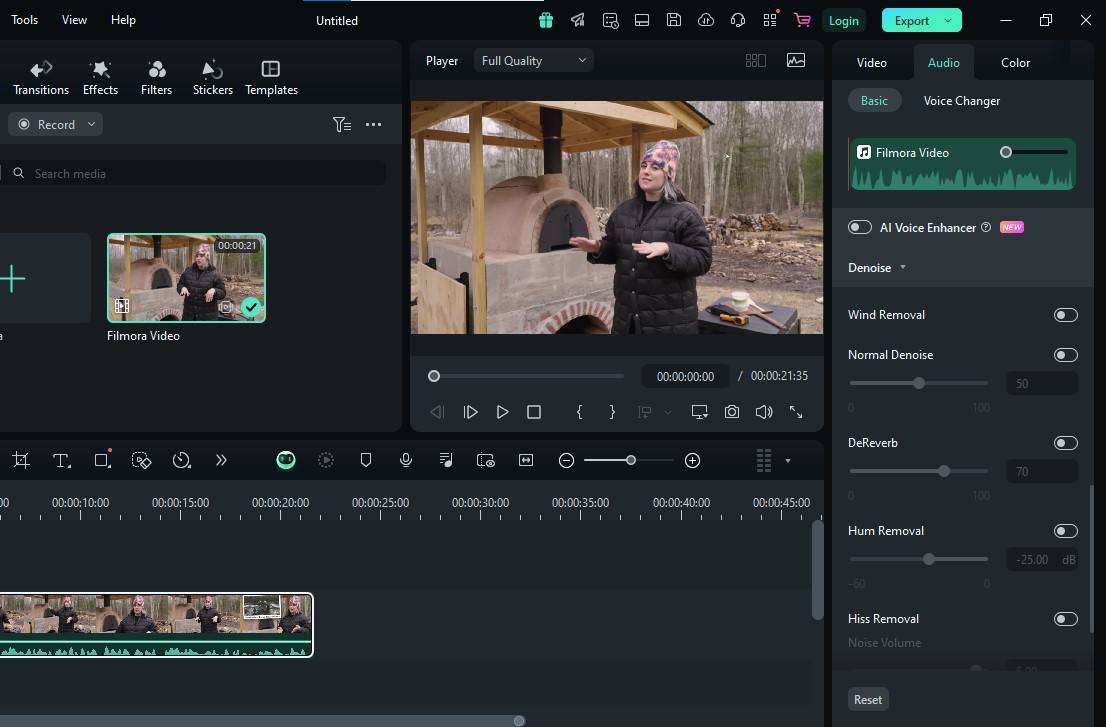
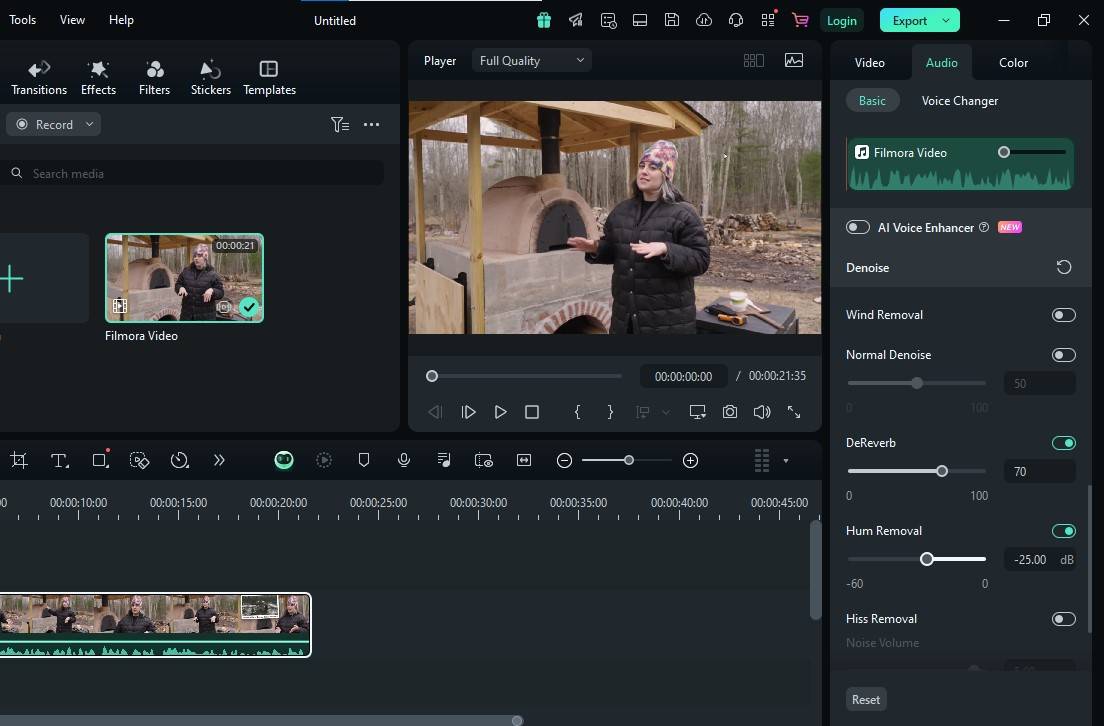
Step 5: Enable your preferred noise removal mode – Wind Removal, Normal Denoise, DeReverb, Hum Removal, or Hiss Removal;
Step 6: Use the Sliders to adjust the noise removal level.
You can preview the effect in real-time in the Player. Once satisfied, go to Export, save your video locally or share it directly to your online platform of choice – YouTube, Vimeo, TikTok, and others.
Conclusion
Background noise in your videos can greatly impact the viewer experience. Even a simple thing, such as your AC humming in the background, can be distracting and push your viewers away.
Fortunately, video editors like Adobe Premiere Pro give you access to numerous methods of removing background noise. If Premiere Pro doesn’t deliver the results you’re after, try your hand with Wondershare Filmora and enjoy impeccable sound quality.
FAQ on removing background noise Premiere Pro
-
What is the easiest way to remove background noise in Premiere Pro?
The simplest way is to use the Essential Sound panel. Select your audio as "Dialogue," then use the "Reduce Noise" slider to quickly adjust and reduce background noise. -
Does reducing background noise affect audio quality in Premiere Pro?
Some noise reduction may slightly impact audio clarity. To minimize this, adjust the noise reduction settings gradually to find the right balance between noise reduction and audio quality. -
Is the Essential Sound panel the only option for noise reduction in Premiere Pro?
No, you can also use the "DeNoise" effect or the "Adaptive Noise Reduction" effect. These effects allow for more precise adjustments, especially in challenging audio scenarios. -
Can Premiere Pro handle heavy background noise effectively?
Premiere Pro can handle moderate background noise well. For heavy background noise, you may need to apply multiple layers of noise reduction or use additional software like Adobe Audition for better results.
