
 100% Security Verified | No Subscription Required | No Malware


 ChatGPT
 Perplexity
 Gemini
 Claude
 Grok
Grok
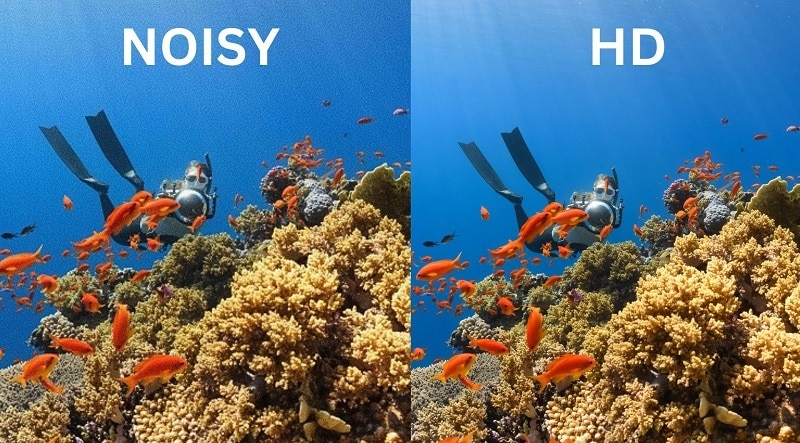
Noise in videos, often referred to as "graininess", is a common issue that everyone encounters. This visual noise can appear as random speckles of color or brightness, especially in low-light conditions, and can detract from the overall quality of the footage.
One of the effective ways to address this problem is using the denoise video feature in Adobe After Effects. But if you are new to video editing, you may not be sure where to start or how to do it effectively since After Effects can be quite complex.
Below, we will guide you on how to remove background noise from video using After Effects, provide another software alternative, and offer tips on how to prevent graininess in your footage.
In this article
Part 1. What Makes Video Look Noisy/Grainy?
When you take video footage but the results are not pleasing because it looks grainy and noisy, you might start wondering what the cause is. Understanding the cause can help you make necessary adjustments to avoid repeating the same issue in the future. Among possible reasons, some of the most common ones are:
- High ISO settings: Increasing the ISO setting on a camera can make the sensor more sensitive to light, but it also amplifies noise. Use the lowest possible ISO setting to achieve the desired exposure.
- Low-light conditions: Insufficient lighting can cause a camera to raise its ISO to get more light. This can introduce noise. Ensure proper lighting during recording, or use a camera with better low-light performance.
- Camera quality: Cameras with lower-quality sensors and optics are more likely to produce noisy footage. Invest in a higher-quality camera if the budget allows.
- Compression settings: Highly compressed video files can have noise. This is due to the loss of detail during compression. Use a higher bitrate or less intensive compression settings when encoding videos.
The reasons above are very likely why your video looks noisy. To have clear, high-quality video footage requires attention to several key factors, including appropriate camera settings, sufficient lighting conditions, and often, the use of a camera with a quality sensor.
If the footage you've captured already appears noisy, you can address this during post-production using tools like the Denoise video feature in Adobe After Effects. We'll discuss how to do this in the next section.
Part 2. How to Reduce Noise (Denoise) on Videos Using After Effects
As we have mentioned, you can use tools to reduce video noise. One of them is the denoise video tool in After Effects. In this section, we will give you a step-by-step guide and show you how to remove background noise from video using After Effects.
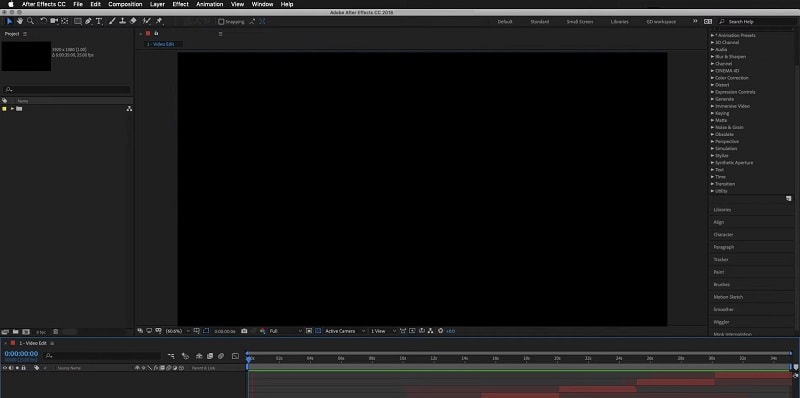
Step1Launch Adobe After Effects on your computer
Run Adobe After Effects on your computer, import your video, and drop it into the timeline section.
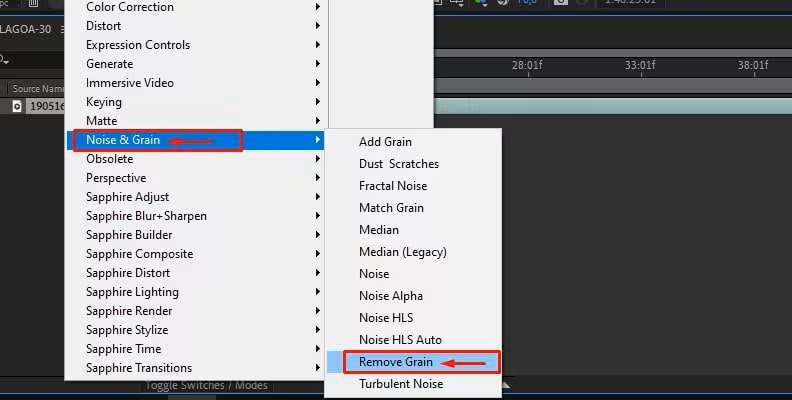
Step2Locate the feature
Select a clip in the timeline and head to Effect > Noise and Grain > Remove Grain.
Step3Enable the feature
Noise reduction and grain removal techniques will be automatically applied, and you will see a preview of how the effects look on the clip.
Step4Adjust the effect settings
If necessary, you can also adjust the effect settings manually in Effect Controls. But if you are satisfied with the result of the Remove Grain automatically effect, you don't need to adjust manually.
Part 3. Easy Denoise Software to Remove Video Noise – Wondershare Filmora
Imagine you have recorded an interview or a podcast, but the audio turns out to be noisy. For this, you try After Effects, but due to its aforementioned limitations, the required results could not be achieved. This is where Wondershare Filmora comes in, providing a comprehensive solution to remove grain and noise from your videos' audio. This AI-powered multimedia tool uses advanced AI to remove flaws from your audio.
The tool also provides you with the ability to record voiceovers and add real-time noise reduction with the Video DenoiserNormal Denoising feature. It lets users DeReverb the audio of their video by adjusting it according to their preferences. Moreover, you get the ability to remove the unwanted hisses and hums in the audio seamlessly.
Amazing Audio Enhancement Features Offered By Filmora
- Audio DuckingAI Audio Ducking: Filmora's Audio Ducking automatically detects the spoken dialogue in your video and lowers the volume of background music. This ensures that voiceovers, dialogues, or narrations are clear and easily heard without manual adjustments.
- AI Audio EnhancerVoice Enhancer: The voice enhancer uses advanced algorithms to reduce background noise and enhance speech clarity. This gives your recording a professional-grade effect with high-quality results.
- Volume and Speed Adjustment: Filmora provides easy-to-use tools to adjust audio by accessing the audio panel on the right. Users can also control clip speed to synchronize audio with video perfectly and give a time-lapse or slow-motion effect.
- Audio Extraction: This tool supports detaching or extracting audio from video clips with a single click. You can then process the audio as a separate media and apply modifications to it.
- Multiple Audio Formats Support: A vast array of audio formats is supported by the tool to provide users with ease of use. Some of the famous audio formats supported by this platform are MP3, WAV, and AAC.
Step for Denoising Audio with Filmora Desktop
To make the video sound flawless and grain-free, read the steps of denoising video with Filmora Desktop mentioned below:
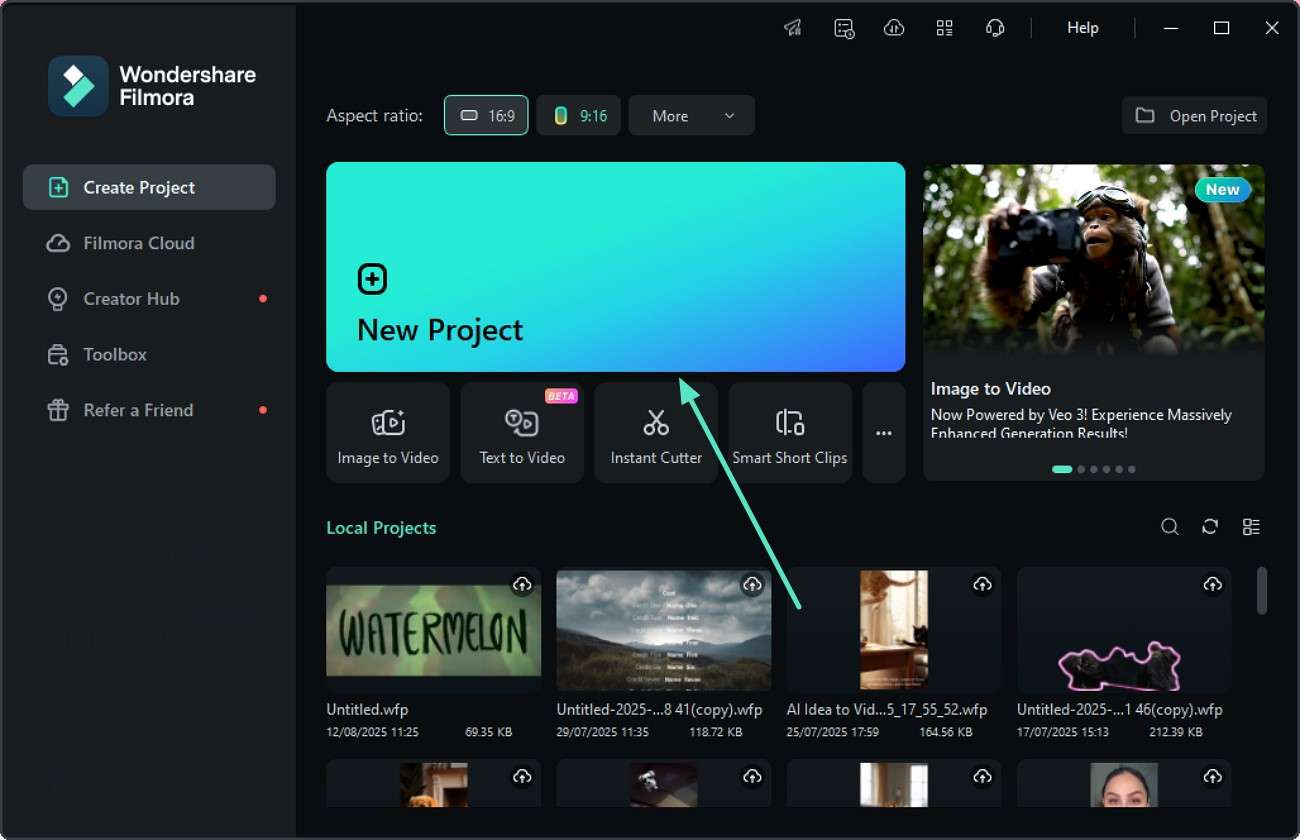
Step1Import the Video to Denoise.
After launching the tool on your device, press the "New project" tab located on the homepage. Next, add the video with grain to the tool and drag it to the editing timeline.
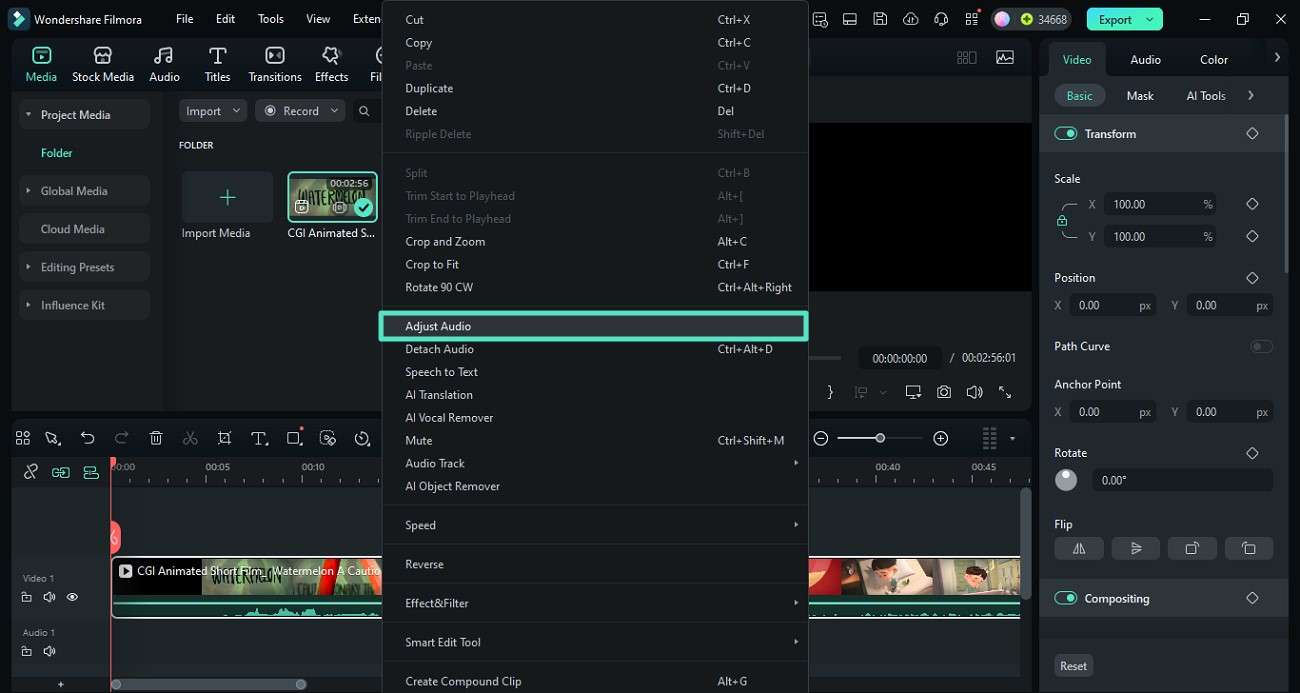
Step2Turn the Audio Adjustment on.
Access the video track on the timeline and click on the "Adjust Audio" option by right-clicking on the track. This will enable the "Audio" panel present on the right side of the interface.
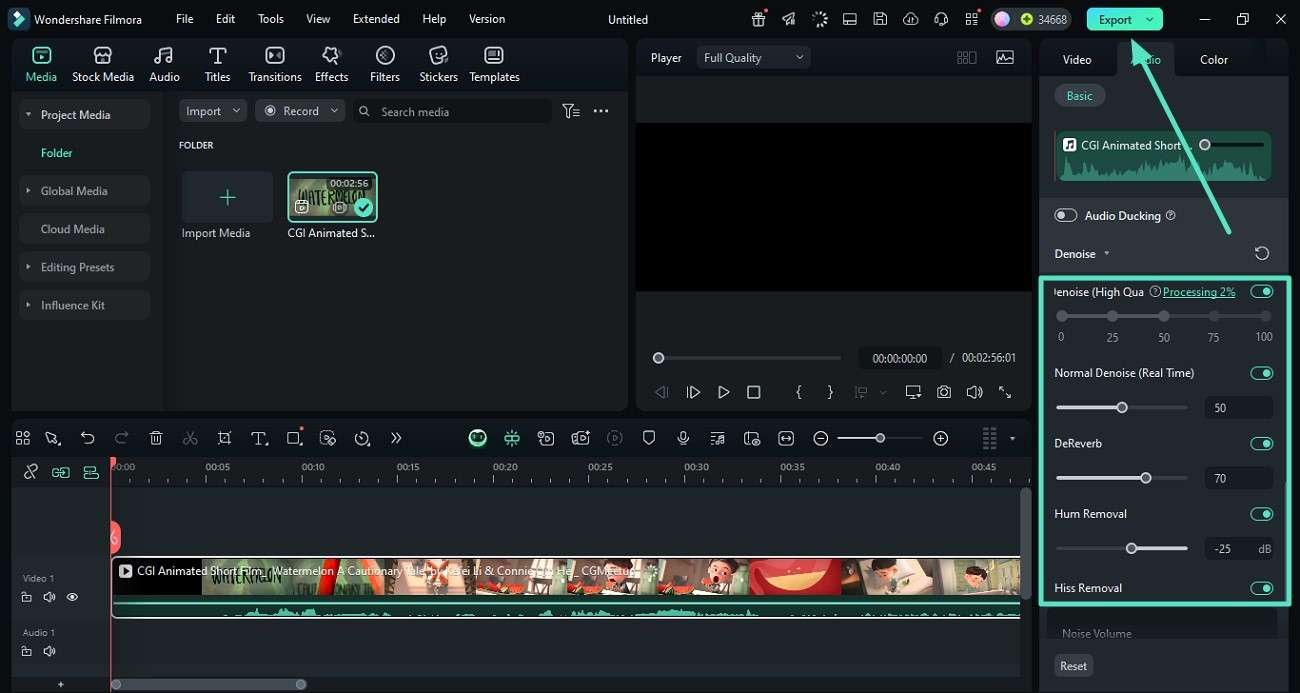
Step3Enable the AI Denoise Feature.
Head to the "Audio" panel and scroll through to find the "AI Denoise" feature. Turn its toggle on and adjust the quality according to your preferences. Remove the hiss by turning the "Hiss Removal" on and dragging its slider. Once the noise is removed, press the "Export" button in the top-right corner to save the results.
Comprehensive Guide to Denoise Video with Filmora App
With the intuitive interface of the Filmora App [iOS/Android], users can effortlessly remove the grain from their videos using their smartphones. Follow the guide below to learn how to denoise video using this incredible application:
 secure download

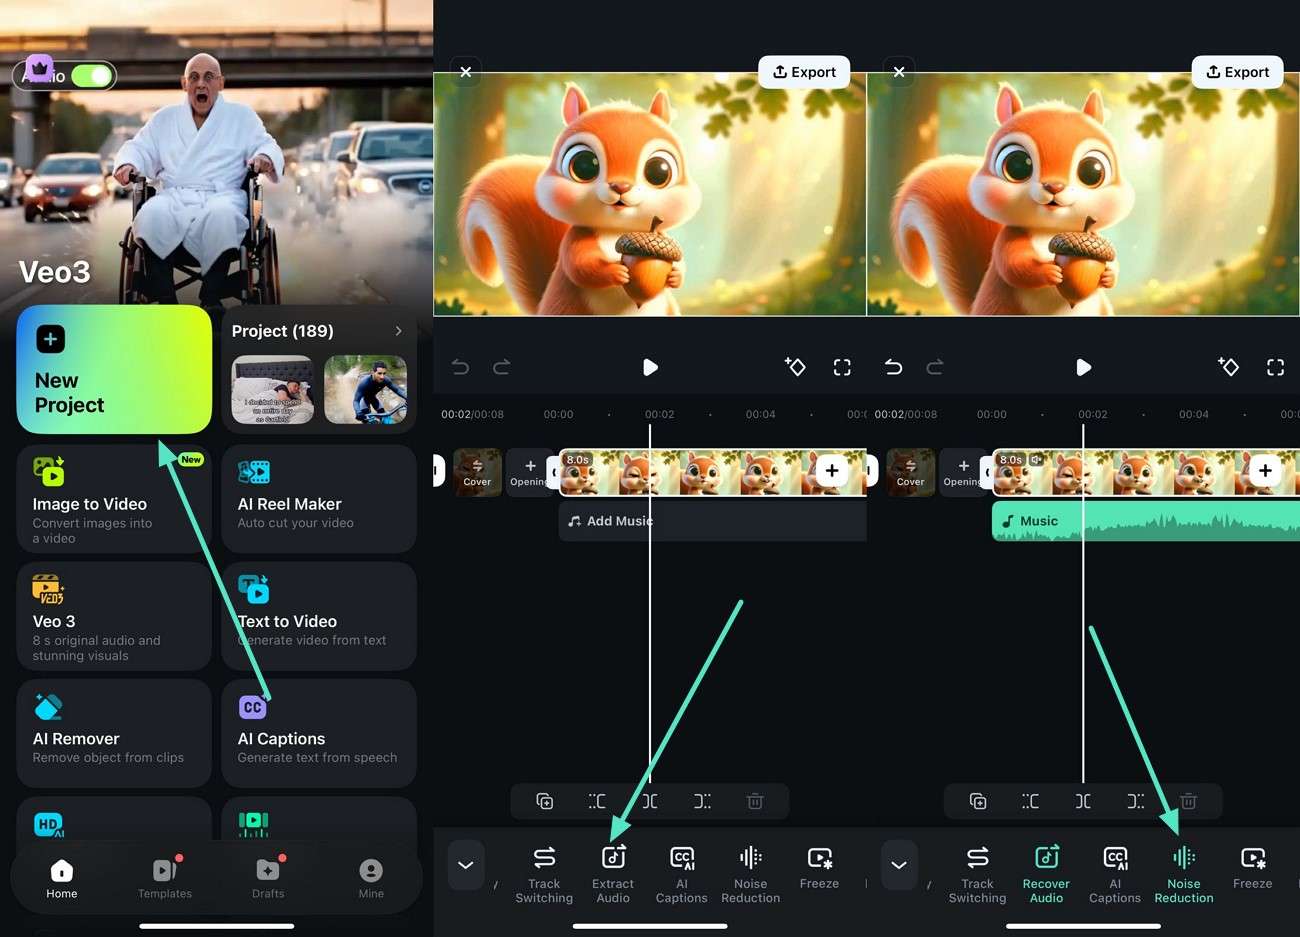
Step1Extract Audio and Reduce Noise.
Once you have launched the application, press the "New Project" option and import the Video. Tap on the video track and select the "Extract Audio" from the toolbar below. After the audio is detached, tap on it and press the "Noise Reduction" option to successfully denoise the audio.
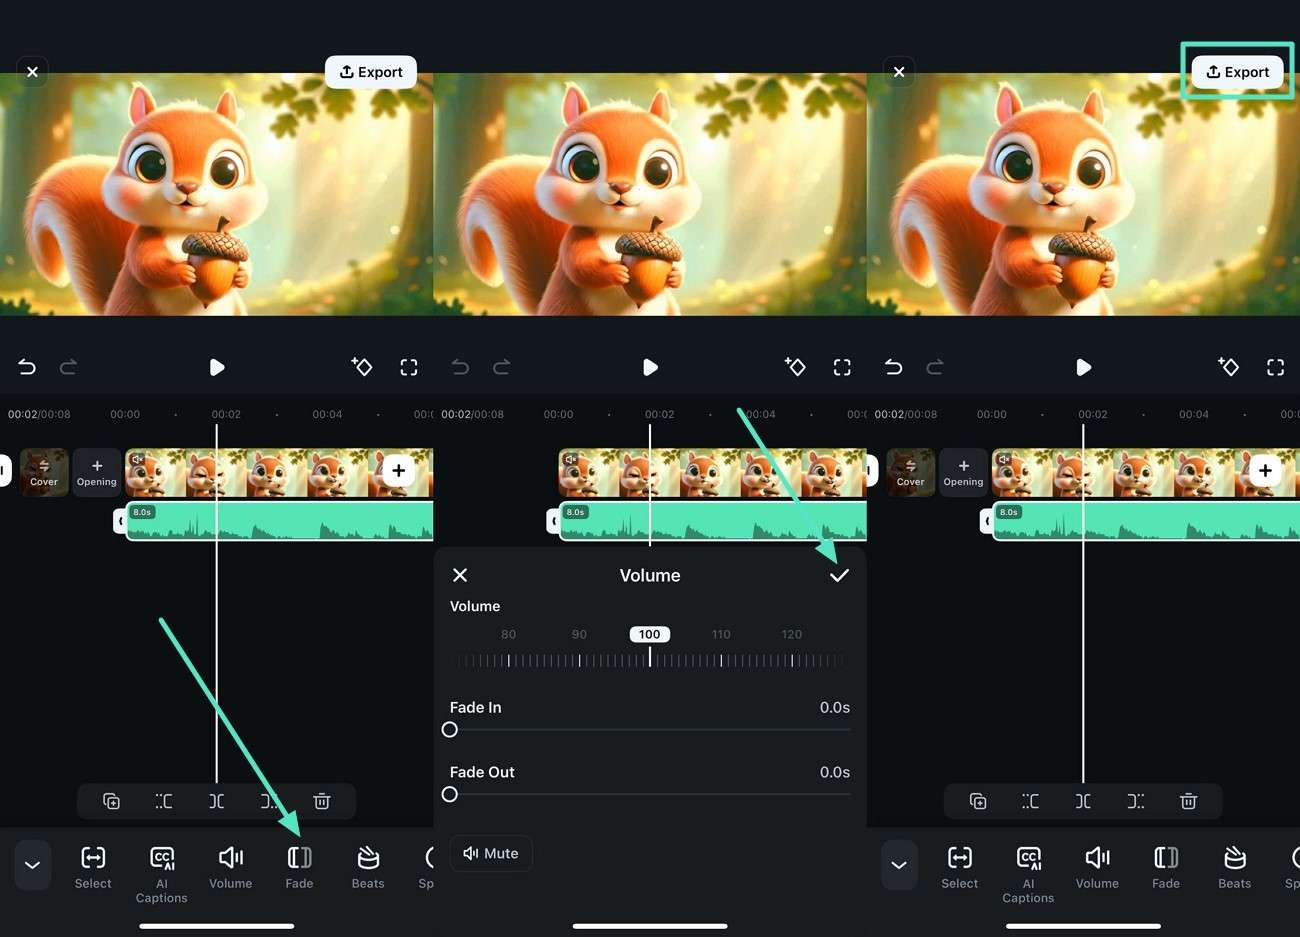
Step2Apply Further Features and Export.
When the noise is removed, tap on the "Fades" option to give the audio a transitional effect. Drag the fade in and out sliders according to your choice and press the "Tick" icon. Finally, head to the top-right corner of the interface and press the "Export" button to save the results.
Part 4. Tips to Prevent Noise in Videos
Besides using a denoise tool during post-production, there are proactive steps you can take to prevent excessive noise in your videos. To get a quality video and minimize video noise, you can optimize the shooting process with some of the tips below:
- Optimize lighting to ensure the scene is well-lit. Use natural light or add extra light, like softboxes or ring lights.
- Set your camera to manual mode. Control the ISO, keeping it low for proper exposure.
- Choose cameras with bigger sensors. They perform better in low light and make less noise.
- Shoot at the highest resolution your camera supports, and downscale if needed.
- Use reduction software like Adobe After Effects or Wondershare Filmora. Which is highly effective in reducing noise while preserving detail.
By combining the tips above, you can significantly reduce video noise and improve the overall quality of your footage.
Conclusion
You've shot a video, but when you start editing it, the results look bad—grainy and noisy. This will be very irritating. Retaking the video will require a lot of effort and time, especially if you are a video editor working on a deadline.
If that happens, you can use the denoise video After Effects or other software like Wondershare Filmora for easier steps. They let you reduce the noise to improve your clip's quality. And to prevent video noise, you can prepare by watching light, using cameras with larger sensors, and controlling the ISO. These will help you get a video with the least noise.
