

 TL;DR:
AVS Video Editor is best suited for beginners seeking fundamental, manual video editing tools on a Windows PC, whereas Wondershare Filmora serves as an advanced alternative for creators needing cross-platform compatibility and AI-automated capabilities.
● AVS Video Editor restricts its installation strictly to Windows 7, 8, and 10, relying on an older interface to perform manual multi-track layering, audio correction, and DVD menu creation without any AI tools.
● Wondershare Filmora accelerates project workflows using improved GPU acceleration, a magnetic timeline, and specific AI-driven features like Smart Cutout, auto beat sync, and AI-generated background music.
● While Filmora expands software access to macOS, Android, and iOS devices, users testing the platform must note that exporting in the free version applies a mandatory watermark to the final video.
Ask AI for a summary
 ChatGPT
 Perplexity
 Gemini
 Claude
 Grok
Grok
Imagine a small business owner new to video creation, looking for an intuitive yet reliable tool to produce polished promotional videos on a Windows PC. They need something easy to learn, without being overwhelmed, but still capable of delivering professional-looking results.
AVS Video Editor caters to beginners and casual creators with essential editing tools and effects. However, as their video needs grow, many users begin seeking more powerful alternatives with modern features. This article provides a detailed review of AVS Video Editor and introduces a superior alternative designed to meet evolving editing demands.
Part 1. Reviewing AVS Video Editor: Basics and Feature Overview
AVS Video Editor is developed by Online Media Technologies Ltd., a company specializing in multimedia software solutions geared toward mainstream users. This software is designed explicitly for Windows users, supporting Windows 7, 8, and 10.
In terms of file format flexibility, AVS video editing software supports a wide array of popular file types for both import and export.
- Video Imports: Supports AVI, VOB, WMV, MP4, DVD, Blu-ray, and digital camera footage.
- Audio Imports: Compatible with MP3, WAV, WMA, and AAC.
- Export Options: Offers MP4, AVI, WMV, MKV, and MOV formats, optimized for social media, mobile devices, and DVD burning.
Features Overview of AVS Video Editor [Better Understanding]
To get a deeper insight into what the tool is all about, let us have a look at the core features offered by this efficient video editor:
Pricing Plans
| Plans | Pricing |
| Yearly | $149/year |
| Unlimited | $279/one-time-purchase |
Part 2. A Quick Video Editing Tutorial With AVS Video Editor
After learning about the coherent functionalities of AVS Video Editor in detail, let us now have a look at the comprehensive guide on how to edit a video using this tool:
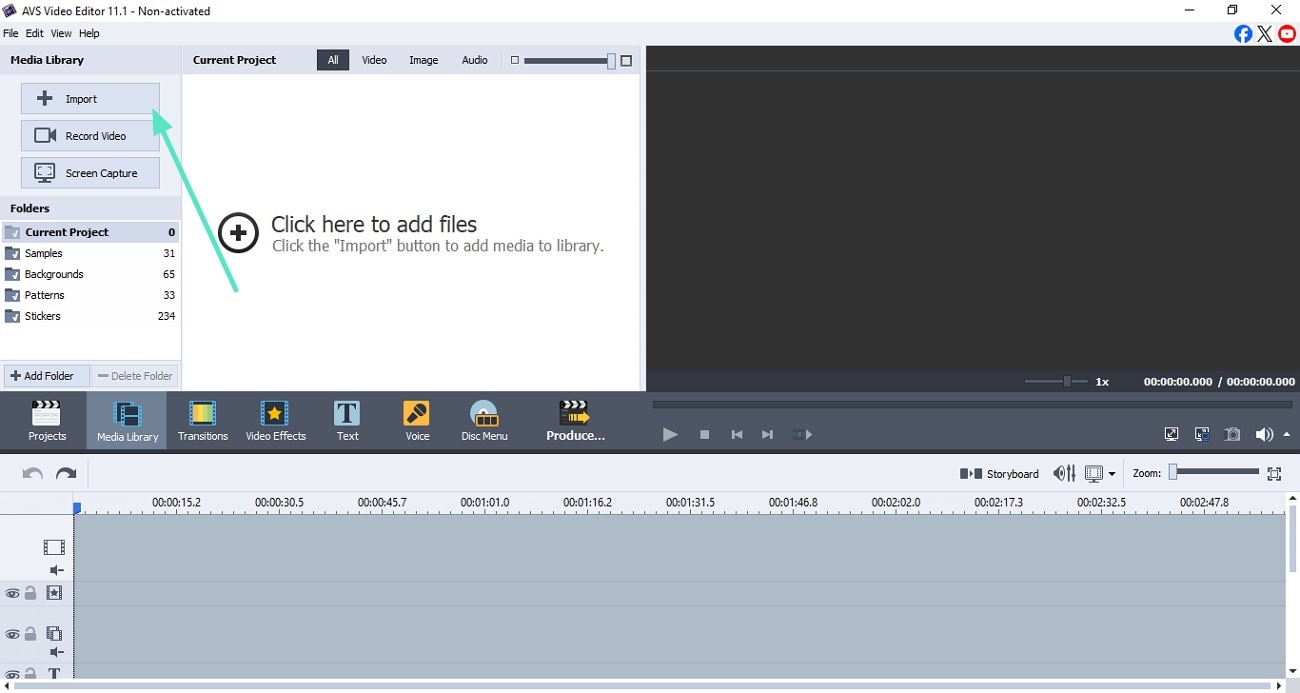
- Step 1: Import Video After Launching AVS
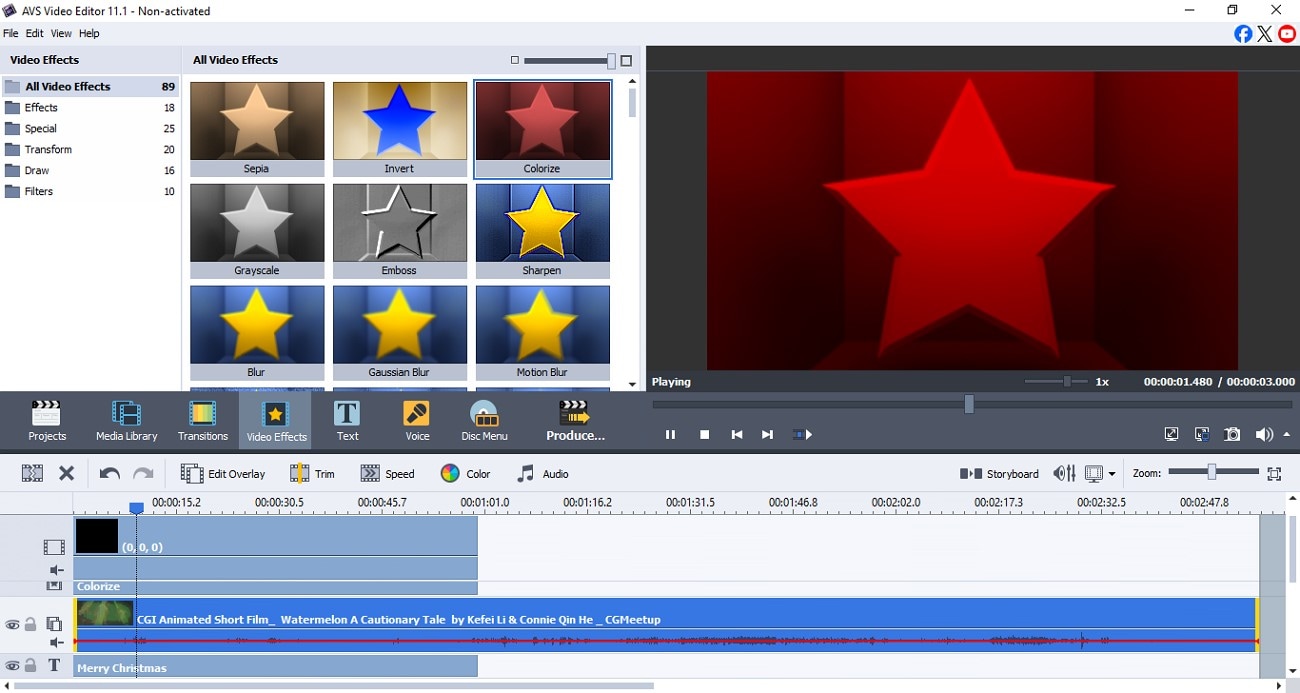
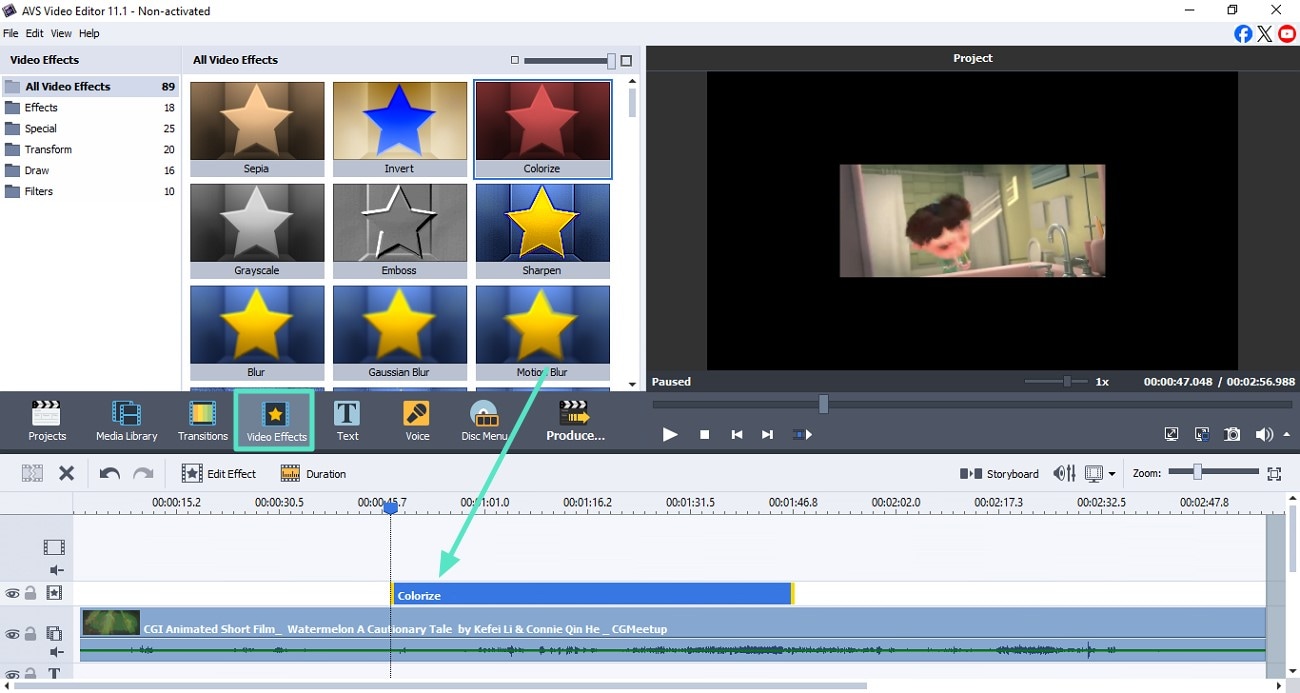
- Step 2: Incorporate Visual Effects
- Step 3: Insert Relevant Text Across AVS
- Step 4: Trim Unwanted Video Sections
- Step 5: Review the Editing Results and Save
- Once you have opened the tool on your device, locate the "Import" option on the left.
- Click on it to add the video you want to edit to the tool's interface.
- Drag the video to the editing timeline to begin the editing process.
- To enhance the visuals, head to the toolbar and locate the "Video Effects" option.
- Now choose the effect of your choice from the library enabled above.
- Apply the selected effect by dragging it to the timeline over the video.
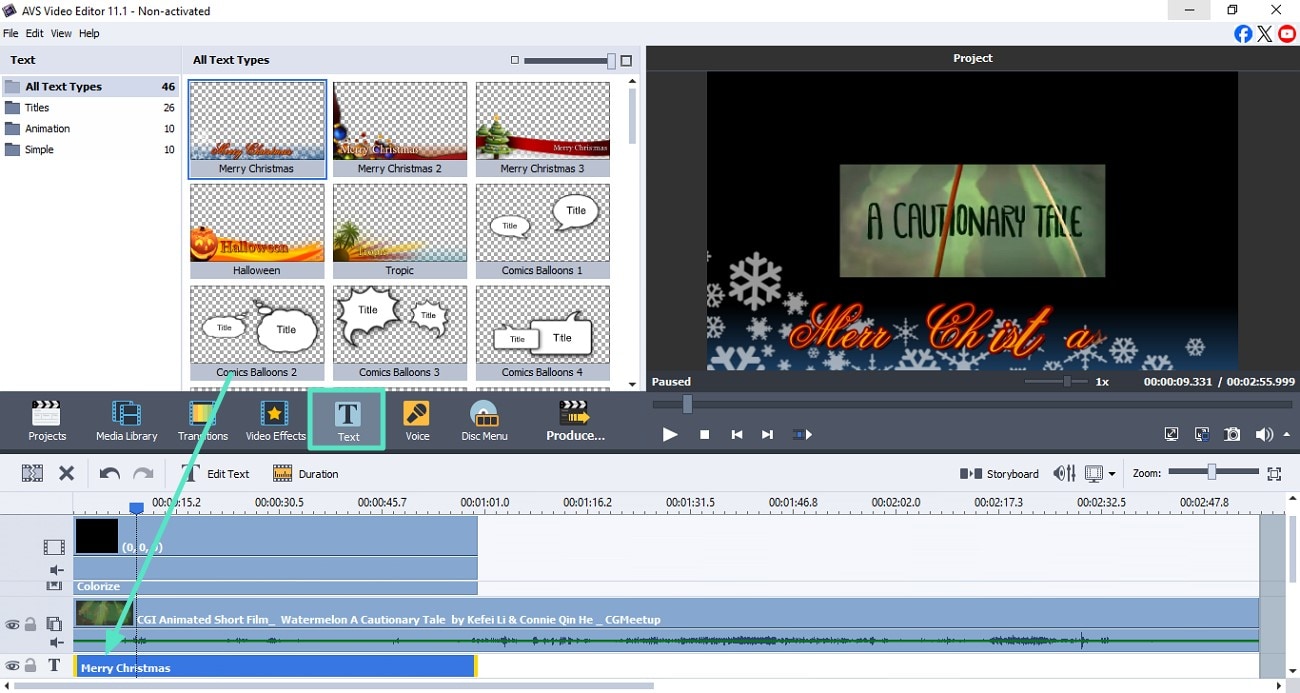
- Moving forward, click the "Text" icon located next to Effects on the toolbar.
- Now choose the text templates from the options provided and drag them to the timeline.
- Customize the text template by double-clicking on the text track on the AVS video software timeline.
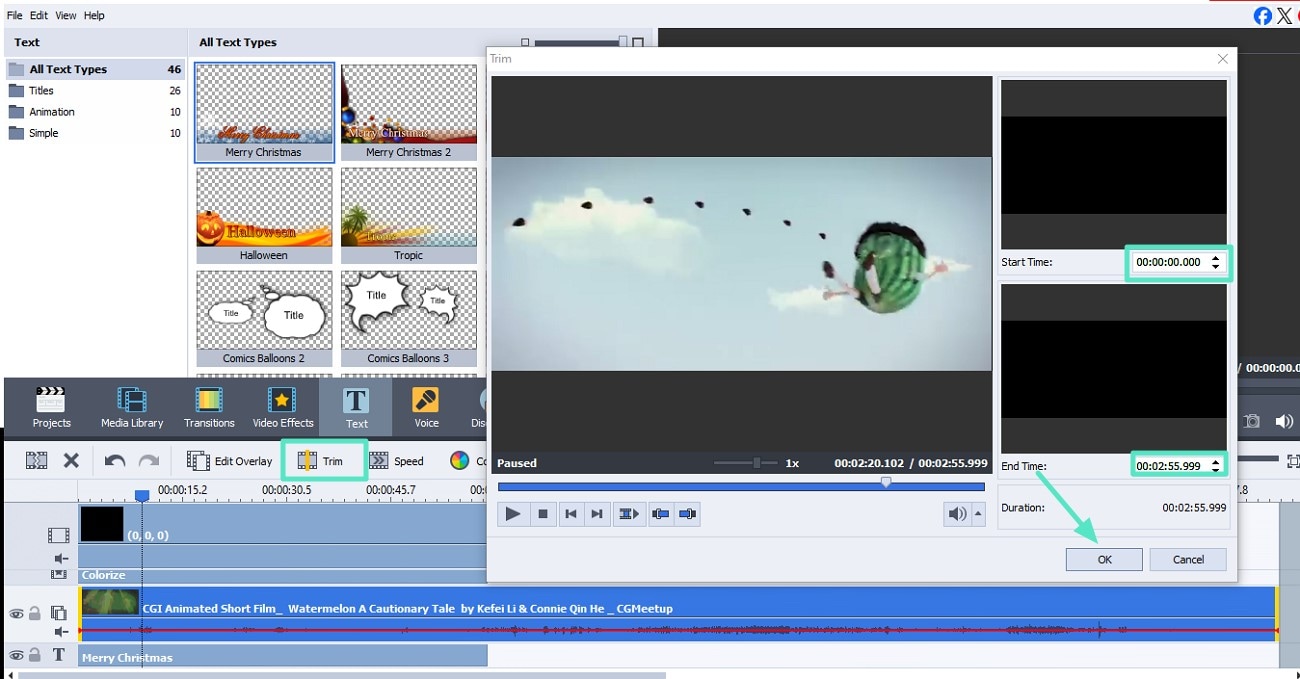
- Locate the "Trim" option above the timeline and click on it to enable the trim window.
- Here, specify the Start and End times by accessing the timers.
- Press the "OK" button on the window to save the applied changes.
- Once all your editing is done, preview the results in the preview window by clicking the "Play" button.
- Now head to the top-left corner of the interface and expand the "File" menu.
- Next, press the "Save Project" button to successfully save the results to your device.

Part 3. Pros and Cons of Using AVS Video Editor
After learning about this video editor in detail, let us explore the top pros and cons of using AVS video editing software:
- Besides importing videos, users can capture videos with the built-in camcorder.
- You get the ability to add text to your videos to make them more comprehensive.
- The audio corrector offered by the tool automatically removes the flaws in the audio of the video.
- It lets you create a menu for your disc, such as layout, background, and titles.
- The interface of the tool gives a pretty outdated feel because of its design.
- AVS Video Editor's functionalities are limited to Windows users as it does not provide support for macOS.
- It lacks various AI features to automate the editing process and solely focuses on manual editing, which is time-consuming.
Part 4. Featuring A Better Video Editing Alternative: Wondershare Filmora
If you are looking for a more comprehensive solution to edit videos with advanced functionalities, you can use tools like Wondershare Filmora. The platform offers an easy-to-use interface, suitable for both beginners and professional video editors. This all-in-one multimedia tool offers an extensive set of basic video editing features such as crop, cut, merge, and split.
Users get the ability to access the resource library that contains thousands of resources such as templates, effects, filters, and sound. It includes a magnetic timeline to import and organize multiple clips simultaneously effortlessly. Additionally, you can preview the applied functionalities within the dedicated preview window to track your progress. Besides comprehensive basic editing, Filmora offers various AI-powered features that automate the video creation process, unlike AVS video converter.
- Supports multi-language subtitles, making your content accessible to a wider, global audience.
- Video speed adjustment allows for creative pacing and better storytelling.
- Instant Cutter enables precise trimming, saving time and improving workflow efficiency.
- Drawing tools help highlight key elements or guide viewer attention visually.
- Customizable stickers and text overlays add unique branding and style to your videos.
- The video exported in the free version of this AVS Video Editor alternative contains a watermark.
- Basic Video Editing: Trim, split, merge, adjust speed, and organize clips on a magnetic timeline.
- Advanced AI Editing: AI-powered editing features include Smart Cutout and AI Video Enhancer to streamline and polish video edits. The AI Image-to-video transforms static images into dynamic videos.
- AI-Powered Audio Features: Filmora integrates AI-driven audio tools, including vocal removers and audio denoise. It also generates royalty-free, professional-quality AI music and sound effects.
- Color Grading and Visual Enhancement: Apply cinematic color styles with color grading tools, 3D LUTs and color palette extraction. Add visually appealing effects and filters to give the video a more vibrant look.
- Extensive Exporting Options: Adjust the frame rates, resolution, and format for the video to be exported with this AVS video editing software alternative.
For more details, please visit the purchase page where various pricing plans are available.
Windows, Mac, Android, iOS
Step-by-Step Guide on How to Edit Video Using Filmora
As discussed, Filmora offers a handy set of features for users to edit their videos. Mentioned below is the step-by-step guide on how to use this AVS video editor effects alternative for AI-integrated video editing:
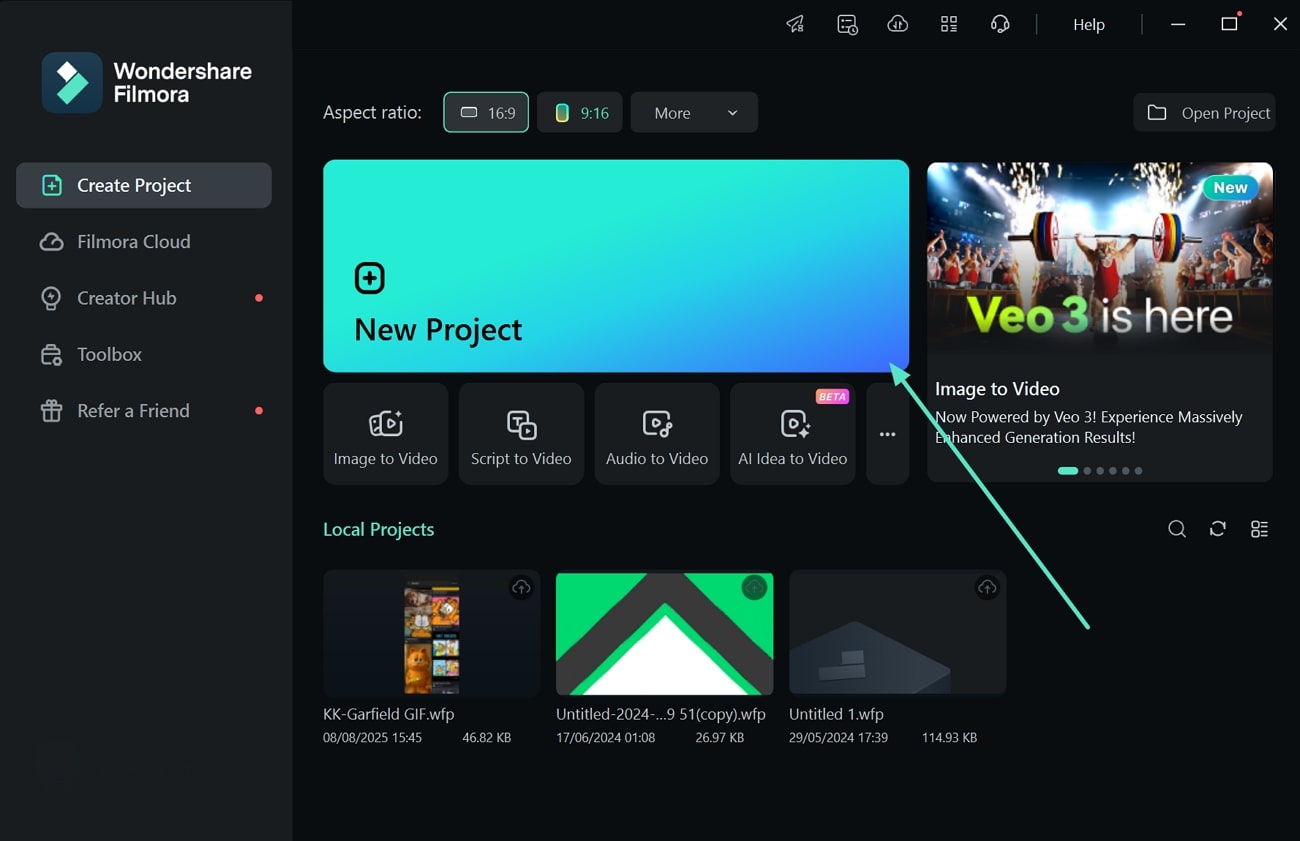
- To initiate the process, open Filmora on your PC and click on the "New Project" tab.
- Next, add your video to Filmora's interface using the designated option and drag it to the editing timeline.
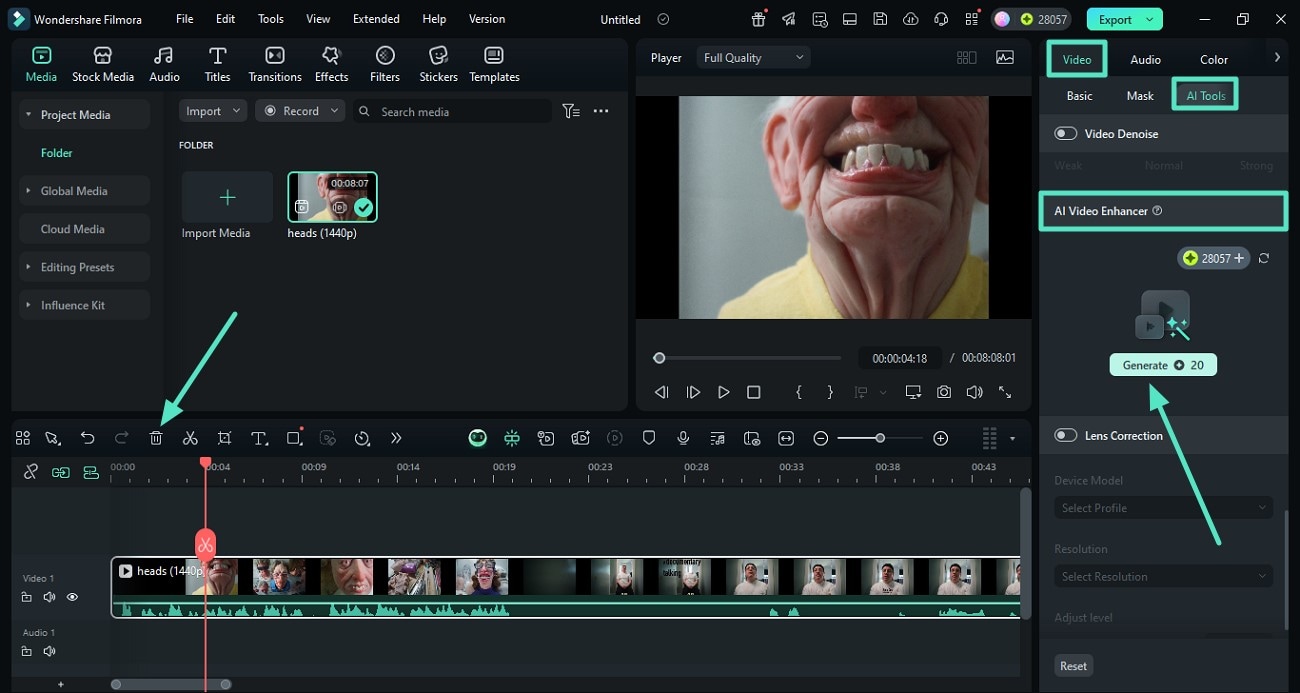
- In the following interface, access the "Video" panel on the right and enable the "AI Tools" section.
- Scroll through the options and locate the "AI Video Enhancer" option.
- Press the "Generate" button to let the tool create an enhanced version of your video.
- Drag it to the editing timeline and remove the older version by clicking on the "Delete" icon.
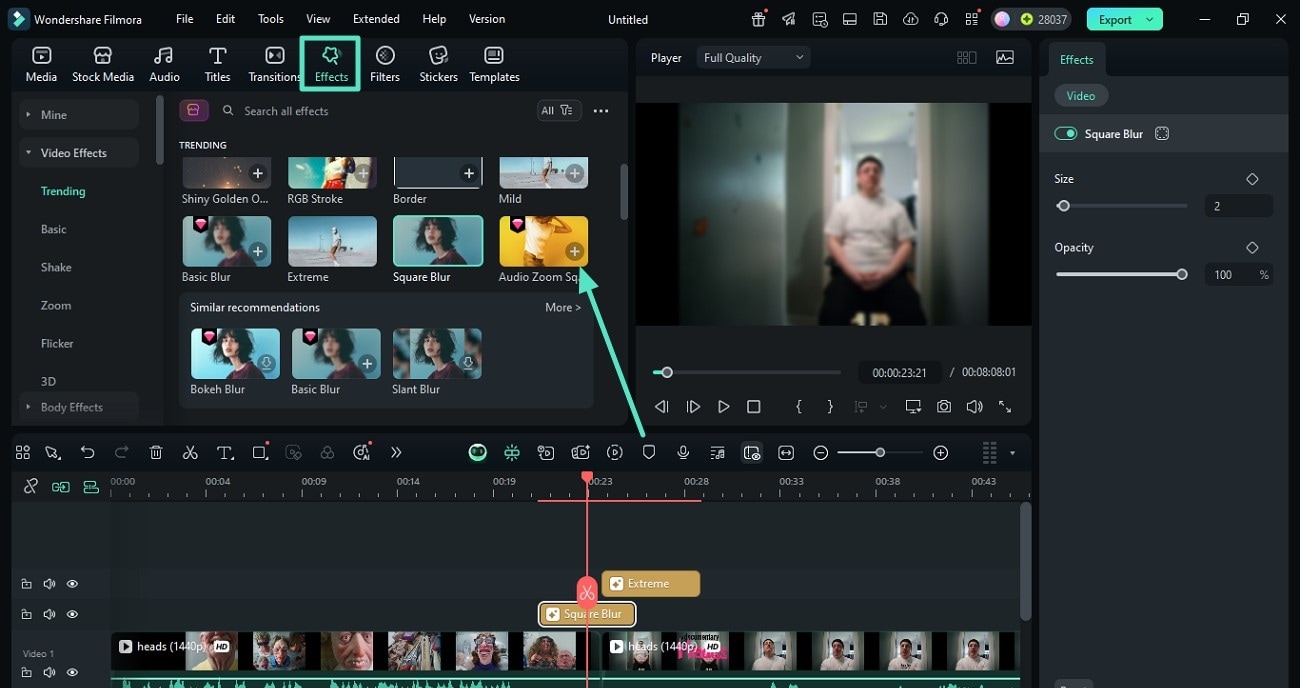
- Once the video is enhanced, head to the toolbar at the top and access the "Effects" option.
- Now, select the effect of your choice from the library and apply it using the "+" icon.
- Moving forward, access the "Titles" option from the toolbar and expand the "AI Captions" from the left.
- Select the language and press the "Generate" button to start the caption generation process on this AVS video software alternative.
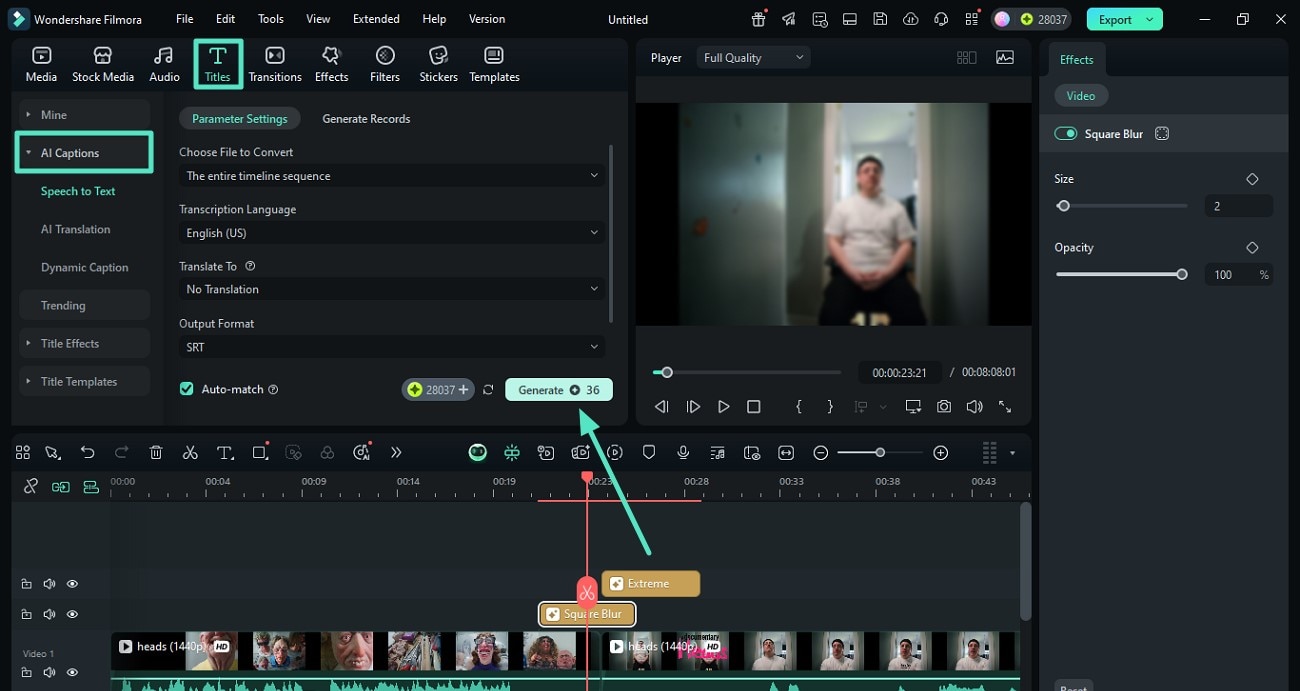
- Once the captions are generated, click on it and customize them as per your choice.
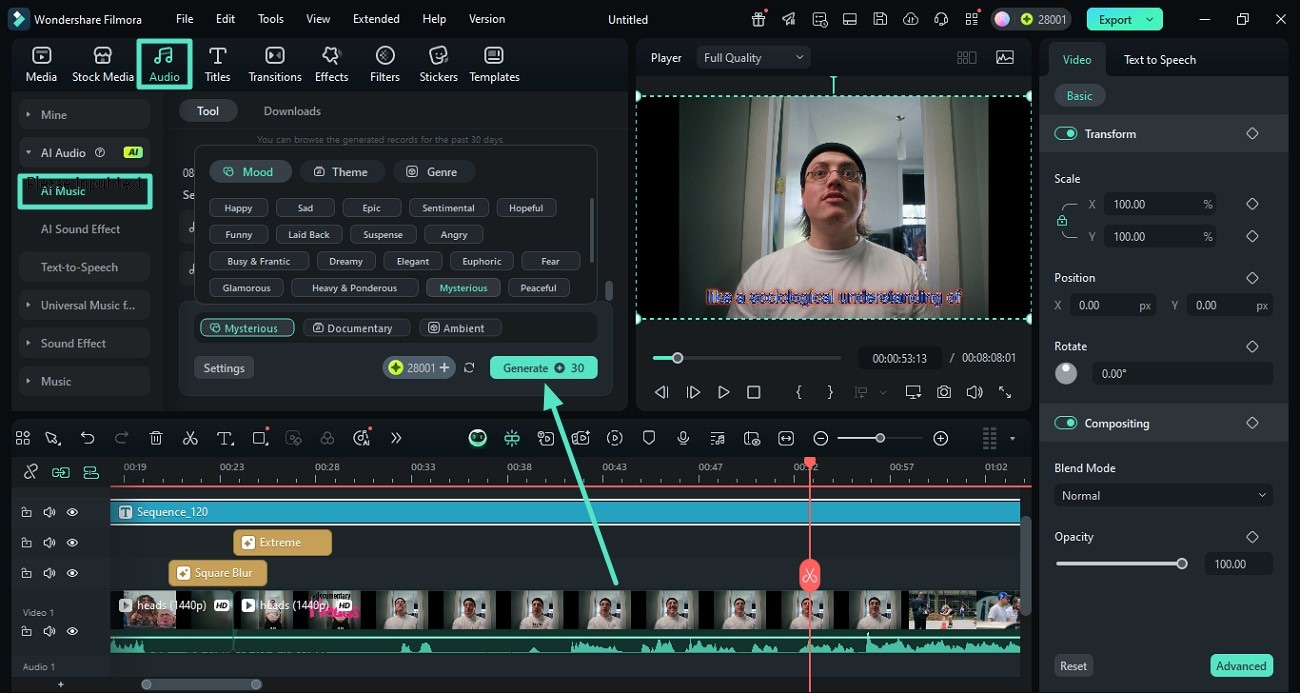
- Next, go to the "Audio" section on the toolbar and press the "Audio" option.
- Expand the "AI Audio" section from the left and specify the attributes for the background music.
- Hit the "Generate" button to let the tool generate a background score.
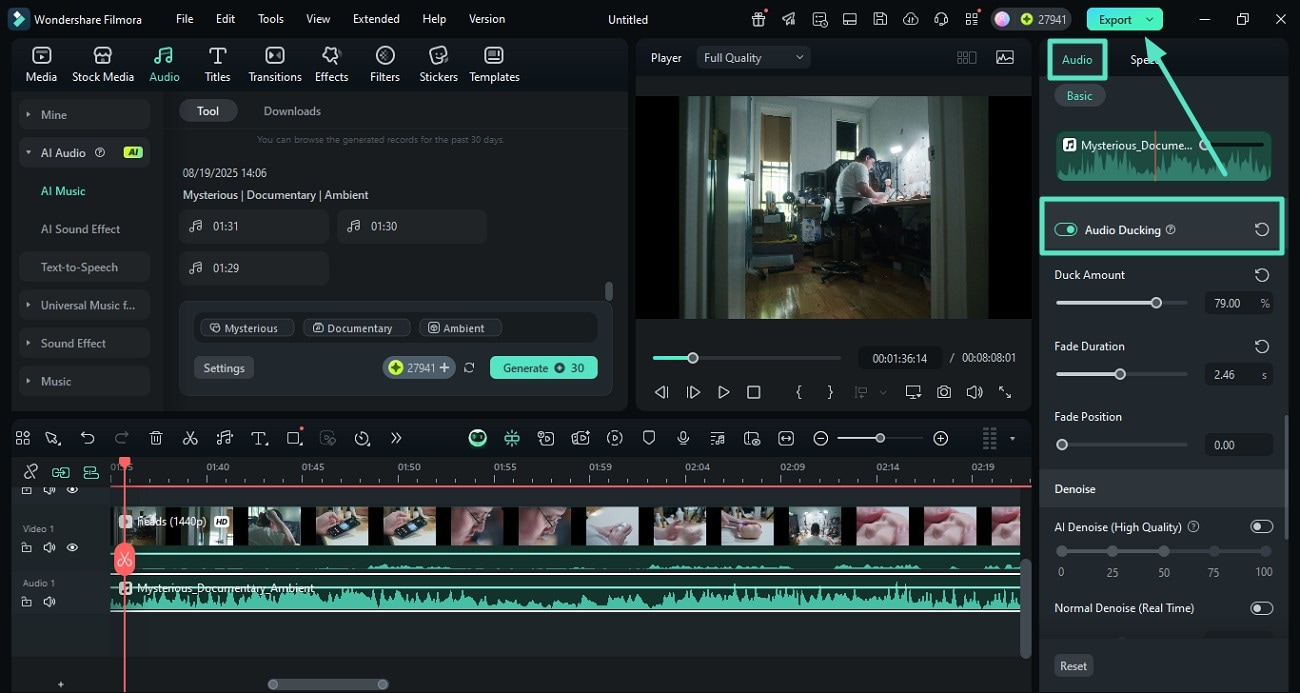
- When the audio is generated, access the "Audio" panel on the right side.
- Locate the "Audio Ducking" feature to lower music volume when there is dialogue.
- Perform other audio enhancements from the panel and preview your changes.
- Finally, hit the "Export" button once you are satisfied with the final output.
Part 5. Filmora vs. AVS Video Editor: Which Suits Your Editing Needs?
After exploring the details of both AVS Video Editor and Filmora, you may wonder which one aligns better with your workflow. While AVS Video Editor provides a solid solution for Windows-based users, Filmora expands on flexibility and advanced features.
The following table outlines some areas where Filmora extends its capabilities, helping you evaluate which software may be more suitable for your creative projects:
| Feature | Filmora's Advantage in Comparison |
| Cross-Platform Support | Works on both Windows and macOS, offering greater flexibility, while AVS Video Editor is tailored for Windows users. |
| Modern UI & UX | Provides a sleeker, more intuitive interface with a magnetic timeline for smoother editing, enhancing overall workflow. |
| Advanced Effects Library | Includes a broader set of cinematic effects, motion graphics, and AI-enhanced tools that go beyond the standard library of AVS. |
| AI-Powered Features | Features AI tools like auto beat sync, background remover, portrait enhancement, and motion tracking, giving creators more automation in editing. |
| Regular Updates | Continuously adds new features and effect packs via the creative assets store, ensuring evolving resources for users. |
| Optimized Performance | Delivers faster rendering and improved GPU acceleration for efficient video processing. |
Conclusion
To wrap it up, this article provides an in-depth review of AVS Video Editor along with its user guide. The tool also suggested an alternative to this tool, which offers a more comprehensive interface with advanced functionalities, Wondershare Filmora. Undoubtedly, Wondershare Filmora is one of the most reliable video editing tools that offers basic editing with AI-powered functionalities.
