

 TL;DR:
Premiere Pro's Essential Sound panel streamlines audio correction by categorizing clips for targeted manual adjustments, whereas Wondershare Filmora provides a faster, AI-automated alternative.
● To use the Essential Sound panel, you must first manually assign each timeline clip to Dialogue, Music, SFX, or Ambience to activate the specific Auto-Match loudness and Repair sliders.
● The Essential Sound panel is limited by its preset-driven controls, meaning it cannot fully repair heavily damaged audio and lacks the precise fine-tuning available in Adobe Audition.
● Wondershare Filmora is best suited for beginners seeking rapid processing, as it bypasses manual parameter adjustments with automated toggles for AI Audio Enhancer, Audio Ducking, and Silence Detection.
Ask AI for a summary
 ChatGPT
 Perplexity
 Gemini
 Claude
 Grok
Grok
Have you ever finished editing a video only to realize the audio sounds uneven, noisy, or difficult to hear? The Essential Sound in Premiere Pro helps fix that by balancing levels, reducing background noise, and improving overall clarity.
The Essential Sound panel in Premiere Pro makes editing more straightforward by grouping audio into categories like dialogue, music, and effects. Each category applies tailored adjustments that bring consistency and cleaner sound to your project.
In this guide, you'll learn what the Premiere Pro Essential Sound panel can do and how to use it step by step. Plus, we'll also share a simpler alternative if you want faster results. Let's get started!
Part 1. What Can Essential Sound in Premiere Pro Do?
The Essential Sound in Premiere Pro is a built-in tool that organizes audio into four types: Dialogue, Music, SFX, and Ambience. Each type has specialized controls that fix common issues and bring consistency to your mix.
Assigning your clips to the right type saves you from manually stacking effects and helps achieve a more professional sound. Here's a breakdown of each category on the Essential Sound panel in Premiere Pro and its purpose:
| Category | Purpose |
| Dialogue | Enhances speech clarity by reducing background noise, adjusting volume level, and enhancing speech presence. |
| Music | Balances background music with other tracks. It helps adjust loudness and shapes tone so it complements dialogue or effects. |
| SFX (Sound Effects) | Enhances sound effects by controlling dynamics and ensuring they stand out without overwhelming the mix. |
| Ambience | Maintains background atmosphere while preventing it from clashing with dialogue or music. |
Part 2. How to Use the Essential Sound Panel in Premiere Pro
The Premiere Pro Essential Sound tool gives you an organized way to edit and improve your audio. Instead of applying effects one by one, you can assign clips to categories and use tools that fit their purpose.
Follow this step-by-step guide to learn how to use Premiere Pro's Essential Sound panel:
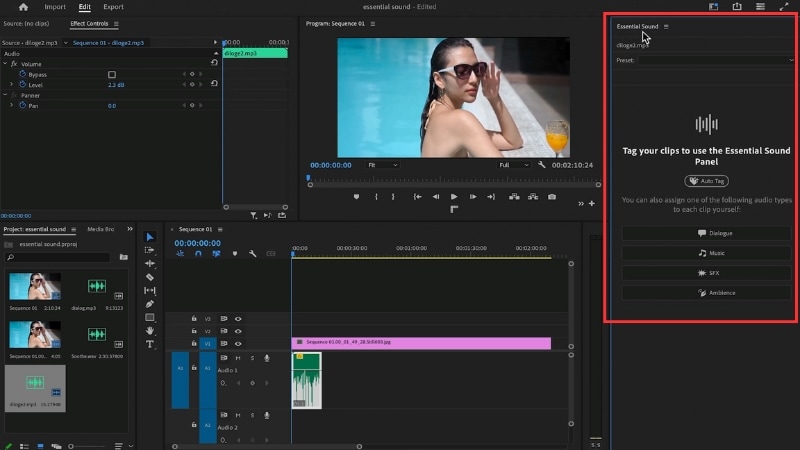
- Select the audio clip you want to adjust on the timeline, then choose one of the four categories: Dialogue, Music, SFX, or Ambience.
- Each type activates a set of controls suited for that kind of audio.
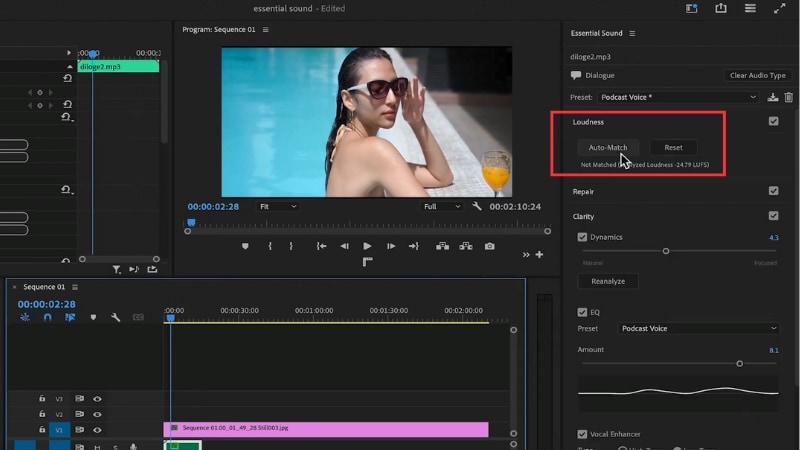
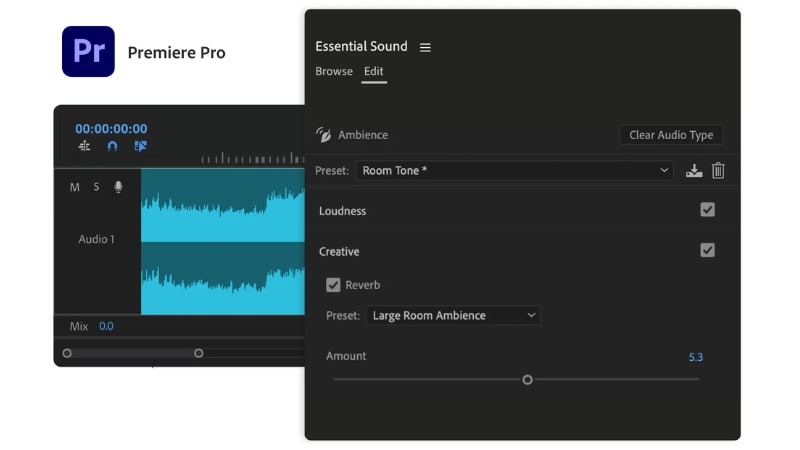
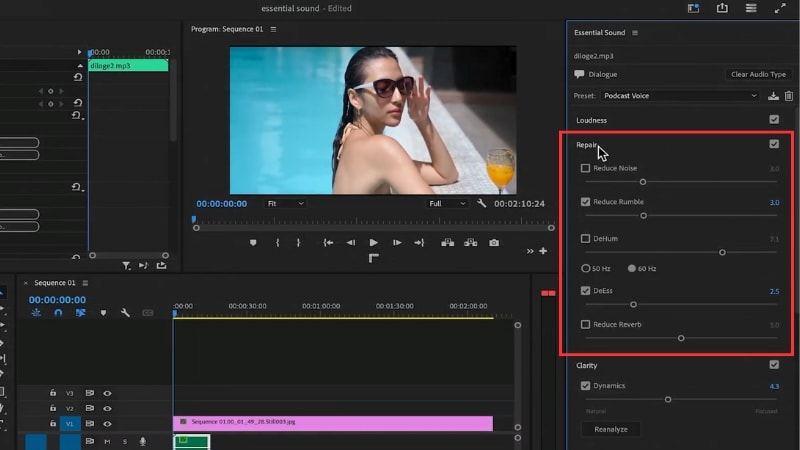
- In the Repair section, you can fix common audio problems like reducing noise, hum, or rumble, and controlling excess reverb.
- Adjust the sliders to smooth out problem areas without affecting the main sound.
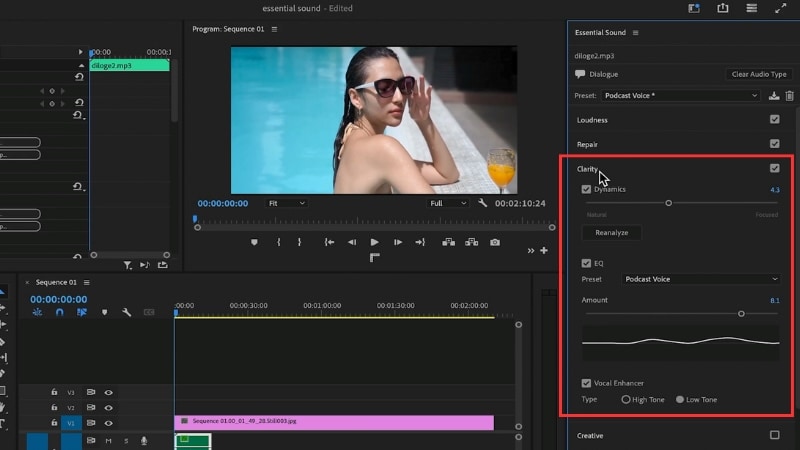
- For speech, improve presence using EQ, dynamics, or the Vocal Enhancer.
- For music and ambience, adjust tone, tighten dynamics, and bring out key details without distortion.

Pros and Cons of Using the Essential Sound Panel
Like any editing tool, the Premiere's Essential Sound panel comes with strengths and limitations. It's great for quick improvements inside Premiere Pro, but it may not cover every detail that advanced users need.
- Simplifies audio editing by grouping tools into categories.
- Auto-Match loudness saves time and ensures consistency.
- Repair tools handle common issues like noise and reverb.
- Works directly inside Premiere Pro without extra software.
- Lacks advanced fine-tuning compared to Adobe Audition.
- May not fix heavily damaged audio.
- Presets can feel limited for complex mixes.
- Some adjustments reduce flexibility if you want full manual control.
Bonus: A Simpler Alternative to the Essential Sound Panel
Feeling overwhelmed by all the settings in Premiere Pro? If Premiere Pro's Essential Sound panel feels like too much, there are alternatives that can simplify the process. One option is Wondershare Filmora, which automates many of these adjustments with its AI-powered audio tools.
Filmora Compared with Premiere Pro's Essential Sound
The Essential Sound panel in Premiere Pro gives you flexible, manual controls over audio editing. Meanwhile, Filmora takes a more automated, AI-driven approach. Here is a comparison of how each editor handles core audio tasks using their respective tools.
- Import your video or audio files into the timeline. Select the track you want to edit, and the editing panel will appear on the right side of the screen.
- Go to Audio > Basic to access Filmora's AI-powered audio features.
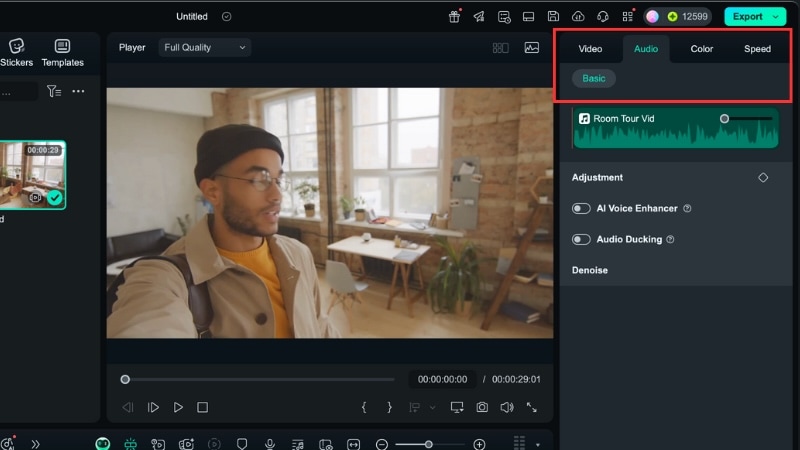
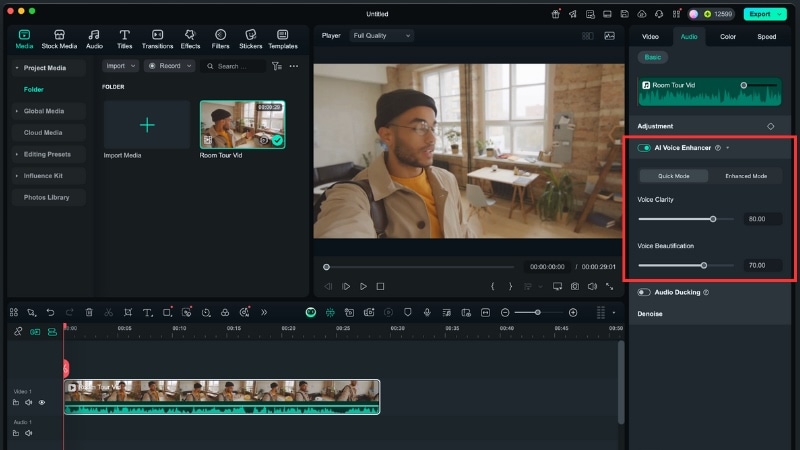
- Turn on AI Audio Enhancer to balance and improve the track.
- You can choose between Quick or Enhanced mode, and adjust the Voice Clarity and Voice Beautification sliders as needed.
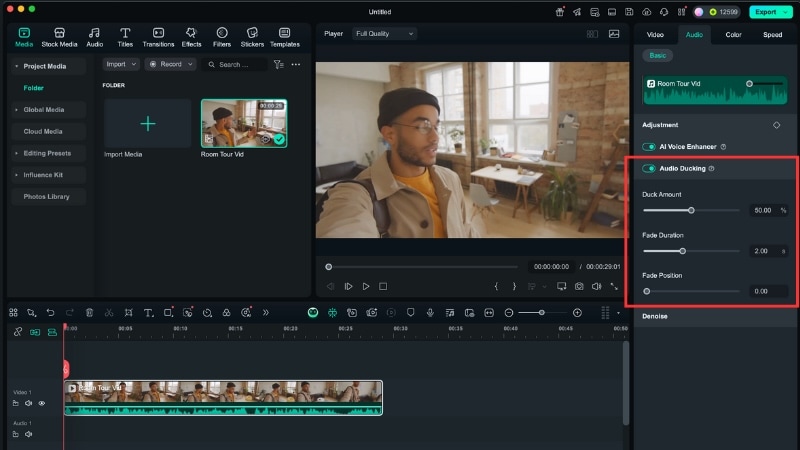
- If your project includes both dialogue and background music, enable Audio Ducking. This tool automatically lowers the music volume whenever someone speaks, keeping the voice clear.
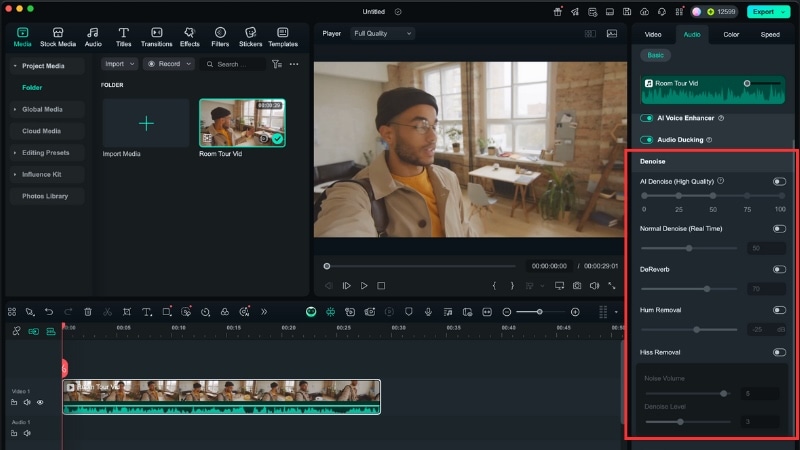
- If background noise remains after using AI Audio Enhancer, turn on the Denoise tools.
- Options include AI Denoise, Normal Denoise, DeReverb, Hum Removal, and Hiss Removal. Each works with a simple toggle, so no complex adjustments are required.
-
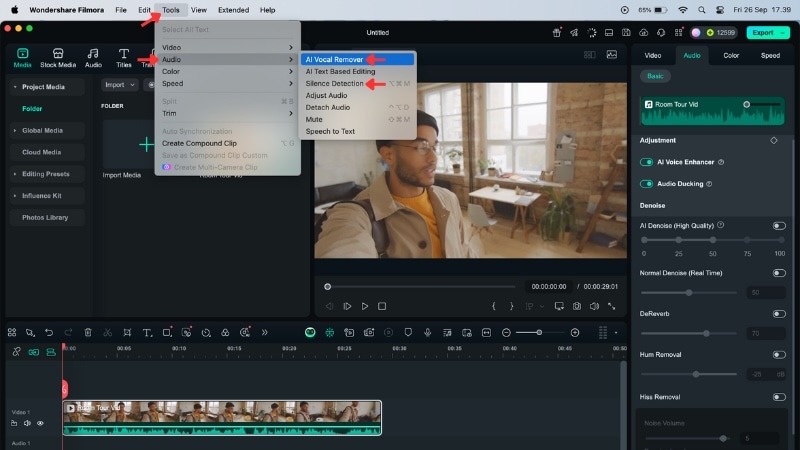
AI Voice Removal and Silence Detection – Go to the top menu, select Tools > Audio. Here, you'll find options to isolate vocals and cut out silent gaps.
-
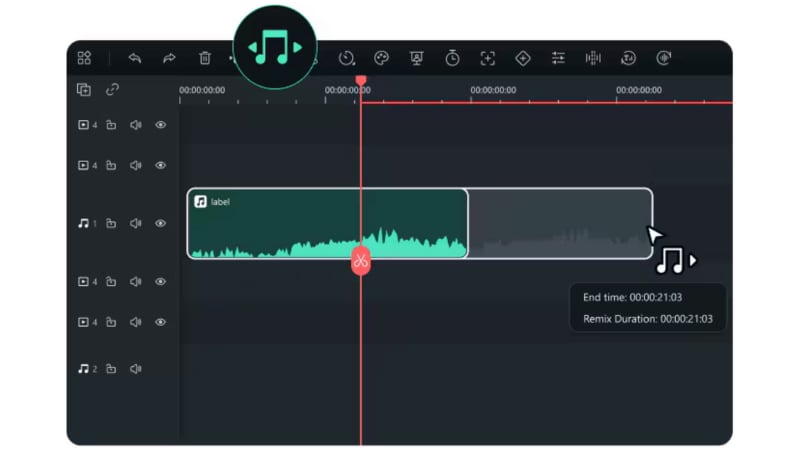
Audio Stretch – Use this tool if your background music is shorter than your video length. Just drag the edge of the music track to match the duration you need.
Why Choose Filmora for Audio Editing
Filmora takes a different approach compared to Premiere Pro. Premiere Pro offers sliders and detailed parameters for each adjustment, while Filmora tools are powered by AI.
- Simplified workflow: Filmora handles volume balancing, clarity, and reduces background noise together, so you don't waste time switching between separate tools.
- Time-saving automation: Features such as Silence Detection and Audio Ducking instantly handle repetitive edits that would normally take several steps in Premiere.
- Creative flexibility: Beyond cleanup, tools like Vocal Removal, Audio Stretch, and Voice Changer give you room to experiment with your projects.
- Accessible and cost-effective: With a beginner-friendly design and flexible pricing, Filmora is easier to get started with compared to Adobe's subscription model.
In short, Filmora is designed to give you clean, professional audio quickly, while keeping the editing experience approachable and enjoyable.
Conclusion
Essential Sound in Premiere Pro gives you control over loudness, noise, and clarity in one panel. By assigning clips to categories like dialogue, music, or ambience, you can adjust them more efficiently and create a balanced mix.
Still, the Essential Sound panel in Premiere Pro may feel complex for beginners. If you want a quicker option, Filmora's AI-powered audio tools provide a simpler workflow. It lets you do noise reduction, ducking, and vocal enhancement in fewer steps.
Give Filmora a try for an easier editing experience.
FAQs About Essential Sound in Premiere Pro
-
What's the difference between using Essential Sound and manual EQ/compression tools?
The Premiere Pro's Essential Sound panel simplifies audio editing by offering presets and category-based adjustments. Manual EQ and compression tools provide deeper control and flexibility but require technical knowledge and more time to fine-tune. -
Can I apply Essential Sound settings to multiple clips at once?
Yes. You can select several clips on the timeline and assign them to a category in the Essential Sound panel. Once applied, adjustments like loudness matching, repair, or clarity settings will affect all chosen clips simultaneously, saving significant editing time. -
Do I still need Adobe Audition if I use Essential Sound in Premiere Pro?
Not always, it depends on your project needs. The Essential Sound panel covers most basic audio editing needs. But, Adobe Audition is for advanced audio restoration, multitrack mixing, and detailed sound design that go beyond what Premiere Pro offers.
