In order to provide video editors a simple method to combine unprocessed material into a finished product, Adobe Premiere Pro was created. Add effects in premiere pro shines at this job if you're trying to take the raw video of a video that was taken and remove all of the less fascinating bits while retaining all of the better pieces. You may utilize how to add video effects in premiere pro by importing your material into the application, adding it all to a sequence, and then starting to rearrange the individual clips and add effects.
In Adobe Premiere Pro, you can significantly speed up the editing process, including a large number of common effects that can be applied to your video and configurable parameters that can change the clip size, opacity, rotation, and position. Knowing how to add after effects to premiere pro can be learned with the upcoming steps as it also offers a variety of editing tools that lets you clip, split a structured sequence of tracks and is designed for playback. Additionally, Premiere Pro templates may be used to jumpstart your procedure.
In this article
Part 1. Types of Video Effects on Adobe Premiere Pro
A video editing program called Adobe Premiere Pro can be used to create everything from TV programs and movies to advertisements and family videos. These effects include Transitions, VFX, Audio, Videos as well as Advanced level effects like Green Screen. In addition, to know how to add shake effect in premiere pro, we’ve explained in the upcoming steps.
For editors who don't want to utilize the other motion graphic packages, Premiere provides a ton of built-in effects. Here are a few effects that you may not be aware are available to you. Any filmmaker or content producer must understand how to apply effects since they are necessary for a top-notch video. We've compiled easy steps on applying effects in Premiere Pro to be of assistance.
Part 2. How to Add Effects in Premier Pro
Add Transition Effects
There are several transition effects in Adobe Premiere Pro, and there are countless ways to customize them to fit your film. It is quite easy to locate transitions and add them. The Effects panel, which is accessible from the very top options bar, contains all the transition options. A panel will show up on the right when you choose this. To include a transition, adhere to these procedures.
- Navigate to the Video Transitions area of the Effects panel.
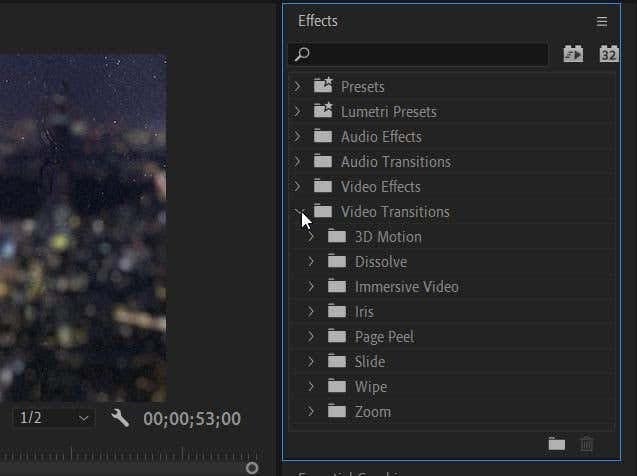
- Select the desired transition type from any of the available ones When you wish to employ a transition, press and hold it before dragging it to the start or finish of the clip. Alternately, insert it in between two clips to serve as a transition between the start and finish of each.
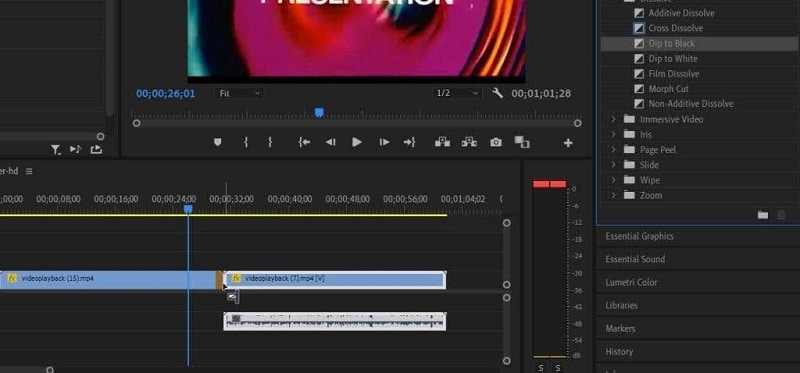
- In Premiere, there are several possible transitions, and some can be more suitable for your project than others.
Add Visual Effects
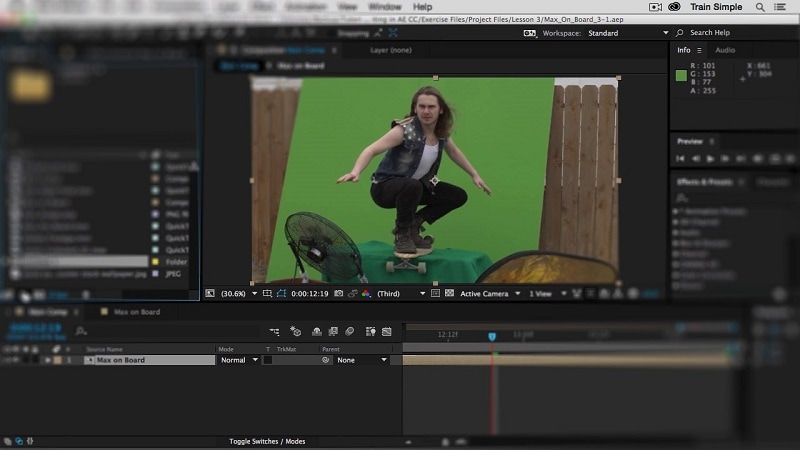
The Essential Graphics panel was added by Adobe to Premiere Pro. Users now have a much different workflow than they had with the few prior title panels. Now that everything is in one panel, you can easily create, animate, and use VFX. Some of the VFX shots were just building miniature towns and adding pieces, while others involved the standard green screen removal and backdrop replacement.
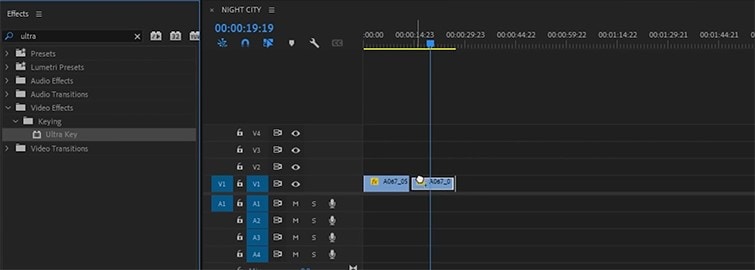
- Simply importing and uploading your video and audio files into Premiere Pro is the first step. The procedure of clicking through is fairly simple. Choose "New Project." Press the Media Browser panel button and find the Ultra Key tool by opening the Effects panel.
- The film clip with the green screen should have the Ultra Key added. Utilizing the matte creation and matte cleaning tools, remove the green screen using the ultra key effect. When softening, be cautious to eliminate any sharp edges. All of this can be adjusted under the Effects Control panel.
- Put your backdrop material behind your green screen clip after you have a clear key. You should now be able to view your backdrop behind the keyed layer.
Add Text Effects
There are many justifications for include text in your video. It has the ability to reach a bigger audience and is a fantastic example of cross-media integration. We must be able to write text since it is such a crucial component of video production. Learning how to add text in Adobe Premiere is quite simple; here's an example:
- Select the type tool from the tool window. To add text, click the backdrop and then type. The segment includes a music titled visuals.
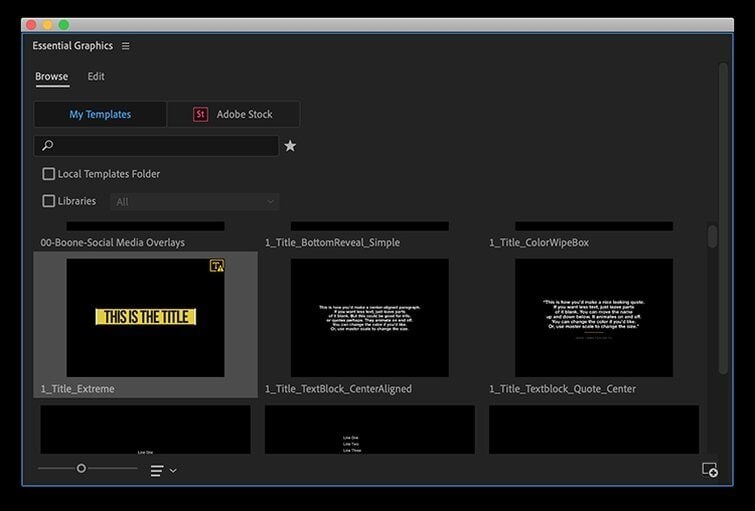
- choosing the Type Tool (T) Drag a text box onto your movie using the Graphic Type Tool, then type in it. You may need to go to Windows > Tools and click and hold on Type Tool if it isn't already selected.
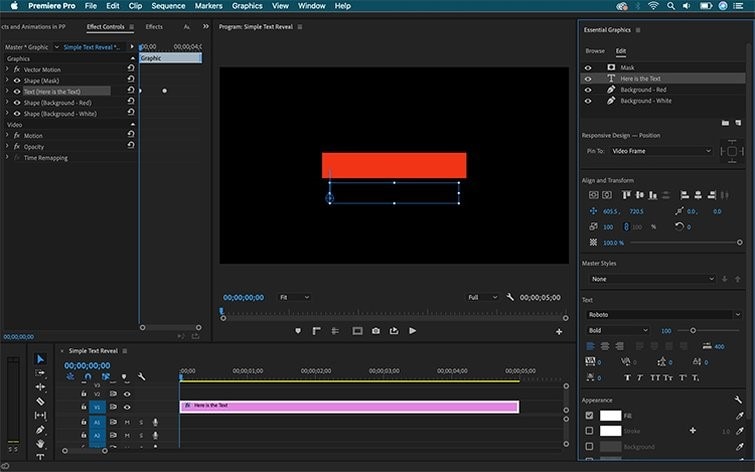
- Head over to the Effect controls panel. under the Text Tab. The text's font and color can be changed. Decide on a place. Use the Effect Controls panel if you want to add some simple motion to your text. Motion may be added here. You can make rolling credits at the conclusion of your movie or add a rotating effect to your titles using the Properties window as shown below.
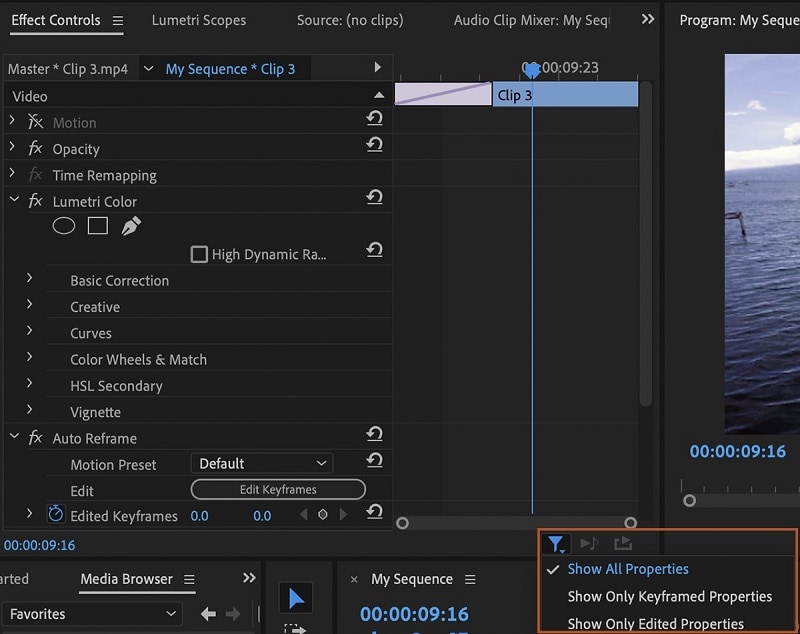
- To Fine-Tune the Text Effects, go to Window > Effect Controls You can see all of the effects I changed in the Essential Graphics panel using this panel. A graphic layer will instantly reflect and be highlighted in the Effect Controls panel when clicked on in the Essential Graphics panel, and vice versa.
Add Audio Effects
It's simple to work with audio with Premiere Pro. By selecting Clip > Audio Options > Audio Gain (or by hitting "G" on your keyboard), you may fast change audio levels. By adding keyframes to the audio clips in your sequence, you can also get greater audio control.
- First, equalize the audio. You have thus eliminated your stutters and the buzz from the audio track of your speaker. You may use the Parametric Equalizer effect under Effects > Audio Effects to give your voices a last boost of clarity and flow.
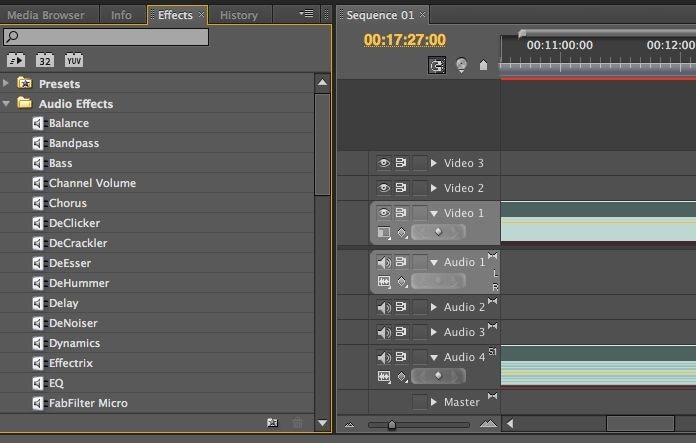
- Click on your clip and choose Effect Controls > Custom Setup > Edit to make more customizations.
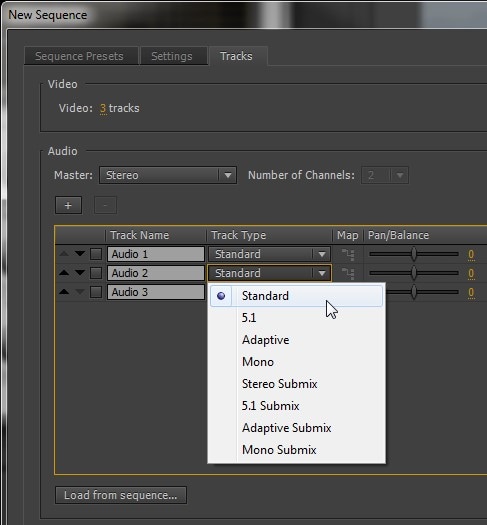
- Make use of the vocal enhancer. In the dropdown menu of your parametric equalizer, choose vocal enhancement. Next, adjust your frequencies upward and downward until everything sounds good.
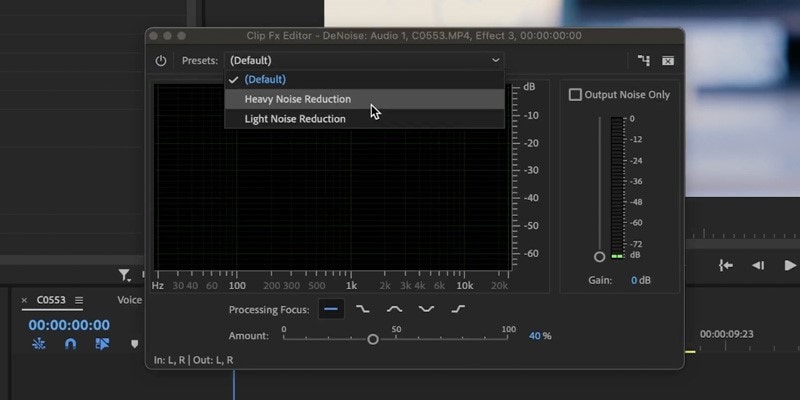
- In Adobe Premiere Pro, a crossfade is used as the audio transition by default. Use them to join audio files together, provide a smooth transition from opening to closing credits, or add and remove sounds as required. Select Audio Transitions > Crossfade from the Effects menu.
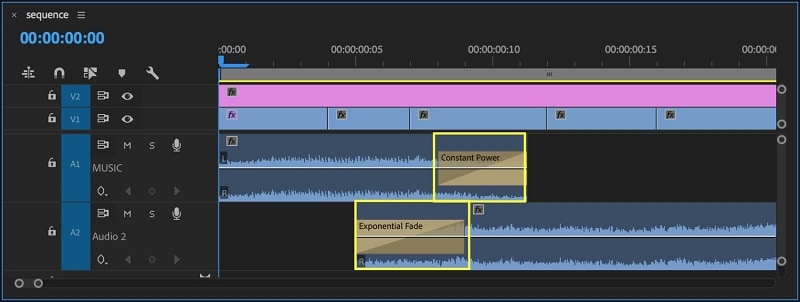
- For fine-tuning your audio, go to Preferences > Timeline > Audio Transition Default to finish. To polish your audio, use duration.
Presets Effects:
Presets for Adobe Premiere Pro CC can be a useful tool while editing videos. They eliminate the need for constant manual adjustment by enabling the user to rapidly and simply apply effects, transitions, and other intricate settings. You may utilize effect presets to give your video clips effects. This is a fantastic way to give your project some flare and originality!
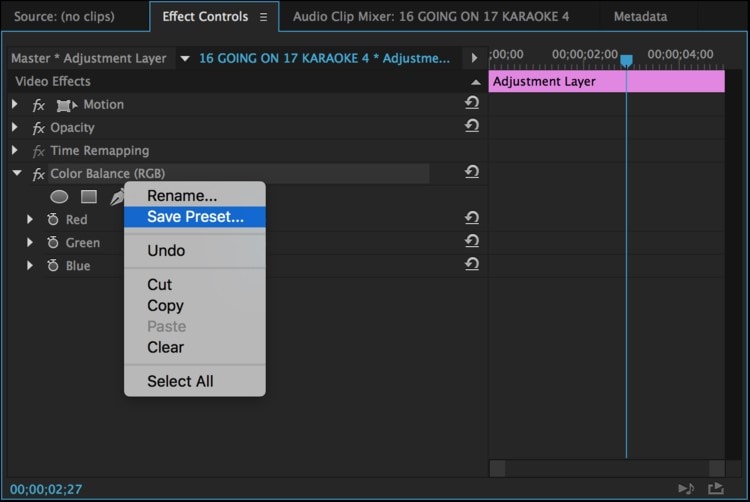
- After adjusting the effect to your liking, right-click the name and choose Save Preset. Your own effects are kept by default by Premiere Pro CC in the Presets folder of your Effects Window.
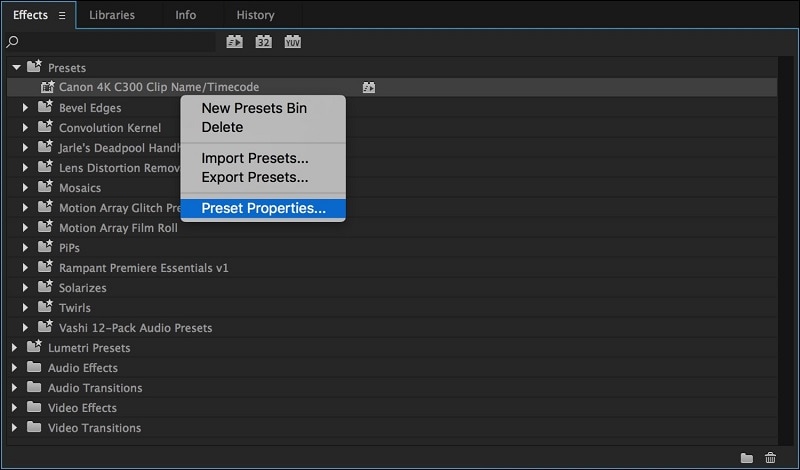
- Right-click the effect preset and choose "Preset Properties..." to alter the Name, Type, or Description of the preset. This option can also be found in the pop-up menu for the Effects panel.
- Editors using Premiere Pro may export and share effect presets. This includes changes to the speed, opacity, and motion! Select "Export Presets" from the Effects panel pop-up menu after selecting the effect preset or presets you want to export. The names of the specific preset included in this file remain unchanged.
Part 3. Alternative Way to Add Effects to Videos [Use Filmora]
Making films can be a wonderful way to save your priceless memories, and several internet influencers have made it their full-time profession and artistic endeavor. Due to how easy it is to locate and utilize its many functions, Filmora is simpler to use than a tool like Adobe Premiere. Simply locate the effect you want to use and drag it onto your timeline. You can quickly find and use any feature you choose.
The most recent edition of a video editing tool regarded for being the most user-friendly and intuitive in its industry is called Wondershare Filmora. The magnetic timeline in Wondershare Filmora enables effects to locate and quickly snap to the boundaries of clips and other effects when they are dropped into different tracks. You may disable this function. Advanced color tuning is available, allowing you to modify the white balance, light, color, and HSL settings as well as add 3D LUTs and custom vignetting. Follow the steps below to Add effects to videos using Filmora:
Steps to Use Filmora to Add Effects to Videos:
Step1Import Files
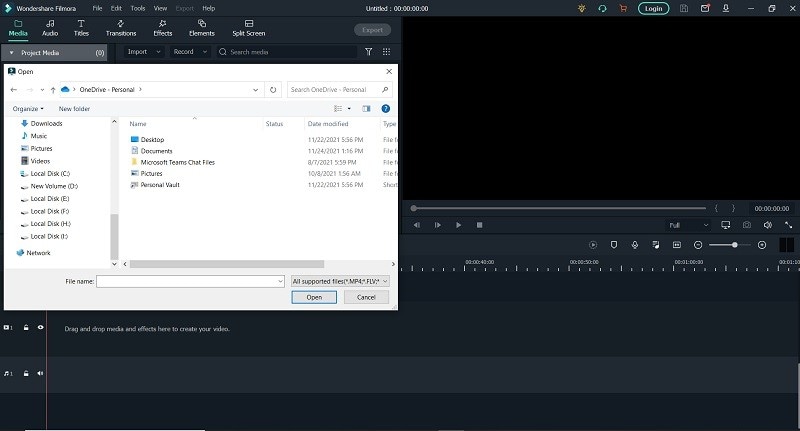
The first step is to import files. You may accomplish this by downloading videos, music, and photographs from social networking websites as well as from your computer. You can quickly arrange the Filmora Media Library to make it simple to locate your clips. To add an element to the timeline, drag it there or click the "Import Files" button.
Step2Use Sound Effects
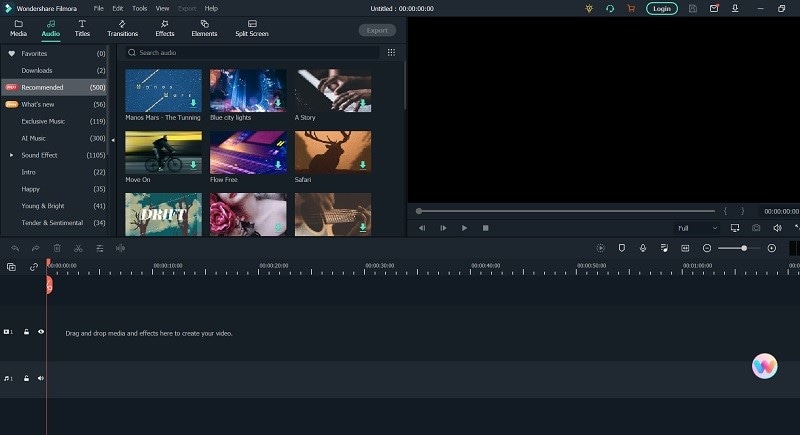
To enter the sound editing window, double-click on the soundtrack in the timeline. Drag your movie to the timeline, pick the "Music" tab, click on the sound effect, and then drag it to the timeline's soundtrack. You may also change the sound's tempo, fade-in and fade-out effects, loudness, and other settings. Additionally, background noise can be eliminated.
Step3Apply Effects
Simply locate the effect you want to use and drag it onto your timeline. You may employ sophisticated tools like green screen, picture-in-picture (PIP), split-screen, stabilization, and speed adjustments to elevate your films to a new level.
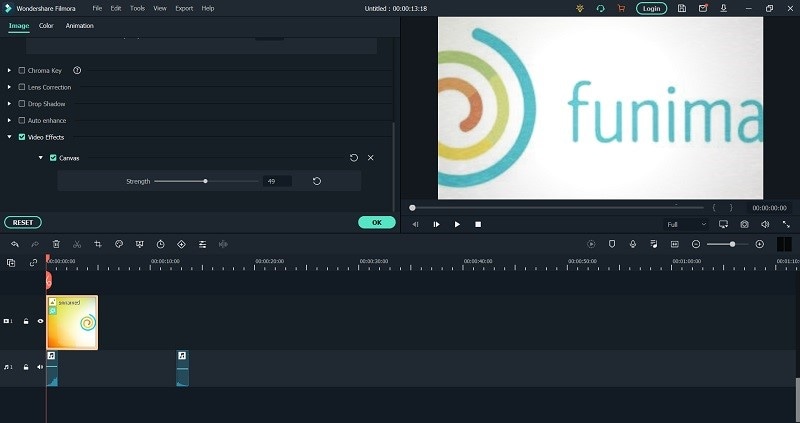
Step4Export the Masterpiece
Wondershare There are many export possibilities available with Filmora9. You can instantly publish your films to Facebook, Vimeo, YouTube, and other social networking platforms. You may pick from a variety of video file types when exporting your movie, including WMV, MP4, AVI, MOV, FLV, MKV, TS, 3GP, MPEG-2, WEBM, MP3, and GIF. A DVD might also be created.

Conclusion
Adobe Premiere Pro enables video editors to import their material and add it to sequences that can be put together anyway the editor sees fit. This involves cutting out extraneous material, combining brief portions that make a narrative, and adding sound effects, music, or effects. You now know how to add after effects to premiere pro. However, Filmora, a reliable video editor with an amazing feature set, particularly for its affordable price, is what we suggest for the best performance. The editing process is simplified, allowing users to concentrate on being creative.


 100% Security Verified | No Subscription Required | No Malware

