

 TL;DR:
Creating a seamless video loop requires choosing a method based on your footage type: use After Effects' Interpret Footage for simple set-count repeats, expression-driven Time Remapping for infinite automated cycles, or blending techniques for complex, non-repeating camera movements.
● Applying the loopOut() or loopOut("cycle",0) expression to Time Remapping or animation properties generates infinite playback, but requires you to manually extend the composition timeline and ensure start and end frames match perfectly to avoid visible jumps.
● Footage containing unpredictable motion, such as clouds, cannot be looped naturally with expressions and requires you to duplicate a pre-composition, overlap it by 10 to 30 frames, and apply a 100% to 0% opacity fade across the overlap to hide the seam.
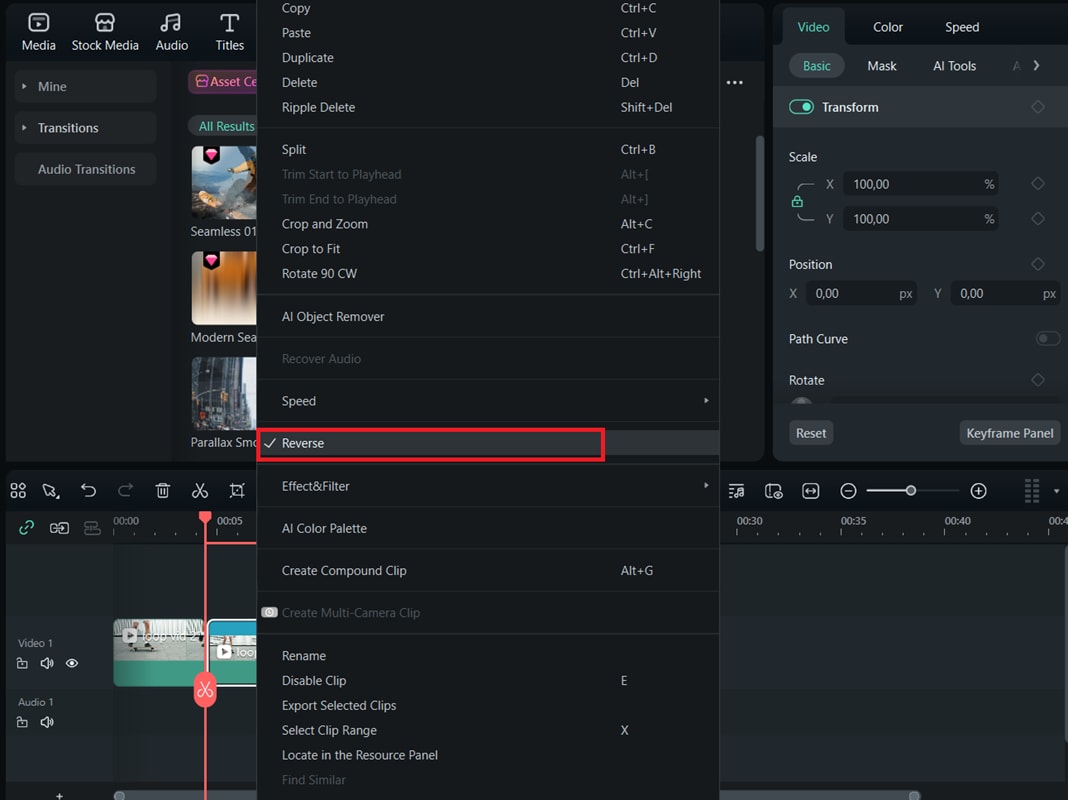
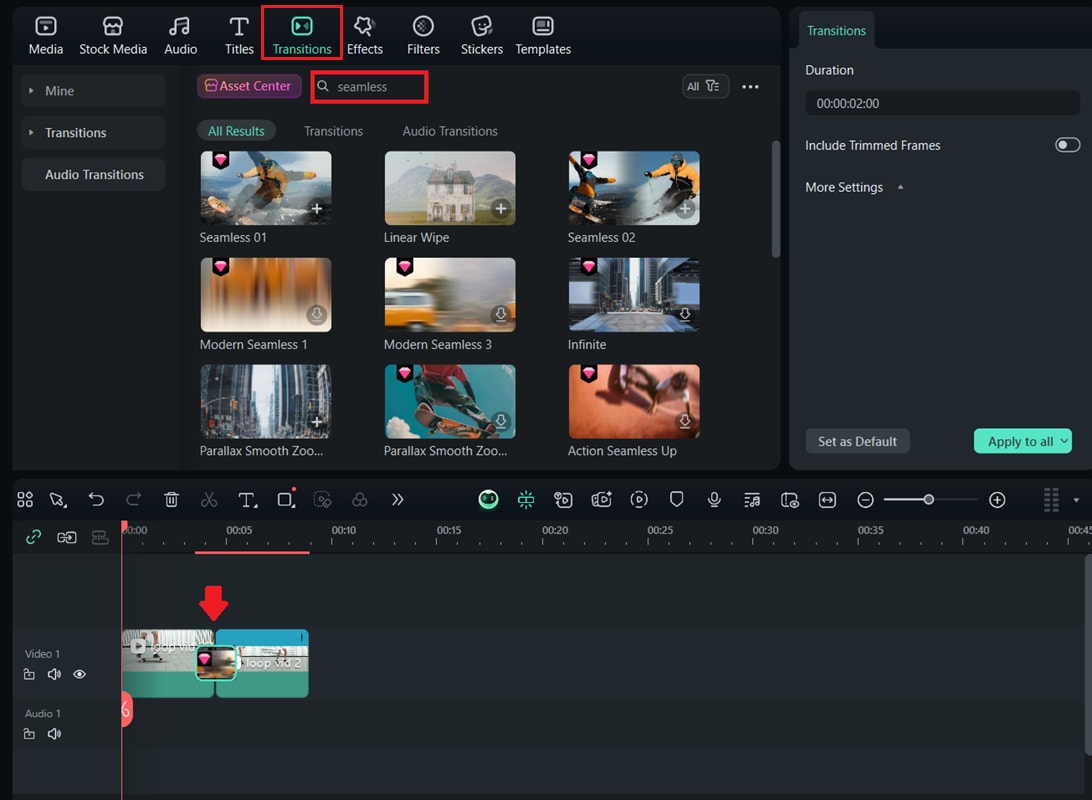
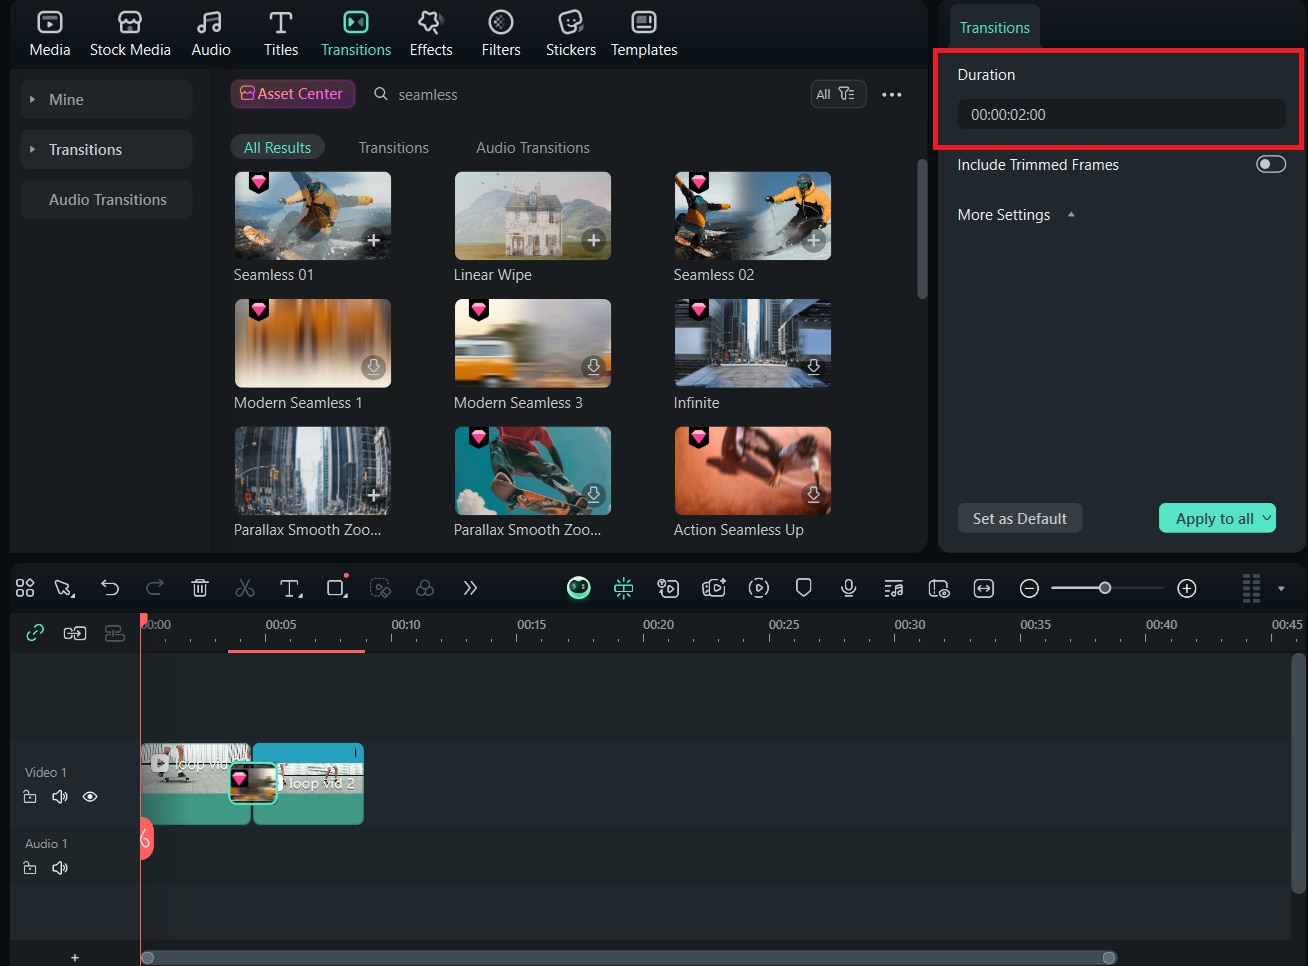
● Users lacking technical expression knowledge can use Wondershare Filmora to quickly loop short clips by placing a reversed duplicate next to the original with a built-in transition, though exports on the free plan will contain a watermark.
Ask AI for a summary
 ChatGPT
 Perplexity
 Gemini
 Claude
 Grok
Grok
Looping a video in After Effects means making your clip play repeatedly without interruptions or awkward jumps, creating a smooth and continuous motion. This technique is essential for projects that need to run endlessly, such as GIF-style animations, looping backgrounds, or repeating motion graphics.
You've probably seen video loops in action all around you; on social media, subtle background loops in presentations, or motion graphics elements you found online, just to name a few. If you want to know how to loop videos in After Effects, our guide here will walk you through the steps in a simple and easy-to-follow way.

Part 1. 4 Easy Ways to Loop Videos in After Effects
If you want to loop a video in After Effects, several built-in methods make this process simple and effective. Whether you need a short clip to repeat a few times, an endless loop for an animated background, or a seamless cycle for motion graphics, After Effects offers multiple ways to achieve this smooth, continuous playback.
Below are four popular methods you can use depending on your project needs.
Method 1: Looping via "Interpret Footage" Settings
When to use: Quick repeats of raw footage, stock clips, or any short clip you want to repeat a set number of times.
1. Import your clip to the Project panel
2. Right-click the footage item and choose Interpret Footage > Main.
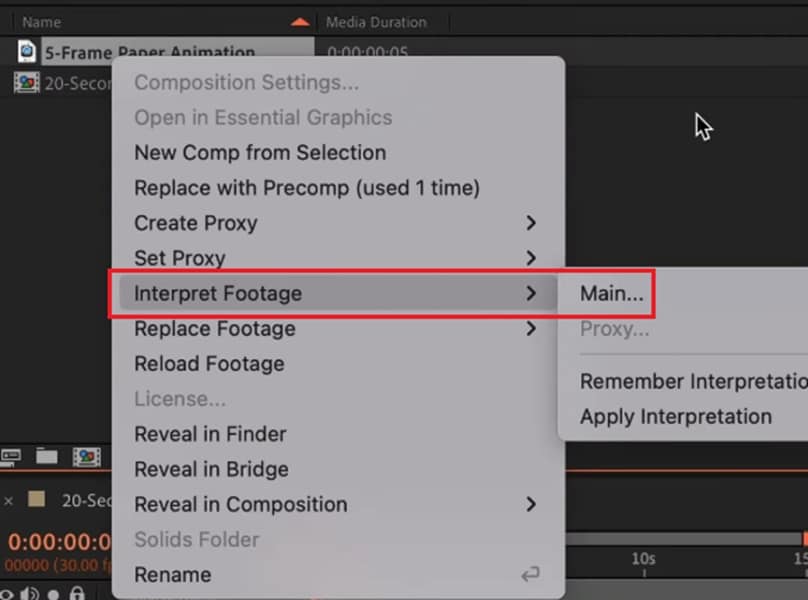
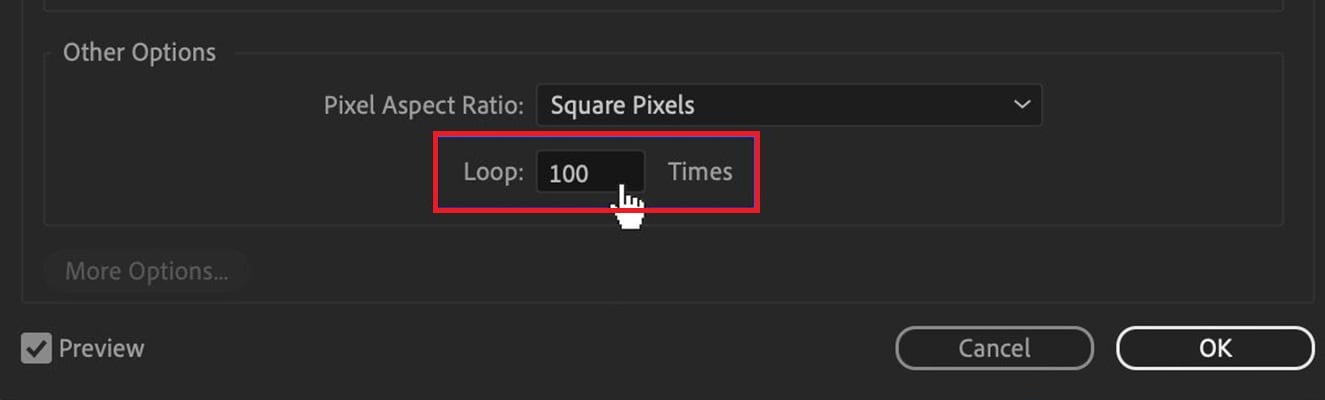
3. In the Interpret Footage dialog, locate the Loop option and enter how many times you want the clip to repeat..
4. Click OK, then drag the footage into your composition.
5. Extend the composition duration or duplicate the layer as necessary to align with your timeline.
- Fast and non-destructive
- No keyframing or expressions required.
- You must manually adjust the composition length, which is not ideal for endless loops.
Method 2: Time Remapping with loopOut() Expression
When to use: When you want an infinite loop or precise control over the loop range, especially for animated clips or those requiring timing adjustments.
1. Select the layer you want to loop.
2. Choose Layer > Time > Enable Time Remapping. After Effects adds keyframes at the layer start and end.

3. Set keyframes for the exact segment you want to loop. Move the playhead to the first frame of the segment and add a keyframe. Move to the last frame of the segment and add another keyframe.
4. Alt-click the Time Remap stopwatch to open the expression field and type loopOut(), then press Enter.
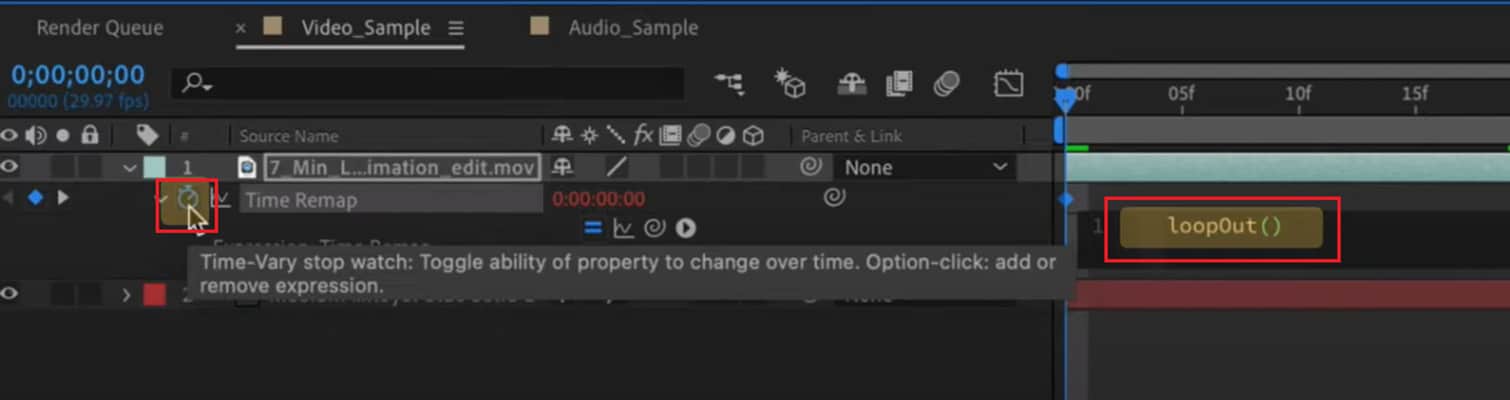
5. Extend your composition length. The layer will now repeat the keyed segment for the rest of the comp.
6. If you see a visible jump at the seam, try either moving the final keyframe one frame earlier or copying the first frame and pasting it just before the last keyframe to smooth the cut.
- Powerful and flexible, works for infinite loops and variable durations.
- Requires expression knowledge.
- Visible jumps may appear if start and end frames don't match perfectly.
Method 3: Seamless Loop via Pre-composition and Blending
When to use: For motion that cannot be naturally repeated, such as camera movements, clouds, or complex animations where you need a clean professional loop.
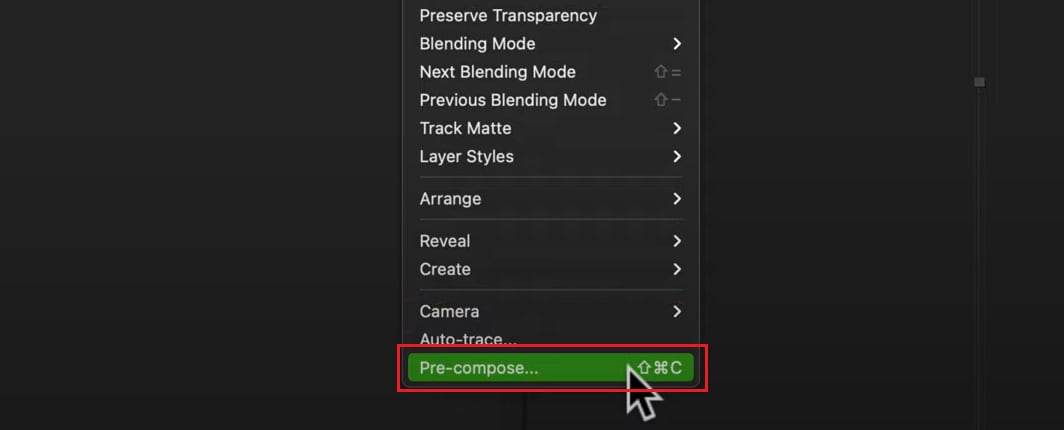
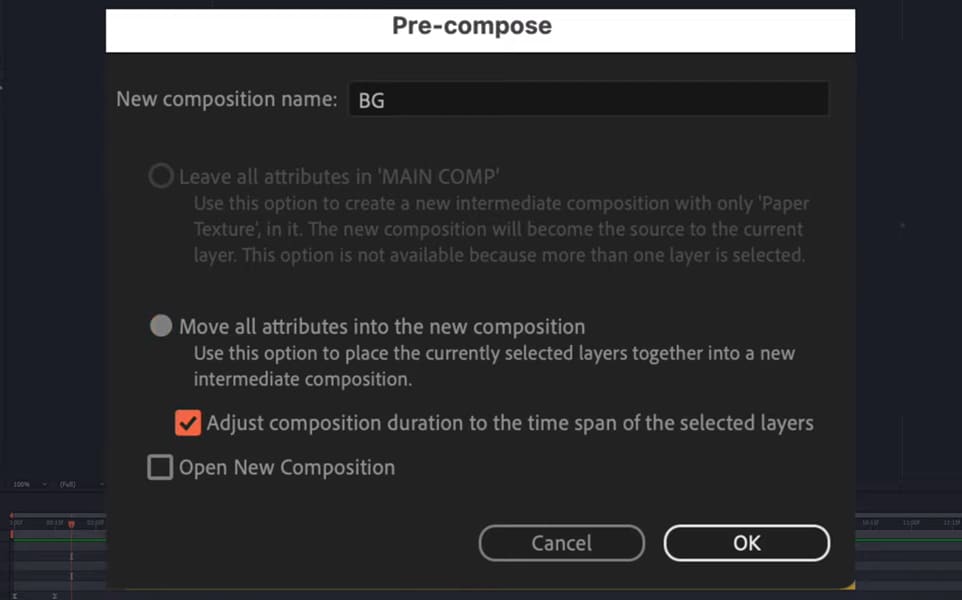
1. Pre-compose your clip or animated layer. Select your layer and go to Layer → Pre-compose, then choose to move all attributes into the new pre-comp.
2. Duplicate the pre-composition. Place the second copy directly on top of the first in your timeline.
3. Slide the duplicated layer so it overlaps the end of the original by roughly 10–30 frames.
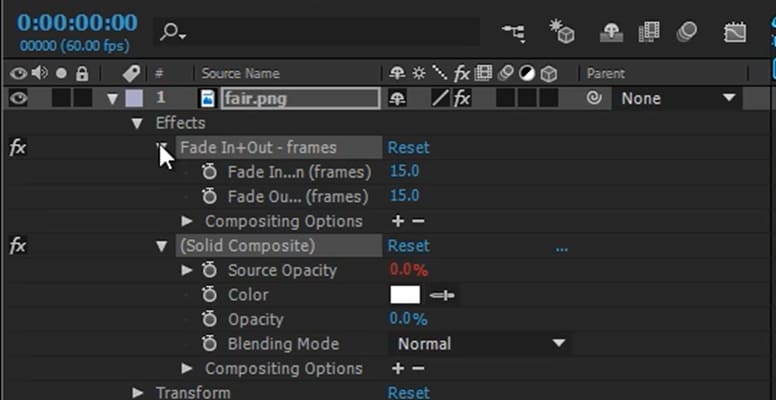
4. Apply a simple opacity fade. Fade out the top layer from 100% to 0% across the overlap, or use a dissolve transition to merge smoothly.
5. To extend playback, duplicate the overlapped comp again or use Interpret Footage → Loop on the pre-comp.
- Produces very smooth, natural loops with no hard jumps.
- Ideal for high-quality backgrounds.
- More manual work and slower rendering.
- Requires trial and error to find the best overlap.
Method 4: Looping Shape or Text Animations
When to use: For motion graphics created inside After Effects, such as repeated text effects, animated shapes, or icons.
1. Create your shape or text animation in After Effects.
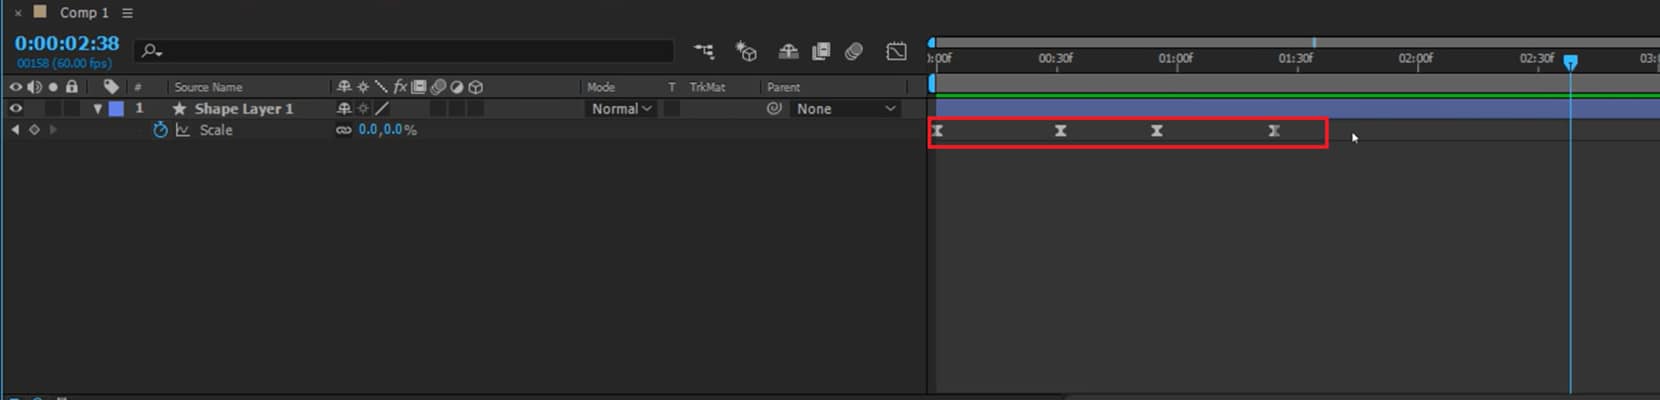
2. Add keyframes for the property you want to loop (Position, Rotation, Scale, etc.).
3. Alt-click the stopwatch for that property.
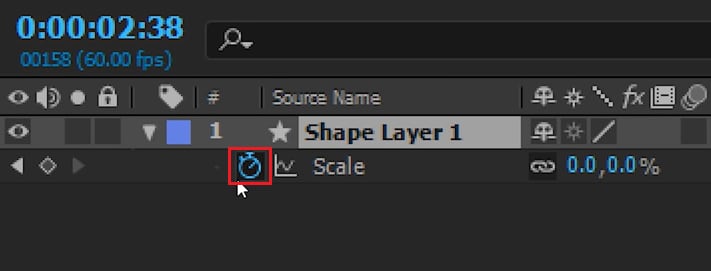
4. Type loopOut("cycle",0) in the expression box and press Enter.
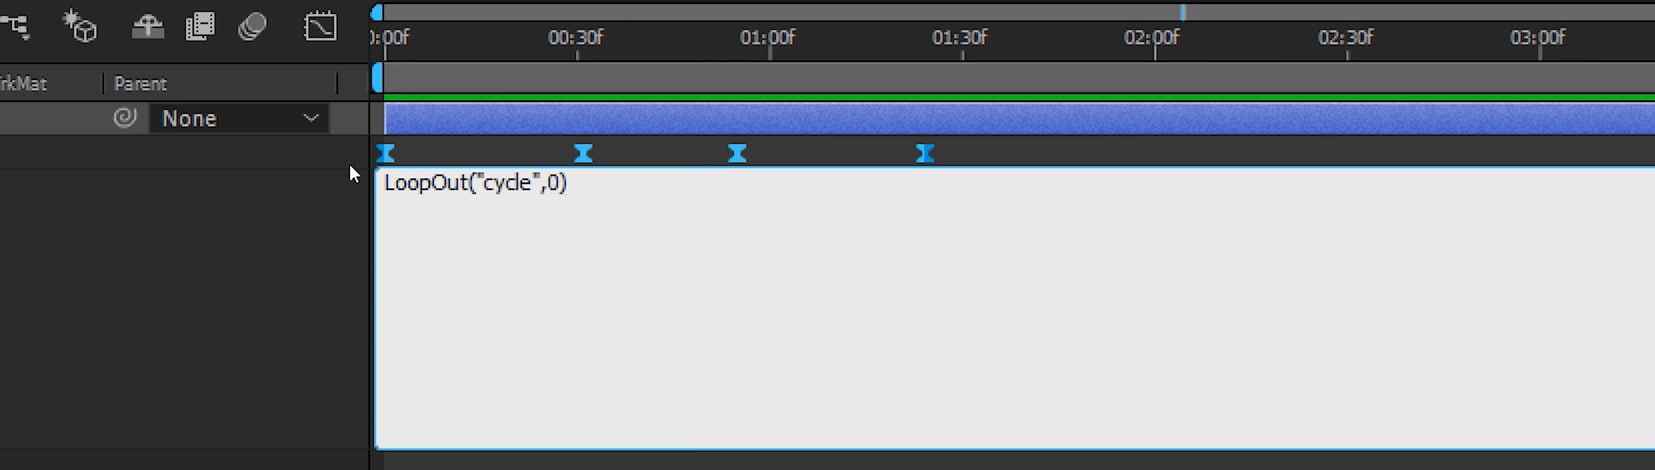
5. Extend your timeline so the animation repeats.
6. Adjust keyframes if you notice a jump between loops.
- Clean way to repeat AE animations without exporting.
- Works well for templates and motion graphics.
- Adjusting start/end conditions precisely can be time-consuming.
- Expressions are required for infinite looping.
Part 2. Beginner-Friendly Alternative: Filmora for Seamless Loops
While After Effects offers powerful looping capabilities through expressions and keyframe techniques, these methods can feel overwhelming for users who simply need a quick, seamless loop.
If you're looking for a more straightforward approach that doesn't require technical expertise, Wondershare Filmora provides an intuitive alternative. Its visual workflow eliminates the complexity of expressions while still delivering clean, professional looping results. If you are interested, read on!

When to use Filmora:
✅You want to create a quick loop with minimal setup
✅You prefer visual tools over expressions and keyframe math
✅You are looping short clips or background textures for social posts or presentations
✅You need built-in transitions to hide the seam
How to Create a Looping Video in Filmora:


- Very short and simple learning curve
- Quick results without coding expressions
- Built-in seamless transitions help hide cuts
- Ready-to-use presets for social media and easy export
- Less advanced control compared to After Effects
- Watermark on exports in the free plan
Why Filmora feels more beginner-friendly than After Effects
Filmora emphasizes speed and clarity with drag-and-drop steps and ready-made transitions. After Effects offers deeper control for complex motion design, but the setup process can take longer. If your goal is to create a smooth loop as quickly as possible, Filmora is the easier option to get started with.
Part 3. Common Mistakes to Avoid
By now, you've seen both the detailed After Effects approach and the quicker Filmora alternative. No matter which method you choose, avoiding certain mistakes can save you from loops that feel awkward or unprofessional.

- Forgetting to extend the composition in After Effects: If your composition isn't long enough to cover all keyframes or duplicated layers, the loop will cut off abruptly. Always check the timeline duration before exporting.
- Leaving a visible seam or cut: A hard cut where the end meets the start instantly breaks the illusion. Whether in AE or Filmora, use crossfades, opacity blends, or overlapping frames to hide the seam.
- Overusing repetition without variation: If the loop is too short and simply repeats over and over, it can become boring. Consider adding subtle variations like color shifts, zooms, or small motion changes to keep it engaging.
- Using transitions that draw attention to themselves: Some flashy transitions can highlight the loop point instead of hiding it. Use seamless or soft transitions that blend naturally.
- Not matching the movement speed: When the motion at the end of the clip doesn't match the start, the loop feels jumpy. In AE, adjust keyframe timing; in Filmora, trim and align clips so movement flows smoothly.
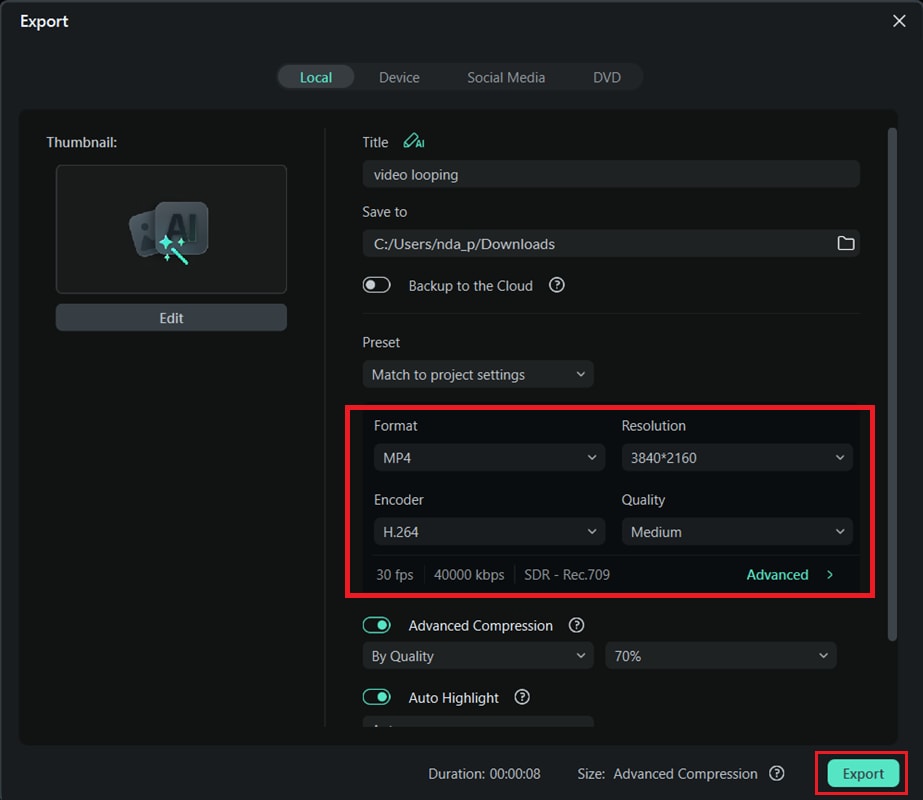
- Exporting at the wrong frame rate: If you change frame rate during export, you risk stutters in the loop. Keep your export settings consistent with your project settings.
Part 4. Comparison Table of Each Video Loop Method
With the common mistakes out of the way, it's easier to choose the method that fits your skills, project type, and time constraints.
To help you decide, here's a brief comparison of different looping approaches, factoring in ease of use, flexibility, and how steep the learning curve can be.
| Method | Best For | Ease of Use | Flexibility | Seamlessness | Learning Curve / Time Required |
| Interpret Footage → Loop | Quick loops from short, already seamless clips | Moderate | Low | High | Beginner-friendly; takes minutes if footage is ready |
| Time Remap + loopOut | Complex motion loops that sync with keyframes | Moderate | High | High | Intermediate; 15 - 30 minutes depending on complexity |
| Pre-comp + Blending | Removing visible seams in footage | Low | Medium | High | Beginner to intermediate; 10 - 20 minutes |
| Loop Expressions on Animation Props | Looping animation without duplicating layers | Low | High | High | Intermediate; quick once expressions are learned |
| Filmora Seamless Loops | Beginners or quick results with minimal setup | High | Medium | High | Beginner; 5 - 10 minutes with guided tools |
Conclusion
Seamless video loops can be created in many ways, from advanced loop video in After Effects techniques to beginner-friendly editors. If you have experience with motion graphics and want complete control, AE methods like Time Remap with loopOut or Pre-comp with Blending are ideal for creating precise and custom loops.
If speed and simplicity are your priority, Filmora's seamless loops feature delivers professional-looking results with minimal effort.
The right choice depends on your project needs, the available time you have, and your editing skills. You can try different methods, mix approaches when possible, and you'll create loops that are not only smooth but also creatively matched to your goal.
