 100% Security Verified | No Subscription Required | No Malware

Want to make your Canva creations play on a continuous loop? Whether you need to loop a video in Canva for impactful social media ads, create a self-playing Canva presentation loop for events, or design an engaging Canva slideshow loop, you're in the right place. Looping content can significantly boost viewer engagement. This comprehensive guide will walk you through exactly how to loop video on Canva, and also cover methods for making your entire Canva presentations and slideshows repeat seamlessly. Let's dive in!
Content Table
Part 1: How to Loop Video in Canva
Canva is a good online video editor that allows users to create stunning videos. It has a simple interface that makes it easy to use even for beginners. Looping a video is a great way to make your content more engaging.
A straightforward way to loop a video in Canva, effectively making it play multiple times, is by duplicating the page containing your video. This method also allows you to add transitions for a smoother loop. Here’s how:
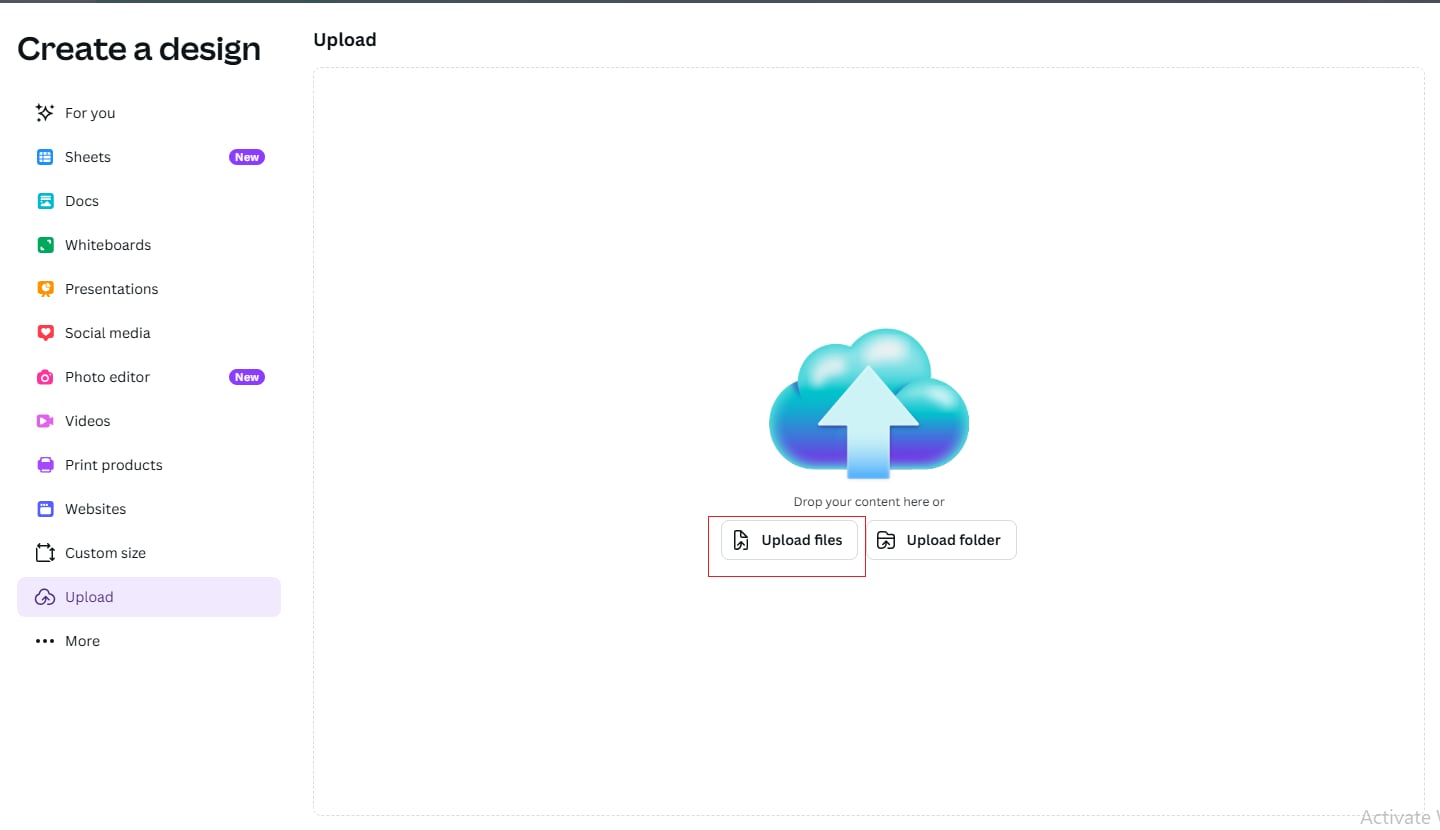
Step 1: Create an account on Canva and select the video:
Upload your video to Canva and drag it onto a page in your design. Adjust its size and position as needed.
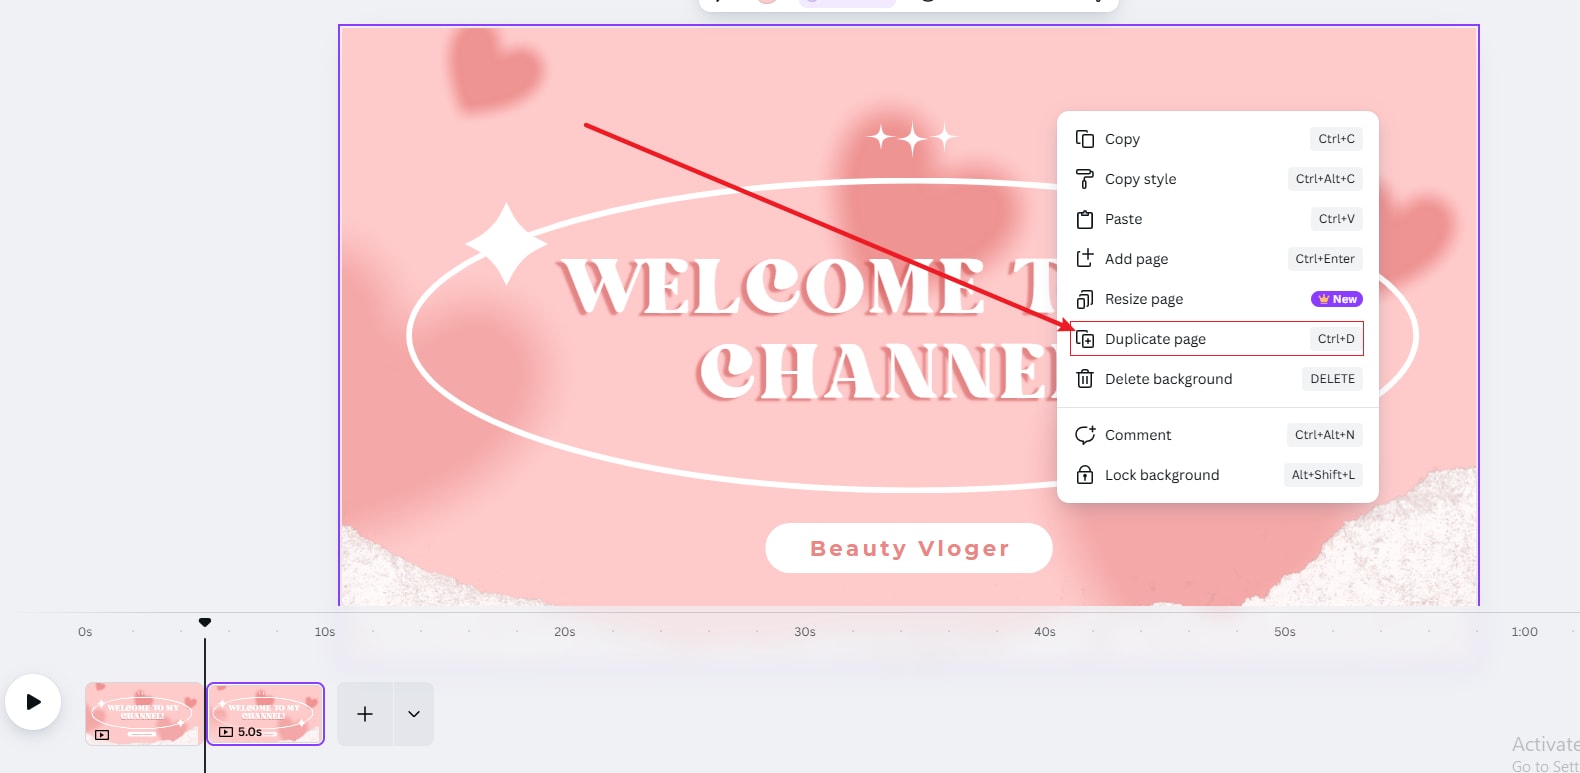
Step 2: Duplicate the Page
Once your video is on the page, you need to duplicate this entire page. You can do this by clicking the "Duplicate page" icon (often looks like two pages with a plus sign) that appears above or beside your selected page in the editor timeline, or by right-clicking the page thumbnail and selecting "Duplicate page." Repeat this process to create as many repetitions of the video as you need for your loop.
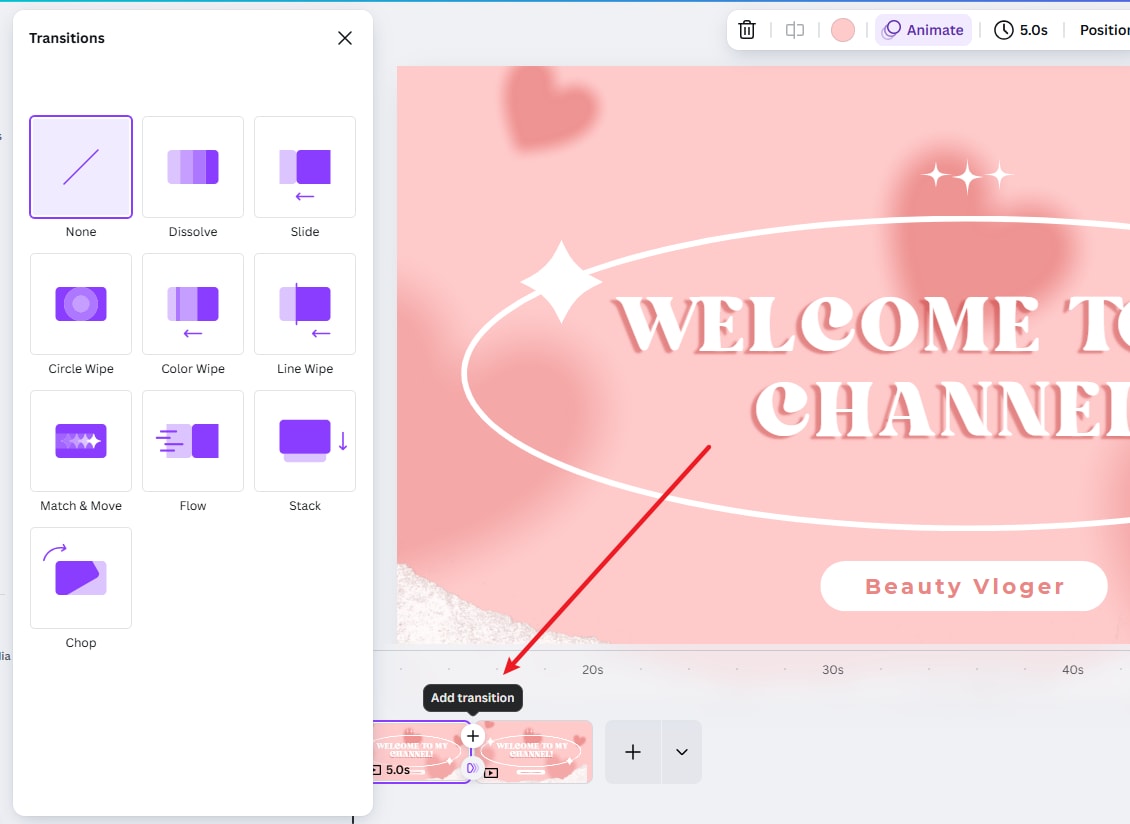
Step 3: Add Transitions (Optional)
For a more seamless loop, you can add transitions between the duplicated video pages. Click on the small "+" icon or "Add transition" button that appears between pages in the timeline. Choose a subtle transition like "Dissolve" to make the jump between video repetitions less jarring.
Step 3: Preview and Export:
Preview your design to see the looped video in action. When you export your design as a video (e.g., MP4), these duplicated pages will play sequentially, creating the loop effect. The total video length will be the sum of all duplicated page durations.
Why should we need the Loop video in Canva video editor?
If you're looking for a way to make your video stand out from the crowd, then you've come to the right place! Here are three ways that you can use looping videos in Canva software to create a more compelling piece of content.
- It adds more value to your content because viewers can watch it over and over again without having to do anything else.
- It helps attract new viewers because they'll feel compelled to watch the whole thing or at least take action after watching part of it (like clicking on a button).
- It increases retention rates because people will remember something much better than just a static image or text string because there's movement involved in each frame of the image.
Part 2: How to Loop a Canva Presentation or Slideshow
Many users want to know how to make a Canva presentation loop or how to loop a Canva slideshow for continuous playback. This is perfect for trade shows, lobby displays, or self-running informational content. Canva makes this straightforward with its Autoplay feature:
- Open Your Design and Access Presentation Mode: First, finalize all slides in your Canva presentation. Then, to start presenting, you can either click the dedicated "Present" button in the top right corner of the Canva editor or click the "Share" button and select "Present" from the dropdown options.
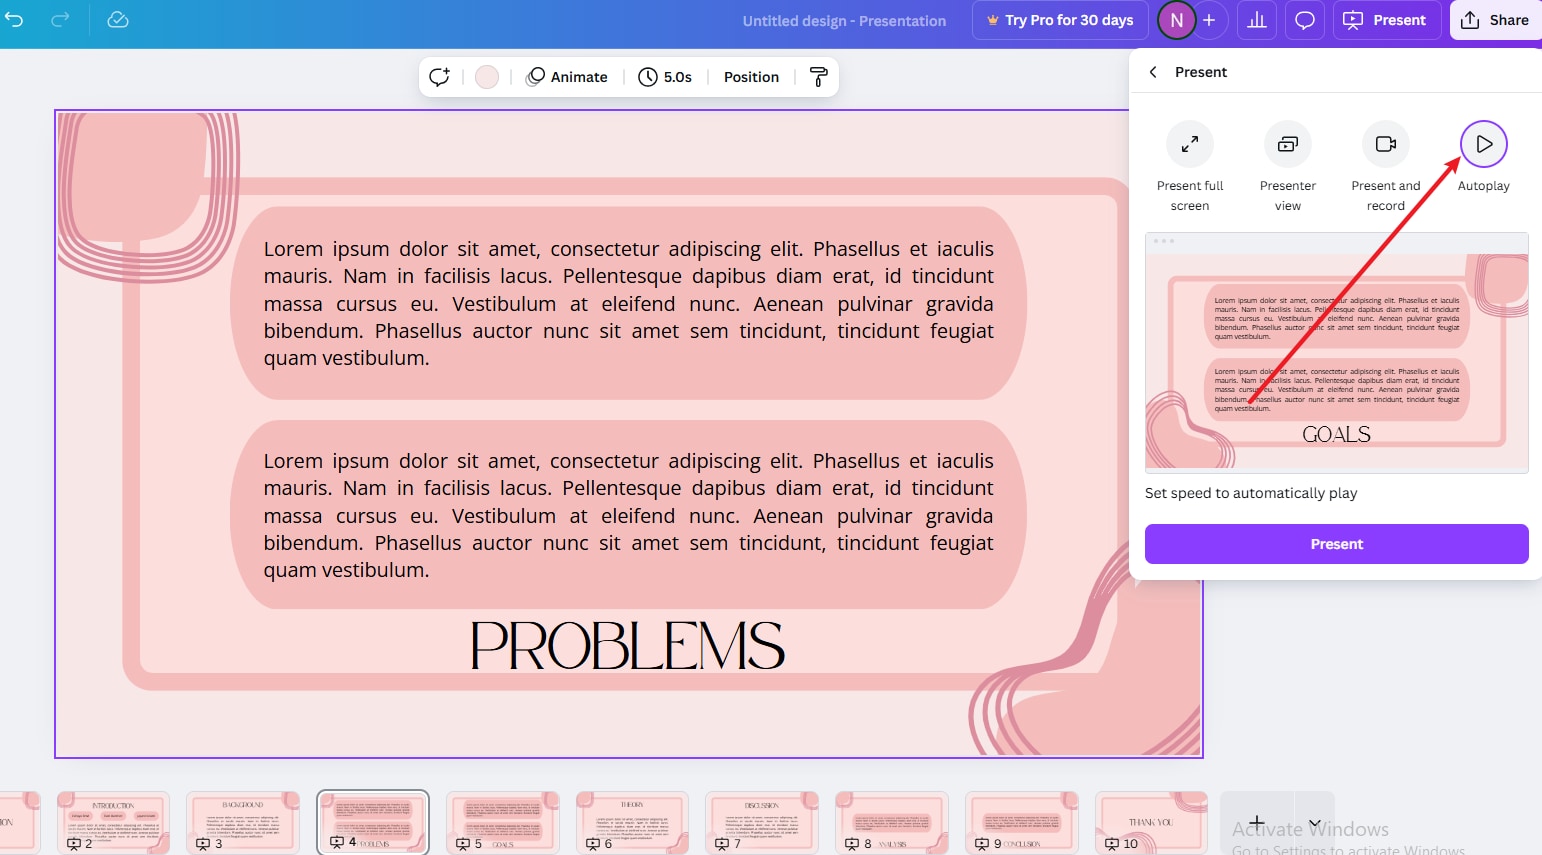
- Choose Autoplay Presentation Type: After initiating the presentation, Canva will offer several types: "Present full screen," "Presenter view," "Present and record," and "Autoplay." You should select "Autoplay" to enable continuous looping.
- Understand Automatic Looping with Autoplay: Once "Autoplay" is selected, your Canva presentation will begin playing automatically and is designed to loop by default. This means after the last slide, it will automatically restart from the beginning without needing a separate "Loop" setting.
- Control Playback and Set Slide Timings: During autoplay, you can usually access on-screen controls by moving your mouse, which may allow you to "Pause autoplay" if needed. For the loop to work as desired, ensure you've set appropriate timings for each slide in the Canva editor before starting the presentation, as this dictates how long each slide displays before advancing.
In Autoplay mode, the presentation loops automatically. You can control playback and pause if needed.
By selecting "Autoplay," your Canva slideshow will automatically loop, continuously playing from the first slide back to the beginning after the last slide. This directly addresses how to loop Canva presentation and how to loop Canva slideshow queries effectively.
Part 3: Alternative Way to Loop a Video
If you're looking for how to loop a video on Canva but need more flexibility, Filmora offers a great alternative. Unlike traditional video editing software like Adobe Premiere or Final Cut Pro, where looping requires manual cutting and merging, Filmora provides a one-click loop feature for seamless playback.
With Filmora, you can:
- Effortlessly loop any video clip for continuous play.
- Sync video and audio perfectly.
- Enhance loops with motion graphics, text, and effects.
Whether you're creating social media content, music videos, or presentations, Filmora makes looping easy—even for beginners.
Now, let’s dive into how to loop a video using Filmora step by step:
Step 1: Download Filmora for free and Create a project in it:

 secure download

Download the Filmora software from any browser. After installation opens the software and clicks on create a project. Just add a video in your timeline that you would like to loop. With the Loop tool, you can easily add titles and credits, as well as transitions and effects to your videos.

Step 2: Select the video and make copies of it:
Move the play head to the end of your clip and press right-click to copy the video then use CTRL + V to paste the clip and continue pasting as many copies as you want to create.

Step 3: Add Transition to the video to make it more seamless
Lastly, If you want to make your loop more seamless then go to the Transitions tab and type dissolve in the search bar. Drag the dissolve transition between the two clips on the timeline. This can be useful when you want viewers to watch the video repeatedly.

How To Loop a Video in Filmora Mobile
On the other hand, here’s how to loop a video in Filmora’s mobile version. The upside of this tool is that you can reliably make looped videos through your mobile phone versus using a desktop browser for Canva. You can imagine how easy it is to take a video and directly loop it through your mobile device. Similar to the desktop version, you can enjoy easy looping as follows:
secure download
Step 1: Create a New Project
Start from the homepage by tapping New Project. Then, locate your video and Import it.
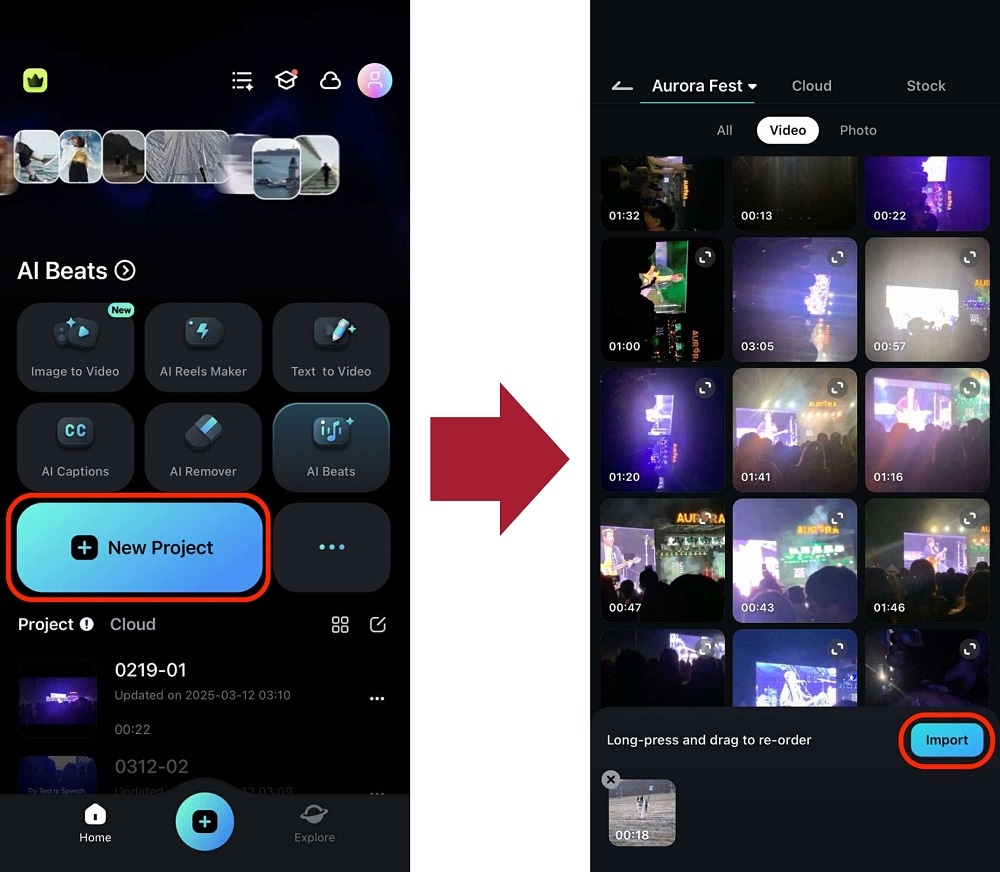
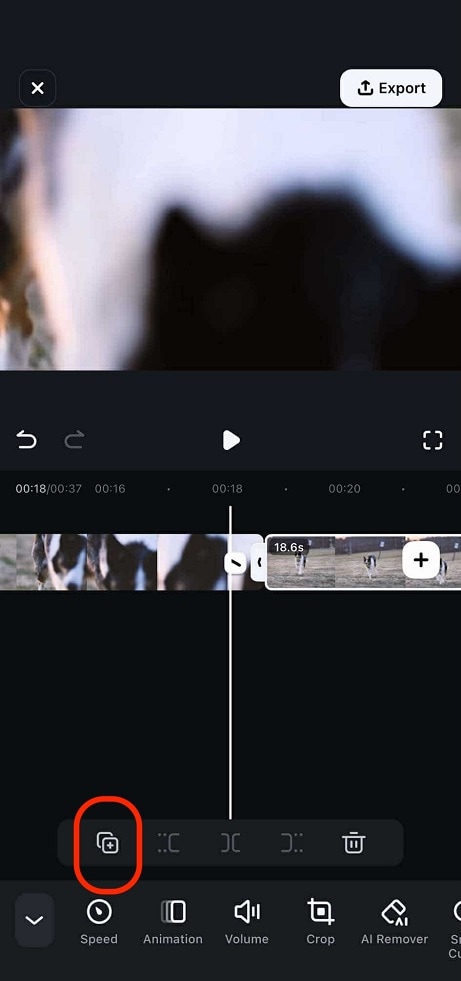
Step 2: Duplicate and Make the Loops
Now that you’re in the editing interface, select the video from the timeline. Then, use the duplicate button marked below to make one video copy. You can do this as many times as needed!
As you can see, both the mobile and desktop versions offer quick and easy ways to loop a video. Try them out today and enjoy cross-platform compatibility so you can pick up your work from anywhere.
Part 4: FAQs About Video Loop
1. Can you loop animation in Canva?
Yes, we can make loop animation in Canva. Looping animation in Canva software is not difficult, but it does require a little bit of practice. To loop animation in Canva, follow these steps:
- Go to the Animation tab on the left side of the screen.
- Click on the New Animation button in the top right corner of your screen.
- Select the type of animation you want to create from the drop-down menu next to "Create New Animation From." This will open up a window that allows you to select between several different options for how your animation will appear, choose one that appeals most to you!
2. How do I loop an mp4 video?
Looping the mp4 video is a fairly simple process. First, you need to import the video into your computer. The easiest way to do this is using the .mp4 files that come with your camera or phone. You can also use any other audio file or a preview of the video as an indicator of where you want to start and end your looping.
Once you have imported your video, you can begin looping it. To do this, click on the “play” button and wait until all the videos have been played. Then, click on one of the two buttons below. The bottom button will play one frame forward in time while the top button will play one frame backward in time.
3. How do I make Canva videos longer?
We've got a special function in Canva that lets you crop your video while making it longer. Here's how:
- Go to the video editor by clicking the cog icon on the top right of your screen.
- Select "Crop Video" from the menu.
- Choose how much footage you want to cut out and press "OK."
- You're done! Your video is now cropped and longer than before!
secure download
Conclusion
Looping video generates interest and emotion in the minds of viewers and it is a great tool. According to research, over 80% of internet users watch videos online to get information or because they want to gain knowledge. People's attention span has diminished significantly, since the invention of gadgets and all these must-have devices. The video will seem like you are editing the video in real-time.
