
 100% Security Verified | No Subscription Required | No Malware

In such cases, audio transition effects may be employed in an effort to achieve a smooth mix. Audio transitions in Premiere Pro will assist in cleaning off those jagged edges and in making your audio sound as natural as your imagery. It could be either fading out of the song or a crossfade of 2 clips, Premiere audio transitions will ensure that your audience is not distracted.
This blog discusses this feature of Premiere Pro and how you can use it. We will also look into an alternative to this tool that offers simplified working and more AI features.

In this article
Part 1. An Introduction to Audio Transitions in Adobe Premiere Pro
Transitions are very important when editing audio in Premiere Pro, which would make it sound smooth and natural. Unlike sharp cuts, the effects of audio transition are the combination of clips, the adjustment of the volume, and the continuity between the scenes. Benefit from the drag and drop methods and remove unwanted gaps or harsh jumps in audio. The following points cover the types of audio transitions Premiere Pro features:
- Constant Gain: This type of audio transition creates a quick, linear fade between clips to change volume at a steady rate. It is best for simple edits, but it can sound abrupt compared to smoother options.
- Constant Power: It gives the audio a natural-sounding crossfade, in which one clip is fading away and the other is fading in, with a curve.
- Exponential Fade: The third kind of audio transition is used to make a gradual fade-in or fade-out, whereby it begins softly and then accelerates. It works best when transitioning between two people in dialogue or changing the scene and requiring a small but natural transition.
Part 2. A Step-by-Step Guide to Using Premiere Pro for Audio Transition
This video and audio editor offers 3 major types of audio transitions for a professional impact. The following section covers the details on how to use these audio transitions in Premiere Pro:
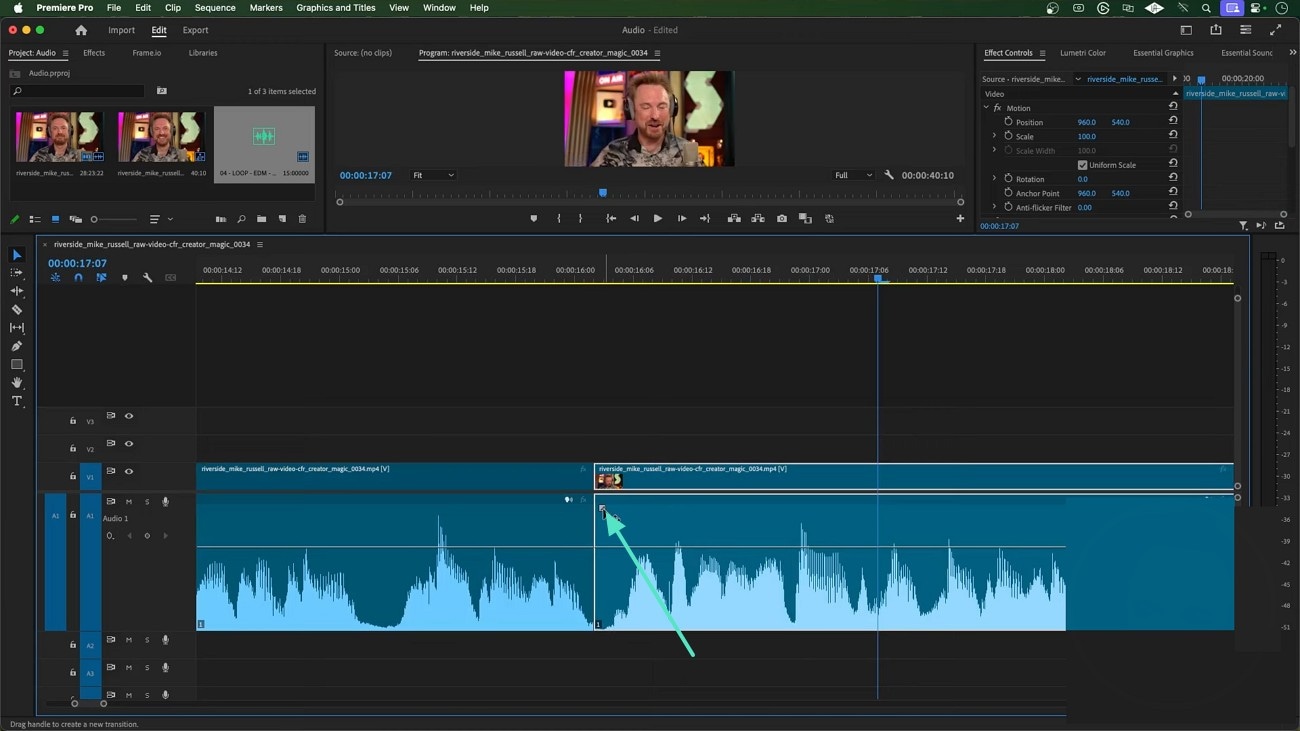
- Step 1. After importing a video, split the track from the timeline by double-clicking the desired points. At the start of the timeline, click the "Arrow" icon to apply a little fade-in to the audio. You can drag it in the timeline to increase and decrease the area where the effect will be applied.
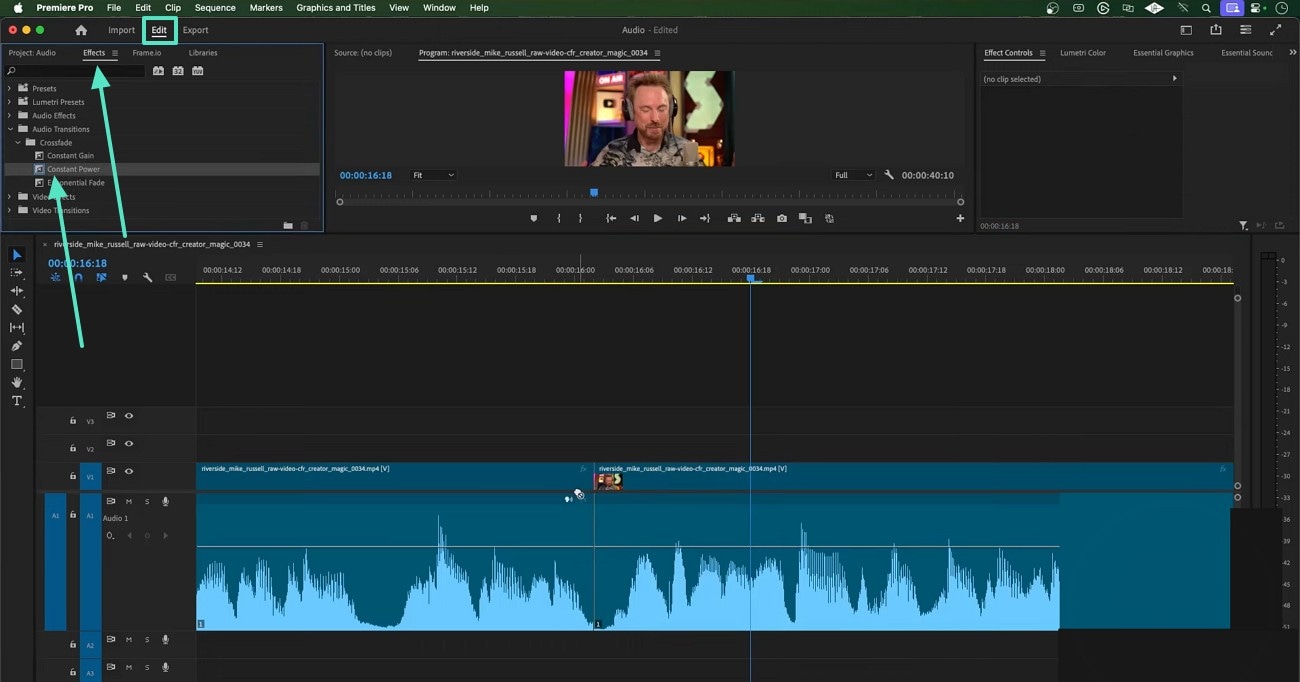
- Step 2. Now, head to the "Edit" tab and enter the "Effects" section to explore the transition effects. Check the "Constant Power" box to drag and drop it to the transition area in the timeline. This action will produce a smoother, more natural-sounding crossfade in the audio.
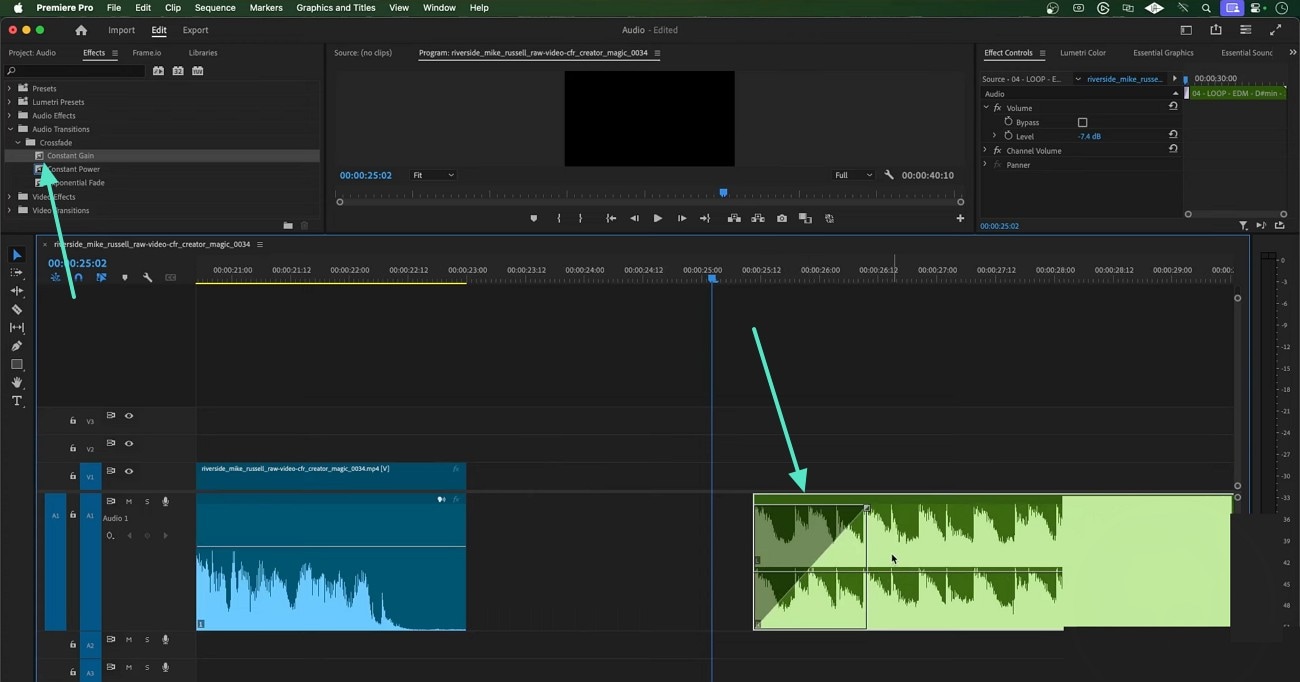
- Step 3. From the same panel, select the "Constant Gain" option and drag it at the start of a music track if your file has any. By doing this, the volume of the music ramps up in a straight, linear way from silence to full level.
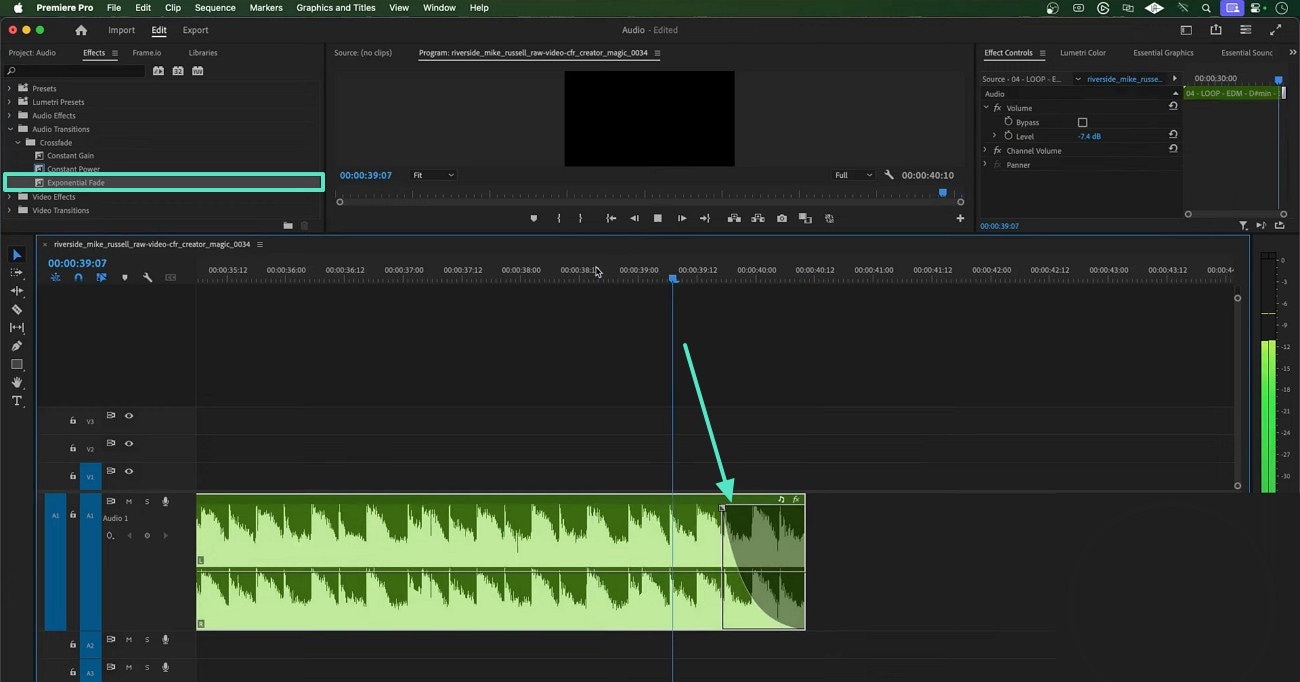
- Step 4. For a short, sharp fade out in the audio, check the "Exponential Fade" box from the top left panel. From the timeline, use the designated arrows to adjust the size of the effect.
Part 3. Looking into a Better Alternative to Premiere Pro for Audio Transitions
Having discussed the functionality of the audio transition Premiere Pro, we know that it takes an expert to work with this tool. If you are a beginner looking for an intuitive interface and more AI features than this software, look into Filmora. With an easy-to-use interface and simple navigation, this platform serves as a handy alternative. It has simple sliders that can be used to adjust the fade-in and fade-out effects.
The tool enables users to divide the timeline into several tracks and add a transition at every point. In addition to these transition effects, users can use the AI capabilities to polish their audio with a single click. You can do a lot with your sounds, whether it is removing background noise or enhancing the voices. Additionally, users can adjust the volume of their audio by using a simple dragging process.
 secure download

Using Wondershare Filmora to Apply Audio Transition
The application of transitions in this alternative to audio transition in Premiere Pro is simpler and more reliable. The following text is a detailed guide on using Wondershare Filmora for audio effects:
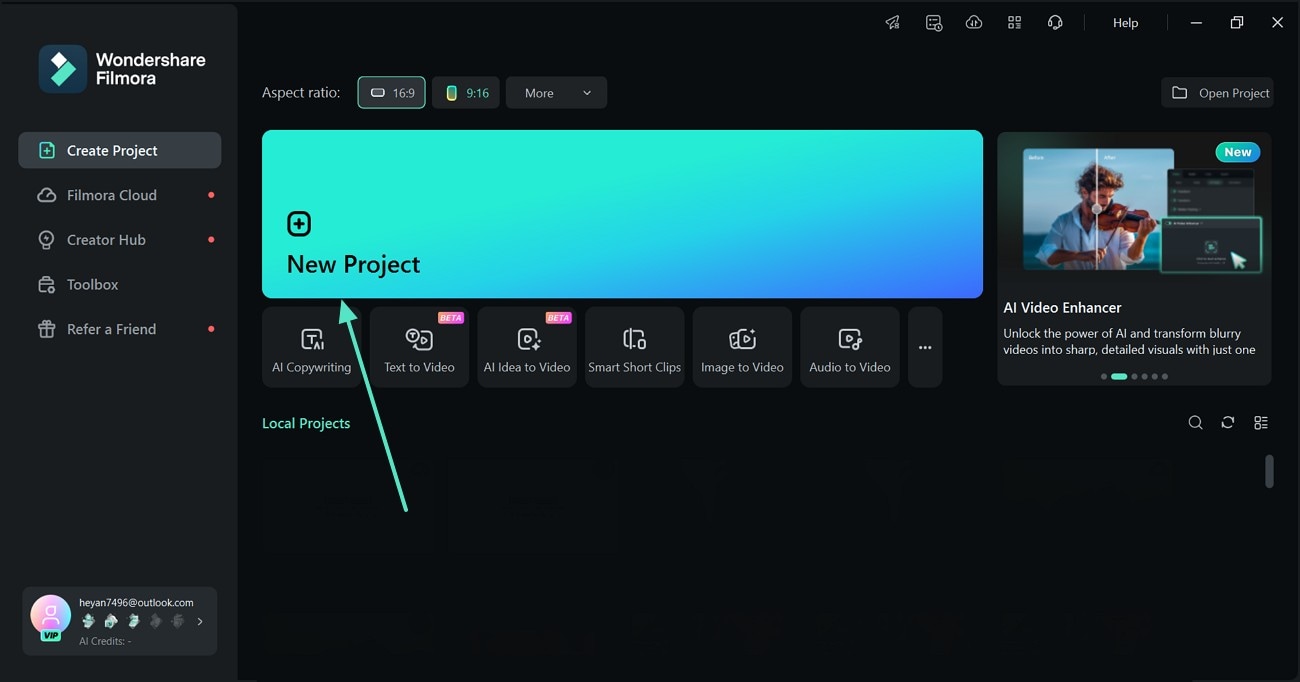
- Step 1. Begin with a New Project. To start the process, access the "New Project" button to import a video in the following interface.
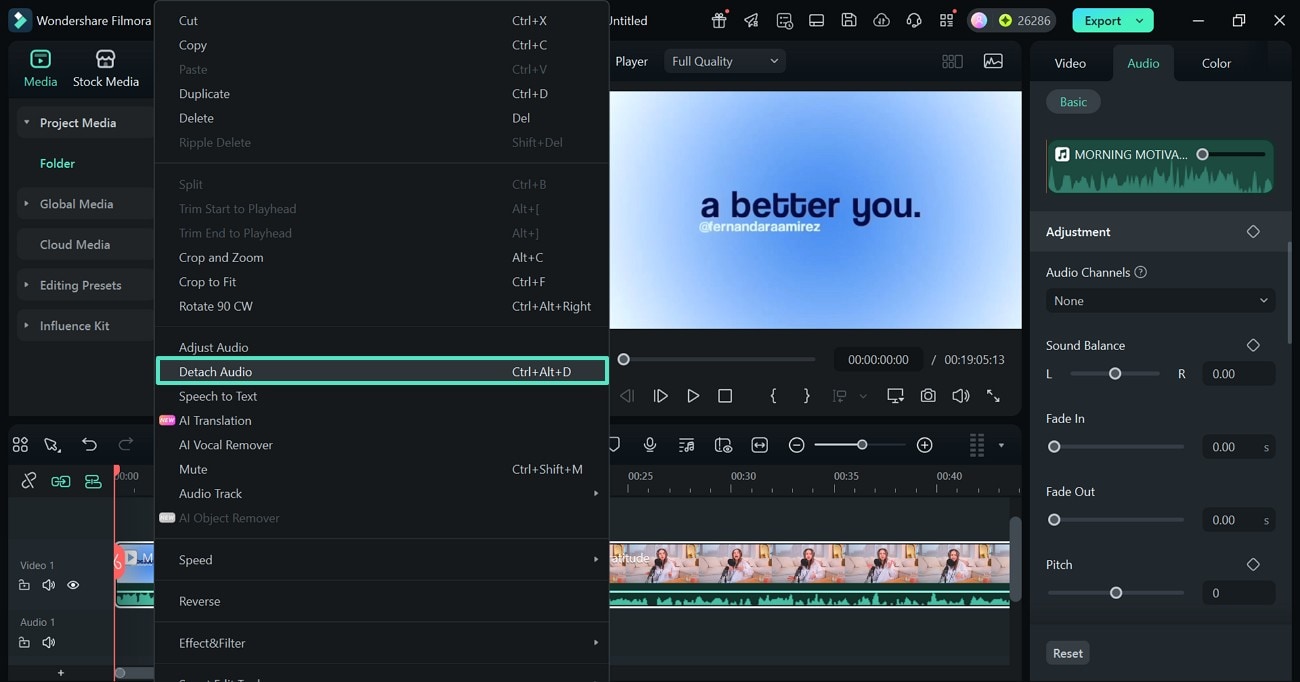
- Step 2. Split the Audio Track. Once the video has been dropped to the timeline, right-click on the timeline and select the video track. The next consideration is to remove the audio track of the video track using the pop-up menu by choosing the "Detach Audio" option. It will allow adjusting the sound without affecting the video.
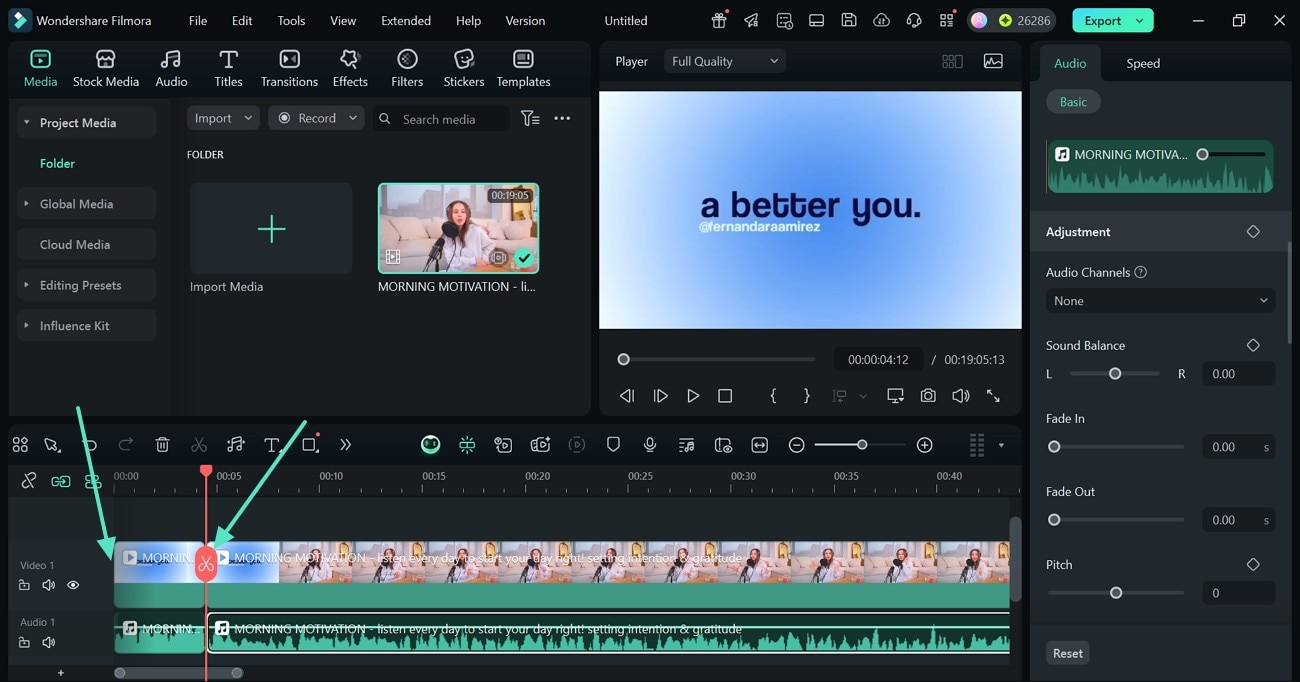
- Step 3. Split the Audio Track to Create an Audio Gap. Next, double-click at the start of the audio track to start a new clip and double-click again at the point where you want the clip to end.
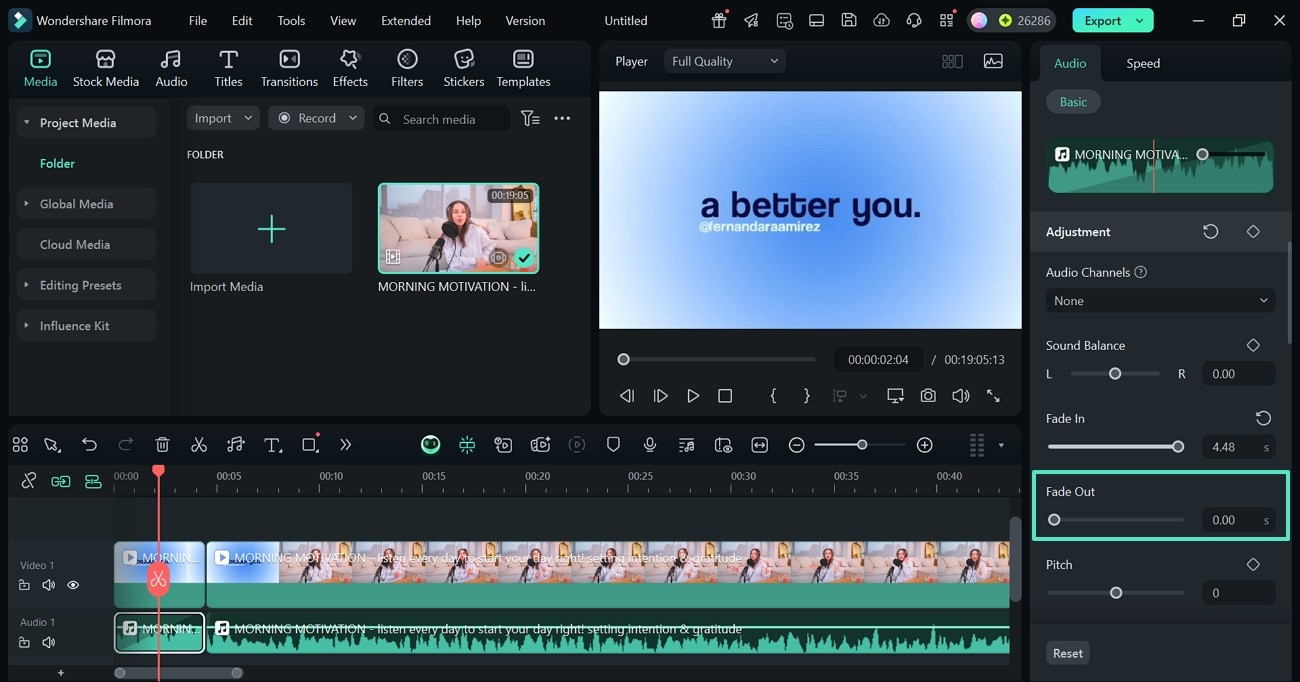
- Step 4. Apply a Fade-In Effect to the Start of the Track. Access the right panel while your newly created clip is selected. Navigate to the fade-in slider and adjust it as needed. You can also access the audio editing panel by right-clicking on the desired audio track and referring to the following pop-up menu.

- Step 5. Add a Fade-Out Transition Effect at the End of the Clip. Similarly, access the fade-out slider and drag it as needed at the end of the newly created clip. Optionally, you can add fade-in effects at the start of the next clip and fade out at the end of it.
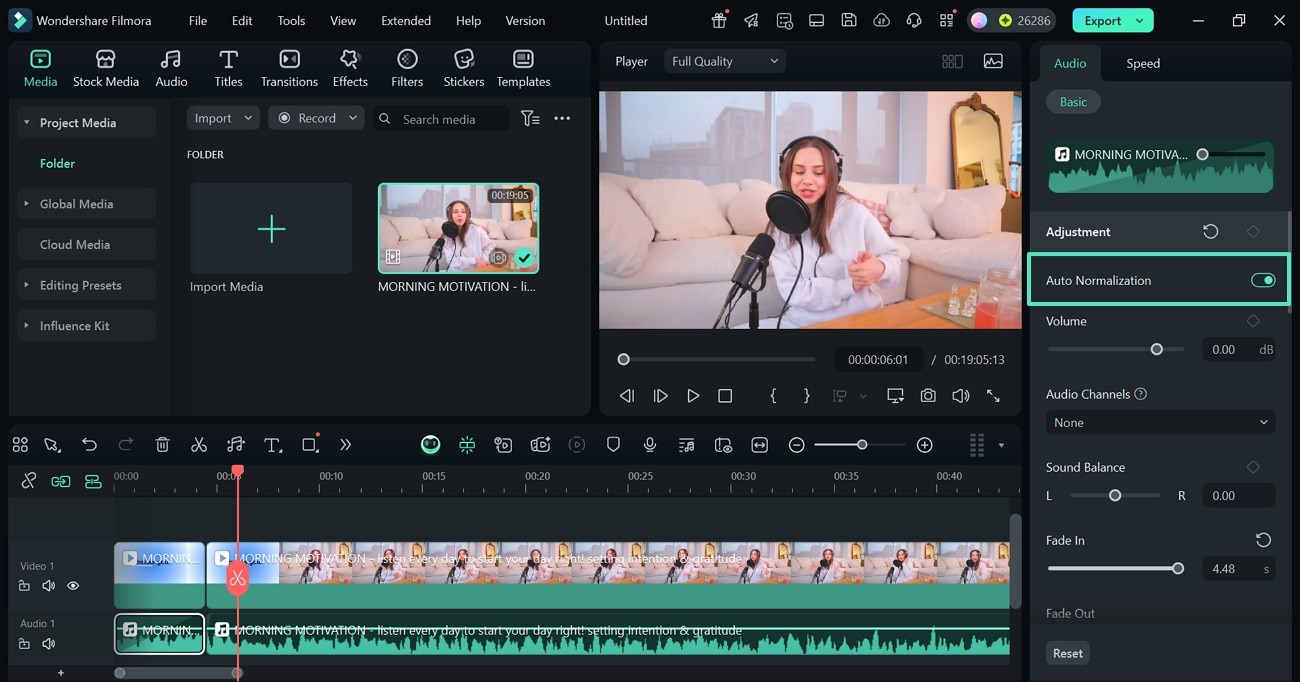
- Step 6. Turn on the Auto Normalization Option. From the top of the right panel, enable the "Auto Normalization" toggle to automatically adjust the overall volume of the audio to reach a set loudness target.
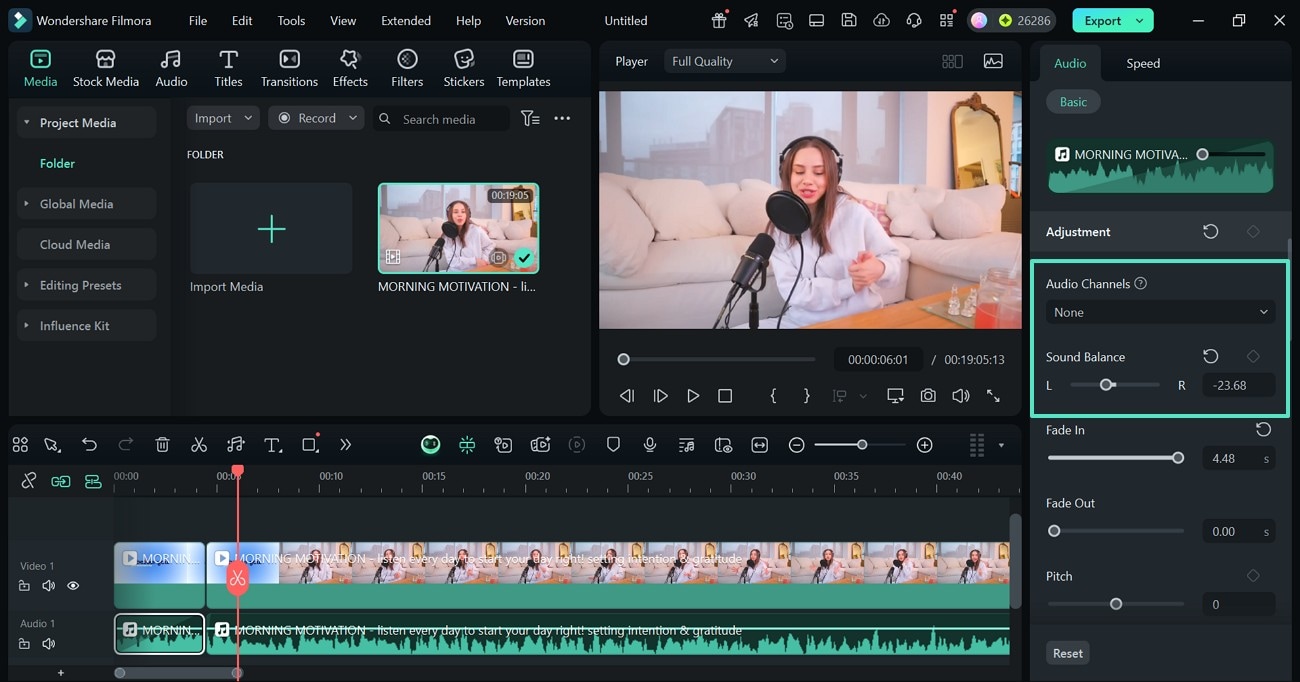
- Step 7. Pick the Audio Channel. Now, scroll down the panel to explore the "Audio Channels" drop-down menu to pick the desired channel. Or you can access the "Sound Balance" slider to customize the sound in whichever ear you want.
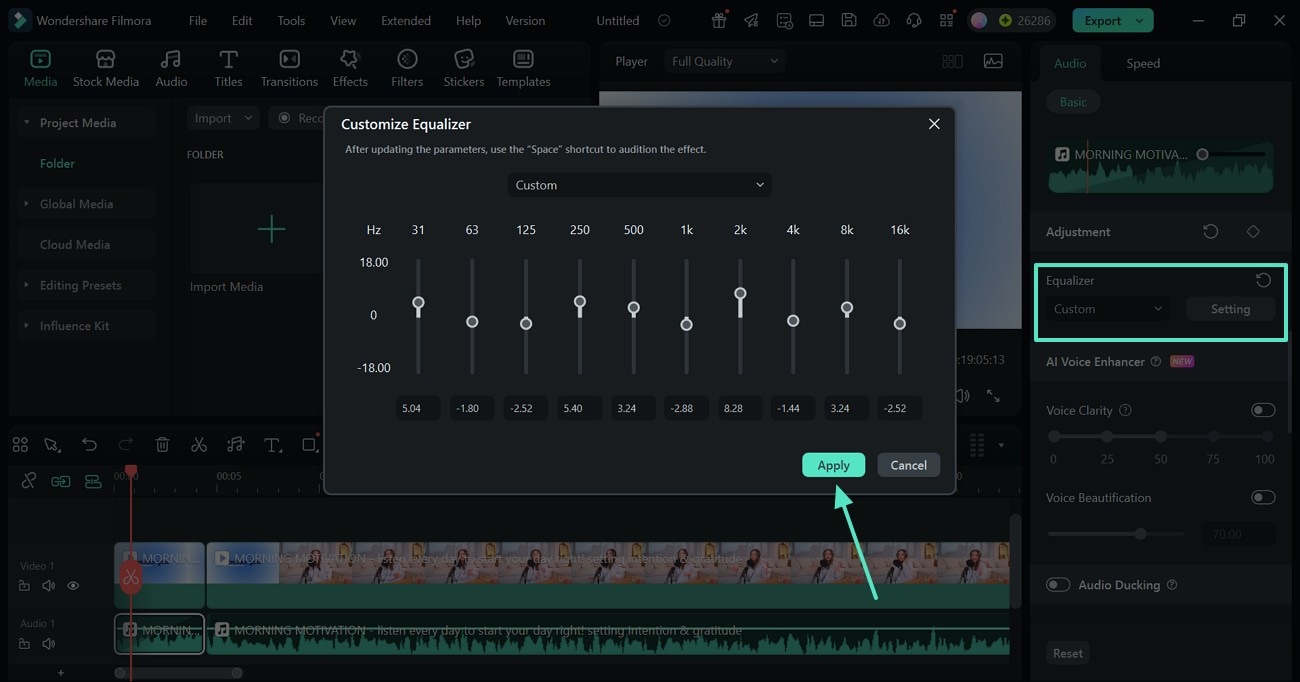
- Step 8. Apply the Customized Equalizer Settings. Next, access the "Equalizer" menu and select the "Setting" button to open a new window. Here, enter your desired options using the designated slidersto adjust and boost the balance of frequency ranges.
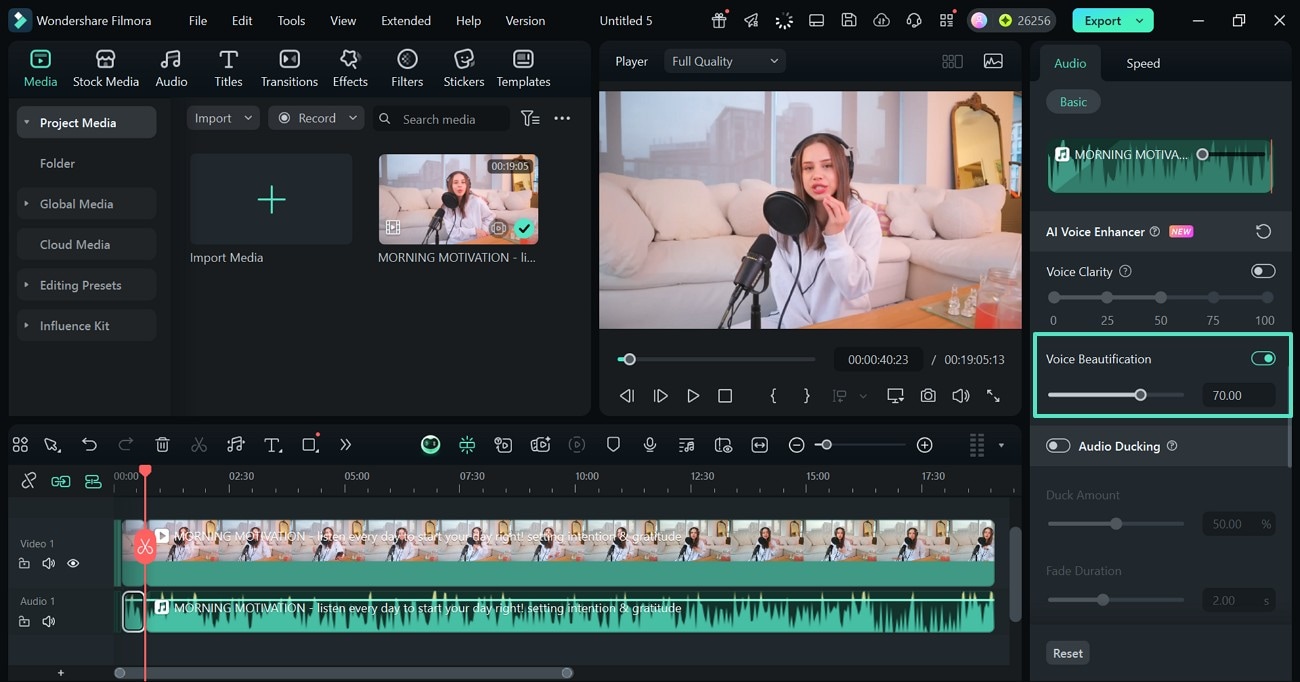
- Step 9. Add Beauty to the Speech in the Video. Using the "AI Voice Enhancer" menu, enable the "Voice Beautification" option and customise its intensity.
- Step 10. Create a Balance of Volume with Audio Ducking. Now, enable the "Audio Ducking" option and apply it where you want dialogue or voiceover to stand out over background music. The "Duck Amount" slider will allow you to select the amount of audio suppression.
Using the "Fade Duration" slider, you will be able to customise the duration for which you want to suppress an audio track. The fade position slider will let you control when the background audio begins to fade down.

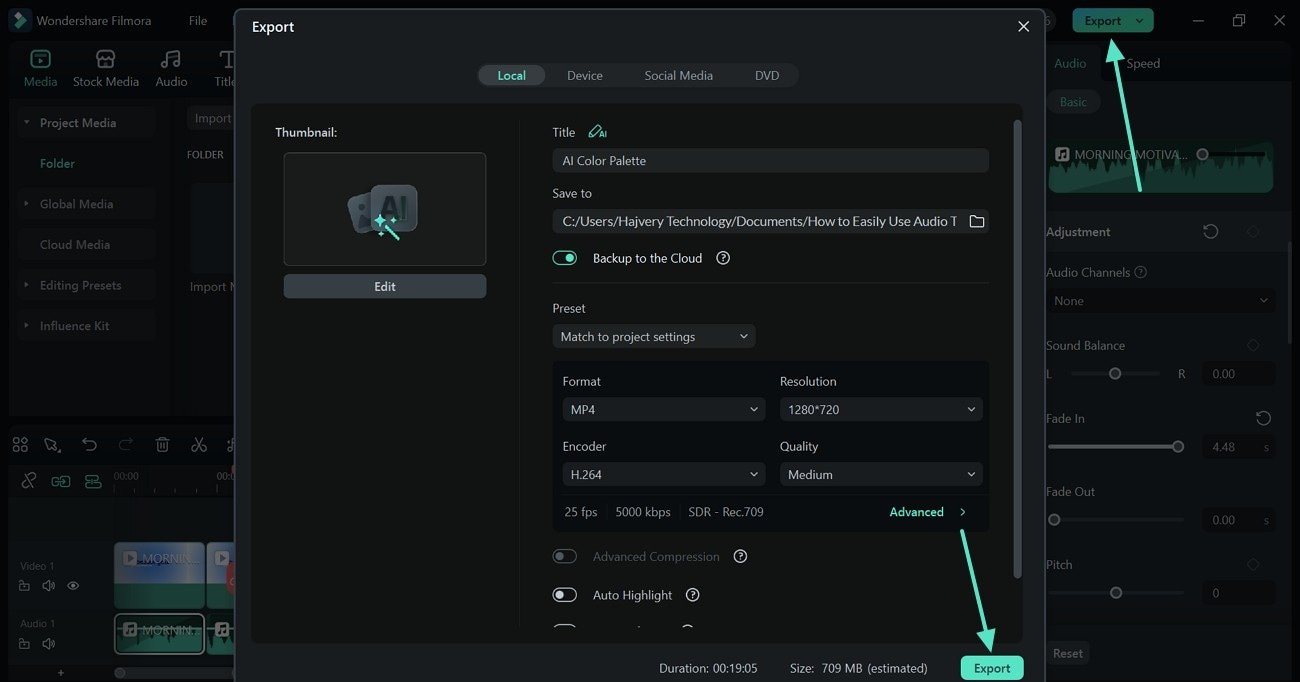
- Step 11. Save the Video After Applying the Transition Effect. To end the process, select the "Export" button at the top right and access the new window to save the video to your device.
secure download
Conclusion
In essence, audio transitions in Premiere Pro are considered professional-grade for extensive tweaking. Although handy, this tool might not be useful for a beginner audience or for people looking for more diverse AI audio editing features. Filmora is a better alternative to this tool as it offers extensive AI-powered features for audio editing while keeping the interface simple.
