
 100% Security Verified | No Subscription Required | No Malware


 ChatGPT
 Perplexity
 Gemini
 Claude
 Grok
Grok
Have you ever listened to a podcast that was so slow it was painful, or an audio clip that flew past, making it impossible to understand? You may be typing to learn a lecture or simply watching a video at your speed, but the speed of the audio may affect your experience. Unfortunately, not all media players or editing tools offer an easy way to adjust the audio speed without affecting the sound quality.
This article will guide you through the easiest ways to change audio speed by introducing the top desktop and mobile apps. These tools will help you perform quick and professional editing on the go, even without an internet connection.
In this article
Part 1. Common Use Cases for Changing Audio Speed
Before we look into the top tools you can count on to change speed of audio files, here are some of the real-time examples. These situations will help you better understand the need for such tools:
1. Learning and Transcriptions
Important information such as the pronunciation, the tone, or the pitch of speech may get misplaced in case of excessive rapidity in speech. Reducing the playback speed allows the learners to analyze a word or musical note by word, which facilitates the transcription of the written text in a more accurate way or explains the complex speech.
2. Audiobook Listening or Podcasts
Audio books or podcast may go too fast or too slow to comprehend when heard in a natural speed. To satisfy the users who require to have the audio at high speed in order to save time and to promote their efficiency, they can increase speed of audio. This will help them absorb more content in a shorter span of time without having to manually skip to the critical information.

3. Video and Media Editing
Editors would frequently come across the fact that the sound recording does not relate to the video playback, e.g. a soundtrack will finish earlier than the scene. When this happens, a mismatched or unpleasant viewer experience may occur with unadjusted audio. Manipulation of the audio speed is another editing feature that allows the editor to align sound and pictures to a pitch, either time-lapse, dramatic slow-motion or tighter control of the time.
4. Fixing Recording Mistakes
There are instances when sound is captured at irregular rhythm or at a slow change in rate that interferes with the clarity. These mishaps may render the performances to be out of beat or out of the context, particularly in musical or conversational recordings. By changing the audio speed, you get back the initial timing and flow that would prove hard to keep up with.
5. Technical Purposes
Various platforms and devices usually require different audio timing or frame rates. When audio is not synchronized, it may lead to sync problems or playback errors, in case of extraordinary production or a broadcast. Adjusting the speed of the audio allows one to get the perfect match with the platform standards and thus makes performance and compatibility across media outputs to be smooth.
Part 2. Top 3 Tools for Adjusting Audio Speed on Desktop
In this section, we will start discussing the top 3 tools you can consider to change audio speed while using your PC:
1. MP3 Cutter - Audio Speed Changer
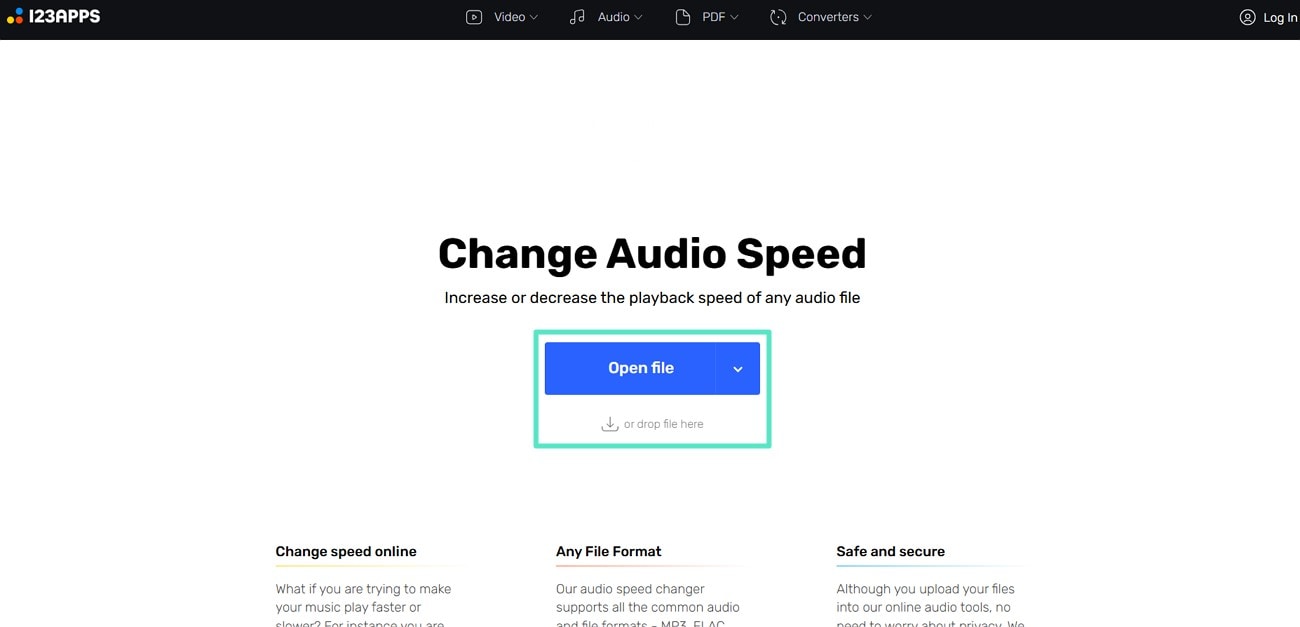
The intuitive interface allows precise selection and speed adjustments. It will enable users to upload files up to 10GB in size. By combining cutting and speed control under one interface, it becomes a quick fix for basic audio speed management. You can speed up audio for any audio file format, as it supports all formats. With the help of the steps below, you will get a better understanding of it:
Step 1. Once you access the MP3 Cutter, click on the "Open Fille" button to add the audio file to make adjustments to it.
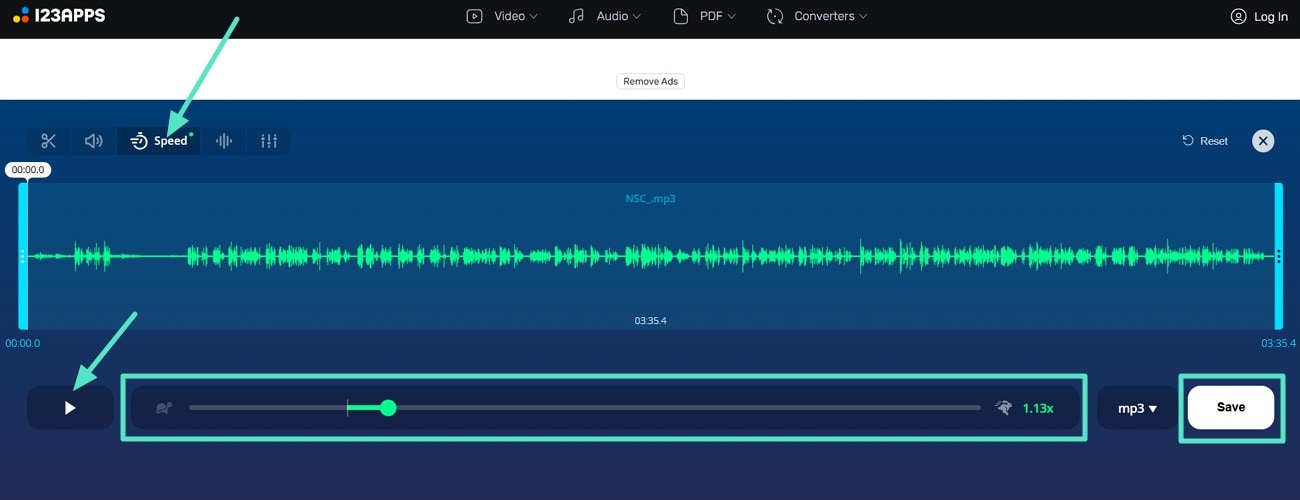
Step 2. At the "Speed" tab, drag the "Speed Slider" either to slow it down or increase it. Then, hit the "Play" button to preview the results and hit the "Save" button to download the audio file with the new audio speed.
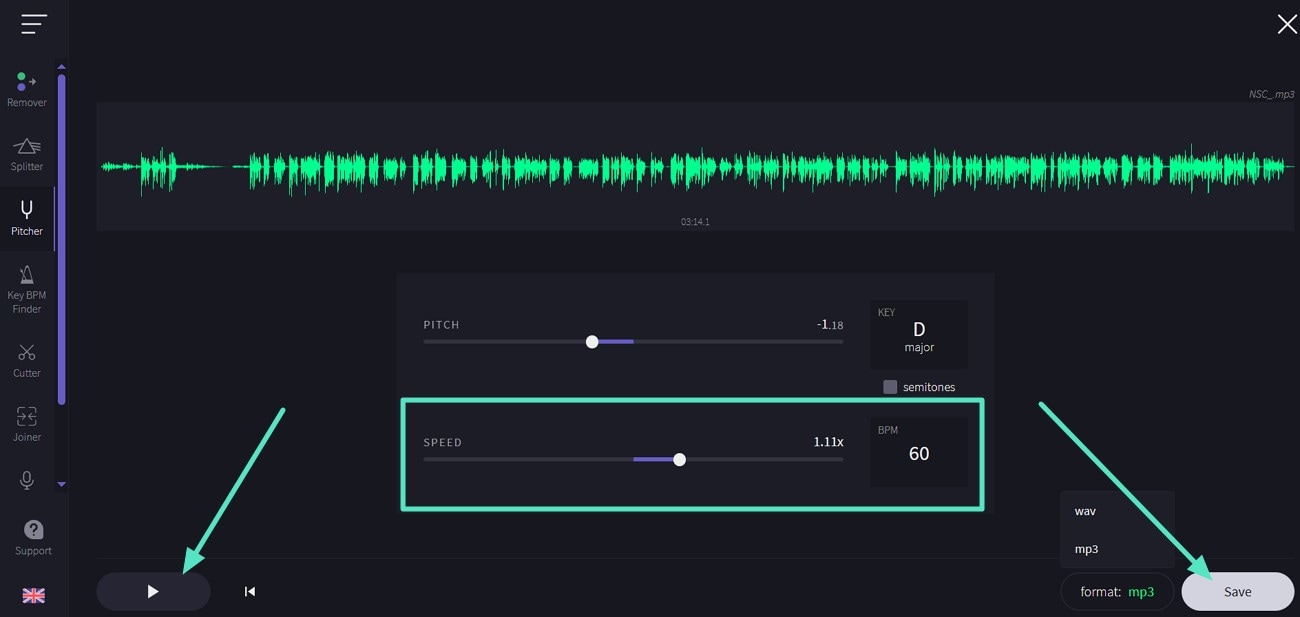
2. Vocal Remover - Audio Speed and Pitch Changer
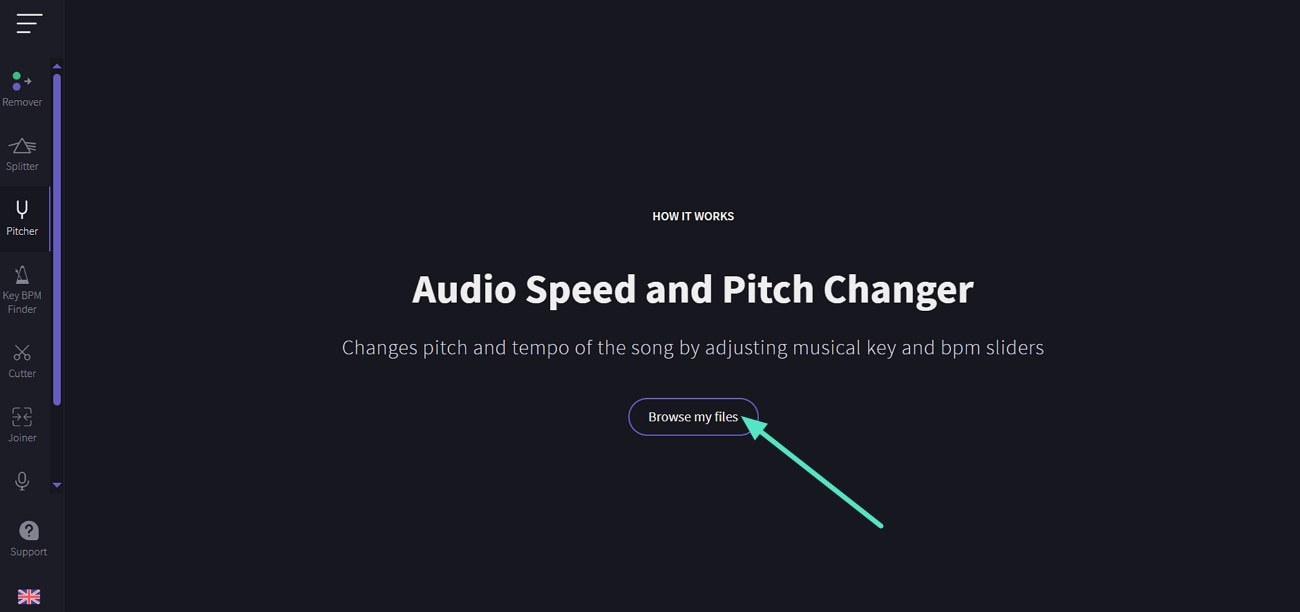
This web-based tool offers both vocal removal and audio speed/pitch adjustment, which makes it a versatile tool for various scenarios. While adjusting the speed, you can view the BPM value for more accurate and precise adjustment. After changing the audio speed slower, you can change the file format from MP3 to WAV while exporting the results. Dive into the steps below to reduce or increase the speed of your audiobooks:
Step 1. Launch the main interface of the tool and click on the "Browse My Files" button in the Pitcher section to add the files you want to work on.
Step 2. Upon uploading the file, adjust the "Speed" slider to reduce or increase the speed. Once you select the "Play" button and are satisfied with the results, hit "Save" to download the new audio.
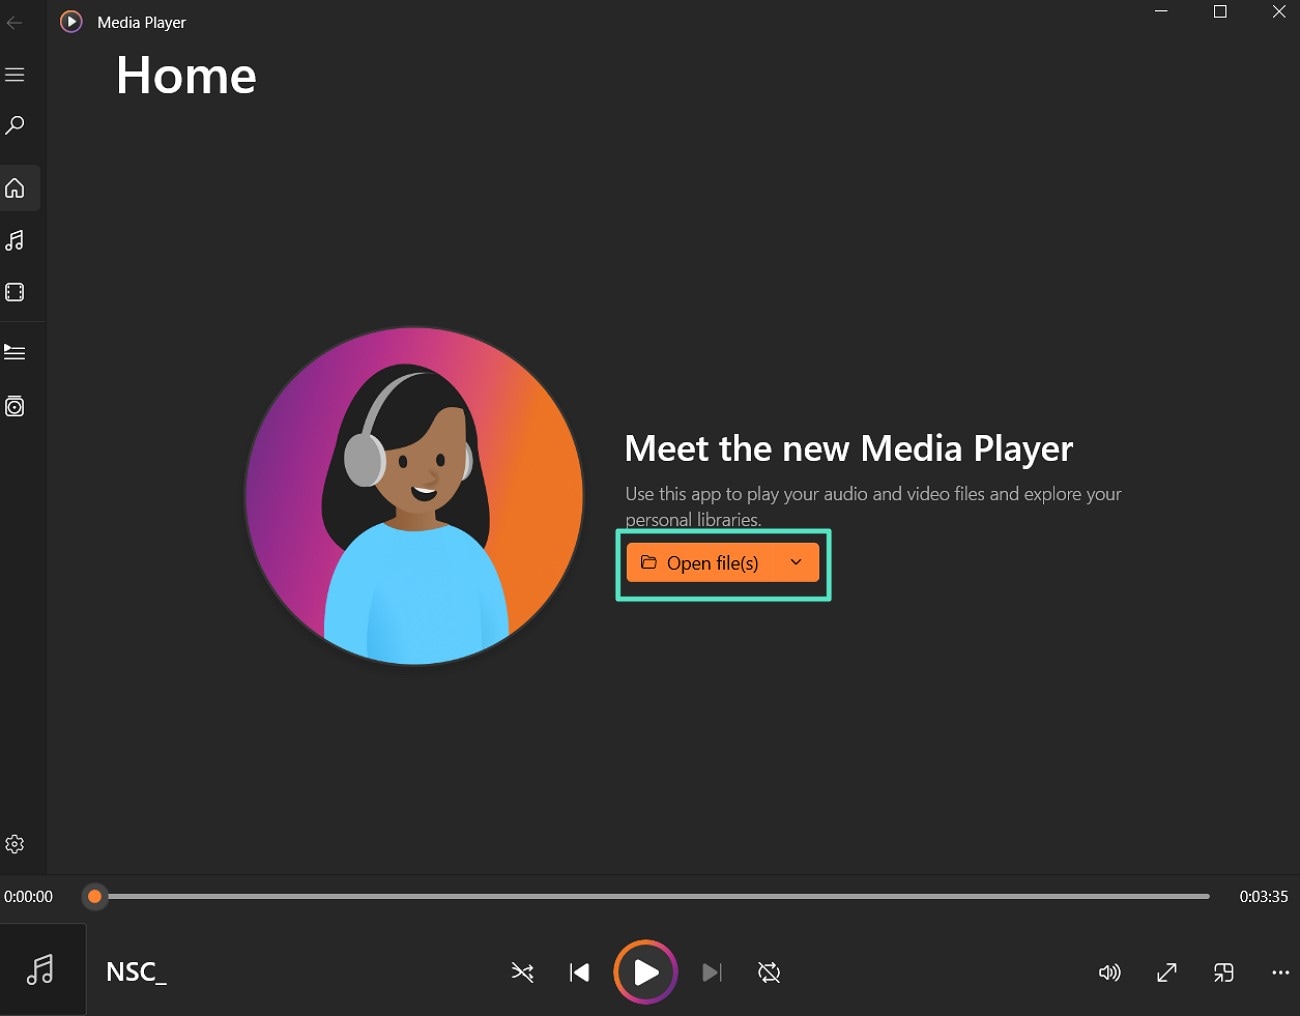
3. Windows Media Player
Windows Media Player is located on most windows computers, and it has fast speed playback settings option. It enables the users to continually change and hear the audio according to their desires. It ensures you do not have to go back and forth between online solutions to adjust the speed. While it lacks professional editing capabilities, its simplicity makes it great for quick reviews. Here's how to speed up audio files:
Step 1. Launch the software on your Windows, hit the "Open File(s)" button to add the audiobook or podcast you want to edit.
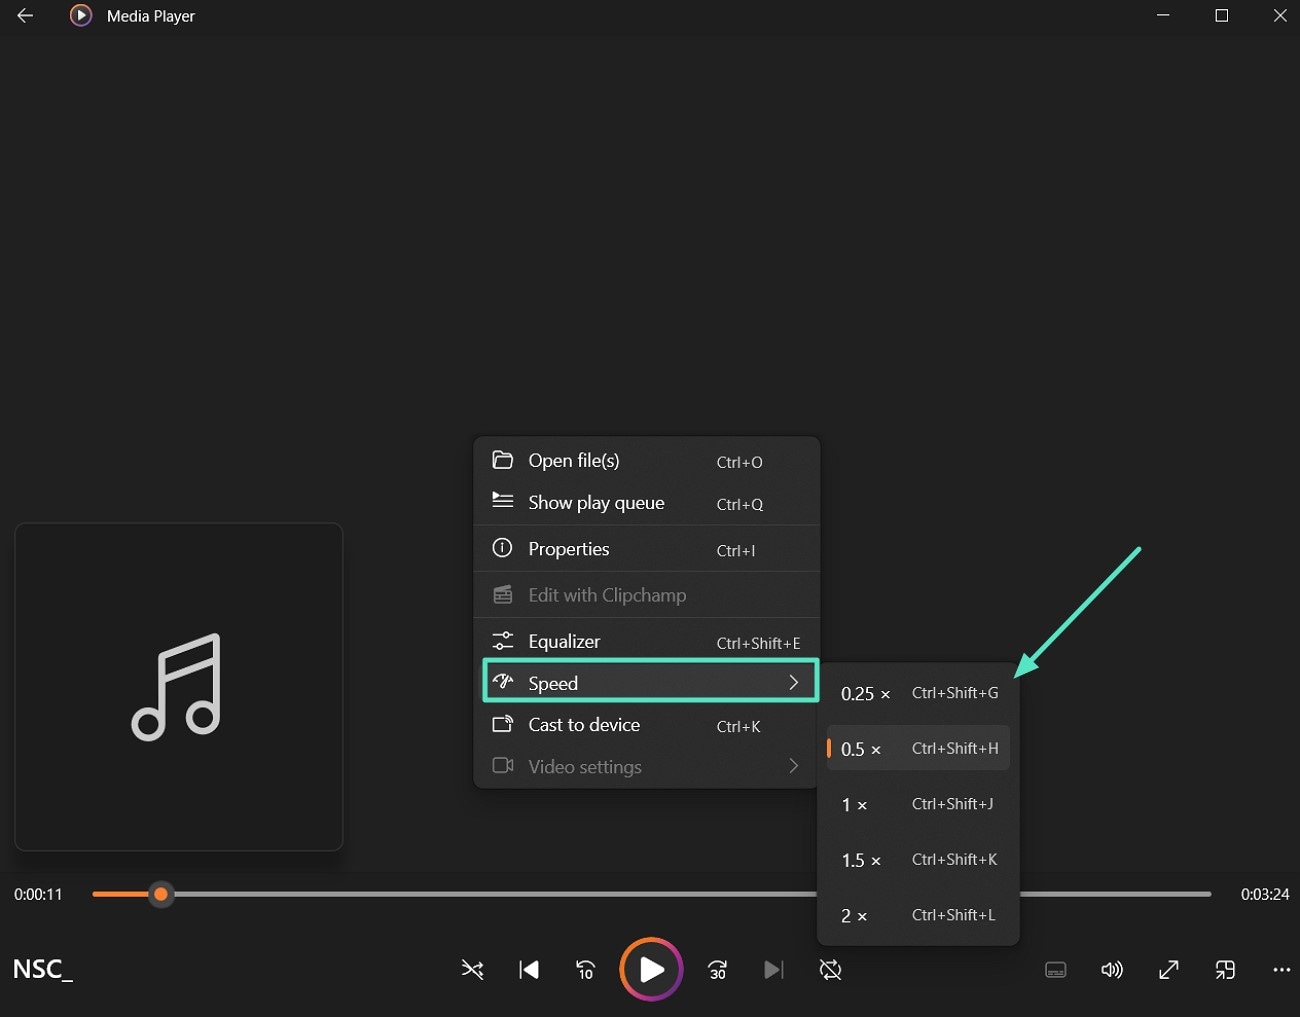
Step 2. Once the audio file starts playing, right-click on the screen and choose the "Speed" option from the drop-down menu. You can select the rate of speed you want the audio to play at from the extended menu.
Part 3. Best Desktop Tool to Cater Audio and Video Editing – Wondershare Filmora
Apart from these PC tools, you can utilize a software that only limits you to adjusting the speed of the audio. Introducing Wondershare Filmora, a desktop tool that allows users to work on multiple file formats all under one platform. You can utilize its integrated AI tools to manage and enhance the quality of your audio files. It gives users the freedom to control their files and manage them as per their requirements.
In addition, it also gives you an option to separate audio with a video so that you can modify the various files separately. The intuitiveness of design makes the tool easy to navigate around by less technical and editorial users. Its multitasking feature to work on more than one project within the same timeline ensures that you complete your work in less time.
Simple Guide to Tweak Audio Files Using Filmora
Filmora offers two methods for managing your audio. We'll walk you through each, so you can choose the one that suits you best:
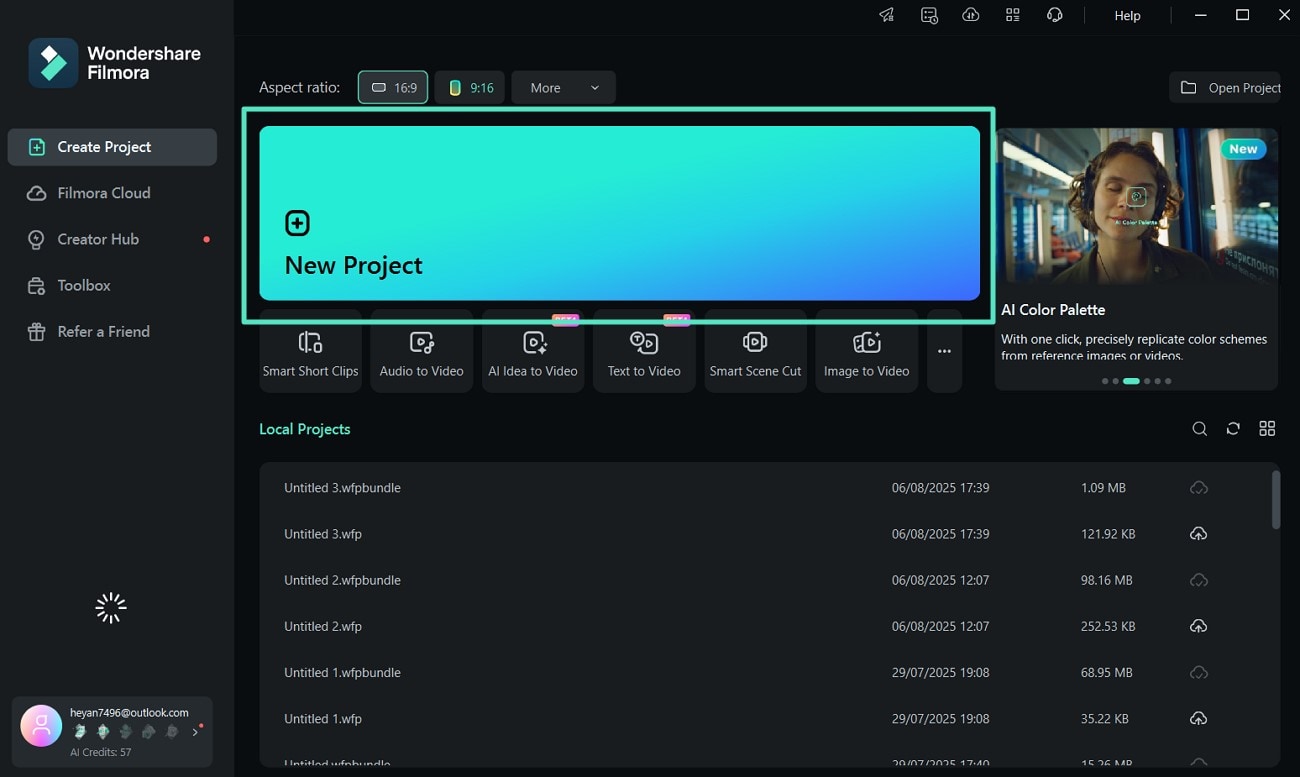
Method 1. Regular Adjustment Using Uniform Speed or Speed Ramping
- Step 1. Click New Project From the Filmora Startup Window. As you get access to the startup window of Filmora desktop tool, click on "New Project" to import the audio file you want to manage.
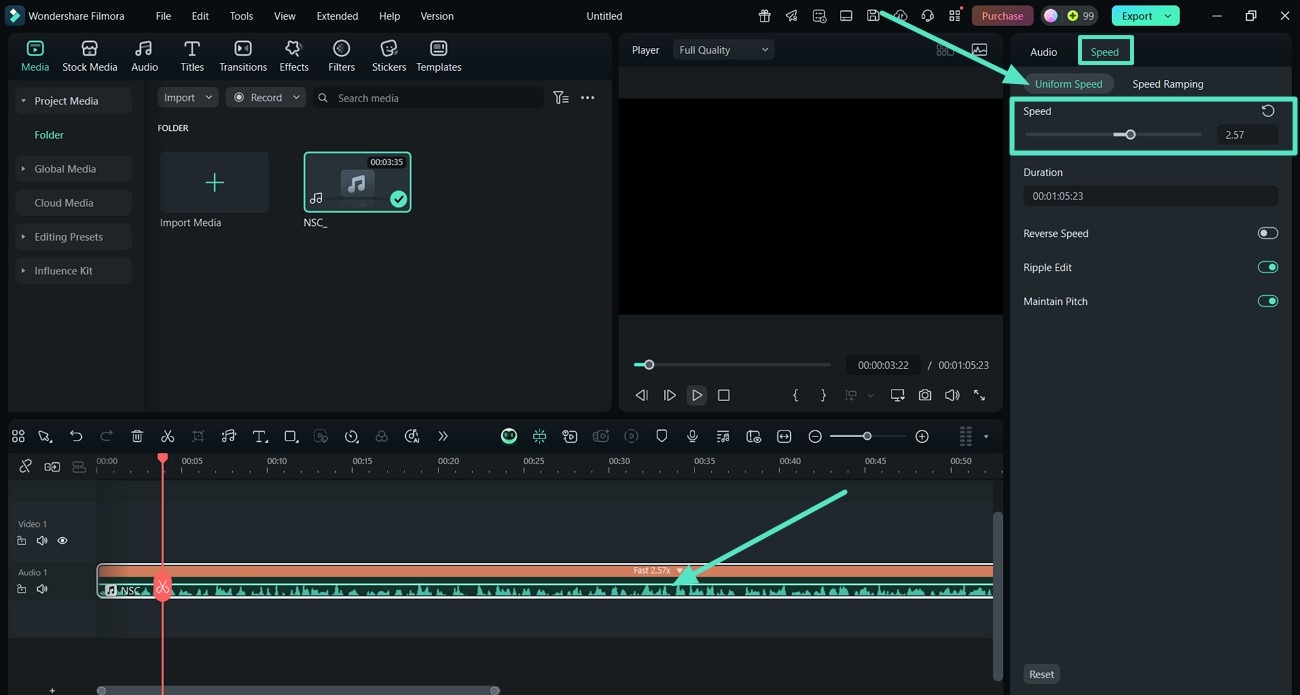
- Step 2. Adjust Speed Slider Under Uniform Speed. At the editing interface, click on the audio on the timeline, and access the side editing panel. Here, locate the "Speed" tab and choose "Uniform Speed" to adjust the "Speed" slider.
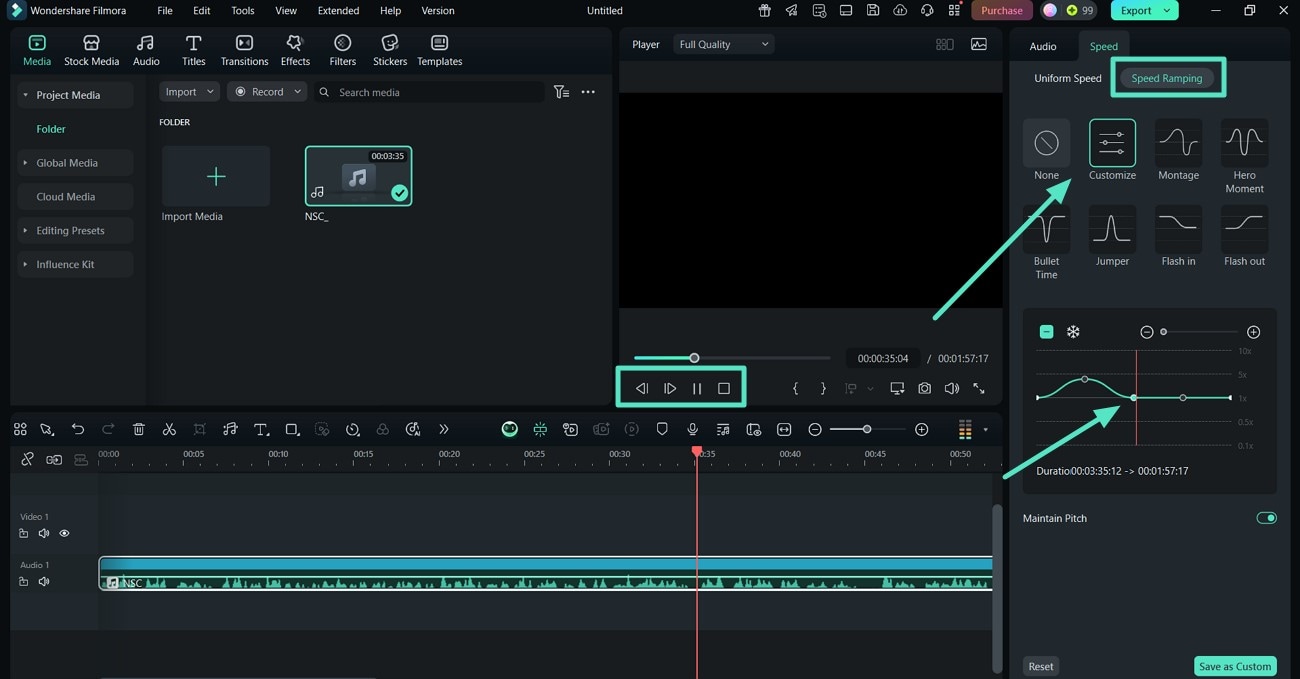
- Step 3. Opt for Speed Ramping For Audio File. If you are not satisfied with the Uniform speed results, shift to the "Speed Ramping" section. Now, from the various manual adjustments, pick the "Custom" option to set the dots on the "Speed Graph" present. Press the "Play" button to preview the results and hit the "Export" tab to save the changes.
 secure download

Method 2. Detach Audio and Adjust Speed
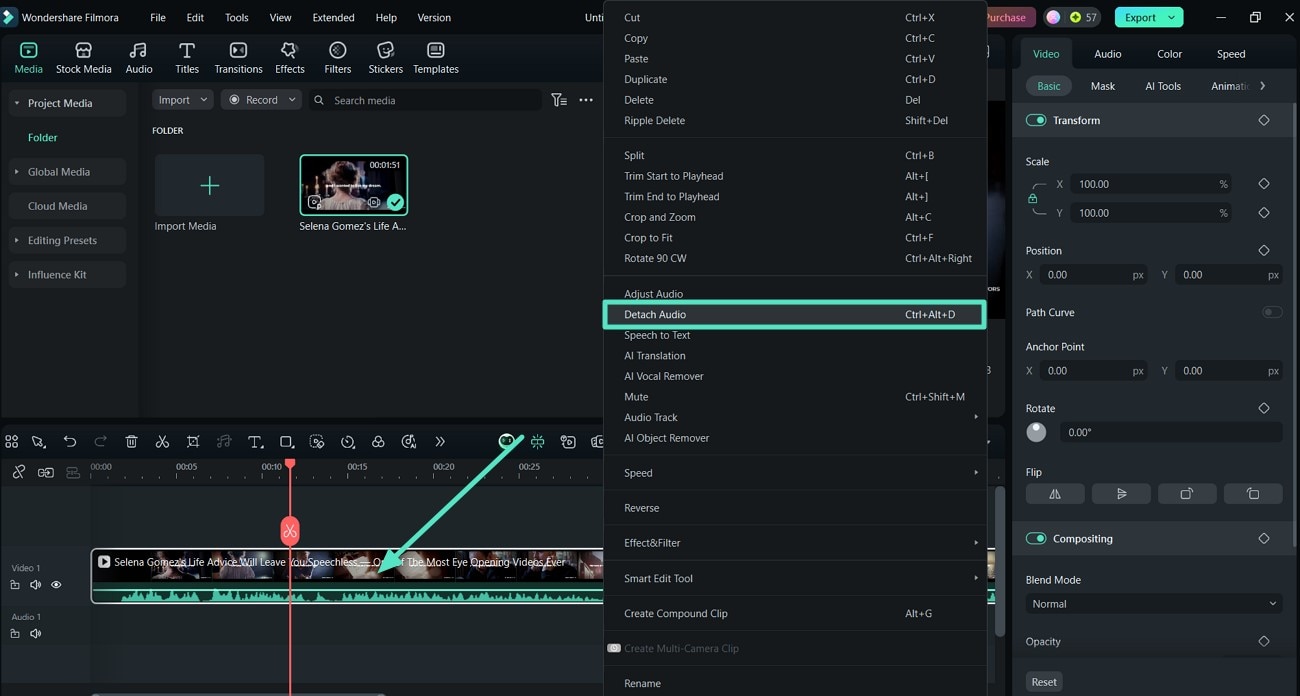
- Step 1. Import the Video to Filmora and Detach the Audio. Upon starting up the Filmora desktop tool, click on "New Project" to import a video file, whose audio you need to manage. Once you are on the editing interface, right-click on the video in the timeline and pick "Detach Audio" from the drop-down menu.
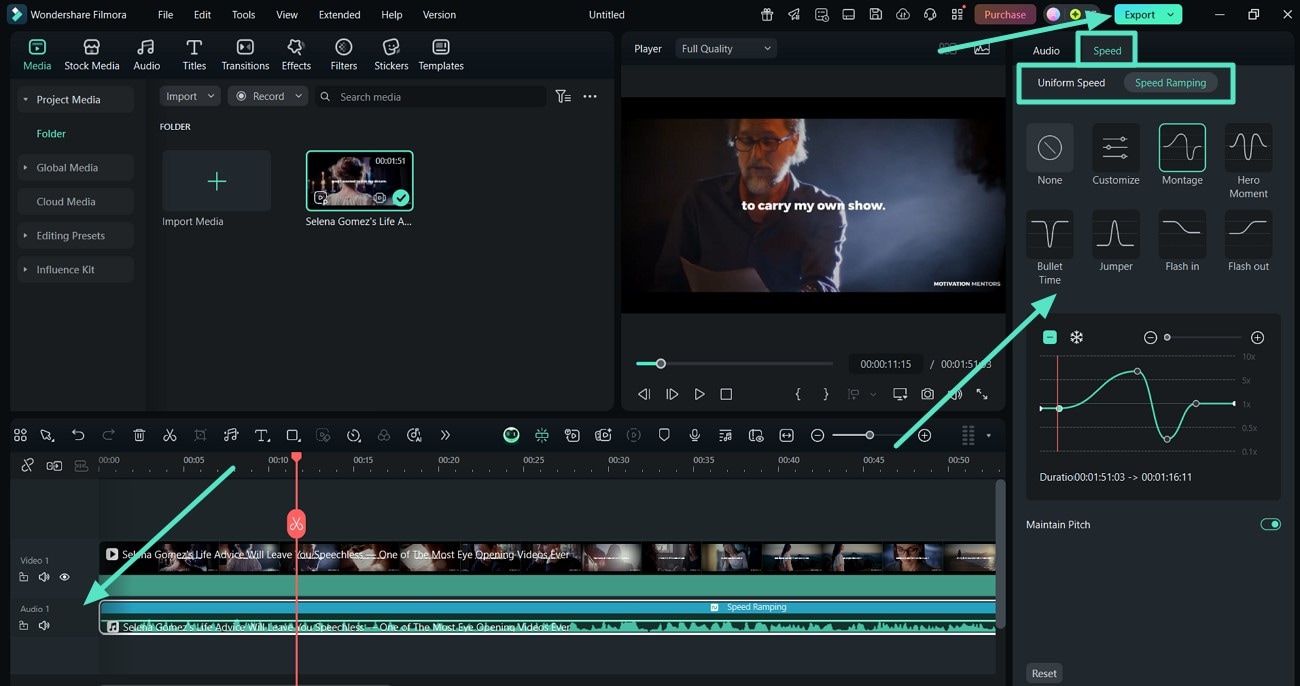
- Step 2. Repeat the Uniform Speed or Speed Ramping Process. Click on the "Audio" on the timeline and shift to the "Speed" tab to manage "Uniform Speed" or "Speed Ramping." Finally, preview the results and hit the "Export" tab.
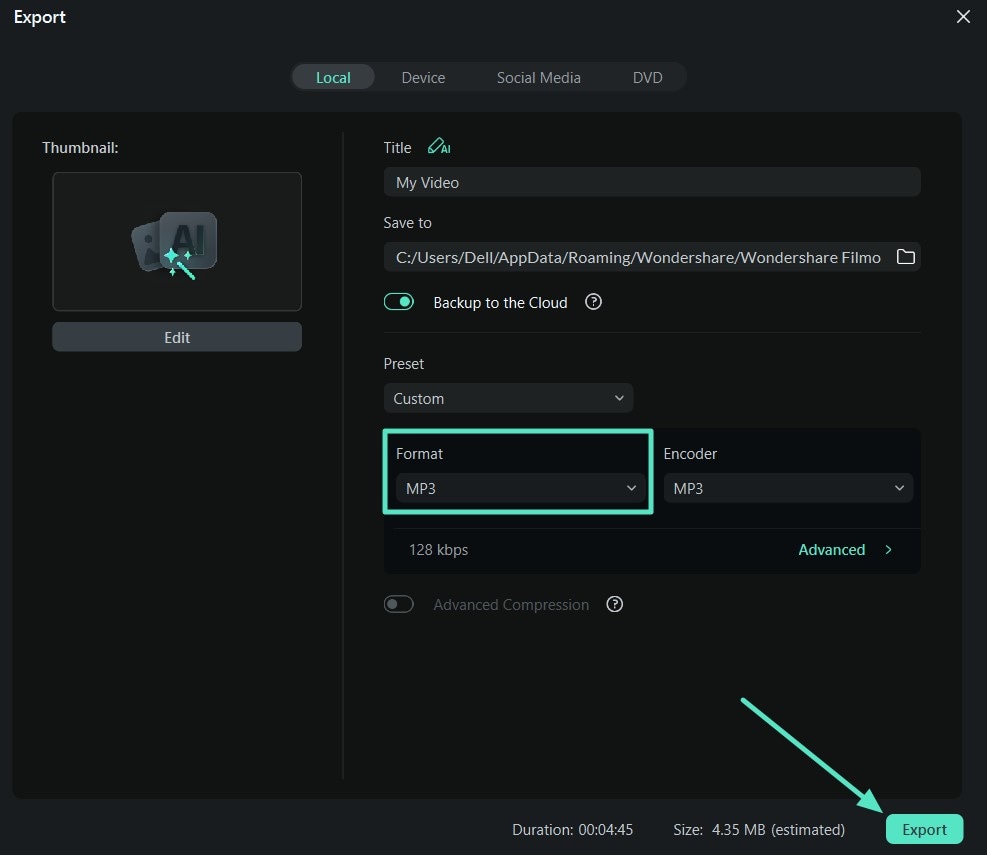
- Step 3. Export Audio Clip with Changed Audio. In the end, you can pick the "Format" as "MP3" to export the audio file that has its speed changed and tap on "Export" to download the results.
secure download
Part 4. 3 Best Mobile Apps for Changing Audio Speed
Music Speed Changer [iOS/Android]
It provides real-time adjustments, looping pieces, and a waveform visualization that is best suited for musicians, podcasters and students. Users can slow down complex passages or quick tracks for review with clear playback without distortion. Its mobile functionality makes it especially convenient for on-the-go practice or to increase the speed of audio. Below are the steps you need to follow to modify audio playback:
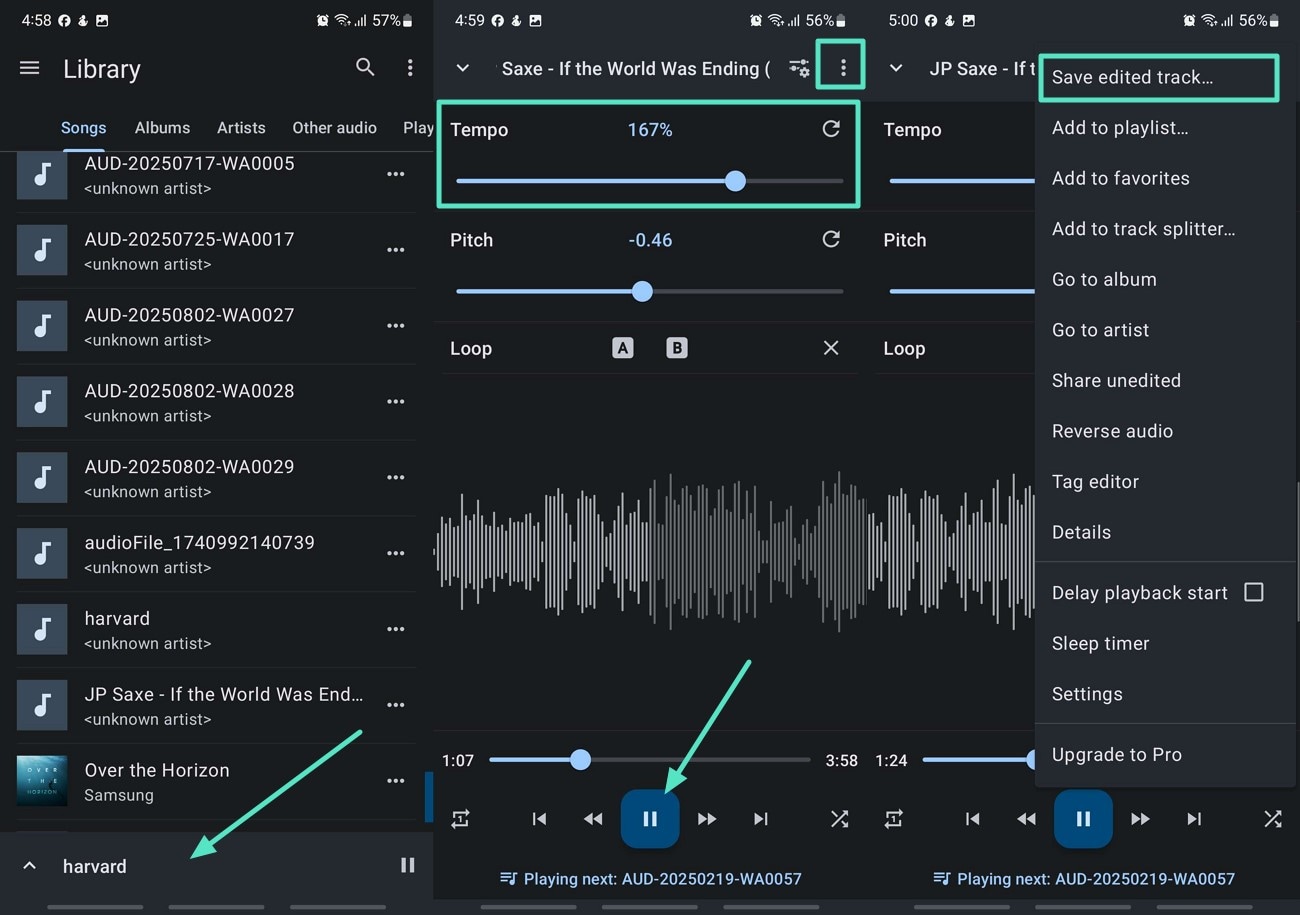
Instructions. As you launch the app, pick the audio file that you want to edit and tap on it. Adjust the "Tempo" slider to either speed up or slow it down. You can "Preview" the audio from the "Play" button and tap on the "Three Vertical Dots" to "Save Edited Track" to your mobile.
Audipo: Audio Speed Changer [iOS - Android]
Audipo is known for its advanced playback controls, especially suited for long recordings like lectures or audiobooks. It allows users to set bookmarks, loop specific segments, and adjust playback speed with fine control. Its user-friendly design and mobile compatibility mean users can engage with long audio content without losing their place while changing the speed of the audio. Customize your audio files' speed using the steps discussed below:
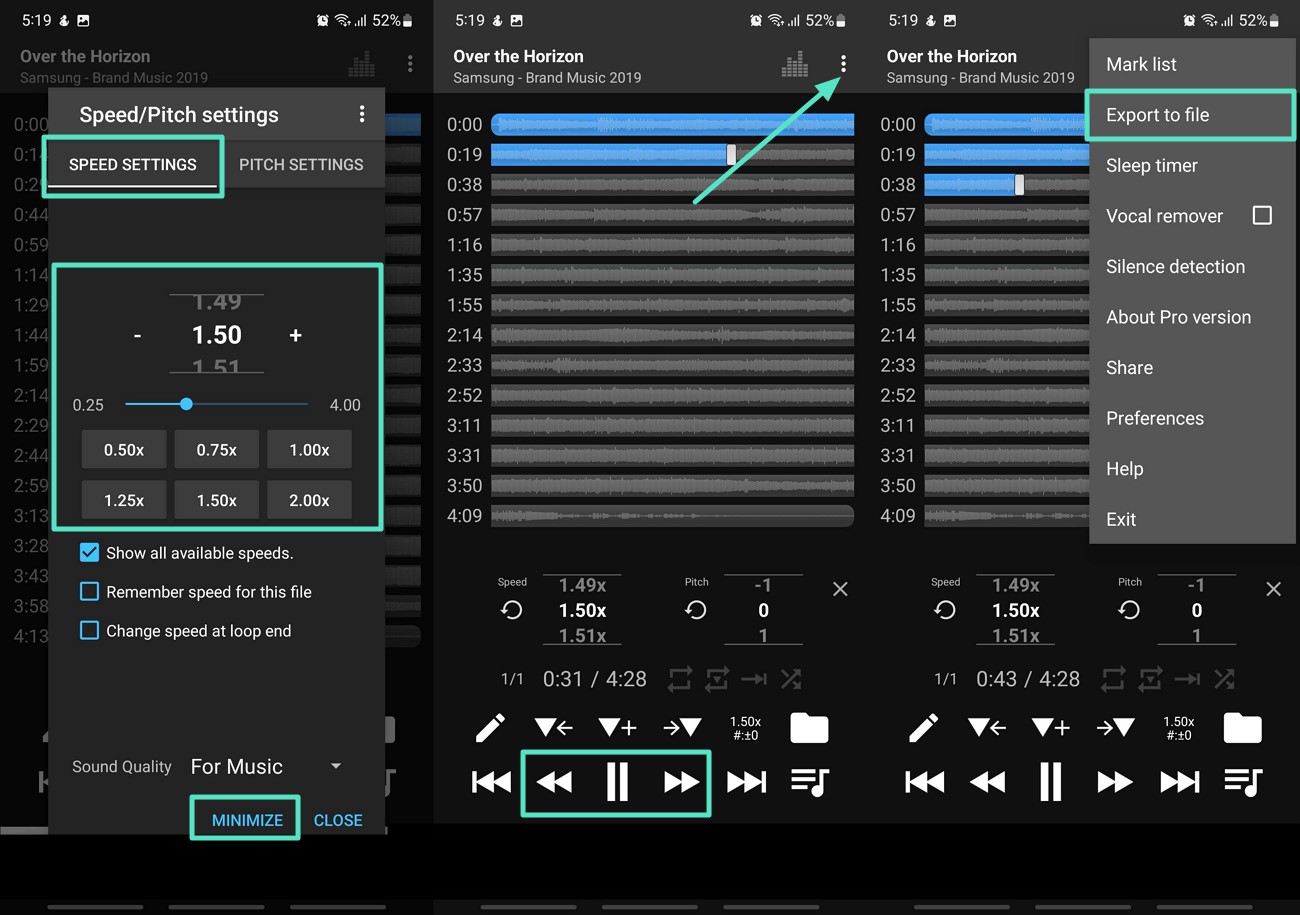
Step 1. Start by choosing the "Upload Option" and then tap on it to select the "Speed Control" icon, and proceed to the next step.

Step 2. From the Speed Settings, adjust to either speed it up or slow it down through the presets. Once done, press the "Play" button to review the change in speed. From the top right corner "Three Dots" pick the "Export To File" option to save the changes.
Up Tempo: Pitch, Speed Changer [iOS - Android]
This tool allows users to adjust the Pitch and Tempo of audio files while previewing them to ensure they are adjusting the speed as per their requirements. You can also trim the audio file from the timeline to avoid wasting time on unnecessary parts of the audio. Moreover, Up Tempo ensures you preserve the format to avoid losing track of previous data. Take control of your audiobook audio speed and files using the steps below:
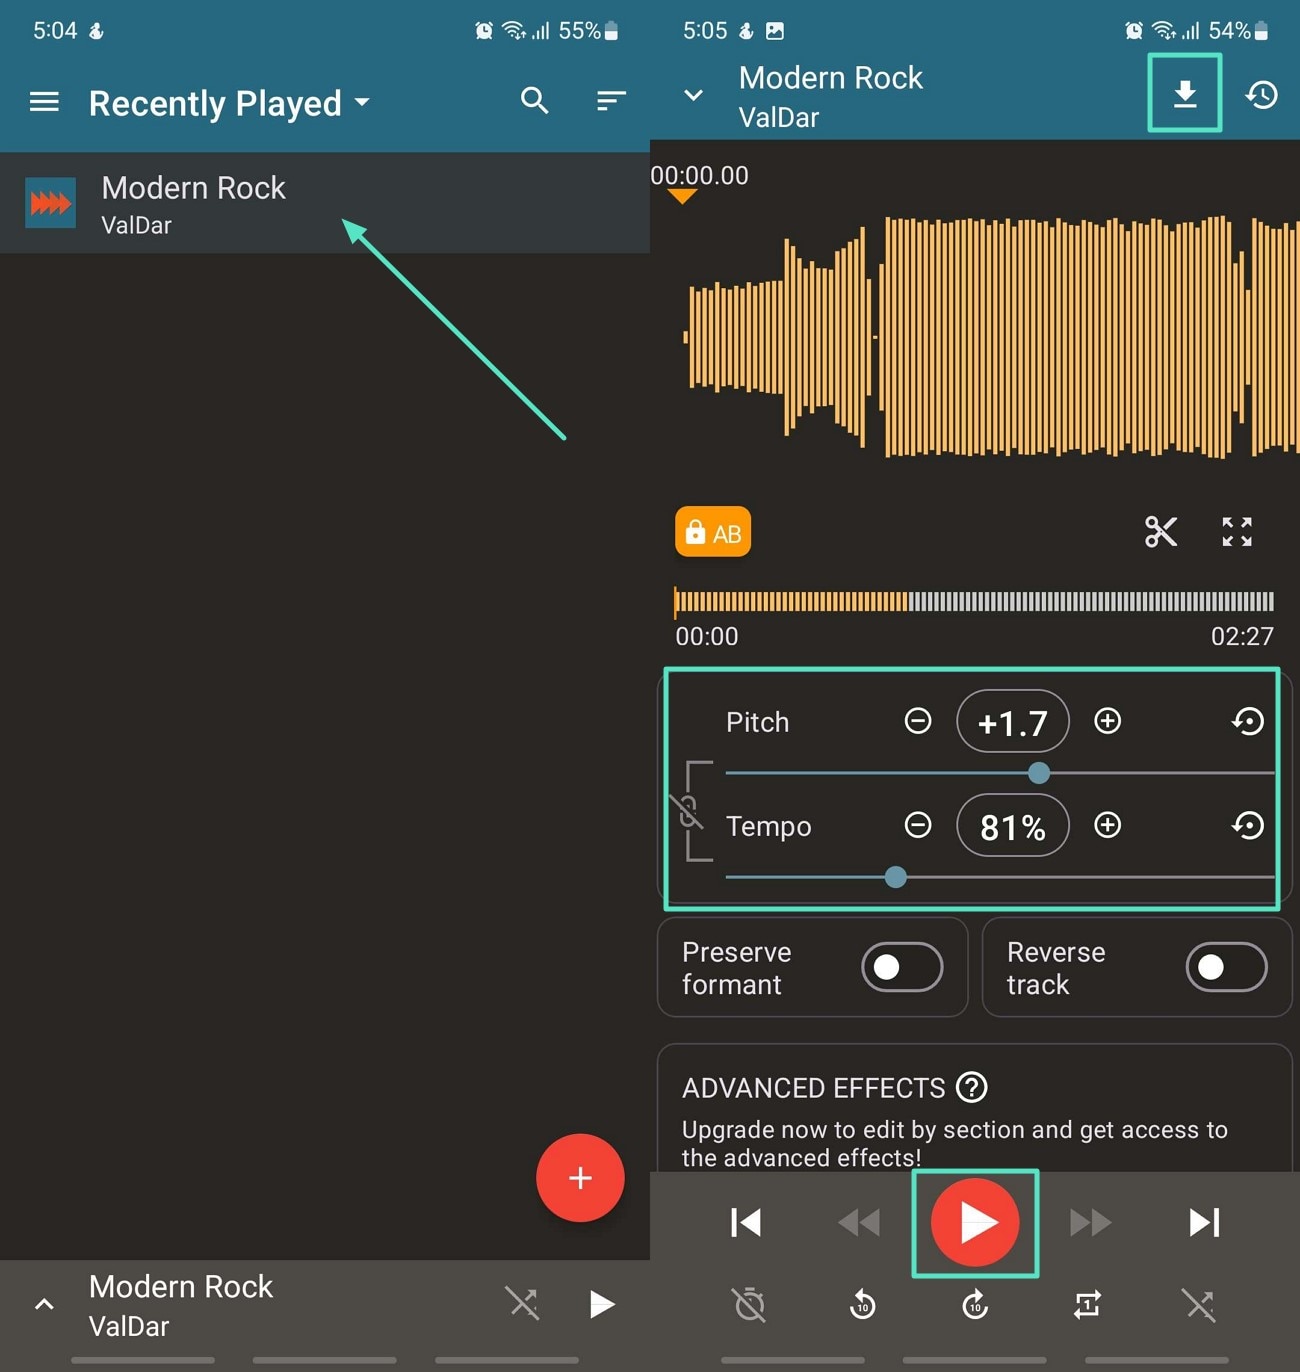
Instructions. Once the app is launched, tap on the audio file to start the editing process. Navigate to the "Pitch" and "Tempo" sliders to speed up or slow down the audio. Press "Play" to preview the changes and the "Download" icon to save the changes.
Part 5. Top Pick for Editing Audio and Video on Mobile – Filmora App
For a more competitive experience in audio and video editing, Filmora App [iOS/Android] features some of the best functions that allows users to take control of their creations. It allows users to upload video files and detach the audio segment from them within seconds. You have the opportunity to work with audio and video files simultaneously, with no need to alternate tools.
In addition, it also equips you with the capacity to create new audio content to your videos in the AI Audio feature. You can use the Denoise feature in case you have to eliminate unnecessary sound in the audio files.
Stepwise Guide to Changing Audio Speed Using Filmora App
Check out these simple steps to modify the audio speed of your videos to your preference with the help of the Filmora App:
- Step 1. Download Filmora App, Import Video, and Extract Audio. You can begin the process by installing the app on your respective device, and tap on "New Project" to import the video. Then, tap on the video in the timeline to scroll and pick the "Extract Audio" button.
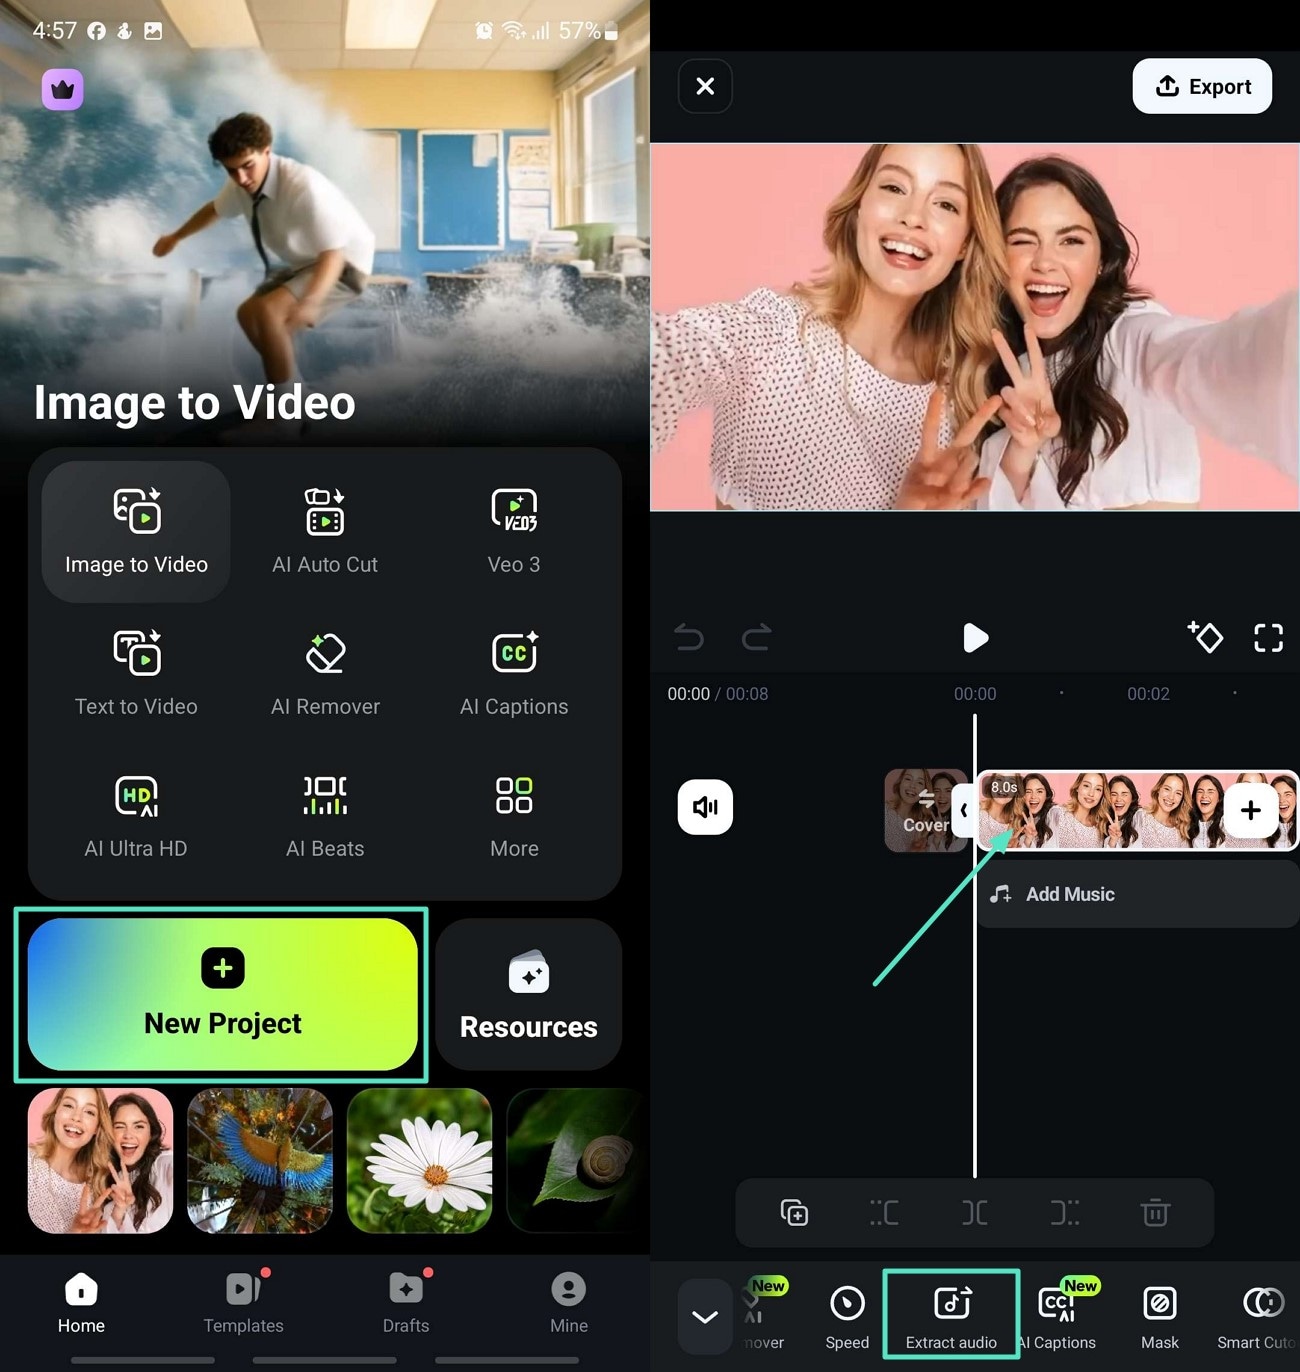
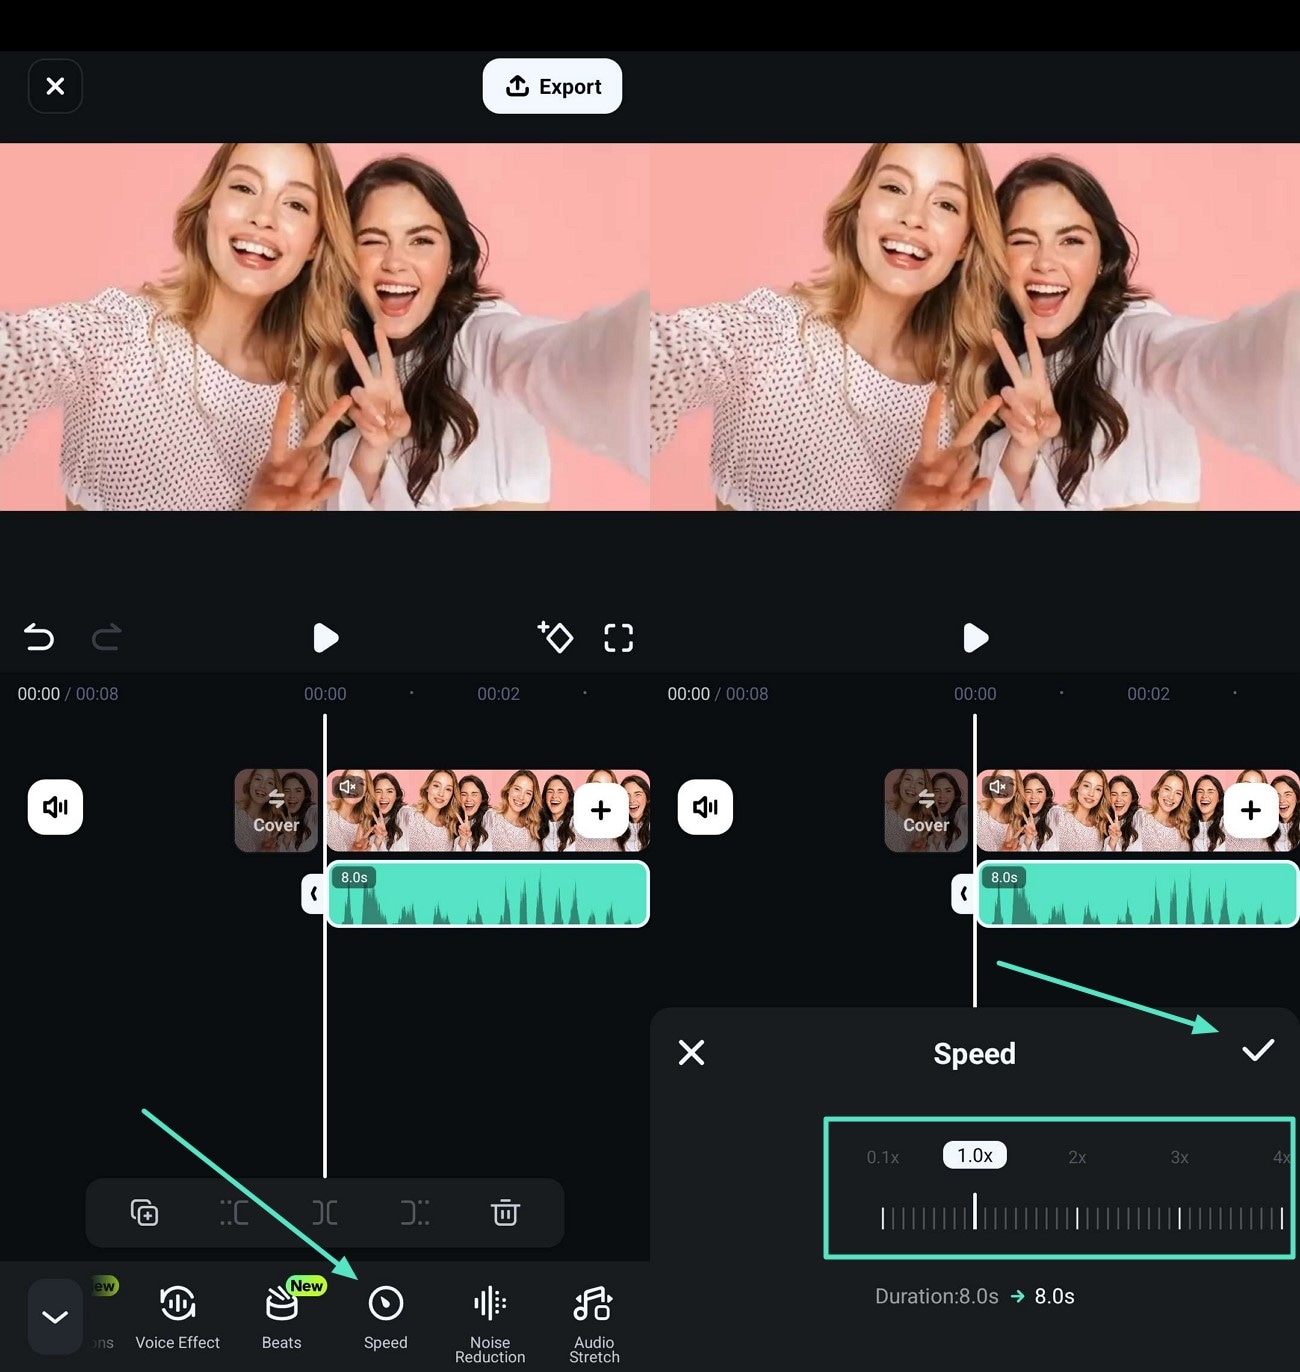
- Step 2. Tap on Audio and Adjust Speed Slider. Now, tap on the extracted audio to bring up the bottom toolbar, where you will locate the "Speed" option. Next, slide your finger across the slider to adjust the speed to your liking, and then hit the "Tick" icon to save the changes.
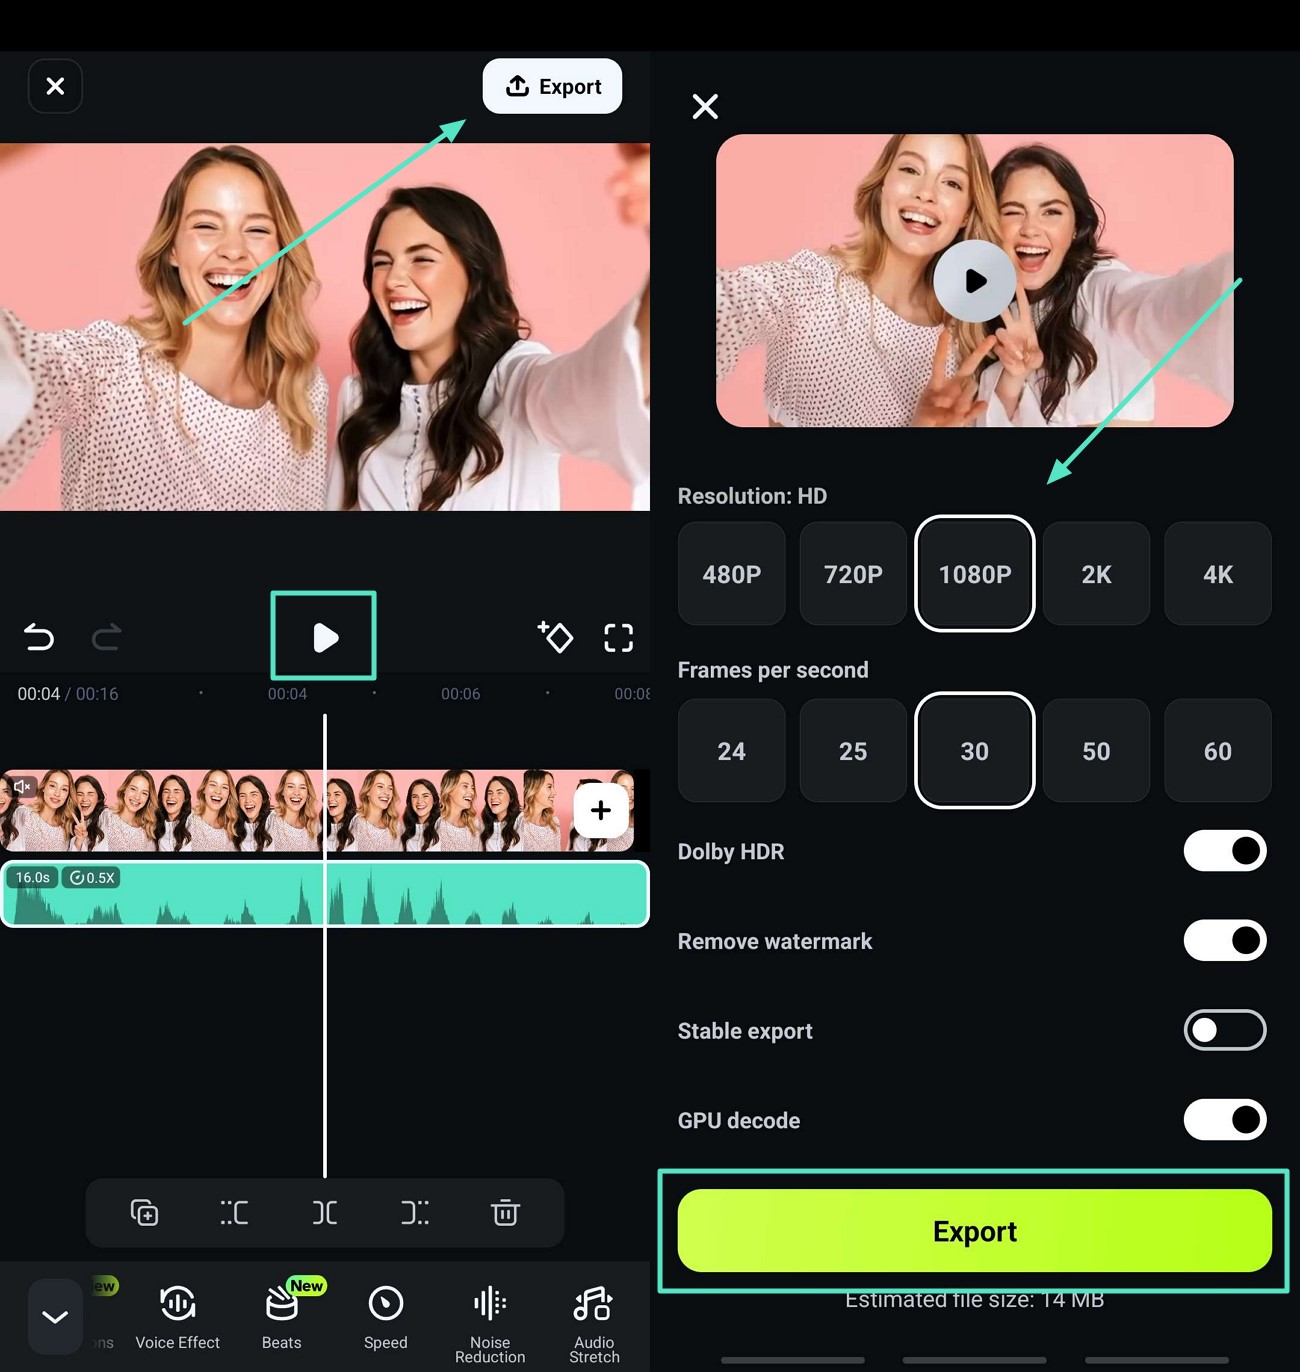
- Step 3. Preview and Export Changed Audio File. Once the audio speed is adjusted, hit the "Play" button to preview the results and move to the "Export" tab. Finally, adjust the "Resolution" and hit the "Export" button to save your results.
secure download
Conclusion
To conclude this article, we have looked into the various desktop tools, online and mobile solutions you can use in order to change audio speed. Nonetheless, when discovering the tools, we saw that none of them provides advanced editing features. That is why we suggest using Wondershare Filmora, be it a mobile or desktop application; Filmora is there to suit every need.
