- After Effects Tutorial
- Add smooth fade-in and fade-out effects to your audio.
- Create professional sound transitions in seconds.
- Edit effortlessly with Filmora’s intuitive audio tools.

 100% Security Verified | No Subscription Required | No Malware
How to Fade In and Fade Out Audio in Adobe After Effects

Nov 05, 2025• Proven solutions
 TL;DR:
Fading audio in Adobe After Effects requires manually plotting Audio Levels keyframes between -100dB for silence and 0dB for full volume, while Wondershare Filmora offers a faster alternative utilizing dedicated fade sliders.
● To execute an After Effects fade-in, place an initial -100dB keyframe at the start point and a 0dB keyframe where full volume should hit, reversing this exact sequence for a fade-out.
● After Effects is best suited for complex motion graphics requiring manual timeline control, whereas Filmora is ideal for beginners needing rapid one-click fade applications across desktop and iOS or Android devices.
● When using fade effects to mix two different tracks mid-scene, avoid lowering the audio level entirely to -100dB to prevent unintended dead silence from disrupting the video flow.
Ask AI for a summary
 ChatGPT
 Perplexity
 Gemini
 Claude
 Grok
Grok
Creating a smooth audio fade in After Effects is essential for professional video soundtracks, but it isn't always straightforward. While After Effects is a powerhouse for visuals, making audio fade in or out requires manually setting keyframes.
This guide will walk you through the exact steps to fade out audio in After Effects and create a perfect fade in. We will also show you a much easier method using a powerful After Effects alternative, perfect for creators who want quick, high-quality results.
Read More to Get: Best Audio Mixer Software to Trim Your Sound Easily >>
In this Article
Video Tutorial: How to Fade In and Out Audio in After Effects
How to Fade In Audio in After Effects (Step-by-Step)
Creating a smooth fade-in for your audio track in After Effects involves setting two keyframes to control the audio level. Here's how to do it precisely.
Step 1: Reveal Audio Properties
First, place your audio clip on the timeline. Click the small arrow next to your audio layer's name to expand it. Then, click the arrow next to "Audio" to see the "Audio Levels" and "Waveform" properties. Viewing the waveform helps you visually confirm where the audio begins.

Step 2: Set the Starting Keyframe (Silence)
Move the playhead to the very beginning of your audio clip (or wherever you want the fade to start). Find the Audio Levels property and click the stopwatch icon next to it. This action enables keyframing and places your first keyframe. Set the value to a low number, like -100dB, which represents silence.

Step 3: Set the Ending Keyframe (Full Volume)
Next, move the playhead forward in the timeline to the point where you want the audio to reach full volume (e.g., 2 seconds in). Now, change the Audio Levels value to 0dB. After Effects will automatically add a second keyframe. You have now successfully created an audio fade-in effect.

How to Fade Out Audio in After Effects (Step-by-Step)
The process to fade out audio in After Effects is very similar but involves reversing the keyframe values. This is perfect for ending a scene or video smoothly.
Step 1: Find the Fade Out Start Point
Move the playhead to the position on your timeline where you want the fade-out to begin. Ensure the audio properties are visible (Layer > Audio > Audio Levels).
Step 2: Set the Starting Keyframe (Full Volume)
With the playhead in position, click the diamond-shaped 'Add Keyframe' icon to the left of the Audio Levels property. Make sure the value is at 0dB. This keyframe tells After Effects to keep the audio at full volume up to this point.
Step 3: Set the Ending Keyframe (Silence)
Finally, move the playhead to the very end of your audio clip. Now, change the Audio Levels value to -100dB. A new keyframe will be created, and After Effects will generate a smooth fade from full volume to silence between your two keyframes. This completes your after effects audio fade out.
You may also like:
15 Free After Effects Templates to Power up Your Video
Create and Animate a Dashed (or Dotted) Line in After Effects
A Faster Way to Fade Audio: The Filmora Alternative
People who are looking for a more straightforward solution with an easy-to-use interface can find Wondershare Filmora as the right option. Using this tool, users get the ability to fade out audio of after-effects video from their PC as well as smartphones.
Using Filmora for Adding Fades in Audio on Desktop
If you are looking to add fades to give the audio of your video a flair of dynamism, you can try Filmora on your computer. This AI-powered multimedia editor allows you to record and edit audio for your video and enhance it with full customization according to your preferences. With dedicated fade-in and fade-out features, you can apply these effects to any part of the video, along with extensive adjustments.
To give your audience professional-grade audio for your video, you can adjust other elements offered by the tool. Besides the transitional effect, you also get an equalizer and other AI-powered audio enhancement functions to generate high-quality content. To learn how to fade out audio in After Effects alternative, read the steps mentioned below:
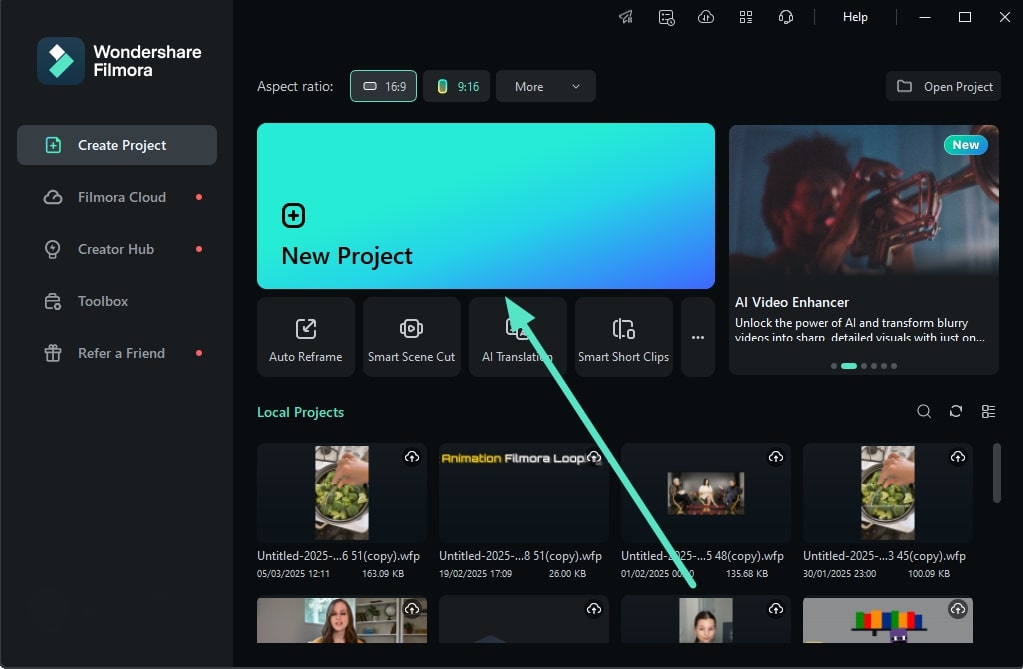
- Step 1. Initiate by Creating a New Project and Importing Video. To begin the process, launch the tool on your computer and click the "New Project" tab from the homepage. Next, import the video for which you want to add audio effects and drag it to the timeline to proceed forward.
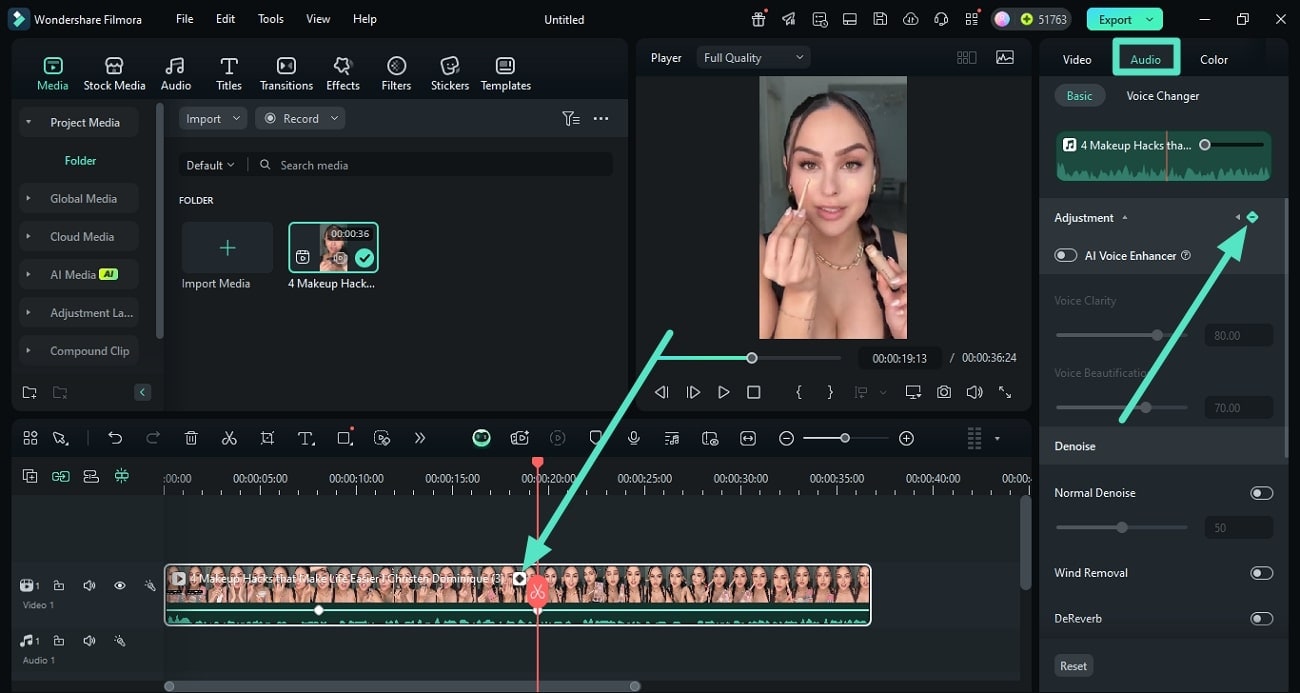
- Step 2. Add Keyframes at Different Points of the Video. After the video is imported, head to the "Audio" panel located on the right side of the interface and scroll through the options. Place the play head to the point where you want to add fade-in on the audio track. Head back to the same audio panel, select the "Adjustment" option, and click the "Keyframing" icon to add a keyframe to the video track.
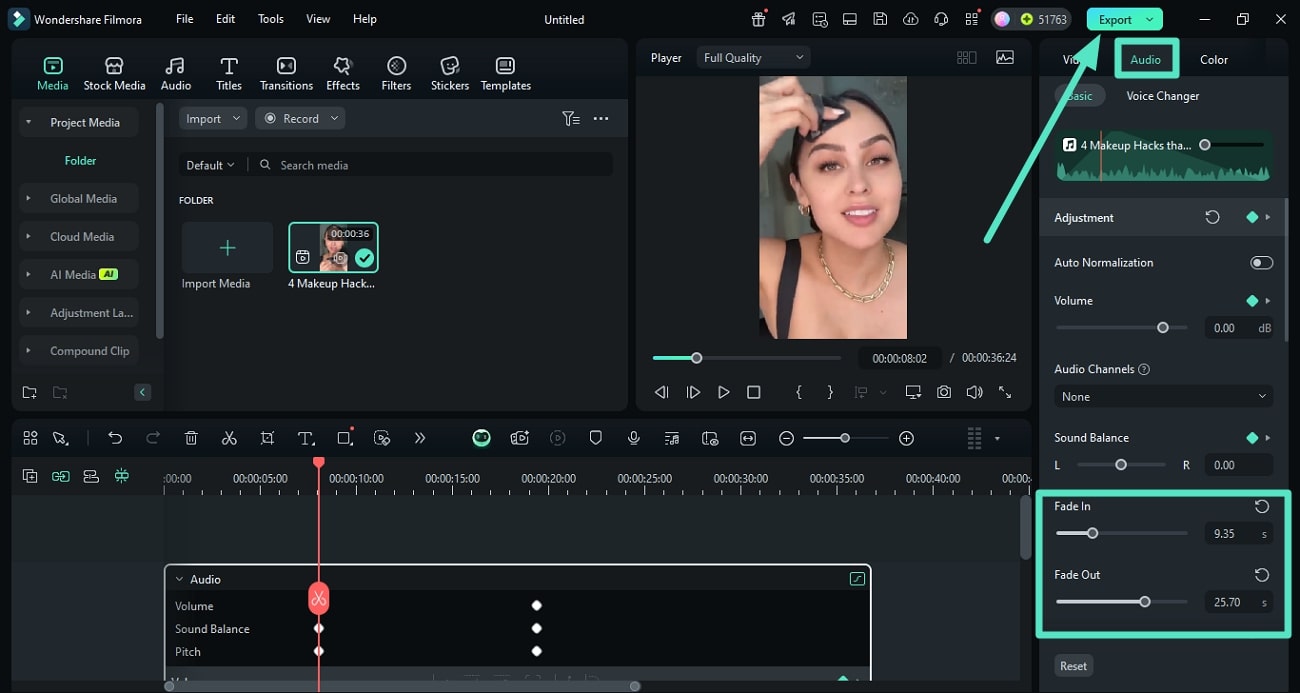
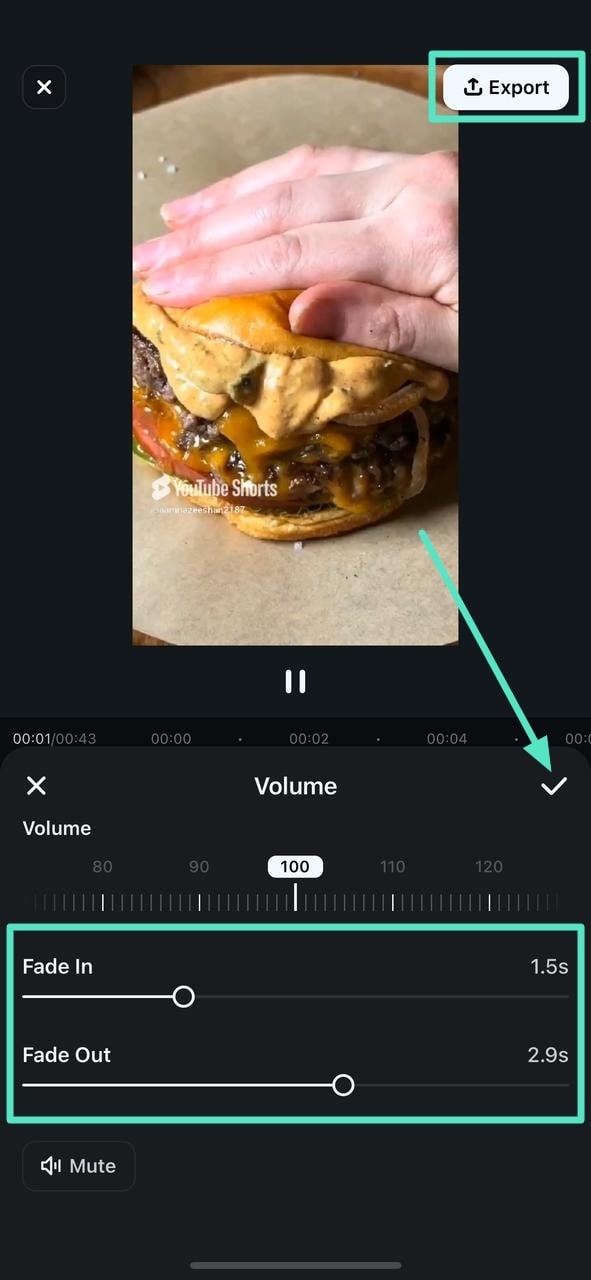
- Step 3. Add Fade In and Fade Out at Different Points. Add multiple keyframes at different points of the video by repeating the same procedures. Once added, head to the same "Audio" panel and drag the "Fade In" slider according to your preferences. Next, jump to the next keyframe and access the "Fade Out" slider to apply the effect to the specific point. Once you are done adding all the fades, head to the top-right corner of the interface and press "Export" to save.
 secure download

Adding Fades to Video with the Filmora App
You can also use the Filmora App [iOS/Android] if they are on the go and need a quick editing solution. The tool seamlessly extracts the audio from the video and allows you to add the fade-in and fade-out effects. Moreover, you can also incorporate different beats and audio effects to make the video more engaging.
Additionally, record a voiceover to your videos and modify the audio according to your preferences using this app. To learn how to apply the fades in audio After Effects on your video, read the steps provided below:
- Step 1. Begin by Creating a New App Project. Once you have launched the application on your smartphone, tap on the "New Project" option located on the homepage. Now, import your video to the app to begin the fade process.

- Step 2. Extract Audio from the Video. After the video is imported to the app's interface, head to the toolbar located at the bottom and tap on the video track. Once the toolbar is enabled, tap the "Extract Audio" option to detach the audio below the video track.

- Step 3. Add Keyframes on Different Points. When the audio is extracted, add keyframes using the dedicated icon located at the bottom left of the video preview. Head to the keyframe on the audio track and tap the "Fade" icon located in the toolbar.
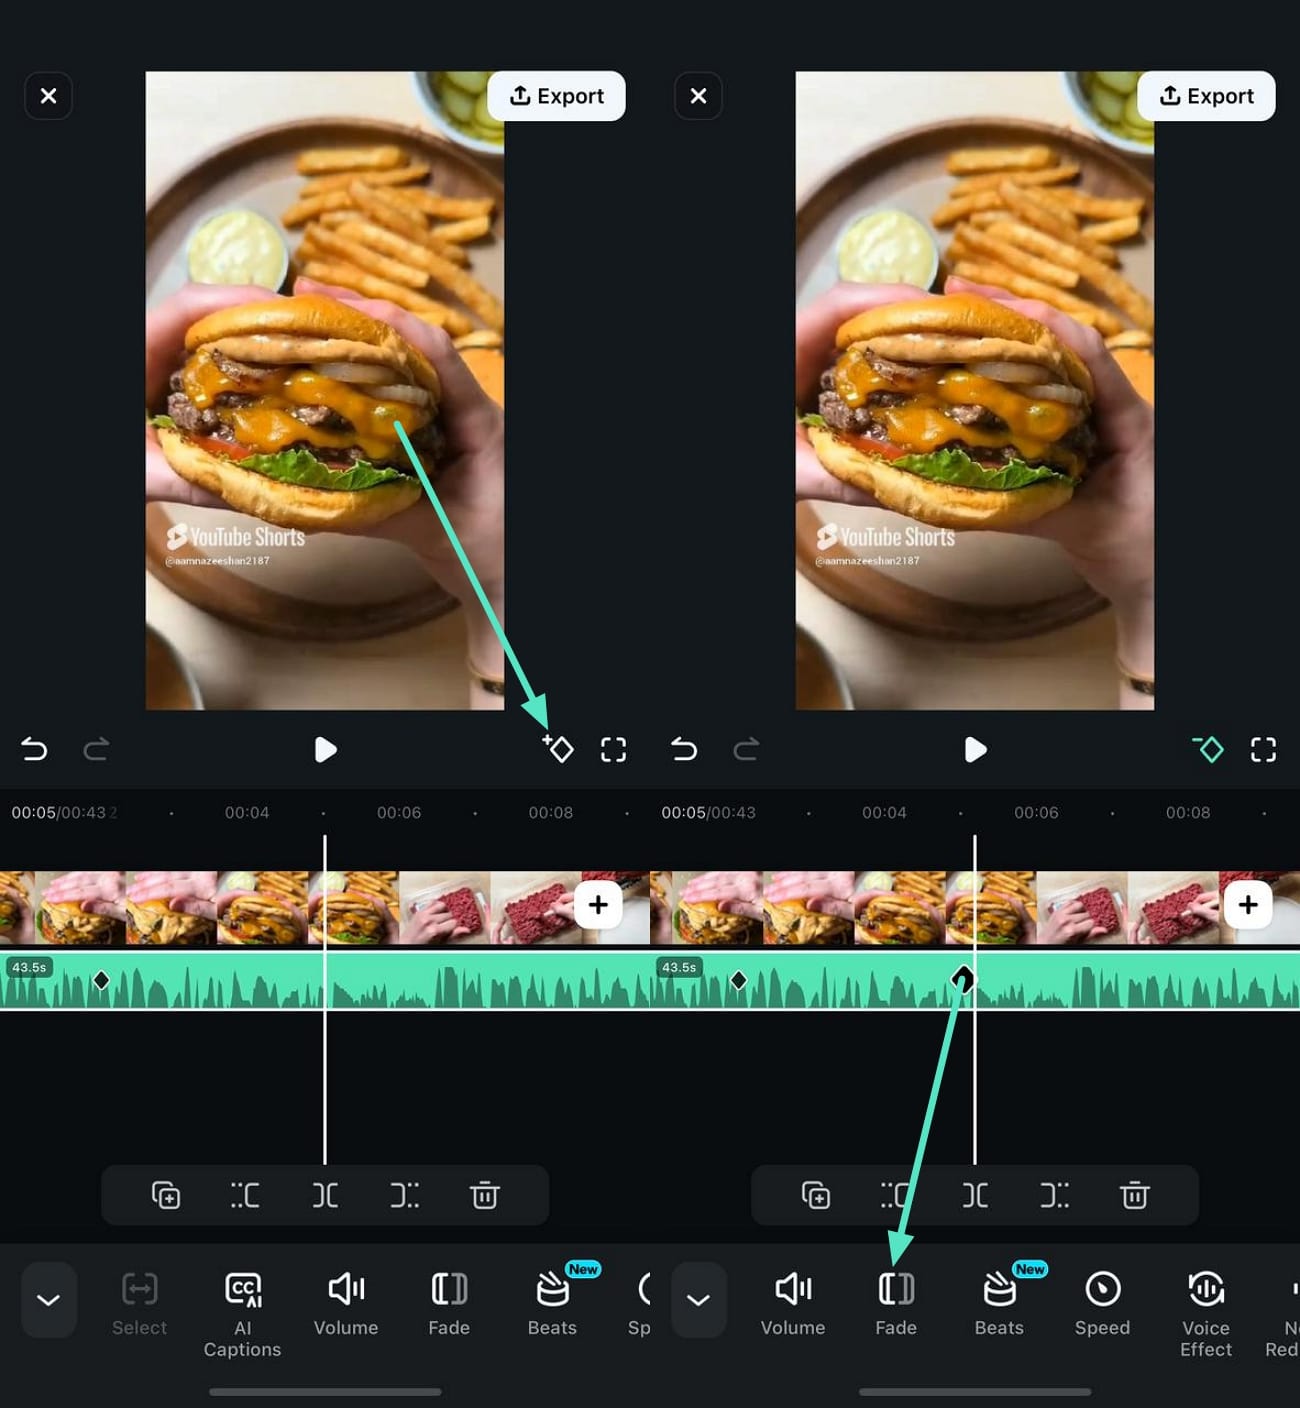
- Step 4. Adjust Fades In and Outs By Dragging the Slider. In the following interface, drag the "Fade-In" slider to add the intro transition to the video. Move to the next keyframe and apply the "Fade Out" to it by dragging the slider. Save the applied changes to the video by tapping on the small "Tick." Once you are satisfied with the results, tap the "Export" button at the top-right corner to save the video.
secure download
After Effects vs. Filmora: Which is Easier for Audio Fades?
| Feature | Adobe After Effects | Wondershare Filmora |
|---|---|---|
| Fade Process | Manual keyframing of audio levels | Dedicated "Fade In" & "Fade Out" sliders |
| Ease of Use | Requires knowledge of keyframes & timeline | Intuitive, beginner-friendly interface |
| Speed | Slower, multi-step process | Fast, one-click application |
| Best For | Complex motion graphics with integrated audio | Quick, efficient video editing with professional audio effects |
Tips For Making Better Fade In and Fade Out Effects
The process of creating a fade in or a fade out effect in AE is quite simple, but it is up to you to discover creative ways of using these effects. Here are a few tips that can help you use these audio effects more creatively.
1. Avoid Hard Cuts
A high pitch sound at the very begging of a new sequence can ruin your soundtrack and ultimately the entire video, so in case you've cut an audio file at the location where the sound peaks, you can apply a fade in effect to make the transition between two audio files softer.
You may also like: How to Cut Video in After Effects
2. Be Mindful of Audio Compression
Audio compression is a process that reduces loud sounds and amplifies quiet sounds, resulting from the audio file's dynamic range being compressed. In most cases, you won't notice the effects of audio compression, but if you compress an audio file too much, you might get some unwanted side effects if you add a fade out effect to that file. That's why it is best to rely on the default audio compression features a video or audio editing app offers.
3. Use the Fade In and Fade Out Effects Creatively
Besides opening and closing scenes, you can also use the Fade in and fade out effects to mix two different tracks while the shot is still in progress. Fade out one track, make it look like a scene is ending, and then introduce a new theme that changes the mood of that scene. The important thing is to avoid reducing the audio level all the way to -100db because you might end up creating silence in a scene that disrupts the flow of an entire video.
Frequently Asked Questions About Audio Fades
How do I make audio fade out faster in After Effects?
To make the fade out faster, simply move the start and end keyframes closer together on your timeline. The shorter the distance between the 0db keyframe and the -100db keyframe, the quicker the fade will be.
Can you crossfade audio in After Effects?
Yes, you can create a crossfade by overlapping two audio clips. Fade out the first clip while simultaneously fading in the second clip. For a simpler, one-click crossfade solution, an editor like Filmora is often more efficient.
What's the difference between audio fade and audio ducking?
An audio fade typically reduces the volume to silence at the beginning or end of a clip. Audio ducking automatically lowers the volume of one track (like background music) when another track (like dialogue) is playing. Filmora offers a dedicated Audio Ducking feature to make this process easy.
Conclusion: Get Perfect Audio Fades, Faster
While you can certainly fade audio in After Effects using keyframes, the process can be slow and technical. For video creators who need efficient, professional results without the steep learning curve, the choice is clear.
Wondershare Filmora provides a dedicated, intuitive solution to add audio fades in seconds. Stop wrestling with keyframes and focus on your creativity. Download Filmora today and experience how simple professional video editing can be.
secure download
Benjamin Arango
staff Editor
