- After Effects Tutorial
How to Pan and Zoom in After Effects [Step by Step]

Feb 11, 2026• Proven solutions
The Ken Burns Effect is used in videography of still images to create a certain experience or ambiance. If you want to bring certain still images to life or to prevent the viewer from being bored with a monotonous sight on screen for too long, you can take advantages of using Ken Burns effect. And in this article, we're going to show you how to make pan & zoom effect in After Effects.
- Part 1: How to Pan and Zoom (Ken Burns effect) in After Effects
- Part 2: An Easier Way to Pan and Zoom
- Part 3: 4 Tips on How to zoom in/out on After Effects
Part 1: How to Pan and Zoom (Ken Burns effect) in After Effects
After Effects provides its users to apply the pan and zoom effect to videos by following the following process:
Step 1: Import image first
Start the program and open a new project. Click File to import the required file onto the project file. It would be better if your image is high quality as it may get blurry after it is zoomed in. So it is necessary to import a high resolution image.
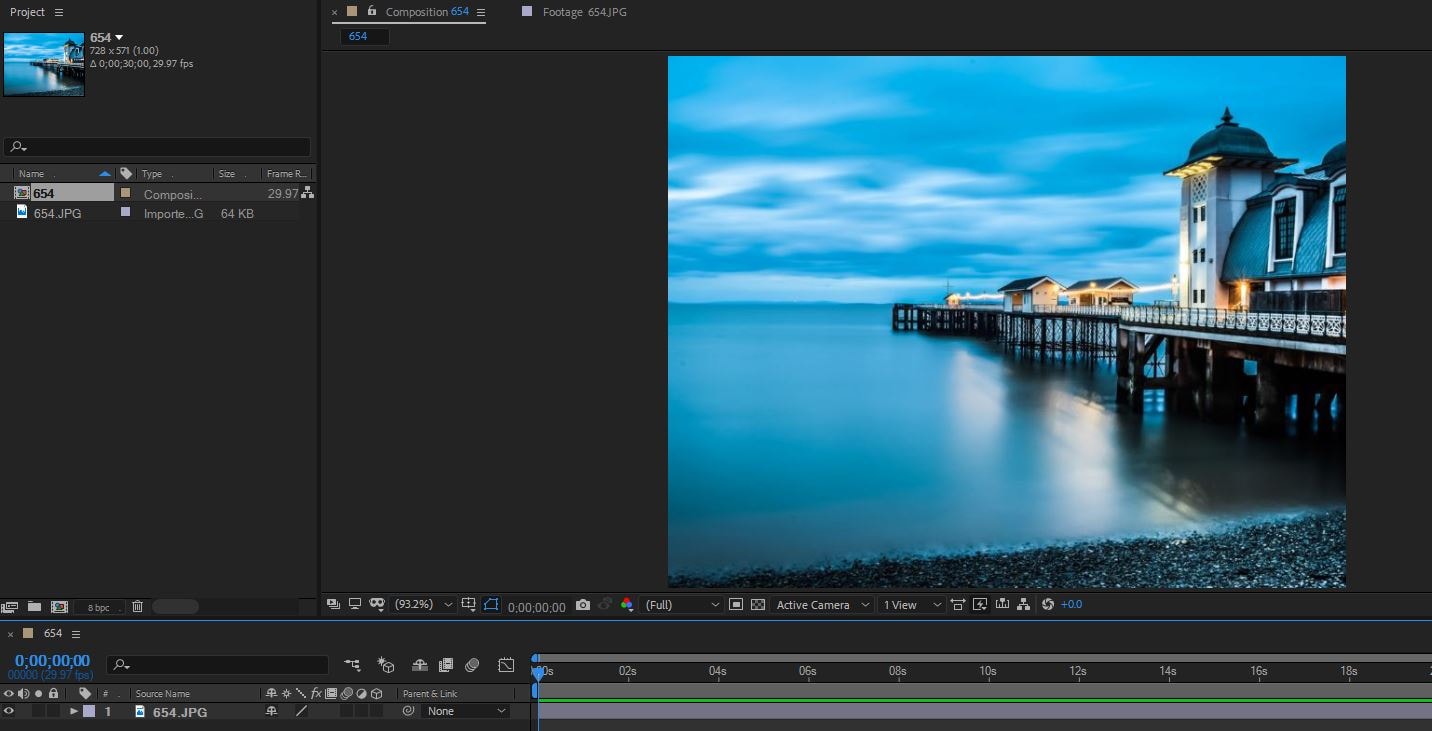
Step 2: Scale and position the image
Next hit S and Shift + P to get scale and postion. Then clcik on the stop watch icon next to postion and scale. Move your playhead ahead around 2-10 seconds. How long it should be is based on what you need and the material you used. Here, we will move two seconds ahead. Now scale the image to whichever direction you want. Next clik the grey dot in the preview windows to drag it in one direction. After you are satisfied, play the effect to see if it has succeeded.

Step 3: Save changes
By now, this effect is done. If you want to refine your iamge, you can Shift+Click on the keyframes to select all, next ctrl+click on one of the first ones and then click Keyframe Assistant > Easy Ease to touch up the image. In the end, click File > Save to keep your work.
You May Interest: How to Create and Animate a Dashed (or Dotted) Line in After Effects
Part 2: An Easier Way to Pan and Zoom
After Effects gives you control, but it takes time. If you want to use pan and zoom effects without dealing with keyframes, Wondershare Filmora makes it easier.
Filmora has a Pan and Zoom tool that lets you zoom in and out or move across a scene in a few clicks. You can keep the original aspect ratio or change it to fit your project. You also get different movement options. Zoom in from far to near, zoom out from near to far, pan from left to right or right to left, or swap the start and end points. Try different presets and see what works best.
Here's how to use pan and zoom effects in Filmora

 secure download

Step 1: Import Your Video
Open Filmora on your desktop and create a new project after you log in. Next, import and add the video to the editing timeline.
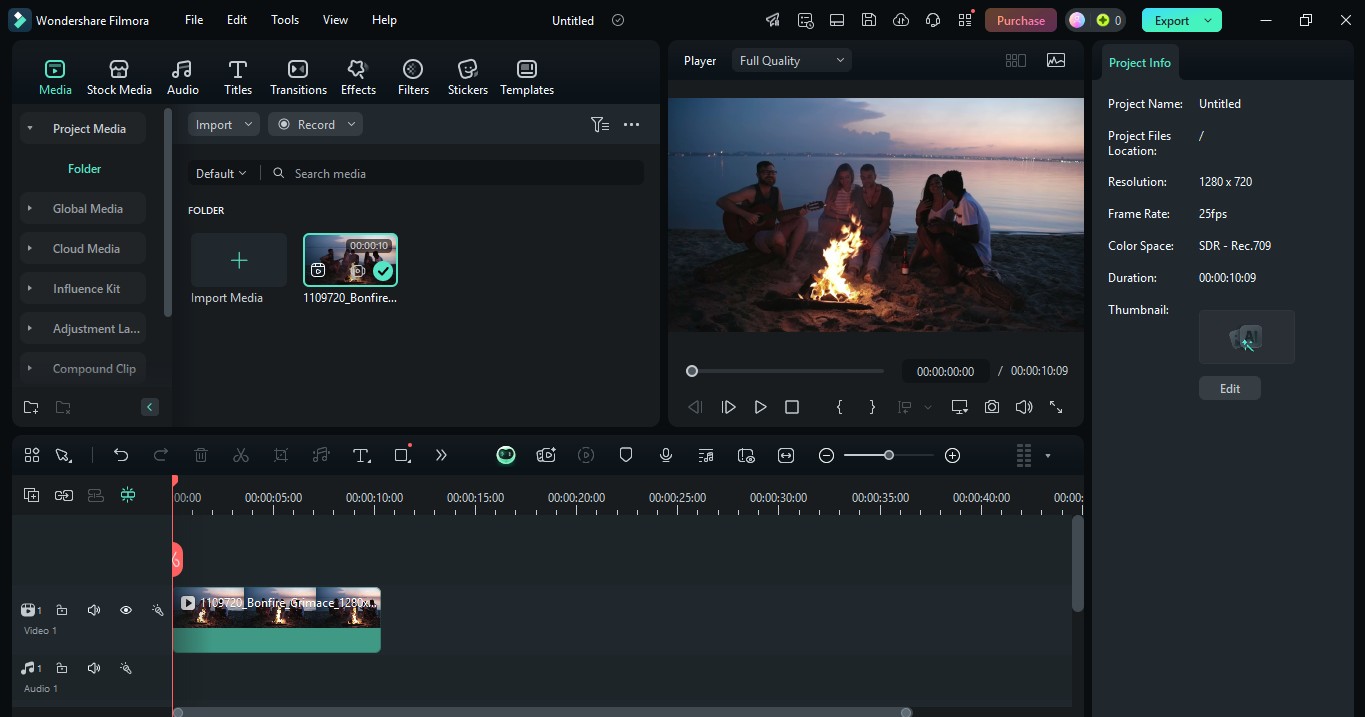
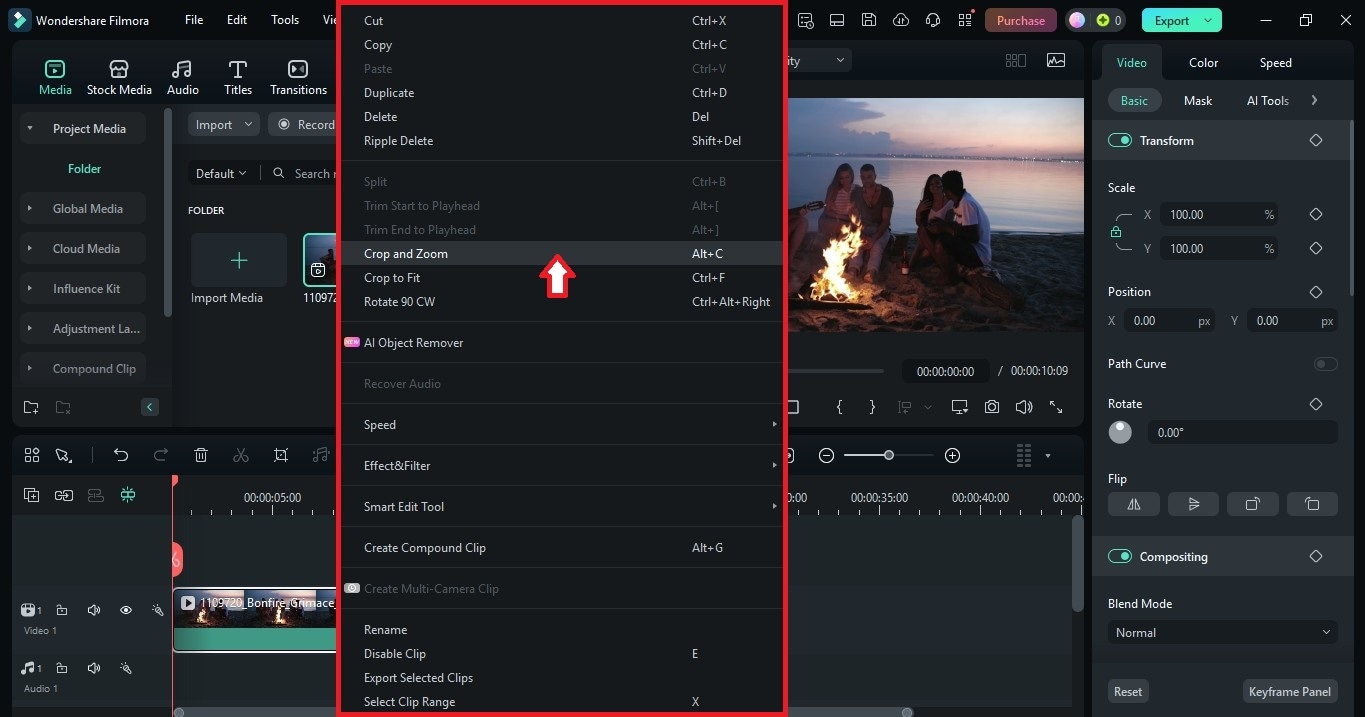
Step 2: Open the Pan and Zoom Tool
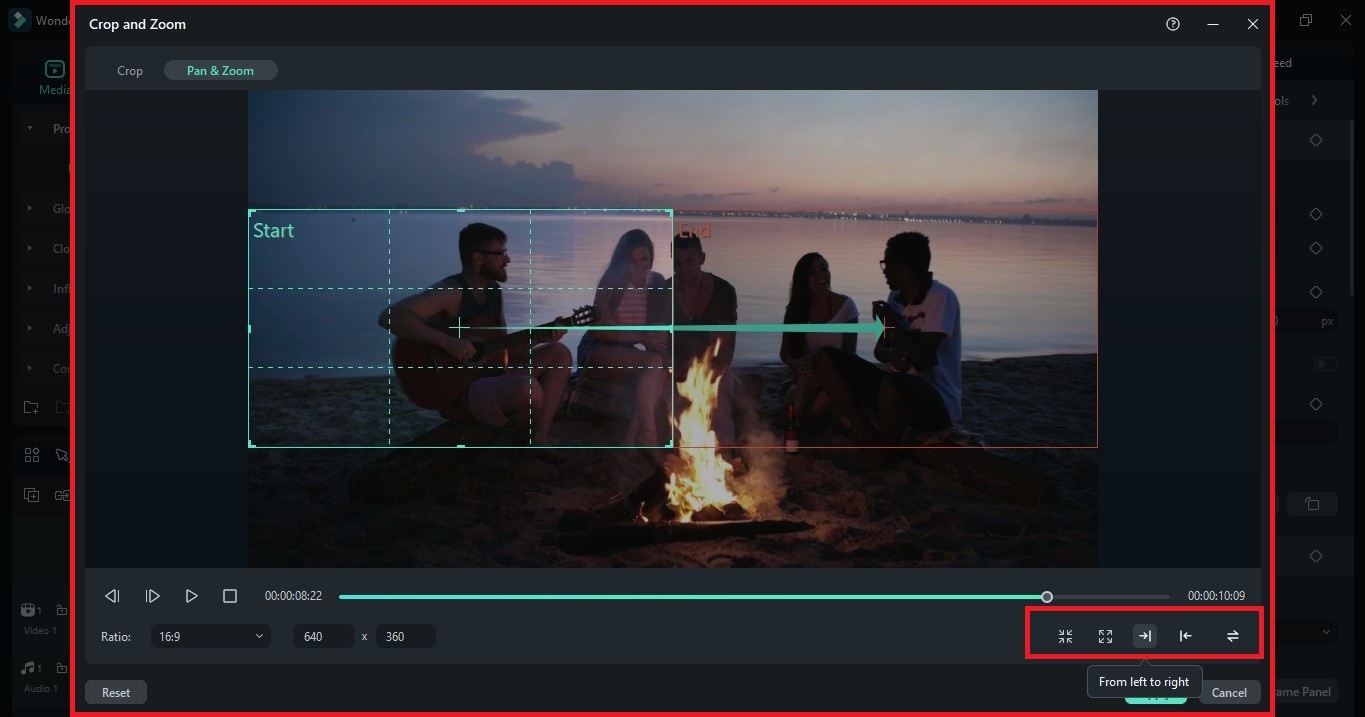
Right-click the video clip in the timeline and choose Crop and Zoom. A new window will open. Go to the Pan and Zoom tab.
Step 3: Adjust the Crop or Zoom Area
- Click and drag the edges or corners of the Start and End frame rectangles to define the area you want to zoom in and out. You can move the frames to set the direction of the pan.
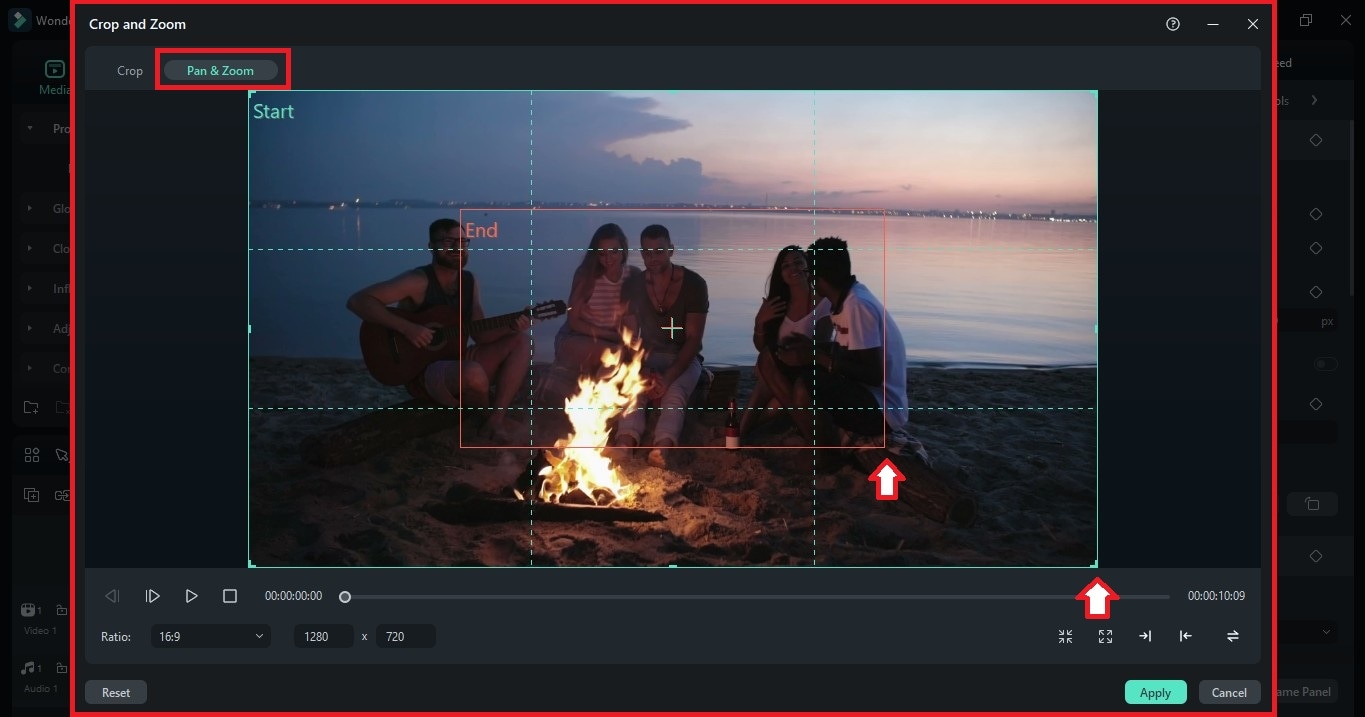
- Alternatively, use the preset options for quick adjustments. Select From far to near, From near to far, From left to right, From right to left, or Swap the start and end points for instant movement.
Step 4: Play the Video
Preview the pan and zoom effect before applying it. Adjust the Start and End frames if needed. Click the Reset button in the lower-left corner to start over.
Step 5: Save the Pan and Zoom Effect
Click Apply on the Crop and Zoom pop-up window to save changes. Play the video to see the zoom effect in action.
secure download
Part 3: 4 Tips on How to zoom in/out on After Effects
1.Planned and Purposeful Zooming
The main objective here when zooming in is to get a grasp on the viewer and create intimacy with the video. Whereas when zooming out more detail is exposed. There should be proper attention paid towards the intention of zooming and over zooming should be avoided at all costs.
2.Varying Motion
Try to play around with the pan and zoom motion, do not allow your moves to be monotonous throughout. Be diverse.
3.Careful with the Speed
You do not want to move in or out too fast or too slow, that could easily ruin the entire effect. Timing and speed both matter immensely for this effect to have a meaningful impact.
4.Transitions
Avoid hard transitions When transitioning from one focal point to another be steady and calm and try not to make it sudden but rather meaningful.
secure download
You may want to know about how to make glitch effect in After Effects and websites to download glitch effect background.
Are you looking for free After Effects templates to use? Here are 15 best places online that provide a large number of different After Effects templates.
by Benjamin Arango Jan 06, 2026 11:35 AM
After Effects is considered to be among the best editing programs for color correction. Here are some easy steps for color grading in After Effects.
by Benjamin Arango Jan 06, 2026 11:35 AM
Benjamin Arango
staff Editor
