


 100% Security Verified | No Subscription Required | No Malware

On average, YouTube intro videos only last for about five to eight seconds. Well, that is already enough. There is no need to go more than that since it only aims to give viewers a glimpse. That being the case, the content of the intro videos must be precise and well-structured. Is it recommended to add text to intro videos? Of course, it is. However, make sure that this element is arranged creatively and concisely around the frame. Don’t worry. If you’re familiar with the functions of your chosen video editor, this task is indeed a piece of cake.
One way or another, you’re at liberty to format the content of your intro video in your desired style. For instance, you may use a pre-made intro template with text or resort to animated text for the intro. It’s totally up to you. Just browse some tutorials online and find the best guide that works perfectly in your current situation. For sure, you will not run out of choices. There are tons of them scattered all over the internet.
In this article, we will talk about the proper application of textual elements for intro videos. We will also provide some tips on how to use a text-based intro template for your video content. Lastly, we will give you a step-by-step guide on how to do it in quick and easy steps. Continue reading below to learn more.
In this article
How to Create an Animated Text For Intro Videos Using Wondershare Filmora?
When using text assets in intro videos, animation is always a part of it. These two elements are indeed inseparable in this regard. Why so? Simply because intro videos must look and feel engaging and interactive. Of course, you cannot achieve such effects if the text in your intro is static and motionless. Don’t worry. The process of creating animation text for intro videos is actually a walk in the park. Video editing software like Wondershare Filmora is equipped with powerful tools and features that can assist you in this regard. Do you want to try Wondershare Filmora and explore its intro templates with text assets? If that is so, read the details below to learn more about this app.

Key Features
Here are the key features of Wondershare Filmora that can help you add text to intro videos.
- Wondershare Filmora features a large template and resources library. Of course, among the collections you can explore here include animated intro text and other intro templates with text assets. Just browse the available selections and choose one that fits your preferred style. Don’t worry. Most of them are customizable within the platform.
- The tools within the Wondershare Filmora workspace are capable of facilitating both basic and professional video editing. Among them are speed ramping, keyframing, green screen, compound clips, color match, motion tracking, and many others. Yes. You can definitely use these features to add text to intro videos and implement your desired concept.
- Wondershare Filmora offers numerous AI tools in case you’re seeking this kind of video editing assistance. To mention a few, these are AI Music Generator, AI Object Remover, AI Sticker Generator, and many others. Just explore these features on the platform and try to incorporate them into your creation process.
- Wondershare Filmora gives you numerous options for video export. Basically, you may render and download your output in a specific format you prefer to use. Among the supported file types include MP4, WMV, AVI, MOV, F4V, MKV, TS, 3GP, MPEG-2, WEBM, GIF, and MP3. Simply configure the export settings based on your preferences.
Step-By-Step Guide
It’s very easy to add text to intro videos using Wondershare Filmora. The process is simple and straightforward. Do you want to try it now on your end? If that is so, read the tutorial below and follow the indicated steps accordingly.
Step 1: Download Wondershare Filmora from its official website. Right after, install it on your computer.
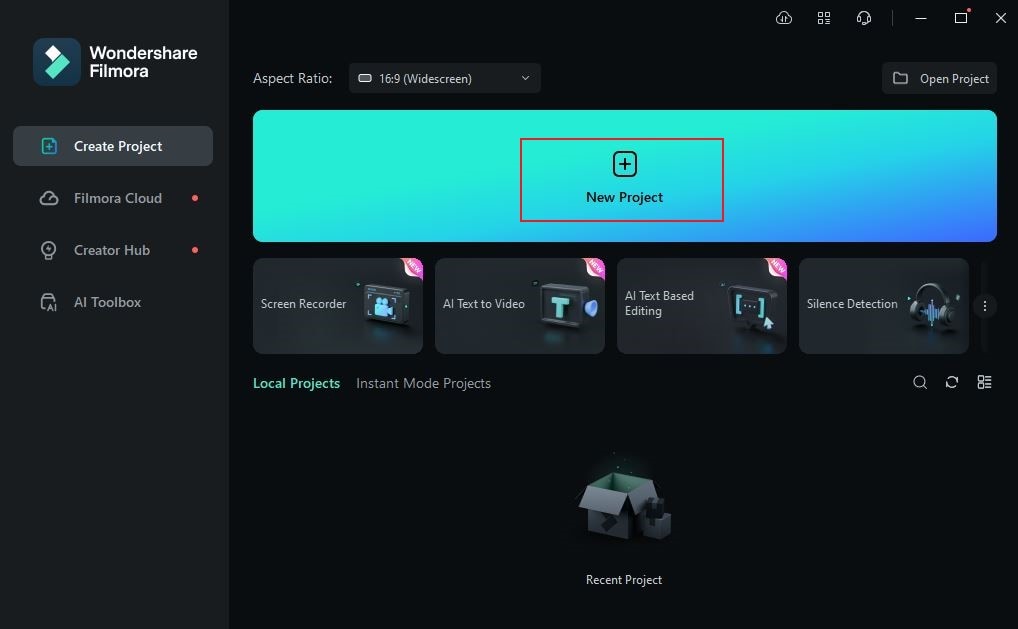
Step 2: Run the newly installed video editing software on your desktop afterward. Once it fully loads up, go to the main dashboard and then click New Project to start editing. Alternatively, scroll down to the Recent Projects section and open an existing session if there is any.
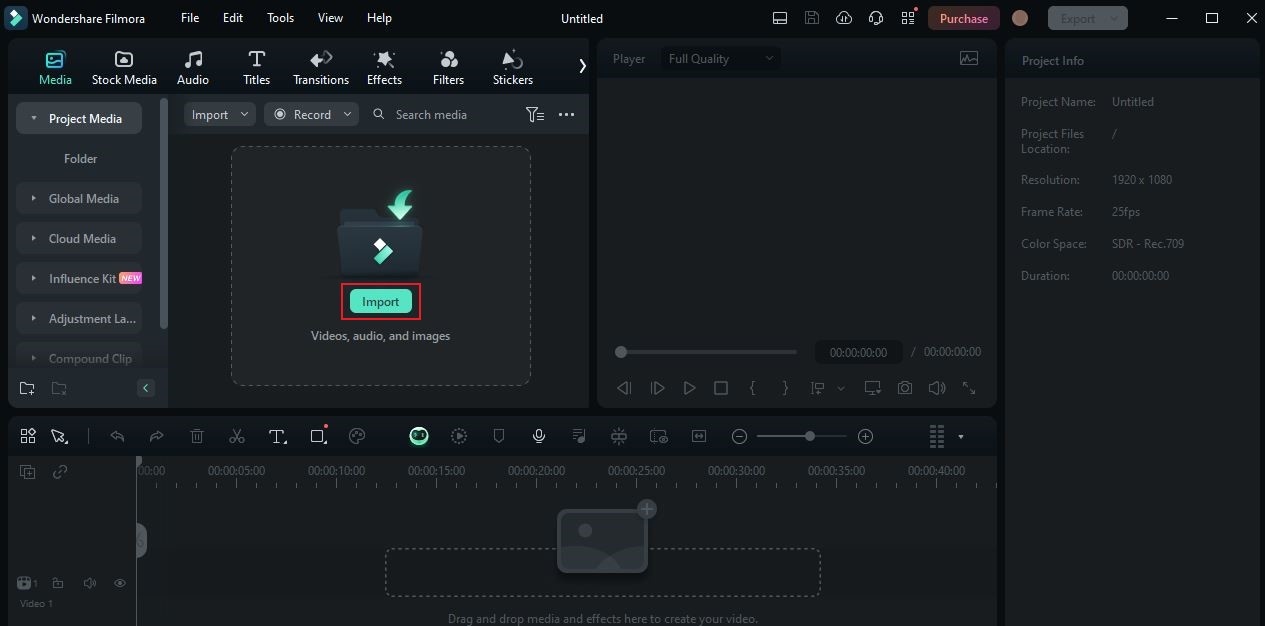
Step 3: Before you proceed, it’s best to first organize all the media assets you’re going to use in this project. To do that, navigate to the Elements Panel and then click Import under the Media tab. Select the files from the local storage of your computer and then upload them to the platform. Don’t worry. Depending on the type and size of the assets, this process will only take a few minutes to complete.
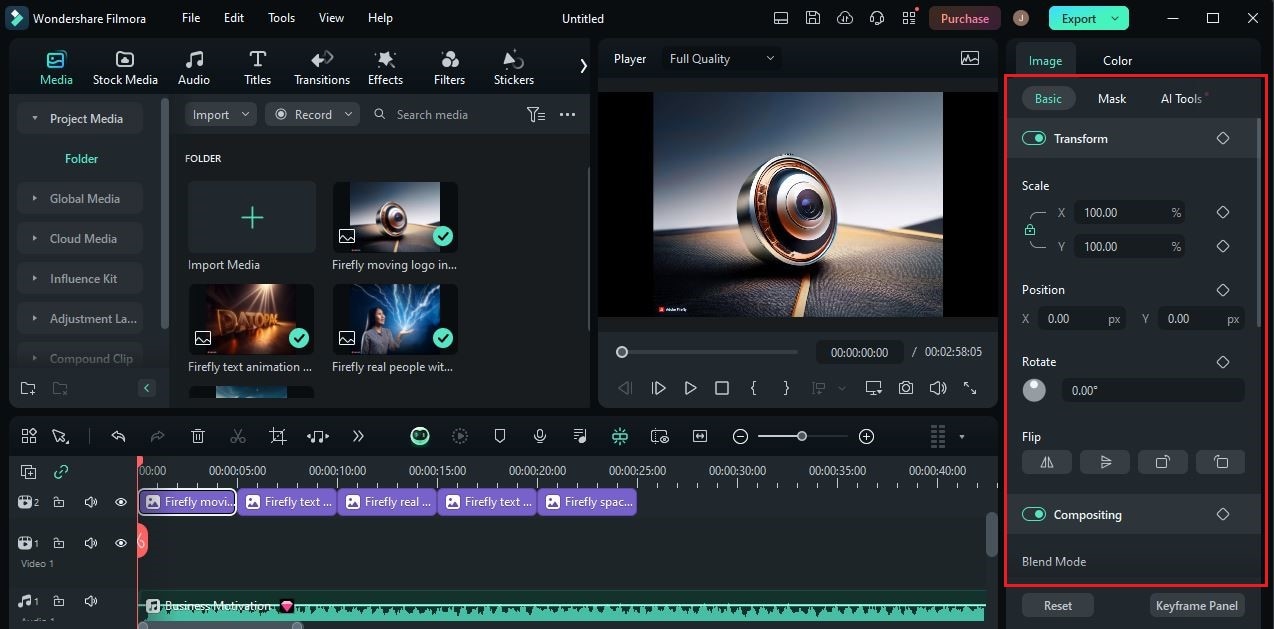
Step 4: After that, you may now create the intro video based on your creative concept. Start by dragging the images, video clips, and audio files from the Elements Panel to the Editor Timeline. Arrange the assets accordingly and sync them together in one video.

Step 5: Use the tools on the dashboard to finalize the clips and other assets. You may trim some footage to fit it in, insert transition effects, and configure various settings, such as color, video, and audio. Just click on the asset you want to modify and access the corresponding settings on the right-side corner.
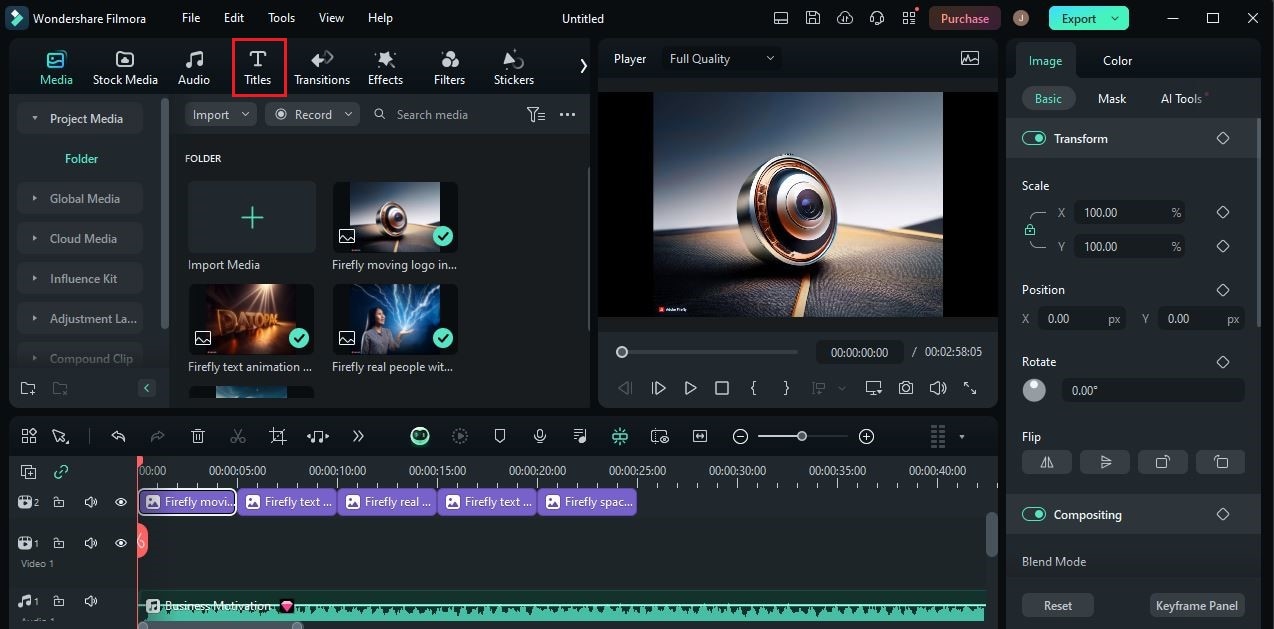
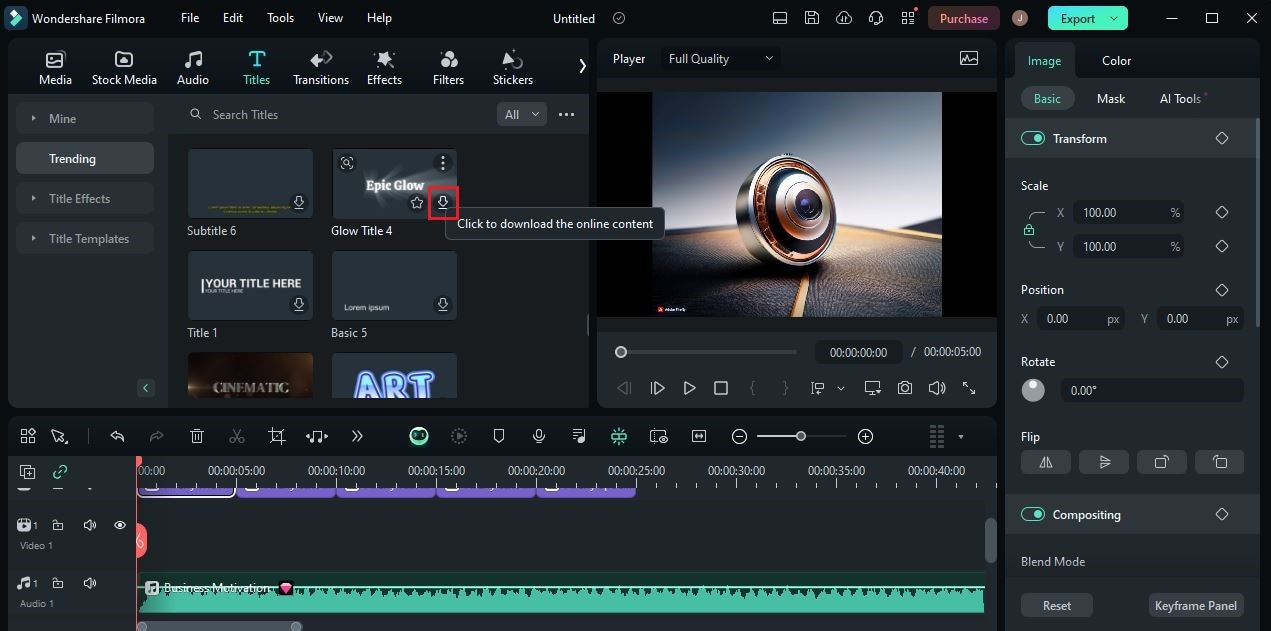
Step 6: At this point, it’s time to add text to your intro video. Don’t worry. It’s indeed a piece of cake. To get started, simply go back to the Elements Panel and click on the Titles tab.
Step 7: Immediately, various title styles and designs will be displayed on your screen. Browse the provided options and choose one that matches your preferences. Once done, hover your mouse cursor over the intro text template you prefer to use and click the Download button inside. Grab the newly downloaded title asset afterward and then drag it all the way to the Editor Timeline to start the customization.
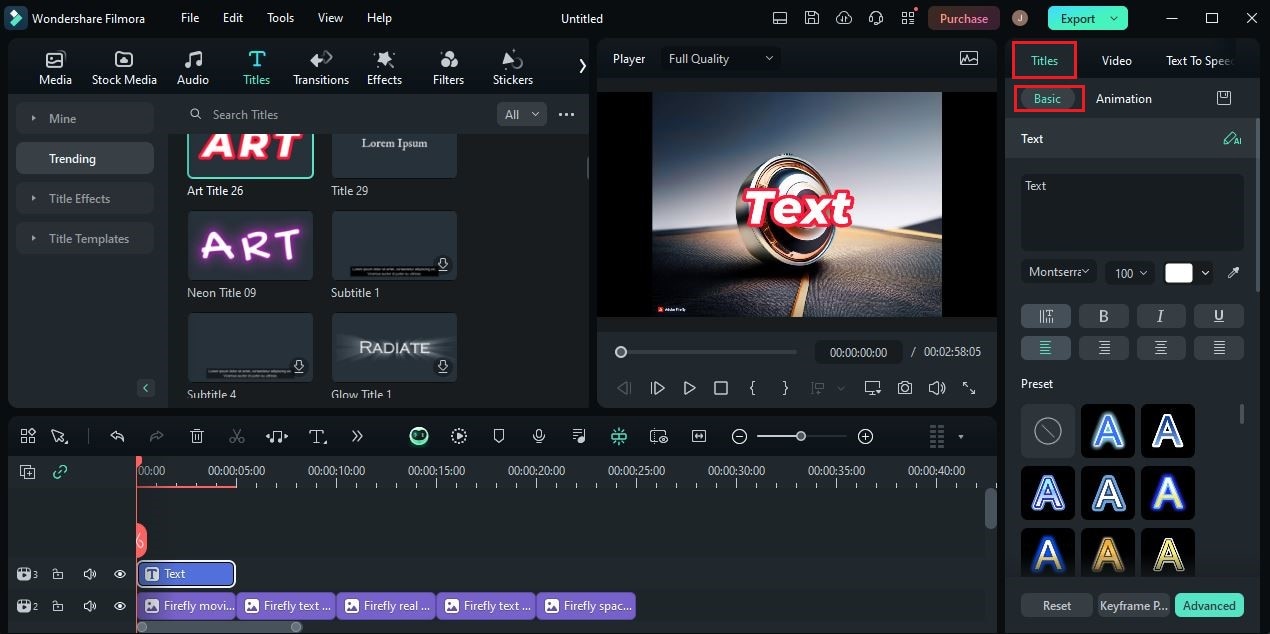
Step 8: After finalizing the position of the selected title asset, you may now start customizing its design and content. Simply go to the right-side panel and access the personalization settings under the Titles tab. As for Basic settings, click on the provided text box and then replace the default text with the actual content you wish to display. Following that, scroll down to the typography settings below. Configure the font style, size, color, and alignment based on your preferences. Alternatively, you may explore the selections under the Preset section if you don’t want to customize the text from scratch. Just select your preferred preset and then it will be automatically applied.
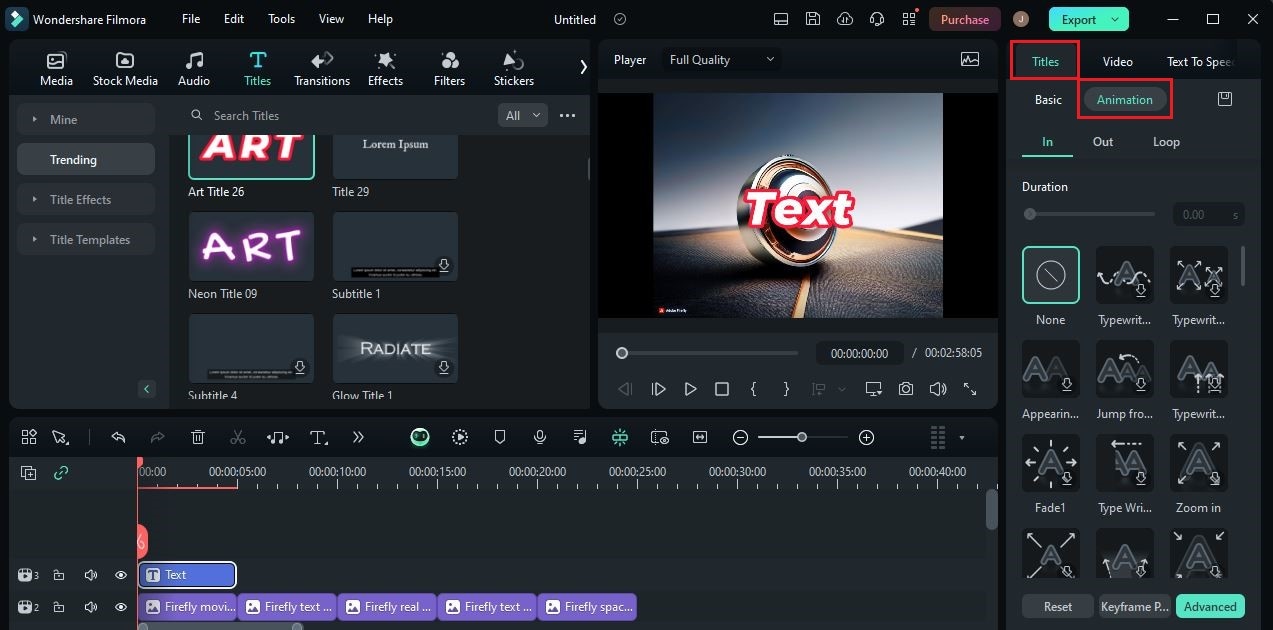
Step 9: Tap the Animation tab afterward. From there, select the animation you want to use for both entry and exit. Additionally, configure the duration settings of each animation. Don’t worry. There are lots of options to choose from. For sure, you’ll not run out of choices when you add text to your intro videos.
Step 10: Finally, it’s time to preview the output. Go to the Preview Panel and then click the Play button. Watch it very carefully and review the text in your intro video. If you’re satisfied with the result, click the Export button to render the final version of your intro video and save a copy to your computer.
When Do You Need to Add Text to Intro Videos?
Although recommended to keep it minimal, text-based elements should not be missing from intro videos. You must include a variety of them in order to deliver crucial information, such as title, context, and many others. Without them, it’s going to be difficult for you to catch the viewers’ attention and retain their interest. But hold on. You still need to ensure that you don’t overdo this task. Only include the specific types of text that play a vital role in this regard. Do you want to know what those are? If so, check out the list below. Read the items very carefully and keep them in mind.
Name of a particular person.
Let’s say you’ve mentioned your name or the name of your co-host during the introduction. If that is so, it’s best to add text to your intro video displaying the names you’ve previously mentioned. Don’t worry. The airtime should not be a big deal in this matter. You can flash it for around one to two seconds at the exact moment when the name is mentioned.

Ideas that require emphasis.
Adding text to intro videos signifies emphasis. That being the case, you should take it to your advantage. For instance, there is something important you wish to point out. In this case, you may write it in the form of text-based titles and include it in your intro video. Don’t sweat it. You can just use an intro template with text assets to do it with ease and convenience.
Call-To-Action
If you’re including a call-to-action in your intro video, it should be the highlight of the content. Write the call-to-action in the text form and add it to your intro. With regard to the design, you can do it manually and use the available tools on the platform. Alternatively, you may use an intro template with text assets if you don’t want to start from scratch. Yes. It’s just as simple as that. No need to undergo a very complicated process.

Keywords relevant to the visual content of the intro video.
With regard to maintaining the interest of your viewers, adding text to your intro video can somehow help you. How so? It’s very simple. Find the verbal keywords and include them in your intro as text assets. Try to flash them while the keywords are being mentioned in the actual video. Is that effective? Of course. Doing so can make your intro video a lot more engaging and interactive.
Name of your channel.
Do you want to instill the name of your channel in the minds of the viewers? Mentioning them multiple times in the intro video is one thing you can do. But to intensify the effect, you may also add text to your intro video with the name of your channel. Don’t worry. There are tons of text for intro template selections that you can use in this regard. Just choose the best one that suits the theme and style of your channel.

Tips For Inserting Text Into Intro Video
As mentioned earlier, it’s not that hard to insert text into the intro video. The process is very simple since modern video editing apps support this feature very well. However, take note that you really have to be creative when doing this task. Make sure that the text in your intro is serving its purpose properly. To help you get started, there are some tips you may take into account. Check them out below and keep them in mind.
Incorporate a text style that resembles your branding.
Choose a specific typography design that somehow reflects your brand as a content creator. It can be in the form of color, font style, text animation, or sound effects. Be consistent in this regard, so that viewers can easily remember your channel through this aspect.

Use titles and subtitles together.
The text is much easier to read if they are all arranged in a proper hierarchy. That’s why you should use titles and subtitles when you add text to intro videos. Don’t worry. It’s a default feature of most video editing software out there. No need to change the size of the texts manually. Likewise, you may also use a text and intro template with a defined typography hierarchy. That is convenient, indeed.
Make sure that the text in the intro looks coherent.
In terms of general design, ensure that the intro text is consistent and well-coordinated. If you use blue as the font color of the title, choose a related palette for the others. The same thing goes for the font style. If the title is written in cursive, find another font with the same style and use it for the others. Don’t worry. It may look like a lot of work at a glance. But in actuality, it’s not, especially if you’re going to use an intro template with text assets. You can do it with just the snap of a finger.

Arrange the position of the text accordingly.
Apart from the typographical format, another thing you should finalize well is the position of the text in the frame. Align each text-based asset in the proper layout to ensure readability and visual quality, especially for animated intro text. Don’t worry. It’s not as hard as you think. Just allocate enough space for the design and animation of each title asset.
Check the composition before you add text to intro videos.
Plan your text design based on the composition of your intro video. Before you add text to your intro video, check the objects and elements around the frame. Find the specific spot with adequate space and use it for your title assets. Don’t worry. It doesn’t take a genius to accomplish this task. Just refer to your creative concept and implement it based on your personal preferences.

Conclusion
Indeed, an intro video is not complete without text-based assets. It is a very important element that enhances the power of the intro to capture attention and maintain interest. That’s why you should always consider adding text to intro videos. As discussed earlier, it’s a simple task that can make a huge difference for your intro video. Don’t worry. You can use a custom-tailored intro template with text assets if you prefer a convenient approach. Alternatively, you can easily create an animated intro text from scratch with Wondershare Filmora. It’s a powerful video editing software capable of assisting you very well in this kind of project. Explore the features of this amazing content creation application and take them to your advantage.
