There comes a moment in every visual artist's career to master motion tracking. Making immovable objects jump, float, glide, or fly around is not that complicated. Motion tracking is a simple process that delivers impressive results and takes your craft to the next level.
Today, we will teach you the basics of motion tracking in After Effects, Adobe users' favorite motion graphics software. You will learn about the different motion tracking types and features available in Adobe's tool and how to use them to apply motion to static objects in footage.
In this article
6 Types of Motion Tracking Features in After Effects
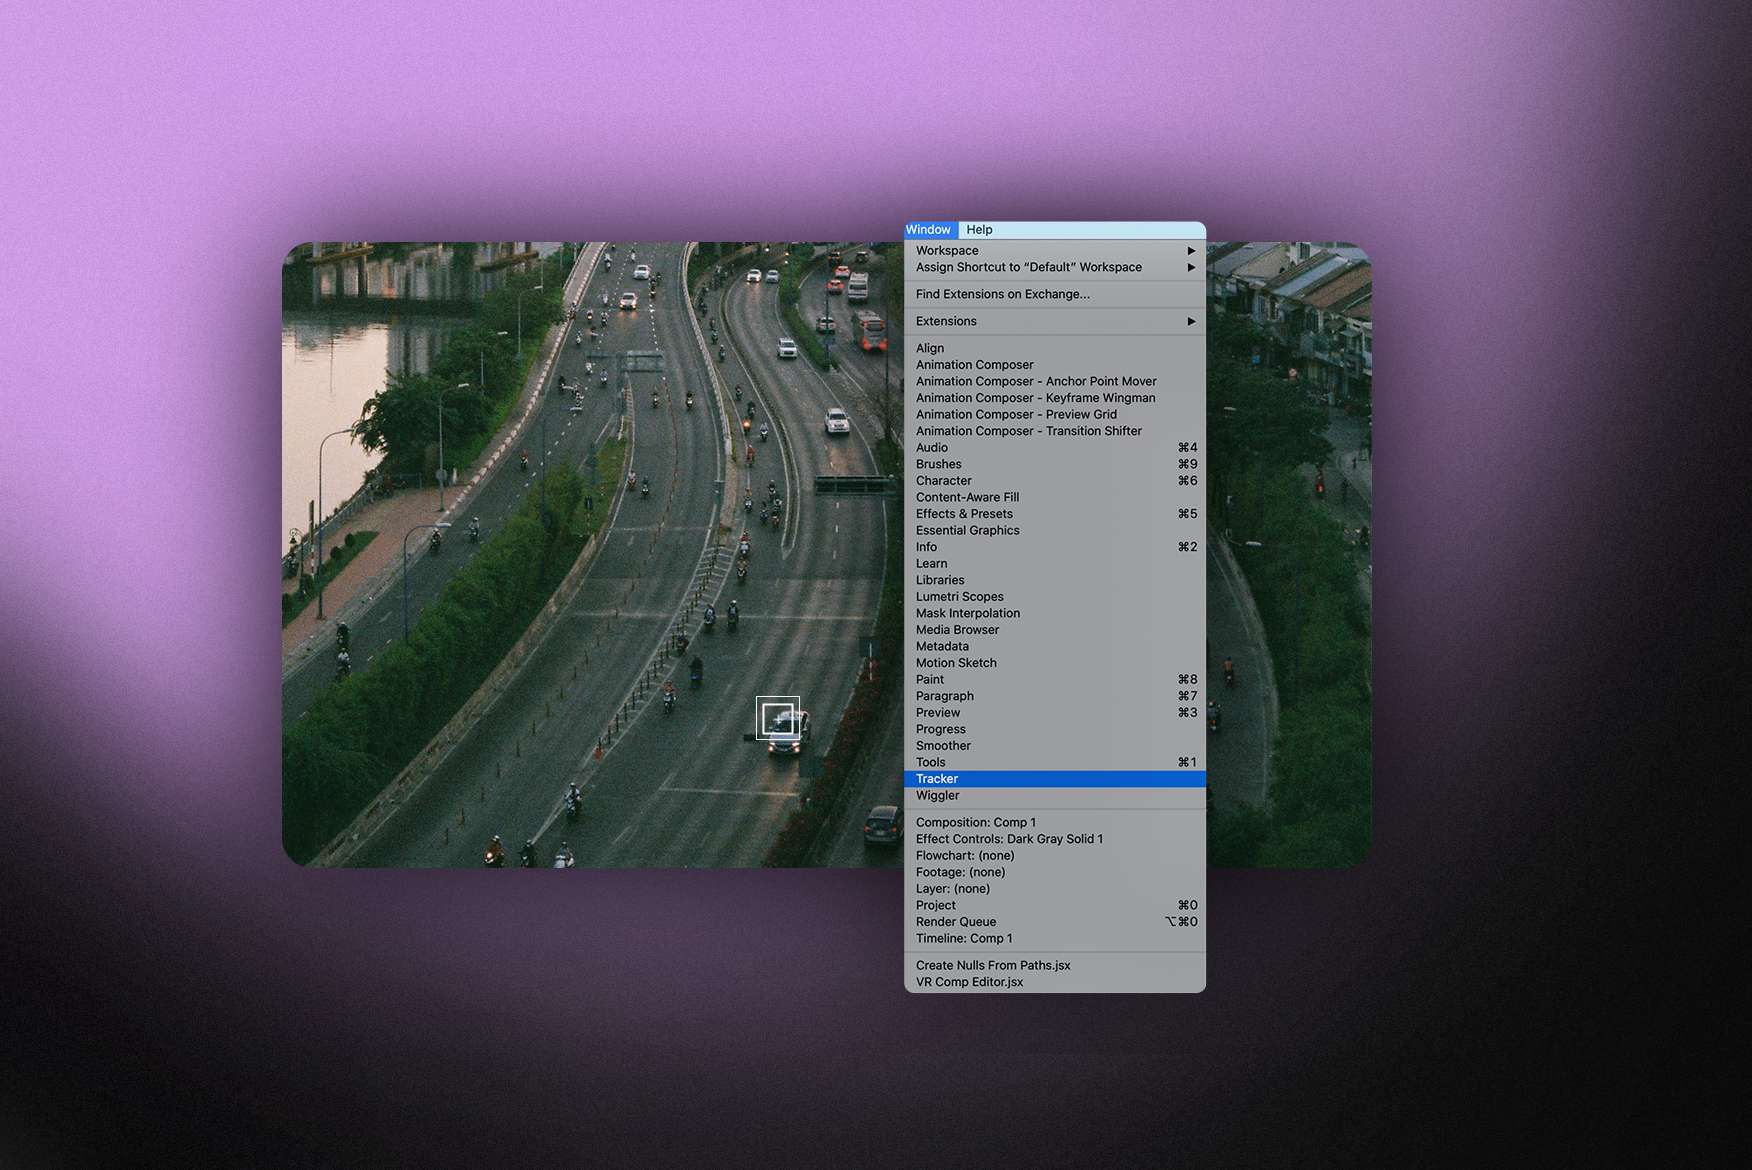
Object tracking in After Effects is one of the most used features of this tool, and for a couple of good reasons. First and foremost, it helps create movement and add dynamic to the scene. You can use it on any object, graphic, or text to make them move around or magically appear.
In addition to that, After Effects tracking is a fairly simple technique that most beginners can master without much trouble. To make things easier (and spur creativity), After Effects offers not one but over five different motion tracking features for users of different skill levels.
One-Point Tracking

Best For: Creatives at the beginning of their motion-tracking journey.
When amateurs and beginners talk about motion tracking in visual art, they usually picture an artist composing a scene with one-point (a.k.a. single-point) tracking. This is when you track the motion of one object and apply it to another object, thus creating a matching movement.
Although this is the simplest motion-tracking technique, the results are very effective: one-point tracking creates the illusion that the camera is moving around a single point.
Two-Point Tracking
Best For: Adding movement to simple projects, like ads and TikToks.
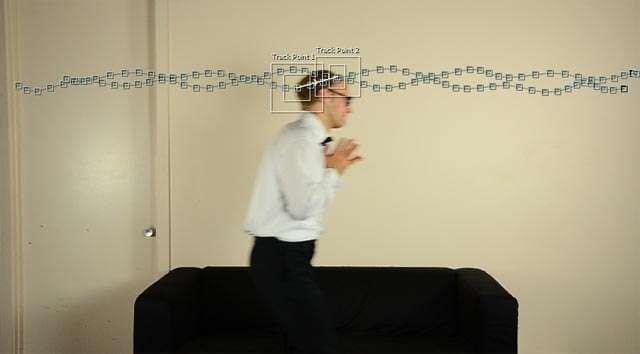
But what if you want the camera to move around your object and gradually zoom out at the same time like it's referencing a happy ending? You can do this with two-point tracking.
Two-point tracking in After Effects enables you to assign an additional tracking point related to the original one and then have each of them track a different type of movement. After Effects will track the movement from both sources, including their position, scale, and rotation.
Four-Point Tracking
Best For: Replacing screen for product-related content and tutorials.
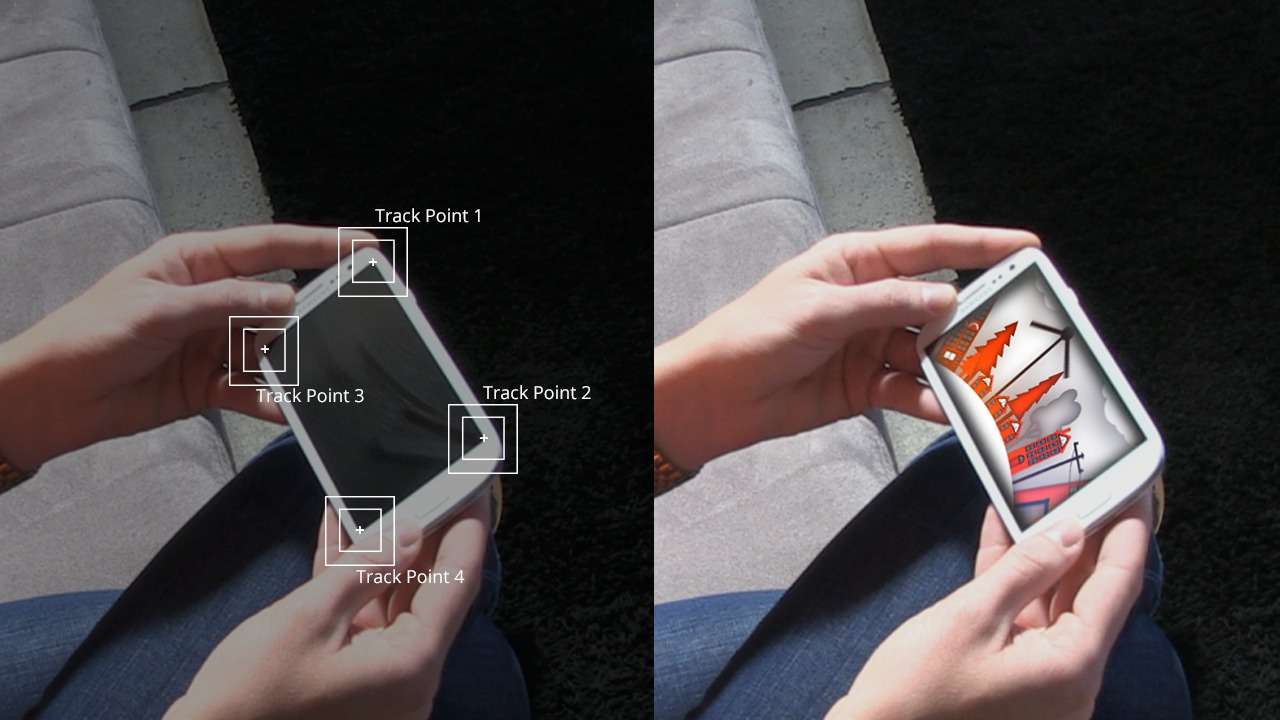
Four-point tracking follows the same principles explained before but applies them to four points instead of a single or two points. It, too, captures position, scale, and rotation.
Perhaps you've heard of "perspective tracking" and "corner pin tracking," but you didn't know what they mean. Four-point tracking is often called that because it is used for a specific type of motion tracking, where you track the corners of the screen for screen replacements.
Planar Tracking
Best For: Accurate motion detection within a two-dimensional plane.
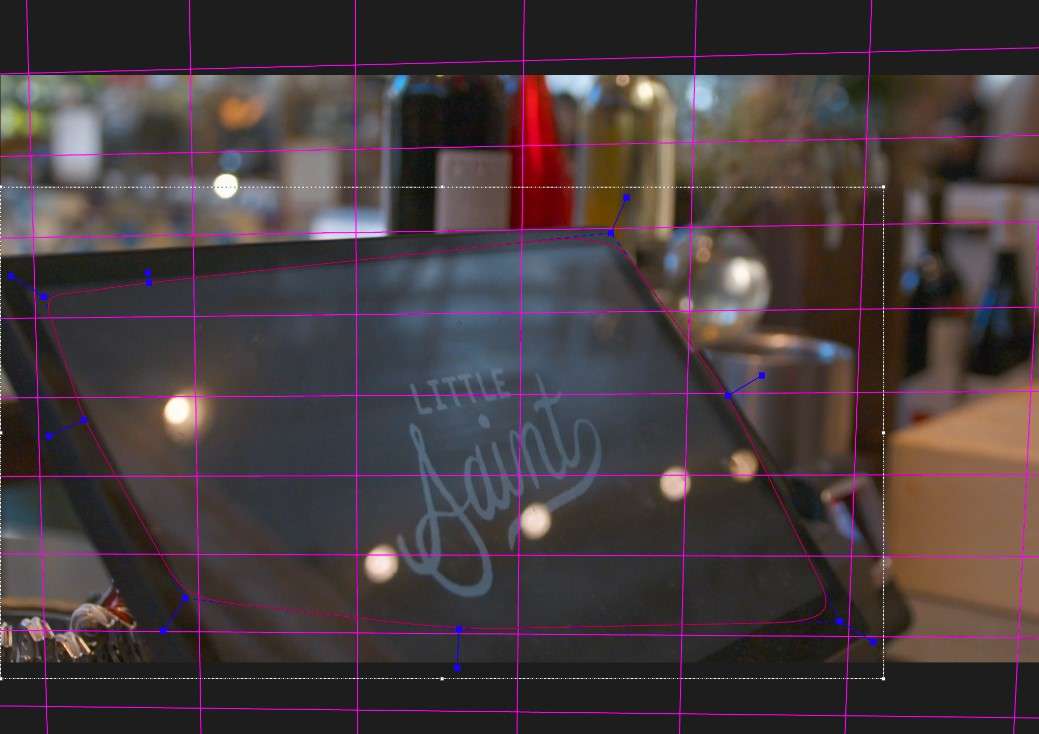
Planar tracking in After Effects is used for recording motion data of flat or plane surfaces. It is a type of multi-point tracking and an advanced motion capture technique that requires a lot of time and effort to master. But don't worry. You'll get there with practice and patience.
If you're feeling confident enough to jump straight to planar tracking, you will need a special plugin called Mocha. The Mocha Effects can be accessed with After Effects for free.
Spline Tracking
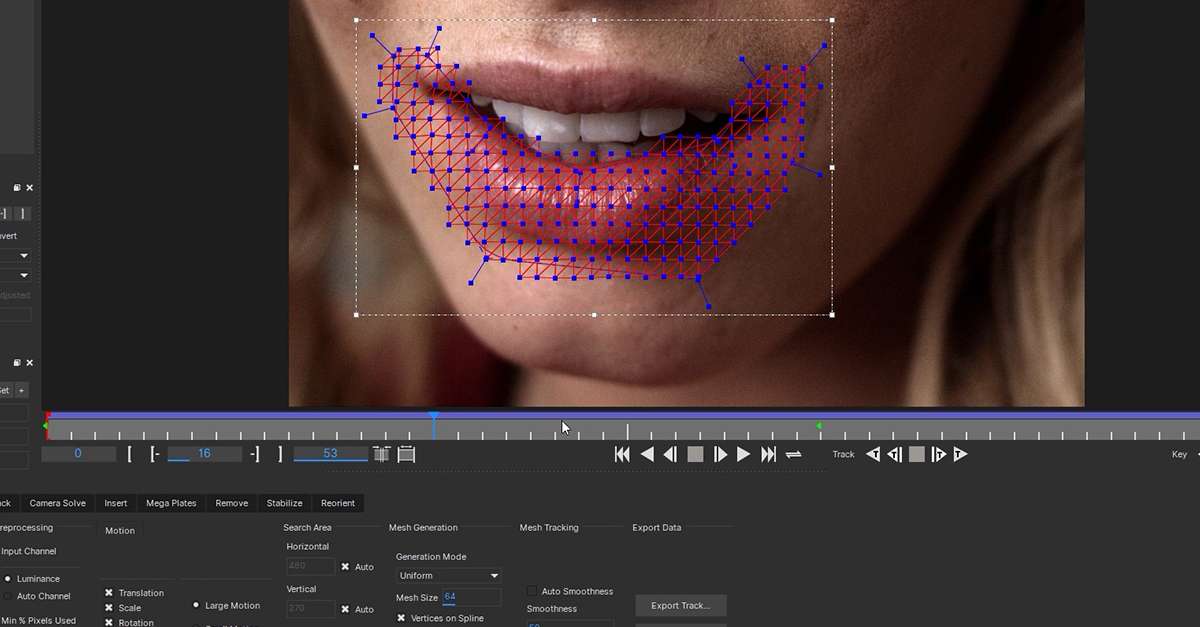
Best For: Smooth and flexible movement analysis and animation.
We don't want to lie to you: splinar tracking is very advanced. This motion-tracking feature in After Effects is used by creatives who desire very accurate and smooth results.
Spline tracking is perfect if you want to trace and turn an object into a 2D animation. It's best used for achieving complex camera movement and creating multi-object scenes.
3D Camera Tracking
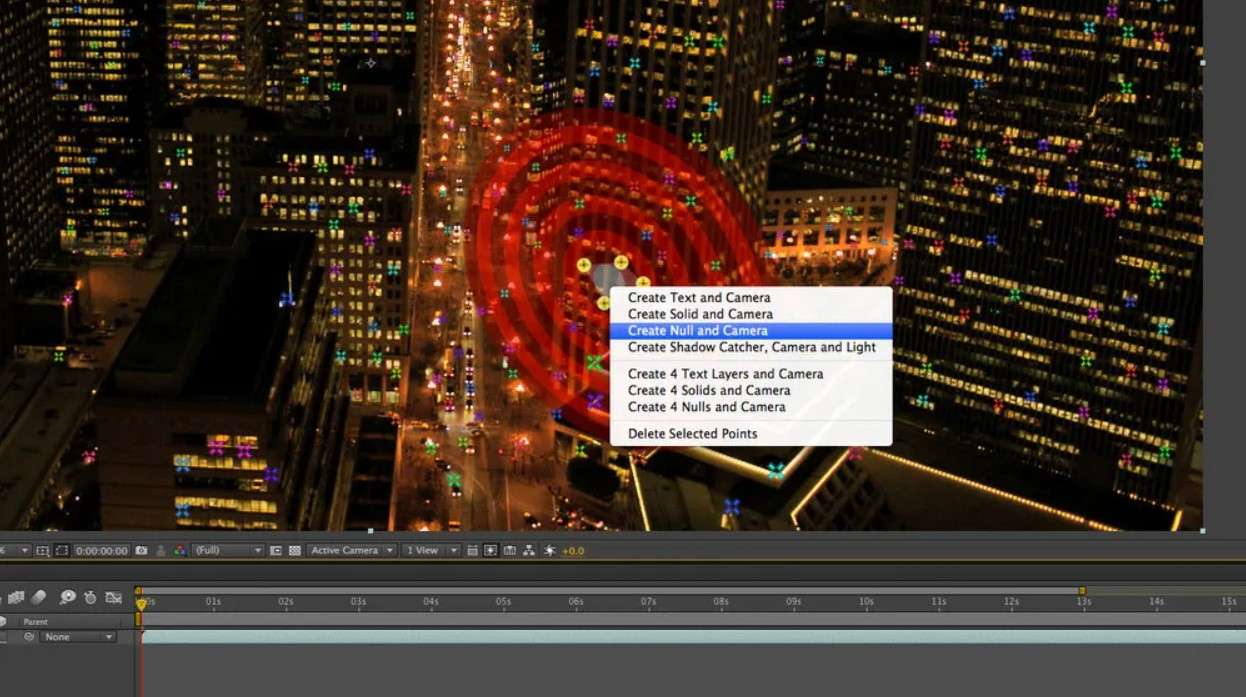
Best For: Animation production and video game development.
Instead of creating movement from separate objects, 3D camera tracking captures movement from video footage. It analyzes and replicates camera movement used in footage.
After Effects combines automatic and manual 3D tracking, which gives users the freedom to create and add custom 3D elements over 2D footage. After generating automatic motion-tracking points, Adobe's software lets the creative decide which motion-tracking points to use.
How to Apply Motion Tracking in After Effects?
Now that you know that After Effects can provide you with motion-tracking tools that range from simple to complex, it's time to learn the basics. In this section, you will find a step-by-step guide for applying one-point motion tracking in After Effects. Let's get down to business.
- Start and Import a New Project
Open After Effects and use drag-and-drop to import the media files for your new project. You will need a video clip and a static object, such as a logo. If you want to add text and make it move with the scene, you can do that in After Effects later on.
- Arrange the Scene (Composition)
Drag the video clip into a new Composition and then drag the object on top of it.

- Add a Layer for Motion Tracking
Select the video clip from your new Composition and click on the Layer tab in the top menu bar. Select New > Null Object. This step creates a separate invisible layer where After Effects will copy your motion data after you capture it.

- Start the Track Motion Feature
Select the video clip and head to the top menu bar again. This time, choose the Animation tab and select Track Motion from the drop-down menu.

- Set the Motion Tracking Point
Inspect your scene and move the plane to a high-contrast area (ideally black-on-white). This area should also be in perfect focus. You will see a plane with two squares—the small square is where the tracking point is right now, while the larger square represents where it will be in the next frame. Select the plane edges to adjust the scale.

- Analyze and Adjust the Trackers
Click the Play button to analyze results, or click the Forward button for a frame-by-frame analysis. If needed, adjust the points to correct the aim.

- Apply Motion to a Static Object
Click on Edit Target and select Null next to the Layer option. Next, select Apply > OK. Move the logo in place and then pair it with the Null Layer.

Alternative Motion Tracking Tool to After Effects - Filmora
Be honest with yourself: do you really need multi-point tracking and other advanced motion-tracking features? Unless you are working in animation, film, or video game production, and your job requires you to have a professional-grade tool to match your skills, you probably don't.
Instead of getting frustrated with After Effects and not achieving the results you wanted, try a more beginner-friendly alternative - Wondershare Filmora. Filmora is a video editing tool with an extensive list of features that can help you create dynamic, engaging, and viral content.
One of these features is Motion Tracking, which is incredibly simple to use:
- Open Wondershare Filmora and select New Project.

- Click the + icon or drag and drop a video clip from your computer.

- Drag the video to the timeline below and make sure the playhead is at the start of the clip.

- Go to Tools > Video and choose Motion Tracking.

- Pick an object to track and tag it with a tracking plane. Make sure the object stays in the frame for the entirety of the clip. Then, hit Click to start Motion Track.

- Next, choose an object to follow the movement in your clip. You can import an object from your device, download it from the internet, or pick a creative asset from Filmora's gallery. Drag it to the timeline and drop it right on top of your video clip. Make sure it is the same duration as your video.

- Click on Link Element under Motion Tracking and choose the object you want to link to the movement.

- Learn how to track moving objects with precision.
- Add text, images, or effects that follow the action seamlessly.
- Enhance storytelling by keeping elements in focus.

How To Use Motion Tracking With Filmora Mobile
As we all know, motion tracking is a complicated video editing skill requiring a desktop. However, these days, mobile apps are equipped with features to do it. This means that you can create advanced-level video editing procedures on the go. This is an excellent development because most videos are taken from a mobile phone. You might as well edit them using the device, right?
Filmora is one of those tools that offer this fantastic feature. To access it, follow the steps below:
Step 1: Download Filmora on your mobile phone (Android and iOS).
Step 2: Make a New Project, then import your video.
Tip: Using videos with a green screen is a more effective way to use motion tracking.
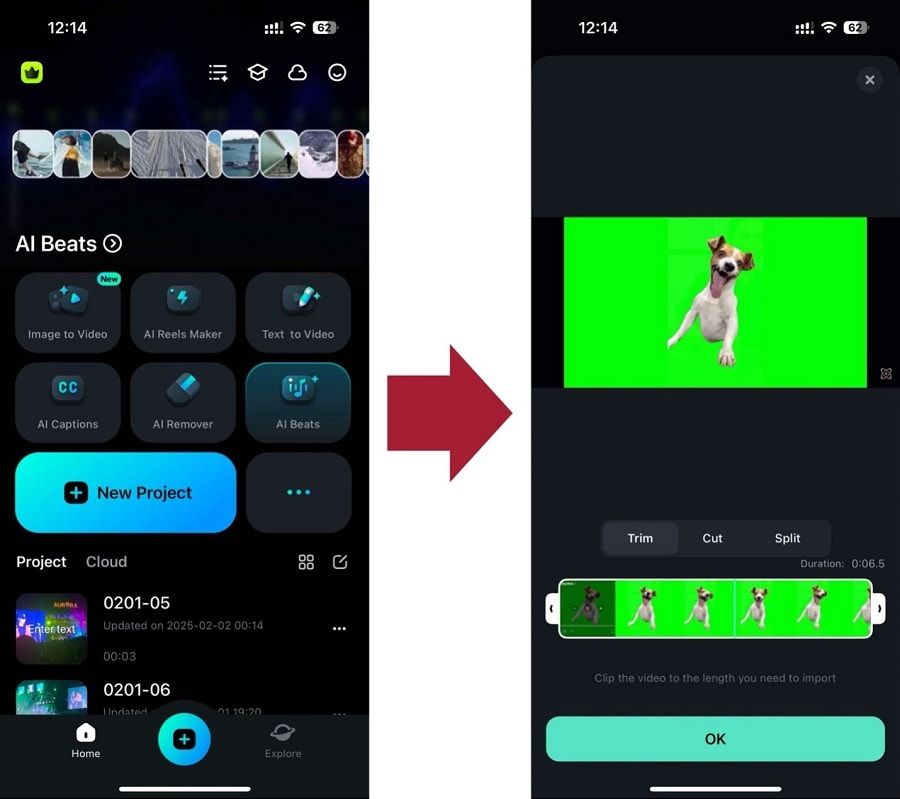
Step 3 (Optional): If you’re using a green screen video, use the Smart Cutout feature first to remove the background.
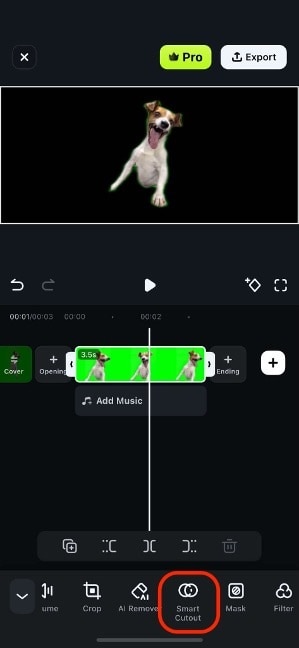
Step 4: Now, add an Effect to the video.
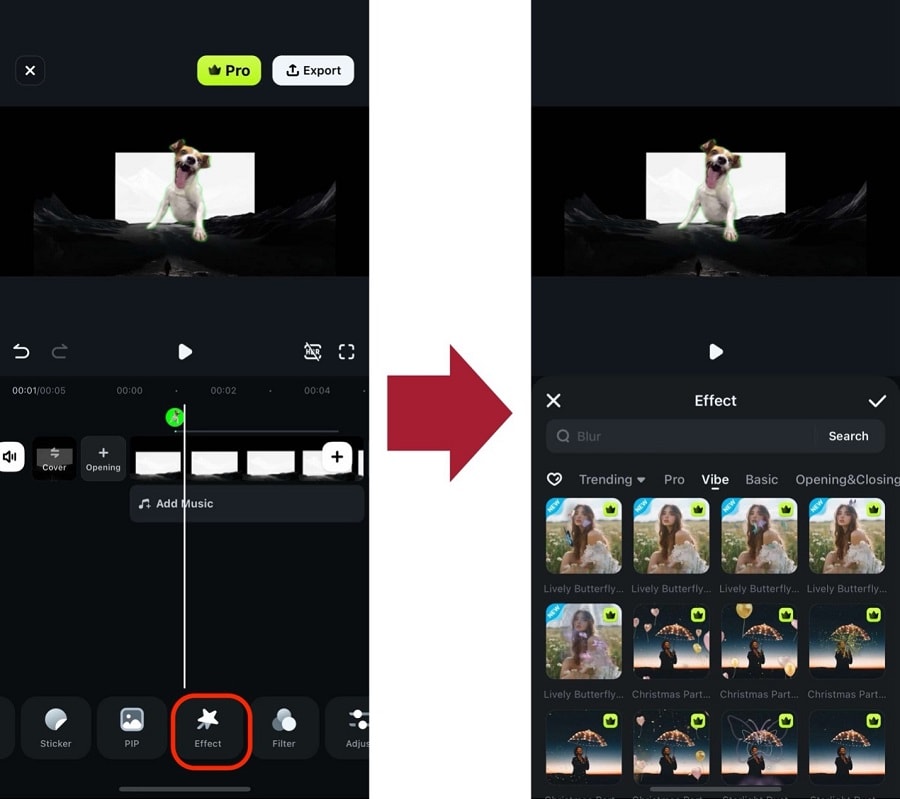
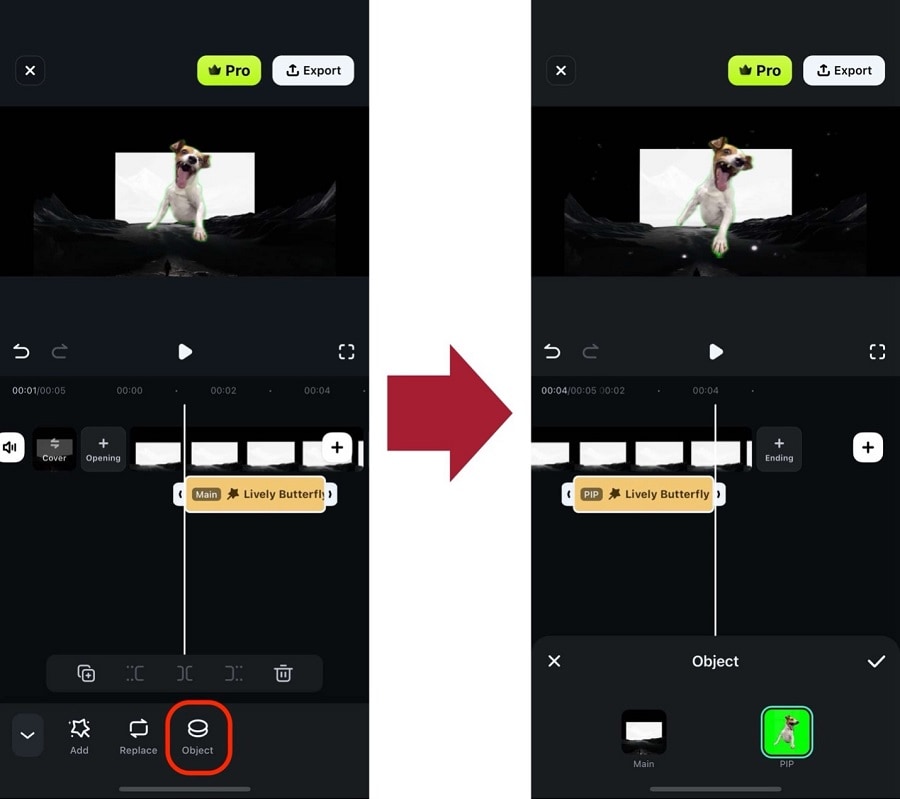
Step 5: Once the effect is applied, select the clip again. Then, go to Object and select the object you want to motion track. This will use the effect as the object moves.
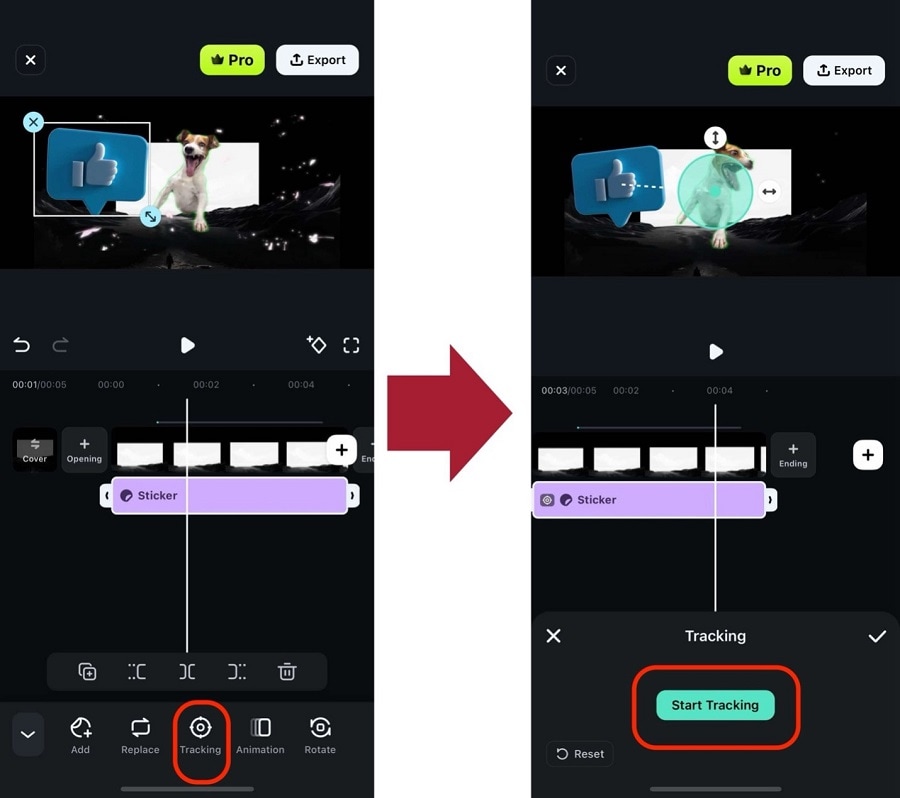
Step 6: You can also do the same on stickers or text. Select the object (Sticker or text) you’ve added, then go to Tracking > Start Tracking.
With the methods provided above, you’ve now unlocked the skill of motion tracking without using Blender on your phone. These advanced functions are made possible by Filmora, so try it out today!
Conclusion
If you want to improve and advance your After Effects skills, you should start by learning how to use different types of motion tracking. This popular After Effects feature is often used in advertising and film to add an element of interactivity to immovable objects in video clips.
For a more user-friendly alternative to After Effects, go to Wondershare Filmora. This fantastic tool for beginners will help you master motion tracking without being intimidated by options, but it can also be used by professionals who need to create engaging content quickly.


 100% Security Verified | No Subscription Required | No Malware


