


 100% Security Verified | No Subscription Required | No Malware
 TL;DR:
Creating a continuous glitch effect in After Effects requires animating your text or logo with scale and opacity keyframes, applying the Bad TV preset, and using a Displacement Map on an adjustment layer to drive the physical distortion.
● To execute the manual glitch animation, you must pre-compose your finalized text or logo layer before adding the Displacement Map to a separate adjustment layer to control the specific horizontal and vertical shifting parameters.
● You can further customize the manual distortion to achieve an RGB split aesthetic by utilizing the Fill effect on your selected layers to assign distinct colors and adjusting the keyframe timing.
● Users who want to bypass manual keyframing and displacement mapping can utilize pre-configured templates like the Fast Glitch Logo for high-speed neon distortion or the Cinematic 80's Style for retro video introductions.
Ask AI for a summary
 ChatGPT
 Perplexity
 Gemini
 Claude
 Grok
Grok
Film making is a whole process that has many different phases. When we watch and enjoy some film, video game, or even any television program, we instantly assume that it is very easy to record something. You don't know the amount of effort and time that filmmaking requires. After recording, something comes the real challenge to make it presentable.
Something that is edited with grace and beauty will automatically attract many eyes. After Effects is one such platform that helps you make your content presentable and attractive. One thing that took the market effortlessly was the glitch effect. Let us talk more about the glitch effect After Effects in this article.
Part 1. How Do You Do Glitch Effect in After Effects?
Glitch is a very old art. We all know very well about its origin, but we can't identify it. Glitch is the distorted signal on the screen that signifies any kind of error or flaw in the original image. In old times, a glitch was symbolized like an error, but in today's modernized world, a glitch is used as glitch transition After Effect.
Since the glitch effect adds an aesthetic and classic effect to your video, content creators prefer using it. This section will guide you completely on how someone can add After Effects green glitch.
Step 1: Start by opening After Effects and then select ‘New Composition.' A small window will show up on the screen. There, set a name for your composition. You can set your desired resolution and adjust to your preferred Frame Rate.

Step 2: After doing the initial settings, now it's time to set the background layer for your video. You have to right-click on the timeline panel and then go for the option of 'New.' From there, select the 'Solid' option and name it afterward to set the background layer.

Step 3: Once the background is set, head over to 'Effects and Presets.' There, search for 4 color gradients and drag them to your solid layer. Now, move to the Effects Control window and set the colors according to your video style.

Step 4: You can import the logo and drag it to the composition. Or else, you can also work with the Text tool in After Effects. For that, click on the Text tool from the menu bar and type your desired text. You can edit and adjust the text fonts from the right editing panel.

Step 5: Now, add the Scale animation to the text. Press ‘S’ on your keyboard to open Scale Parameter for the text. For creating a keyframe, move 1 second on the timeline and then click on the 'Stop' button. Now go back to the start of the timeline and adjust the Scale Parameter until your logo/text fills the entire screen.

Step 6: Then, press 'T' on your keyboard to bring opacity parameters. With an opacity keyframe, the text/logo will gradually fade. Now again, make the keyframe by pressing the Stopwatch button. After that, go to the start and set the opacity parameter to 0%. You can view all the keyframes on one layer by selecting and pressing ‘U’ on the keyboard.

Step 7: Now press F9 to ‘Easy Ease’ any keyframe. With this, you can adjust the scale animation. For this just select the last keyframe and head to the 'Graph Editor' icon., This allows you to change the speed of animation per keyframe. Click on the yellow handle and drag it to the left side.

Step 8: After all the settings, let's add a distorted effect. For that, head to the Effects and Presets window. Look for any Bad TV effect and add your favorite to the text/logo. From the effects control window, you can play with the wave height, width, and whatever you want to adjust.

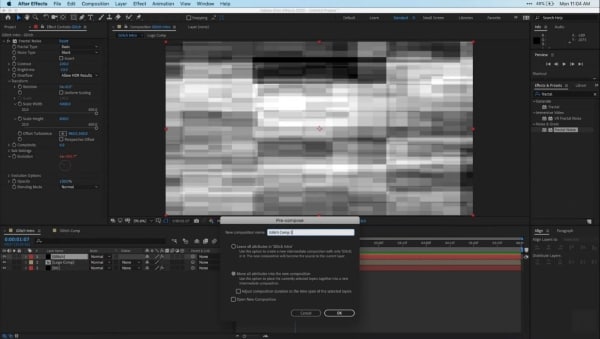
Step 9: After all the adjustments, just click on the text/logo, and from the menu that will show up, select the option of ‘Pre-compose.' Now set a name for this and check the button to move all attributes to the new composition.

Step 10: Now, right-click on the timeline window panel and select the New option for creating the glitch effect. From there, select the Solid option and then set a name for that. You can also adjust the resolution.

Step 11: Now move to the Effects and Presets section, select a glitch effect, and add it to the timeline. Then move to the effects control window and adjust the different attributes as you prefer. Once all the adjustments are made, Pre-compose this solid layer as you did earlier.
Step 12: Here, again, right-click in the timeline and select New. Then from that, select the Adjustment Layer option. Now search for Displacement Map and add that onto the layer. Adjust its horizontal and vertical displacement from the effects control window to make the non-stop glitching effect.

Step 13: You can also add color to your text/logo. For that, select the layer you want to work on and search for 'Fill.' With this, you can either add the same or even distinct color to the text/logo. You can do RGB split After Effects. You can also adjust the time of the keyframes, and you are all done.

Part 2. 5 Awesome Glitch Effect Templates for After Effects
With After Effect, you can create your glitch effect and use different glitch templates. There are some amazing and stunning templates available on the internet. This section will discuss different glitch templates other than the After Effect glitch effect.
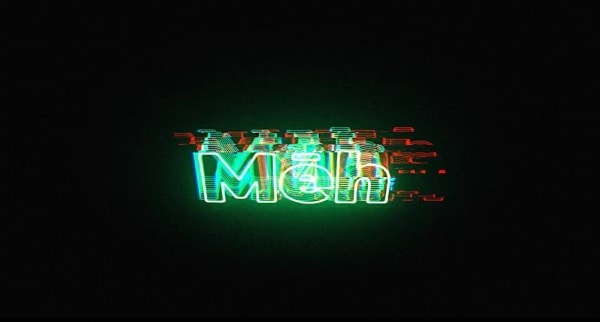
1. Fast Glitch Logo
The Fast Glitch Logo, as its name represents, is speedy. It has some vibrant neon colors that bring life to the effect and the video. It has animation in it. The glitch effect is dynamic with colorful and fast distortion.

2. Glitch Slideshow Panel
Who isn’t fascinated by the slideshows? The fun part here is adding glitch After Effects effect to your slideshows. With this cool template, you can add glitches and distortion to your slideshow. The slideshow also blurs with the transition.

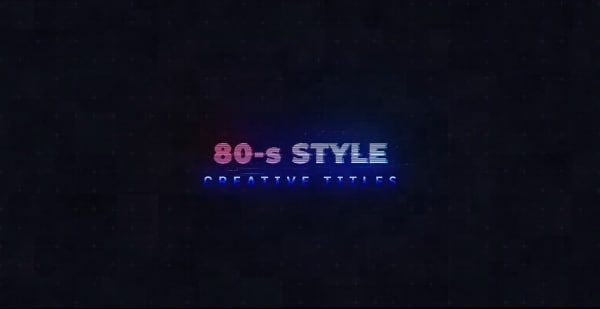
3. Cinematic 80's Style
If you are looking for a great combination of stunning effects with a touch of the 80s, this template is surely the deal for you. Not only is it easy to use, but it also acts as a very cool introduction to any video. A must-try!
4. Rolling Glitch Logo
This short template features a modern, dark, electro touch in logo display. You can find it to be very attractive and effective for your videos. It provides you with the touch of technology, making it quite versatile as a template option.
5. Video Glitch Title
Lastly, let us talk about the Video Glitch Title, where you can share the video's title with a little touch of glitch and distortion in it. The template is retro. It offers a variety of colors to add to your title and make it look aesthetic.

Closing Words
The media industry takes over the world, and various editing skills and effects are taking over the media industry. Among those famous effects, one is the glitch effect. You can add distortion to your videos and then reveal the truth underneath the colorful distortion.
This article holds sufficient details about the After Effects glitch effect. This article can learn everything about glitch transition After Effects and glitch text After Effects.
