Cinematic videos are those cool intros that look very similar to a 'real' movie, but in reality, they aren't a movie. Cinematographers are those experts who film cinematic videos. A cinematic video or film has the same features like a movie has.
Cinematic videos intro are quality videos that include proper sounds, choreography, delicate lighting, etc. If you want to learn more about cinematic videos, then stay with us.
Part 1. Tutorial to Create Cinematic Video with Movie Intro in Filmora
Aesthetic and cool intros are easy to conceptualize, but many people fail at the time of creating them. Sometimes people lack the general skill to film, and sometimes people don't know how to edit their video intros. Filmora by Wondershare is the perfect platform for those who find it hard to edit videos. Filmora is a video editing software that is available for free.
Wondershare Filmora has a very basic and easy-to-use interface that every new person can understand without any trouble. Filmora has a huge asset library full of titles, effects, transitions, animations, and a lot more features.
Versatile Video Editor - Wondershare Filmora
An easy yet powerful editor
Numerous effects to choose from
Detailed tutorials provided by the official channel
Creating Movie Intro for Cinematic Video
Filmora is the best editing software that will help you create a movie intro for a cinematic video. In the following section, we will be sharing steps with you that will aid in creating a cool intro for your video.
Step 1: Select your Favorite Effect
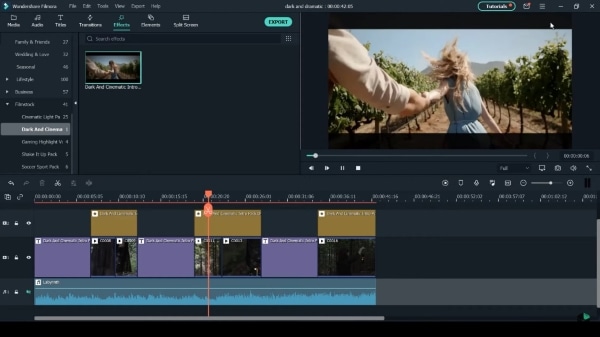
First of all, you are supposed to open Wondershare Filmora Video Editor. Then go to the titles tab and click on 'Filmstock.' All the video effects will open in a drop-down menu on the left side of the screen. From the list of effects, you can select your desired effect. The total count of titles is written in front of the effect name. So, in Filmstock, you have a lot of options to choose from.
Step 2: Add a Suitable Title
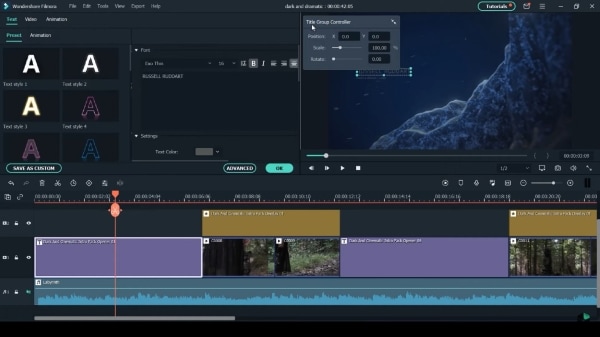
You can also preview the titles by double-clicking on them. The playback will be on the right side of the screen. You can drag and drop your favorite title to the desired location in the timeline. Every title comes with a preset text; to change that, you have to double click on the title in the timeline, and after that, a control panel will appear in front of you.
Step 3: Play with the Title
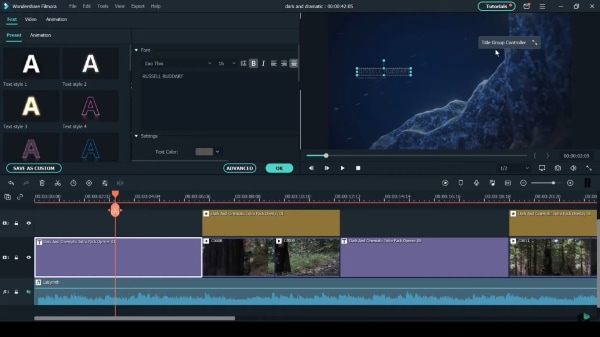
You can completely manage the title from the control panel according to what you want. You can change the title by tapping on the text. You can reset the size of the title. You can also change its location on the screen. You can select your favorite font style and even change its font size.
Step 4: Adjust the Overlay
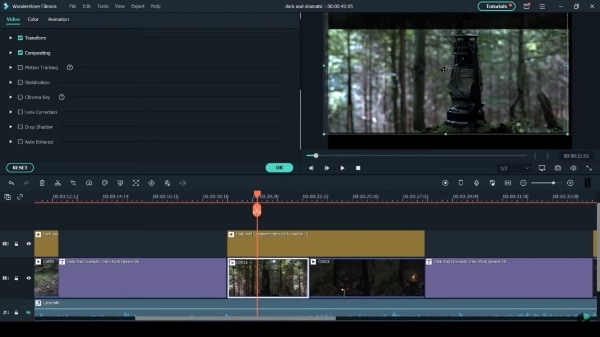
If the pack contains any overlay, then that will be visible in the ‘Effects’ tab. You can visit the tab and explore the overlay. You have to select the overlay and then drag it to the timeline to add it. You can customize the length of the overlay by adjusting it and dragging it in and out.
After you have adjusted the overlay, you can also reposition the footage by double-tapping on it. You can move and adjust the footage within the bars.
Step 5: Color Correction
The next step for editing is color correction. You have to select the clip from the timeline that you want to color correct. After selecting the clip, you have to hit the ‘palette’ icon from the icon bar above the timeline and select the option of 'Color Correction.'
You can either select any preset from the color correction panel or go to the ‘Adjust’ tab. You can make the adjustments by yourself, or you can 'Auto' adjust it.
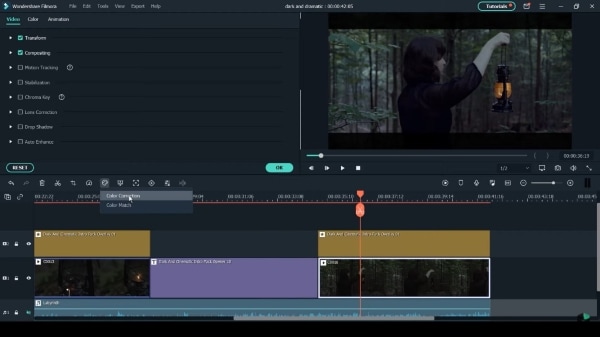
Step 6: Preview Results
By tapping on the ‘Eye’ icon at the top right corner, you can preview the changes that you made. Once you are satisfied with all the adjustments, click on the 'OK' button.
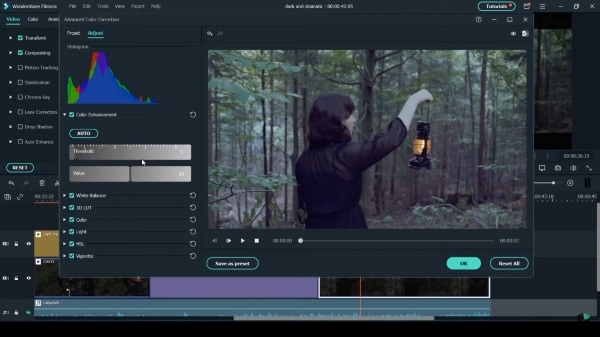
Bonus Tips: 3 Popular Cinematic Intros for Filmora Video Editor
Wondershare Filmora allows you to access Wondershare Filmstock, where you get hundreds of video editing effects, audios, images, and whatnot. A few of its amazing video editing effects are:
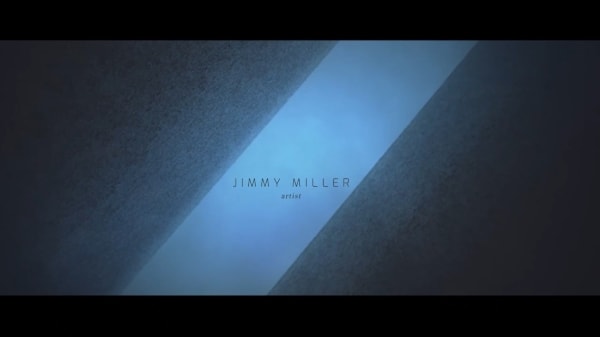
Dark and Cinematic Intro Pack
If you are editing any mystery video, nothing is better than the ‘Dark and Cinematic Intro Pack’ by Wondershare Filmstock. The pack has 16 titles and 1 overlay. It gives all the dark vibes that create the perfect environment for any mysterious activity.
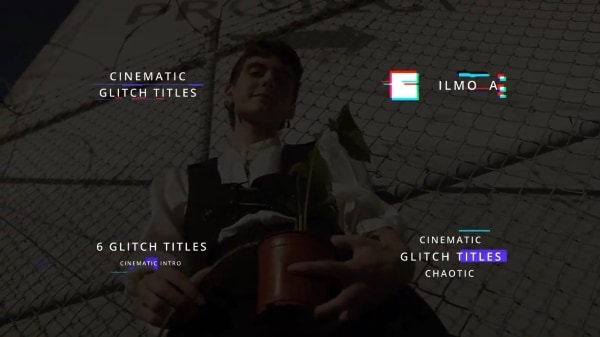
Cinematic Intro Vol 02
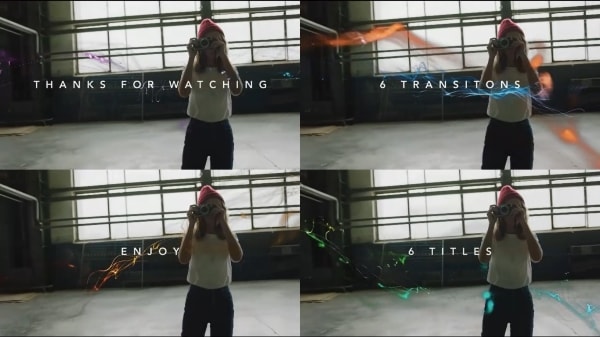
If you are looking for a mind-blowing effect to edit your videos, then this pack is perfect. It has amazing glitch openers, transitions, and titles. The pack has 6 transitions and 19 titles. This is an aesthetic pack with dust, digital distortion, shapes, and rhythm.
Cinematic Intro Vol 03
If you are a fan of colorful and sparkly edits, then this pack is for you. The pack will bring life to your video from its glamour and shine. It has a slow motion of shiny particles that look elegant and equally beautiful. The flare and light in the pack make it very attractive. The effect has 18 titles and 7 transitions.
Part 2. 5 Useful Tips to Create Cinematic Videos
Using a camera to record while doing some action never helps to create a classic cinematic video. Cool intros are always filmed with a little bit of planning. Some skills and some magical tips are used to create aesthetic video intros. If you want to create a movie intro, then the information shared in the section below is perfect for you.
1. Create a Mind Map
As mentioned earlier that planning is required before you start filming. So hence, the most useful tip for creating cool video intros is to sketch your mind. Whatever you have planned, roughly draw it so that it is easy for you to compile your thoughts and create something amazing at the time of recording.
Having a bird' eye view of the vision, you have in your mind helps you stay on track even under pressure. Also, the sketching part contributes to open your mind so you can welcome new creative thoughts.
<2. Shutter Angle and Shutter Speed
The best shutter angle to shoot is 180 degrees. At this shutter angle, the shutter speed is double the frame rate. If you are shooting at 24 FPS, then your shutter speed should be 1/48. If you are recording something in slow motion, then you should increase the shutter speed.
3. Color Grading
Lighting and color grading is another aspect that requires your attention. Filming in good lighting is essential. If something still doesn't seem right, then color grading or color correction will save your life. In the post-production phase, while editing, you can color correct and color grade every bit of the footage to make it seem attractive. Remembering the key point is that nothing can save you, not even color grading if you film in poor lighting.
4. Shoot and Edit at 24 FPS
The standard for shooting is 24 FPS (frames per second). Shooting at 48, 60, or any other frame rate than 24 will affect the quality of your film. It won't look like a proper film. Also, viewers expect us to film at a standard FPS because our eyes and brains are trained to expect 24 FPS throughout the years.
This standard 24 FPS makes the movie intro look cinematic in appearance instead of making it look too realistic.
5. Cinematic Crop
While learning about editing, you come across various processes. Few of which are easy, and few are tough. Cinematic Crop is the easiest way to edit your video intros. By using this method, your film looks very professional.
Your computer widescreen monitor is 16:9 or maybe 16:10. At the same time, the big screen aspect ratio is 2.35:1. We are converting from standard widescreen to an ultra-wide big screen. You might have to crop the edges to give a cinematic appearance.
End Note
Cinematic videos are very attractive and classy. After reading and learning from the article above, many of you people will be able to aesthetic an create intro movie. Those who face trouble while editing any video are also resolved as the introduction of Wondershare Filmora Video Editor will change your life. The breathtaking features and the brilliant editing effects are worth using.
Wondershare Filmora
Get started easily with Filmora's powerful performance, intuitive interface, and countless effects!


 100% Security Verified | No Subscription Required | No Malware

