

 TL;DR:
Adobe Lightroom provides precise, metadata-dependent distortion correction primarily for photographers, while Wondershare Filmora offers a faster, preset-driven alternative optimized for beginners and vloggers editing video from action cameras.
● Lightroom relies on accurate lens metadata to enable automatic profile corrections; if your camera is unrecognized or you are removing extreme fisheye curves, you must manually adjust the Distortion slider and crop the resulting stretched areas.
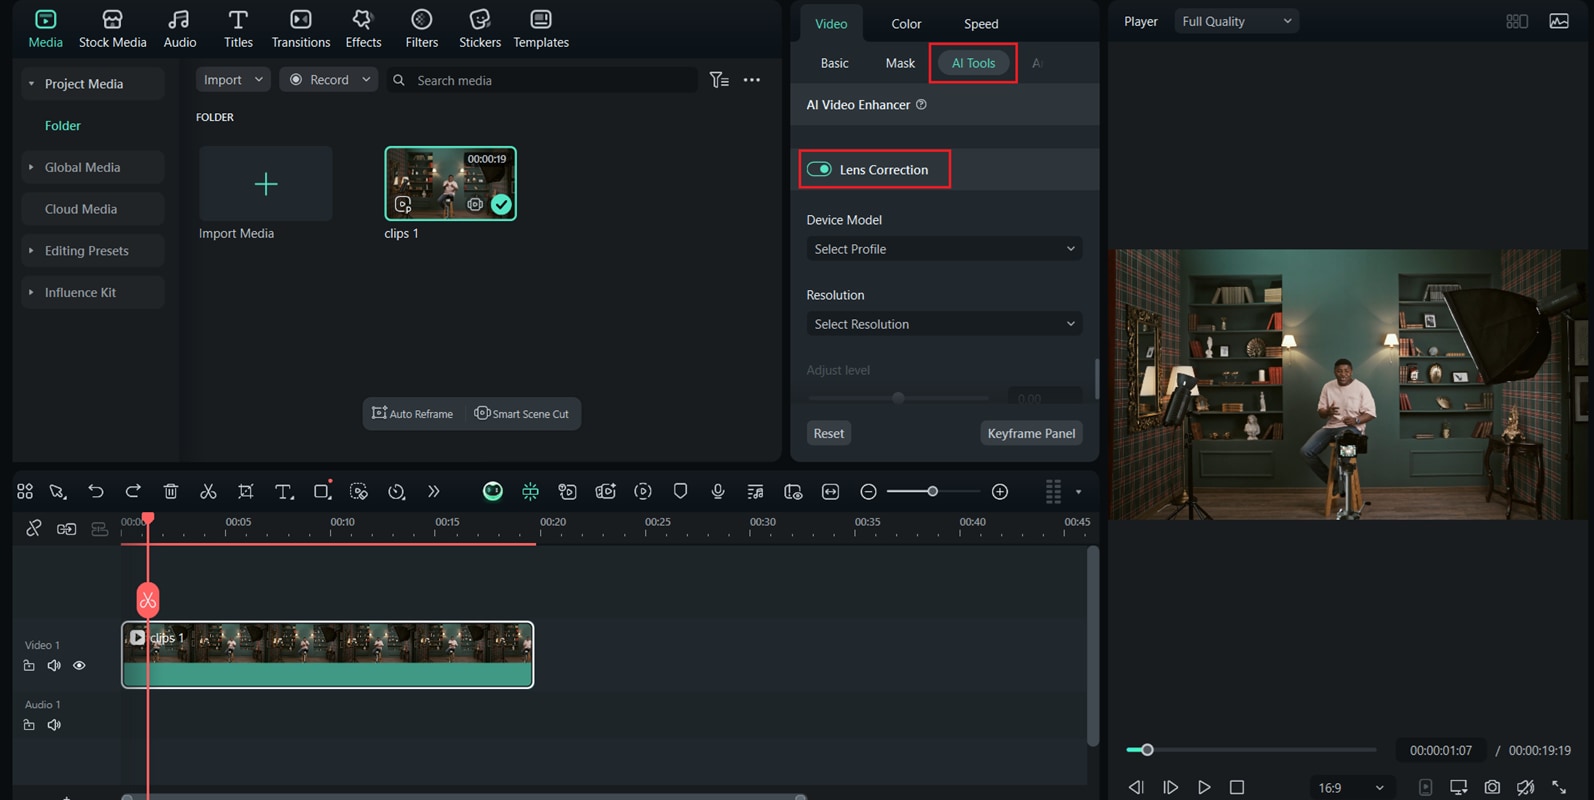
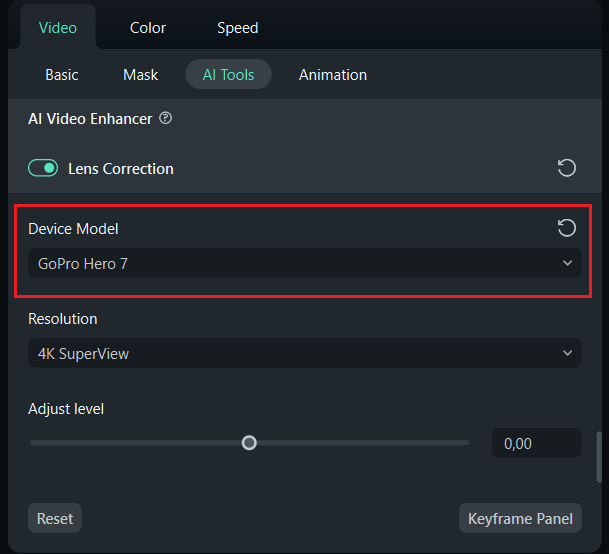
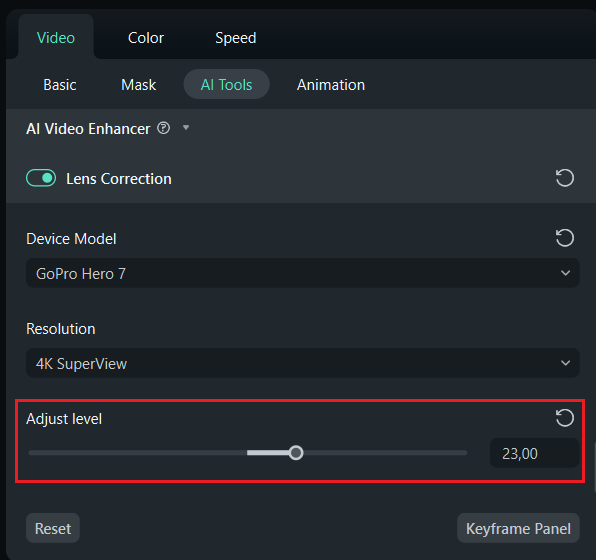
● Filmora bypasses manual adjustments with a toggle located under Video > AI Tools > Lens Correction, allowing users to instantly apply dedicated built-in presets for specific models like the GoPro Hero 5, 6, and 7.
● Because fixing heavy lens distortion mathematically alters the image corners and forces you to crop the edges, you must intentionally frame your shots slightly wider during production to avoid losing essential visual details.
Ask AI for a summary
 ChatGPT
 Perplexity
 Gemini
 Claude
 Grok
Grok
Have you ever noticed your photos looking slightly bent or curved at the edges? This occurs due to lens distortion, a common optical effect resulting from how lenses bend light. It usually appears as barrel distortion with lines bulging outward, pincushion distortion where lines pull inward, or the dramatic curves of a fisheye lens.
Luckily, you don't have to accept these flaws. The Lightroom lens correction feature enables easy distortion correction by automatically applying built-in lens profiles or manually adjusting the settings.
In this article, we'll discuss how to correct different types of distortion in Adobe Lightroom, from automatic profile-based fixes to manual adjustments, as well as how to handle fisheye effects. We'll also recommend a quicker alternative with intuitive tools designed for creators who want fast results without the learning curve.

Part 1. Understanding Lens Distortion
Before learning how to correct it, it is important to understand what lens distortion is. Different lenses create different kinds of distortion, and knowing the type makes correction easier.
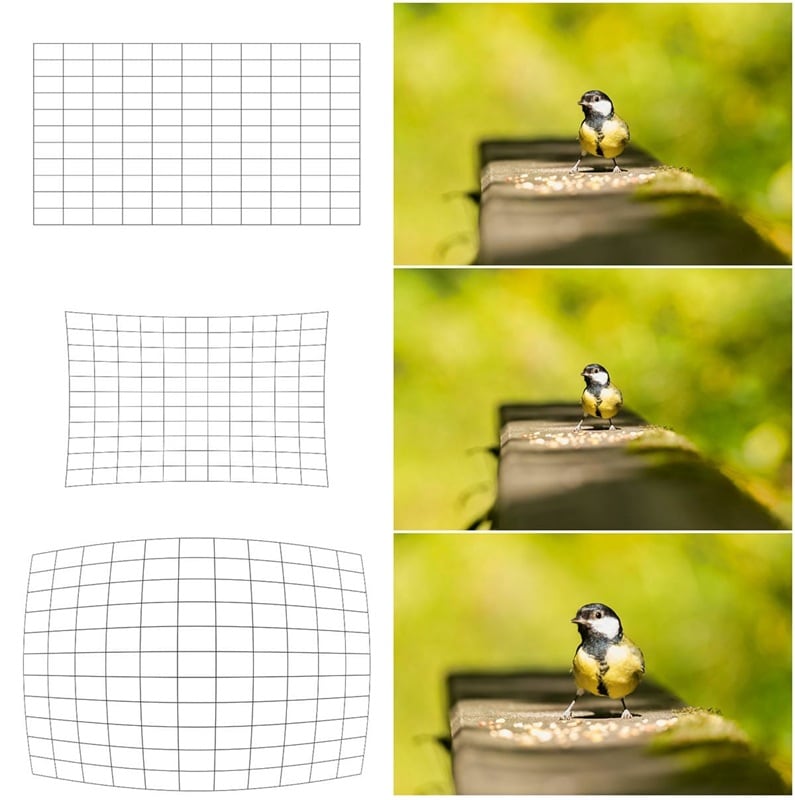
Image: iphotography.com
- Barrel distortion: Most common in wide-angle lenses, this makes straight lines bow outward, as if you're looking at the photo through a rounded barrel.
- Pincushion distortion: More typical in telephoto lenses, where lines appear to pinch inward toward the center of the image.
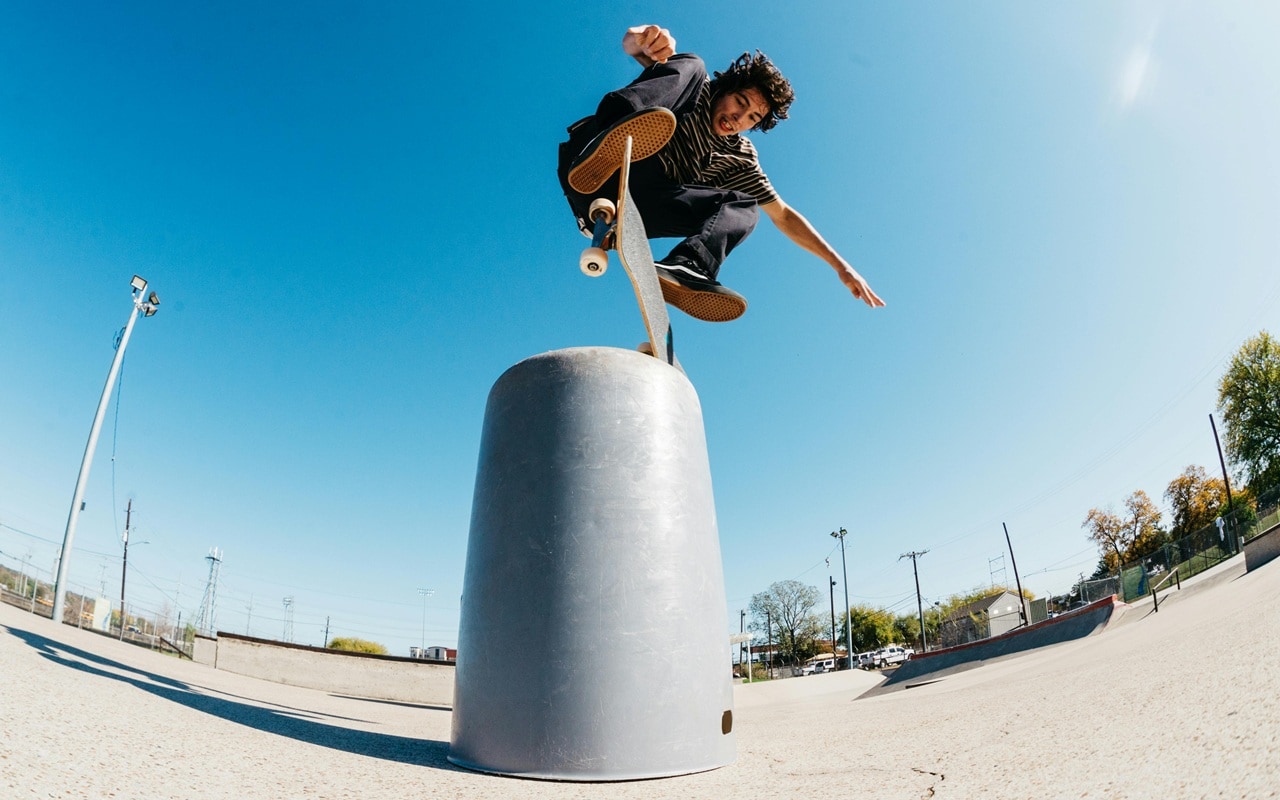
- Fisheye distortion: An extreme form of wide-angle distortion, creating a curved, bubble-like effect that can be artistic but often unrealistic.
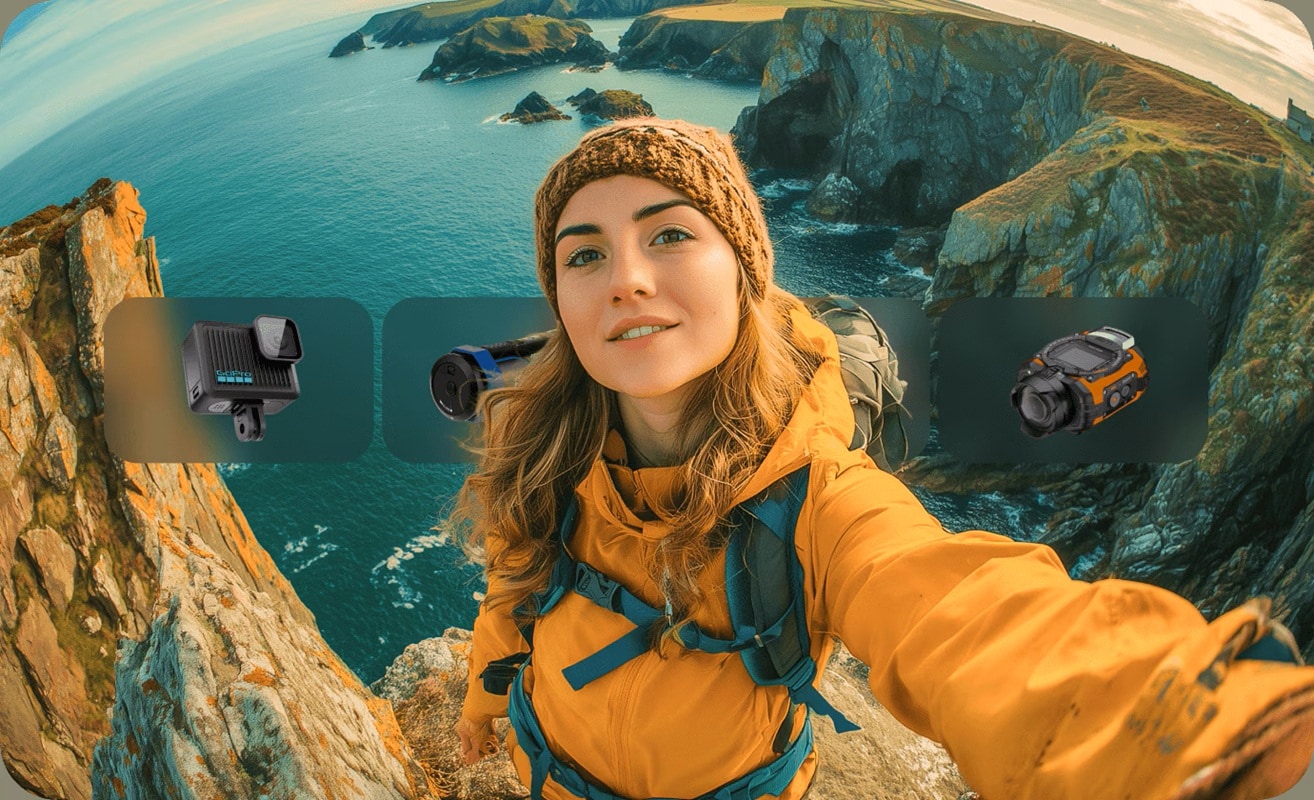
Action cameras like GoPro tend to exaggerate these effects because of their ultra-wide lenses. These cameras are designed to capture as much of the scene as possible, but this often bends straight lines dramatically, especially around the edges of the frame. That's why using tools such as lens distortion Lightroom correction becomes an essential step for action cam footage, ensuring your shots look more natural and professionally finished.
Part 2. How to Use Lens Correction in Adobe Lightroom
Lightroom makes it super straightforward to fix common lens issues. Whether you want to fix them automatically with one click or have more control over the details, the Lightroom lens correction feature gives you flexible options. Here are three methods you can use:
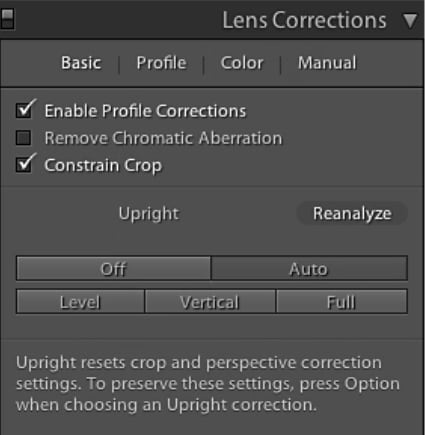
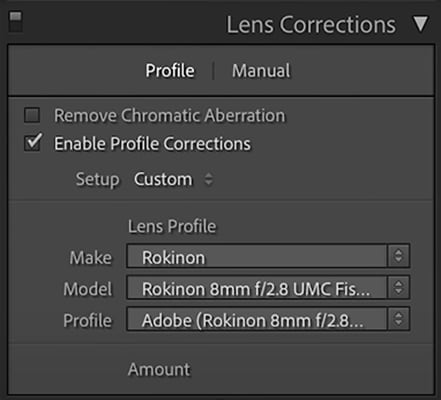
1. Enable Profile Corrections (Automatic Method)
The quickest way to fix distortion is to let Lightroom automatically detect your lens and apply the right correction profile. This works well for most modern lenses since Lightroom has an extensive built-in database.
How to Fix:
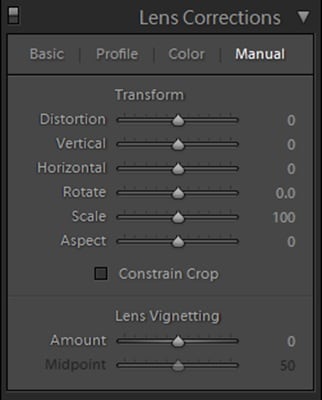
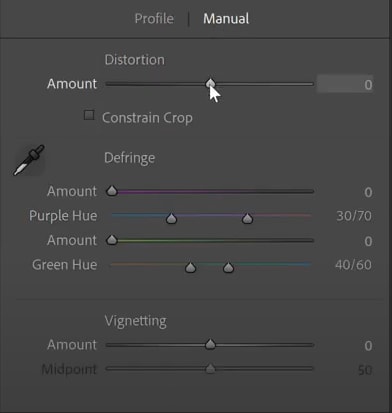
2. Manual Distortion Correction
If your lens isn't supported or you want more control, the Manual tab gives you sliders to fine-tune distortion yourself. This is most useful for photos where auto-correction doesn't look quite right.
How to Fix:
3. Fisheye Correction in Lightroom
Fisheye lenses create a dramatic curved effect, but sometimes you may want a more natural-looking image. Lightroom allows you to "remove the fisheye effect” by applying a profile or manually adjusting the distortion.
How to Fix:
Part 3. When Lightroom Lens Correction Isn't Enough
Although Lightroom's lens correction feature is powerful, it isn't perfect for every situation. Depending on your camera and editing needs, you may run into a few limitations:
- Requires accurate lens metadata: Automatic profile corrections only work if Lightroom can read your lens information. If the metadata is missing or the lens isn't in Lightroom's database, you'll have to adjust everything manually.
- Extra steps for GoPro and action cameras: Ultra-wide action cam lenses often produce heavy distortion that may not be fully corrected with Lightroom's built-in profiles. This means additional manual adjustments are needed, which can be time-consuming.
- Slower for beginners: Lightroom offers professional-level precision, but navigating multiple panels and sliders can feel overwhelming if you're new to photo editing.
- Not ideal for quick workflows: If you just want a quick one-click solution, Lightroom's detailed process might feel slower compared to simpler editing tools.
- Limited for video: Lightroom is primarily designed for photo editing, so if you need lens distortion correction for video footage, you'll need a different tool.
Part 4. Filmora Desktop as a Faster Lens Correction Alternative
If the Lightroom lens correction tool feels too complicated or time-consuming, Wondershare Filmora offers a much faster way to handle lens distortion. Instead of digging into panels and sliders, Filmora simplifies the process with one-click correction and ready-to-use presets.
Why Choose Filmora for Lens Correction:
- Intuitive and convenient operation – Correct distortion in seconds with an easy-to-use tool.
- Built-in presets for GoPro Hero 5/6/7 and other action cameras – Save time by applying a preset that matches your device.
- Resolution and correction adjustment –Customize the intensity of the correction to get the exact look you want.
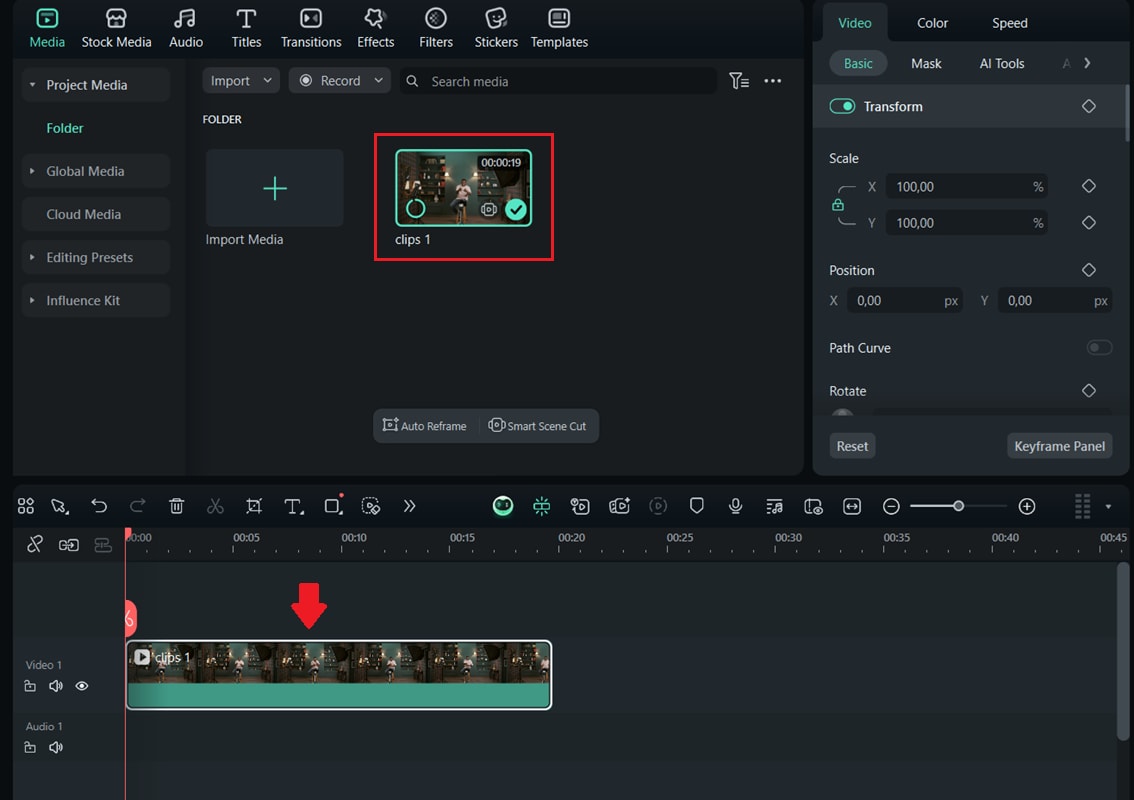
Correcting distortion in Filmora takes only a few steps:
Comparing Lightroom vs Filmora for Lens Correction
Both Lightroom and Filmora can correct lens distortion, but they approach the task differently. Lightroom offers detailed professional controls, while Filmora focuses on speed and convenience. Here's a quick comparison to help you decide which tool fits your workflow best:
| Feature | Lightroom | Filmora Desktop |
| Auto lens profile | ✔️Extensive database of supported lenses | ✔️Built-in profiles for popular action cams |
| One-click operation | ❌Requires navigating panels and settings | ✔️Quick and simple toggle |
| GoPro presets | ❌Not included | ✔️ Dedicated presets for GoPro Hero |
| Manual fine-tuning | ✔️Detailed sliders and perspective controls | ❌Limited to basic adjustment |
| Best for | Photographers who want precise adjustments | Beginners, vloggers, and action cam users |
Part 5. Tips for Best Results
Whether you're using Lightroom lens correction or Filmora's quick presets, a few good practices during shooting and editing can make distortion correction more effective and less time-consuming.
- Shoot with minimal tilt: Keeping your camera level helps reduce perspective distortion, so there's less work needed in post-processing.
- Use a tripod for architectural shots: Buildings and interiors often reveal distortion quickly. A stable, level tripod setup helps preserve straight lines.
- Save your own presets : In Lightroom, you can create custom lens correction presets for frequently used lenses. In Filmora, saving your correction settings helps speed up future edits.
- Frame a little wider: Correcting heavy distortion sometimes requires cropping. Leaving extra space around your subject ensures you don't lose important details.
- Check edges and corners: Distortion is often more noticeable at the edges of the frame. Always zoom in and double-check after applying corrections.
- Balance correction with style: Sometimes a bit of distortion (like a fisheye look) can be part of the creative effect. Don't feel you always have to remove it completely.
Conclusion
If you have ever looked at your GoPro photos or videos and wondered why the edges appear so curved, you are not alone. Lens distortion is a common issue, but fixing it is easy once you know the right tools. In this article, we've discussed three Lightroom lens correction methods along with an alternative using Filmora.
Lightroom is ideal for those who enjoy detailed adjustments, while Filmora Desktop offers quick, one-click fixes with presets designed for GoPro and other action cameras. Both approaches have their strengths and can make your footage look natural again. Paired with smart shooting habits, you will always get clean, polished results ready to share.
Frequently Asked Questions
-
What is distortion correction in Lightroom?
Distortion correction in Lightroom is a tool that helps straighten curved lines caused by lens optics. By applying automatic profiles or manual adjustments, it restores a more natural look to your photos and videos. -
Can Lightroom fix fisheye distortion?
Yes, Lightroom can reduce fisheye distortion, but it often requires manual adjustments. The automatic profile may not fully remove the extreme curves of a fisheye lens, so you might need to adjust sliders to achieve the desired result. -
What's the difference between Lightroom lens distortion correction and Filmora's?
Lightroom offers detailed manual and automatic corrections, making it ideal for professional editing. Filmora, on the other hand, provides quick lens correction with a single click using built-in presets, especially convenient for GoPro and action camera footage.
